Diy Canvas Sign Simple Steps with Supplies, Design Tips, and Finishing Tricks
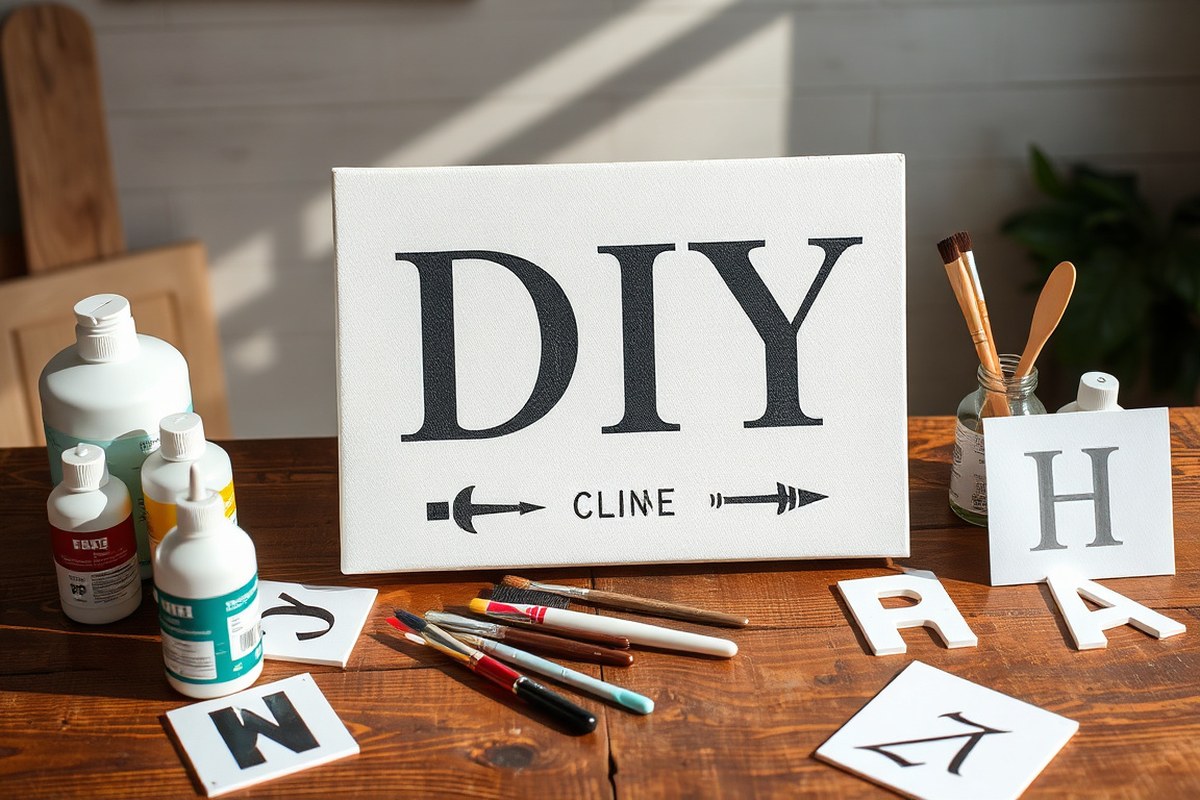
A DIY canvas sign offers a simple and affordable way to create custom decor that fits your space and style perfectly. You can personalize a 16″ x 20″ canvas with paint, vinyl, or lettering techniques to make your unique statement. Starting with a clean, primed canvas ensures your design stands out and lasts longer.
Key Takeaways
- Choose a 16″ x 20″ canvas for a manageable size that works well with most DIY sign templates.
- Use regular white acrylic paint to prime your canvas for a smooth, bright base coat.
- Both wood stakes and 1″ x 2″ strip boards make sturdy frame options for DIY canvas signs.
- Lettering options include hand-painting, stenciling, and applying vinyl with machines like Silhouette Cameo or Cricut.
- Plan your font and layout carefully on paper before transferring to the canvas for clean results.
- Apply multiple coats of stain or paint with drying time between for richer colors on wooden frames.
What Is a DIY Canvas Sign and How Does It Work?

A DIY canvas sign is a customizable home decor piece made by painting or applying lettering and designs onto a stretched canvas surface. Unlike wooden or metal signs, canvas signs use fabric stretched tightly over a wooden frame, usually measuring around 16 inches by 20 inches. This size is common for canvas signs and fits well with popular DIY sign templates, making it accessible for beginners. The fabric’s texture allows for easy painting, tracing, or applying transfers, giving you flexibility in design methods.
Canvas is a good medium for signs because it is lightweight, easy to hang, and absorbs paint or ink consistently without the uneven surfaces that wood or metal might have. You don’t need special tools to prepare the canvas since most stretched canvases come pre-primed and ready for acrylic paints or markers. Compared to wood or metal, canvas also reduces the risk of splinters or sharp edges, making it safer to handle and better suited for indoor decoration.
Typical materials used in making a canvas sign include the canvas itself, paint or permanent markers, carbon paper for tracing, a stylus or pencil, and sometimes stencils or printed templates. The common technique to transfer your design involves placing printed sign templates underneath the carbon paper, which is laid on top of the canvas. By tracing over the carbon paper with a stylus, you transfer the design outlines cleanly onto the fabric.
After transferring your design, you can use paint or markers to color inside the outlines, creating detailed and unique lettering or decorations. Keeping your canvas and sign flat and steady during both the transfer and painting steps helps prevent smudging and text misalignment. A basic project often takes a few hours from beginning to end, depending on how detailed the design is and how long your paint or ink takes to dry.
DIY canvas signs can be framed or left unframed, and the edges may be trimmed or folded back depending on the look you want. Some crafters attach wooden strips to create raised frames that extend beyond the edges of the canvas for extra dimension. Canvas offers a flexible and budget-friendly surface for sign-making, fitting styles from rustic to modern, and generally costs less than custom wood or metal signs.
Essential Supplies Needed for Your Canvas Sign Project
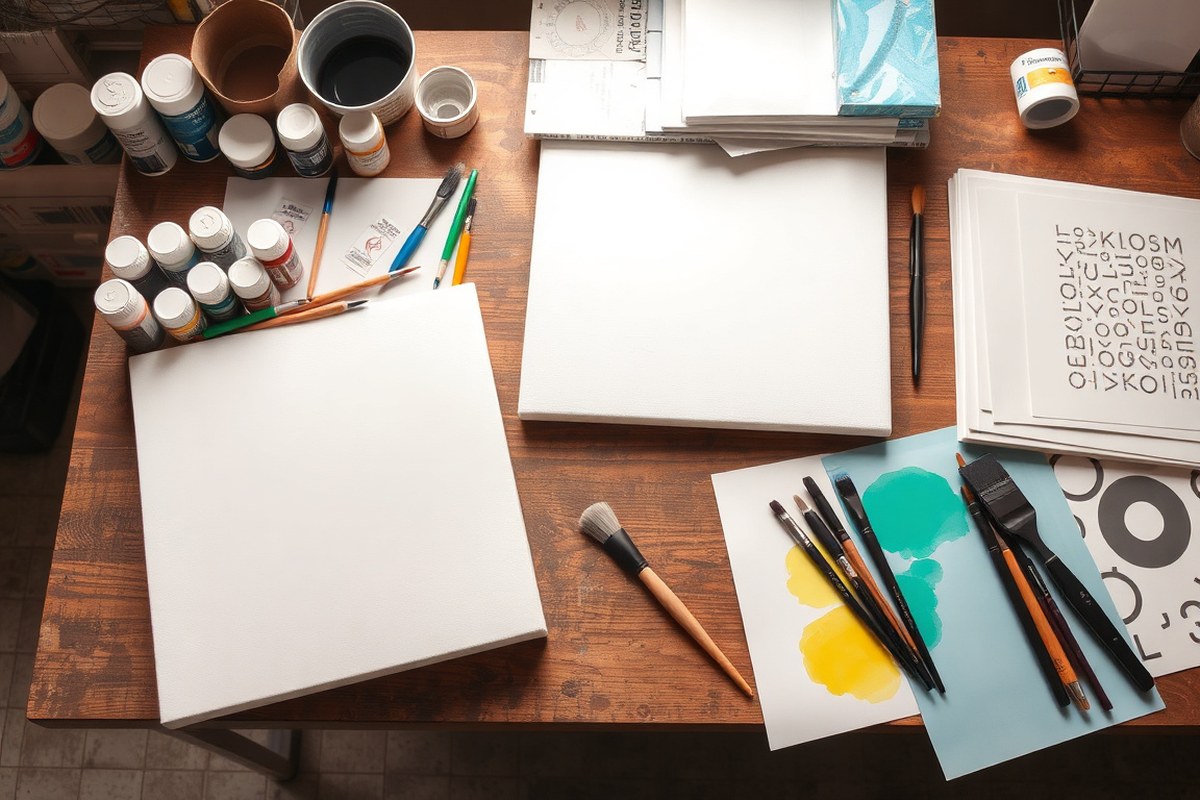
Choose a canvas size that fits your project space and design complexity. For a child’s playroom, a 10×20 inch pre-stretched cotton canvas works well, it’s easy to handle and affordable, typically priced between $8 and $15 at craft stores like Michael’s. Cotton canvas accepts both paint and vinyl smoothly. For a cleaner, wipeable surface, try covering the canvas with 651 vinyl, which is a durable, outdoor-rated adhesive vinyl that cleans easily. This vinyl adheres well to canvas if you preheat the canvas with a Cricut EasyPress at around 305°F for 15 seconds before applying the vinyl.
Acrylic paint is the go-to medium for canvas signs, it dries quickly, sticks well, and comes in a wide color range. Select various brush sizes, including a 1-inch flat brush for backgrounds and thin detail brushes for lettering or fine lines. Budget brushes can cost under $5 apiece; premium synthetic bristles tend to last longer and provide smoother strokes, costing $10 or more. For painting bold letters or shapes, stencils can save time and make your design crisp. Vinyl stencil sheets cut by a machine like the Cricut Explore Air 2 handle detailed patterns better than store-bought stencils and help avoid uneven edges.
Spring clamps hold canvas frames more securely than twisty clamps; having at least two makes your workspace more manageable.
- Pre-stretched cotton canvas 10×20 inches (available at Michael’s or Hobby Lobby)
- Acrylic paints, both primary colors and white for layering and highlights
- Brush set: 1-inch flat brush, small detail brushes
- Vinyl sheets (651 vinyl for decal or Cricut Stencil Vinyl for painting)
- Cricut Explore Air 2 or Silhouette Cameo for cutting vinyl or stencils
- Cricut EasyPress to preheat canvas and adhere vinyl properly
- Spring clamps for securing canvas frame during work
Markers designed for fabric or acrylic paint pens can be useful for finer lines or quick lettering but do not replace brushes for paint coverage. Using vinyl or heat transfer vinyl (HTV) works best with cutting machines to get clean edges and fonts the right size. For beginners or those on a budget, hand-cut stencils or freehand lettering can work but expect more trial and error.
The quality and type of your supplies affect the final look and durability of the sign. Investing in good brushes and vinyl will pay off by reducing frustration and increasing precision. Budget-friendly options are fine for trial runs, but upgrading brush quality and using a cutting machine will yield professional-looking results faster. Don’t overlook workspace tools like cutting mats and tape to handle vinyl and stencils safely without damaging your surfaces.
How to Prepare and Prime the Canvas for Painting or Lettering
Preparing and priming your canvas properly is key to making sure paint or vinyl sticks well and your sign lasts. Start by cleaning the canvas to remove dust or oils, then apply one to five coats of white acrylic paint or gesso as a primer. Let each coat dry fully and lightly sand between coats for a smooth surface. Reusing old canvases or reversed stretched canvases works if they are cleaned and primed similarly. Avoid warping by keeping the canvas flat during drying and using moderate amounts of paint.
Cleaning the Canvas Surface
Begin by checking your canvas for dust, dirt, or any residues that could interfere with paint adhesion. This step is especially important if you’re reusing an old canvas or using a reversed stretched canvas. Use a soft brush or a dry cloth to gently remove loose dust. If the canvas shows grease or stubborn dirt, lightly dampen a cloth with water and a tiny drop of mild soap, then blot the surface and let it air dry completely before moving on.
Cleaning ensures that primer or paint bonds effectively to the fabric rather than trapping dirt underneath. Skipping this can cause peeling or uneven paint coverage.
Applying Primer or Base Coat
After cleaning, use white acrylic craft paint or gesso as your primer. White helps colors and lettering stand out clearly and creates a uniform base. Most hobbyists start with a plain white canvas and build coats from there. One coat may cover some canvas textures, but for a crisp white base, apply 3 to 5 thin coats, letting each dry fully between applications. Thinner coats reduce the risk of warping.
An old 11×14 canvas can be prepped well with regular white acrylic paint from a craft store, costing less than $1 per small bottle. Use a flat brush to apply the paint in gentle, even strokes to avoid brush marks or pooling.
- Place your canvas flat on a clean work surface.
- Dip a flat brush into white acrylic paint or gesso.
- Apply the first thin, even coat across the entire canvas surface.
- Allow the coat to dry for at least 30 minutes at room temperature.
- Lightly sand the surface with fine-grit sandpaper (220 grit) when dry.
- Wipe away dust with a dry cloth.
- Repeat steps 2 through 6 for additional coats until the canvas is evenly white and smooth (3 to 5 coats usually).
For a reversed stretched canvas, the same priming method applies after removing and turning the fabric over. Clean and prime the painted stretcher bars if you want a finished look.
Drying and Sanding Before Design
Proper drying between coats prevents paint from cracking or causing the canvas to warp. Keep the canvas flat in a well-ventilated room at moderate temperatures (65-75°F). Avoid direct sunlight or heat sources that can dry the paint too fast and cause uneven surfaces.
After the final coat dries completely (at least 2 hours after the last application), gently sand the surface one last time with fine-grit sandpaper. This step smooths out any brush strokes or slight bumps, resulting in a cleaner area for painting or applying vinyl lettering.
Wipe away all sanding dust with a dry microfiber cloth for the best adhesion. Your canvas should now feel smooth but still have enough tooth for paint or vinyl glue to grip without sliding off.
Comparison of Lettering and Decoration Techniques on Canvas
Picking the right lettering and decoration technique can shape your DIY canvas sign’s look and longevity. Paint offers flexibility in color and texture, letting you create thick brush strokes or fine lines. It’s affordable and needs basic tools like brushes and acrylic paint, which can cost under $10 for a small project. Painting works well for signs needing a handcrafted feel but demands a steady hand and drying time of 20-30 minutes.
Vinyl lettering produces crisp, clean letters and lasts longer than paint, especially outdoors. Using a vinyl cutter or ordering pre-cut vinyl gives precise results but costs more, around $10-$20 for a basic kit or printed vinyl sheets. Vinyl is best for smooth fonts and quick application on the primed canvas surface. It requires no drying time, but sticking vinyl to rough canvas can be tricky.
Stenciling blends painting and vinyl benefits. Stencils allow repeated patterns or fonts without freehand skill. You buy or cut stencils from plastic or paper, then paint over them. Stenciling uses less expensive supplies but can bleed paint if rushed. It suits beginners wanting consistent lettering shapes and can be done with a sponge or stencil brush. Expect moderate durability, depending on paint quality.
Stickers or decals are simple and quick but less durable, particularly outdoors. They’re ideal for temporary signs or those handled gently. Sticker prices vary widely, and no special tools are needed beyond clean hands and a smooth canvas. They may peel or fade faster than paint or vinyl.
Adding 3D elements like raised letters or embellishments gives depth and texture but increases complexity and cost. Materials include wood cutouts, foam letters, or glued objects. Tools might include stronger adhesives or a hot glue gun. This technique is best for decorative indoor signs and hobbyists comfortable with hand tools.
| Technique | Durability | Cost | Tools Required | Difficulty | Best for |
|---|---|---|---|---|---|
| Paint | Medium, lasts years indoors, fades outdoors | Low, under $10 for brushes and paint | Brushes, acrylic paint | Medium, steady hand needed, drying time | Customizable, textured lettering |
| Vinyl | High, weather-resistant, long-lasting | Medium, $10-$20 for cutter or printed sheets | Vinyl cutter or pre-cut vinyl | Medium, precise application, no drying | Sharp edges, durable signs |
| Stenciling | Medium, depends on paint and surface | Low, stencil materials and paint under $10 | Stencils, sponge or stencil brush | Easy, beginner-friendly with practice | Consistent shapes, repeated patterns |
| Stickers/Decals | Low, prone to peeling, fading | Varies, from few dollars upward | None, just clean surface | Very easy, quick application | Temporary or indoor signs |
| 3D Elements | Medium, can chip or loosen | Medium to high, wood, foam, adhesives | Glue gun, adhesives, craft materials | Harder, requires hand tools and planning | Decorative, textured indoor signs |
Using paint suits you if you want a hands-on approach and don’t mind setting aside time to wait for drying. Vinyl is smart if you want a polished look that lasts outside or if you prefer applying ready shapes. Stenciling reduces the chance of mistakes while keeping costs low, making it a good starter option. Stickers serve well for quick projects or signs that won’t get much wear. 3D additions boost visual interest but need patience and careful assembly.
Designing Your Canvas Sign: Tips for Fonts, Layout, and Transfers
Your canvas sign’s impact depends greatly on a clear, appealing design, which starts with choosing the right fonts, arranging elements thoughtfully, and transferring your design accurately. Focusing on legibility and balance will guide people’s eyes naturally, making your message stand out. Free design software and simple transfer methods can help you bring your vision to life without needing costly tools.
Selecting Fonts for Legibility and Style
Choose fonts that are easy to read from a distance to ensure your message is understood quickly. Sans-serif fonts like Arial or Helvetica offer clean lines, perfect for a modern look. Serif fonts such as Times New Roman give a classic feel but work best for short phrases rather than long sentences on canvas. Avoid overly decorative or script fonts unless you keep them large and minimal.
Pairing fonts can add interest but use no more than two different styles. Match a bold, attention-grabbing font for your headline with a simpler font for supporting text. For example, combine a bold slab serif with a lightweight sans-serif to maintain readability and style.
- Use fonts sized between 36 to 72 points for headlines, depending on your canvas size.
- Limit the number of fonts to two to avoid clutter.
- Check contrast between font colors and your canvas background for better visibility.
- Test your font choices by printing them at actual size before painting.
- Consider style relevance: rustic fonts suit farmhouse signs, modern fonts fit sleek decor.
Arranging the Design on Canvas
Balance your layout by centering your text and imagery, or using a grid system to guide placement. Leave ample margin space, at least 1 to 2 inches around edges, to prevent your design from feeling cramped or cut off when framed.
Keep line spacing generous (around 1.2 to 1.5 times the font size) to improve reading ease. For longer phrases, break text into multiple lines instead of one cramped line. Sketch a rough layout on paper or use free apps like Canva or Fotor to experiment digitally. Use simple alignment techniques: center alignment works well for symmetrical signs, left alignment fits casual or rustic looks, and right alignment can add uniqueness but may reduce readability.
Transferring the Design to the Canvas
Accurately transferring your design is critical for a clean result. One common method is tracing: print your design on regular paper, tape it to a window or lightbox with the canvas underneath, and trace with a pencil or fabric marker. For dark or textured canvases, tracing may be challenging.
Carbon paper is a reliable alternative. Place the carbon paper between your printed design and the canvas, then trace firmly over your design lines. The pressure transfers the carbon onto the canvas for a clear outline. You’ll find carbon paper priced around $5 to $10 for a pack of 10 sheets online or in craft stores.
Heat transfer using a stencil and an EasyPress machine can also apply your design efficiently if you have the equipment. Heat-transfer vinyl or stencil sheets cost about $10 to $20 per pack. Follow the device instructions carefully for temperature and pressing time to avoid damaging your canvas.
Use light pencil marks for tracing, as heavy lines can show through paint or stain your canvas permanently.
Step-by-Step Tutorial for Painting and Finishing a Canvas Sign
Painting a canvas sign requires patience and precision to get clean letters and a polished finish. You’ll outline and fill in your design carefully, correct any slip-ups, and then apply a protective coat to shield your artwork. Drying times vary, but sealing the sign properly ensures your work lasts and looks great.
Outlining and Filling Your Letters
Start with a light pencil sketch or traced outline of your letters on the primed canvas to guide your painting. Use a fine-tipped brush or paint marker for outlining to keep edges sharp. Acrylic paint is a good choice since it adheres well to canvas and dries quickly, typically within 15 to 30 minutes for a thin layer.
When filling in the letters, use a slightly larger brush and apply paint in even strokes, letting each section dry before adding another coat if needed. Avoid overloading the brush, which can cause paint to bleed or pool. Work slowly to keep the lines crisp and avoid smudging your outlines.
- Lightly trace your letters onto the canvas with pencil or transfer method.
- Outline each letter carefully with a fine brush or paint pen.
- Fill in the letters with acrylic paint using a medium brush.
- Allow the paint to dry for 15 to 30 minutes before adding a second coat.
- Paint additional details or decorations once the base layer is dry.
Fixing Mistakes and Touching Up
Painting errors happen easily on canvas. Quickly wipe off wet paint mistakes with a damp cloth or cotton swab before they dry. For dried paint, lightly sand the area with fine-grit sandpaper, then repaint over the corrected spot. Using a white or background-colored acrylic paint to cover small errors often works well before repainting letters.
Touch up edges carefully with a small brush, following your outline. Multiple thin layers improve coverage and reduce visible brushstrokes. Avoid scrubbing too hard on the canvas surface, which might damage the fabric or primer.
Applying a Protective Finish
Seal your painted canvas to protect it from dust, moisture, and fading. A clear acrylic spray sealant or brush-on varnish designed for fabric and acrylic paint is best. Matte or satin finishes typically provide a nice, natural look without glare.
Apply at least two thin coats, allowing 20 to 30 minutes to dry between applications. Let the final sealed canvas cure for 24 to 48 hours before handling to ensure the finish hardens fully. Prices for sealants range from $5 to $15, depending on size and brand.
Adding Frames and Display Options to Your Canvas Sign
Choosing between building or buying a frame for your canvas sign depends on your skill level, tools, and the exact look you want. Buying a ready-made frame can save time and provide a professional finish, especially if you find one that fits your canvas size. Custom building a frame allows you to match your décor perfectly and gives you control over materials and style.
Wood frames work best with canvas signs. Softwoods like pine offer affordability and ease of cutting, while hardwoods like oak or maple provide durability and a more polished appearance. Metal frames provide a sleek, modern look and require extra hardware for assembly and attachment if you prefer a different style.
To build a basic wood frame, cut four pieces: two the length of your canvas plus twice the width of the frame board, and two the width of your canvas plus twice the frame board width. For example, if your canvas is 16 by 20 inches and your frame boards are 3/4 inch wide, your length pieces should be 17.5 inches (16 + 1.5) and the width pieces 21.5 inches (20 + 1.5). Join the pieces at 45-degree angles with wood glue and finish with nails or corner brackets for extra strength.
Mounting the canvas to the frame requires care to avoid damage and ensure stability. Wrap the canvas edges around the frame and secure with a staple gun or upholstery tacks on the back or sides of the frame. Use enough staples or tacks spaced about 2 inches apart to prevent sagging. Avoid stapling too close to the edge of the canvas, as this can cause tearing or loosen the fabric over time.
- Allow 1.5 inches added to canvas dimensions when planning frame size if using 3/4-inch wide frame boards
- Use a staple gun or tacks to attach canvas edges firmly to frame’s back or sides
- Sand frame edges smooth before assembly to prevent canvas snags
- Consider painting or staining the frame before mounting the canvas
- Install sawtooth hangers or D-rings on the frame back for easy wall mounting
- Leave space around the edges of your sign’s design to accommodate the frame overlap
- For a no-frame option, add hanging hardware directly to a stretched canvas using eye hooks and wire
For hanging, the frame should have sturdy hardware installed, such as D-rings or sawtooth hooks. Use wall anchors rated for the sign’s weight to keep the installation secure when the sign is heavy or larger than 20 inches on any side. Smaller canvas signs can also hang from command strips designed for picture frames. Another option is to use an easel or shelf display for a tabletop presentation.
Different display styles affect how the sign fits your space. Floating frames add a modern touch by showing a gap between the canvas edge and the frame. Box frames encase the canvas fully with depth, giving a shadowbox effect. Deciding on a style depends on your room’s design theme and how much you want the frame itself to stand out versus highlighting the canvas artwork.
Common Beginner Mistakes and How to Fix Them Quickly
Uneven or blotchy lettering often happens when paint is applied too thickly or unevenly. Use lighter coats of paint and let each layer dry before adding another to keep letters sharp and crisp. Avoid brushing back and forth in the same area; instead, use gentle, even strokes or sponges for better control.
Paint smears and color bleeding usually occur when the surface isn’t sealed or prepped properly. For projects using vinyl stencils, paint a base layer over the entire canvas and stencil, then paint the second color on top. This “seals” the stencil edges, making any bleeding less noticeable. To fix existing smears, let the paint dry fully, then carefully scrape off smears with a craft knife or lightly sand the surface before repainting.
Vinyl often won’t stick well to canvas since the fabric’s texture keeps the adhesive from bonding fully. Use a firm, smooth backing like a wooden frame behind the canvas to support the vinyl, or switch to paint or permanent markers for lettering. When you use vinyl, apply a clear acrylic sealer over it to prevent peeling. To fix bubbles, lift the vinyl gently and smooth out air pockets with a credit card or a squeegee, then press firmly back in place.
Warping or tearing happens when the canvas gets too wet or is stretched unevenly. Use acrylic paint instead of water-heavy paints to minimize warping. Keep the canvas flat on a protected surface and avoid saturating it with water or paint. Warping can be fixed by letting the canvas dry flat upside down on a smooth surface or gently stretching it back into shape while it’s still damp. For tears, patch the back of the canvas with lightweight fabric glue and press it flat under a heavy book until dry.
- Use thin, even layers of paint for clean lettering
- Seal vinyl edges with a topcoat to prevent bleeding
- Press vinyl smoothly and remove bubbles with a squeegee
- Avoid saturating the canvas with water or paint
- Allow full drying between paint coats
- Patch tears from behind with fabric glue
- Protect finished work with a clear acrylic sealer
Working in thin layers and letting each coat dry reduces almost all problems with paint bleeding or uneven coverage.
Step-by-Step Action Plan for Your DIY Canvas Sign
Follow these clear steps to create your personalized canvas sign successfully. Each phase helps you move closer to a finished piece you’ll enjoy displaying.
- Before You Start: Gather all supplies including canvas, paints, brushes, and stencils. Having everything ready saves time and avoids interruptions.
- Day 1: Prepare your canvas by lightly sanding and applying a coat of primer. Let it dry fully; dry primer will feel smooth and wrinkle-free.
- Day 2: Plan your design by sketching or transferring your layout onto the canvas. Confirm your placement looks balanced and centered before painting.
- Day 3: Paint or letter your sign using your chosen technique. Allow each layer of paint to dry before adding more to prevent smudging.
- Day 4: Apply a protective clear coat to seal your design. After it dries, the surface should feel smooth and slightly glossy or matte, depending on your finish.
- Day 5: Attach a frame or add hanging hardware. Test the stability by gently hanging to ensure it stays secure.
- Day 6-7: Display your sign and enjoy your handiwork. Adjust lighting or placement for best visibility and impact.
Frequently Asked Questions
What Size Canvas Do You Need for a DIY Canvas Sign?
A 16″ x 20″ canvas is ideal for most DIY sign templates, offering enough space for clear designs without overwhelming a room. This size fits well in common display areas and makes lettering easier to manage.
Can I Use My DIY Canvas Sign Templates on Other Surfaces?
Yes, the same templates work on wood, paper, or fabric using carbon paper tracing. This versatility lets you create matching decor pieces with one method.
How Should I Attach a Frame to My Canvas Sign?
Glue the frame so its edge is flush with the back of the canvas for a clean, flush look that extends past the front. This provides a modern framed effect with no overlap on the canvas surface.
Is a Silhouette Cameo or Cricut Necessary for Making DIY Canvas Signs?
No, you don’t need a Silhouette Cameo or Cricut. Hand-painting or using carbon paper tracing works well for great results.
What Is Reverse Canvas DIY and How Does It Differ?
Reverse canvas DIY involves removing the canvas from the frame and repurposing the frame as part of the design. It offers a sturdy base and unique look different from standard stretched canvas signs.
How Do I Make Sure My Paint Design Doesn’t Smudge on a Canvas Sign?
Wait for the Mod Podge to dry completely before painting. This base coats the canvas and prevents paint from bleeding or smudging during application.
Final Thoughts
Creating a custom DIY canvas sign lets you express your style while adding a personal touch to your space. Starting with clear steps will build your confidence and skills quickly. Begin by selecting a simple design for your first project to get comfortable with the materials and techniques.