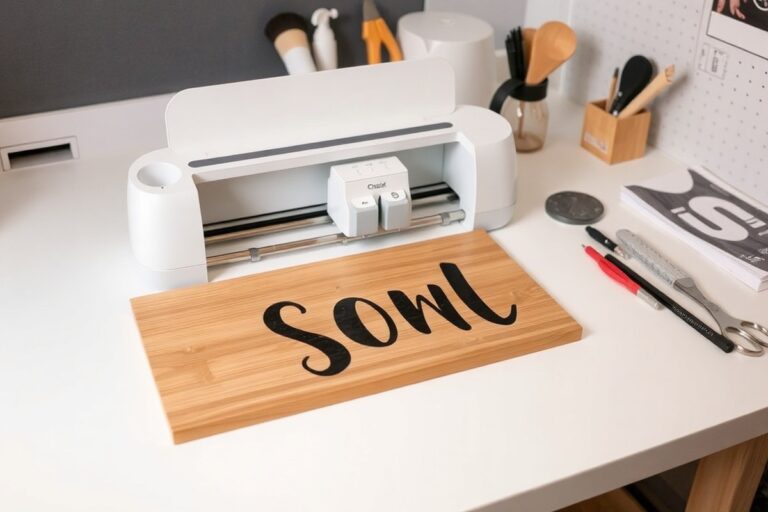
How to Apply Vinyl to a Window: A Complete Guide with Pro Tips
How to apply vinyl to a window starts with cleaning the surface thoroughly and removing any old residue. Next, carefully measure and cut the vinyl to fit the window size before peeling and applying it slowly to avoid bubbles. Begin with a well-prepared, dry window to ensure the vinyl adheres smoothly and lasts longer.
Key Takeaways
- Always clean the window with a scraper at a 30° angle to remove dirt and old adhesive completely.
- Measure twice and cut the vinyl slightly smaller than the window dimensions for a precise fit.
- Peel the backing paper gradually while applying the vinyl to prevent air bubbles from forming.
- Use a squeegee or credit card to smooth the vinyl outward from the center during application.
- Work in a dust-free environment to avoid particles trapping under the vinyl surface.
- Allow the vinyl to set in place for several hours before cleaning the window to ensure proper adhesion.
How to Apply Vinyl to a Window Step-by-Step

Applying vinyl to a window requires careful preparation, precise alignment, and a smooth finishing process to avoid bubbles and wrinkles. Start with a clean, dry surface and use tools like a plastic squeegee and masking tape to assist with positioning and adhesion. Working slowly and methodically will help ensure the vinyl sticks evenly and looks professional. Follow these step-by-step instructions to apply your vinyl correctly and avoid common pitfalls during installation.
- Clean the window surface thoroughly using a window cleaning spray and a microfiber cloth to remove all dirt, dust, and grease. Wait for the glass to dry completely; moisture can interfere with adhesion and cause bubbles.
- Position the vinyl on the window by peeling back a small portion of the backing paper. Use masking tape to temporarily secure the vinyl in place, aligning it carefully according to your desired placement. Check that the design is straight and centered before fully removing the backing.
- Peel the backing paper slowly while simultaneously applying the vinyl to the window. Use your free hand to hold the vinyl taut and prevent it from folding over or creating wrinkles during this process.
- Smooth out the vinyl using a plastic squeegee starting from the center and moving outward toward the edges. This action pushes out air bubbles and excess adhesive. Apply firm but controlled pressure, and use overlapping strokes to ensure no bubbles remain trapped.
- Fix any air bubbles immediately by carefully lifting the nearest edge of the vinyl and reapplying it with the squeegee. For small bubbles that cannot be lifted, gently pierce the bubble with a pin and then smooth it down.
- Trim excess vinyl carefully with a sharp vinyl cutter or utility knife along the edges of the window frame, taking care not to scratch the glass or damage the window’s surroundings.
- Allow the vinyl to set fully by avoiding touching or cleaning the window for at least 24 hours. This time frame ensures optimal curing of the adhesive for long-lasting results.
Key points to remember include working in a temperature range between 50°F and 90°F, which helps the adhesive bond properly without becoming too hard or too soft. Using a squeegee with firm plastic edges rather than metal prevents scratching the glass. For larger vinyl sheets or graphics pre-spaced together, slow peeling synchronized with squeegee application reduces wrinkle formation. Masking tape placement during positioning keeps the vinyl from shifting while you work.
Properly applied vinyl will look smooth, consistent, and firmly adhered with no visible bubbles or wrinkles. Skipping thorough cleaning or rushing the smoothing step often leads to poor adhesion, trapped air pockets, or unsightly bubbles that shorten the vinyl’s lifespan and effectiveness.
Tools and Materials Needed for Window Vinyl Application
To apply vinyl to a window successfully, you need a few essential tools and the right materials. Having everything ready before you start makes the process smoother and helps prevent mistakes that could cause bubbles, peeling, or poor adhesion.
The first tool on your list should be a squeegee with a soft edge designed for vinyl installation. This tool helps smooth out the vinyl and remove air bubbles during application. A utility knife is necessary for trimming excess vinyl around the edges of the window. A measuring tape and a carpenter’s square ensure precise alignment and cutting of both the vinyl and any replacement materials. You will also want a spray bottle filled with a mixture of water and a few drops of dish soap; this solution allows you to reposition the vinyl before it fully sticks to the glass, which is particularly helpful when applying large pieces.
Before applying the vinyl, cleaning the window surface thoroughly is important. Use a glass cleaner or a specialized surface prep product to eliminate dirt, grease, and residues. These contaminants interfere with the vinyl’s adhesive and shorten its lifespan. Use lint-free cloths for wiping to avoid fibers sticking to the glass.
- Squeegee with a felt or rubber edge
- Utility knife with sharp blades
- Measuring tape (at least 12 inches)
- Carpenter’s square for accurate angles
- Spray bottle with soapy water solution
- Glass cleaner or surface prep solution
- Lint-free cloths
Vinyl types vary depending on your project needs. For window application, cast vinyl films made specifically for glass work best. They are thinner, more flexible, and resist shrinking or expanding with temperature changes better than calendared vinyl films. For decorative or privacy purposes, frosted or etched glass vinyl film is popular. Outdoor-rated adhesive vinyl designed for window use lasts longer, typically 7 to 10 years, while standard indoor vinyl may last less.
| Vinyl Type | Use | Durability | Cost Range |
|---|---|---|---|
| Cast vinyl film | Window glass application, decals, privacy films | 7 to 10 years | $2 to $5 per square foot |
| Calendared vinyl film | Signage, flat surfaces, limited window use | 3 to 5 years | $1 to $3 per square foot |
| Frosted/etched glass vinyl | Privacy and decorative window covering | 5 to 7 years | $3 to $6 per square foot |
Always clean the window surface thoroughly and let it dry completely before applying the vinyl to ensure the best adhesive bond.
Specialized surface cleaners designed to remove silicone or oil residues can be necessary if the windows were previously treated or have protective films. Investing in good-quality vinyl and taking the time to prepare properly will save you hours of fixing mistakes or replacing failed vinyl applications later. The right tools and materials create a foundation for neat, durable window vinyl results that improve your home’s appearance and energy efficiency.
Preparing Your Window for a Perfect Vinyl Application
Preparing your window properly ensures the vinyl adheres smoothly and lasts. This involves thoroughly cleaning the glass, confirming the surface is suitable by checking for damage or texture, and guaranteeing the window is completely dry and free of dust before application.
Remove Dirt, Oils, and Residues
Even if the window looks clean, invisible dust, oils, or wax residues can prevent vinyl from sticking well. Use a cleaning method that removes these contaminants without leaving residue behind. Rubbing alcohol is effective because it cleans deeply and evaporates quickly. Here is a step-by-step cleaning checklist to prepare the glass surface:
- Remove any loose dirt or dust by wiping the window gently with a dry microfiber cloth.
- Moisten a clean cloth with isopropyl rubbing alcohol (70% or higher) and wipe the glass in a circular motion.
- Use a second clean cloth dampened with water to wipe away any alcohol residue.
- Dry the surface completely with a lint-free, dry cloth.
- Inspect for any remaining smudges or particles; repeat cleaning if necessary.
This process avoids residues typical of detergents or wax-based cleaners, which can interfere with adhesion. Avoid ammonia-based cleaners as they may leave films.
Check Window Surface for Damage or Texture
Vinyl adheres best to smooth, clean glass without imperfections. Surfaces with cracks, chips, heavy textures, or dirt buildup cause adhesion issues and bubbling. Examine both the glass and frame carefully before installation.
Look for scratches, deep dirt deposits, or any remnants of previous adhesives. When the window frame shows peeling paint or debris, carefully clean it using a plastic scraper held at a 30° angle. Remove any obstructions such as old window weights or cords to ensure a snug, smooth fit for vinyl. Consider these points to decide if the surface is suitable:
- Is the glass flat and free of visible damage?
- Is the frame clean, smooth, and structurally sound?
- Are there no residual adhesives, wax, or paint that will resist vinyl?
Address any problems that arise before applying vinyl, or replace the window if needed. Poor surface conditions make even the best vinyl fail prematurely.
Dry and Avoid Dust Before Applying Vinyl
After cleaning, the window must be completely dry. Moisture trapped under vinyl or on the application surface reduces adhesion and can cause bubbling or peeling.
Before starting the vinyl application, wipe the window one last time with a dry cloth and double-check for dust. Avoid windy or dusty environments during application to keep the surface pristine. Room temperatures between 50°F and 85°F are ideal; extremely cold or hot conditions can prevent proper bonding. Follow these steps to maintain a dust-free, dry window:
- Dry the glass thoroughly with a lint-free cloth after cleaning.
- Avoid touching the cleaned surface with bare hands to prevent oily fingerprints.
- Apply the vinyl shortly after cleaning, minimizing the time the glass is exposed to dust or moisture.
- Hold off on application during high winds or dusty weather if working outdoors.
Ensuring a clean, dry, dust-free surface lays a reliable foundation that supports strong adhesion and a smooth vinyl finish.
Choosing the Right Vinyl Type for Your Window Project
Choosing the right vinyl type for your window project depends mainly on how and where you’ll use it. Vinyl used on windows can serve different purposes, such as decorative graphics or actual replacement frames. You’ll find that vinyl for windows generally comes in two broad categories: indoor vinyl decal films and outdoor vinyl window panels or replacement window frames made of polyvinyl chloride (PVC). Each suits specific applications, durability needs, and visual outcomes.
The most durable vinyl for window replacement is PVC, the same material used in vinyl windows for home construction. PVC vinyl is strong, low maintenance, and provides good energy efficiency due to built-in UV stabilizers. This makes it excellent for outdoor use and long-lasting performance. In contrast, vinyl films used for decorative or advertising graphics on windows are usually thinner and designed for indoor or temporary outdoor use. These films vary in adhesive strength and thickness, so selecting one made for outdoor conditions is essential if you expect it to last beyond a few weeks in sunlight. Below is a comparison table summarizing key vinyl types and their typical uses when applied to windows:
| Vinyl Type | Common Use | Durability | Ideal Location | Visual Outcome | Estimated Cost per sq. Ft. |
|---|---|---|---|---|---|
| PVC Vinyl (Replacement Window) | Window frames, full window units | High (10-20 years) | Outdoor, exposed to sun & weather | Solid, weather-resistant | $15 – $40 |
| Outdoor Vinyl Film | Window graphics, decorative films | Moderate (6 months – 3 years) | Outdoor, sun-exposed window glass | Clear or opaque with printed designs | $2 – $6 |
| Indoor Vinyl Film | Short-term decals, partial coverage | Low (weeks to months) | Indoor window glass | Custom colors and textures | $1 – $4 |
When selecting vinyl, consider the window’s location and expected exposure to sunlight and weather. For example, using indoor film on an outdoor window exposed to direct sun can lead to fading and peeling within weeks. Likewise, applying PVC replacement vinyl is only suitable if you’re replacing window frames or full window units, not for decorative decals. Check this selection criteria checklist before buying vinyl:
- Exposure: Does the window face direct sunlight or harsh weather? Outdoor or PVC vinyl is necessary.
- Purpose: Will vinyl change appearance only, or replace parts of the window?
- Lifespan: How long do you need it to last? Short-term decorations can use indoor films; replacements need durable PVC.
- Appearance: Do you want opaque, transparent, patterned, or smooth finishes?
- Installation skill: PVC vinyl requires precise fitting and sometimes professional handling, while film is more DIY-friendly.
Cost also influences your choice. Higher quality, outdoor-rated films and PVC window frames cost more upfront but save on repairs and replacements. Lower-cost indoor films may suit renters or seasonal decorations but typically require frequent replacement. Always pick materials rated for your environment and project needs to ensure a successful vinyl application.
Environmental Factors That Affect Vinyl Application
Temperature and humidity play a significant role in how well vinyl adheres to a window surface. The ideal temperature range for applying vinyl is between 50°F and 85°F. Below 50°F, the vinyl can become stiff and brittle, making it harder to apply smoothly without wrinkles or bubbles. Above 85°F, the vinyl adhesive may become too soft, which can cause it to stretch or even lift after application. Humidity should ideally be between 40% and 70%. High humidity can interfere with the adhesive’s ability to bond, especially if moisture gets trapped under the vinyl, while very dry air may cause the vinyl to dry unevenly, risking poor adhesion and early peeling.
Vinyl application outdoors requires consideration of seasonal weather. In colder months, temperatures often drop below the ideal range, which can slow down curing time and increase the chance of the vinyl lifting. In contrast, summer heat can soften the adhesive too much, making the vinyl more susceptible to stretching or distortion as you apply it. Avoid applying vinyl during rainy or extremely humid days since water vapor can prevent the adhesive from bonding correctly. Early morning or late afternoon application times help avoid the peak heat in summer.
Weather impacts the drying and curing of vinyl adhesive significantly. Curing usually takes about 24 to 48 hours in the right conditions to achieve full adhesive strength. Exposure to wind, moisture, or fluctuating temperatures during this time may reduce the bond’s quality. Proper preparation, such as cleaning and drying the window thoroughly before application, helps reduce environmental risks. Using a heat gun or hair dryer on low heat after application can improve adhesion and smooth out bubbles, especially in cooler weather, but keep the temperature controlled to avoid warping the vinyl.
Taking time to monitor local weather forecasts before starting is a practical step. Applying vinyl on a mild, dry day gives the best chance for long-lasting results. If you must apply vinyl in less-than-ideal weather, try to work quickly and consider using a temporary shelter like a canopy to block wind and protect from moisture. Always allow the vinyl to cure undisturbed for at least 24 hours before cleaning or exposing the window to wet conditions.
Do not apply vinyl when temperatures are below 50°F or above 85°F, or when humidity is over 70%, to ensure proper adhesion and avoid damage during curing.
Troubleshooting Common Vinyl Application Problems
Common issues during vinyl application on windows include air bubbles, wrinkles, peeling, and mistakes in placement. Addressing these problems carefully ensures a smooth, long-lasting finish that looks professional. Knowing how to fix and avoid these troubles saves time and protects your investment in vinyl decoration or replacement.
Removing and Preventing Air Bubbles
Air bubbles often appear when the adhesive side of the vinyl traps air pockets against the glass. They can make the vinyl look uneven and reduce its lifespan by letting moisture in. To remove bubbles after applying the vinyl, use a flexible squeegee to gently push them toward the edges, starting from the center. Work slowly and firmly but avoid tearing the vinyl.
Prevention is key to avoid bubbles during application. Lightly misting the window with a mix of water and a small amount of dish soap before applying helps the vinyl slide and adjust smoothly. Conduct the application in temperatures above 40°F to allow the adhesive to set correctly. Applying the vinyl slowly and smoothing as you go reduces trapped air underneath.
- Use a squeegee with a rubber edge for best results
- Apply vinyl in moderate, stable temperatures, ideally above 40°F
- Slightly wet the window surface to allow repositioning
- Press firmly from center outward to push air out
- For small persistent bubbles, gently puncture with a pin and press down
- Avoid stretching vinyl excessively during application
Small wrinkles can be eased out similarly by smoothing with your fingers or a squeegee. For large creases, lifting and repositioning is safer than trying to stretch or pull forcibly.
Fixing Adhesion Problems
Vinyl can peel or fail to stick properly if the surface is dirty, oily, or wet. Before application, thoroughly clean the window using glass cleaner or rubbing alcohol to remove dust, oils, and residues. Waiting for the window to dry completely before placing vinyl improve adhesion.
Surface temperature influences how well vinyl sticks. Applying it to a glass cooler than 40°F can cause poor bonding. Vinyl peeling later might mean the surface wasn’t prepared right or conditions were not ideal during installation. To fix poor adhesion:
- Carefully lift peeled edges without stretching the vinyl
- Clean the exposed surface and the vinyl backing lightly
- Reapply with gentle pressure and a squeegee, pushing air out
- Consider using a heat gun on low to warm the vinyl, improving stickiness
- Avoid excessive heat, which can warp or damage vinyl
Proper adhesive bonding means the vinyl should stay smooth and firmly attached for years even through harsh weather.
Safe Repositioning of Applied Vinyl
Repositioning vinyl after application is possible but requires care to avoid stretching, tearing, or losing adhesive strength. Lightly spraying the glass with a water-soap mixture before application lets you lift and re-align the vinyl easily without damage.
To reposition vinyl that has fully stuck, carefully peel it back from one corner. Doing this gently minimizes the chance of adhesive failure. Avoid forcing vinyl that resists movement.
Once lifted, you can reapply by aligning it carefully, then pushing out air bubbles with a squeegee. This method works best if the vinyl is still relatively new in its application process.
Aftercare and Maintenance for Long-Lasting Vinyl Windows
Allow the vinyl on your window to cure for at least 72 hours before cleaning or exposing it to significant moisture. This curing time helps the adhesive fully set and bond to the glass, ensuring long-term durability. Avoid washing the window or using any cleaning products during this period to prevent weakening the adhesive or causing the vinyl to lift.
After the curing period, clean the vinyl gently using a soft cloth or sponge, warm water, and mild soap. Avoid abrasive scrubbers, ammonia-based cleaners, or solvents, as these can damage the vinyl surface or degrade the adhesive over time. Pat the surface dry with a soft, lint-free towel instead of rubbing hard to keep the vinyl intact.
Perform cleaning once every two to four weeks, depending on exposure to dirt and environmental factors. More frequent cleanings may be needed if the windows face industrial areas, pollen-heavy zones, or heavy rain, which can leave residue that dulls the vinyl’s appearance. Regular maintenance keeps the vinyl looking fresh and prevents buildup that might compromise its adhesion.
Inspect the vinyl periodically for any signs of peeling or damage, especially along the edges. Address small issues promptly by gently smoothing down lifted edges or reapplying pressure using a squeegee. Avoid using heat guns or hair dryers to force adhesion, as excessive heat may warp or discolor the vinyl.
Keep window frames and tracks clean as well since dirt and debris in these areas can stress the vinyl film. Use a soft brush or vacuum attachment to remove dust, then wipe down with a damp cloth. Well-maintained window frames support the vinyl and reduce the risk of scratches or tears during operation.
Vinyl windows generally require less maintenance than wood or painted surfaces because they don’t need sealing or repainting. Choosing appropriate cleaning products and sticking to regular care routines can extend the lifespan of the vinyl for many years, typically 10 to 20 years depending on exposure. Avoid pressure washing near the vinyl as the intense water jets can loosen the adhesive and cause peeling.
When to Call a Professional for Vinyl Window Installation
Professional help is recommended for vinyl window projects involving large or complex installations, replacement windows, or when you lack the necessary skills and tools. Simple decal applications are often manageable on your own, but higher-stakes work benefits from expert experience. Assessing the complexity and potential risks will guide your decision to DIY or call a pro.
Assessing Project Complexity
Consider the size, design, and purpose of the vinyl window application. Simple decorative decals or small graphic films usually don’t require professional intervention. Projects that involve full window replacements or intricate vinyl graphics with precise alignment and weatherproof sealing tend to exceed typical DIY skills. Take note of your comfort level with using specialized tools like heat guns, squeegees, and utility knives.
Evaluate the environment where the application takes place. Outdoor installations or windows exposed to direct sunlight and temperature fluctuations need more precise workmanship for durability. Also, if your window structure includes non-standard shapes or sizes, professional installers can better handle custom-cut vinyl and exact fitting. Use this checklist to gauge complexity:
- Size of vinyl: large sheets over 4 square feet require steady handling.
- Type of window: replacement window installation versus surface application.
- Design detail: simple single-color decals versus multi-layered or gradient vinyl.
- Environmental exposure: exterior windows needing weatherproof sealing.
- Your experience with similar projects or relevant tools.
- Access to help or guidance during installation.
Risks of DIY Mistakes
Errors during vinyl application can lead to air bubbles, wrinkles, or poor adhesion that shorten the lifespan of the vinyl. A poorly sealed vinyl on replacement windows might allow moisture and drafts, negating energy efficiency improvements. The risk of damaging the window frame or glass during installation is higher if you lack experience.
Attempting complex vinyl cuts or dealing with uneven surfaces can result in wasted materials and additional costs. Incorrect measuring or cutting can cause permanent damage to the vinyl, requiring a costly replacement purchase. The physical challenge of safely reaching high or awkward windows also raises safety concerns.
Test your technique on a small, inconspicuous area before tackling the whole window to avoid costly errors.
Advantages of Hiring a Professional
Certified vinyl window installers provide precise preparation, cutting, and application tailored to your project’s specifications. Professionals can handle exterior installations with proper flashing and sealing to ensure weatherproof and energy-efficient results. Their experience reduces installation time and protects your investment.
Hiring a pro typically costs between $100 and $300 per window, according to industry estimates, which can be justified by longer-lasting results and fewer mistakes. Certified installers also offer warranties that cover application issues, giving you peace of mind. For complicated windows or those in challenging environments, professional work increases durability and aesthetic appeal.
Step-by-Step Action Plan
Follow this plan to get your vinyl applied cleanly and securely for a window that looks great and lasts.
- Before you start: Clean the window thoroughly with a glass cleaner and lint-free cloth. The glass should look spotless and dry to ensure good adhesion.
- Day 1: Measure your window and cut the vinyl to size, leaving a small margin for trimming. Confirm the vinyl fits properly by holding it against the window.
- Day 1, later: Peel the backing slowly while applying the vinyl from one edge to the other, using a squeegee to smooth out bubbles. Check for any trapped air or wrinkles as you go.
- Day 1, final step: Trim excess vinyl along edges and corners with a sharp craft knife. Edges should lay flat without peeling.
- After 24 hours: Inspect the vinyl for any lifting or trapped moisture. Gently press down any areas that need it to maintain adhesion.
- After 1 week: Clean the vinyl gently with mild soap and water. Avoid harsh chemicals to preserve the vinyl’s appearance.
- If problems occur: For bubbles that remain, carefully lift the vinyl near the bubble and reapply with the squeegee. Repeat as needed within the first few days.
Frequently Asked Questions
What Is the Easiest Way to Apply Vinyl to a Window?
Start by thoroughly cleaning the window and drying it completely. Use a squeegee or credit card to smooth the vinyl from the center out to avoid bubbles and wrinkles for a clean application.
Can I Apply Window Vinyl on a Curved or Uneven Surface?
Window vinyl adheres best to flat, smooth glass surfaces. Curved or uneven windows may cause bubbles or peeling, so it’s best to avoid applying vinyl there or use special vinyl designed for curves.
How Long Does Vinyl Window Application Typically Take?
Applying vinyl to a standard window usually takes 30 minutes to an hour. This includes surface prep, vinyl positioning, and smoothing out air bubbles.
Is It Okay to Apply Vinyl on Cold Glass Surfaces?
Vinyl application works best when glass is at room temperature or slightly warmer. Cold surfaces can reduce adhesion and cause vinyl to lift or bubble over time.
Can Vinyl Damage My Window Glass When Removed?
Vinyl itself usually won’t damage glass if removed carefully. Use a plastic scraper and warm soapy water to gently lift the edges and peel off the vinyl without scratching.
Do I Need Special Vinyl for Exterior Windows?
Exterior window vinyl should be durable, weather-resistant, and UV protected. Look for vinyl labeled for outdoor use to ensure it lasts through sun, rain, and temperature changes.
Wrapping Up
Applying vinyl to your window is a process of careful preparation and steady application. Taking these clear steps today helps you achieve a smooth finish that lasts through seasons. Start with a clean surface and patience, then check your work regularly to catch issues early. Your next move is to gather your tools and pick the right vinyl so you can begin applying with confidence.