How to Light Up House Numbers with 8 Effective Methods for Better Visibility
How to light up house numbers effectively starts with choosing the right lighting type and positioning it to shine directly on the numbers for clear visibility. Using dedicated address light fixtures or backlit panels ensures numbers are visible day and night. Begin by making sure your house numbers are at least 4 inches tall with a bold stroke to maximize the lighting impact.
Key Takeaways
- Use dedicated address light fixtures designed to focus light directly on your house numbers for maximum clarity.
- Mount lights above or below house numbers, aiming them precisely to avoid shadows and glare.
- Opt for weatherproof lighting fixtures with at least an IP65 rating for outdoor durability.
- Consider solar-powered or motion-activated lighting to reduce electrical costs and add convenience.
- Choose LED lighting for energy efficiency and bright, consistent illumination.
- Trace house numbers onto clear plexiglass for backlit or halo-lit styles with modern appeal.
1. Best Methods to Light Up House Numbers
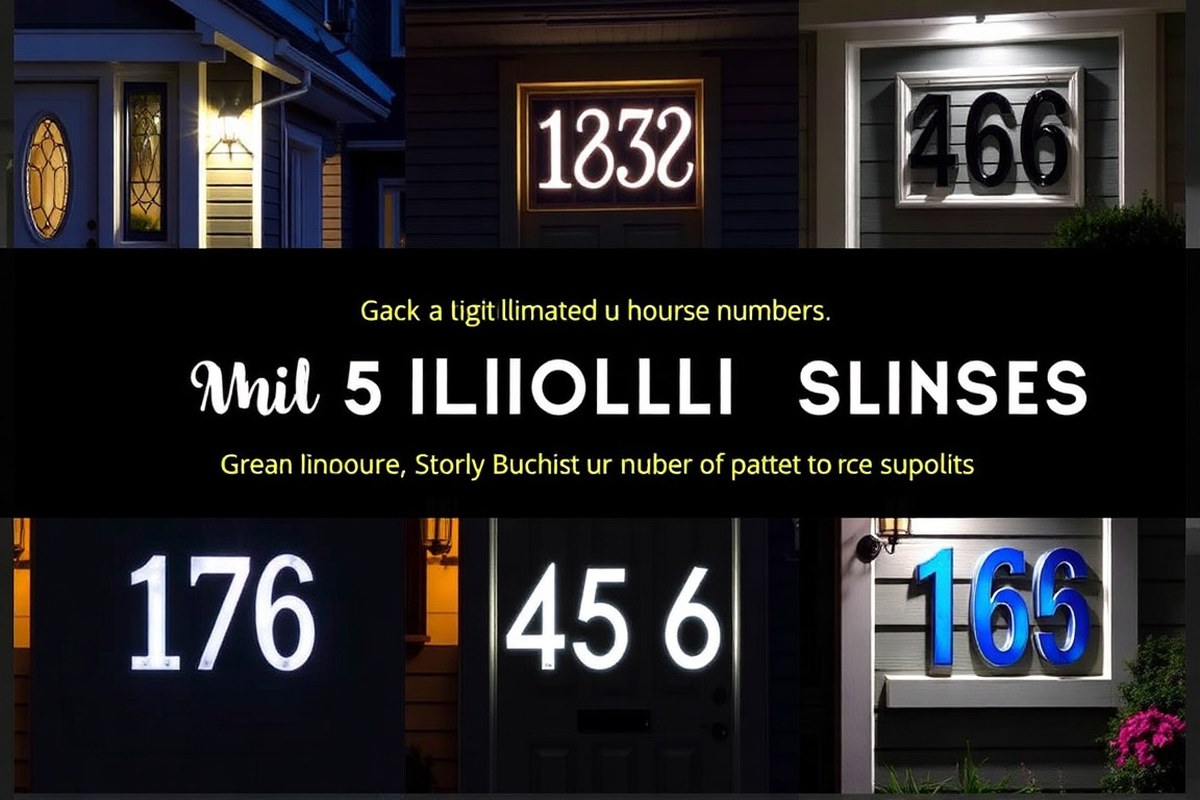
Lighting house numbers can be done several ways, including backlit numbers, solar-powered lights, wired LED fixtures, and motion-activated or smart lighting systems. Each method varies in cost, installation complexity, energy use, and visibility. Choosing the right approach depends on your budget, home style, available power sources, and whether you want constant illumination or security-triggered lighting.
Backlit and Halo-Lit House Numbers Explained
Backlit house numbers have LED modules mounted behind each digit. The light shines outward and creates a glowing effect against the wall, making the numbers easy to read at night. Halo lighting is a variation where the illumination casts a soft outline or “halo” around the numbers, giving a modern look that fits well with minimalist or mid-century modern homes.
This method requires wiring and precise installation but offers excellent visibility and energy efficiency because LEDs use low power. The illumination is steady, not dependent on motion or sunlight. However, installation costs can be higher because of the wiring and mounting processes. Also, backlit numbers work best on flat, solid wall surfaces to maximize the light effect.
Solar-Powered Lighting Options
- Solar-powered LED lights are popular for lighting house numbers because they require no wiring and save energy.
- Ideal for locations receiving at least 4 to 6 hours of direct sun daily to guarantee adequate battery charging.
- Solar fixtures often come with integrated LEDs and sensors that turn the light on automatically at dusk and off at dawn.
- Environmental factors such as heavy shade, cloudy weather, or snow cover reduce their effectiveness.
- Maintenance includes occasional cleaning of solar panels and battery replacement every 2 to 3 years.
Solar lighting suits homeowners wanting an easy, eco-friendly option without electrical work but may provide less consistent brightness compared to wired systems.
Motion-Activated and Smart Lighting Features
Motion-activated lights improve energy efficiency and security by staying off until movement triggers them. For house numbers, they light up only when someone approaches, which saves power but leaves periods without illumination. This can be a drawback if you want numbers visible all night for emergency or delivery purposes.
Smart lighting systems allow programming brightness, timing, and integration with other home automation devices. You can schedule lights to turn on at dusk or activate with motion detectors linked to your phone. These systems use energy-efficient LEDs and can offer the best combination of visibility, convenience, and security, but they require more upfront cost and technical setup. Pairing backlit or halo-lit numbers with motion sensor porch lights can give continuous number visibility plus added security benefits.
| Lighting Method | Average Cost | Installation Complexity | Energy Use | Visibility | Pros | Cons |
|---|---|---|---|---|---|---|
| Backlit/Halo-Lit Numbers | $150 – $500 | Wired, professional recommended | Low (LED powered) | High, steady glow | Modern look, constant visibility, energy-efficient | Higher upfront cost, wall surface dependent |
| Solar-Powered LED Lights | $50 – $150 | Easy DIY, no wiring | None (solar) | Moderate, depends on sunlight | Cost-effective, easy install, eco-friendly | Reduced brightness in shade/cloud, battery maintenance |
| Motion-Activated Lights | $75 – $200 | Moderate, some wiring or battery | Very low, only on motion | Variable, only lit with motion | Saves energy, adds security | Inconsistent illumination, gaps in visibility |
| Smart LED Lighting | $150 – $400 | Moderate to complex, professional advised | Low (LED) | High, programmable | Customizable, integrates with home systems | Higher cost, requires technical setup |
| Dedicated Address Light Fixtures | $100 – $300 | Wired installation | Moderate (depends on bulb) | Good, depending on fixture | Classic look, reliable | Requires wiring, may use more energy |
Each lighting method serves particular needs. Backlit and smart LED lights offer excellent constant visibility with low energy use but need wiring and higher upfront investment. Solar options are affordable and easy to install but rely heavily on sun exposure. Motion-activated lighting reduces energy use but leaves numbers dark when no motion occurs, which may not suit all safety or visibility needs.
2. How to Choose the Right Lighting Style for Your Home
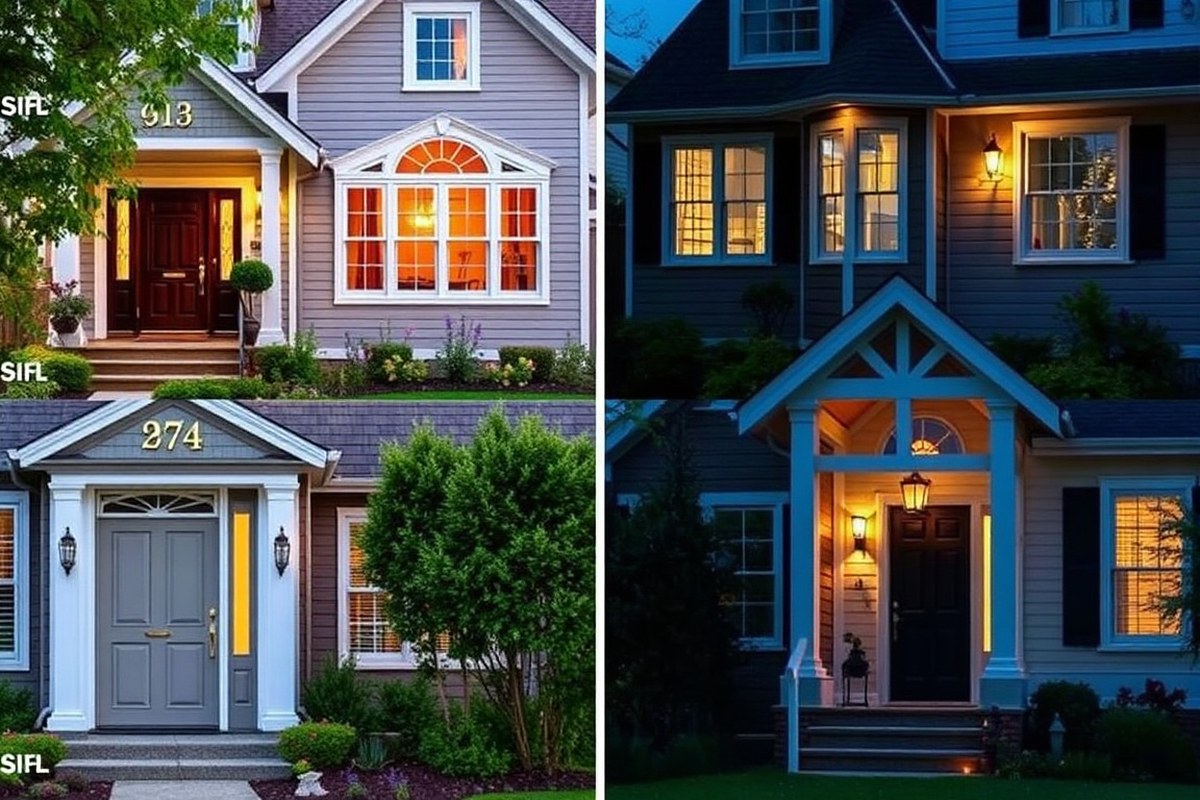
Choosing the right lighting style for your house numbers depends on your home’s architectural style, the surrounding landscape, and the level of contrast needed to boost visibility. Traditional homes work best with classic fixtures and warmer light tones, while modern houses suit sleek, minimalistic designs with cooler, white LEDs. Matching the finish, color, and positioning of lights to your facade and landscaping improve both curb appeal and readability.
Lighting Styles That Complement Traditional vs. Modern Homes
Traditional homes, such as Victorian or Colonial styles, pair well with lantern-style fixtures or classic spotlights featuring bronze, black, or brass finishes. These lighting options create a warm, inviting glow in soft white or amber tones, which highlights intricate details of traditional numbers and their plates. For example, a black wrought iron lantern mounted above a dark wood number plaque improve charm and does not look out of place.
Modern homes with clean lines, flat siding, or concrete surfaces benefit from recessed or slim LED strip lights that offer bright, even illumination. Stainless steel, matte black, or brushed nickel finishes reinforce the minimalist look. Cool white LEDs with color temperatures around 4000K to 5000K provide crisp contrast with minimalist fonts and open layouts.
Integrating Lighting with Landscaping and Facades
Lighting your house numbers should blend naturally with your landscaping and facade. Place fixtures where they won’t cast unwanted shadows from plants or architectural features. For homes with dense greenery, path lights or small ground-mounted LED uplights angled at the numbers can bring focus without harsh glare. In contrast, homes with smooth facades benefit from wall-mounted lights focused directly on the number plate.
Consider finishes that coordinate with exterior elements like brick, stone, or wood. For a home with stone cladding and natural landscaping, light fixtures in weathered bronze or copper can integrate well. Lighting near vines or bushes requires durable, weatherproof fixtures with at least IP65 ratings to resist moisture and dirt.
Choosing Colors and Finishes for Maximum Contrast
High contrast between house numbers and their background drastically improves visibility from the street. Dark numbers on light-colored walls or light numbers on darker surfaces stand out best. For instance, white or silver numbers on navy blue siding, or black numbers on cream stucco, are easy to read day or night.
Lighting color also affects perception. Warm white lights (2700K to 3000K) complement warm-toned facades, while cool white lights (4000K to 5000K) improve numbers on cooler, modern surfaces. Avoid overly bright lighting that creates glare or washes out number details. Test different bulb intensities and angles before installation to ensure numbers remain distinct without glare or shadow.
Design Matching Tips with Examples by Architecture
Select fonts and fixtures designed for your home’s era and style. For a Craftsman bungalow, choose wider serif fonts paired with bronze sconce lights that mimic early 20th-century designs. In contrast, a mid-century modern home may use simple sans-serif numbers illuminated by slim linear LED bars in brushed metal.
Test the visibility of your numbers by printing them at 4 inches or larger and holding them against your home’s exterior. Walk the distance someone would view your home from, usually at least 20 to 30 feet, and adjust the light angle and brightness accordingly. Use personalized drilling templates and concealed mounting hardware to place lights precisely, avoiding common mistakes like light spill or low contrast.
Place your light fixture to shine directly on the house numbers with at least a 30-degree angle to avoid shadows and glare for the clearest visibility.
3. Safety and Legal Requirements for Illuminated House Numbers
House numbers must follow specific size and visibility rules set by local codes to ensure they can be easily seen day or night. Proper electrical safety is necessary while installing illuminated numbers to prevent hazards and maintain reliable lighting. Meeting these standards helps emergency responders, delivery drivers, and visitors find your home quickly and safely.
Minimum Size and Visibility Requirements
Most local governments mandate house numbers be at least 4 inches tall to guarantee they can be seen clearly from the street, especially during the night. Choosing numbers in a color contrasting with the background improve readability. Positioning the numbers close to a porch light or another direct lighting source helps make them more visible in the dark. Simple, straightforward fonts without complex designs remain readable from a distance of 20 to 30 feet. Checking with your city or county’s building or zoning department will confirm specific local size and placement rules. These often include:
- Minimum digit height of 4 inches, sometimes up to 6 inches in low-visibility areas
- Placement at or near eye level on a flat, visible surface facing the street
- Numbers made of durable materials that resist fading and can be illuminated effectively
- Illumination that does not cause glare or light pollution affecting neighbors
Failure to comply with these regulations can result in penalties or require costly reinstallation. Staying within legal standards ensures your house number is functional and your home follows community rules.
Checking Local Rules and Permits
Because rules vary by location, local regulations often dictate how and where illuminated house numbers can be installed. They may also cover the type of light (solar, LED, backlit, etc.) and whether wiring or fixtures require a permit.
Contact the local building department or review municipality codes online before purchasing lighting products or starting installation. Some areas require professional electrician work and inspection for any new electrical connections outdoors that affect the home’s wiring or exterior appearance. Keeping documentation of compliance is useful if questions arise, such as from homeowners’ associations or during home inspections.
Electrical Safety Precautions During Installation
Outdoor lighting for house numbers involves working with electrical wiring, which requires caution to prevent shocks, damage, or fire risks. Follow these essential safety tips:
- Turn off power at the circuit breaker before starting any electrical work
- Use weatherproof outdoor-rated fixtures, cables, connectors, and junction boxes
- Install a Ground Fault Circuit Interrupter (GFCI) outlet or breaker to reduce electric shock risk
- Run wiring along existing electrical paths near the house number location when possible
- Secure wiring to avoid damage from weather, pets, or pests
- Consider solar-powered lighting if electrical access is impractical or costly
- When uncertain about electrical wiring or handling new installations, hiring a licensed electrician ensures the work meets safety standards and local building codes.
Neglecting proper safety during installation can lead to malfunctioning lights or hazards that affect your home and family.
Checklist for Compliance and Safety
Use this checklist to make sure your illuminated house numbers meet standards and stay safe during installation:
- Confirm minimum digit height and visibility standards with local authority
- Choose contrasting colors and clear fonts for number visibility
- Position numbers near a light source or install suitable illumination
- Verify if permits or inspections are required for electrical work
- Use outdoor-rated lighting fixtures and wiring components
- Turn off power before working with wiring; test the circuit for voltage
- Install GFCI protection and secure all wiring against weather and damage
- Consider professional installation if electrical or permit requirements are complex
Following this list helps create illuminated house numbers that stay visible, attractive, and safe for years.
4. Positioning and Installing Lights for Maximum Visibility
For clear and easy-to-read house numbers at night, proper positioning and installation of lights are essential. Mounting lights directly above or below the numbers at a slight downward angle usually works best. The ideal height places the fixture about 6 to 8 inches from the numbers, angled 30 to 45 degrees downward. This setting helps illuminate each digit evenly while reducing glare and shadows that could obscure the numbers.
When deciding between lighting from above or below, consider the style of your house and the surrounding environment. Above-mounted lights complement traditional or craftsman exteriors, offering soft, warm illumination without harsh reflections. Below-mounted lights can work well in certain scenarios but risk casting distracting shadows if not angled correctly.
For a neat appearance and to protect wiring, hide cables along trim or behind siding, securing them firmly with outdoor-rated clips or conduit. Using low-voltage landscape lighting fixtures simplifies wiring and power management, often connecting to existing outdoor circuits or timed switches for ease of use. Follow this installation checklist to position and install address lights correctly:
- Choose the fixture location: Find a spot 6, 8 inches above or below the house numbers that is free from landscaping obstructions. Ensure the fixture will shine directly on the numbers without creating glare visible from the street.
- Set the mounting height: Mark the spot on the surface so the light fixture will sit 6 to 8 inches from the top or bottom edge of the numbers. Use a level to keep the installation straight.
- Determine the angle: Plan to tilt the fixture downward between 30 and 45 degrees. This angle maximizes even coverage of each digit and minimizes shadows.
- Run the wiring: If the fixture requires wiring, run cables along existing trim or behind siding for concealment. Use outdoor-rated cable and secure it with clips or conduit every 12 to 18 inches to prevent sagging or damage.
- Mount the fixture: Attach the light fixture to the marked location using screws and anchors that work with your wall type (wood, stucco, or brick). Double-check the fixture’s angle before tightening.
- Connect the power: Wire the fixture to a low-voltage transformer or existing outdoor circuit following manufacturer instructions. Use a switch or timer for easy control and energy savings.
- Test the lighting: Turn on the light at night and observe the illumination. Adjust the angle slightly if you notice glare or shadows covering part of the numbers.
- Secure and weatherproof: Seal all openings around wiring with outdoor-rated caulk to prevent moisture intrusion. Check that all components are rated for outdoor use at local temperature ranges, typically down to 0°F or lower in cold climates.
Proper light placement that avoids shadows or glare ensures your house numbers stand out clearly from the street. Avoid mounting lights too close or too far, as this can cause uneven illumination or waste energy. Hiding wiring maintains curb appeal while protecting components from weather and damage. Following these precise steps can help you achieve bright, efficient lighting that makes your address easy to find at night.
5. DIY Techniques to Create Lighted House Numbers
Creating lighted house numbers yourself can save money and add a personal touch. Using common items like Christmas lights or solar string lights works well for illuminating numbers affordably. These materials are widely available, usually costing between $10 and $30 per strand, and can be adapted to fit the size and placement of your house numbers. The glow they provide improves visibility at night and can improve your home’s curb appeal without a significant upfront cost or complex installation.
To start, you will need a strand of small Christmas lights or solar-powered string lights, a drill with appropriate bits, mounting screws or adhesive hooks, waterproof electrical tape, and the house numbers themselves if they are not yet installed. A power source nearby makes using standard Christmas lights easier, but solar strings avoid electrical work entirely. It’s essential to use lights rated for outdoor use to withstand weather and avoid fire hazards. Follow these steps to create glowing numbers using Christmas or solar string lights:
- Measure the height and width of each house number to estimate how many bulbs you need from the light strand. For example, a three-number set often fits a 50-light strand, but adjust based on your number sizes and spacing.
- Lay out the numbers and plan the light placement. Wrap the string lights carefully around each number’s edges or back, so bulbs face outward and highlight the digits uniformly.
- Drill small pilot holes (1/8 inch or smaller) into the backing surface, matching where you’ll secure the lights with screws or hooks. Wear eye protection and check for wiring behind walls before drilling.
- Attach the lights using waterproof electrical tape along the backs or edges of the numbers, or use small screws/hooks through the pilot holes if the surface allows. Ensure all bulbs are stable and not touching flammable materials.
- Connect the light strand to a power outlet or switch on the solar lights and test them in the evening. Adjust bulb positions if some areas appear dim or shadows obscure numbers.
- Seal any exposed wiring or connections with weatherproof covers or tape to prevent moisture damage and electrical shorts.
- Regularly check and replace burned-out bulbs to maintain clear visibility.
Warning: Always use outdoor-rated lights and equipment and follow manufacturer safety instructions to prevent fire hazards. Do not overload electrical outlets with multiple strands of lights.
6. Maintenance and Troubleshooting for Outdoor Number Lighting
Maintaining your outdoor number lights regularly keeps them bright and clear, especially since they face rain, snow, dust, and temperature changes. Clean the lights once every three months to remove dirt and debris, which can dim the illumination or damage the fixture over time. Use a soft cloth with mild soap and water; avoid harsh chemicals that can erode protective coatings.
Weather protection starts with selecting materials rated for outdoor use, such as rust-resistant metals or sealed plastic. Apply a silicone-based sealant around any openings or joints every year to prevent water intrusion, which can cause electrical shorts or corrosion. During extreme cold or storms, check for cracks or loosened fittings more frequently to avoid long-term damage.
If your lights flicker or stop working, start by inspecting the power source and connection points. Loose wires or worn-out switches often cause flickering. Turn off the power before tightening any screws or reconnecting wires to avoid shocks. Replace bulbs with the exact wattage and type recommended by the manufacturer to prevent overheating or poor performance.
When you notice dimming or failure, check the transformer or solar panel (if used). Solar panels need full sun exposure and may require a wipe-down every month for optimum charging. Transformers exposed to moisture should be inspected for rust and replaced every 3 to 5 years depending on local climate conditions.
- Clean light covers quarterly with mild soap and soft cloth
- Inspect and tighten wiring biannually
- Apply silicone sealant annually to fixture seams
- Replace bulbs with manufacturer-specified type and wattage
- Wipe solar panels monthly for full sun exposure
- Check transformers for rust and moisture damage every year
- Increase inspections during winter and wet seasons
Following this maintenance schedule can extend the life of your illuminated house numbers and ensure they remain visible at night. Addressing flickering quickly prevents electrical hazards and costly repairs later. Weatherproofing protects not only the lights but the wall or post they’re mounted on. Poor upkeep leads to fading light output, increased energy use, and uneven illumination. A well-maintained setup avoids these issues and keeps your home’s address clearly lit for guests and emergency responders.
7. Common Mistakes and How to Fix Them When Lighting Numbers
Poor placement of lighting often reduces the legibility of your house numbers because light either falls unevenly or casts shadows, making the numbers hard to read. Position your lights so they shine directly on the numbers without creating strong contrasts. For example, place lights above or slightly in front of the numbers, aiming the beam downward at a 30- to 45-degree angle to minimize glare and shadows. Avoid placing lights too low or from the side, which can cause shadows that obscure parts of the numbers.
Glare occurs when lighting is too intense or aimed incorrectly, washing out the numbers rather than highlighting them. Use fixtures with adjustable angles and dimmable LEDs to control brightness. A light output of 100 to 300 lumens is usually enough for clear visibility without glare. Shielded fixtures or frosted covers diffuse the light, preventing harsh spots and making the numbers easier to read at night.
Wiring problems often arise because wires are left exposed or connected incorrectly. Always match wires by color, typically black to black (hot), white to white (neutral), and green or bare copper to ground, to ensure safe and proper functioning. Use waterproof connectors and secure wires along structural elements to hide them and protect against weather damage. Conduits or cable covers designed for outdoor use, which cost around $10 to $25 for a 5-foot section, offer a clean look and protect wiring from moisture and pests.
- Mount lights above or in front of numbers to reduce shadows and increase visibility.
- Use adjustable, dimmable LED fixtures to control brightness and avoid glare.
- Diffuse light with frosted or shielded covers to soften harsh beams.
- Match wire colors correctly: black to black, white to white, ground to ground.
- Secure and hide wires with outdoor-rated conduits or cable covers to prevent exposure.
- Clean lenses and fixtures regularly to maintain light quality and coverage.
- Check fixture aim seasonally to adjust for changes in ambient light and growth of landscaping.
Fixing these common issues often costs less than $50 for supplies like covers, connectors, and conduit sections. Good results mean your house numbers are easy to spot from the street without harsh light spills or dark patches. Poor lighting placement or wiring mistakes may cause flickering, outages, or unsafe conditions. Proper installation and regular checks help keep your illuminated numbers clear and attractive year-round.
8. Cost, Time, and When to Hire a Professional
Lighting up your house numbers typically costs between $50 and $300, depending on the type of fixture and installation required. A simple battery-operated LED spotlight or solar-powered light can be on the lower end of that range. Hardwired or backlit installations that require electrical work can push costs toward $200 to $300. The installation time varies from less than an hour for plug-in or solar lights to a few hours for a wired setup, including mounting and electrical connections.
Deciding when to hire a licensed electrician matters mostly when the project involves connecting to your home’s electrical system. Handling electrical wiring without proper training can risk shock, improper grounding, or code violations. A professional will ensure safe, compliant installation, especially if trenching, connecting to an outdoor circuit, or modifying breaker panels are involved.
| Type of House Number Lighting | Installation Cost | Estimated Installation Time | Professional Help Recommended? |
|---|---|---|---|
| Battery-Operated LED Spotlight | $50 – $80 | 30 minutes or less | No |
| Solar-Powered Light Fixture | $75 – $120 | 30 to 45 minutes | No |
| Plug-In Low-Voltage Lighting | $100 – $150 | 1 – 2 hours | Usually no, unless electrical access is complex |
| Hardwired Front or Backlit Numbers | $150 – $300 | 2 – 4 hours | Yes, licensed electrician strongly recommended |
Before starting your project, assess if you feel comfortable running electrical wiring and following local codes. Simple battery or solar options only need mounting and minor adjustments, making them quick and cost-effective DIY tasks. If your home numbers require wired lighting, especially backlighting with hidden wiring, hire a professional. This helps avoid safety hazards and ensures the lights are installed where they effectively highlight your numbers without glare or shadows.
Make sure to turn off power at the breaker before working on any wired lighting installation.
Installation quality impacts the visibility and attractiveness of your house numbers. Well-placed lighting that highlights the numbers without creating harsh shadows or glare improves curb appeal and helps visitors and emergency responders find your home easily. You can adjust simpler lights like LEDs and spotlights as needed, but wiring changes require more effort or professional assistance.
Step-by-Step Action Plan for Lighting Your House Numbers
Take these steps to make your house numbers stand out clearly after dark and improve your home’s curb appeal.
- Before you start: Choose the lighting style and fixtures that fit your home’s exterior and budget.
- Day 1: Purchase the chosen lighting equipment and verify all needed tools are ready for installation.
- Day 2: Test the lighting fixtures indoors to confirm they work properly and produce adequate brightness for visibility.
- Day 3: Plan the positioning of lights around your house numbers for even illumination with minimal glare.
- Day 4: Install lighting following local safety codes and manufacturer instructions, securing all wiring properly.
- Day 5: Switch on the lights after sunset to check visibility from the street and make adjustments if needed.
- Week 1: Monitor the setup for any flickering or dim spots and perform minor fixes or maintenance as required.
- After 1 month: Clean the fixtures to keep brightness optimal, and replace bulbs or batteries as part of routine care.
Frequently Asked Questions
Can Solar-Powered Lights Provide Enough Brightness for House Numbers?
Solar-powered lights can be bright enough, especially in sunny locations. They save energy and avoid wiring but may need regular battery replacement.
How Do Smart Lighting Systems Improve House Number Visibility?
Smart lighting adjusts brightness automatically based on ambient light. This feature saves energy and ensures numbers stay visible without manual control.
Are Motion-Activated Lights Effective for Illuminating House Numbers at Night?
Motion-activated lights highlight numbers only when detecting movement. They save power but might miss visibility if there’s no activity nearby.
Can Backlit House Numbers Work on Any Exterior Wall Surface?
Backlit numbers work best on smooth, light-colored walls for clear contrast. Rough or dark surfaces can reduce lighting effectiveness.
What Is the Best Height to Install Illuminated House Numbers?
Place numbers at eye level, typically 4 to 6 feet above ground, for easy visibility. Position near entryway lighting if possible.
Do Reflective Coatings Replace the Need for Lighting on House Numbers?
Reflective coatings improve visibility in headlights but don’t replace lighting. Combining both offers the best night visibility.
Key Points to Remember
Well-lit house numbers make it easier for visitors, delivery drivers, and emergency responders to find your home quickly. Focus on choosing durable lighting and placing it where the numbers are clearly visible without glare. Start by selecting a fixture that suits your style and environment, then follow safe installation practices. This straightforward approach will boost your home’s curb appeal and safety in a matter of days.