What Is an Illuminated Sign? Complete Guide to Types, Benefits, and Costs
What is an illuminated sign? It’s a sign that uses lighting to make messages visible day and night, usually through built-in LEDs, neon, or fluorescent lights. These signs improve visibility and brand attention by glowing, helping businesses stay noticeable after dark. Start by deciding the lighting technology that fits your needs and check local rules on brightness and size before installation.
Key Takeaways
- LED illuminated signs make up about 60% of the market due to their energy efficiency and long life.
- Illuminated signs extend brand visibility beyond daylight hours, boosting recognition by up to 80%.
- Aluminum components in outdoor signs resist rust and can last over 25 years with proper maintenance.
- LEDs use 50-75% less energy than neon or fluorescent lights, saving on electricity costs.
- Typical LED sign modules last between 50,000 and 70,000 hours, roughly 5 to 7 years of daily use.
- Power supplies and drivers generally require replacement every 3-5 years to keep signs operating well.
What Is an Illuminated Sign and How Does It Work?
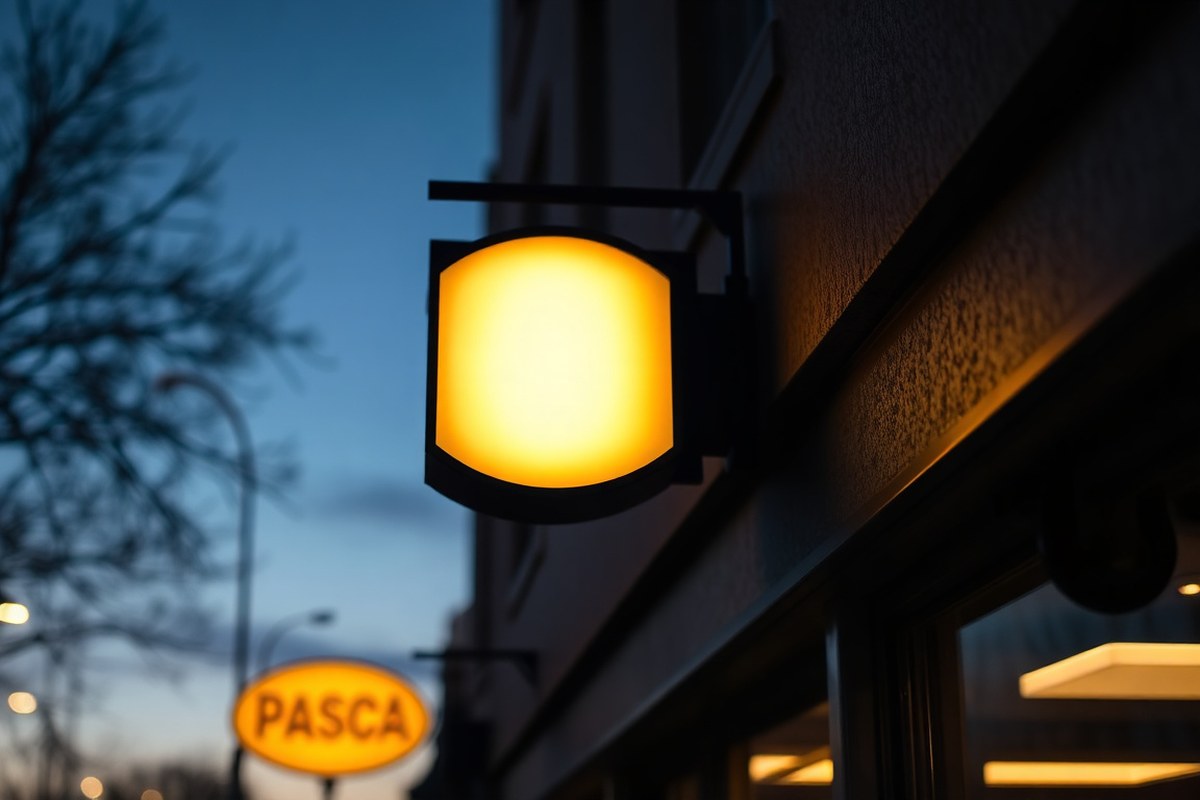
An illuminated sign is a type of signage that incorporates built-in lighting, such as LEDs, neon gas, or fluorescent bulbs, to make its text or graphics visible in low light or at night. Unlike non-illuminated signs that rely on natural or external light sources, these signs have internal light sources integrated directly into their structure. This internal illumination ensures consistent brightness around the clock, which is especially useful for businesses operating after dark or located in poorly lit areas.
The primary goal of an illuminated sign is to boost visibility and attract attention beyond daylight hours. You’ll commonly see them at grocery stores, malls, gas stations, and apartment complexes, where clear, readable signage is important. The internal lighting also improve brand recognition by making signs stand out in all lighting conditions, which can lead to increased foot traffic and customer awareness.
Most illuminated signs use LED modules, neon gas tubes, or fluorescent bulbs as their internal light sources. LEDs have become the most popular choice due to their energy efficiency, long lifespan, often lasting between 50,000 to 100,000 hours, and ability to produce bright, vibrant colors. Neon signs use electrically charged gas to emit a distinctive glow, ideal for creating eye-catching and colorful designs. Fluorescent bulbs offer a steady and uniform light but tend to consume more electricity and have shorter lifespans compared to LEDs.
The internal lighting works by placing the light source inside or behind a translucent panel or box. This setup diffuses the light evenly across the sign’s surface, illuminating letters, logos, or graphics so they remain highly visible both during the day when natural light is dim and at night. The translucent panel often has a face made of materials like acrylic, which allows for efficient light transmission without harsh glare. Proper design and installation ensure that the light source does not create hot spots or uneven brightness, which could reduce legibility.
Choosing the right type of internal lighting depends on factors such as whether the sign will be used indoors or outdoors, power consumption preferences, and the desired brightness level. Outdoor signs often require more durable and weather-resistant lighting options like LEDs, while indoor signs can use softer fluorescent lighting. Also, municipalities may regulate the brightness and size of illuminated signs, typically limiting luminance to between 300 and 500 candelas per square meter (about 5 to 20 foot-candles) and restricting the area that lighting can cover, so it’s important to check local codes before installation.
Common Types of Illuminated Signs and Their Uses

Popular illuminated signs include channel letters, lightboxes, neon tubing, and backlit lettering. Each type offers distinct visual effects and suits different business needs, from storefront visibility to premium branding.
Channel Letter Signs
Channel letter signs are individual 3D letters or shapes mounted on a building facade, usually with LED modules inside. These signs are highly effective for storefronts because they provide clear visibility up to 150 to 200 meters away. You can choose front-lit, back-lit (halo), or dual-lit letters, depending on whether you want direct illumination or a subtle glow around each letter.
These signs often come with raceway mounting for easier installation and maintenance or direct mounting for a sleeker look. Construction materials generally include aluminum with acrylic or polycarbonate faces, keeping signs durable and weather-resistant. Channel letters suit retailers, restaurants, and gas stations where brand recognition from a distance is important.
Lightbox and Tray Signs
Lightbox signs, also called cabinet or tray signs, feature large, uniform illuminated panels with translucent faces displaying logos or messages. They create bright, consistent lighting, ideal for malls, airports, or any commercial space needing large, eye-catching panels.
These signs usually use LED or fluorescent lights inside a metal or plastic enclosure. The lightboxes offer a broad surface, perfect for complex graphics and large text. They cost less per square foot compared to channel letters but require a larger footprint and more structural support.
- Large, flat illuminated surface
- Used in malls, commercial buildings, and airports
- Displays logos or promotional messages clearly
- More affordable for big signage areas than channel letters
- Needs proper weather sealing for longevity
- Uniform brightness reduces visual distractions
- Simple mounting options available
Well-maintained lightbox signs can last over 10 years, but poorly sealed units may face water intrusion and discoloration.
Neon and Flex Face Signs
Neon signs use bent glass tubes filled with inert gases, creating vibrant colors and a vintage look. Their color saturation is unmatched, making them great for businesses seeking retro or artistic appeal. Neon signs typically last 8,000 to 15,000 hours but require regular maintenance due to fragility.
Flex face signs, which simulate neon effects with LED strips or tubing, offer similar brightness with better energy efficiency and durability. They also handle outdoor use better in varying temperatures. Neon signs remain popular in bars, diners, and boutiques, while flex face signs suit modern businesses needing that neon glow with less upkeep.
Halo and Backlit Lettering
Halo lighting creates a subtle glow behind letters by placing LEDs behind the signage, causing light to bleed around the edges for an upscale look. This style suits premium brands, high-end restaurants, and boutiques that want to catch attention without harsh lighting.
Backlit lettering refers to letters illuminated from inside or behind, producing a more direct but controlled light source. Both techniques require precise installation and quality materials to avoid uneven lighting or glare.
Proper installation of halo and backlit signs demands attention to spacing and mounting to ensure even light distribution without hotspots or shadows.
These signs usually cost more than simple channel letters due to complexity but deliver a distinctive and elegant visual effect that aligns with exclusive branding strategies.
Lighting Technologies Compared: LED, Neon, and Fluorescent
LED lighting outperforms neon and fluorescent technologies in energy efficiency and lifespan, making it the preferred choice for most illuminated signs. LEDs use 50-75% less energy than neon or fluorescent lights and last 5 to 10 times longer. This results in significantly lower operating costs and fewer maintenance visits, which is important for storefronts or office façades that need constant visibility.
Neon signs are valued for their classic, vibrant glow but tend to consume more energy and require more upkeep. Fluorescent lights fall in between, typically less efficient than LEDs but with moderate maintenance needs. Choosing the right lighting also depends on how long you expect the sign to operate daily and the brightness level allowed by local regulations, which often cap signage brightness at about 200 to 300 cd/m².
The upfront cost for LED signs is generally higher than neon or fluorescent, but LEDs quickly recover this difference through energy savings and reduced maintenance. For example, a retail LED retrofit can cut sign energy use by roughly 60%, often paying back the investment within 2 to 4 years.
| Lighting Type | Energy Use | Lifespan (hours) | Upfront Cost | Maintenance |
|---|---|---|---|---|
| LED | 50-75% less than neon/fluorescent | 50,000, 100,000 | Higher | Low |
| Neon | Higher than LED | 8,000, 15,000 | Moderate | High |
| Fluorescent | Moderate, less than neon but more than LED | ~15,000, 20,000 | Lower to moderate | Moderate |
Installing LED signage makes sense if energy efficiency and long-term cost savings are priorities. Although the initial expense is higher, LEDs drastically reduce electricity bills and minimize sign servicing. Neon offers a unique aesthetic but may not be cost-effective for long-term business needs and requires frequent maintenance to address gas leaks or color fading.
Fluorescent options serve as a middle ground but generally lack the longevity and efficiency of LEDs. Remember that LED technology continues to improve, improving the brightness and durability while maintaining low energy consumption. Always account for local brightness limits and installation or permit expenses to evaluate the overall return on investment accurately.
Key Benefits of Illuminated Signs for Businesses
Illuminated signs boost your business by extending visibility beyond daylight hours, making your brand noticeable whenever customers are nearby. Evening and nighttime visibility can increase foot traffic by 20 to 30 percent, meaning more potential customers see your store when many others have already closed. This wider exposure helps make your business a landmark within busy retail areas or signs that stand out in low-light settings. Bright, eye-catching lighting naturally attracts attention, so customers remember your brand better and are more likely to choose your store over competitors.
The glowing effect of illuminated signage plays a direct role in reinforcing brand identity. Studies show illuminated signs increase brand recognition by up to 80 percent compared to non-lit alternatives. Your custom sign can use distinct colors, shapes, or fonts lit consistently to make your business instantly recognizable. For example, LED backlit letters provide clear, even illumination that sharpens your message and helps customers recall your brand months after their first impression.
Besides attracting attention, illuminated signs influence customer behavior by signaling your presence and professionalism. Well-lit storefronts suggest reliability and attention to detail, increasing trust and encouraging patrons to enter. Many businesses that update to LED illumination report sales improving around 10 percent, as better signage converts attention into actual visits and purchases. This effect is stronger in service-based businesses where reputation matters significantly, and a professional image can tip a customer’s choice.
LED signs offer practical advantages that make them the preferred choice for illuminated signage. They use less energy than traditional neon signs, cutting electrical costs while running 24/7, because LEDs generate less heat and last longer, reducing replacement frequency and maintenance expenses. For outdoor signage, LEDs hold up well under various weather conditions, from freezing winters to hot summers, maintaining consistent brightness without fading. Faux neon LED options mimic classic neon aesthetics but with improved durability and efficiency, allowing you to retain a vintage look while benefiting from modern technology.
Creating an effective illuminated sign involves designing it to reflect your brand’s personality clearly and ensuring compliance with local electrical codes like NEC Article 600 and UL standards. Choosing the right size, color, and brightness depends on your location and customer base. Signs in dense shopping corridors may need brighter, more vibrant lighting than businesses in quieter neighborhoods. Proper installation maximizes impact by positioning signs where they are visible from multiple angles and distances.
Installation Process and Regulatory Compliance Checklist
Installing an illuminated sign requires careful planning and compliance with local regulations to avoid delays and fines. The process involves assessing the site, obtaining necessary permits, and completing a safe electrical hookup. Following clear steps ensures the sign is visible, safe, and legally approved.
Site Assessment and Design Approval
Start by conducting a thorough site survey to check mounting surfaces, measure available space, and verify power access. This helps confirm the sign’s size and design will fit smoothly and comply with local size restrictions. Your design needs approval from local authorities or property managers before fabrication begins.
Balancing the sign’s brightness and color temperature with your brand and the surroundings affects visual impact. Keep in mind that some design aspects, like cabinet depth or illumination type, depend on your location’s zoning rules and landlord restrictions. Well-planned design approval reduces costly adjustments during installation.
Obtaining Permits and Meeting Codes
Permits must be secured before installation, typically costing $50 to $500 depending on jurisdiction. Submit your design along with site details to your city or municipal office for approval. Requirements include maximum brightness, luminance limits, size restrictions, and setback distances from streets or sidewalks.
Local building codes, electrical codes, and ADA regulations also apply. Coordinate with a licensed electrician to ensure your illuminated sign meets all safety and electrical standards, including dedicated circuits and GFCI protection. Certain zones, especially historic or residential, may restrict illuminated signs or require special variances.
Installation and Electrical Hookup
Installation usually involves a team of 2 to 4 technicians. The process begins with fabricating mounting brackets and running conduit to the power source. Securely anchor the sign to the building or ground, ensuring it withstands wind loads if applicable. All wiring, drivers, and lamps should be sealed against weather and accessible for maintenance.
Final steps include connecting the sign to power, performing photometric tests to verify brightness matches permits, and conducting safety checks. Simple wall-mounted LED signs may install within 2 to 6 hours, while rooftop or highway-facing signs need multiple days plus structural assessments. Following manufacturer guidelines and having a licensed electrician are essential to avoid electrical hazards.
- Conduct a detailed site survey to measure space and assess mounting and power availability.
- Design the sign according to local size, brightness, and zoning restrictions while coordinating with landlords.
- Submit permit applications early to municipal authorities, including design, power details, and compliance with building codes.
- Schedule professional fabrication of mounting hardware and electrical conduit based on site conditions.
- Arrange for a licensed electrician to set up a dedicated circuit with GFCI protection if required.
- Install the sign securely, anchoring brackets and sealing all electrical components for weather resistance.
- Test the sign’s illumination and safety systems, adjusting brightness as needed to meet permit limits.
- Document compliance with codes and retain permits for future inspections or maintenance.
Tip: Obtain all permits before ordering materials to prevent costly redesigns or installation delays due to local code violations.
Maintenance Best Practices and Typical Lifespans
Illuminated signs require regular maintenance to ensure they remain bright and effective. A routine schedule helps catch potential issues early and extends the life of both lighting and housing components. Typically, inspections happen annually, with cleaning every 3 to 6 months depending on the environment and sign exposure.
Cleaning and Visual Inspections
Cleaning illuminated signs improves visibility and prevents damage. Dirt, dust, and grime can reduce light output and cause uneven illumination. Clean the sign face every 3 to 6 months using a soft cloth and mild detergent. Avoid harsh chemicals that could damage acrylic or paint. Visual inspections should coincide with cleaning schedules to check for cracks, seal deterioration, or water intrusion.
Inspection also involves verifying electrical connections and looking for discolouration or fading on the sign face, which may indicate underlying issues. In high-pollution or coastal areas, shorten cleaning intervals to 3 months to prevent corrosion and buildup.
- Clean the face with non-abrasive detergent and water
- Check seals for cracks or gaps
- Inspect wiring and electrical connections
- Look for signs of water damage or fading
- Trim nearby vegetation that could block light
- Document findings for maintenance records
Quarterly inspections work best for businesses with multiple signs, reducing unexpected outages by up to 60% compared to annual checks. These inspections should include testing light output and verifying structural stability.
Replacing Bulbs and Drivers
Lighting components wear out over time and need timely replacement to maintain brightness. LED bulbs typically last between 30,000 and 50,000 hours before output drops noticeably. Drivers, which control the LED power supply, tend to fail earlier, usually requiring replacement every 5 to 7 years or when the light output falls below 70% of the original brightness.
Schedule bulb and driver replacements based on run hours rather than just appearance. For example, a sign running 12 hours daily might need bulb assessment every 5 years, while drivers should be checked at least every 3 years. Prompt driver replacement avoids flickering or full light failure. Keep spare parts on hand to minimize downtime. Signs reliant on fluorescent or neon lighting may require more frequent bulb changes and professional servicing due to fragility and electrical hazards.
Protecting Aluminum and Acrylic Components
The housing of the sign, usually made of aluminum for the cabinet and acrylic for the face, plays a big role in longevity. Aluminum returns, typically 1 to 3 mm thick, resist corrosion but should be inspected for signs of rust or paint peeling. Acrylic faces, generally 3 to 6 mm thick, diffuse light and can crack or yellow over time.
Maintain acrylic by cleaning as noted above and checking for UV damage. Replace any yellowed or cracked panels to preserve light diffusion quality. Aluminum surfaces benefit from periodic repainting or touch-up to prevent oxidation. Proper sealing is critical to keep moisture out and avoid internal component damage. Environmental factors like salt spray near the coast or extreme temperatures may accelerate wear and require more frequent maintenance.
How to Choose the Right Illuminated Sign for Your Business
Choosing the right illuminated sign for your business depends on several key factors that impact its effectiveness and your return on investment. Start by considering your budget, which involves balancing the upfront price against long-term operating costs. LED signs typically have higher initial costs, around $250 to $1,500 for a medium-sized sign, but they use 75% less energy than fluorescent alternatives and last up to 50,000 hours. Neon signs may have moderate installation costs yet higher maintenance expenses, while fluorescent signs often cost less upfront but burn out faster.
Your sign’s location critically affects both the type and size you select. Outdoor signs require durable materials that withstand weather and UV exposure, such as aluminum or acrylic, and lighting technology meant for variable temperatures and brightness levels. Indoor signs can use less strong materials and softer lighting to create ambiance. For example, if your business is on a busy street, a large, high-brightness LED face-lit sign will capture maximum attention, while a smaller halo-illuminated sign may suit storefronts in covered malls.
Branding goals shape the style and color of your illuminated sign. The sign should align visually with your logo and business identity. Halo-lit signs provide a modern, sophisticated look, ideal for corporate settings, while neon signs offer a retro feel that fits entertainment venues. Bright, vivid colors grab attention but can overwhelm in subtle environments.
- Budget: balance upfront cost with energy use and maintenance over 3 to 5 years
- Location: outdoor signage needs weather-resistant materials and brighter lighting
- Lighting type: LED for efficiency and long life; neon for vintage style; fluorescent for low initial cost
- Size: larger signs draw more attention but may face local zoning limits
- Brand fit: match sign style and color with your brand identity
- Durability: expect 10 to 15 years of lifespan with proper maintenance
Durability also factors greatly into your decision. Most well-made illuminated signs last between 10 and 15 years, but harsh environments can shorten lifespan. Choosing a reliable sign vendor with quality materials ensures fewer repairs. Lighting that heats up excessively or uses outdated technology will require more frequent replacement, increasing your total cost of ownership.
Finally, consider your lighting technology choice aligned with your business needs. LED illumination is best for nearly all businesses today due to low energy consumption, minimal maintenance, and bright, customizable colors. Neon suits businesses aiming for a distinctive retro or artistic presence but can be fragile and expensive to repair. Fluorescent options cost less initially but involve more frequent bulb replacements and higher energy use. Retrofits to LED systems often pay back within 2 to 4 years through energy savings.
Common Mistakes and Limitations of Illuminated Signage
Common mistakes in illuminated sign planning often include overlooking local regulations and choosing the wrong lighting technology. Many business owners fail to check zoning laws or sign codes, which can lead to fines or forced removal. Ignoring these rules is costly and causes downtime, so always verify allowed sign size, brightness limits, and placement restrictions with your city’s planning office before ordering.
Another frequent issue is poor maintenance. Signs exposed to weather, especially outdoor LED or neon signs, can accumulate dirt or suffer from water damage that dims lighting or damages electrical components. Regular inspections and cleaning every 3 to 6 months can extend your sign’s lifespan and save you from expensive repairs that may cost several hundred or even thousands of dollars depending on the sign type.
Selecting the wrong lighting type for the installation environment can also cause problems. LED lights are bright and energy-efficient, making them ideal for outdoor pylon or monument signs, but fluorescent lights may underperform outdoors due to shorter lifespans and sensitivity to temperature changes. Neon requires careful handling and more maintenance, making it less practical for harsh environments.
- Check all local regulations on size, brightness, and placement before installation
- Schedule cleaning and electrical inspections every 3 to 6 months
- Choose LED lighting for outdoor signs to ensure durability and brightness
- Use aluminum or weather-resistant materials for longer-lasting construction
- Install dimmers or timers to avoid excessive brightness during late-night hours
- Monitor sign brightness to prevent glare or disturbance, especially near residential areas
- Have a licensed professional handle electrical components to meet safety codes
Always keep documentation of maintenance and inspection dates to stay ahead of potential failures or regulatory issues.
Brightness limits exist primarily to reduce light pollution and avoid distracting drivers or neighbors. Some jurisdictions cap LED sign luminance to around 5,000 candela per square meter, although this varies greatly. Installing variable brightness controls can help you comply with these rules and adjust the sign’s visibility according to ambient light and time of day.
Installation location restrictions often limit signs near historic districts or within certain distances from streets or intersections to avoid distraction hazards. You should measure the exact mounting height and distance from roads to ensure compliance, typically using professional surveying tools or sign installer services. Ignoring these limitations can mean costly repositioning of your sign.
Your First Steps to Installing an Illuminated Sign
Start your signage project with a clear plan that guides you from selection to maintenance efficiently.
- Before you start: Research local sign regulations to ensure compliance; confirm your sign design meets all requirements to avoid costly revisions.
- Week 1: Choose the lighting technology that fits your budget and branding, such as LED for energy efficiency or neon for classic appeal; verify that your choice aligns with your business’s style and operating hours.
- Week 2: Work with a reputable sign manufacturer and installer; check their references and examples of past illuminated sign projects to ensure quality.
- Week 3: Approve the final design and secure any necessary permits; make sure the permits cover installation and illumination specifications.
- Week 4: Schedule and supervise the installation, confirming the sign is properly mounted and wired; test the sign’s lighting immediately after installation for full functionality.
- First 3 months: Monitor the sign’s performance daily during business hours; note any dimming or flickering to address maintenance needs early.
- After 6 months: Conduct routine maintenance checks, including cleaning and inspecting electrical components; timely upkeep extends sign lifespan and maintains a strong business image.
Frequently Asked Questions
What Materials Are Best for Outdoor Illuminated Sign Durability?
Aluminium is best for outdoor illuminated signs because it resists rust and can last over 25 years with proper cleaning and weatherproofing. This helps avoid full replacement costs.
Can Illuminated Signs Include Motion or Dynamic Lighting Effects?
Yes, but many cities restrict dynamic lighting in historic districts to reduce distractions or light pollution, so check local rules before adding moving or changing lights.
How Energy-Efficient Are LED Illuminated Signs Compared to Alternatives?
LED signs use up to 60% less energy than neon or fluorescent, lowering power bills and reducing maintenance needs due to their longer lifespan.
Do Illuminated Signs Require Special Insurance Coverage for Businesses?
Some insurance policies may require notification or additional coverage for electrical fixtures like illuminated signs, so consult your insurer to ensure proper protection.
How Does the Brightness of an Illuminated Sign Affect Customer Attraction?
Brighter signs, within regulated limits (300-500 cd/m²), tend to draw more attention, especially at night, but too much brightness can cause glare and deter potential customers.
Can Illuminated Signs Be Customized for Branding Purposes?
Yes, illuminated signs offer great flexibility in colours, shapes, and lighting types, helping businesses create a unique and attractive brand presence.
Final Thoughts
Illuminated signs attract attention and extend brand visibility well beyond daylight hours. Choosing the right sign technology and maintaining it properly will maximize your investment. Start by reaching out to local sign companies to discuss options tailored to your business location and marketing goals.