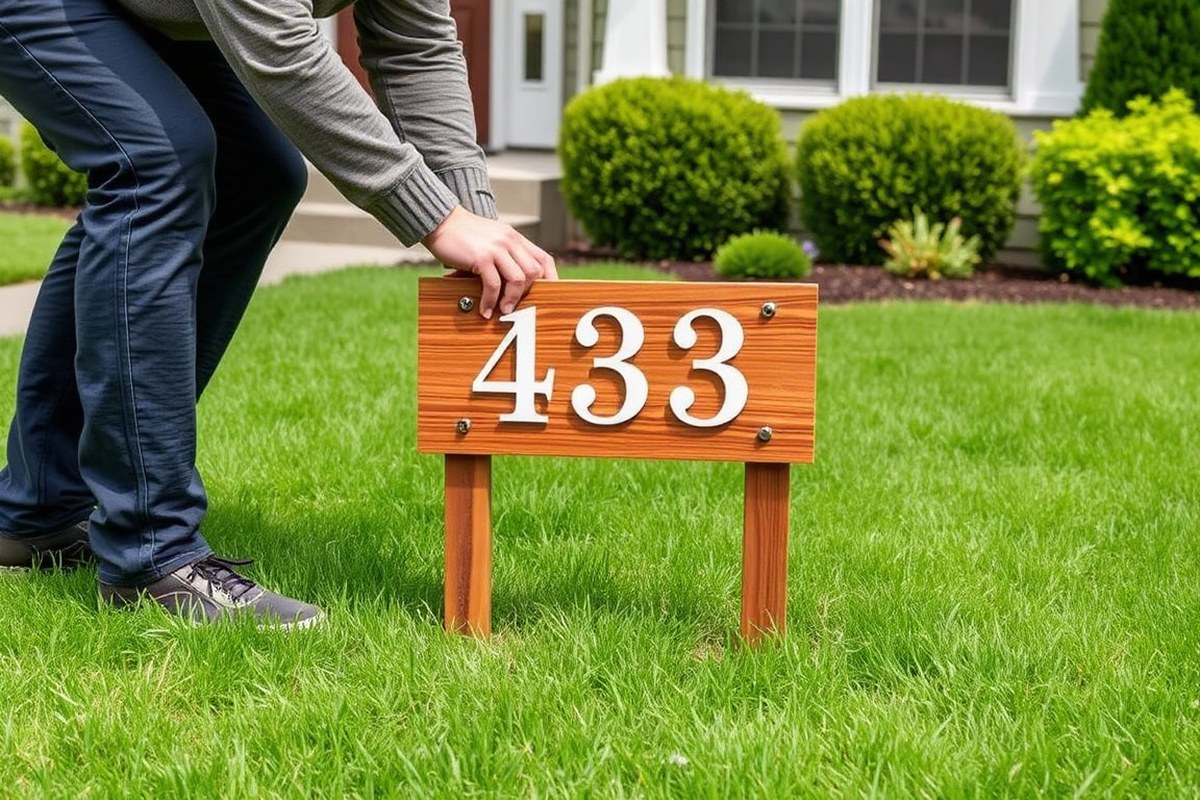
How to Install a Yard Address Sign: 8 Essential Steps for Clear Visibility
Knowing how to install a yard address sign properly ensures it stays visible, secure, and legible from the street. Mount the sign between 4 and 6 feet high to align with drivers’ and pedestrians’ natural sightlines. Start by choosing a clear location free from landscaping obstructions for the best daily visibility.
Key Takeaways
- Mount address signs 4 to 6 feet from the ground to optimize visibility for both drivers and pedestrians.
- Use durable materials like cedar boards or weather-resistant plastics to extend your sign’s lifespan in sunlight.
- Attach your sign with at least three fasteners for stability and to prevent warping or movement.
- Select a location that contrasts with landscaping and remains unobstructed by bushes or other yard features.
- Ensure your address numbers are at least 4 inches tall to be readable from about 40 feet away.
- Prepare the ground or mounting surface by clearing debris and ensuring it is level before installation.
1. How to Properly Install a Yard Address Sign for Maximum Visibility

Installing your yard address sign in the right location and height is essential for maximum visibility to drivers and pedestrians. Position the sign where it contrasts well with the surroundings and faces the street or driveway, ensuring it can be read easily from a moderate distance. Mount the sign at a height between 4 and 6 feet from the ground to align with the natural line of sight. This height avoids obstruction by shrubs and keeps the sign at eye level for most passersby. Proper placement also satisfies driving safety and postal service standards that require address signs to be clearly visible from the road.
The best installation method depends on your yard’s soil conditions. For hard or rocky ground, install the stakes first and then attach the sign, allowing easy adjustment if you encounter obstacles. In soft soil, mounting the sign first and then driving the stakes can save time. Make sure the sign is upright and stable to avoid leaning or falling, which reduces visibility. If your sign faces frequent sun exposure, consider UV-resistant materials or shade to prolong its appearance and readability for several years. Follow these steps to install your yard address sign for optimal visibility:
- Choose a spot near the street or driveway with good contrast to the sign’s colors. Avoid placing where landscaping will grow to block it.
- Measure the mounting height from the ground to be between 4 and 6 feet, ideally around 5 feet for average visibility.
- Select the installation method based on ground type: drive stakes in first if soil is hard or rocky, or start with the sign for soft soil.
- Prepare the site by clearing grass, debris, or loose soil to create a stable area for the sign and stakes to sit firmly.
- Install the stakes or sign, applying steady pressure to avoid bending or damage. Adjust to keep the sign level and facing the street.
- Secure the sign with screws or brackets to the stakes or mounting frame, ensuring it cannot shift or tilt easily.
- Check visibility from several angles along the street and sidewalk, adjusting if needed to achieve clear and unobstructed sightlines.
- Maintain the sign by trimming plants around it and cleaning the surface periodically. Reapply protective coatings if using wood to prevent weathering.
2. Tools and Materials Needed for Installing Address Signs

To install a yard address sign properly, gather these essential tools and materials. You will need the address sign itself, mounting hardware such as screws or stakes, and, depending on your installation surface, anchors or heavy-duty adhesive. A measuring tape and a level help ensure correct placement. A drill or screwdriver will be required for secure attachment, along with a pencil or marker to mark spots. A template or stencil can simplify marking drill holes or alignment points. For stakes, a rubber mallet may help drive them into the ground without damage.
Choosing between adhesive and screws depends mainly on the surface and sign weight. Screws or bolts work best on wood, metal, or masonry where you can drill holes safely. Adhesives suit flat, smooth surfaces like painted siding or metal posts but may not hold well outdoors on rough or uneven surfaces, especially if the sign is large or heavy. For yard signs mounted on stakes inserted into soil, no tools are needed for attachment, but you still must ensure the stakes are long and sturdy enough to resist wind and accidental bumps.
- Address sign with appropriate size for visibility (e.g., 60″ by 15″ for large signs)
- Mounting hardware: screws, bolts, anchors for hard surfaces, or stakes for soil
- Heavy-duty outdoor adhesive for smooth surfaces where drilling is not an option
- Measuring tape and level for positioning
- Drill or screwdriver to attach hardware
- Marker or pencil and a pre-made template to mark drilling spots
- Rubber mallet if using stakes for soil installation
Mark your desired placement with a template or by measuring carefully. For a sign about 60 inches by 15 inches, spacing three well-distributed mounting points at the back can prevent sagging and ensure stability. Use anchors if drilling into concrete or brick. Drive stakes deep enough, at least 12 to 18 inches, to keep the sign upright in varying weather. Secure screws fully but avoid over-tightening, which can crack the sign or weaken mounting points. Adhesives require clean, dry surfaces and curing time, typically 24 hours, so plan for that delay before finalizing the sign’s position.
Never skip using a level before securing the sign; a crooked address sign can reduce legibility from the street and lower curb appeal.
Selecting the right tools and materials prevents common pitfalls such as loose signs or damage to surfaces. Investing in proper anchors or high-quality outdoor adhesive can range from $5 to $15 extra but pays off in durability. Always consider your yard’s soil type or exterior wall material before choosing mounting hardware to ensure a long-lasting installation.
3. Choosing the Right Spot and Height for Your Address Sign
Select a location for your yard address sign where it can be seen clearly from the street or road that runs in front of your property. The mounting height matters because it affects how far away the sign can be read. Avoid spots where trees, bushes, or other objects block the view or cause glare that makes the sign hard to see during the day. Proper placement ensures emergency responders and delivery drivers can quickly find your home.
Recommended Mounting Height Range
Mount your sign at a height where both pedestrians and drivers can easily read it. According to VisualPro’s standards for sign legibility, each inch of letter height corresponds to about 10 feet of readable distance for people with normal vision. For example, if your sign letters are 3 inches tall, place it so it can be read clearly from roughly 30 feet away. A good rule of thumb is to install the sign 4 to 6 feet above the ground, which keeps it visible above typical landscaping while staying within average driver line of sight. Avoid placing it too low where grass, snow buildup, or dirt could hide the sign, or too high where it might fall outside the normal field of view.
Ideal Distance from Driveway and Road
Position your address sign close enough to the road or driveway to be seen easily when pulling in or passing by. Generally, a spot within 5 to 10 feet of the driveway entrance works best. This distance keeps the sign within a driver’s natural viewing range without obstructing vehicle movement. When you stand at the street, the sign should be clearly legible and not hidden behind mailboxes, fences, or shrubs. Consider the angle of approach as well; placing the sign perpendicular or slightly angled toward the street improves visibility for passing cars.
Avoiding Obstructions and Glare
Check for any landscaping like trees or bushes that might block or partly hide the sign as plants grow over time. Keep the area around the sign trimmed to maintain a clear sightline year-round. Select a spot that minimizes glare from morning or afternoon sun, especially if your sign has a reflective surface. If unavoidable, choose a location with some natural shade or rotate the sign slightly to reduce direct sunlight, which can fade colors and make text harder to read. Avoid placing the sign behind shiny objects or glass surfaces that create reflections or glare, harming legibility during key hours.
4. Preparing Ground and Surfaces Before Installation
Preparing the ground or mounting surface before installing your yard address sign ensures the sign stays secure and looks professional. The type of soil or surface affects how you dig, anchor, or attach the sign, and proper preparation helps prevent damage to your property and the sign itself. Using the right tools and methods for your specific conditions improves stability and longevity.
Soft Soil Preparation Techniques
Soft soil usually makes it easier to install posts or stakes but requires attention to stability. Before digging, clear the area of debris like roots, rocks, or loose mulch to get a firm base. Dig a hole approximately 12 to 18 inches deep and about twice the diameter of your sign post to create enough room for a stable fit.
After placing your post, fill the hole with a mix of backfilled soil and small gravel, tamping it down in layers to reduce shifting. Using quick-setting concrete can add long-term durability, especially if the soil remains loose or moist. Expect to spend $10 to $20 on concrete mix for a single post, which is a reasonable investment for preventing leaning or sagging.
Handling Rocky or Compacted Soil
When soil is hard, rocky, or contains dense clay, digging holes can be challenging and requires different tools and strategies. Start with a sturdy digging bar or a manual post hole digger designed for breaking through packed earth. Applying water to the soil the day before can soften the ground, making it easier to dig.
Clear out as many rocks as possible and remove large stones from the hole to avoid creating pressure points that could crack the sign post or weaken anchoring. Instead of relying solely on backfilled soil, use a gravel base and compact well. In very difficult soil, consider using a metal post sleeve with concrete poured around it for extra support. Using power augers is an option but avoid them if the area has underground utilities or cables.
Surface Preparation for Fences or Walls
Installing an address sign on a fence or wall requires making sure the mounting surface is clean, flat, and undamaged. Clean the area with mild soap and water to remove dirt, dust, or grease, then allow it to dry completely. Uneven surfaces can cause poor contact or twisting, so use a level and, if necessary, add a plywood backing behind the sign to provide a flat mounting plane.
Protect your fence or wall by selecting screws or anchors suited to the material, like rust-resistant stainless steel screws for wood or masonry anchors for brick and concrete. Avoid large drills or impact tools that could crack or splinter the surface. When possible, pre-drill small pilot holes slightly smaller than the screw diameter to reduce cracking and make installation smoother.
5. Methods for Mounting Yard Address Signs on Various Surfaces
Two common methods for mounting yard address signs include using stakes to position the sign in the ground and attaching the sign directly to walls or fences. Stakes come in different sizes, typically around 30 inches long, and work well for soft soil where you can easily drive them 12 to 18 inches deep for stability. Signs mounted on stakes can be removed or repositioned, which is handy for renters or those who might landscape frequently.
The stakes-first method means driving the stakes firmly into the ground first, then attaching the sign to the stakes. This approach offers a sturdy base but requires pre-planning for exact placement. The sign-first method involves attaching the sign to the stakes before driving everything into the ground, which can be easier when working alone but may require adjusting the height after installation.
Mounting yard signs on fences or walls is another effective option, especially in yards with hard surfaces or limited planting areas. Use screws to attach the sign directly to wooden fences or siding, making sure to locate wall studs first for secure fastening. This method is permanent and less susceptible to wind damage but may require tools like a drill and a stud finder.
Each mounting option suits different yard types and preferences. Soft, open yards favor stakes, while hardscapes or renter situations often call for wall or fence mounting. Here’s a comparison of popular mounting methods, focusing on cost, installation ease, and durability.
| Mounting Method | Installation Steps | Typical Cost | Best Yard Type | Pros | Cons |
|---|---|---|---|---|---|
| Stakes-First | Drive stakes 12-18″ into soil, attach sign | $10-$25 for stakes + sign | Soft soil, open space | Stable, adjustable height, removable | Needs soft ground, may shift if soil loosens |
| Sign-First on Stakes | Attach sign to stakes, then drive into ground | $10-$25 | Soft soil, single-person install | Easy solo install, quick setup | Height harder to adjust after driving |
| Wall or Fence Mount | Locate studs, drill pilot holes, screw sign to surface | $5-$15 for screws + sign | Hard surfaces, renters, limited yard space | Permanent, wind resistant, neat | Requires drilling, less flexible position |
Before drilling into walls or fences, use a stud finder to avoid damaging electrical wiring or plumbing hidden behind the surface.
Choosing the best method depends on your yard’s surface and your willingness to make holes or adjust the sign later. Soft yards with loose soil work best for stakes. If your yard has concrete, brick, or fenced boundaries, mounting directly will keep your sign secure and visible. Some communities with homeowners associations might limit where and how signs can be mounted, so check local rules before installation.
6. Ensuring Your Yard Address Sign Is Level, Secure, and Long-Lasting
To keep your yard address sign level and securely installed, begin by using a reliable level tool such as the Empire Magnetic I-Beam Level, which ranges from $15 to $25. Place the level on top of the sign to ensure it is perfectly horizontal before securing it. Mark the exact placement with a pencil to avoid adjustments after drilling or fastening. Ensuring the sign is level matters because an uneven sign can confuse visitors and reduce curb appeal, while a crooked sign risks loosening over time.
Choosing the right fasteners depends on your sign’s mounting surface. For wooden posts or fences, galvanized or stainless steel screws are ideal because they resist rust and corrosion outside. When mounting on metal posts, use self-tapping screws designed for metal. For masonry surfaces like brick or concrete, employing sleeve anchors or masonry screws paired with a hammer drill is best to guarantee a firm hold. Adhesives like outdoor-grade construction adhesive can work for lightweight signs but typically do not provide the long-term security that mechanical fasteners offer, especially in windy conditions.
After securing the sign, protect it from weather damage by selecting weather-resistant materials such as treated wood, metal with rust-proof coatings, or durable plastic composites. Applying a clear outdoor sealant or wood preservative adds an extra protective layer, reducing damage from UV rays, rain, and temperature changes. For wood signs, plan to reseal or touch up the finish every 1 to 2 years, which generally costs between $10 and $30 for a quart of sealant. Avoid placing the sign in low spots where water pools, as repeated moisture exposure accelerates wear.
Use a checklist when installing: clean the mounting surface to remove dirt and debris, precisely mark where the sign will attach, verify the sign’s horizontal position with a level, and choose appropriate fasteners based on the surface type. Drill pilot holes when using screws to prevent wood splitting or masonry cracking. After installation, check the sign’s stability by gently shaking it; it should not wobble or shift.
Signs installed without these precautions often lean, loosen, or weather prematurely, requiring repairs or replacement sooner than expected. You might notice fading, warping, or rust if the sign lacks protective coatings or uses unsuitable fasteners. In areas with extreme weather, consider mounting the sign with extra brackets or reinforcement to withstand strong winds. Proper installation and upkeep increase your sign’s readability and lifespan, ensuring your address is visible for years to come.
7. Common Mistakes When Installing Address Signs and How to Avoid Them
One of the most common mistakes during address sign installation is incorrect character spacing, which affects readability from the street. Characters placed too close together or too far apart make it difficult for drivers or emergency responders to quickly identify your address. To fix this, measure the spacing between numbers carefully, aiming for about one-half to three-quarters of an inch between digits on signs measuring 12 to 18 inches wide. Use a ruler or spacing template to maintain consistent gaps, ensuring the entire sign remains legible from 30 to 50 feet away at night and in daylight.
Another frequent error involves poor material selection. Some signs, especially those made from low-quality plastics or untreated wood, weather poorly or fade quickly under sun and rain exposure. This leads to fading, cracking, or warping within a year. Choosing weather-resistant materials such as aluminum, powder-coated steel, or UV-protected acrylic extends the lifespan. Modern House Numbers offers handcrafted signs designed for longevity, which include mounting hardware tailored to secure the sign firmly without damaging it.
Skipping surface preparation or improper mounting can cause crooked signs, loose fixtures, or early sign failure. A crooked sign not only looks unprofessional but may confuse visitors or delivery services. Preparing the mounting surface by cleaning dirt, dust, and debris ensures strong adhesion or firm screw placement. When installing, use a level tool after mounting the sign to check for straightness, adjusting screws or repositioning as needed. Tighten mounting screws just enough to hold the sign firmly without cracking or bending the material. This precision usually takes an extra 10 to 15 minutes but prevents reinstallation costs, which can range from $50 to $100 for additional labor or materials.
- Measure and maintain even number spacing between 0.5, 0.75 inches for readability
- Use durable materials like aluminum or UV-resistant acrylic to resist weather damage
- Clean and prep the mounting surface thoroughly before installation
- Use a level to ensure the sign is perfectly horizontal and straight
- Tighten screws just enough to hold the sign without causing damage
- Avoid mounting signs too low, which can block visibility due to shrubs or snow
- Follow included mounting instructions and use supplied hardware where possible
Signs placed too low often get obscured by landscaping, snow, or parked cars, reducing visibility from the road. Mount your sign at least 5 feet from the ground to stay clear of typical obstructions. When choosing sign size, larger characters (at least 4 inches tall) improve readability from a distance. Small fonts or crowded layouts reduce legibility, especially during twilight or inclement weather.
Following these steps prevents many common mistakes that lead to poor visibility or damage. Taking extra care during installation pays off with a clear, durable, and effective address sign that serves your home well for years.
8. Local Regulations and Compliance for Installing Yard Address Signs
Local regulations, fire codes, USPS standards, and homeowners association (HOA) rules influence the installation of yard address signs. Understanding these requirements helps you avoid fines, ensures your address sign remains visible for emergency responders, and maintains neighborhood standards. Obtaining permits may be necessary depending on your location and the scope of your installation.
Understanding USPS and Fire Code Standards
The United States Postal Service (USPS) and fire codes established by organizations like the National Fire Protection Association (NFPA) and the International Fire Code (IFC) set minimum requirements for your address sign. The IFC Section 505.1 requires address numbers to be at least 4 inches tall with a stroke width of 0.5 inches to guarantee easy legibility from the street. This is essential for quick emergency response and efficient mail delivery. Some municipalities, particularly in California, mandate illuminated numbers on all buildings constructed after 2011 to maintain visibility during nighttime. Checking both USPS guidelines and local fire codes will help you meet these visibility and size standards.
Address signs that do not meet these standards may be considered noncompliant, resulting in a notice to correct or penalties from your local fire department or municipality. Planning to use reflective or backlit materials can improve nighttime visibility but should comply with local rules about illumination and electricity use.
Checking HOA or Municipal Requirements
HOAs often have specific rules regarding the style, size, color, and placement of address signs to preserve neighborhood aesthetics. They may also regulate materials, lighting, and mounting methods. Municipal codes can add another layer of regulation, sometimes requiring specific setbacks from roads, pointers visibility angles, or restrictions on sign height and width. HOA covenants and city ordinances usually contain detailed provisions, so reviewing these documents before installation is important.
Failure to comply may lead to HOA fines or orders to remove and reinstall the sign. Some HOAs require written approval or submission of a design plan before installation. Contacting your HOA board or municipal planning office will confirm applicable rules and approval procedures.
When Permits Are Necessary
Permits depend on your local building department or municipal authority and the nature of the installation. Simple yard posts or plaques often do not require permits. However, installations involving electrical work (for illuminated signs), mounting on public property, or large, permanent structures usually do. Permit applications generally ask for sign dimensions, material details, and exact location plans. Processing can take days to weeks and might include inspection fees ranging from $25 to $150 or higher.
Before beginning, contact your city or county building department to confirm if a permit is required. Applying for and receiving permits ensures your sign’s installation complies with safety codes and local laws, avoiding future removal or fines. Some areas also require inspection after installation for final approval.
Always verify local and HOA codes before installing your yard address sign to avoid costly removal or penalties later.
Step-by-Step Action Plan for Installing Your Yard Address Sign
Follow these key steps to get your yard address sign installed clearly and securely.
- Before you start: Check local regulations about sign size and placement to avoid fines. Confirm your planned spot is compliant.
- Day 1: Gather your tools and materials, sign, post, mounting hardware, measuring tape, level, shovel or post hole digger, and concrete mix if needed.
- Day 2: Mark your installation spot at a visible height near the driveway or street edge, around 4 to 6 feet high, making sure it’s clear of obstructions.
- Day 3: Prepare the ground by digging a hole about 2 feet deep for your post or securing hardware, clearing away rocks and debris.
- Day 4: Install the post or mounting bracket, using concrete if appropriate for stability. Use a level to make sure the post is straight.
- Day 5: Attach your address sign securely to the post or surface with appropriate anchors or screws. Double-check visibility from the street.
- After 1 week: Inspect the sign for stability and visibility, especially after weather exposure. Tighten any hardware if the sign shifts.
Frequently Asked Questions
What Type of Wood Is Best for a Yard Address Sign?
Cedar is a great choice because it is weather-resistant and durable. Using 6-inch wide cedar boards helps create a sturdy and long-lasting sign that withstands outdoor conditions.
Can I Install a Yard Address Sign Without Using Stakes?
Yes, you can mount the sign on walls, fences, or posts using screws or brackets. This method works well if the ground is too hard or you want a more permanent fixture.
How Do I Protect My Wooden Address Sign from Weather Damage?
Staining and sealing your sign helps prevent moisture damage and fading. Applying a good-quality outdoor sealant every year will extend the wood’s life and keep the sign looking fresh.
What Size Should My Yard Address Sign Be for Best Visibility?
Choose a size that is easy to read from the street without being too large. Many signs offer 4 size options; pick one that balances visibility with your yard’s space.
Can I Install My Address Sign Myself If I’ve Never Done a DIY Project?
Yes, installing a yard address sign is beginner-friendly. Using yard stakes and basic tools, you can complete the project in a couple of hours without prior experience.
What Is the Ideal Mounting Height for a Yard Address Sign?
Mount the sign between 4 and 6 feet from the ground to stay within drivers’ and pedestrians’ natural line of sight for easy identification.
The Bottom Line
Your yard address sign should remain visible and sturdy with careful placement and secure installation. Take the steps to check visibility from the street at different times of day to ensure your sign is easy to find for visitors and emergency responders. Your next move is to find the best spot in your yard and start gathering the materials for your installation project.