Beach House Sign Ideas That Inspire: 12 Creative Options with Tips
Finding the right beach house sign ideas boosts your coastal home’s charm instantly. Choose signs that match your style and location to maintain a relaxed, inviting vibe. Start by selecting a design that reflects your personality or the atmosphere you want your beach house to convey.
Key Takeaways
- Wood signs with nautical rope accents work well for rustic coastal aesthetics and weather moderately.
- Aluminum or acrylic signs resist moisture better, ideal for direct sun and salty air exposure.
- Personalized signs add unique character and make thoughtful gifts for beachside celebrations.
- Choose colors inspired by sand, sea, and sky for authentic beach vibes that blend naturally.
- Properly size your sign to fit the space without overwhelming entryways or porches.
- Mount signs securely with rust-resistant hardware to withstand coastal wind and rain.
1. Popular Types of Beach House Signs and Their Uses
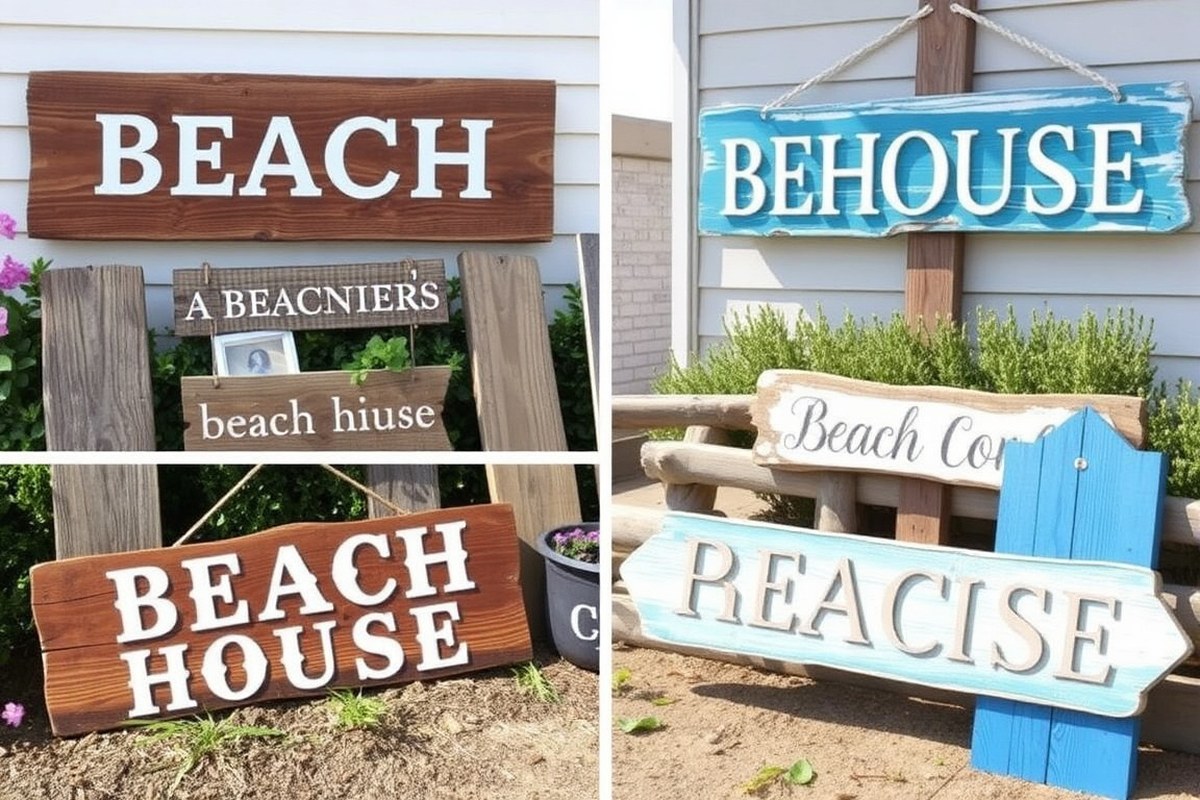
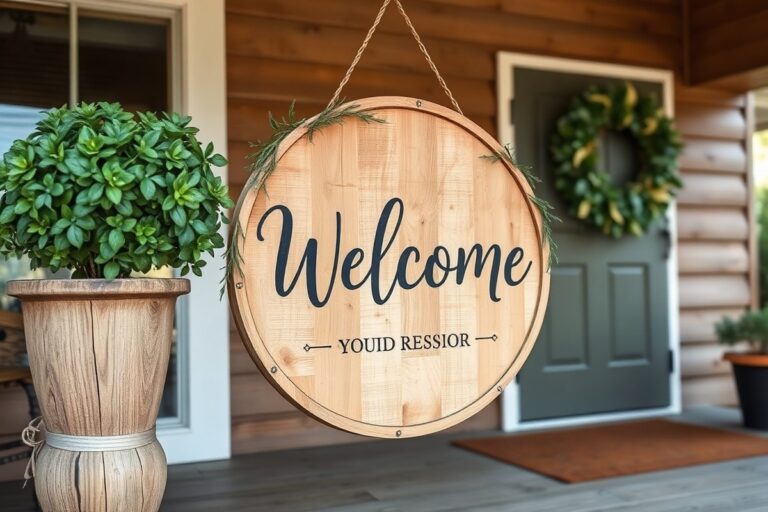
Beach house signs come in several popular types, each suited to different uses and locations around your coastal property. The main categories include welcome signs, directional signs, address or name signs, and decorative wall art. Welcome signs typically greet visitors and set the tone for your home, often placed near the front door or porch. Directional signs are helpful outdoors to point guests to the beach, pool, or driveway. Address or name signs identify your property clearly for deliveries or emergency responders and usually install near the front gate or mailbox. Decorative wall art signs inside the house add a cozy, coastal touch and can feature beach-inspired quotes or personalized family names.
Size and style differ based on function. Welcome signs should be medium to large, ranging from 18 to 24 inches wide, with clear, friendly fonts and coastal graphics like palm trees or anchors. These signs invite guests and improve curb appeal. Directional signs generally need to be smaller, around 12 to 16 inches wide, but still legible from a short distance. They often use arrows and simple wording such as “Beach This Way.” Since beach house signs are frequently exposed to sun, salt, and wind, materials matter. Durable options include painted wood, aluminum, or weather-resistant acrylic, especially for outdoor use. Indoor signs can use softer materials like canvas or lightweight wood that complement your interior style without weather concerns.
- Welcome signs: 18 to 24 inches wide, placed by entryways, often personalized with family names
- Directional signs: 12 to 16 inches wide, outdoor locations like gardens or walkways with arrows
- Address or name signs: typically 10 to 20 inches wide, mounted near mailbox or front gate
- Decorative wall art signs: various sizes indoors, adding coastal flair to living rooms or bedrooms
- Material choice depends on indoor vs. Outdoor location, weather-resistant for outside
- Styles range from rustic vintage wood to modern acrylic, matching your overall beach house vibe
Using beach house signs indoors is as popular as outdoors. Many owners display personalized welcome signs or coastal-themed artwork on living room or hallway walls. This brings the beach vibe inside and complements your décor with seashells, driftwood accents, or nautical colors. Outdoor signs command more durability and visible placement, while indoor signs allow for more creative styles and softer finishes without weather constraints. Some beach house signs cost between $70 and $130 or more, depending on size, customization, and material. Whether you invest in one statement welcome sign or a few smaller directional pieces, choose signs that suit your property’s layout and your aesthetic preferences to create a relaxed, inviting environment for both guests and family alike.
2. Choosing the Right Materials for Durable Outdoor Signs
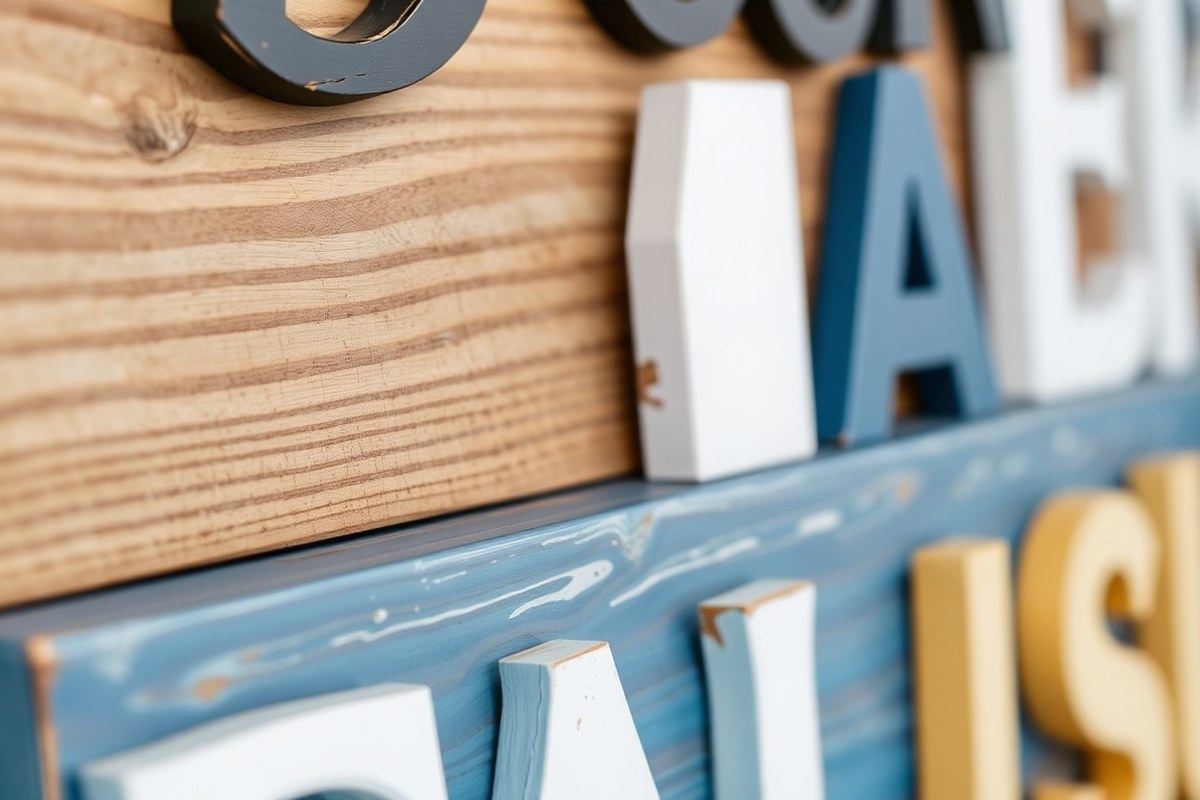
Choosing the right material for your beach house sign plays a big role in how well it withstands weather and lasts outdoors. Signs facing sun, salt air, wind, and storms need materials that resist fading, warping, and rust. Cost and maintenance frequency also affect your choice, depending on how long you want the sign to look good without frequent upkeep.
Wood is a classic pick because of its natural charm and coastal feel, often used in signs like the “Beach House Decor – Sea Turtle Sign.” Cedar and redwood resist moisture and decay better than pine but still need sealants or paint to protect them from salt and sun. Expect well-maintained wood signs to last 3 to 5 years outdoors before weather damage shows.
Metal signs, such as aluminum or galvanized steel, hold up better against moisture and salt air but can rust if the protective coating is damaged. They stay crisp for 5 to 10 years and need minimal maintenance beyond cleaning and touch-ups. Their cost tends to be higher than wood but they often make a more durable investment.
High-density PVC and similar plastics are gaining popularity for outdoor beach signs. These materials resist peeling, cracking, and fading. Some personalized beach house signs with coordinates or family names use weatherproof plastics. They can last beyond 10 years, costing less upfront than metal but more than untreated wood. Below is a table summarizing common materials for beach house signs along with durability, cost, and weather resistance considerations:
| Material | Typical Outdoor Lifespan | Cost Range (USD) | Weather Resistance | Maintenance |
|---|---|---|---|---|
| Wood (Cedar/Redwood) | 3 to 5 years | $50 to $130 | Moderate; needs sealing or paint | Annual sealing or repainting |
| Metal (Aluminum/Steel) | 5 to 10 years | $100 to $140 | High; may rust if coating damaged | Occasional cleaning and touch-up |
| High-Density PVC/Plastic | 7 to 10+ years | $70 to $130 | Very high; resists cracking and fading | Minimal cleaning |
Materials exposed to consistent direct sunlight will fade quicker, so ultraviolet-resistant coatings are beneficial, especially on wood signs. Signs near the ocean endure salt spray, which accelerates corrosion and wood decay. Choose materials with a protective finish or consider placing signs in a spot with some shade and less direct spray.
Use outdoor weatherproof markers if you plan to personalize a sign yourself; they help paint or ink resist fading caused by sun and moisture.
Balancing upfront cost with lifespan helps you decide. Wood may save money initially but needs regular upkeep, while metal and PVC demand less maintenance and can last longer but cost more. Assess your local climate and how much time you want to spend maintaining the sign to find the right fit for your beach house’s outdoor charm.
3. Customizing Your Beach House Sign: Personalization Options
Beach house signs can definitely be personalized or custom made to reflect your style, story, and coastal vibe. Personalization includes adding names, dates, messages, chosen colors, or even custom artwork that captures your favorite beach memories. Custom signs cost more than ready-made ones but offer a unique look tailored to your home.
Common Personalization Elements for Signs
Names and family initials are popular choices to make a beach house sign feel uniquely yours. Many homeowners add the house number or the year the property was built or purchased. Including a short personal message or a welcoming phrase like “The Johnsons’ Seaside Retreat” adds charm and warmth. Some signs incorporate custom artwork such as a painted lighthouse, palm tree, or wave design that matches your coastal décor theme.
Choosing classic white text on blue or driftwood tones maintains that iconic beach vibe, but you can pick bolder colors to stand out or match your specific color palette. Custom fonts are another option, with script styles used for romantic or elegant homes, and block lettering for a rustic beach cottage feel.
How to Order a Customized Beach House Sign
Start by selecting the material that suits your needs and budget; commonly used are treated wood, metal, or high-density PVC. Next, decide on the text and artwork you want. Many online retailers have design tools where you enter names, choose fonts, upload images, and select colors. If you prefer working offline, local sign shops can help draft your design on paper or digitally for approval.
Check the dimensions carefully to fit your space and decide whether you want hanging hardware or pre-drilled holes. Upon finalizing the design, ask for a proof or mock-up to confirm the appearance before production. Production typically takes 1 to 3 weeks depending on complexity and your location.
Price Ranges and What Affects Cost
Custom beach house signs usually range from $50 to $300. Basic single-color signs with simple text start near $50, while multi-color designs, artwork, and larger sizes can push the price above $200. Handmade or artist-painted signs often cost more due to labor-intensive work and unique features.
Adding custom lighting or tech enhancements increases that range. For example, backlit or LED-accented signs may add $75 to $150 or more depending on the technology and installation complexity. Shipping costs also vary with size and material; expect $20 to $50 more for larger, heavier signs.
Incorporating Lighting and Modern Features
Lighting can highlight your sign and boost curb appeal during evenings. Options include LED strip lights along the edges, small built-in bulbs for letters, or solar-powered lights for energy efficiency. An electrician may be needed for hardwired options to ensure safe installation that meets local codes.
Smart technology integration is possible but less common. Some custom shops offer signs that link to outdoor smart home systems, allowing you to control lighting color or brightness from a phone app. Solar-powered LED signs provide illumination without wiring, making them easier to install on beach properties with limited electrical access.
Checklist for Personalizing Your Beach House Sign
Start by defining what you want your sign to say and what style matches your home’s look. Choose your sign’s shape and size based on where it will hang. Select materials resistant to coastal weather like treated wood or rustproof metal. Pick colors and font styles that complement your exterior and décor.
Decide if you want custom artwork and either provide your own designs or ask the maker for options. Consider lighting, solar LED for easier installation, or wired LED for permanent, bright effects requiring professional help. Always request a preview of your design and confirm all details before production begins to avoid surprises.
4. Popular Coastal and Nautical Themes for Sign Design
Coastal and nautical themes work best for beach house signs because they reflect the natural environment and lifestyle near the water. Selecting the right theme helps your signs blend smooth with your home’s coastal decor while expressing your personal style. Classic nautical designs often use navy, rope, and anchor motifs, while tropical themes highlight bright colors and beach flora.
Classic Nautical Elements for Timeless Signs
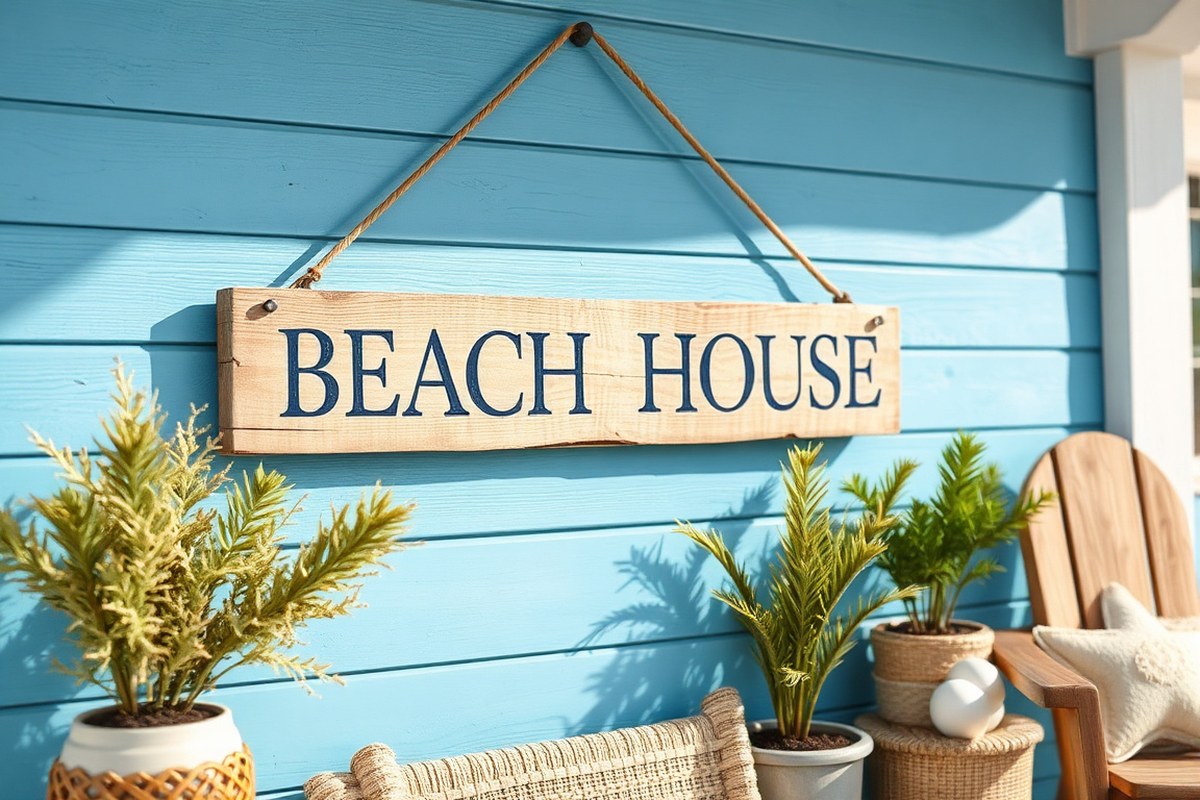
Classic nautical themes rely on traditional maritime imagery and colors, such as anchors, ship wheels, lighthouses, and ropes. Navy blue, white, and red are common colors, with weathered wood backgrounds to evoke the look of old ships. Incorporating rope borders or knots as accents immediately signals a nautical style. These signs work well on entryways or porches, creating a masculine and timeless coastal vibe.
Focus on materials like reclaimed wood or distressed finishes to capture the rugged character of maritime tools. For the wording, use fonts that resemble stencil or serif styles, similar to what you’d see painted on boats. Expect to spend between $50 and $150 for a professionally made sign with these features, depending on size and detail.
Tropical Beach House Themes That Brighten Spaces
Tropical coastal signs feature lighter backgrounds with pastel or bright colors like turquoise, coral, and sunny yellow. Palm trees, flamingos, seashells, and hibiscus flowers are popular design elements. These signs often use script or casual handwriting fonts to suggest a relaxed, island lifestyle. They suit sunrooms, decks, or indoor spaces where you want to add a cheerful, laid-back atmosphere.
Creating tropical signs requires attention to color vibrancy and smooth finishes to keep the look fresh and light. Sign makers may apply UV-resistant paints or sealants to preserve brightness in direct sunlight. Budgeting around $40 to $120 can get you a sign that includes these vivid details and protects well against coastal weather.
Mediterranean and Coastal Fusion Styles
Some signs blend coastal and Mediterranean influences, featuring soft blues, sandy beiges, and terracotta tones. These incorporate architectural motifs like arches or tile patterns alongside seashells and nautical ropes. Mediterranean-style signs bring warmth and elegance, which match well with stucco or stone walls common in coastal homes with this style.
Look for marine-inspired graphics combined with hand-painted or mosaic-like details. These signs might call for custom orders or artisan creators and could cost $100 to $200 depending on complexity and size. They work well as statement pieces in hallways or living rooms that already showcase Mediterranean coastal decor.
Incorporating Nautical Details into Your Beach Sign
Adding nautical elements to your sign involves choosing appropriate symbols and textures that hint at the sea. Common options include:
- Anchor shapes for stability and tradition
- Rope borders or knotted accents to add texture
- Wooden slats that resemble ship decking
- Colors like navy, white, and red to stay true to maritime palettes
- Images of lighthouses or ship wheels to suggest navigation
Applying these details precisely can improve your sign’s appeal and tie it directly to coastal living. Use weatherproof paints and finishes to keep ropes and wood from deteriorating in salty air. Signs combining these elements are versatile enough to display outdoors or indoors.
Design Features That Signal Nautical vs. Tropical Looks
To distinguish between nautical and tropical signs, focus on composition and color choices. Nautical signs usually have a more structured and weathered appearance with dark blues and reds on rustic wood. Tropical signs favor bright, airy backgrounds with natural imagery in pinks, greens, or turquoise. Choose fonts accordingly: block and stencil fonts for nautical, casual and flowing scripts for tropical.
Machine-routed signs or hand-painting both work, but tropical styles benefit from smooth surfaces and glossy paint to improve vibrant hues. Nautical signs often look best with matte or distressed finishes to convey age and the salty sea breeze. Recognizing these visual cues helps you select or customize a sign that complements your existing coastal theme perfectly.
5. Size and Placement Tips for Maximum Visual Impact
Choosing the right size for your beach house sign depends on where you want to place it and how far away people will be when viewing it. Signs near doorways or entry paths usually do well at 12 to 18 inches wide, making them easy to read up close without overwhelming the space. For larger walls or fences, signs can range from 24 to 36 inches wide to stand out against broader backgrounds. Adjust height proportionally to keep letters clear and legible. The goal is balance: the sign should catch attention without overpowering your coastal decor.
Placement influences how much your sign draws eyes and improve your beach house style. Entryways, porches, or patios offer prime spots where guests naturally look first. Placing signs near light sources or under awnings protects them from sun damage while ensuring visibility. Consider hanging signs at eye level, about 60 to 65 inches from the ground, so they’re comfortable to read without needing to crouch or look up. For fences or larger exterior walls, center the sign horizontally and use surrounding space wisely, leaving some margin around the edges for a clean look.
Making sure your sign is hung safely and attractively involves using the right materials and tools for your wall type. Whether mounting on wood, stucco, or brick, proper anchors and hardware prevent damage and keep your sign secure during coastal winds. Taking time to align your sign straight and level results in a professional appearance that complements your beachy vibe. Follow these steps to hang your beach house sign with lasting appeal and visual impact:
- Measure the space where the sign will go to confirm size and placement options. Mark the desired height, usually around 60-65 inches from the ground.
- Select hardware based on your wall type: use wood screws for wooden siding, masonry anchors for stucco or brick, and corrosion-resistant hooks for metal surfaces.
- Mark drill points on the wall with a pencil, using a level to ensure the sign will hang straight.
- Drill pilot holes appropriate to the anchors or screws you chose, taking care not to crack the surface or go too deep.
- Install anchors if needed; these provide strong support on harder surfaces like brick.
- Hang the sign on screws or hooks, checking that it’s level and secure.
- Inspect the installation periodically, especially after storms or high winds, tightening or adjusting as necessary to prevent damage.
Use stainless steel or weather-resistant hardware in coastal environments to avoid rust and ensure your sign stays securely mounted over time.
6. DIY Beach House Sign Projects Anyone Can Try
Creating your own beach house sign is a fun, affordable way to add coastal charm and a personal touch to your space. Simple materials like reclaimed wood, paint, and stencils let you build signs that suit your style and theme. Most basic projects take a weekend or less depending on design complexity and drying times.
Essential Tools for DIY Signs
A few basic tools are necessary for most beach house sign projects. A cordless drill or screwdriver speeds up assembly if you’re nailing planks or attaching hanging hardware. Sandpaper or an electric sander smooths rough edges and weathered wood. Paintbrushes, foam brushes, or stencils help create clean lettering and artwork. A measuring tape and pencil keep text and design aligned. Optional but helpful tools include a wood-burning pen for detailed lettering, painter’s tape for crisp lines, and a hot glue gun for attaching decorative accents like shells or rope.
Choosing Materials for DIY Projects
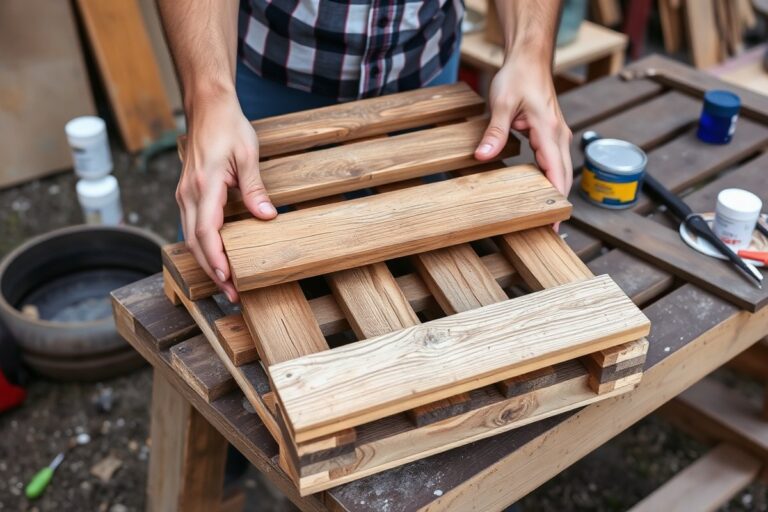
Wood is the most popular choice for beach house signs due to its rustic feel and durability. Reclaimed wood offers an authentic weathered look and tends to be affordable or free if you find old pallets or barn wood. Cedar or pine planks work well because they resist moisture and rot better than softer woods.
For outdoor use, pick exterior-grade acrylic or latex paints and sealants to protect your sign from sun damage and humidity. Weatherproof vinyl decals can speed up lettering for those hesitant about hand-painting. Other materials to consider are rope for framing or hanging and small natural elements like driftwood pieces and sea shells for embellishment.
Step-by-Step Guide to Building a Sign
Follow these straightforward steps to construct a simple painted wood beach sign that can be customized with your choice of text or coastal graphics. The total project time typically ranges from 2 to 5 hours, including paint drying.
- Measure and cut your wood plank to the desired sign size, commonly about 12 to 24 inches wide and 6 to 12 inches tall.
- Sand all surfaces and edges smoothly to remove splinters and prep for painting.
- Apply one or two coats of primer or a base paint color, letting it dry completely (usually 1 to 2 hours per coat).
- Use pencil to lightly sketch your design or lettering on the wood surface.
- Paint over your sketch with brushes or stencils, applying 1-2 coats as needed for coverage. Allow paint to dry fully between coats (minimum 30 minutes).
- Add decorative touches like a rope hanger glued or nailed on, or small shell accents attached with a hot glue gun.
- Seal your sign with a clear exterior satin or matte polyurethane spray to protect against weather and fading.
- Let the finish cure for 24 hours before hanging your sign outdoors.
7. Color Palettes and Finishes That Evoke Beach Vibes
Colors that evoke an authentic beach vibe lean toward soft, natural tones and gentle contrasts. Whites, sandy beiges, soft blues, seafoam greens, and muted grays reflect typical coastal landscapes. These shades mimic sand, sea, shells, and sky, fostering a calm, inviting atmosphere. Bright or neon colors usually feel out of place unless the sign aims for a tropical, lively theme, where vibrant turquoise, coral, or sunny yellow can work well to represent palm trees or sunsets.
The finish on your beach house sign influences how the colors and materials look and endure outdoor coastal conditions. Matte or satin finishes avoid unwanted glare and help colors blend naturally with weathered wood or driftwood textures, common in coastal decor. Avoid high-gloss finishes, as they may look too polished for a casual, seaside style. Weathered or distressed paint techniques deepen the sign’s rustic charm and improve the connection to the seashore.
Matching your sign’s palette and finish to existing coastal decor starts with observing the dominant colors and materials in your space. For example, if your beach house features driftwood furniture or rope accents, choose color palettes that harmonize with those woods, think soft taupes or muted blues, and opt for a matte or lightly distressed finish. A sign with a rustic driftwood frame combined with subtle color gradients can easy blend into a room filled with sandy tones and blue-green cushions. Here are steps to choose colors and finishes that create a true beach vibe and fit well with your decor:
- Start with a base of neutral whites, sandy beiges, or soft grays to mimic beach sand and shells.
- Add accents of ocean-inspired blues or seafoam greens to reflect the water and sky.
- For tropical themes, integrate bright coral, turquoise, or yellow sparingly to avoid overpowering subtle decor.
- Use matte or satin finishes to prevent glare and create a natural, weathered appearance.
- Consider distressing or weathering paint for a rustic, worn look that fits coastal driftwood styles.
- Match sign frame or backing materials to existing natural elements like driftwood or rope.
- Test paint samples in daylight near the sign’s intended location for accurate color matching.
Applying paint with delicate transitions between colors adds depth and softness, emulating the serenity of coastal water and sky. Cost-wise, basic acrylic paints for a small sign will typically range between $10 and $25, with additional expenses for brushes or sealants. Weatherproof sealers improve durability in salty air but might slightly alter sheen or color, so test them on sample surfaces first.
Poor color choices often clash with existing decor or come off as too bold and artificial, breaking the peaceful beach ambiance. Too shiny a finish looks out of sync with natural textures, and neglecting weatherproofing can cause fast fading or peeling near oceanfronts. Taking time to align your sign’s colors and finishes with your home’s style ensures it becomes a smooth, welcoming part of your coastal retreat.
8. Adding Natural Accents Like Shells and Driftwood
Adding natural accents like shells and driftwood gives your beach house sign an authentic coastal charm. These materials provide texture and a handmade feel that captures the essence of the sea. Using elements gathered from your own beach trips makes each sign unique and personal, improving the warmth and character of your seaside retreat. Wooden signs benefit from the rough, weathered look of driftwood, while shells add visual interest and variety. Jute rope can also complement these accents by introducing natural maritime texture.
To add these seaside materials effectively, you need to prepare your sign surface and choose the right adhesives for outdoor durability. Natural accents can be delicate so proper maintenance is important to keep them looking fresh. Sealing the finished sign protects wood and shells from salt, sun, and moisture damage, extending the life of your custom beach decor.
- Select your base sign. Choose a wooden or reclaimed wood sign with a smooth surface for easier attachment. Weathered driftwood pieces also work well as sign backings.
- Gather your materials. Collect assorted seashells, pieces of driftwood, and marine rope like twisted jute. Clean all natural elements by rinsing and allowing them to dry fully to avoid mold or pests.
- Plan your layout. Arrange the shells and driftwood on the sign’s surface before attaching. Group shells in clusters or line a driftwood border for visual balance.
- Attach accents securely. Use exterior-grade waterproof glue or epoxy to fix shells and driftwood onto the sign. Apply generous adhesive but avoid excess that can show outside the natural pieces.
- Add nautical rope. Wrap jute rope around the sign’s edges or frame as a finishing touch, gluing ends to prevent unraveling.
- Seal the sign. Apply a clear marine-grade varnish or polyurethane over the entire sign, including natural accents. This seals the materials, protects from UV rays, and repels moisture.
- Allow proper drying time. Let the sign dry for at least 24 hours in a shaded, well-ventilated area before hanging outdoors.
- Maintain regularly. Clean your sign gently with a soft brush and mild soap, and reapply a fresh coat of clear sealer each year or when wear becomes noticeable.
Using adhesives rated for outdoor use prevents pieces from falling off due to weather changes, especially in salty coastal air.
9. Incorporating Playful, Multilingual, and Quote-Based Wording
Incorporating playful, multilingual, and quote-based wording into your beach house sign adds charm and personality to your coastal decor. Using puns catches attention and creates a lighthearted mood that fits the relaxed beach lifestyle. Multilingual phrases bring a global feel, celebrating the diverse cultures connected by the ocean. Inspirational quotes can express your personal beach philosophy or uplift guests with positive vibes.
Popular playful phrases often use simple, catchy formats. Examples include “Eat, Sleep, Beach,” which sums up the ideal beach routine, or puns like “Seas the Day” and “Shell Yeah.” These messages resonate with beach lovers by highlighting sun, sand, and surf with a fun twist. Multilingual options can feature greetings or beach-themed words in languages like Spanish, French, or Hawaiian. For example, “Bienvenidos a la Playa” (Welcome to the Beach) or “Aloha o e Kahakai” (Love of the Beach) add exotic flair while being easy to understand. Creating personalized message templates starts with deciding the tone you want, fun, inspiring, or serene. Use this simple template structure to build your phrase:
- Playful template: [Beach-related verb or noun] + [catchy phrase or pun] (e.g., “Sandy Toes, Salty Kisses”)
- Multilingual template: [Greeting or welcome phrase in another language] + [English tagline or translation] (e.g., “Bienvenue, Beach Bliss Awaits”)
- Quote-based template: [Short inspirational quote] + [attribution or beach-themed graphic] (e.g., “Let the Sea Set You Free”, Anonymous)
Decorative beach sign stencils make it easy to apply these wordings precisely, especially if your handwriting isn’t steady. Reusable stencils cost $10 to $25 depending on size and design complexity. They let you try different phrases without wasting materials. When working with wood, plan for signs around 12 to 18 inches wide for easy visibility, so the lettering isn’t too cramped or sparse.
Good results show clear, readable lettering with balanced spacing and color contrast, such as white or light blue text on a natural wood background. Avoid overly long or complex sentences, they become hard to read from a distance and lose impact. Also, check the meaning of words and phrases in foreign languages if you opt for multilingual signs to ensure accuracy and cultural sensitivity. Playful and quote-based signs that follow these guidelines bring warmth and personality to your beach house facade or porch.
10. Illuminated and LED Beach Signs for Nighttime Ambiance
Illuminated and LED signs can be excellent additions to a beach house, especially if you want to enjoy your coastal decor well into the evening. These signs improve ambiance and improve visibility without being overpowering. While they are suitable for beach houses, you must consider factors like weather resistance, power sources, and light intensity before choosing a specific illuminated sign.
LED signs use low electrical power, last up to 50,000 hours, and generate minimal heat, making them energy-efficient and safe options for outdoor use. Solar-powered LED signs provide an eco-friendly choice that stores energy during the day and lights up at night, avoiding wiring headaches. When selecting an LED or illuminated sign, prioritize waterproof and corrosion-resistant materials like aluminum or marine-grade plastics to withstand salty air and moisture exposure common in coastal environments.
Consider the brightness of the sign carefully. Too much light can disturb neighbors or spoil the peaceful beach atmosphere. Signs with adjustable brightness or motion sensors help balance visibility with subtlety. A good rule of thumb is to pick signs with brightness levels around 200 to 400 lumens for small outdoor areas. This is enough to read the sign clearly without causing glare or light pollution.
To integrate lighting with your beach house sign, you can choose pre-lit signs or retrofit existing signs with LED strip lights or rope lights. Retrofitting requires a weatherproof housing for the lights and a reliable outdoor power source, such as a GFCI-protected outlet rated for outdoor use. Always use outdoor-rated wiring and fixtures, and check local codes for electrical compliance. Low-voltage LED kits (~12 volts) are safer and simpler to install, especially if you are unfamiliar with electrical work. For solar setups, position the solar panel in a location that receives at least six hours of direct sunlight daily to ensure consistent operation.
Costs vary widely depending on size, materials, and tech features. Basic LED strip lighting kits start around $20 to $50, while custom illuminated signs with built-in LED lights can range from $150 to $400 or more. Installation for simple additions might take one to two hours; complex setups may require professional help, especially if electrical work is needed.
Good results show a sign that is clearly visible after dark, improve your beach house’s charm, and withstands coastal weather without fading, rusting, or electrical failure. Poor results often stem from insufficient weatherproofing, improper brightness, or poor placement that exposes the sign to harsh elements or too much direct light. Check seals and connections regularly, especially after storms, to maintain functionality and appearance.
11. Common Mistakes and How to Fix Them When Choosing Signs
Choosing or making beach house signs often leads to common mistakes in size, placement, materials, and style. One frequent error is selecting a sign that is too large or too small for the available space. Oversized signs can overwhelm your porch or entryway, while tiny signs get lost amid other elements. A practical way to fix this is to measure the wall or post where the sign will hang. Ideally, a sign should occupy about 30% to 50% of that area to maintain balance and visibility. Using painter’s tape to mark the sign’s approximate size on the wall before purchase or creation helps visualize the fit.
Another problem is poor placement, such as mounting a sign too high or too low. A sign placed above eye level might be missed or hard to read. Hanging too low can make it vulnerable to damage from foot traffic or pets. Aim to install the sign at eye level, roughly 5 to 6 feet from the ground, ensuring easy readability and protection. Check the surrounding environment for obstacles like lighting fixtures, house numbers, or plants to avoid cluttering the view.
Material choice mistakes include using wood without proper sealing or metal prone to rust near salty air. Unsealed wood absorbs moisture, swells, and fades, while untreated metals corrode quickly in coastal climates. Fix this by selecting weather-resistant materials such as marine-grade plywood sealed with at least three coats of exterior polyurethane or metals treated with rust-proof coatings. When sealing wood, apply several thin layers and allow 24 hours drying time between coats. Using materials that handle UV exposure and salt spray preserves the sign’s finish and extends its lifespan.
Style errors often arise from designs that clash with your beach house’s overall look or resist the casual, relaxed vibe that coastal decor favors. Avoid signs that are too formal or busy. Instead, choose styles with clean lines, nautical fonts, or natural textures like driftwood and rope. This coordination maintains a harmonious aesthetic and feels welcoming. Combining your personalized text with simple graphics like seashells or waves also improve the charm without overwhelming the space.
For installation, use corrosion-resistant screws or hooks designed for outdoor use to avoid rust and damage to your sign and house exterior. Anchoring the sign with two screws spaced at least one-third the sign’s length apart keeps it stable. For hanging on brick or stone, use masonry anchors and drill bits designed for those surfaces. Use a level to ensure the sign is straight before securing it, adjusting as needed. Adding weatherproof hanging wire or heavy-duty picture hooks can work for lighter signs, but heavier ones require direct mounts.
Always pre-drill holes for screws to prevent wood from splitting and consider using silicone caulk around fasteners to block moisture penetration, especially in salty coastal climates.
12. Maintenance Tips to Prolong Your Beach House Sign’s Life
Beach house signs face constant exposure to sun, salt air, moisture, and wind, which can cause fading, warping, cracking, and corrosion over time. Proper maintenance keeps your sign looking fresh and intact, protecting your investment and improving your beach home’s curb appeal. Signs made from wood, metal, or plastics each require slightly different care, but the basic principles focus on cleaning, sealing, and timely repairs.
Cleaning removes salt deposits, dirt, and mildew that accelerate deterioration. Protecting the surface with weather-resistant coatings blocks harmful UV rays and moisture. Repairing minor damage early stops problems from worsening, preventing costly replacements. Below are clear steps to maintain your beach house sign effectively throughout the year.
- Clean the sign monthly. Use a soft cloth or sponge with mild soap and fresh water. Rinse thoroughly with fresh water to avoid salt buildup. Avoid harsh chemicals or abrasive scrubbers that can damage finishes. Cleaning prevents surface salt and grime from eroding paint or wood fibers.
- Inspect for damage regularly. Check for peeling paint, rust spots, cracks, or loose fasteners every 3 to 6 months, depending on local weather. Early detection helps plan timely repairs and prevents moisture intrusion that can swell wood or corrode metal.
- Apply a protective sealant yearly. For wooden signs, use an exterior-grade marine varnish or spar urethane with UV inhibitors. Metal signs benefit from a clear rust-resistant lacquer. Plastic signs may need a UV protectant spray. Follow product instructions for drying times; most require 24 to 48 hours to cure. Protective coatings reduce sun damage and water absorption significantly.
- Touch up paint or finish as needed. Use outdoor paints or stains designed for your sign’s material that resist fading and peeling. Match colors carefully and apply thin coats for even coverage. Most brands cost $10 to $30 per quart, which covers multiple touch-ups.
- Tighten or replace hardware annually. Check screws, hooks, and brackets for rust or looseness. Replace rusted hardware with stainless steel or brass to resist corrosion in salty environments. Secure mounting prevents damage from strong coastal winds.
- Store or cover signs during severe weather. Remove smaller or fragile signs when storms or hurricanes threaten. Use waterproof covers or tarps for larger permanent signs if removal isn’t feasible. This precaution reduces risk of physical damage from wind-blown debris or water infiltration.
- Repair cracks and chips promptly. Fill small wood splits or resin chips with exterior wood filler or epoxy putty. Sand smooth and repaint after drying according to product directions. Prompt repairs protect the underlying material from moisture that causes swelling or rust.
Signs kept clean, sealed, and well-secured can last a decade or more in coastal environments. Signs ignored or exposed without care often fade, warp, or rust within 1 to 3 years. Regular maintenance takes a few hours spread over the year but prevents costly replacements and keeps your beach house welcoming and well maintained.
Step-by-Step Action Plan for Choosing and Maintaining Your Beach House Sign
Use this plan to pick the perfect beach house sign and keep it looking great season after season.
- Before you start: Decide the sign’s primary purpose, like welcome messages or house names, to focus your design. You’ll know it’s clear when you can list specific text or images you want.
- Day 1: Choose materials based on your climate, favoring marine-grade wood or weather-resistant composites to ensure durability. Confirm by checking product specifications or reviews on longevity outdoors.
- Day 3: Pick colors and finishes that reflect beach tones, soft blues, sandy neutrals, or crisp white, to match your coastal decor. Success means your selections feel cohesive with nearby decor and surroundings.
- Day 5: Decide on the sign’s size and placement, aiming for visibility without overpowering your porch or entry. Measure spaces and consider sight lines; test by holding a sample size in place.
- Week 2: Personalize by adding custom text or natural accents like shells or driftwood for a unique touch. Check that customization options align with your style and maintenance commitment.
- Week 3: Install or hang the sign securely, using rust-proof fasteners in spots shielded from direct weather when possible. It’s secure if it withstands wind without movement.
- Monthly: Perform maintenance by cleaning with gentle soap and water, repainting faded areas, and replacing damaged natural accents. Good results mean your sign remains vibrant and intact.
Frequently Asked Questions
How Can I Match My Beach House Sign with My Overall Decor Style?
Choose colors, fonts, and themes that align with your home’s color palette and coastal vibe. This keeps your sign visually connected with other decorations for a cohesive look.
What Are Budget-Friendly Ways to Update an Existing Beach House Sign?
Refresh the paint, add new natural accents like shells or driftwood, or swap out the wording with vinyl lettering. These simple updates can give your sign a refreshed look without replacing it.
How Can I Secure My Beach House Sign Against Strong Coastal Winds?
Use sturdy fasteners like stainless steel screws and install the sign on a sheltered wall or under an eave. Choosing durable materials like marine-grade wood can also help resist weather stress.
Are There Eco-Friendly Materials for Making Beach House Signs?
Yes, reclaimed wood and sustainably sourced driftwood work well and reduce environmental impact. These materials also add natural character fitting a coastal setting.
What Wording Ideas Make Beach House Signs More Welcoming?
Phrases like “Welcome to our Beach House” or playful sayings about ocean life invite guests warmly. Personalizing with family names can also improve the greeting.
How Do Illuminated Beach House Signs Affect Nighttime Curb Appeal?
They make your home easy to spot after dark and create a cozy, inviting vibe. Opt for low-energy LED versions for safety and energy savings.
The Bottom Line
Your beach house sign does more than mark your space; it shares a welcoming statement that fits your style and withstands coastal weather. Start by focusing on durable materials and a color scheme that blends with your surroundings. Take a simple step today by selecting a sign style that resonates with your personality and setting, then build from there.