How to Make Cabin Signs: 8 Proven Methods with Tools and Tips
Knowing how to make cabin signs starts with picking the right materials and tools to fit your design and environment. Using quality wood, proper paint, and precise tools ensures your sign looks great and lasts outdoors. Begin by selecting wood like plywood or reclaimed timber, which provide sturdy bases and a natural feel for cabin decor.
Gather essential tools such as brushes, stencils, and vinyl for design transfer, plus sealants to protect your finished work from weather damage. Choosing permanent or removable vinyl depends on whether you want a lasting sign or one you can update easily.
Key Takeaways
- Use plywood or reclaimed wood as a cost-effective, durable base for cabin signs.
- Buy permanent vinyl (651) for lasting decals, or removable vinyl (631) for temporary designs.
- Primer your wood first with two coats for better paint adhesion and durability.
- Stencil designs help maintain clean edges and professional-looking lettering.
- Let paint dry 5 to 10 minutes before peeling vinyl to avoid paint peeling.
- Select hardware pulls around $1.50 each to add rustic accents to your sign.
1. What Materials and Tools You Need to Make Cabin Signs
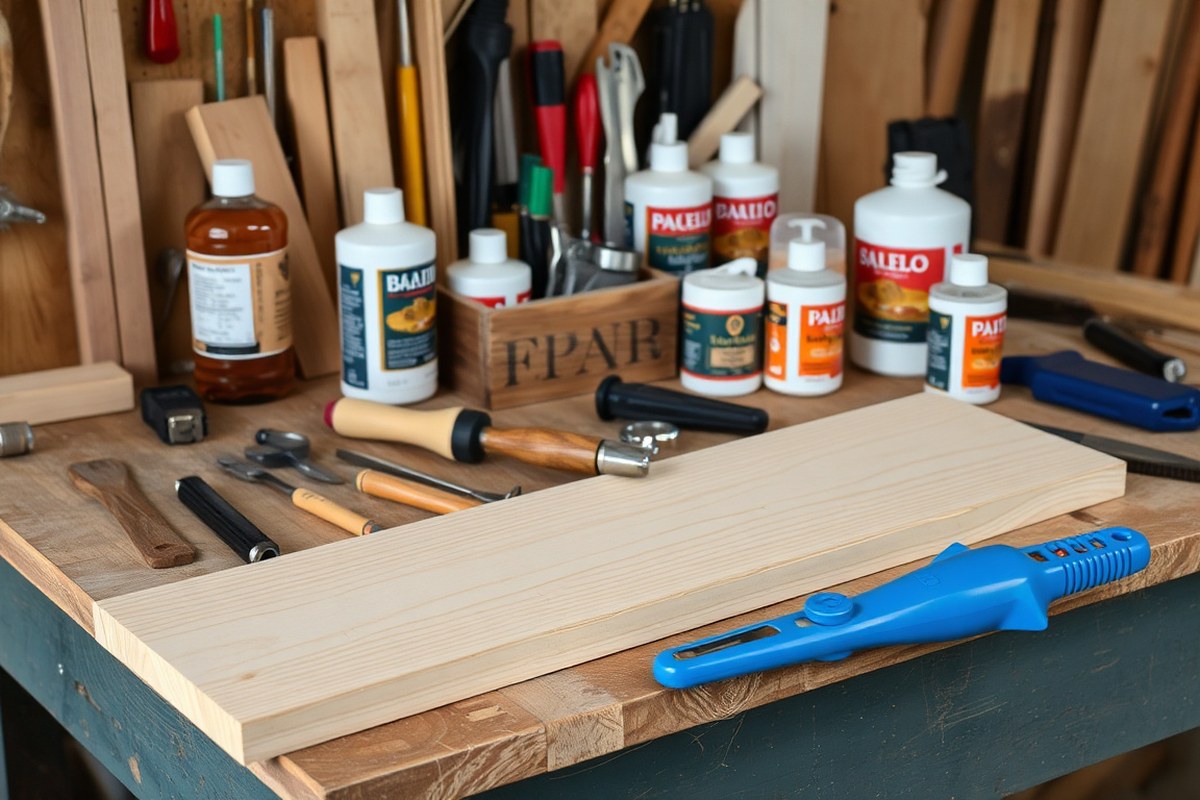
Choosing the right materials and tools sets the foundation for a strong, attractive cabin sign that lasts outdoors. For the wood, durable, weather-resistant options are key. Cedar and redwood work well because they resist rot and insects without frequent sealing. Pine is a budget-friendly choice, though it needs sealant to hold up outside. Reclaimed wood is popular for its rustic charm and unique character, but check that it’s free from nails and damage. Boards should be at least 3/4 inch thick for stability and to accept paint or stain evenly.
When picking paint or stain, go for products designed for outdoor use. Exterior acrylic latex paints provide vibrant color and good weather protection. Oil-based stains soak into wood and help prevent moisture damage, ideal if you want to highlight the natural grain. For best results, prep the wood by sanding smooth and applying a primer or wood conditioner before painting. A clear topcoat, such as a spar urethane, adds UV and water resistance, extending your sign’s life outdoors.
Basic tools you’ll need include a saw to cut the wood to size, either a handsaw for simple cuts or a circular saw for faster work. Sanding blocks or an electric sander smooth edges and surfaces. Brushes come in various shapes; a flat brush is versatile for larger areas, and fine detail brushes help with lettering. For transferring designs, vinyl letters or stencils are handy. You might also want a hot glue gun or wood glue for assembly if you layer elements or add decorative pieces.
- Cedar or redwood boards, 3/4 inch thick, for natural durability
- Exterior acrylic latex paint or oil-based wood stain plus clear spar urethane
- Handsaw or circular saw and sandpaper or power sander for smooth surfaces
- Flat and fine-tipped brushes for painting and detailing
- Vinyl lettering or stencils to transfer your design accurately
- Wood glue or hot glue gun for attaching decorations
- Optional: Silhouette Cameo or similar cutting machine for custom vinyl
Look for reclaimed wood and supplies at local lumber yards, salvage stores, or online marketplaces where prices often beat big-box stores. Paint stores sometimes offer smaller sample sizes, which are perfect if you only need a little color for your sign. Avoid cheap, low-quality paints or brushes since they often require multiple coats and fail to endure exposure. Spending slightly more on quality materials upfront usually saves time and money over the years by reducing the need for frequent repairs or repainting.
2. How to Design a Cabin Sign That Fits Your Style and Space

Designing a cabin sign that suits your style and fits well in its location involves planning the size, picking readable fonts and colors, and deciding on any images or logos. The right design balances visibility with aesthetics to create a sign that feels personal and stands up outdoors.
Choosing the Right Size for Visibility
Size depends largely on where the sign will be placed and how far away it needs to be read. A sign over a cabin door might be smaller than one on a roadside post, which requires larger lettering to catch a driver’s eye. Measure your available space first, then choose sign dimensions that fit comfortably without crowding the area.
For good readability, letters should be at least 1 inch tall for signs viewed up close, such as near doorways. If the sign will be viewed from a distance of 10 feet or more, increase letter height to 3 inches or greater. Keep in mind that longer signs can offer more design flexibility but may cost slightly more in wood and finish.
Selecting Fonts and Colors That Pop
Fonts with simple, bold shapes improve legibility, especially for outdoor signs exposed to weather and lighting changes. Sans-serif fonts or block prints work well for cabin signs. Avoid overly decorative or cursive fonts unless you use tools like the “weld” option in design software to join letters, ensuring clean cuts if using a cutting machine.
Color contrast between letters and background is key. Dark letters on a light wood background or white letters on darker wood boost visibility. Natural wood tones like whites, browns, or greens pair nicely with rustic cabin themes and weatherproof finishes. Using color sparingly helps maintain a classic look and aids quick reading.
Incorporating Graphics and Personal Touches
Adding images, logos, or symbols can make your cabin sign uniquely yours. Choose simple graphics that complement the text without overwhelming it. Pine trees, wildlife silhouettes, or a lake icon are popular for cabin signs and can be created or downloaded from free design resources.
Use design software like free versions of Canva or Inkscape to combine text and images. These tools let you adjust sizes precisely and preview your layout. Save your design file to match your sign’s dimensions exactly to help with transferring or cutting later.
Balancing text and graphics involves spacing elements so neither crowd the other. Keep a margin of at least 1 inch around the edges and allow some white space between words and images. This balance improves readability and improve the overall look.
- Measure the location for your sign to set maximum dimensions.
- Select font styles that are clear and suited for outdoor reading.
- Pick font sizes based on expected viewing distance, aiming for 1, 3 inches tall letters.
- Choose color combinations with strong contrast against your wood background.
- Decide on simple graphics or logos that reflect your cabin’s character.
- Use free or paid design software to create and adjust your sign layout.
- Print or digitally transfer your design to maintain accuracy for cutting or painting.
- Sketch your design on paper as a final check before production.
Tip: Always test your font and color choices by stepping back from your design mockup to simulate actual viewing distance and lighting conditions. This prevents readability issues after the sign is made.
3. Different Methods to Transfer Your Design Onto Wood
There are several practical ways to transfer your design onto wood for cabin signs, including stencils, vinyl decals, freezer paper transfer, and direct painting. Each method offers different benefits depending on your skill level, desired finish, and the type of wood you’re working with. Below is a table comparing these techniques by pros, cons, and best uses to help you choose what fits your project.
| Transfer Method | Pros | Cons | Best Uses |
|---|---|---|---|
| Stencil Painting | Low cost; good for beginners; easy to customize | Can cause paint bleed; requires careful taping | Simple designs and solid colors on light or medium wood |
| Vinyl Decals | Creates clean, precise lettering; great for multi-color; easily removable | Requires cutting machine; setup time; less ideal for rough surfaces | Detailed or multi-color signs; smooth wood; dark woods for contrast |
| Freezer Paper Transfer | Affordable; transfers printed designs well; good detail | Works best on smooth wood; limited size; may need practice for alignment | Small to medium, detailed printed designs; lighter wood |
| Direct Painting (with Chalk or Freehand) | No special materials needed; flexible for freehand art | Requires steady hand; can be less precise | Simple or rustic-style signs; artistic or unique designs |
The choice depends on the wood’s texture, your equipment, and how detailed or polished you want the final sign to look.
Stencil Painting Step-by-Step
Stencils offer a direct way to apply your design by painting through cut-out shapes. Start by printing and cutting your stencil from heavy cardstock or stencil film. Tape the stencil securely to your wood surface using painter’s tape to avoid paint seepage under the edges.
Use a stencil brush or sponge with just a small amount of paint, dip it lightly and dab off excess on a paper towel before applying. Dab the paint carefully over the stencil, applying several light coats instead of one heavy coat. This reduces bleeding and makes the edges crisp.
After painting, remove the stencil immediately before the paint dries to prevent peeling. Let your paint dry for 10 to 15 minutes to set the design, then add touch-ups if needed. If you see bleeding, seal outlines with a fine brush and matching paint color.
Using Vinyl Decals for Clean Lettering
Vinyl decals produce sharp, professional letters or intricate shapes, especially useful for multi-color signs. First, design your lettering on a computer and cut it from adhesive vinyl using a machine like a Cricut or Silhouette. Use standard machine settings such as blade depth 1, speed 5, thickness 10 for most vinyl.
- Peel the backing off the vinyl carefully and place the vinyl sticky side down on a piece of transfer tape cut slightly larger than the design.
- Use a credit card to smooth the transfer tape over the vinyl, ensuring good adhesion.
- Line up the design on your wood, then press and rub the transfer tape firmly onto the wood surface.
- Slowly remove the transfer tape, leaving the vinyl attached to the wood.
- To paint around the design for a reverse stencil effect, cover the vinyl with paint and peel it while paint is tacky (about 5-10 minutes after application) for clean edges.
This method works well on smoother woods and dark wood where vinyl’s opacity contrasts against the grain. Because vinyl can be removed without damaging paint or wood, it offers flexibility if you want to update or change signs over time.
Freezer Paper and Other Transfer Techniques
Freezer paper transfer is an affordable way to transfer printed designs onto wood. Print your design in reverse on the shiny side of freezer paper using an inkjet printer. Then, place the printed side down onto the wood, pressing firmly and uniformly with a warm (not hot) iron for 15 to 30 seconds.
Once cooled, peel off the freezer paper to reveal the design transferred in toner or ink. You can use a paintbrush to go over the transferred lines if needed. This method works best with smooth, light-colored wood and small to medium-sized designs.
Another alternative is a chalk transfer. Rub chalk on the back of your printed design, tape it onto the wood, and trace the design with a pencil or stylus. The chalk leaves a light outline to paint over. This works well if you have textured or darker wood where freezer paper or vinyl might not adhere perfectly.
4. How to Paint and Finish Your Cabin Sign for Longevity
To ensure your cabin sign withstands weather and fading, start with a high-quality outdoor primer designed for wood. A popular choice is Zinsser primer, which provides good adhesion and blocks stains. Apply two coats of primer with light sanding between to create a smooth base. Use a brush or roller to cover the entire surface evenly. This step matters because it seals the wood and prevents moisture from compromising the paint.
When painting, opt for acrylic latex exterior paints. These paints resist UV rays and moisture well and dry faster than oil-based options. For coloring, black craft paint works well on stencil lettering, applied gently with a stencil roller to avoid bleeding beneath edges. Allow each coat to dry fully before adding the next, usually about 1 to 2 hours depending on temperature and humidity. Two to three coats typically provide solid coverage and durability.
Mixing staining and painting techniques can add depth to your sign’s look. Apply a wood stain first to highlight the grain, then paint over stencil areas once the stain cures, usually after 24 hours. Sealing the whole sign becomes even more important to protect both layers. You can coat the sign with marine-grade polyurethane, which adds a tough, waterproof finish ideal for cabins near water or in heavy rain.
After painting, seal the sign with an outdoor clear sealer like spar urethane or marine varnish. Apply at least two coats, allowing 24 hours to dry between layers to avoid cloudiness or tackiness. This seals out moisture and slows UV damage to the paint and wood. Keep the sign out of direct sun for the first few days until fully cured to prevent peeling.
For long-term upkeep, check the sign annually and clean off dirt with mild soap and water. Touch up worn paint areas and reseal every 2 to 3 years, depending on exposure. Signs mounted in very sunny or rainy locations may need more frequent care. Proper sealing and maintenance can extend the sign’s life beyond 5 to 7 years, saving you time and money on replacements.
Good results show as vibrant, crack-free paint with a smooth, even finish that repels water. Common issues like peeling, blistering, or faded colors often come from skipping primer, rushing drying times, or using indoor paints outdoors. Following these steps and choosing weatherproof products will keep your cabin sign looking its best through seasons of sun and snow.
5. Creating Rustic and Weathered Cabin Signs with Ease
Rustic and weathered cabin signs get their charm from natural wear and layered finishes that mimic years of outdoor exposure. You can create these looks with a few sanding, staining, and paint techniques that add depth and character to your wood. Using reclaimed wood safely improve authenticity, while layering paint and distressing reveal a well-loved, vintage patina.
Sanding and Distressing Techniques
Sanding is the first step to shaping a rustic sign’s texture. Start with medium-grit sandpaper (80-120 grit) to smooth rough edges and remove splinters while leaving a slightly uneven surface. Distressing involves adding dents, scratches, and worn spots to mimic natural wear. Use tools like hammers, chains, screwdrivers, or wire brushes to create varied surface marks.
Focus sanding on corners and edges where wear would naturally happen. After roughing up the wood, dry brushing or light sanding over paint layers can expose underlying wood or colors for a chipped look. Keep some raw wood areas visible for a realistic finish.
Using Stains and Paint Layers
Layered finishes bring the weathered appearance to life. Begin by applying a wood stain to improve grain and add an aged tone. Use oil-based or gel stains for deeper penetration and longer-lasting color. Let the stain dry 24 hours before adding paint layers.
Choose two or more paint colors, base and accent, to layer on your sign. Apply a solid base coat first and let it dry thoroughly. Then, brush on a contrasting topcoat, thicker in some areas and lighter in others, before distressing. Sand certain spots or scrape paint with a putty knife to expose colors beneath. Milk paint or chalk paint work well for chippy, matte effects.
Applying a clear matte sealer after distressing protects the finish without adding shine. Avoid heavy varnishes that reduce the worn look.
Working with Reclaimed Wood Safely
Reclaimed wood adds authenticity but requires careful handling. Inspect all lumber for nails, screws, or staples and remove them with pliers or a pry bar. Wash the wood surface with mild detergent and water to remove dirt, mildew, or insect residues, then let it dry completely.
To kill any hidden pests, bake small pieces in the oven at 160°F for about 30 minutes or leave larger pieces in direct sunlight for several days. Avoid using reclaimed wood treated with chemical preservatives, which can be toxic. Always wear a dust mask when sanding reclaimed wood to prevent inhaling old paint dust or particles.
Wear gloves and a dust mask when working with reclaimed wood to protect against old paint dust, nails, and potential mold.
Step-by-step Rustic Finishing Tutorial:
- Sand the wood with 80-120 grit sandpaper, focusing on edges and any repaired areas.
- Distress wood by lightly hitting with a hammer, scratching with a screwdriver, or scuffing with a wire brush for varied texture.
- Apply a wood stain evenly using a cloth or brush; allow to dry 24 hours.
- Paint your base coat in one color; let it dry completely (at least 4 hours).
- Brush on a contrasting topcoat selectively, heavier in some spots, lighter in others.
- Sand or scrape the paint to reveal underlying layers and some bare wood, focusing on high-wear areas.
- Seal the finished sign with a clear matte sealer to protect the rustic look from weathering.
6. How to Add Dimension and Lettering Beyond Painting
Adding dimension and lettering beyond basic painting lets your cabin sign stand out with tactile and visual interest. Raised or layered letters create shadows and depth that catch the eye. To make raised letters, cut your letters or shapes from thin wood, such as 1/4-inch plywood or MDF, then attach them to the base sign using wood glue or a strong adhesive like 3M double-sided tape. Align the letters carefully using a ruler or registration marks to keep consistent spacing. Press firmly and clamp lightly if needed; let the glue cure for at least 24 hours for a secure bond. Raised letters can be left natural, stained, or painted to complement your background.
Wood burning, or pyrography, is another option to add lettering or decorative outlines. This technique uses a heated pen to burn designs into the wood surface. Wood burning offers a handmade look and works best on smooth, light woods like pine or basswood. To use wood burning, start with a clean, sanded surface, sketch your design lightly in pencil, and then trace with a wood burning tool set between 650°F and 750°F. Move at a steady pace to avoid scorching. Practice on scrap wood before applying your design. This method adds a warm, rustic feel and lasts outdoors if sealed properly with a clear finish.
Natural embellishments bring organic texture and cabin charm. You can attach small pine cones, acorns, twigs, or pressed leaves using wood glue or a hot glue gun. These elements suit designs with a woodland theme and provide real dimensional accents without complicated tools. Keep your arrangement balanced so the embellishments improve rather than clutter the sign.
- Raised letters: cut from 1/4-inch wood or MDF, glued with wood glue or 3M double-sided tape, aligned with a ruler
- Wood burning: use a pen heated to 650°F, 750°F, trace a pencil sketch on smooth pine or basswood
- Carving: for deeper dimension, carve letters with a gouge or rotary tool before painting or staining
- Natural items: attach small pine cones, acorns, twigs with wood glue or hot glue gun
- Layered effects: combine painted background, raised letters, and wood burning details for contrast
- Seal wood burned and natural elements with weatherproof clear coat for durability outdoors
Combining multiple decoration methods requires thoughtful design harmony. For example, paint your sign background first and let it dry completely. Then add raised letters before finishing with subtle wood burning details around the edges or letter contours. Avoid overcrowding the surface; choose one dominant technique and support it with accents from others to keep the design clean and readable. Using sealers after all decorations are applied protects your work from weathering while maintaining the depth and texture you created.
7. Best Practices for Mounting and Maintaining Outdoor Cabin Signs
Choosing the right hardware and mounting method ensures your cabin sign stays secure through changing weather, and regular maintenance keeps it looking fresh for years. Black metal hardware pulls around $1.50 each work well for a rustic look and sturdy hold. Prevent warping by sealing all sides of the wood and avoiding direct ground contact. Reapplying protective coatings such as spar urethane every 1 to 2 years shields your sign from moisture and UV damage. Follow regular inspections to spot cracks or peeling early and address them promptly.
To securely hang your cabin sign, follow this stepwise guide. The method varies slightly depending on the sign’s size and weight but generally uses durable hardware placed in appropriate anchor points. Proper installation reduces strain on the wood and hardware, minimizing failure risks.
- Choose mounting hardware. Select black metal pulls, heavy-duty screw hooks, or stainless steel eye bolts rated for outdoor use. Match hardware size to your sign’s weight.
- Mark sign placement. Use a level to position the sign at your desired height and mark holes on the cabin wall or post where the hardware will attach.
- Pre-drill holes. Drill pilot holes slightly smaller than your screws into the mounting surface to prevent wood splitting.
- Install wall anchors if needed. For drywall or hollow surfaces, insert plastic or metal anchors rated for outdoor loads to ensure secure screw hold.
- Attach hardware to the wall. Screw in hooks, eye bolts, or pulls firmly into the prepared holes or anchors.
- Fix hardware to the sign. Fasten D-rings, wire hangers, or screw eyes to the back of your sign using corrosion-resistant screws placed near the edges for balanced support.
- Hang the sign. Connect the sign’s hardware to the wall mounts, adjusting for level and secure fit.
Maintain your sign seasonally to combat wear from rain, sun, and temperature swings. Check every spring and fall for chips, cracks, and loose hardware. Clean dirt and mold with a soft brush and mild detergent. Dry thoroughly before any treatment. Sand areas with peeling finish lightly, then reapply a UV-resistant spar urethane or exterior-grade varnish. Avoid applying coatings in temperatures below 50°F or in direct sunlight for a smooth cure. Re-coating takes about an hour to dry to the touch and up to 24 hours to fully cure.
Common problems include wood cracking from moisture fluctuations and paint peeling from UV exposure. Prevent cracks by sealing all edges and storing signs in covered areas during harsh winters if possible. Tightening screws can resolve hardware looseness caused by wood shrinking. Following this care routine extends your cabin sign’s charm and durability without costly repairs or replacements.
8. Common Mistakes to Avoid When Making Cabin Signs
One common mistake is failing to prepare the wood surface properly, leading to paint peeling or vinyl decals lifting. Sand the wood smooth with fine-grit sandpaper and clean off dust before applying paint or adhesive materials. This ensures better adhesion and a longer-lasting finish.
Poor sizing and design visibility often happen when you don’t consider the viewing distance and outdoor lighting. Use large, bold fonts with high contrast colors. Test your design size by printing it on paper and stepping back several feet to check readability. Confirm your decals have sharp, clean edges to prevent a fuzzy appearance when applied.
Uneven finishes or fading usually result from improper paint application or exposure to harsh weather without protection. Apply multiple thin coats of exterior-grade paint, letting each layer dry thoroughly. Finally, seal your sign with a clear, UV-resistant finish designed for outdoor use. Look for products that remain flexible to avoid cracking over time.
Safety is critical when working with wood, tools, and finishing chemicals. Always wear goggles and a dust mask when sanding or cutting wood. Use gloves when handling stains, paints, or sealants to avoid skin irritation. Work in a well-ventilated area to minimize inhaling fumes.
- Avoid applying paint or vinyl on damp or dirty surfaces, always clean and dry first.
- Fix peeling paint by sanding the affected spot, cleaning it, and repainting immediately.
- Should vinyl decals begin to lift, add a strong adhesive such as outdoor-grade glue beneath the edges and press them down firmly.
- Check that your stencil or vinyl cutter blade is sharp for clean cuts and accurate design transfer.
- Keep your work area organized to prevent accidents with sharp tools or chemical spills.
- Let your sign cure fully before mounting outside, this can take one to two weeks depending on materials.
Always wear protective gear when working with power tools and chemicals to prevent injury and long-term health effects.
Quick fixes for paint chipping include gently sanding the chipped area and repainting with matching paint. Vinyl lifting may require heating the decal slightly with a hairdryer to soften the adhesive before pressing back down firmly. These small actions save repainting or recutting the entire sign.
Knowing the right steps and precautions helps you avoid delays and extra costs. Signs that look evenly painted with clear lettering and strong adhesion will last years with routine upkeep. Failure to heed these points risks wasted time, money, and a sign that loses its charm well before it should.
Step-by-Step Action Plan
Start creating your cabin sign by following these clear steps in order. Each phase helps ensure your sign looks great and lasts outside.
- Before you start: Choose the wood and tools that fit your space and style, such as cedar or pine and brushes or wood burners. Confirm materials suit outdoor use by checking they resist moisture.
- Day 1: Design your sign on paper or a computer, selecting fonts and imagery that match your cabin’s vibe. Review it to confirm it fits your intended sign size.
- Day 2: Transfer your design onto the wood using your chosen method, freehand, stencil, or carbon paper, and verify the layout aligns properly.
- Day 3: Apply paint or wood stain carefully, including any weathered effects, letting each coat dry fully for durable coverage.
- Day 4: Add dimension with raised lettering or carving, ensuring all elements are securely attached or engraved.
- Day 5: Seal the sign with an outdoor-grade clear coat to protect it from sun and rain. Check that it feels dry and smooth before handling.
- Day 6: Mount your sign using rust-resistant screws or brackets on a stable surface. Test its firmness by lightly pushing to avoid future damage.
- After 3 months: Inspect your sign for any wear or fading, and touch up paint or sealant if needed to maintain its appearance.
Frequently Asked Questions
How to Make Cabin Signs?
Start by choosing your wood and design, then transfer your design using stencils or vinyl decals, and finish with paint or weathered effects to add character and protect the wood.
What Type of Wood Works Best for Outdoor Cabin Signs?
Cedar and pine are popular because they resist rot and take paint well, ideal for withstanding weather.
Can I Use a Vinyl Cutter to Make Cabin Signs?
Yes, using permanent vinyl (651) helps create detailed decals that can be applied to your painted or raw wood surface.
How Do I Create a Weathered Look on a New Cabin Sign?
Sand and distress the wood before painting, then use glaze or stain to improve the aged appearance.
What’s a Good Way to Seal Cabin Signs Against the Elements?
Use a clear outdoor polyurethane or spar varnish to protect from moisture and UV damage for longer durability.
Can I Add 3D Elements to My Cabin Sign?
Yes, layering wood letters or metal pieces adds dimension beyond painting, making your sign stand out more.
Key Points to Remember
Making a personalized cabin sign that lasts outdoors comes down to following each step with care, from design to finishing and mounting. Start now by choosing quality wood that suits your style and climate, then plan your design to reflect your cabin’s character. Taking the time upfront ensures your sign will be a welcoming, enduring feature for years to come.