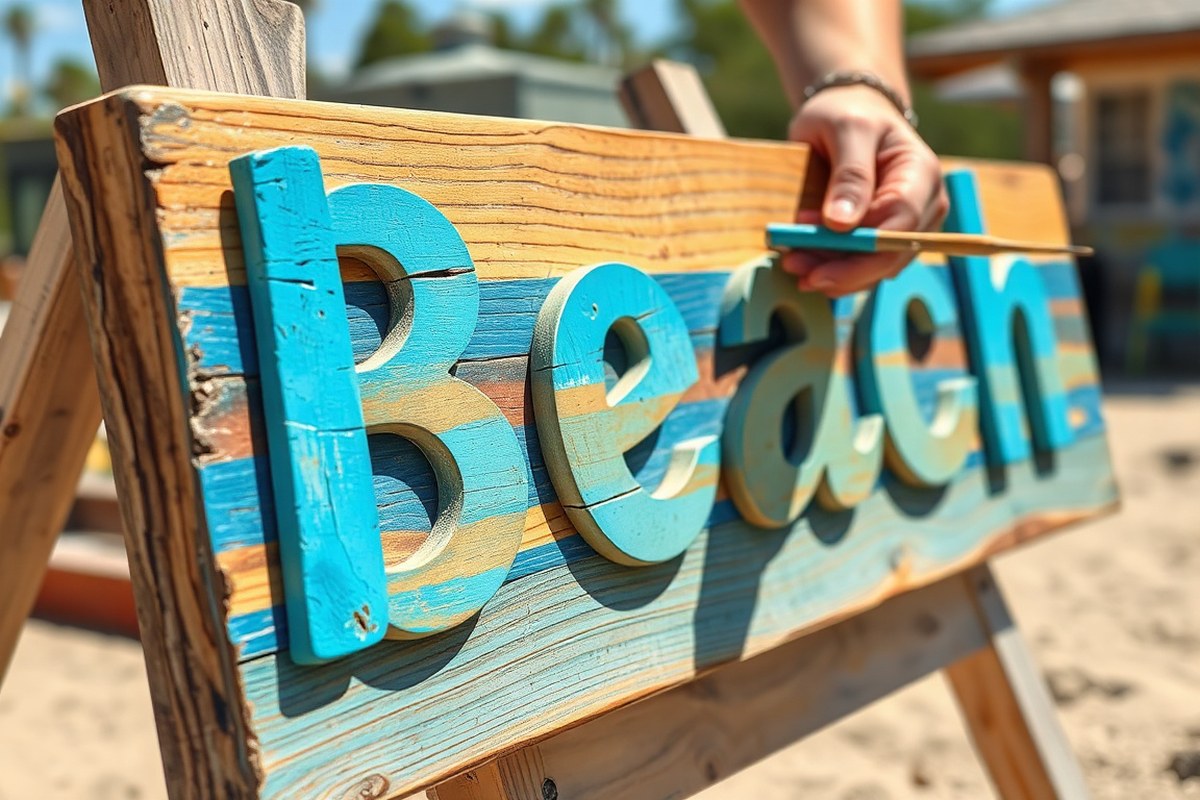
How to Make Beach Signs: A Complete DIY Guide with Tips & Materials
How to make beach signs starts with selecting the right wood and preparing it properly for outdoor use. Using reclaimed wood or simple wood slats between 1 to 2 inches thick helps achieve durability and charm. Start by measuring and cutting your wood to size, ensuring smooth edges for easier painting and decorating.
Key Takeaways
- Choose old or reclaimed wood slats 1 to 2 inches thick for authentic, weather-resistant beach signs.
- Cut wood into manageable pieces, like 7-by-3-inch slats, to maximize the number of signs per board.
- Mark measurement points with a pencil about 3 1/2 inches from the top for consistent lettering placement.
- Use canvas, paint, and natural elements like cinnamon to create rustic textures affordably.
- Project design decals with a projector or use stencils to apply crisp, accurate lettering.
- Dig holes 6 inches wider than your signpost and 1 to 2 feet deep to secure ground-mounted signs firmly.
What Materials and Tools Do You Need to Make a Beach Sign?

Choosing the right materials and tools is key for making durable and attractive beach signs. For wood, options like cedar, pine, and reclaimed wood are popular. Cedar resists moisture and insects well, making it ideal for outdoor use but costs around $10 to $15 per 6-foot board. Pine is more affordable, about $5 to $8 per board, but needs extra sealing to prevent weather damage. Reclaimed wood adds character and is free if you have access to scrap wood, but it might require extra sanding and treatment.
Outdoor paints should be weather-resistant acrylic or exterior latex paints, which stand up to sun and rain. These paints dry fast, usually within an hour to touch, and fully cure in 24 to 48 hours. Using a primer first helps paint adhere better and prolongs the sign’s life. Look for paint brands labeled “exterior” or “outdoor use” at craft or hardware stores; expect to pay $5 to $15 per small container depending on the brand and finish.
Basic tools for beginners include a handsaw or circular saw to cut wood to size, sandpaper or a power sander to smooth edges, paintbrushes or foam brushes for applying primer and paint, and nails or wood glue to assemble pieces. Optional but helpful tools are a drill with screwdriver bits for faster assembly and a stencil or projector for precise lettering. Sanding is important to avoid splinters, and using quality brushes helps achieve even paint coverage without streaks.
- Cedar wood: durable and naturally weather-resistant, $10, $15 per 6-foot board.
- Pine wood: budget-friendly but requires sealing, $5, $8 per 6-foot board.
- Reclaimed wood: free or inexpensive, adds rustic charm but needs extra prep.
- Exterior acrylic or latex paint: fast-drying and weatherproof; $5, $15 per container.
- Hand saw or circular saw: for cutting wood to sign size.
- Sandpaper or electric sander: smooth edges and surface.
- Paintbrushes or foam brushes: apply primer and multiple paint coats.
Using reclaimed wood gives your project a weathered look but check for nails and imperfections before cutting. For new wood types, sanding rough edges smoothes the surface for painting and reduces splinters. Applying at least two coats of exterior paint with a primer base creates a durable finish which should last several seasons outdoors. Assemble your signs with weatherproof screws or outdoor wood glue to ensure they hold up in coastal conditions. Keep your tools handy and work in a well-ventilated space for the best results.
How to Prepare and Cut Wood for Your Beach Sign
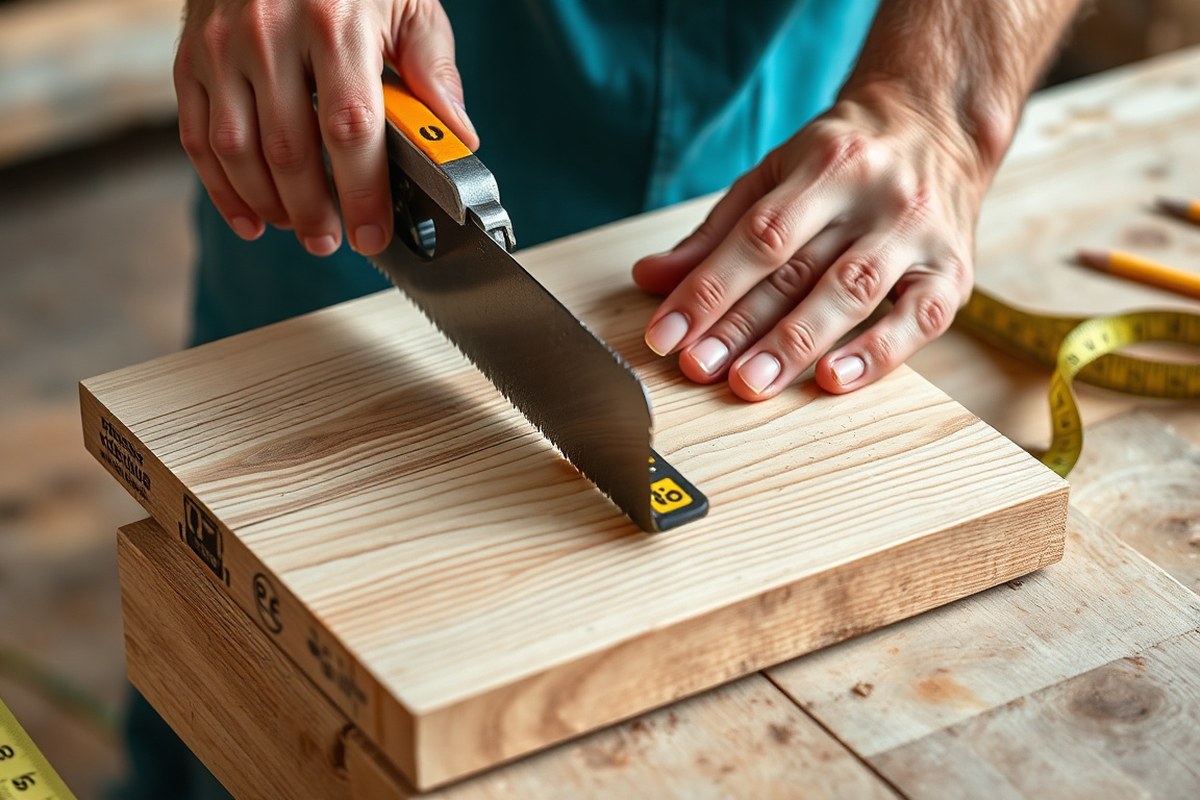
Preparing and cutting wood properly sets the foundation for a successful beach sign project. You’ll want to select the right size and thickness, cut safely and accurately, then sand the wood smooth so paint or decorations stick well. Taking time here means your finished sign looks clean and lasts longer outdoors.
Measuring and Marking Your Wood
Choosing the right dimensions depends on where you plan to display your beach sign and what message it holds. Popular sizes for individual boards range from about 6 to 12 inches wide and 18 to 24 inches long, with 3/4-inch thickness being common for durability and ease of handling. Thinner wood may warp outdoors, while thicker pieces can be heavy and harder to cut.
Measure twice to avoid mistakes. Use a tape measure and a pencil to mark where you want to cut. Draw straight lines across the board with a carpenter’s square for accurate edges. Begin by planning any directional arrows or shaped edges on paper, then transfer those outlines to your wood before making any cuts.
Safe Cutting Techniques for Beginners
Cutting wood for your sign will most likely require a saw. A hand saw or a circular saw works well for straight cuts, while a jigsaw suits curved or shaped edges. Without a saw, you can use wood cutting services available at many Home Depot stores or ask a friend with tool experience for assistance.
Wear safety glasses and hearing protection when using power saws, and keep your fingers clear of the blade path. Secure the board tightly on a stable surface using clamps or a sawhorse to prevent slipping. Take your time and follow the cut line steadily for a clean edge.
- Put on safety glasses and ear protection.
- Clamp your wood to a sturdy work surface.
- Align your saw blade with the pencil line.
- Start cutting slowly to create a kerf groove.
- Follow the line steadily without forcing the saw.
- Finish the cut and set the board aside safely.
Tip: Make the cut on the side of the line you want to keep, so sanding can smooth out any minor imperfections.
Sanding and Surface Preparation
After cutting, sanding creates a smooth surface that helps paint adhere better and prevents splinters. Use medium-grit (about 80 to 120 grit) sandpaper for initial smoothing, then finish with fine-grit (180 to 220 grit) for a polished surface. Sand along the grain rather than against it to avoid scratches.
Remove all sawdust from the wood by wiping with a damp cloth or tack cloth. Let the wood dry completely if wet. This cleaning step ensures paint sticks well without raised bumps or uneven patches.
Before painting, check for nails, knots, or rough patches that could affect your sign’s look. Fill holes or gaps with wood filler if needed, and sand again lightly once dried. For a rustic or weathered appearance, skip detailed sanding to allow the wood’s natural texture to show through your paint.
Step-By-Step Painting and Decorating Your Beach Sign
Painting and decorating your beach sign involves layering paint for the background, carefully applying letters and graphics, and finishing with distressing techniques that give a weathered look. Using stencils or freehand methods makes lettering easier, while sanding and certain paint washes add rustic charm. Protecting the sign with a durable finish ensures it withstands outdoor conditions.
Painting the Base Layers and Background
Start by preparing the wood surface with light sanding to remove rough spots. Use a primer or a white base coat as your first paint layer to help colors stand out and last longer. For a coastal or driftwood look, mix chalk paint with water to create a thin “wash” and apply it over the primer. This wash mimics the faded look of weathered wood.
Control drying times carefully. Allow each paint layer to dry for at least 1 to 2 hours before adding the next. This prevents colors from blending unintentionally and keeps lines crisp. You can also experiment with soft brush strokes or sponging to add texture to your background.
- Sand the wood surface lightly with fine-grit sandpaper to smooth out any rough areas.
- Apply a white or light-colored primer as the first paint coat and let it dry completely (1-2 hours minimum).
- Mix paint with water to create a thin wash if aiming for a driftwood effect, then brush it on the primed surface.
- Allow this wash to dry fully before moving to the next step to avoid smudging.
- Use soft brush or sponge techniques to add subtle texture or variations in color on the background.
Adding Letters and Graphics with Stencils
Choose cardboard or plastic stencils for letters and any marine-themed shapes like starfish, shells, or whales. Secure each stencil to the sign with painter’s tape to prevent shifting. Apply paint with a sponge or stencil brush by dabbing gently, which helps avoid paint bleeding under the stencil edges.
For freehand lettering, lightly pencil your design onto the surface first, then paint over the lines with a fine brush. Slight imperfections or visible brush strokes add to the charm of a handmade beach sign. Allow lettering to dry for at least 30 minutes before removing stencils or adding more details.
Leaving some background color showing through your letters can improve a rustic or weathered look. Don’t rush the drying process to keep lines sharp. You may need 2 coats of paint for full opacity, especially with lighter colors on darker backgrounds.
Creating Weathered and Rustic Finishes
To achieve a weathered look, sand the edges and surface areas of your sign lightly after the paint has dried. Focus on places that would naturally wear with time, such as corners and raised lettering. This reveals underlying layers, mimicking wood worn by sun, salt, and sea.
Another approach is layering colors: start with a white coat, then add a contrasting top color, lightly sanding afterward to expose the white beneath. Applying a whitewash using diluted paint can create that washed-out driftwood effect quickly and easily.
You can also try a rust effect by lightly sprinkling cinnamon powder on wet paint or adding textured rust-colored paint for a unique look. Finally, seal your sign with an outdoor-rated clear varnish or polyurethane. This protects the paint from humidity, sun, and wind, preserving your beach sign’s look for seasons.
How to Add Lettering and Graphics with Ease and Accuracy
Choosing the right font and size for your beach sign is key to making your message clear and attractive. Bold, simple fonts like sans-serif or playful handwritten styles work well because they read easily from a distance. Aim for letters that are at least 2 to 3 inches tall for visibility on smaller signs, and larger if your sign will be viewed from farther away. Keep your text concise to avoid crowding, and consider the mood you want, classic, casual, or whimsical, when selecting your font.
Transferring letters onto wood accurately can be done a few ways, depending on your tools and skill level. Stencils are popular because they offer clean, repeatable shapes and minimize mistakes. You can buy ready-made stencils or create your own by cutting letters out of cardstock or plastic sheets. Place the stencil on the wood, secure it with painter’s tape, and apply paint with a sponge or stencil brush in light coats to avoid bleeding.
Freehand painting gives you more creative freedom but requires a steady hand and practice to get neat lines. When you’re new to painting letters, start by sketching them lightly with pencil or chalk as a guide. Use paintbrushes with fine tips for details and broader ones for filling in. Freehand works well if your design is simple or has a personal touch, but it can lead to uneven edges or size inconsistency if you’re not careful.
Tracing is another method that combines precision with freehand flexibility. You can print your lettering on vellum or regular paper and trace it onto the wood using graphite transfer paper underneath. Tape everything securely to prevent shifting during tracing. Press firmly but not too hard to avoid indenting the wood. After transferring, fill in the outlines with paint. This approach is good for complex or custom fonts that are hard to stencil.
Projectors offer an advanced way to get precise results. Set up a digital projector to display your text and graphics directly onto the wood surface. Adjust the size to fit your sign, then trace the projected image lightly with pencil. This method lets you work with any font or image from your computer, allowing maximum customization. A basic mini projector costs around $100, which might be worth it if you plan to make many signs or want fine detail.
Stencils work well for beginners who want neat, repeatable lettering without much effort or expense. They typically cost $10 to $30 for a set and last for multiple projects. Freehand painting suits those wanting a personal touch and are confident with brush control but risks unevenness. Tracing with transfer paper balances accuracy and design variety at a low cost, graphite paper costs less than $5 for a pack. Projectors require more investment but provide maximum flexibility and precision.
Whichever method you pick, keep your work area well-lit and your wood surface clean and dry. After finishing your letters, seal the sign with a clear outdoor varnish to protect your work from weather. Clean lines with even paint coverage signal a well-done job. Smudges, blurry edges, or crooked letters usually mean the stencil slipped, the brush was overloaded, or the tracing moved during transfer. Practicing on scrap wood can help you avoid these problems.
Different Types and Styles of Beach Signs to Inspire Your Project
Beach signs come in a variety of styles, each bringing its own charm and practical use to your project. Rustic beach signs, often made from rough or reclaimed wood, emphasize natural textures and muted colors, making them perfect for outdoor settings where weather resistance is needed. Their raw look is easy to achieve by using untreated or lightly sanded pine or cedar boards. To create a rustic effect, paint faded lettering with white or pastel chalk paint and distress the edges with sandpaper for authenticity. These signs typically cost $10 to $25 in materials, depending on the wood type.
Directional beach signs guide visitors to various locations and often have arrows with handwritten or stencil letters. They usually use lighter, smoother wood like pine or plywood for easier painting. To make directional signs stand out, paint the background in bright coastal colors like turquoise or coral and use clear white letters that contrast well. These are better suited for outdoor installation, so seal them with a weatherproofing varnish to last through sun and rain. Basic directional signs take about 1 to 2 hours to complete.
Driftwood signs bring a natural seaside vibe using found or purchased driftwood pieces. The irregular shapes and faded hues of driftwood create an organic look that works well indoors or in sheltered patios. Arrange several driftwood planks horizontally or vertically and secure them with hidden backs or twine. Paint your message with waterproof paint or use vinyl lettering for a cleaner look. Because driftwood often varies in size and durability, prepare to sort pieces carefully and reinforce connections; this can add time but gives an authentic feel for around $15 to $30 in materials.
Vintage beach signs often replicate old-fashioned wooden boards with faded letters, peeling paint, or retro font styles. You can achieve this by layering multiple paint colors and sanding in spots to mimic years of wear. Using reclaimed wood or wood stained dark before painting helps create a period look. These signs excel indoors or covered porches where wear is minimal. Although slightly more involved, the layering technique usually requires around 3 paint coats and 30 minutes drying time between each for the best effect.
Multi-layered beach signs combine depth and design complexity through several stacked wood layers or mixed materials like wood backing with metal or rope accents. These signs add visual interest and uniqueness but require more tools like small nails, strong glue, and careful measuring. Use lightweight woods to keep the sign manageable. This style works well indoors or in protected areas to avoid damage from weather. Costs can range from $20 to $50 depending on the number of layers and added materials, with construction taking several hours.
Material choice directly affects both the durability and appearance of your beach sign. For outdoor use, cedar and treated pine resist moisture and insect damage better than untreated softwoods. Driftwood provides a natural look but is less predictable in longevity. Plywood and composite boards give smooth surfaces but might not weather well unless properly sealed. Indoor signs can use softer or thinner wood, allowing more intricate paintwork or layering effects.
Seal outdoor signs with a clear marine varnish or exterior polyurethane to protect paint from fading and wood from swelling during humid beach seasons.
How to Safely Install and Secure Your Outdoor Beach Sign
Freestanding outdoor beach signs need stable installation to withstand wind, rain, and sun exposure. Proper digging, securing, and choosing the right spot help your sign last longer and stay safe. Follow careful steps to position your sign and secure its post firmly in the ground.
Choosing the Right Location and Preparing Ground
Select a location that is visible yet sheltered from the strongest winds, like near a fence line or a wall. Make sure the ground is firm and free from large roots, pipes, or underground cables by checking utility maps if necessary. Choosing a flat or slightly sloped area helps with drainage, preventing water from pooling around the post.
Clear the area of debris, rocks, or grass so digging is easier and the post can set directly into the soil or gravel. Measure the spot carefully to avoid blocking pathways or driveways.
Digging and Placing the Post Safely
Digging the right size hole ensures your post is stable and secure. A good rule of thumb for post depth is at least one-third of the post’s total height. For example, a 6-foot post requires a 2-foot deep hole. The hole should be about 8 to 12 inches wide to allow firm packing of gravel or rocks around the post.
Always use a sturdy shovel and wear gloves to protect your hands during digging. Check the soil type: sandy soil needs deeper holes or wider bases to prevent shifting. In harder soils or clay, use a post hole digger for easier removal.
Securing and Weatherproofing Your Sign
Properly securing your post keeps the sign stable and prolongs its life by reducing sway and movement. Place the post in the hole, then pack larger rocks at the bottom for drainage and finer gravel around the sides. Tamp the gravel tightly to create a firm base.
Use galvanized screws or stainless steel nails to attach your sign to the post; these resist rust much better than regular steel fasteners. Applying exterior-grade wood sealant or outdoor paint to your post and sign protects against moisture and sun damage. For extra stability in windy areas, add concrete mix around the post after placing rocks and gravel.
- Choose a location visible, level, and clear of obstructions or utilities.
- Mark the spot and dig a hole 2 feet deep and 8-12 inches wide for a 6-foot post (adjust depth to one-third post height).
- Place larger rocks at the bottom of the hole to improve drainage.
- Set the post upright into the hole, checking it is level with a carpenter’s level.
- Fill the hole around the post with gravel, tamping it down firmly to eliminate gaps.
- Attach your sign using galvanized screws or stainless steel nails to prevent rust.
- Apply a weatherproof sealant or exterior paint on the post and sign for protection.
- Optionally, pour quick-setting concrete around the gravel for extra strength in exposed locations.
Budget, Time, and Cost Considerations for Making Beach Signs
Materials for a beach sign generally cost between $15 and $50, depending on the size and detail of your project. Wood boards vary in price from about $5 for a small pallet piece up to $25 for a weather-resistant cedar or pine plank. Paint typically costs $8 to $15 per small container, and outdoor spray sealers add another $10 to $15 to ensure your sign withstands weather exposure.
The project timeline breaks down into stages that fit well into a weekend or a few weekday evenings. Preparing and cutting the wood usually takes 1 to 2 hours, including measuring and sanding edges. Painting and decorating may need 2 to 3 hours, allowing for drying time between coats. Adding lettering and graphics can take 1 to 2 hours, depending on the complexity of your design and method, such as stenciling or freehand. Finally, spraying the sign with a sealer requires 15 to 30 minutes, plus several hours of drying before outdoor installation.
Keeping your beach sign affordable while maintaining quality comes down to selecting materials carefully and using DIY tricks. Choose reclaimed wood or pallets when possible, as these are often free or very cheap and can add rustic charm. Purchase paint in small quantities or sample sizes to reduce expense, and reuse stencils to save on supplies. Avoid skipping the spray sealer step, it protects your work and extends the life of your sign, saving money on replacements in the long run.
| Step | Estimated Time | Typical Cost (USD) | Tips |
|---|---|---|---|
| Wood preparation and cutting | 1 to 2 hours | $5 to $25 | Use reclaimed wood to save costs. |
| Painting and decoration | 2 to 3 hours | $8 to $15 per paint container | Buy sample-size paint; allow drying between coats. |
| Lettering and graphics | 1 to 2 hours | Free to $10 for stencils | Reuse stencils; try freehand if confident. |
| Spray sealing | 15 to 30 minutes, plus drying | $10 to $15 | Do not skip; protects against weather damage. |
Total costs depend on your choices but expect to invest around $30 to $60 for most projects. Starting with a clear budget helps prevent overspending on supplies you do not need. Shopping at local craft stores or online deals can reduce prices while still providing quality materials. Spending extra time on the preparation stages results in a smoother painting and lettering process and a sign that lasts longer outdoors.
Common Mistakes to Avoid and How to Fix Them When Making Beach Signs
Common pitfalls when making beach signs often start with measurement errors and poor wood preparation. Incorrect measurements can cause signboards to be uneven or the lettering to be off-center, which affects the overall look and balance. To fix this, always measure twice and mark your cuts clearly using a pencil and a square tool for precision. Sand the wood thoroughly before painting when it feels warped or rough, beginning with coarse sandpaper (80 to 120 grit) and ending with fine (220 grit) to smooth the surface for better paint adhesion.
Painting mistakes are frequent among beginners too, especially when the paint layers are either too thick or too thin. Using watered-down paint without enough coats leads to a patchy appearance, while too thick paint can cause drips and uneven texture. To avoid these, apply multiple thin layers and allow each to dry completely before adding the next. When drips appear, lightly sand them after they dry, and then smooth out the paint by repainting those spots. When painting lettering, using stencils or transfer paper helps maintain accuracy. Mistakes in lettering, like smudging or uneven spacing, can be fixed by gently scraping off paint with a craft knife or cotton swab dipped in a little water if the paint is still wet.
Weather damage like peeling paint or faded colors happens when signs aren’t properly sealed or placed in harsh sun or rain. Applying an outdoor polyurethane or clear sealant rated for exterior use after the paint dries protects the sign. Reapply this sealant every 1 to 2 years depending on exposure. For weathered or peeling paint, first sand the affected area down to bare wood and repaint following the proper preparation and painting steps again. UV-resistant paints specifically designed for outdoor use can slow fading, and mounting the sign under partial shade also extends its lifespan.
- Measure twice and use a square tool to mark cuts for accuracy
- Sand wood progressively from rough to fine grit for smoothness
- Apply thin, even coats of paint and let dry fully between layers
- Use stencils or transfer paper for clean, correctly spaced lettering
- Correct wet paint mistakes by gently lifting with a damp cotton swab
- Seal finished signs with outdoor polyurethane for weather resistance
- Sand and repaint any peeling or damaged areas before resealing
Always test your paint and sealant on a scrap piece of your wood before working on the final sign to ensure compatibility and desired finish.
Following these fixes and tips helps prevent common errors and ensures your beach sign looks polished and lasts through weather exposure. Attention to detail during prep, painting, and sealing prevents costly redo work and keeps the sign vibrant and durable for outdoor display.
Step-by-Step Action Plan for Making Your Beach Sign
Follow these steps to create a personalized beach sign that suits your style and lasts outdoors.
- Before you start: Gather your materials and tools, including wood, paint, brushes, stencils, and protective finish. Check each item to make sure everything is ready and in good condition.
- Day 1: Measure and mark your wood pieces according to your desired sign size. Ensure markings are straight and clear before cutting.
- Day 2: Cut the wood carefully using a saw, then sand all edges and surfaces until smooth. Run your hand over the wood to confirm no rough spots remain.
- Day 3: Apply a primer or base coat of paint and let it dry completely. The surface should feel dry and evenly covered before moving on.
- Day 4: Paint your background color and decorative elements. Add layers as needed, letting each dry fully to avoid smearing or peeling.
- Day 5: Add letters and graphics using stencils or paint pens. Double-check alignment and spacing before painting to ensure accuracy.
- Day 6: Seal your sign with a clear outdoor protective finish. Wait until the finish feels dry and hard to the touch.
- Day 7: Install your sign securely outdoors using appropriate hardware. Test stability by gently shaking the sign to confirm it is firmly in place.
Frequently Asked Questions
What Type of Wood Lasts Longest for Outdoor Beach Signs?
Cedar and redwood resist moisture and insects best, keeping signs durable outdoors. Choose wood that is naturally weather-resistant for longer wear by the beach.
Can I Make Beach Signs Weatherproof Without Paint?
Applying a clear sealant or outdoor varnish protects signs from rain and sun damage. Sealants help maintain the wood’s appearance when paint isn’t used.
How Do I Create a Vintage Look on My Beach Signs?
Distress the wood by sanding edges and using dark wax or diluted stain for aged effects. This technique mimics the worn look of old beach signs found in decor shops.
What’s a Simple Way to Attach Multiple Directional Signs to a Post?
Use screws or nails to secure signs at different angles on a single post for clear navigation. Space the signs evenly so the post can accommodate more additions over time.
How Can I Prevent Beach Sign Colors from Fading Quickly?
Use UV-resistant paints and apply a topcoat with UV protection to keep colors vibrant. Bright colors last longer under sun exposure when protected this way.
Is It Necessary to Prime the Wood Before Painting Beach Signs?
Priming is recommended to help paint adhere better and to prevent peeling or chipping. It creates a smooth base, especially for untreated or old wood surfaces.
Wrapping Up
Making a beach sign combines creativity with practical skills to brighten your space. Start by choosing a simple design that fits your time and budget. Taking one clear step at a time makes the process rewarding and ensures your sign stays beautiful for seasons to come.