
How to Make a Framed Wood Sign with Cricut: A Complete Step-by-Step Guide
How to make a framed wood sign with Cricut is simple when you use vinyl lettering or stencils cut from your machine paired with a stained wood base and frame. Start with a half-inch plywood board sized to your project, and use 1×2 lumber for the frame. Cutting the vinyl or stencil design accurately in Cricut Design Space before transferring it ensures clean, professional results.
Key Takeaways
- Choose ½” pre-sanded plywood for a smooth sign base that is easy to paint or stain.
- Use 1×2 lumber for framing to create a sturdy perimeter that improve the wood sign’s look.
- Set your design size carefully in Cricut Design Space to match your wood sign dimensions exactly.
- Cut vinyl lettering with permanent, outdoor-rated vinyl to ensure durability up to three years.
- Use Cricut Explore 3 or Maker 3 for longer vinyl cuts without a mat, up to 12 feet from vinyl rolls.
- Stain the 1×2 framing lumber before assembly to save time and achieve an even finish.
Materials and Tools Needed for a Framed Wood Sign
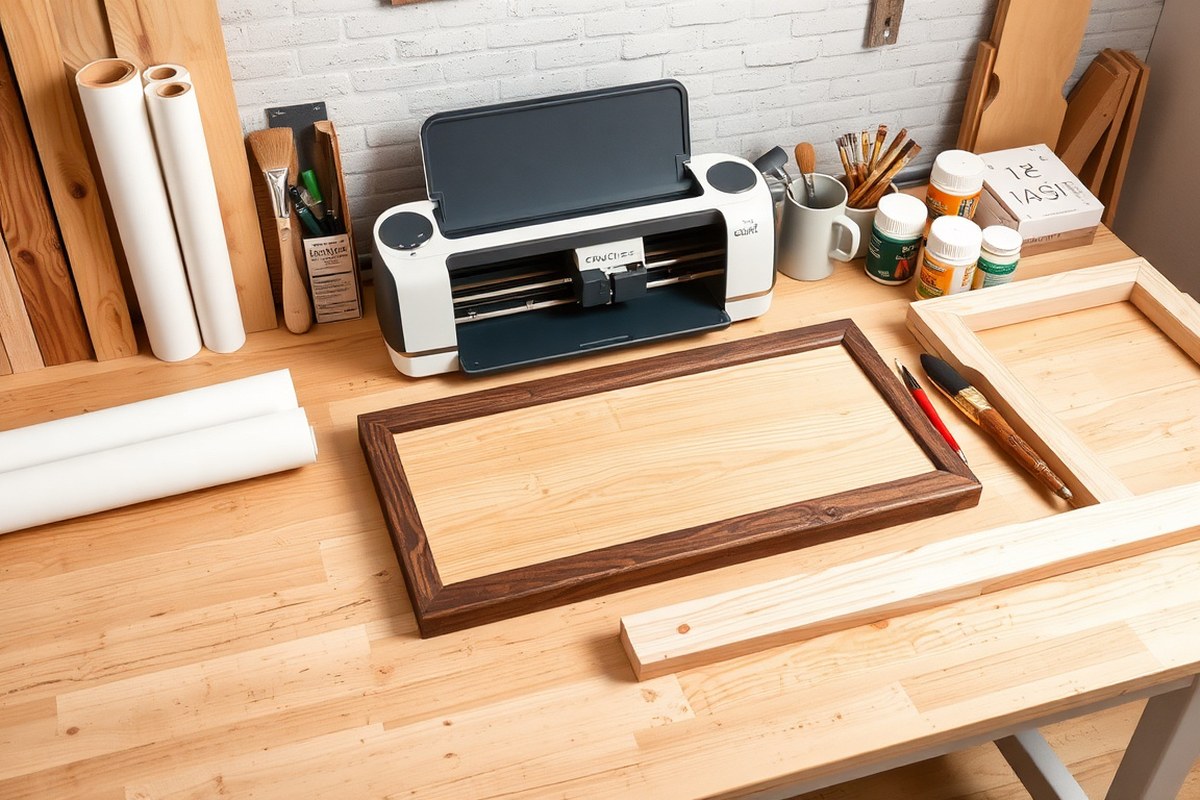
To make a framed wood sign with your Cricut, you’ll need specific materials and tools designed for durability and ease of use. Start with the wood base: choose pine or birch plywood for smooth surfaces that hold paint and vinyl well. A 1/2-inch thickness works best, thin enough to cut and handle easily but thick enough for framing. For the frame itself, solid wood like pine or poplar offers strength and a clean finish. Avoid soft woods prone to dents, especially if your sign will be handled frequently.
Vinyl and paint are critical for clean, lasting designs. Use outdoor or permanent adhesive vinyl designed for wood surfaces, this helps your lettering or stencils stick firmly without lifting. Standard permanent vinyl costs around $3 to $5 per 12×12-inch sheet. For paint, opt for acrylic craft paints formulated for wood; these dry quickly and resist cracking. Select a paint suitable for the sign’s final location, indoor or outdoor, to ensure longevity.
- Wood base: 1/2-inch thick pine or birch plywood, cut to desired sign size (commonly 12×24 inches or larger)
- Frame pieces: 1×2 pine or poplar wood strips, pre-cut or cut to fit the sign perimeter
- Cricut permanent adhesive vinyl for lettering or stencils (12×12-inch sheets)
- Acrylic craft paint for painting the base and lettering (choose colors as needed)
- Transfer tape to apply vinyl designs smoothly onto wood
- Basic woodworking tools: small hand saw or miter saw, brad nailer with 1¼-inch nails or wood glue for framing
- Sandpaper (120 grit) for smoothing wood surfaces before painting
Alternatives save time or reduce costs. Instead of plywood, pre-made wood plaques from craft stores work well and come in standard sizes, usually $10, $20. If you can’t use a brad nailer, wood glue combined with clamps can secure the frame, though it requires longer drying times, 24 hours instead of minutes. For vinyl, consider using stencil vinyl if you plan to paint the lettering rather than applying vinyl letters directly, especially helpful for multi-color designs.
Sanding the wood before applying paint or vinyl prevents splinters and helps the paint stick evenly. Lightly sanding after each paint coat can improve finish smoothness. When choosing vinyl, check the manufacturer’s recommended surfaces; permanent vinyl is best for wood. Avoid removable vinyl because it can peel prematurely, especially outdoors. To protect your finished sign, add a clear sealer like polyurethane if the sign will be exposed to moisture or sunlight, though that step is part of finishing rather than initial preparation.
Choosing and Setting Up Your Cricut Design for Wood Signs
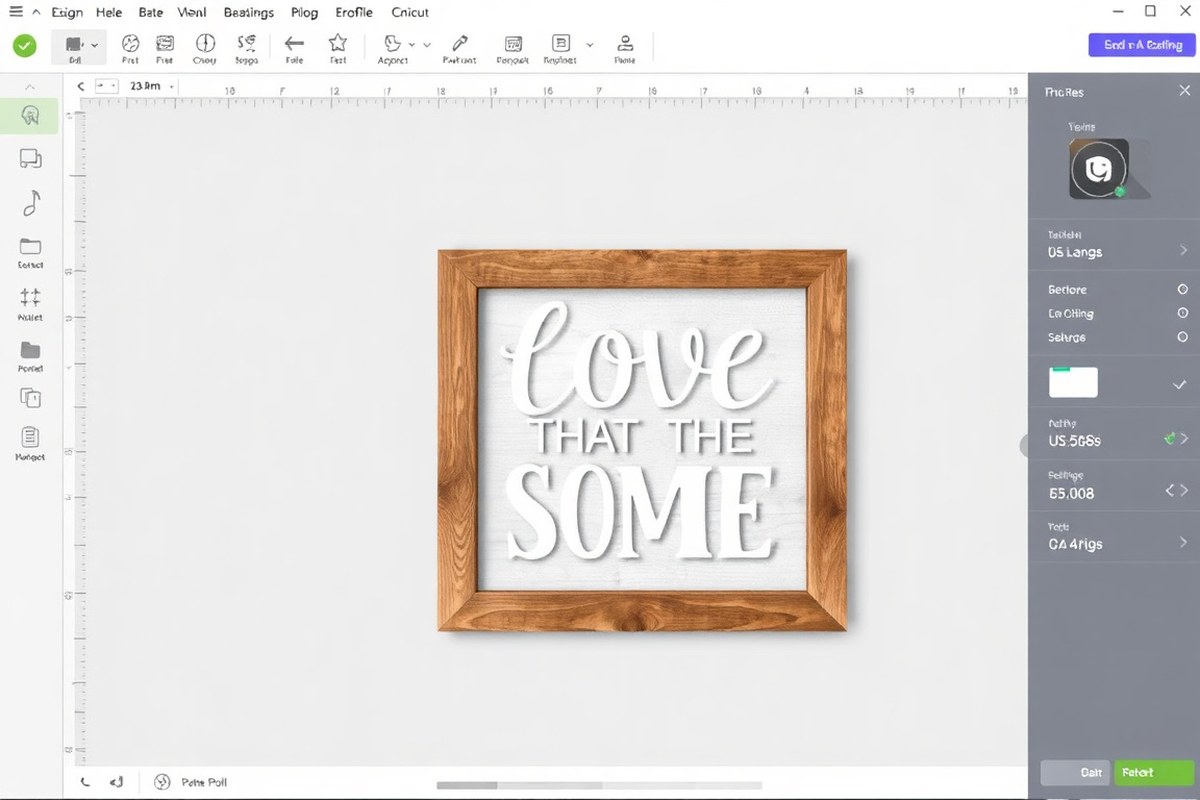
To create your framed wood sign design in Cricut Design Space, start by setting the design to match your wood size, then add or upload the lettering and graphics you want. Adjust fonts, images, and sizes precisely before saving your project. Optimize the file for vinyl cutting by selecting the right materials and settings to ensure clean, accurate cuts for your vinyl or stencil.
Sizing Designs to Match Your Wood Dimensions
Measure the exact dimensions of your wood sign before starting the design. Enter these dimensions in Cricut Design Space by selecting the design and using the resize tool to fit within the width and height of your wood. Avoid making the design too large or too small; leaving a margin around the edges helps with placement and framing.
The maximum cut size depends on your Cricut model and whether you use a cutting mat or Smart Materials. For example, with the Cricut Explore 3 or Maker 3 and Smart Materials, you can cut up to 12 feet long without a mat. If you have an older machine, you may need to split your design into sections that fit on a 12×24-inch mat.
Choosing Fonts and Graphics for Visibility
Fonts should be bold and simple to ensure readability from a distance. Use Cricut Design Space’s font library to pick easily readable styles, especially if painting through a stencil. Avoid thin or elaborate fonts that may be hard to cut accurately or paint neatly.
To add decorative elements, use built-in images or upload SVG files. Resize graphics proportionally to your lettering to maintain balance. Consider adding an offset outline around letters for clear edges and better paint sealing when using stencils.
Preparing Cut Settings for Vinyl and Stencils
Select the “Custom” material setting on your Cricut machine and choose “Stencil Vinyl” or “Permanent Vinyl” depending on your project. Stencil vinyl is ideal for painting letters, while permanent vinyl applies directly. Use a sharp blade and verify the mat or Smart Material is properly loaded.
Add registration marks or use Cricut’s alignment options if making multi-piece stencils to ensure perfect positioning on the wood. Create offsets around text for stencils to prevent paint bleed and improve durability. Test cut a small sample to confirm settings before cutting your final pieces. Follow this step-by-step process to set up your design:
- Open Cricut Design Space and create a new project.
- Measure your wood sign and set custom dimensions in the canvas area.
- Add text or upload SVG images, then arrange elements to fit inside your sign area.
- Choose fonts and adjust letter spacing and size for visibility.
- Add an offset if using stencils to create a border around your letters.
- Select the correct material type (“Stencil Vinyl” or “Permanent Vinyl”).
- Load your vinyl, roll or mat, according to your machine model.
- Preview the cut to verify design placement and prepare for cutting.
Test cutting a small piece of vinyl or stencil material before starting ensures you avoid wasting materials on incorrect settings or sizing. Always double-check measurements and machine setup before cutting.
Cutting Vinyl Lettering and Stencils with Cricut Machines
Loading vinyl correctly and choosing the right material setting on your Cricut are key steps for a clean cut on your wood sign. Using the appropriate vinyl type, permanent or stencil, affects how your design will apply and last on the wood surface. Cutting larger pieces without a mat is an option on some Cricut machines but requires care to avoid errors. Follow a clear process to ensure accurate cuts and smooth transfer.
Selecting the Correct Material on Cricut
Choosing the right material setting affects blade depth and pressure, so your vinyl cuts cleanly without tearing or residue. For a wood sign, permanent adhesive vinyl is best for lettering, while stencil vinyl works well if you plan to paint inside the cut design. Cricut Design Space lets you select specific materials such as “Permanent Vinyl,” “Stencil Vinyl,” or “Vinyl.” These preset settings adjust blade pressure and speed automatically.
Permanent vinyl requires moderate pressure and a fine blade to cut through the thin adhesive layer. Stencil vinyl is usually thicker and may need a slower, more precise cut to prevent jagged edges. Using the correct setting avoids wasting vinyl or damaging the mat.
Loading Vinyl and Using Transfer Tape
Prepare your mat by placing vinyl shiny side down and sticky side up. For stencil vinyl, put the matte side down. Smooth out bubbles or wrinkles with a scraper tool for an even cut. Load the mat into the Cricut machine aligning the leading edge under the rollers, then press the flashing go button.
After cutting, remove the vinyl carefully from the mat to avoid curling. Use weeding tools to peel away the excess vinyl, leaving the design. Apply transfer tape over the vinyl design to lift and position it on the wood sign without stretching or misalignment. Remove the transfer tape at roughly a 45-degree angle to keep vinyl pieces stuck to the tape.
- Cut vinyl pieces to fit your mat size before loading.
- Place vinyl on mat sticky side up for stencil or down for adhesive vinyl.
- Smooth vinyl to remove air bubbles using a scraper.
- Load mat into Cricut machine and press Go to start cutting.
- Unload mat when finished and peel vinyl carefully from mat edges first.
- Weed out excess vinyl around your design using a weeding hook or tweezers.
- Apply transfer tape evenly and burnish with a scraper tool.
- Position the transfer tape over your wood sign and peel transfer tape slowly at a 45-degree angle.
Cutting Long or Multi-Part Designs
Large wood signs often require vinyl wider or longer than your available mats. The Cricut Explore Air 2 can cut vinyl without a mat, which helps with longer pieces. To do this, trim your vinyl to a manageable width and load it directly under the rollers, using the machine’s guides to keep the edge straight.
Multi-part or layered designs benefit from cutting each layer separately and then aligning them on the transfer tape before applying to the sign. This technique prevents misplacement and makes weeding easier. When using multiple mats for one design, label each mat in Design Space and follow the prompts to cut one after another.
Preparing mats in sizes like 12×24 inches allows cutting bigger areas in one go, reducing seams. When using smaller mats, cut stencil or adhesive vinyl on separate mats then assemble on transfer tape outside the sign for precise layering.
Preparing and Painting the Wood Sign Base and Frame
Preparing the wood base and frame well before painting or staining is key to making a sign that looks professional and lasts a long time. Proper sanding, cleaning, and selecting the right finish help paint or stain stick better and prevent issues like peeling or an uneven surface. Following a clear timeline for drying also ensures the best results when applying vinyl or stencil details later.
Sanding and Cleaning the Wood Surface
Sanding smooths rough spots, opens the wood pores for better stain or paint absorption, and removes any dirt or old finish. Use medium-grit sandpaper (around 120 grit) first, then finish with fine grit (220 grit) for a smooth surface without scratches. After sanding, remove all dust and debris by wiping the wood with a damp cloth or tack cloth. This cleaning step is essential as leftover dust can cause paint to clump or peel.
Check the edges and corners of the 1×2 frame lumber carefully to make sure they’re smooth and free from splinters. When the wood features knots or uneven grain, sanding those areas more helps ensure a uniform stain or paint finish.
Choosing and Applying Wood Stain or Paint
Oil-based stains or water-based stains both work well with wood signs, but water-based stains dry faster and clean up with soap and water. For paint, latex or acrylic paints are common choices because they bond well to wood and resist fading. Semi-gloss or satin finish paints provide durability and a smooth look for signs.
Applying your stain or paint in thin, even coats improves adhesion and avoids drips or pooling. Use a foam brush or high-quality synthetic brush for paint to minimize brush marks. When staining, follow the wood grain and wipe off excess stain with a clean cloth after about 5 minutes so it doesn’t get sticky or blotchy. Here’s a simple timeline to prepare and paint or stain your wood sign base and frame:
- Sand the wood starting with 120 grit, then smooth with 220 grit sandpaper.
- Wipe the wood clean of dust with a damp cloth or tack cloth; let dry completely.
- When staining, brush a thin layer with a foam applicator, wipe away extra after 5 minutes, then let it dry for 6 to 8 hours.
- When painting, brush on a thin first coat using a synthetic brush and let it dry for 1 to 2 hours.
- Add a second paint coat for even coverage; allow it to dry fully.
- Inspect the wood for any rough spots; lightly sand with fine grit if needed and wipe clean again.
- Allow the final coat to cure completely before handling or applying vinyl.
Keeping the wood flat on a level surface while drying helps prevent warping. Avoid painting in direct sunlight or very humid conditions, as these can cause bubbling or uneven drying.
Drying and Curing Times Before Vinyl Application
Let paint dry at least 24 hours before applying vinyl lettering or stencils. This ensures the paint has set firmly and reduces the risk of lifting or peeling when you stick vinyl on. After painting, wait an additional 24 hours before placing vinyl for best adhesion and longevity.
Stains usually dry faster, often within 6 to 8 hours, but give them a full day before applying vinyl or other decorations. Patience here pays off by preventing peeling edges or bubbling. Cooler or humid workspaces can slow the curing of finishes, so plan for longer drying times accordingly.
Applying Vinyl Lettering or Stencils to the Wood Surface
Start applying your vinyl stencil by slowly peeling back the white backing paper from the transfer tape at one corner, keeping the vinyl adhered to the tape. Hold the sign steady and gently lay the vinyl stencil onto the wood surface, pressing down as you go to avoid trapping air bubbles. Use a Cricut scraping tool, a craft stick, or even a credit card to firmly smooth the vinyl onto the wood, pushing from the center outward. This pressure helps the vinyl stick properly, reducing gaps and bubbles that can cause paint bleed or peeling later.
Once the vinyl is fully on the wood, remove the transfer tape carefully by pulling it back at a sharp angle, ideally close to 180 degrees, rather than straight up. Doing this slowly reduces the chance of lifting the vinyl stencil from the wood or causing wrinkles. Notice small bubbles? Gently lifting and repositioning the vinyl can often fix the issue before you start painting. Avoid rushing these steps; precise, slow movements are key to good adhesion.
Prevent paint seepage under vinyl stencils by ensuring the edges are tightly sealed. Applying firm pressure when smoothing the vinyl helps create a barrier. You can also press down edges using a burnishing tool to make sure no gaps remain. When painting over stencils, use a dry brush technique or light layers of paint. Avoid applying thick paint coats in one go, as excess paint is more likely to seep under edges. Waiting a few minutes between light coats gives better coverage without seepage.
After painting, let it dry completely before removing the vinyl stencil to reveal sharp paint lines. Peeling the vinyl off too early can cause smudging or peeling paint. Removing it slowly at a low angle helps prevent damage to your design. Paint sometimes seeps under the stencil; lightly sanding the edges or using a fine brush to touch up will clean up imperfections.
Always burnish the vinyl well before removing the transfer tape; poor adhesion here leads to bubbles and paint bleed that are hard to fix later.
Assembling and Framing Your Wood Sign Professionally
Wood signs typically look best with simple, clean frame styles like flat 1×2 lumber for a rustic or farmhouse vibe. You can also choose slightly wider boards or ones with chamfered edges for a more polished look. The key is to pick frame material that complements the wood sign’s texture and size without overpowering the design.
Cutting mitered corners accurately is important for a professional frame. Each corner needs a 45-degree cut so the two pieces form a neat 90-degree angle. Using a miter saw helps achieve precise angles and consistent lengths. Double-check measurements by adding the frame width to your sign dimensions to get the overall size right.
For attaching the frame, combining wood glue with finishing nails or small screws makes the joints stronger and more durable. Reinforce miter corners by adding corner braces or small triangular blocks on the backside where nails or glue might not hold well alone. Follow these steps to assemble and frame your wood sign:
- Measure your sign and frame pieces. Add twice the frame width (typically 3/4 inch per piece) to the sign’s width and height for the final frame size. For example, for a 42-inch long sign with 3/4-inch-wide frame pieces on each side, cut the top and bottom frame pieces to 43 1/2 inches.
- Cut frame pieces from 1×2 lumber. Use a miter saw to cut four pieces: two for the sides and two for the top and bottom. Make 45-degree miter cuts on both ends so they fit together precisely.
- Test fit the frame around the sign. Set the sign on scrap boards about 1/2 inch thick to align frame pieces flush with the sign surface. Adjust any cuts before assembly.
- Apply wood glue to mitered edges. Press all four corners together tightly, ensuring the frame sits flush against the sign backing.
- Secure corners with finishing nails or brad nails. Use a nail gun or hammer to drive small nails at an angle into the adjoining frame pieces to avoid splitting.
- Reinforce corners with corner braces or wood blocks. Attach small triangular wood blocks behind each joint using glue and nails or screws to strengthen the frame.
- Clamp the frame and let glue dry for at least one hour. This ensures a strong bond and minimizes any shifting.
- Sand frame edges smoothly. Use fine-grit sandpaper to remove any rough cuts, especially on miter joints, for a clean finish before painting or staining.
Finishing Touches and Protecting Your Completed Sign
Protecting your framed wood sign involves choosing the right sealant to guard against moisture, sun, and wear. Clear spray sealers designed for wood and vinyl are the simplest option, providing a protective layer without obscuring your paint or vinyl lettering. Look for exterior-grade polyurethane or acrylic sealers that say “UV resistant” and “weatherproof” if you plan to hang your sign outdoors. These typically cost between $8 and $15 per spray can at hardware stores. For indoor signs, a water-based polyurethane sealer is enough to protect against dust and minor spills.
After your paint and vinyl fully cure, usually 24 to 48 hours, apply your sealer in thin, even coats, holding the spray can about 8 to 12 inches from the surface. Spray in a well-ventilated area, wearing a mask and gloves for safety. Multiple light coats (2 to 3) work better than a single heavy coat to avoid drips or cloudiness. Let each layer dry for about 30 minutes before adding the next. Avoid applying sealers in high humidity or temperatures below 50°F, as these conditions can cause bubbles or uneven finishes. Once sealed, wait at least 24 hours before handling your sign to ensure the coating fully hardens.
For extra durability outdoors, applying a marine-grade spar varnish by brush can add long-lasting weather protection. This option requires more skill and drying time but offers superior water resistance and UV protection. Two to three coats spaced by 24 hours each are typical, with light sanding between coats. Spar varnish costs $15 to $25 for a quart, available at paint or marine supply stores.
Properly hanging and storing your framed wood sign also extends its life. When displaying indoors, avoid placing it where direct sunlight hits for many hours daily to prevent fading and warping. Outdoors, hang signs in shaded or protected areas if possible. Use sturdy picture-hanging hardware or weatherproof hooks. Avoid resting the sign directly on damp surfaces or soil, and bring it indoors during extreme weather or winter months.
If you need to store your sign, keep it in a dry, temperature-controlled place. Wrap the sign in soft cloth or bubble wrap to protect the surface and frame. Laying signs flat can prevent bending or warping, but avoid stacking heavy objects on top. With the right finishing and care, your framed wood sign can last for years while keeping its crisp look.
Troubleshooting and Tips for Better Cricut Wood Signs
Vinyl peeling from wood often happens because the surface isn’t clean or smooth enough, or the vinyl adhesive can’t bond well. Before applying vinyl, make sure to clean the wood thoroughly of dust, oils, and residues using rubbing alcohol. Lightly sanding the wood with 220-grit sandpaper can also create a better surface for adhesion. Press the vinyl firmly with a scraper tool, applying even pressure to avoid trapped air bubbles that weaken the bond.
Uneven paint or stencil bleeding usually occurs when the wood absorbs paint too quickly or the stencil paint is applied too heavily. Applying two coats of the stain where you plan to paint, especially on raw or untreated wood, helps seal the surface and reduces bleeding. Use only a small amount of paint on a stencil brush, then remove excess paint by dabbing it off on a separate surface before applying. This helps the paint stay within the stencil edges for cleaner lines.
Crisp cuts depend on blade sharpness, proper material settings, and keeping the mat sticky and flat. If your Cricut cuts are rough or incomplete, check that the blade is clean and not dull. Adjust the cut pressure and use the recommended material setting for vinyl or stencil paper. Replace the cutting mat if it’s lost adhesion or warped. Always load your material firmly and ensure it’s flat on the mat without wrinkles or bubbles.
- Clean and sand the wood surface before applying vinyl
- Apply two coats of stain to areas where you’ll paint to prevent bleeding
- Use a stencil brush with minimal paint, wiping off excess before applying
- Press vinyl firmly with a scraper, removing air bubbles carefully
- Check and replace dull blades and sticky mats regularly
- Adjust cut pressure and material settings on the Cricut for clean cuts
- Keep vinyl and stencil material flat and secure on the cutting mat
Applying the second coat of stain only where paint will go prevents paint bleed without darkening the entire wood piece.
Good results include vinyl edges that lay flat without lifting and paint-lined details staying crisp and inside stencil boundaries. Fix peeling vinyl by gently reheating the adhesive with a hairdryer and pressing it down. Repaint any bleeding with a small artist brush for touch-ups. Cleaning the mat and blade regularly costs little but greatly improves cut precision. These steps prevent most common issues and save time in your next framed wood sign project.
Step-by-Step Action Plan for Your Framed Wood Sign
Follow these clear steps to create your framed wood sign from start to finish. Each phase builds on the last to keep your project on track and looking great.
- Before you start: Gather all materials and tools, including your wood, Cricut machine, vinyl, paint, and frame pieces. Confirm you have what you need to avoid delays.
- Day 1: Select or create your Cricut design and set it up for cutting vinyl. Preview the cut to ensure it matches your sign size and style.
- Day 2: Cut your stencil or lettering with the Cricut and weed excess vinyl. Check that all letters and shapes are cleanly cut and ready to apply.
- Day 3: Prepare your wood base by sanding and painting the background color. Let the paint dry thoroughly until it feels smooth and no longer tacky.
- Day 4: Apply your vinyl stencil or lettering carefully to the wood. Press down firmly and check for bubbles or loose edges before painting or removing the stencil.
- Day 5: Paint over the stencil or fill in the design. Once dry, slowly remove the vinyl to reveal crisp edges without paint bleed.
- Day 6: Assemble the frame around your sign securely, using wood glue and finishing nails if needed. Make sure corners are square and the frame sits flush.
- After 1 week: Seal your completed sign with a protective clear finish. Confirm it feels dry and resists fingerprints or scratches before using or gifting.
Frequently Asked Questions
Can I Make a Framed Wood Sign with a Cricut Explore Air 2?
Yes, you can use the Cricut Explore Air 2 to cut vinyl stencils or lettering for a framed wood sign. It works well for beginner to intermediate projects and allows precise cuts on vinyl to transfer to wood surfaces.
What Kind of Wood Is Best for Cricut Wood Signs?
Pine or poplar wood boards with a smooth, flat surface work best for Cricut signs. They hold paint and vinyl well and are easy to sand and frame. Avoid rough or warped wood for cleaner results.
Can I Use Iron-On Vinyl on Wood Signs?
Iron-on vinyl is not recommended for wood because it requires heat activation that doesn’t bond well with wood’s texture. Adhesive vinyl is better for sticking smoothly and lasting longer on your wood sign.
How Can I Prevent Paint from Bleeding Under My Vinyl Stencil?
Use a small amount of paint and apply in thin layers, allowing each to dry completely. Sealing the wood first with a clear coat can also reduce bleeding under the stencil edges.
Do I Need to Seal My Wood Sign After Applying Vinyl?
Sealing isn’t always necessary, but applying a clear acrylic sealer protects the paint and vinyl from wear and sun damage, especially for signs displayed outdoors.
Can I Make a Large Wood Sign with a Cricut Machine?
Yes, though you may need to cut your design in sections to fit the Cricut cutting mat. Then piece your vinyl or stencil sections carefully on the large wood surface.
The Bottom Line
Creating your framed wood sign with a Cricut lets you customize décor with precision and style. Focus on preparation and careful layering for the best results. Start by choosing a design that excites you and gather your materials today to make your personalized sign project real.