How to Make a Business Sign DIY: 8 Essential Steps for Effective Results
Learning how to make a business sign DIY puts you in control of your brand’s first impression while saving money. Creating your own sign lets you customize the design to fit your business style perfectly and choose materials that work best for your location. Start by clearly defining your sign’s purpose to help guide your design and material choices.
Key Takeaways
- Define your sign’s message and target audience before starting the design process.
- Choose materials suitable for your sign’s location and expected weather exposure.
- Use bold, clear fonts to maximize readability from a distance.
- Consider your brand colors to maintain consistency and increase recognition.
- Plan the size according to visibility requirements and local signage regulations.
- Incorporate weatherproofing techniques to extend your sign’s lifespan outdoors.
1. What Is a DIY Business Sign and How It Works
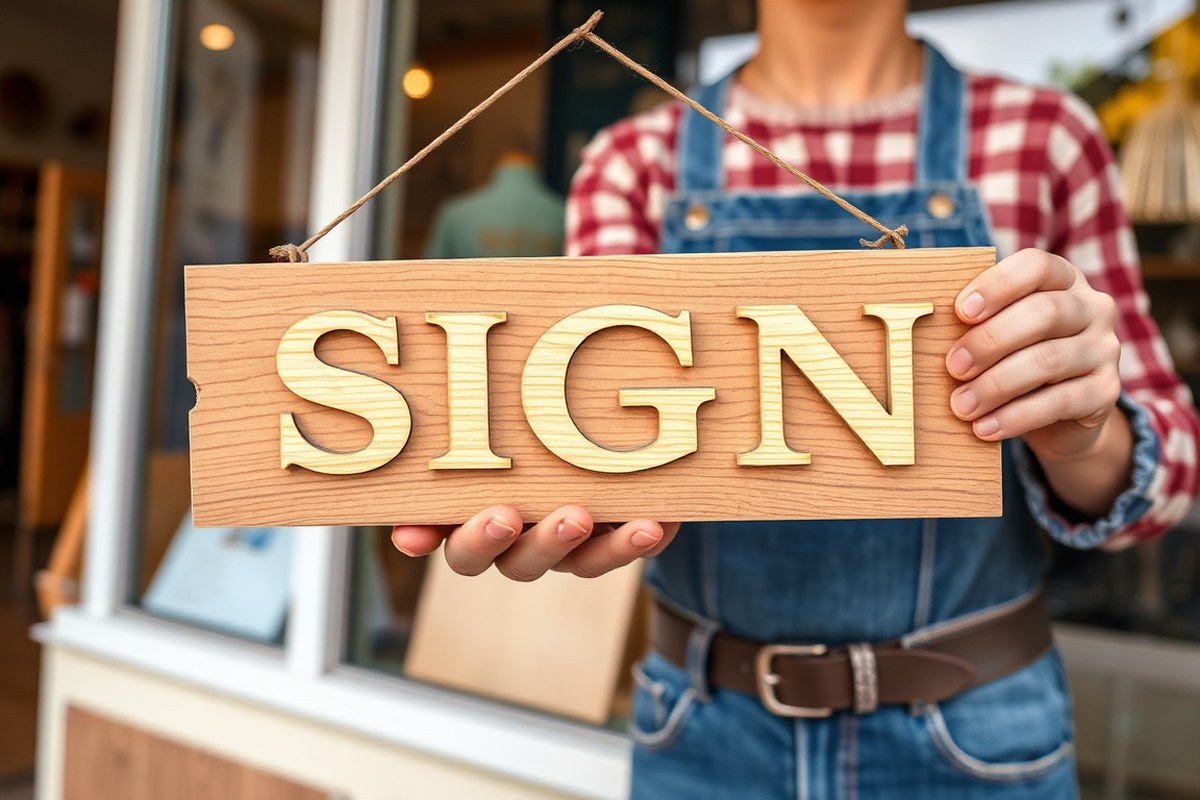
A DIY business sign is any sign that you design and create yourself instead of hiring a professional company. Examples include painted wood pallet signs, chalkboard messages you can update regularly, fabric banners with your logo or sales message, and even 3D letter marquees that you decorate with paint or lights. These signs serve the same basic purpose as commercial signs: to attract attention, communicate your brand’s message, and increase visibility at your business location.
Choosing to make your own business sign lets you save money and customize the design to fit your exact needs. Professional commercial signs can cost several hundred to thousands of dollars depending on size, materials, and complexity. A DIY approach often costs under $50 to $200 if you buy basic supplies like wood, paint, and stencils, making it a budget-friendly option for startups or seasonal promotions. Creating your sign also lets you control every detail, from choosing colors that match your brand palette to changing messages as often as you like, such as with a chalkboard or scroll sign where you simply swap out paper rolls.
DIY signs give small business owners flexibility, but they come with some challenges. You’ll need basic crafting skills, patience, and time to complete your project. Accuracy in measurements, layout, and materials is essential for a professional-looking result. A poorly executed DIY sign can hurt your brand image more than not having a sign at all. In comparison, commercial signs offer durability, professional finishes, and installation services but come with higher costs and less frequent updates.
Research from the University of Cincinnati shows that about 60 percent of businesses experienced sales increases by improving visibility or design of their signs, with an average increase of around 10 percent. Well-made DIY signs can contribute to this boost by catching customer attention and reinforcing your brand. Make sure your DIY sign aligns with your existing branding to maintain consistency, including fonts, colors, and messaging tone.
Many business owners use DIY signs for quick, low-cost marketing solutions or temporary displays during sales or seasonal events. For permanent outdoor signage, investment in professional consultation and materials often provides better lifespan and visibility. However, simple exterior signs like painted arrows or customized lettering on everyday business equipment can both improve brand identity and attract foot traffic without large expenses or complex installation.
Crafting your own business sign also encourages creativity and gives you control to make adjustments based on what you learn over time. Spending time in the planning stage to select the right materials and location improves your chances of making a sign that works well for your specific business. By starting with affordable materials and simple designs, you can create attractive DIY signs that improve brand recognition while saving money and gaining the satisfaction of doing it yourself.
2. How to Plan Your DIY Business Sign for Maximum Impact
Your DIY business sign should start with a clear purpose, a well-scouted location, the right size and shape, and basic design choices. Establishing these before building ensures your sign is visible, effective, and compliant with local rules.
Define the Sign’s Purpose and Message
Begin by deciding what your sign needs to do. Is it to attract new customers, direct traffic, or promote a special offer? The message and goal shape every other decision. Keep it simple: a business name, a slogan, or a directional cue work best. For example, if the goal is to guide customers inside, include an arrow or “Entrance” text.
Clarify if the sign is permanent or temporary, as this changes material and design considerations. Temporary signs might showcase seasonal deals, so they should be easy to update or replace. Permanent signs represent your brand continuously, which calls for professional-grade finishes and durable materials.
Choose the Location for Best Visibility
Walk your property and nearby streets to pinpoint locations where your sign will be noticed. Visibility depends on traffic flow, distance, and sight lines clear of obstructions like trees or parked cars. A sign near sidewalks suits slower pedestrians, while a sign for motorists must be readable at higher speeds and longer distances.
Scan for compliance with local sign codes, which often set rules on placement, height, and setbacks from property lines. Awareness of these limits stops costly reworks later. Consider lighting: a well-lit spot or the ability to add lighting improves nighttime visibility.
Test different spots by holding a mock-up sign to see its impact from various angles and distances. Visibility varies with weather and time of day, so observe under different conditions.
Select the Ideal Size and Shape
The size of your sign and letters depends on how far away it needs to be seen. The United States Sign Council Foundation suggests letter heights based on viewing distance: a sign for drivers on a 45 mph road needs taller letters than one viewed by pedestrians. For example, letters should be about 7 inches tall for visibility from 50 feet and up to 12 inches or more from 100 feet.
Shape should fit the content and location. Rectangular signs suit most text, while arrow shapes work for directional signs. Consider whether the sign will be full-scale, a hanging panel, or wall-mounted, as this impacts design and material choices.
Plan your sign’s proportions to balance lettering size with available space without overcrowding the message. A clear white or contrasting background boosts legibility.
Basic Design Element Decision Rules
Simplicity is key. Use high-contrast colors between text and background, like black on white or yellow on blue. Fonts should be clear, sans serif, and bold, avoiding decorative styles that reduce readability. Limit words to under 10 for quick comprehension.
Incorporate your logo and brand colors for consistency, but don’t let complex details clutter the sign. For signs meant to change often, such as chalkboards, whiteboards or replaceable panels allow quick updates.
Secure any necessary permits by preparing a basic design that meets local rules on brightness, animation, and size restrictions. Review the rules early to avoid expensive changes during or after construction.
Planning Checklist for Your DIY Business Sign
Use this step-by-step checklist to ensure your planning covers key points before building:
- Define the goal: attract customers, direct traffic, or advertise
- Draft the exact message and wording
- Survey the property and surrounding area for the best spot
- Review city or county sign codes and obtain necessary permits
- Measure viewing distances to determine letter height and overall sign size
- Choose a shape fitting the location and message type
- Select clear, contrasting colors and legible fonts
- Decide if the sign will be permanent or temporary
- Test your design and location with mock-ups under real conditions
Following this checklist minimizes costly mistakes during construction. Once complete, you’ll have the foundation for an effective, compliant sign that boosts your business visibility.
Confirm local sign regulations and get permits early; last-minute changes to size or location can increase costs dramatically.
3. Choosing Materials and Tools for DIY Business Signs
Choosing the right materials and tools for your DIY business sign impacts how long it lasts, how professional it looks, and how easy it is to create. Wood and acrylic are among the easiest materials to handle for beginners. Wood offers a rustic look and only requires basic tools like a saw, sandpaper, and paintbrushes. Acrylic provides a smooth surface ideal for paint or vinyl lettering, but needs a plastic cutter or laser cutter for shaping.
Outdoor weather resistance is important for signs exposed to sun, rain, or wind. Aluminum or aluminum composite material (ACM) is the top choice for outdoor signage due to its rustproof, flat surface that holds paint or printing for years. However, metal typically requires power tools like drills and metal cutters, which could be challenging for newcomers.
Fabric signs, like banners, are lightweight and portable. They often use vinyl or mesh and require sewing machines or grommet kits for finishing. Chalkboards give a classic touch, great for menus or temporary messaging, but need regular upkeep and weather protection if outside.
| Material | Ease for DIY | Cost Estimate | Durability / Weather Resistance | Essential Tools |
|---|---|---|---|---|
| Wood | Easy | Under $20 (e.g., 3 boards for large signs) | Moderate; requires sealant for outdoors | Saw, sandpaper, paintbrushes, paint |
| Acrylic | Moderate | $10 – $30 per sheet | Good with proper sealing; indoor/outdoor possible | Plastic cutter, paintbrushes, vinyl cutter (optional) |
| Aluminum/ACM | Challenging | $50 – $100+ depending on size | Excellent; rustproof and long-lasting for outdoors | Drill, metal cutter, primer, paint |
| Fabric (Vinyl/Mesh) | Easy | $15 – $40 for banner-size | Good; weather-resistant but needs finishing | Sewing machine, grommet kit, heat press (optional) |
| Chalkboard | Easy | $10 – $25 | Low; sensitive to weather, best under shelter | Chalk or chalk markers, sealant spray |
Tools vary based on your material choice. Basic hand tools like sandpaper, paintbrushes, and scissors cover wood and fabric projects well. Power tools, including saws and drills, handle larger or tougher materials like wood and metal. Vinyl cutters and heat presses are optional extras that improve lettering quality, especially on acrylic or fabric.
Buying materials such as wood boards or acrylic sheets from local hardware stores keeps costs low and allows you to cut pieces to your desired size. For example, crafting two farmhouse-style wood signs in one day can cost under $20 with three boards. Signs made from aluminum or ACM require a greater upfront investment, but they provide long-term durability, making them worth the cost for permanent outdoor use.
4. Popular DIY Business Sign Types with Step-by-Step Instructions
You can make your own business signs using a few common materials and simple methods tailored to your specific needs and style. These options range from rustic wood pallet signs to flexible chalkboards and vibrant fabric banners, plus eye-catching 3D letter marquee signs. Each type fits different business vibes and budgets while offering unique decoration and durability features.
DIY Wood Pallet Sign Instructions
Wood pallet signs provide a rustic look perfect for cafes, boutiques, or farm stands. They are affordable since you can often find pallets for free or under $10. This type of sign is sturdy for outdoor use and lends a homey charm to your brand presence.
Gather sandpaper, wood stain or paint, stencils or freehand paint, and sealant to protect the wood. Prioritize single-use pallets without broken slats for safety and neatness. Anticipate about 2-3 hours for preparing and painting, plus 24 hours drying time for sealing.
- Disassemble and de-nail the pallet if needed; sand all wood surfaces smooth to avoid splinters and prepare for painting.
- Apply wood stain or paint a base color, allow it to dry fully for 8-12 hours.
- Position stencils or sketch your letters and design; paint your business name using exterior-grade paint or wood markers.
- After lettering dries, seal the entire sign with clear outdoor polyurethane or spray sealant to protect against weather damage.
- Attach hanging hardware or stands depending on whether the sign is wall-mounted or free-standing.
How to Build a Chalkboard Sign
A chalkboard sign works for businesses that change messages often, like daily specials, event notices, or seasonal greetings. It requires minimal materials and can be updated without any extra cost, making it an ideal cost-effective option starting at about $15 for supplies.
Use a pre-made chalkboard sheet or create your own by painting a smooth board with chalkboard paint. Match your business aesthetic with frame styles from plain wood to ornate finishes.
- Cut a smooth wood or MDF board to your desired size and clean the surface thoroughly.
- Apply two coats of chalkboard paint, letting each coat dry for 1-2 hours in a dust-free area.
- Once dry, condition the board by rubbing the side of a piece of chalk over the entire surface, then wipe clean.
- Add a frame or mount it securely to give a finished look.
- Write your message or draw graphics using quality chalk markers or traditional chalk for easy updates.
Making a Fabric Banner Sign
Fabric banner signs add a festive, textured look to markets, store openings, or promotions. These signs are lightweight and portable, costing between $10 and $30 depending on fabric size and paint type. You can reuse fabric banners by swapping out letters or designs using fabric paints or iron-on vinyl.
Choose sturdy canvas or cotton fabric that can withstand sunlight and occasional moisture. Combine with ribbons or grommets for hanging. For clear letters, design templates on Canva or hand-paint each letter within separate flag shapes for a bunting effect.
- Cut fabric into triangular or rectangular pennants about 6 x 8 inches each.
- Draw or stencil one letter per pennant spelling out your business name or slogan.
- Use fabric paint or iron-on vinyl letters for durability; ensure paint dries 24 hours before handling.
- Attach pennants to a long ribbon, spacing evenly with knots or sew edges to keep them secure.
- Hang the banner at your event, storefront, or inside your shop for easy messaging updates.
Creating a 3D Letter Marquee Sign
3D letter marquee signs bring dimensionality and illumination to your signage on a modest budget if you DIY. For less than $50, you can repurpose materials like foam board, LED strip lights, or battery-operated fairy lights to highlight your brand or event.
Select lightweight foam board or thin plywood letters cut to size, then decorate and add lighting. These signs attract attention at night and have a modern yet playful appeal, suitable for indoor displays or covered patios.
- Trace or print your letters onto foam board or plywood; cut out carefully using a craft knife or small saw.
- Paint letters with your brand colors using an acrylic or spray paint for smooth coverage.
- Install LED strip lights or battery-operated mini lights around the edges or inside hollowed letters.
- Secure wiring neatly on the back, ensuring batteries are easy to replace and lights are weather-protected for outdoor use.
- Mount your letters on a flat surface or stand them upright for maximum visibility.
5. Design Tips to Create Eye-Catching and Brand-Consistent Signs
Choosing the right colors and fonts is essential to make your business sign both eye-catching and consistent with your brand. Start by picking colors that reflect your brand’s personality and stand out against the sign’s background. High contrast between text and background improves visibility. For example, white or yellow letters on a dark background work well for outdoor signs, especially along busy roads where drivers have just seconds to read them. Avoid low-contrast schemes like light gray on white, which reduce readability.
Fonts should be simple and easy to read from a distance. Sans-serif fonts such as Helvetica or Arial are popular because they maintain clarity at different sizes. Letter sizes depend on viewing distance; a useful rule is 1 inch of letter height for every 10 feet of viewing distance. For a sign visible from 50 feet, use at least 5-inch tall letters. Keep decorative or script fonts to a minimum, reserving them for secondary text or logos where clarity is less critical.
Maintaining brand consistency means including your logo, brand colors, and fonts consistently across all signs, which helps customers recognize your business easily. Use your business’s official color palette, which may include primary and secondary colors, and stick to the same fonts used in your marketing materials. This not only boosts professionalism but also builds trust. If you’re using a pre-made template, customize it with these brand elements rather than accepting default colors or fonts.
Effective layout is about clear hierarchy and spacing. Place your most important information, usually your business name or key message, at eye level and give it the most prominent size. Secondary details like services, contact info, or slogans should support without cluttering. Avoid overcrowding by leaving enough white space around text and images; this helps the sign “breathe” and makes scanning easier. Align elements consistently using grids or guides, ensuring the sign looks balanced. For example, a layout checklist might include: a bold headline in large, sans-serif font; logo placed top left or center; brand colors prioritized for background and highlights; subtext smaller but legible; and at least one inch of margin between content and sign edges to avoid cutoff or visual crowding.
Designing your sign with these tips can cost as little as $20 on design software or use free online tools offering branded templates to save time. You can adjust your design quickly until everything fits your brand and reads well from the expected distances. A poorly designed sign might have tiny fonts, confusing colors, or a crowded layout that causes people to pass right by without noticing.
Test your design by viewing it from a distance equal to where most customers will see it to ensure readability and color impact before finalizing your sign.
6. Weatherproofing and Maintaining Outdoor DIY Business Signs
Protecting your outdoor DIY business sign from weather elements ensures it stays visible and attractive longer. Weatherproofing involves preventing damage from rain, sun, wind, UV light, humidity, dirt, and temperature changes. Start by choosing materials suited for outdoor use: acrylic is excellent for illuminated signs, while PVC and sign-grade plastics are budget-friendly options for short-term signs. Sealed exterior wood can also work if you prefer a rustic look and commit to regular maintenance.
Sealants and coatings create a barrier against moisture and UV rays. For wood signs, apply multiple coats of a clear exterior-grade polyurethane or spar varnish. These coatings provide flexible protection that withstands expansion and contraction due to outdoor temperature swings. Apply at least two to three coats, letting each dry for 24 hours; lightly sand between coats for smooth results. Expect to spend $15 to $30 for a quart, enough to cover several signs depending on size.
Acrylic signs benefit from UV-resistant spray sealants formulated for plastics. These sprays prevent yellowing and cracking caused by sun exposure. Follow the product’s instructions carefully, spraying in thin, even layers while avoiding drips. Multiple light coats typically work better than one heavy coat. Costs range from $10 to $25 per spray can. Avoid using strong solvents, which can cloud or damage acrylic surfaces.
To maintain your sign, clean it gently every 1 to 3 months using mild soap and water with a soft cloth. Avoid abrasive scrubbers or harsh chemicals that can degrade the finish or paint. Inspect your sign quarterly for any cracks, peeling, or warping. Promptly touch up sealants or repainting to prevent further damage. For wood signs especially, plan to reseal every year or two, depending on local weather conditions.
Strong winds can loosen mounting hardware or cause physical damage. Secure your sign with durable anchors appropriate for the surface, such as heavy-duty screws or brackets designed for outdoor use. Regularly check fasteners following storms or high winds. Keep in mind that sign size and weight affect the type of mounting hardware needed.
Good weatherproofing results in a sign that retains bright colors, clear text, and structural integrity despite exposure. Signs neglected in sealing and maintenance may suffer fading, cracking, mold growth, or warping in just a few months. Invest the time and materials in proper weatherproofing and upkeep to maximize your sign’s lifespan and protect your brand image outdoors.
7. Safe Installation Techniques for DIY Business Signs
Securing your DIY business sign safely depends on the sign’s material and mounting surface. Using the right hardware and tools ensures your sign stays in place, looks professional, and avoids damage to walls or structures. Follow specific installation steps based on your surface and use safety gear to protect yourself throughout.
Mounting Signs on Wood or Drywall
Wood and drywall are common surfaces for indoor or sheltered sign placement. Signs made from medium-density fiberboard (MDF) or plywood can be fastened directly to wooden studs or drywall anchors. Using the correct screws and anchors prevents weakening the wall and keeps your sign stable.
For drywall, use plastic expansion anchors or toggle bolts rated for the sign’s weight. On wood, wood screws penetrating about 1.5 inches offer solid grip. Avoid relying on nails alone, as they may loosen over time. Measure and mark your mounting points precisely, preferably aligning with wall studs for extra security.
Installing Signs on Brick and Concrete
Brick and concrete require more specialized hardware due to their hardness. Use masonry anchors, sleeve anchors, or concrete screws designed to expand inside drilled holes. A power drill with a masonry bit will be essential to make holes properly without cracking the material.
Pre-drilling holes 3/8 inch in diameter and about 2 1/2 inches deep allows the anchors to fit tightly. Choose anchors rated for at least 25% more weight than your sign to provide a safety margin. Avoid attempting to mount heavy signs without this hardware, as loose fasteners can cause injuries or damage.
Safety Equipment and Best Practices
Always wear goggles when drilling, especially into masonry, to protect your eyes from dust and debris. Use gloves to avoid sharp edges on metal or wood signs. A dust mask can prevent inhalation of fine particles when working with drywall or concrete.
Secure your ladder on an even surface if mounting signs above head height, and have a helper hold it steady. Double-check power tool settings and cords before starting. Never climb on unstable surfaces, and work during daylight or in well-lit environments to see clearly. Follow these steps to install your sign safely:
- Measure and mark the exact location for your sign considering visibility and clearance.
- Choose the hardware suitable for your wall type: wood screws and anchors for drywall, masonry anchors for concrete or brick.
- If necessary, drill pilot holes with the right bit size matching your anchors or screws.
- Insert anchors into drilled holes if using masonry or drywall-specific hardware.
- Hold the sign in place and align mounting holes with anchors or studs.
- Insert screws or bolts and tighten them securely without overdriving, which can weaken the grip.
- Check that the sign is level and stable after installation.
- Clean the work area and store tools safely to avoid accidents.
8. Common DIY Business Sign Mistakes and How to Avoid Them
Poor sizing is one of the most common mistakes that reduce a business sign’s effectiveness. A sign that’s too small won’t grab attention, while an oversized sign can look unprofessional and expensive to produce. Pick sizes that suit your location and expected viewer distance, letters at least 4 inches tall for pedestrians and 8 inches or more for drivers help maintain legibility.
Illegible fonts or confusing text also undermine your message. Simple, bold fonts like Arial or Helvetica work best; avoid overly decorative styles. Keep your wording brief and clear. Contrast colors well, dark text on a light background or vice versa, to boost readability even at a glance.
Lack of weatherproofing leads to fading, peeling, or damage quickly, especially outdoors. Use weather-resistant paints, sealants, or laminates designed for outdoor signs. Regular maintenance every 6 to 12 months extends sign life. Failure to weatherproof may cost you extra to replace the sign prematurely.
Noncompliance with local permits and regulations can result in fines or forced removal. Check with your city or county zoning office before installation to secure necessary permits. They’ll specify size limits, placement rules, and lighting restrictions. This ensures your sign is legal and avoids costly delays or penalties.
- Choose sign size based on typical viewing distance and location
- Use high-contrast, simple fonts for readability
- Weatherproof signs with sealants or outdoor-grade materials
- Verify local sign codes and secure required permits
- Install signs safely and securely to prevent hazards
- Replace faded or damaged signs promptly to maintain professionalism
Check your sign’s visibility at different times of day and from various angles before finalizing your design to avoid costly redesigns.Faded or poorly designed signs can often be refreshed by repainting or replacing key elements like lettering. If you’re uncertain about compliance or if the sign will be mounted in a tricky location, such as close to electrical wires or on a busy roadside, consulting a licensed professional is a safer choice. Professional help can ensure the sign meets all local regulations, uses proper materials for durability, and is installed with safety standards in mind, which saves money and hassle over time.
Step-by-Step Action Plan to Create Your DIY Business Sign
Follow these steps to design, build, and install an effective business sign that draws attention and meets local rules.
- Before you start: Research local sign regulations to ensure compliance. You’ll know you’re set when you understand size, lighting, and placement rules.
- Day 1: Sketch your sign design using your brand colors and fonts. Confirm your design grabs attention by showing it to others for feedback.
- Day 2: Choose durable materials and necessary tools based on your design and outdoor conditions. Verify materials suit weatherproofing needs.
- Day 3, 4: Cut and assemble the sign components following step-by-step instructions for your chosen style. Check alignment and stability as you go.
- Day 5: Apply weatherproofing sealants or coatings to protect your sign. Let it dry fully, ensuring it will last through seasonal changes.
- Day 6: Prepare your installation site safely by checking surfaces and gathering mounting hardware. Confirm your mounting method supports the sign’s size and weight.
- Day 7: Install the sign using recommended secure techniques. Inspect the installation to confirm it is stable and visible from key customer areas.
- After 2 weeks: Evaluate the sign’s effectiveness by tracking customer feedback and visibility changes. Adjust placement or design details if needed.
Frequently Asked Questions
What Permits Do I Need for a DIY Business Sign?
You usually need local permits for outdoor business signs, which vary by city. Check with your city’s zoning office to avoid fines and ensure compliance before you start creating your sign.
How Do I Test My DIY Sign Before Finalizing It?
Test your sign at the intended location to confirm visibility and fit. Checking from different angles and distances helps ensure it communicates your message effectively.
Can a DIY Business Sign Increase My Sales?
Yes, upgrading your business sign’s design or visibility can boost sales by around 10%. Investing in a quality DIY sign makes your business easier to find and remember.
What Are Budget-Friendly Materials for a DIY Business Sign?
Wood pallets, chalkboards, and fabric banners are cost-effective options. They allow customization without high expenses while still attracting attention to your business.
How Do I Maintain Brand Consistency with My DIY Sign?
Match your sign’s colors, fonts, and style to your existing branding. Keeping this consistency helps reinforce your business identity and builds customer trust.
Is a DIY Business Sign Suitable for Long-Term Outdoor Use?
Yes, with proper weatherproofing and maintenance, DIY outdoor signs can last. Use sealants and durable materials to protect against rain, sun, and wind.
Wrapping Up
A well-made DIY business sign can attract customers and strengthen your brand without the cost of professional services. Start by selecting your design and materials carefully, then follow safe installation steps. Taking action today on the design phase will put you on track to create a sign that truly supports your business growth.