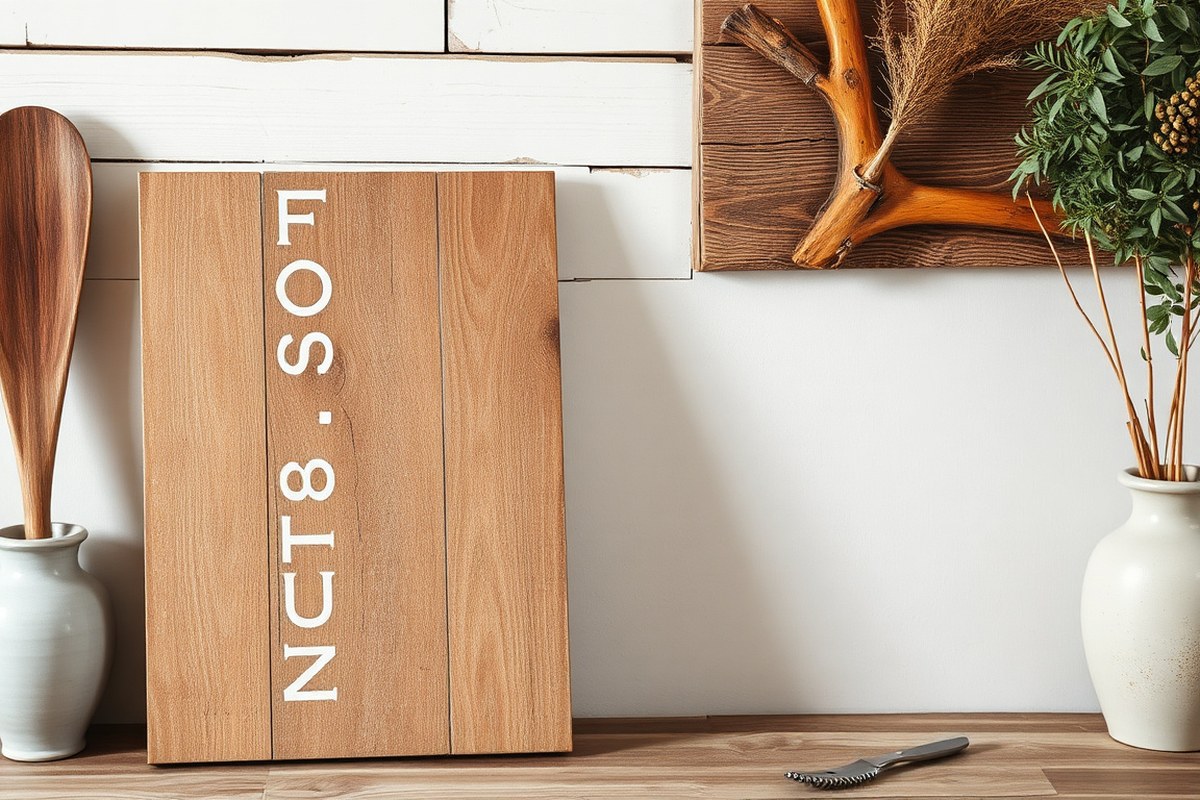
DIY Rustic Sign Ideas and Techniques: A Complete Step-by-Step Guide
Creating a DIY rustic sign adds warm, charming character to any space with a personalized touch. Start by selecting the right wood and simple materials, then focus on distressing techniques for an authentic weathered look. Precise preparation and transferring your design ensure each sign stands out as a unique piece of decor.
Key Takeaways
- Choose wood like pine or reclaimed pallets to achieve authentic rustic textures.
- Measure the wood carefully since 4-foot lengths vary slightly in size for accurate sign dimensions.
- Use a foam brush to apply stain and let it sit 5 to 10 minutes for deep, lasting color.
- Distress wood by sanding unevenly around edges and surface to improve rustic appeal.
- Transfer artwork using carbon paper or printed stencils for clean, precise lettering or designs.
- Seal the sign with clear varnish or wax to protect and preserve the rustic finish.
What Is a DIY Rustic Sign and Popular Styles
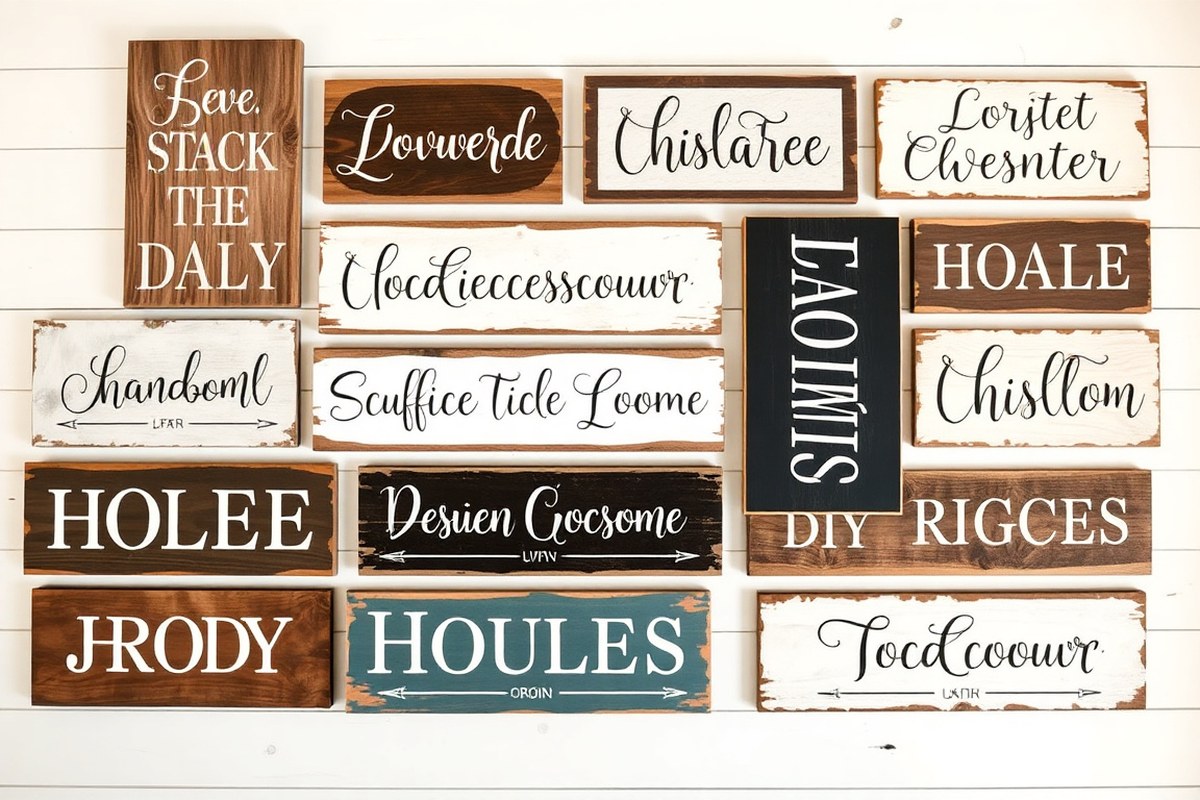
DIY rustic signs are handmade wooden signs designed to bring a natural, aged, and simple aesthetic to home decor. The rustic style emphasizes natural textures, imperfections, and a warm, cozy feel that celebrates the charm of wood’s raw beauty. This style often features rough or distressed wood surfaces, faded paint, or visible grain and knots to create an authentic countryside vibe. Rustic signs typically avoid glossy finishes or perfect edges, aiming instead for a handcrafted look that complements farmhouse, cabin, or vintage-inspired interiors.
Popular rustic signs for home decor include wood pallet signs, plank boards with painted or stenciled text, and chalkboard-style pieces. These often showcase welcoming or inspirational phrases like “Gather” or “Home Sweet Home,” sometimes paired with seasonal messages for holidays or fall themes. Another common type uses reclaimed wood, which adds character and sustainability to the project. Signs made this way can cost as little as $10 to $25 in materials if you find inexpensive or recycled wood, paint, and basic tools at your local DIY store. The designs are easy enough for beginners to tackle in a few hours, producing results that look professionally made but reflect your own creativity.
Choosing the rustic look you want involves considering the level of distressing, color palette, and style of lettering or artwork. For example, a heavily weathered surface with chipped white paint and bold black lettering lends a classic farmhouse feel. A minimally sanded, lightly stained plank with cursive script feels more modern but still casual. To identify your preferred rustic style, start by gathering inspiration photos or browsing DIY project collections that showcase different textures and text treatments. Think about where the sign will go and what mood you want to convey. A kitchen sign might use farmhouse fonts and soft pastel paint, while an entryway sign could feature deeper wood tones and rustic metal accents.
Successful rustic signs balance imperfect wood with simple, clear designs. Avoid overly shiny paint or perfectly sharp edges, which clash with the rustic appeal. Instead, focus on layering colors by dry brushing or sanding after painting to reveal wood beneath. Using stencils or freehand painting adds a personal touch without overcomplicating the process. Most DIY crafters find they get better results by embracing visible brush strokes and minor flaws as part of the charm. Materials and time investment stay low while the finished product brings warmth and personality to any room.
Choosing the Right Wood and Materials for Rustic Signs
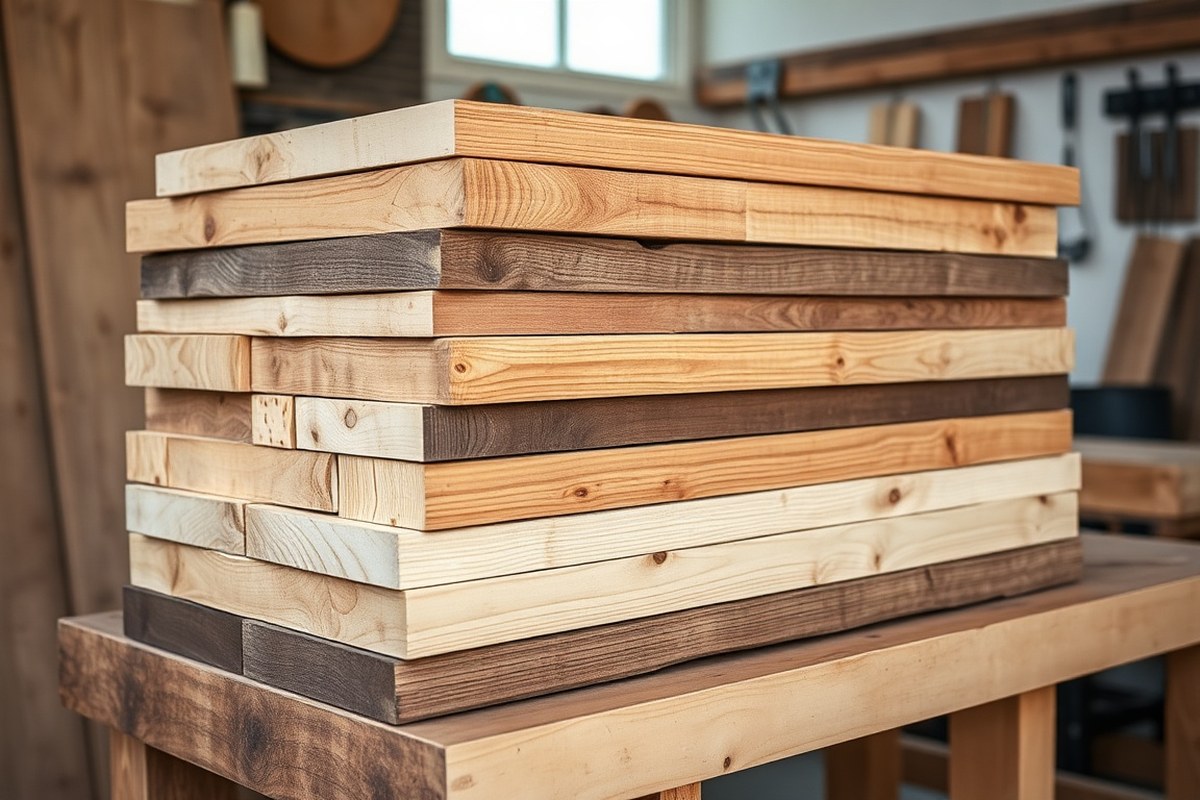
Choosing the right wood and materials directly impacts the rustic feel, durability, and cost of your DIY rustic sign. Opting for reclaimed wood offers authentic texture and history at a lower price but requires extra preparation. New boards provide uniformity and easier workability but may look less naturally rustic until distressed. Complementary materials like metal accents or twine can improve the style and personalize your sign.
Common Wood Types for Rustic Signs
Pine is a popular choice for rustic signs due to its affordability, availability, and soft grain that accepts distressing well. It costs around $5 to $10 per 1×6 board (8 feet long) and works well for beginners. Cedar offers natural resistance to decay and pests, making it suitable for outdoor signs, though it’s pricier at about $15 to $20 per board. Oak and maple are hardwood options with tight grains and durability but can be more expensive and harder to distress effectively.
Reclaimed wood is favored for its unique weathered surface and eco-friendly appeal. It often comes from old pallets, barn wood, or construction scraps. While reclaimed wood can be inexpensive or even free, it typically needs cleaning, sanding, and checking for nails or splinters before use. It provides authentic rustic character unmatched by new boards, but its irregular shape and wear require extra effort during assembly.
| Wood Type | Pros | Cons | Cost Estimate |
|---|---|---|---|
| Pine | Cheap, easy to distress, widely available | Soft wood can dent easily, less weather resistant | $5, $10 per 1×6 board |
| Cedar | Natural decay resistance, good for outdoor use | More expensive, softer wood may dent | $15, $20 per 1×6 board |
| Reclaimed Wood | Authentic rustic look, environmentally friendly, low cost | Needs preparation, inconsistent size, possible damage | Varies; often free to $10 per board |
| Oak/Maple | Strong and durable, fine grain | Harder to distress, higher price | $20+ per 1×6 board |
Additional Materials and Embellishments
Wood alone doesn’t complete a rustic sign. Adding accents like metal brackets, nails, wire, or twine lends authenticity and interest. These elements work especially well with reclaimed wood to highlight its farmhouse appeal. Use weathered or rusted hardware to keep consistent with the rustic theme.
Paint and stain are essential for finishing. A dark walnut or chestnut stain deepens the grain and creates an aged appearance, while white or muted paints can highlight text or designs. Using chalk paint and sanding the edges afterward achieves a distressed look quickly.
Check for nails or staples embedded in reclaimed wood before sanding or cutting to avoid damaging your tools.
Where to Source Affordable Supplies
Pallet wood is a cost-effective and widely available source for rustic signs. You can get whole pallets or disassembled boards for free or under $5. Many pallets use pine or fir, but beware some may be chemically treated and unsuitable for indoor projects. Local hardware stores often sell pine and cedar boards by the foot. Shopping around for sales or bulk purchases can lower costs further.
Reclaimed wood can also be found at demolition sites, salvage yards, or online marketplaces. Ask first before taking materials and always inspect for structural soundness. Craft wood stores offer smaller, pre-cut boards perfect for beginner projects, usually ranging from $5 to $15. Combining reclaimed and new wood allows control over budget while maintaining rustic charm.
Preparing and Distressing Wood for a Rustic Appearance
Preparing wood for a rustic sign involves cleaning, sanding, distressing, and finishing steps to bring out a weathered, aged look without compromising the wood’s integrity. These steps ensure the wood has character and texture, which is essential for a convincing rustic appearance. The process starts with basic cleaning and sanding, moves to distressing techniques that add natural wear, and finishes with stain and sealant application for color depth and protection.
Cleaning and Sanding Basics
Begin by cleaning the wood surface thoroughly to remove dirt, dust, and any residues. Using a damp cloth with mild soap works well, followed by drying the wood completely to avoid trapping moisture. Proper cleaning prevents stains and paint from peeling later on.
Next, lightly sand the wood using medium-grit sandpaper, around 120 to 150 grit, focusing on smoothing rough spots without removing all the natural texture. Pay attention to edges and knots, these areas will become focal points of the rustic look. Avoid over-sanding because the goal is to keep some roughness so the wood doesn’t look brand new.
Creating Distressed, Chippy Paint, and Weathered Effects
Distressing adds character that mimics natural wear over time. One simple method is gently hitting the wood with a hammer or a chain to create small dents and nicks strategically rather than at random. Using coarse steel wool or a wire brush on edges and flat surfaces scrapes away some wood fibers, achieving a weathered texture.
For chippy paint effects, layer acrylic paint and allow each coat to dry for about 20 to 30 minutes before applying the next. After a few layers, lightly sand the surface with fine-grit sandpaper (220 grit) in places to expose underlying paint or bare wood. Another option is to use a damp cloth to rub painted areas before fully drying; this softens the paint and creates a worn look.
Weathered effects can also be improve by applying a light wash of diluted paint (5 parts water to 1 part paint) and wiping it off quickly, keeping some color trapped in the wood grain. These steps help simulate years of exposure to the elements. Take your time here, as distressing is less about precision and more about achieving natural irregularity.
Applying Stain and Sealant for Durability
Once you have the texture and paint effects you want, applying wood stain deepens the color and improve the rustic feel. Use a foam brush or clean cloth to apply the stain evenly, allowing it to soak into the wood for 5 to 10 minutes depending on the shade you want. After that, wipe away excess stain with a clean cloth and let it dry completely, which commonly takes about 24 hours at room temperature.
Seal the wood with a clear satin or matte polyurethane to protect the surface without adding shine. This sealant dries in about 2 to 4 hours but should cure fully for up to 72 hours for best durability. A water-based sealant is easier to clean up and less likely to yellow over time compared to oil-based options.
Depending on your project, you might apply a second thin coat of sealant after the first dries to ensure thorough protection. This final step keeps your rustic sign looking good and guards it from moisture, wear, or fading, especially if it will hang outdoors or in damp areas.
Designing and Transferring Artwork on Rustic Wood Signs
Getting neat lettering on rustic wood signs depends on how you transfer your design onto the surface. Using stencils with paint, carbon paper tracing, vinyl decals, or hand-painting all offer good results if you follow clear steps. Choosing the right method depends on your tools, skill level, and the look you want.
Stencil and Freehand Painting Techniques
Stenciling is a popular way to create clean letters on wood without needing advanced tools. Start by securing the stencil flat on your wood surface with painter’s tape to prevent slipping. Use a small foam brush or stencil brush, applying paint in a dabbing motion rather than brushing to avoid paint bleeding underneath the stencil edges. Acrylic paint works best because it dries fast and adheres well to wood. Let each layer dry before adding more coats for vivid color. Freehand painting suits those confident with brushes but takes more practice. Use a fine-tip brush to carefully outline each letter first, then fill in. Keeping your hand steady and using light brush strokes helps avoid smudging or uneven lines. If you want a rustic style, lightly distress the paint after it dries using fine sandpaper.
Using Carbon Paper and Transfer Methods
Carbon paper lets you trace a printed design onto your wood, ideal when freehand isn’t your strength. Place the carbon paper between your printed template and the wood, with the carbon side touching the wood. Secure all layers with tape so they don’t move. Trace over the design firmly using a stylus or pen, transferring the outline onto the wood’s surface. After removing the template and carbon paper, use a paintbrush or marker to fill in the traced design. This method works well on smooth plywood or pine, which have flat surfaces that hold the transfer clearly. It’s a budget-friendly option requiring only printer paper, carbon paper (usually under $10 for a pack), and basic painting supplies. Avoid pressing too hard or moving the paper during tracing to prevent smudges or double lines.
Applying Vinyl Letters and Decals
Vinyl decals and adhesive letters produce crisp, professional-looking results, especially when you want sharp edges and uniform fonts. Purchase vinyl letters or cut your own with a vinyl cutting machine, then use transfer tape rated for wood surfaces to position the decals precisely. Measure your wood sign and plan the layout before applying to avoid crooked placement. Peel the backing off the vinyl, then press the decal onto the wood and smooth it down with a plastic scraper or credit card to remove air bubbles. Slowly peel away the transfer tape at a sharp angle, leaving the vinyl firmly adhered. This method takes minutes and needs zero painting skill, but the vinyl’s edge might lift over time outdoors unless sealed with a clear coat. Vinyl costs vary; ready-made letters can be about $5 to $20, while cutting your own requires a machine and materials.
Assembling and Finishing Your DIY Rustic Wood Sign
Creating a sturdy DIY rustic sign from multiple boards requires solid joinery and a clear finishing plan to ensure durability. Adding a frame or accent not only improve the rustic charm but also strengthens the structure. Finishing touches like protective coatings help your sign stand up to indoor or outdoor conditions, while hanging hardware ensures it stays securely mounted.
For large signs, joining several boards firmly prevents warping and gaps. Using wood glue along with screws or nails and reinforcing the back with a cross brace is an effective method. Frames or accents such as trim add character and protect edges from damage. Sealing the wood with clear protective finishes guards against moisture and UV damage. For hanging, strong hardware like D-rings, sawtooth hangers, or wire attached to the back keeps the sign safely in place. Follow these steps to assemble and finish your DIY rustic wood sign properly:
- Lay out your boards on a flat surface in the desired order. Double-check measurements to confirm alignment.
- Apply wood glue along the edges where boards meet. Clamp them together and let dry for at least 30 minutes to one hour for a strong bond.
- Secure boards from the back using 1¼-inch wood screws or finishing nails, spaced about every 6 to 8 inches. Pre-drill holes to prevent splitting.
- Attach a cross brace across the back, using a 1×2 or 1×3 piece of wood cut slightly shorter than the width of the assembled boards. Screw it into place to add stability and prevent bowing.
- Install frame or trim around the edges if desired, using wood glue and nails. Stain the back edges of the trim to match or blend with the sign so no bare wood shows when hung.
- Choose a protective finish that fits the environment where your sign will be displayed. Clear satin polyurethane works well for indoor signs. For signs placed outside, select an exterior-grade spar varnish or sealant designed to guard against moisture and UV damage. Follow the label’s directions, applying a minimum of two coats and letting each dry fully.
- Add hanging hardware according to the sign’s weight and wall surface. D-rings and wire support heavier signs and allow more flexibility, while sawtooth hangers work well for lighter pieces. Attach these securely on the back cross brace or frame.
- Hang the sign using appropriate wall anchors or hooks rated for its weight to ensure it stays level and secure.
Always pre-drill holes before screwing into wood to prevent splitting, especially near the edges, and avoid weakening your sign’s structure.
Common Mistakes and How to Fix Them When Making Rustic Signs
Sanding too aggressively is a common mistake when making rustic signs, often leading to splintering or uneven wood surfaces. To avoid this, use medium-grit sandpaper (around 120-grit) for initial smoothing and finish with fine-grit (220-grit). Sand lightly along the wood grain and check your progress frequently. Splintered edges can be fixed by sanding gently with fine grit to smooth rough spots, then wiping away dust before applying paint or stain. When splinters cover a large area, fill the gaps with wood filler, allow it to dry completely (usually 1-2 hours), then sand again.
Uneven staining often results from inconsistent wood preparation or applying stain too thickly. Prevent blotchy finishes by thoroughly cleaning and sanding the wood beforehand. Apply a wood conditioner first if the type of wood is soft or porous, as this helps stain absorb evenly. Use a lint-free cloth or brush to apply the stain in thin, even coats, wiping off any excess within 5 to 10 minutes. Blotches on the stained surface can be fixed by lightly sanding the area after it dries, then applying a thin new coat. For stubborn blotches, stripping the stain with a wood-safe remover may be necessary, which can cost around $10 to $15. Always work in a well-ventilated space to avoid inhaling fumes.
Painting mistakes, like bubbling or peeling, usually happen when the wood surface is dirty, damp, or poorly prepared. Avoid these issues by cleaning the wood thoroughly and allowing it to dry completely before painting. Applying paint too thickly or in high humidity can cause bubbles as paint dries. Use thin coats and allow each one to dry for 1 to 2 hours before adding another. Bubbles forming on the surface require gentle sanding with fine-grit sandpaper, cleaning the area, and repainting. Peeling paint may require scraping off loose areas, sanding smooth, and repainting with a high-quality, outdoor-appropriate paint if the sign will be outside.
Distressing wooden signs adds rustic charm but can damage wood if done carelessly. Use controlled tools like a wire brush, hammer, or slightly damp cloth to create small dents and worn edges. Avoid excessive force that causes cracks or weak spots. Deep damage or weakened wood should be reinforced by gluing a small wood strip on the back and clamping it for 24 hours. Light sanding after distressing helps smooth sharp splinters while keeping the rustic look.
Proper drying times between each step matter. Rushing to paint or stain over a damp or tacky surface leads to failure. Most stains need at least 24 hours to cure, and paints require around 12 to 24 hours depending on humidity and temperature. Ideal working conditions range from 65 to 85 degrees Fahrenheit with low humidity. Using a fan or working outdoors on dry days helps finishes cure well.
Fixing peeling or blotchy finishes requires patience and proper surface prep. Removing old paint or stain with a scraper or chemical stripper, followed by sanding and cleaning, resets the surface for a new finish. High-quality paint and stain tend to last longer and resist issues better. Buying a quart of quality wood stain costs about $10 to $25, and good exterior paint ranges from $20 to $45 per gallon, depending on brand and durability.
Creative Rustic Sign Variations for Different Themes and Seasons
Making rustic signs that match different themes or seasons becomes simple by swapping out a few key elements and adding embellishments that fit the occasion. Start by selecting base materials like pallet wood or reclaimed barn wood for a natural rustic feel. These woods cost around $5 to $15 per board at local hardware stores or can be free if you have access to scrap wood. Keep your base sign neutral by painting or staining it in soft tones like whitewash, weathered gray, or warm brown, which works year-round and lets you easily update decorations.
Reusable seasonal signs work best when you use removable embellishments. For example, add small hooks or thin nails spaced evenly along the top or sides of your sign. Hang lightweight items such as miniature wreaths, faux leaves, or holiday ornaments on these hooks to switch between themes. Velcro strips or adhesive magnetic tape are good options for attaching wooden cutouts or fabric pieces that you want to take on and off without damaging the wood.
Kitchen-themed rustic signs often rely on classic farmhouse elements. Painting simple sayings like “Gather” or “Farm Fresh” in bold, distressed stencil letters creates a strong but welcoming message. Adding small details like a twine bow, miniature wooden kitchen utensils, or a chalkboard section to write daily menus can personalize your sign. Use non-toxic chalk markers that wipe clean with a damp cloth, allowing you to refresh your kitchen decor anytime.
Holiday signs welcome more playful embellishments. For Halloween, attach inexpensive faux spider webs or small bats, fastening them carefully with hot glue or sewing pins so removal won’t harm the sign. Christmas signs can feature pinecone clusters, strips of burlap ribbon, or tiny string lights powered by battery packs. Make sure to use LED lights rated for indoor use and test the battery duration before finalizing your installation.
Easy projects for farmhouse styles include layering different wood pieces to create a dimensional effect. Nail narrower strips vertically in the center of a wider wood panel and paint alternating stripes or shapes. This approach adds rustic charm without complex carpentry or expensive tools. Adding hooks for hanging keys or mugs transforms simple wood plaques into functional art that suits smoky kitchens or cozy entryways.
Good results occur when your embellishments complement the rustic character rather than covering it up. Emphasize natural textures like burlap, jute twine, cotton rope, or metal accents in dark bronze or blackened iron. Avoid overly shiny or plastic-looking materials, which clash with the worn wood feel. Watch for signs of wood splitting or paint chipping around attachment points and adjust nails or adhesives accordingly to keep the sign sturdy through seasons.
Tools, Safety Tips, and Timeline for DIY Rustic Sign Projects
Creating a rustic sign requires a basic set of tools to ensure both safety and quality results. At minimum, you’ll need a sanding block or power sander for smoothing and distressing the wood, paints or wood stains for coloring, paintbrushes or foam brushes for application, and stencils or transfer paper to transfer your design onto the wood. A hammer and nails or wood glue can be necessary if assembling multiple pieces or adding accents. Depending on your design, you might also use a wood-burning tool or vinyl lettering, but these are optional rather than required.
Protecting your skin and lungs during sanding and painting is essential. Always wear a dust mask or respirator rated for fine particles when sanding to prevent inhaling wood dust, which can irritate your respiratory system. Gloves are useful to keep paint or stain off your skin, and wearing long sleeves reduces exposure to chemicals. Eye protection such as safety glasses guards against dust and splatters. Working in a well-ventilated area or outdoors minimizes fumes from paints and stains. These safety measures prevent common issues like skin irritation, allergic reactions, and respiratory discomfort.
A realistic timeline for a DIY rustic sign starts with preparing the wood, which takes about 30 to 60 minutes depending on surface roughness and size. Distressing and sanding the wood usually add 15 to 30 minutes more. Applying paint or stain with drying time between coats can take 2 to 4 hours total, depending on your environment’s temperature and humidity. Transferring artwork to the wood surface often requires another 20 to 30 minutes, while adding finishing touches like sealing or protective coats may take an additional hour, including drying time. Altogether, a basic rustic sign project commonly spans a single afternoon or an evening at home. Larger or more detailed signs will extend this timeline.
For example, to craft a rustic kitchen sign using scrap wood, start by sanding the surface with medium-grit sandpaper for 15 minutes to smooth rough patches but leave texture. Apply a first coat of stain and let dry for about an hour. Use stencils to paint your lettering over the stain, wait 30 minutes, then add a clear sealant for protection. Expect the project to take roughly 3 hours from start to finish, with breaks while waiting for paint and stain to dry. In cooler or more humid environments, drying times can increase, so plan for extra time or use quick-dry paints.
Always wear a dust mask when sanding wood to protect your lungs from fine dust particles that can cause irritation or allergic reactions.
Step-by-Step Action Plan for Your DIY Rustic Sign
Follow these steps to create your rustic sign from start to finish, ensuring each phase is done before moving on.
- Before you start: Gather your materials including wood, paint, brushes, sandpaper, and transfer tools. Confirm you have everything to avoid interruptions later.
- Day 1: Prepare and distress the wood by sanding rough edges and adding texture with a hammer or wire brush. Check that the wood looks worn but solid.
- Day 2: Design your sign on paper or a computer, pick fonts and images fitting your theme. Print or sketch your design to use as a transfer template.
- Day 3: Transfer the artwork to the wood using tracing paper or carbon paper. Make sure the design is clearly visible on the surface.
- Day 4: Paint or stain your design and the wood background. Allow paint to dry completely and touch up any spots where paint looks thin.
- Day 5: Apply a protective finish like clear matte polyurethane to keep your sign durable. Make sure you apply the paint evenly over all the painted and bare areas.
- After 1 week: Inspect your sign for any chips or wear, and lightly sand and repaint if needed. The sign should be sturdy and showcase the rustic look you want.
Frequently Asked Questions
What Types of Paint Work Best for DIY Rustic Signs?
Latex and chalk paints are great choices because they adhere well to wood and create a worn look when distressed. Chalk paint is especially good for a matte, vintage finish that fits rustic decor.
Can I Use Reclaimed Wood for My Rustic Sign?
Yes, reclaimed wood adds authentic character and texture to your sign. Make sure to clean and sand it lightly to remove dirt without losing its aged charm.
How Do I Protect My Rustic Sign for Outdoor Use?
Seal your sign with a clear, weather-resistant polyurethane or outdoor varnish. This prevents damage from moisture and sunlight while maintaining the rustic look.
What Is the Best Way to Hang a DIY Rustic Sign?
Use metal hangers or sawtooth hooks screwed into the back. These provide strong support and keep the sign flat against the wall.
Can I Add Lighting to My Rustic Wood Sign?
Yes, string lights or small LED strips can highlight your sign’s design and create cozy ambiance. Attach them carefully to avoid damaging the wood.
How Long Does Distressing Wood Usually Take?
Distressing takes about 10 to 30 minutes depending on the technique and wood type. Take your time to create natural-looking wear without overdoing it.
Key Points to Remember
Making a DIY rustic sign is a satisfying way to personalize your space with a charming, handmade piece. Start by picking a simple design and wood type you like, then take your time with preparing and painting. Your best next step is to prepare a small workspace with all your materials ready so you can start your project with confidence.