Rustic Sign Ideas: 12 Creative Ways to Make Charming Wood Signs
Rustic sign ideas can transform any space with a warm, timeless charm. Creating wood signs with natural textures, weathered finishes, and simple typography delivers that sought-after cozy and authentic look. Starting with the right wood and finishing techniques sets the foundation for a lasting rustic appeal.
Key Takeaways
- Choose wood types like pine, cedar, or reclaimed pallet wood for an authentic rustic base.
- Use sanding and uneven staining to mimic natural aging on your wood surface.
- Hand-paint lettering or stencil designs to improve the handmade feel of your sign.
- Incorporate mixed materials such as metal accents or twine for added texture and uniqueness.
- Protect your finished sign with a matte sealant to maintain a natural, weathered look.
- Keep safety in mind by wearing goggles and gloves when cutting or sanding wood.
1. What Makes a Rustic Sign Charming and Timeless?
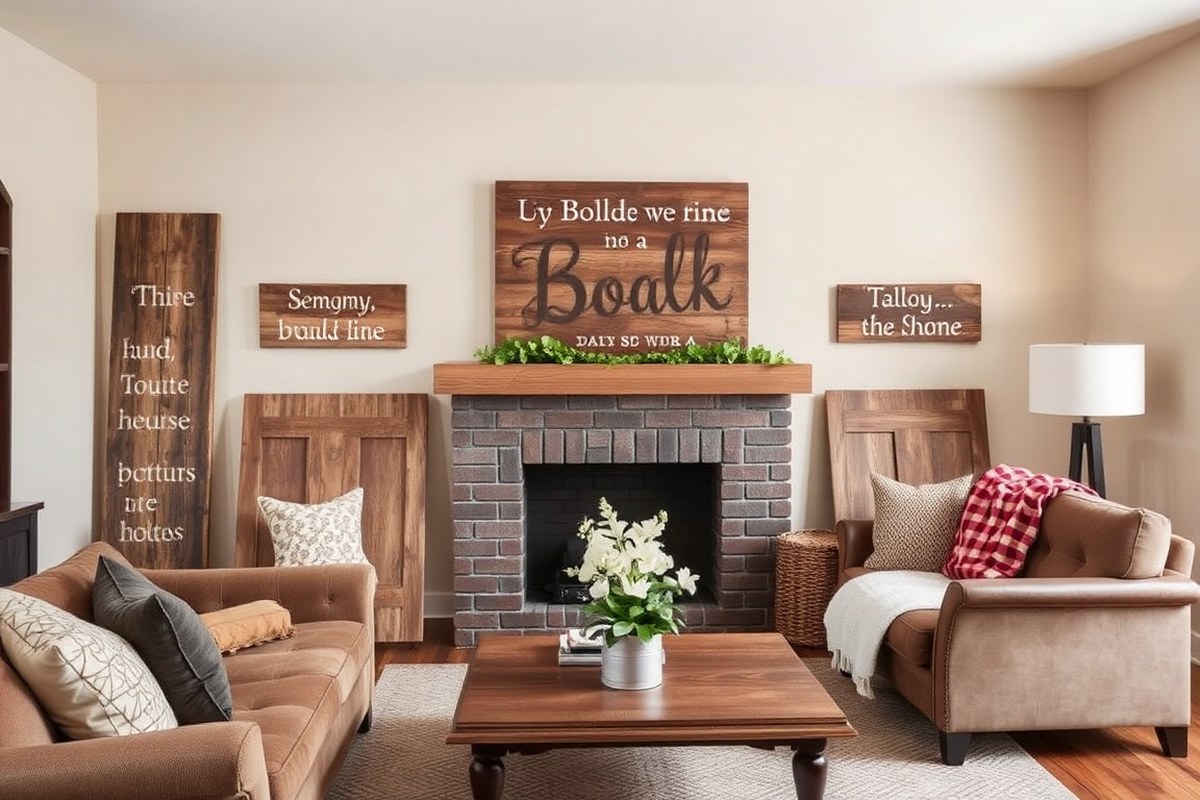
Rustic signs are wooden decor pieces that showcase a simple, unpolished look often made from reclaimed or solid wood like pine. This raw, natural vibe makes them highly popular for barn-inspired or country-style interiors. Their appeal lies in the tactile texture of wood combined with the casual charm of imperfect finishes, such as visible knots, worn paint, or distressed edges.
People love rustic signs because they add warmth and personality to any room. The wood grain and uneven surfaces create a tactile sense that draws the eye and grounds the space in natural elements. This makes your home feel more inviting and lived-in instead of overly staged. It’s easy to place a handmade sign by the front door, on a kitchen wall, or over a mantel to create an immediate cozy atmosphere.
Rustic signs work well for a variety of settings. For example, a rustic wooden sign in a kitchen with the word “Gather” hand-painted softly improve the family-friendly vibe. A rustic sign reading “Welcome” crafted from wood pallets can give your entryway a countryside feel that guests notice. During holidays, signs with rustic styling and seasonal sayings like “O Come Let Us Adore Him” bring heartfelt charm without the need for flashy decor.
Adding rustic signs to your decor generally requires choosing the right wood and embracing its natural imperfections instead of concealing them. The wood’s rough texture or visible grain contributes to its unique character. You can then design the sign with painted or burned-in lettering, which adds a handcrafted touch. This process costs less than $20 for most DIY projects using reclaimed wood and basic paint or stain supplies.
Good results come from keeping the design simple and materials natural. Overly smooth or glossy finishes defeat the rustic purpose by making signs look mass-produced. Instead, sanding just enough to remove splinters, leaving some roughness, and applying a thin stain or matte sealant work better. Signs that turn out too uniform may lose their character and charm, appearing sterile rather than warm.
Rustic signs also let you share meaningful messages or personalization that connects your decor to your lifestyle or family traditions. Personalized rustic signs can show addresses, family names, or favorite sayings. Such customization brings an original element that mass-market decor items rarely provide. This personal touch is another reason rustic signs stay popular for gifts and home accents.
2. How to Choose the Best Wood for Your Rustic Sign
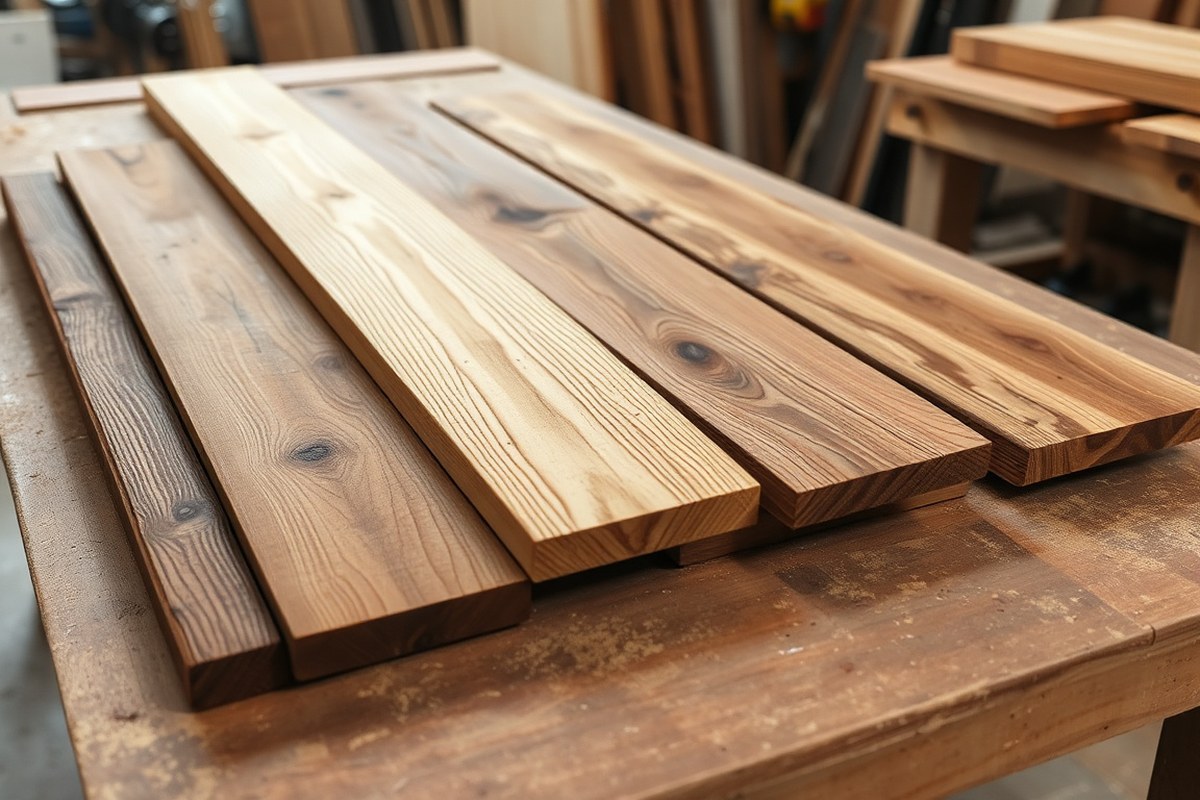
Choosing the right wood for your rustic sign affects its durability, appearance, and cost. Reclaimed wood offers a unique weathered look and is eco-friendly but may require careful cleaning and sanding. Pallet wood is budget-friendly and widely available, giving a rough texture that instantly adds character. Barn wood carries a vintage charm with deep grain marks, perfect for authentic rustic signs but can be pricier. Pine is a softer wood, easier to work with and paint on, making it a great choice for beginners and budget projects.
Select wood based on your project’s location and desired style. For outdoor signs, sturdier woods like barn or reclaimed wood withstand weather better. Indoor signs benefit from lighter woods like pine, which you can easily customize with paint or stain. Always check wood for nails or staples, especially pallet and barn wood, to avoid damaging your tools.
| Wood Type | Cost Range | Workability | Appearance | Best Use |
|---|---|---|---|---|
| Reclaimed Wood | $0, $10 per board foot (often free if repurposed) | Moderate; requires prep to remove debris | Weathered, rustic with natural patina | Indoor/outdoor rustic signs with authentic aged look |
| Pallet Wood | Free, $5 per board foot | Moderate; check for nails, uneven surfaces | Rough texture, casual rustic feel | Budget signs, casual welcome signs |
| Barn Wood | $5, $15 per board foot | Harder; has dense grain, can be tough to sand | Deep grooves, rich rustic character | High-end rustic signs, durable outdoors |
| Pine | $2, $6 per board foot | Easy; soft, smooth surface ideal for painting | Light color, varies in grain, takes stain/paint well | Beginner projects, indoor signs, painted designs |
Look for wood with consistent thickness and minimal warping to ensure your sign stays flat and easy to mount. Pallet and reclaimed woods often have imperfections; embrace these for rustic charm but address structural weaknesses with glue and clamps. Pine’s softness means scratches can happen during handling, but it’s easier to fix with light sanding. Barn wood is durable but heavier, so prepare sturdy hardware to hang larger signs.
Always wear gloves and eye protection when handling reclaimed or pallet wood to avoid injury from nails or splinters hidden in the wood.
3. Three Authentic Finishing Techniques for Rustic Wood Signs
Creating an authentic rustic look on wood signs can be done by focusing on three main techniques: distressing the wood by hand, adding weathered effects using paint and stain, and applying wood burning for detailed accents. Each method gives your sign unique character while emphasizing the aged, handmade quality that defines rustic style.
Distressing Wood by Hand
Distressing wood helps remove the polished finish and adds imperfections to mimic years of wear and tear. This method works well for any type of wood and requires only simple tools.
To distress wood by hand, you focus on roughening edges, creating small dents, and sanding unevenly to expose the natural grain. The goal is to produce subtle randomness that looks natural rather than overly uniform.
- Sand the wood surface lightly with 120-grit sandpaper to remove any smooth finish.
- Use a hammer or a chain to gently tap or dent random spots on the wood’s face and edges.
- Scrape along the wood grain with a metal wire brush to simulate wear lines.
- Sand edges more aggressively to round and soften corners.
- Clean off dust with a dry cloth before applying any finish.
This technique costs little beyond basic tools and takes about 30 minutes to an hour depending on the size of the sign. Watch out for overly deep gouges that can weaken your sign’s structure. The best results show natural-looking scuffs and dents without compromising the wood’s strength.
Creating Weathered Wood with Paint and Stain
Using paint and stain can replicate the faded, sun-bleached effect seen on old outdoor signs. Combining white paint with staining creates layers of color variation and depth.
A popular approach is to first paint the background with white or light-colored spray paint, then sand parts of it back to the wood below to achieve a weathered look. Applying stain afterward improve the texture by darkening worn areas unevenly.
- Cut and prepare your wood board to size and lightly sand it to remove splinters.
- Apply a light coat of white spray paint to the area for your lettering or main design.
- Once dry, sand the painted area using 150-grit sandpaper to distress it, focusing on spots that would naturally wear.
- Apply a wood stain in a warm tone (like walnut or chestnut) with a rag, wiping off excess to allow color variation.
- Let the stain dry for at least 4 hours before adding any text or clear coats.
This process takes a few hours due to drying times but costs under $20 for paint and stain if you don’t already have them. The finished sign should look like it’s been exposed to weather over years, with paint fading unevenly and wood grain showing through.
Using Wood Burning for Rustic Detailing
Wood burning adds fine, permanent designs and textures directly into the wood surface, giving signs a handcrafted touch that natural paint cannot replicate. It works best on softer woods like pine or cedar.
This technique involves heating a wood burning tool and carefully tracing your design into the wood with steady hand movements. By adjusting the pressure and speed, you can create varying line thickness and shading effects.
- Select a wood-burning pen or tool with adjustable temperature settings.
- Prepare your wood by sanding it smooth to 180 grit where you plan to burn.
- Trace or stencil your design lightly with pencil onto the wood.
- Heat the wood burner and slowly trace over your pencil lines with steady pressure.
- Use the tip flat on the surface for thicker lines and the edge for fine details.
- After burning, gently sand any rough spots with fine sandpaper and wipe clean.
Wood burning tools range from $15 to $50 and the process typically takes 30 minutes to over an hour depending on complexity. Avoid rushing to prevent scorching or uneven burns. The finished effect is crisp, dark lines embedded in the wood that will not fade or chip over time.
4. Essential Tools and Safety Tips for Rustic Sign DIY
Creating rustic signs at home requires a handful of specific tools and strict attention to safety. Having the right equipment ensures both the quality of your sign and a safer crafting experience. You’ll need measuring tools, cutting instruments, surfaces for painting or staining, and safety gear to protect yourself from dust, fumes, and sharp edges.
Basic Tool Kit for Rustic Sign Making
At minimum, you’ll need a few essential tools that allow you to shape, decorate, and finish wood with precision. A tape measure or ruler helps maintain accuracy in dimensions. A pencil is necessary for marking cut lines and design layouts. For cutting, a hand saw or power saw like a jigsaw or circular saw works well depending on your comfort and sign size. Sandpaper or a sanding block smooths edges and surfaces, which is critical for a rustic look with no splinters.
To add painted or stenciled designs, brushes, foam brushes, or paint pens are helpful. For more precise lettering, a stencil or transfer paper can guide your work. If you want to add texture or distress the wood, tools such as a hammer, wire brush, or chain can create authentic rustic effects. Finally, an electric drill and screws help with mounting or attaching additional pieces.
Checklist of Must-Have Items
Gather these before starting your project to avoid interruptions:
- Measuring tape or metal ruler
- Pencil and eraser
- Hand saw, jigsaw, or circular saw
- Sandpaper (various grits 80-220) or sanding block
- Paintbrushes, foam brushes, or paint pens
- Stencil or transfer paper for lettering
- Hammer, wire brush, or chain for distressing
- Electric drill with screwdriver bits
- Clamps to secure wood during cutting or painting
- Work surface covered with newspaper or drop cloth
Prices for basic tools vary. A quality tape measure costs around $10, hand saws range from $15 to $50, and paint supplies can be $5 to $20 depending on types used. Borrowing tools or buying second-hand can reduce costs.
Safety Precautions When Working with Wood and Tools
Safety is essential when cutting, sanding, and painting wood. Always wear safety goggles to protect eyes from sawdust and wood chips. Use a dust mask or respirator while sanding or spraying paint to avoid inhaling fine particles and fumes. Gloves prevent splinters and provide extra grip on tools.
Keep your work area well lit and clutter-free to avoid accidents. Secure your wood pieces firmly with clamps before cutting or drilling. Keep power tool cords away from the blade and your hands. Never disable safety guards on saws. Unplug electric tools when changing blades or bits. Work slowly and deliberately; rushing raises the chance of mistakes or injury.
Safe Use of Paints and Finishes
Many rustic signs involve stains, paints, or sealants, which often contain volatile organic compounds (VOCs). Use these products in a well-ventilated space or outdoors. Read the label for drying times and proper application methods. Wear gloves to avoid skin irritation, and avoid eating or drinking while working. Dispose of rags or brushes soaked in oil-based products carefully, as they can catch fire spontaneously.
Maintenance and Clean-Up Tips for a Safe Workspace
After finishing your rustic sign, clean tools immediately to extend their life and avoid rust. Safely store sharp blades in protective covers out of children’s reach. Sweep or vacuum sawdust regularly to prevent slips and reduce inhalation risks. Wash your hands thoroughly after handling finishes or wood. Proper maintenance of tools and the work area helps keep your crafting environment safe and pleasant for future projects.
5. Beginner-Friendly Rustic Sign Projects You Can Finish Quickly
Simple rustic signs that beginners can make quickly often use basic materials and straightforward techniques. These projects typically take between 30 minutes and 2 hours, depending on the design and drying time for finishes. Using scrap wood or pre-cut boards, stencil lettering, and minimal staining or painting makes the process faster and easier for those new to DIY crafts.
Vinyl Decal Wood Signs
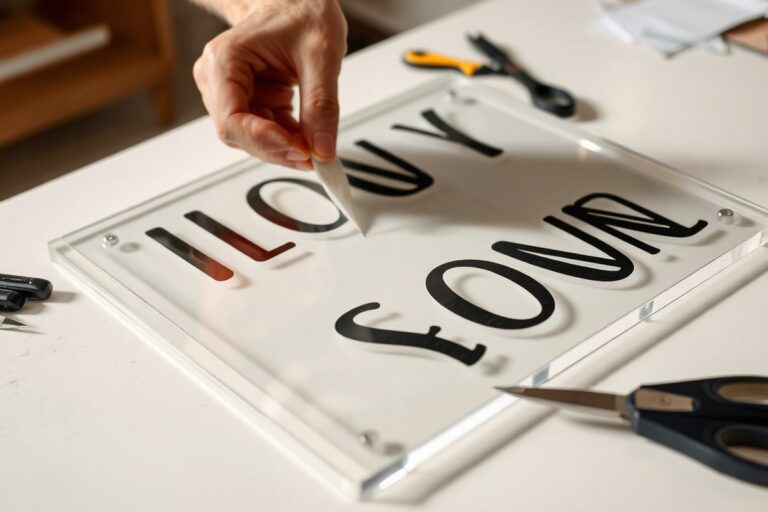
Applying vinyl decals to a wooden board is one of the easiest and fastest ways to create a rustic sign. Choose a smooth wood surface, like a pine board or pallet plank, sand lightly, and wipe clean. Peel and stick your vinyl letters or shapes, then seal with a matte polyurethane spray if you want added protection. This project can take as little as 30 minutes plus drying time.
It’s an excellent option if you don’t feel confident with hand-painting or carving. The vinyl ensures crisp, professional-looking text or images. Use pre-made vinyl decals or cut your own with a basic electronic cutter, such as a Cricut.
Painted Stencil Signs on Scrap Wood
Using stencils on recycled or scrap wood boards allows you to create personalized rustic signs quickly. Start by sanding the wood to remove rough spots and applying a light stain or paint base layer. After it dries, position the stencil and apply paint with a sponge or small brush, tapping gently for solid coverage without bleeding. Remove the stencil carefully and let your sign dry.
This process usually takes about 1 to 2 hours, including dry time. It’s beginner-friendly because the stencil keeps letters neat and requires only basic painting skills. Choose short sayings or simple images to avoid long painting sessions.
Quick Woodburning Projects for Rustic Effects
Woodburning (pyrography) adds a rustic, handmade look with only a woodburning tool and smooth wood board. Trace your design lightly with pencil, then carefully burn over it with the tool. This method is faster than carving and creates a strong visual impact with dark brown lines against natural wood.
For beginners, choose simple patterns or words to keep the project under 2 hours. Work in a well-ventilated area and follow safety instructions for the woodburning tool.
Easy Painted Wooden Pallet Signs
Using wooden pallet slats or fence boards, you can quickly assemble a rustic sign by arranging boards horizontally or vertically, attaching them with nails or wood glue. After securing the boards, apply a coat of paint or stain. Use stencils, vinyl, or freehand paint short messages or seasonal greetings.
This project usually takes 1-2 hours plus drying time and only requires basic tools like a hammer and paintbrush. Pallet wood’s rough texture adds character without extra effort, perfect for a rustic touch.
Beginner Rustic Sign Supplies Checklist
Gathering the right materials and tools ensures your rustic sign stays simple and quick.
- Pre-cut wood boards or scrap wood pieces
- Sandpaper (medium and fine grit)
- Vinyl decals or stencils
- Paint (acrylic or chalk paint recommended)
- Paintbrushes or sponges
- Woodburning tool (optional)
- Clear spray finish (matte polyurethane)
- Basic tools: hammer, nails, wood glue (if assembling boards)
Costs for materials depend on what you already have. Scrap wood reduces expenses; a can of paint or vinyl sheet typically costs $5 to $15 each. Renting or borrowing tools can lower initial costs.
Avoid rushing drying times for paint or finishes, as handling the sign too soon may cause smudging or damage to your design.
6. Popular Themes and Sayings for Rustic Wood Signs
Rustic wood signs make a great statement piece in any home or as a heartfelt gift. Popular themes often focus on warmth and simplicity, reflecting farmhouse charm or cozy cabin vibes. To create a sign that resonates, choose sayings that convey a welcoming message or a reflection of your lifestyle. Classic welcome signs and family name plaques remain steady favorites because they create a personal connection and add character to entryways or living areas.
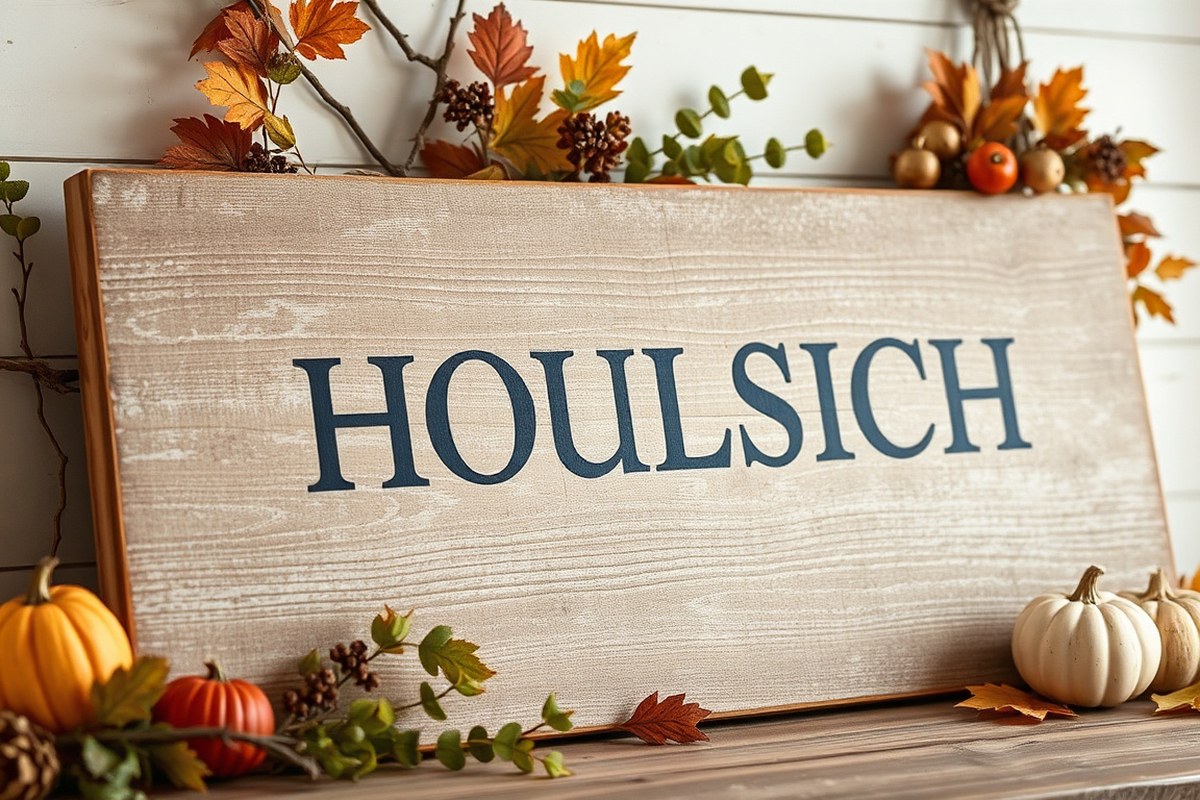
Seasonal and holiday rustic signs stand out for their ability to change the mood in your home throughout the year. Crafting signs for occasions gives a festive touch without needing elaborate decor. These signs often use traditional phrases paired with rustic wood textures to highlight the spirit of seasons or celebrations. Using scrap wood or old pallets can keep costs very low, usually under $15, while delivering a unique handcrafted look.
- “Welcome Home” or “Bless This Home” for constant hospitality.
- “Farm Sweet Farm” or “Home Grown” for rustic farmhouse style.
- Seasonal sayings like “Let It Snow” or “Pumpkin Spice & Everything Nice” for winter and fall.
- Holiday favorites such as “Merry Christmas” or “Happy Harvest” for added festivity.
- Simple bathroom or kitchen signs like “Wash Your Hands” or “Gather Here” to add charm to everyday spaces.
To craft these signs effectively, use stencils or printable templates and apply paint or wood-burning techniques that complement the rustic aesthetic. Selecting fonts that mimic hand lettering improve the authentic feel. Signs should be sealed with a protective finish after painting to prevent wear, especially for outdoor or kitchen use. By sticking to brief, clear messages, you make the signs not only decorative but also readable from a distance.
7. How to Incorporate Mixed Materials for Unique Rustic Signs
Adding mixed materials like leather, metal, rope, or mason jars brings texture and depth to rustic signs, making them stand out with a unique handmade charm. Leather strips or patches provide a soft, warm contrast to rough wood surfaces. You can attach a leather piece using wood glue or small decorative nails. For example, cut a leather strip about 1 to 2 inches wide and glue it along the border or use it to frame a letter or symbol. This method costs less than $10 for a small leather scrap and adds a subtle luxury feel.
Metal elements introduce an industrial vibe that pairs perfectly with rustic wood. Thin sheets of metal can be cut into shapes or letters using tin snips and fastened with small screws or double-sided construction tape designed for metal-to-wood adhesion. A simple DIY approach is to use craft metal sheets priced around $5 to $10 per sheet, cut your desired design, and attach the pieces to the sign’s surface. Avoid heavy metals that add weight, as they can warp thinner wood panels. When done well, metal adds a striking visual and tactile contrast.
Rope is another versatile material that improve rustic signs with a natural, casual texture. Twisted jute or sisal ropes in widths of ¼ to ½ inch are ideal. Wrap or outline the edges of your sign or glue rope to form words or shapes directly on your wood surface. Use a hot glue gun to create strong bonds, layering the rope for dimensionality. This technique costs under $5 for a few feet of rope and can give a boho or coastal feel, especially when paired with lighter wood tones or beach-themed designs.
Mason jars double as decorative and functional elements on rustic signs. Attach small jars to a wooden sign base by screwing jar lids onto the board, then screwing the jars into their lids. These can hold flowers, candles, or seasonal décor for a charming three-dimensional effect. Mason jars are easy to find at around $1 to $3 each and fit well in kitchen, garden, or seasonal rustic sign projects. Secure the jars tightly to prevent rattling, and consider sealing the wood around the screws to avoid splitting.
Combining these materials requires planning the layout to avoid overcrowding or an overly busy look. Start with your wooden base, paint or stain it as desired, and add your stencil or lettering first. Then, layer your mixed materials, securing each with the best adhesive or fasteners for that medium. Let glue dry fully, usually at least an hour, to ensure durability. Pay attention to scale and balance; a large metal letter can serve as a focal point while small leather or rope accents complement it.
Mixed materials can improve simple rustic signs into unique pieces that reflect your style. Experiment with texture and layering but keep in mind the weight, weather exposure, and how these materials will age together. For outdoor signs, metals prone to rust or mason jars exposed to extreme temperatures may need extra protective finishes. These finishing touches not only protect but also seal the character you create with mixed materials, ensuring your rustic sign’s appearance lasts through seasons.
8. Protecting and Finishing Rustic Signs for Long-Lasting Beauty
Protecting and finishing your rustic sign ensures it holds up well over time while preserving its natural, weathered look. Choosing the right finish depends on where you plan to display the sign and the type of wood used. For indoor signs, a clear matte polyurethane or a wax finish can improve the wood grain and maintain a vintage feel without adding shine.
Outdoor signs need more durable protection due to exposure to sun, moisture, and temperature changes. Spar urethane or exterior-grade varnish are ideal because they resist water and UV rays, preventing fading and warping. Apply at least two thin coats, sanding lightly with 220-grit sandpaper between coats for a smooth finish. Wait 24 hours to cure between coats; this usually takes place in temperatures between 65°F and 80°F to ensure proper drying.
Using paint or stain offers additional ways to customize and protect your rustic sign. Oil-based stains penetrate deeper into wood and provide lasting color with some moisture protection. Water-based stains dry faster and clean up easily but might need a sealer on top for full durability. For paint, chalk paint or milk paint work well for rustic aesthetics because they produce a matte finish that can be distressed for vintage charm. After painting, sealing with a clear wax or matte/polyurethane locks in the color and adds a protective layer.
- Sand the wood thoroughly and clean off dust before applying any finish.
- Use a brush or foam applicator to apply thin, even coats of finish or paint.
- Allow each coat to dry completely according to product instructions, usually 4 to 24 hours.
- Lightly sand between coats to remove bubbles and rough spots.
- For outdoor signs, choose finishes labeled for exterior use to withstand weather.
- Test finishes on a scrap wood piece to check color and drying time.
- Use gloves and work in a well-ventilated area to minimize inhalation of fumes.
Many rustic signs benefit from leaving some wood texture visible instead of smoothing everything out perfectly. This helps create an authentic farmhouse or vintage look. A proper finish protects the wood from cracking or fading while preserving that charm. Signs with too thick or glossy a finish can lose the rustic appeal and look more like a factory product.
Using a finish with UV protection is important for outdoor rustic signs to prevent sun damage and keep colors from bleaching out.
Costs vary depending on finish type; a quart of exterior spar urethane runs between $15 and $25 and covers about 100 square feet with two coats. A can of chalk paint about 8 ounces costs around $10 to $15, enough for one or two small signs. Investing time in the finishing process pays off with signs that stay beautiful and sturdy through years of display.
9. Mistakes to Avoid When Making Rustic Signs and How to Fix Them
Common mistakes in DIY rustic sign projects often stem from choosing the wrong materials, improper lettering, or neglecting the finishing process. Using wood that is too smooth or overly processed can result in a sign that loses rustic charm. Opt instead for reclaimed wood or wood with natural imperfections. This type of wood is generally affordable, often costing $5 to $15 for scrap pieces, and adds authentic character.
Lettering errors can spoil a rustic sign’s look. Hand-painting uneven letters or using the wrong font size makes the message hard to read. To fix this, print a stencil of your wording at actual size, cut it out, and trace it onto the wood. This ensures consistent letter sizing and spacing. Use paint designed for wood, applying two thin coats about 30 minutes apart for durability.
Skipping the protective finish leads to quicker wear and fading, especially if the sign will hang outdoors. Applying a clear matte polyurethane or exterior-grade sealant shields the wood without sacrificing the rustic matte surface. This step takes around 1 to 2 hours total, including drying time, and keeps your sign looking good for years.
- Choosing wood scraps and ensuring they are dry to avoid warping
- Using carbon paper or printed stencils for precise lettering
- Applying paint in thin layers to prevent cracking
- Sanding lightly between paint coats for a smooth finish
- Sealing with a matte finish to preserve texture
- Allowing ample drying time before handling or hanging
- Mounting signs securely to prevent damage
One frequent problem is over-sanding the wood, which smooths out the surface that gives rustic signs their appeal. Sand only enough to remove splinters and rough patches. Using finer grit sanding paper (220 grit) between coats helps achieve a polished look without losing texture.
Another issue is improper sizing. Selecting dimensions that are too small can cause your design to overcrowd the sign, while oversized signs may overwhelm the space. Planning your layout on paper first helps you balance the size. Typical rustic signs range from 12 by 24 inches to 18 by 36 inches, depending on the space where you want to display them.
10. Where and How to Display Rustic Signs for Maximum Impact
Rustic signs can make a strong visual impact when placed thoughtfully both indoors and outdoors. Inside, these signs add a warm, country-inspired feel to kitchens, living rooms, entryways, and dining areas. Outdoors, they complement gardens, porches, and fences, providing charm while withstanding weather conditions if properly protected.
For indoor display, choose spots that naturally draw attention but do not clutter the room. Above mantels, near dining nooks, or on bare walls work well. Placement near natural light helps highlight the wood grain and textures. Use lightweight hanging methods like picture hooks, Command strips, or small nails. This prevents damage to the walls and the sign while keeping installation simple. Signs under 10 pounds usually do well with these options, costing less than $10 for supplies.
Outdoor rustic signs require weatherproofing first. Using durable, weatherproof boards made for garden signs protects your work from rain, sun, and temperature swings. Mount your sign where it can be seen easily but away from extreme weather exposure like direct hot sun or heavy rain if possible. Fences, gates, porch walls, or garden stakes make excellent anchors.
- Use heavy-duty screws or outdoor-rated hooks for stable, long-lasting outdoor mounting.
- Apply a waterproof sealant or outdoor finish before hanging.
- Consider attaching a wire or bracket on the back of the sign for hanging on hooks or nails.
- For free-standing signs, add stakes or a wooden base for insertion into soil.
- Regularly check mounting hardware and reapply sealant every 1-2 years.
Indoor rustic signs often feature softer colours and finer detail since they are protected from the elements. Outdoors, bolder paint and simple, carved letters resist fading better. Signs meant for both settings, like holiday designs, should be coated in a clear, weatherproof finish to remain beautiful year-round. You can hang these with sturdy wire hangers or attach them securely to gates.
The right placement not only showcases your rustic sign but also extends its lifespan. You’ll see how the textures and colours become focal points in your home or garden. Avoid placing signs in damp or direct sunlight areas without proper protection since this can cause warping or fading. The difference between a charming accent and a faded, worn sign comes from thoughtful display combined with appropriate hanging methods and maintenance.
11. Customizing Rustic Signs: Personalization Ideas and Techniques
Adding a personal touch to rustic signs turns ordinary decor into meaningful art. You can customize signs with names, dates, and quotes to highlight special moments, family names, or favorite sayings. This personalization creates a distinctive look that fits your style and space, making the sign not only decorative but also a cherished keepsake.
Start by selecting the text or design you want to include. Names and dates often work best in simple, bold fonts that contrast clearly with the wood surface. To transfer your design, print it on paper first and use carbon transfer paper or stencil techniques to trace it onto the wood. This step ensures accuracy before carving or painting.
Carving letters or designs into wood adds depth and texture that painting alone can’t achieve. Use a rotary tool like a Dremel with a carving bit for control and precision, especially on hardwoods where carving can be tougher. Start with shallow cuts about 1/8 inch deep to avoid splintering and gradually deepen as needed. Carving usually takes 1 to 3 hours for a medium-sized sign, depending on detail. Another option is wood burning or pyrography, which uses heat to etch designs into the surface. It delivers a rustic, natural look without removing wood material and takes less time than carving for simpler designs.
Painting offers versatility for adding color and clarity. Use outdoor acrylic paint or chalk paint for a matte, weathered finish. Apply letters with a fine brush or stencil followed by a sponge to dab color. For a distressed effect, lightly sand the painted letters after they dry. Adding a protective clear coat like polyurethane extends durability, especially for signs displayed outdoors, with costs ranging from $10 to $25 per quart.
Quotes work well to personalize signs with meaningful messages. Choose phrases that resonate with your space or audience, such as “Home Sweet Home,” or pet signs that feature your furry friend’s name. Customized pet name door signs, for instance, can include paw print details carved or painted alongside the name to make the piece unique and inviting.
Test your carving or burning technique on scrap wood first to avoid mistakes on your main sign.
You can combine techniques, like carving the main text and painting decorative accents, for richer effects. Keep in mind that precise carving requires patience and steady hands, while painting demands attention to drying times, usually a few hours between coats. Getting the right balance of contrast between text and wood background improves readability and overall aesthetic appeal.
12. When to DIY and When to Buy or Hire a Pro for Rustic Signs
Deciding whether to make your own rustic sign, buy one ready-made, or hire a professional depends mainly on your skill level, budget, and time availability. Having some woodworking experience, basic tools, and a few hours to dedicate makes DIY rewarding and cost-effective. Creating a simple rustic sign with hand-lettered design can cost as little as $20 in materials like pine wood, stains, and paint. In contrast, buying a ready-made rustic sign generally ranges from $40 to $150, depending on size and craftsmanship. Hiring a pro often starts around $150 and can reach several hundred dollars for customized large signs with intricate details or mixed materials.
Lacking experience with tools or painting, or needing precision lettering or complex design, buying or hiring is a safer choice. Mistakes like uneven staining, crooked letters, or splintered wood are common for beginners and can waste time and money. Also, consider your available time: a straightforward DIY sign might take 2 to 4 hours, including drying times, while a more detailed sign can stretch over days or weeks. Professionals can deliver polished results faster, usually within a week, as they have specialized equipment and skills.
Factor in how much the sign will be used. For a one-season outdoor decoration, a DIY sign using affordable wood and finishes might suffice even if it’s not perfect. For long-lasting indoor decor or signs displayed in prominent rooms, investing in a professionally made or bought sign with durable finishes and smooth details pays off. Professionals often use sealants that protect against humidity, fading, and wear longer than most at-home finishes.
The decision rule is straightforward: choose DIY when you want to save money, personalize your design, and have enough time and confidence with woodwork. Buy ready-made if you want moderate cost and quick delivery with decent quality, especially for simple designs. Hire a pro when accuracy, durability, and complex customization matter most, or if your schedule is tight. For example, if you need a rustic wedding sign with ornate lettering and a polished finish within a week, paying around $200 to $300 to a skilled sign maker is typical. Wanting a rustic welcome sign for your front porch and enjoying crafting means budgeting $25 for materials and a few weekend hours.
Keep in mind budget influences whether you can afford high-quality wood and finishing supplies for DIY, or the level of craftsmanship available for purchase. Time affects drying and curing stages, signs with multiple paint layers or wood distressing techniques require patience. Skill impacts the final look: precise burning, carving, or painting adds charm but needs practice. Weigh these factors honestly to avoid frustration and to get a rustic sign that fits your home décor goals.
Step-by-Step Action Plan to Create Your Own Rustic Sign
Use this plan to start making your rustic sign today with clear steps and checkpoints for success.
- Before You Start: Select a piece of wood that fits your space and style; check that the wood is smooth enough to work on but has natural character such as knots or grain. This sets the foundation for your sign.
- Day 1: Decide on your theme or phrase based on popular rustic sayings or personal meaning; sketch the layout on paper or lightly on the wood. Confirm the design looks balanced and readable.
- Day 2: Prepare your wood by sanding edges lightly and applying your chosen finishing technique to bring out texture or add distressing; dry completely before next steps. The wood should feel smooth but still carry rustic charm.
- Day 3: Use your preferred lettering method, stencil, hand-paint, or burn, to add your design; work slowly and check progress for clean, consistent lines.
- Day 4: Incorporate any mixed materials like metal accents or rope hooks, attaching securely; test stability.
- Day 5: Apply a clear sealant suited for indoor or outdoor use to protect your sign; let cure fully to ensure durability.
- Day 6: Plan your display spot to maximize visual impact, considering lighting and wall space; mount your sign using proper hardware for weight and surface type.
- After 2 Weeks: Inspect your sign for any wear or fading; touch up as needed to keep your rustic sign looking fresh and inviting.
Frequently Asked Questions
What Are Some Budget-Friendly Materials for Rustic Signs?
Reclaimed wood and old pallets offer affordable rustic sign options. They add charm and reduce costs while making your project eco-friendly.
Can I Use Non-Wood Materials for Rustic Signs?
Yes, metal and rope can improve rustic signs, adding texture. Combining these with wood helps create unique, eye-catching designs.
How Do I Maintain Rustic Signs Outdoors During Harsh Weather?
Applying a weatherproof sealant protects rustic signs from moisture and sun damage. Reapply yearly for long-lasting beauty and durability.
What Fonts Work Best for Rustic Sign Lettering?
Simple, bold fonts like serif or hand-drawn styles suit rustic signs well. Avoid overly ornate fonts to keep the rustic, readable feel.
How Can I Repurpose Old Household Items into Rustic Signs?
Old windows, shutters, or doors can become rustic signs with painting and lettering. This approach gives new life to vintage items with character.
Are Rustic Signs Suitable for All Home Decor Styles?
Rustic signs complement farmhouse, shabby chic, and country styles best. They may clash with ultra-modern or minimalist decor unless carefully integrated.
Before You Go
Rustic signs add warmth and personality to your home decor when thoughtfully designed and crafted. Start with a simple wood choice and clear design, then build your skills through hands-on finishing and lettering techniques. Try making your first sign using the action plan, and enjoy the process of bringing rustic charm to your space.