Vintage Sign Ideas That Inspire: A Complete Guide to Styles and DIY
Vintage sign ideas add character and nostalgia to any space by blending bold colors, classic fonts, and worn textures that recall past decades. To create or select the perfect vintage sign, focus on authentic styles from the era you want to evoke and consider distressing techniques that improve aged appeal. Start by identifying a theme or message that suits your setting, whether playful diner slogans or rustic farmhouse names, to guide your design or purchase.
Key Takeaways
- Choose vintage sign styles like enamel plaques or rustic farmhouse designs to match your room’s vibe and era preference.
- Use durable materials such as tin or wood when crafting signs for better longevity and authentic texture.
- Apply layering of paints followed by sanding or crackling to replicate authentic weathered surfaces in DIY signs.
- Select bold, simple fonts inspired by vintage diner or roadside signage for eye-catching and readable messages.
- Personalize reproduction signs with custom text or logos to create unique décor or business branding.
- Display vintage signs indoors away from moisture or outdoors with protective coatings to prevent damage.
What Defines Vintage Sign Ideas and Their Appeal
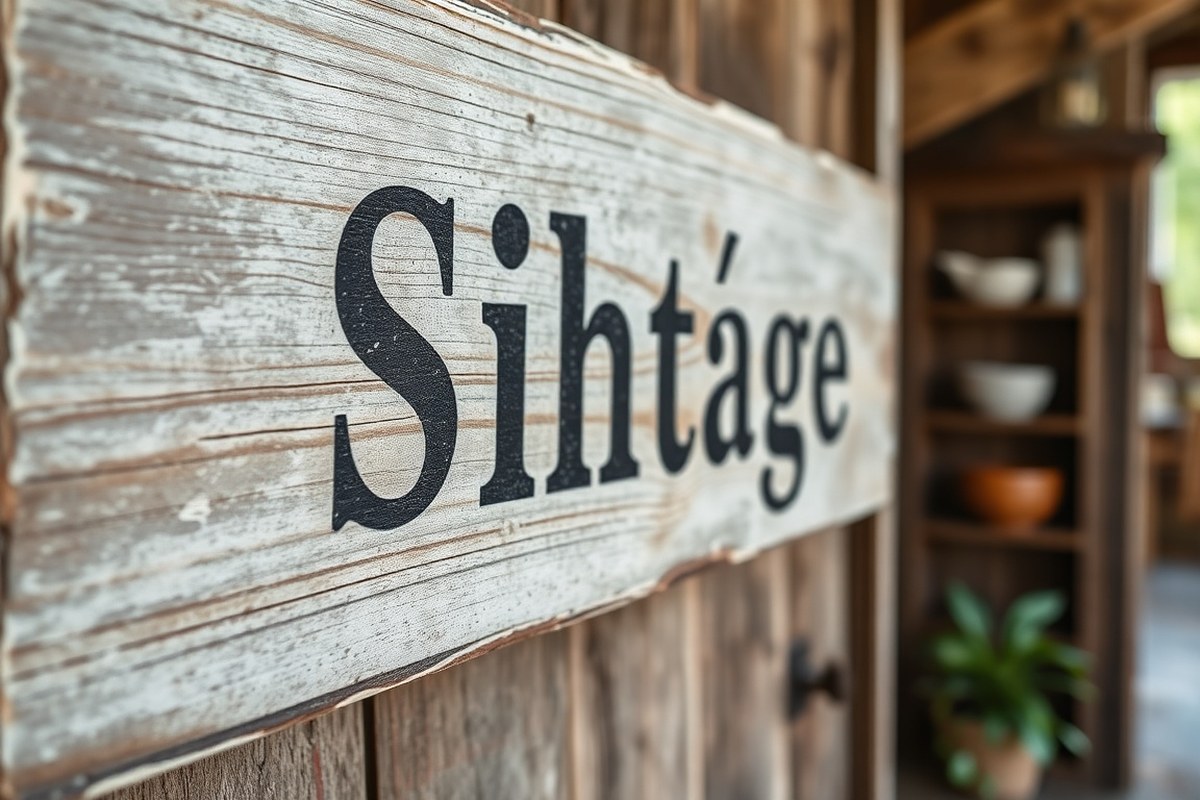
Vintage sign ideas are designs inspired by the advertising and decorative signs commonly seen in the mid-20th century and earlier. They often feature bold fonts, bright or faded colors, and messages that evoke nostalgic themes like diners open 24 hours, soda fountains, old gas stations, or classic movie marquees. These signs replicate the look and feel of original roadside billboards, store fronts, and business advertisements that once added personality to everyday spaces but now bring a worn, timeless charm to modern decor.
The appeal of vintage signs lies in their ability to transport you to a different era, creating warmth and uniqueness in a home or business. Their weathered textures and retro graphics evoke memories or imaginations of simpler times, filling rooms with character far from the sleek, minimalist designs common today. For example, installing a “Fresh Bread” bakery sign or a tin “Schoolhouse” plaque in your kitchen or entryway can add a cozy, inviting atmosphere that feels authentic and personal. This nostalgic energy helps spaces tell a story, making them stand out from generic decorative elements.
To add vintage sign charm, start by selecting a style that fits your space and personality. Signs with bold black lettering on soft pastel backgrounds or crackled paint finishes look authentic and aged. You can find or create signs ranging from small, 16×4 inch decorative tin plates to large, massive letter signs for walls. When making a DIY wood sign, techniques like applying a crackle effect with a special stamp or weathering the edges with sandpaper help achieve an authentic worn look. Most DIY kits and materials cost between $20 and $60, depending on size and detail, making it an affordable way to customize your home décor.
Well-executed vintage signs show slight distressing and subtle imperfections in paint and lettering that suggest age without appearing damaged. Avoid going too far with distressing, or the sign might look careless instead of charming. Also, consider where you’ll display the sign; indoor placement prevents weather damage and fading, preserving the nostalgic appeal over time. Creating or adding a vintage sign injects personality while connecting your living or business space to the history and style of past decades, offering both decorative and emotional value.
Popular Vintage Sign Styles and Their Origins
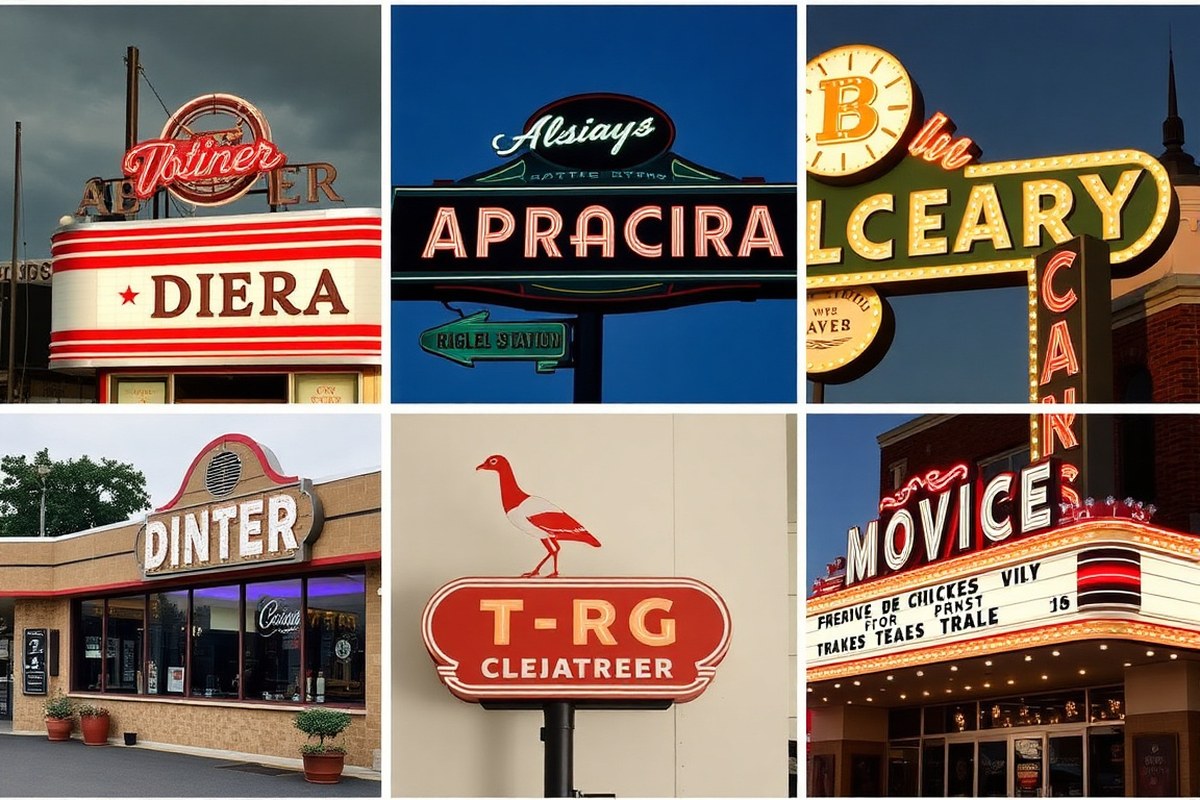
Vintage signs come in several distinct styles, each tied to specific historical uses and visuals. Popular styles include porcelain enamel traffic signs, wooden advertising boards, tin signs for businesses, and marquee or theater signs. These styles differ by their materials, design focus, and original function, shaping their unique appeal for decorating purposes today.
Porcelain Enamel Traffic and Street Signs
Porcelain enamel signs, often used for traffic and directional purposes in the early to mid-20th century, are prized for their glossy, durable finish and bold lettering. These signs generally feature simple but striking color schemes, typically white, red, and black, and strong typography designed for easy reading at a distance. Restoration projects focus on preserving or replicating the enamel shine while repairing any rust or chipping, usually costing $50 to $150 depending on size and condition. Using these signs in your decor adds a vintage industrial or roadside Americana vibe, often seen in vintage collections and garages.
This style matters because its strong enamel finish holds color longer than painted wood, making it ideal for outdoor or high-traffic areas. Simple rust treatment and gentle cleaning ensure it retains charm without losing authenticity. A common pitfall is over-sanding, which can remove the enamel coating and damage the surface.
Wooden Advertising Boards
Wooden signs were staples for cafés, railroads, and beverage companies in the early 1900s, often hand-painted with elaborate typography and sometimes raised lettering or carved elements. Old wood adds authenticity, and repainting requires selecting paints that dry quickly, like acrylic craft paints, to emulate historical techniques while being practical for DIY projects. Costs to create or restore a wooden sign typically range from $20 to $80 depending on wood quality and paint used.
These signs often bear vintage logos, slogans, or welcoming messages, making them suitable for home bars, porches, or kitchens. Detailed typography or hand-drawn art sets them apart, and distressing can simulate years of weather exposure. Avoid using modern fonts or graphics that clash with the antique style when customizing these signs.
Tin Advertising Signs
Tin signs are lightweight, thin metal panels that were common for advertising bars, soda brands, and local businesses. They frequently use colorful designs with retro imagery, like old bottles or product mascots, bringing playful energy to spaces such as kitchens or home bars. These signs may show signs of wear like scratches or minor rust, which adds to their vintage appeal. Creating tin signs can be done by transferring printed templates onto tin or painting directly, with care taken to avoid warping the metal.
The affordability and flexibility of tin make these signs popular. Expect to spend $10 to $40 for DIY materials or reproduction finds. Tin signs help evoke nostalgia without needing bright or modern color schemes, perfect in rooms that benefit from bold style without harsh tones.
Movie Marquee and Theater Signs
Vintage movie theater signs feature blocky lighting arrangements or stylised fonts that replicate classic cinema marquees. They often use metal sheets or wood with illuminated letters in the original versions, though recreations frequently use paint or vinyl stickers. These signs work well indoors to create cozy, entertainment-themed spaces or add a dash of old-Hollywood glamour to a living room or den.
Materials and techniques vary, from simple painted boards with stenciled letters to custom-built illuminated signs costing hundreds. For a DIY effort, a painted wooden board with overlay stencils and muted colors can achieve an authentic look inexpensively. Avoid overly bright paints or modern lettering that doesn’t match mid-century styles.
Specialty Signs by Theme and Function
Other popular vintage signs focus on niche themes like sports leagues, libraries, gardens, or pharmacies. Sports league signs use bold, simple text and muted palettes for a fun yet understated look. Vintage library or reading signs convey a warm, thoughtful atmosphere with comforting color schemes and serif fonts. Garden nursery signs incorporate natural imagery and green hues to inspire freshness. “DRUGS” signs, once common above pharmacies, provide unexpected personality and nostalgia when displayed in modern homes.
Choosing signs based on theme blends decor with personal interests or business identity. Specialty signs usually involve furniture-grade wood or tin and hand-painting techniques tailored to the subject. These may require more detailed research to match historical lettering and color choices accurately.
Cleaning vintage signs should be gentle; harsh scrubbing can remove original paint or enamel, so use soft cloths and mild soap to protect their character.
Choosing the Right Vintage Sign Style for Your Space
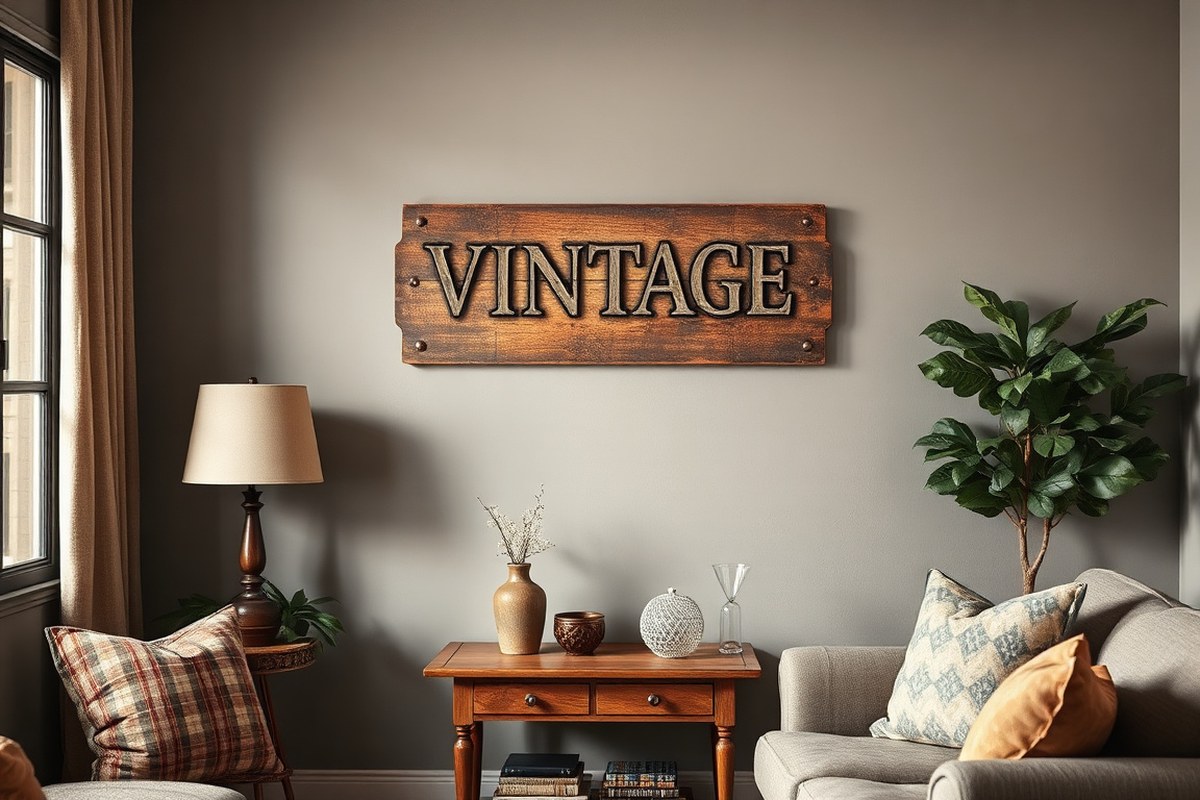
Match the vintage sign style to your room or business by considering its theme, colors, and mood. A sign themed around coffee, soda, or bitters can naturally guide your color palette, making it easier to blend with existing decor. For example, a vintage soda sign with bright reds and blues works well in a breakfast nook to energize the space, while a rustic grocery board with earth tones fits above a pantry or kitchen area. Choosing the right size and scale is important: signs that are too large can overwhelm smaller rooms, whereas small signs might get lost in spacious areas. Aim for signs that cover roughly one-third of the wall space where you plan to hang them for balanced visual impact.
Combining vintage signs with modern decor requires attention to color and style harmony. Keep it balanced by picking signs with main colors that echo those found in rugs, frames, or other accents in the room. Signs featuring clean, simple color blocks or modern fonts allow a smoother transition into contemporary spaces. A vintage sign with bold block letters fits an industrial or retro diner theme, while script fonts create a softer, vintage café feel. Modern reproductions with lighter backgrounds and cleaner lines can give the vintage look a fresh twist that fits well into minimalist or modern designs without clashing.
- Choose signs that reflect the room’s function (e.g., coffee signs for kitchens, travel signs for patios or guest rooms)
- Match the sign’s dominant colors to existing decor elements like rugs or picture frames
- Use a sign size that fills about one-third of your chosen wall space for good proportion
- Select script fonts for a gentle mood or bold block letters for strong vintage character
- Pair vintage spotlight lamps or small vases nearby to add decorative touches without clutter
- For a modern look, pick signs with clean lines and simple color blocks
- Hang signs flat on the wall to save floor space and maximize style impact
Business owners can choose signs with logos, route names, or service messages that clearly convey their theme while adding retro charm. A fuel logo or old brand sign can create a distinctive focal point in a showroom or reception area. Reproductions often cost less and are easier to find than original antiques, meaning you can switch out signs seasonally or as your decor evolves. Lighting a vintage sign well can highlight its details and add dramatic flair without needing extra decorative items around it.
Materials Used in Vintage Signs and Their Characteristics
Vintage signs often use four key materials: enamel, tin, wood, and metal. Each material offers its own look, feel, durability, and typical use, making it important to choose the right one for your project or decor space. Enamel signs are known for their bright, glossy surfaces that resist weather damage, making them ideal for outdoor displays. Tin signs tend to be lightweight and affordable, with a playful retro vibe suitable for kitchens or craft rooms. Wood signs bring a warm, handmade touch with natural textures, perfect for rustic farmhouse styles. Metal signs vary from wrought iron to simpler frames, usually lasting long and adding industrial charm.
| Material | Feel/Look | Durability | Typical Uses | Care | Cost Range |
|---|---|---|---|---|---|
| Enamel | Glossy, bright, smooth | Very durable, weather-resistant | Outdoor shop signs, collector plaques | Wipe with soft, damp cloth | Moderate to high, dependent on size and design |
| Tin | Matte or lightly glossy, thin | Moderate, prone to dents | Kitchen signs, craft rooms, playful decor | Soft, damp cloth cleaning | Lower-cost, often under $30 for small pieces |
| Wood | Matte, textured, warm | Durable indoors; outdoors needs sealing | Rustic, farmhouse signs, wedding gifts | Dust regularly, avoid moisture | Varies, $20, $100+, depending on wood and finish |
| Metal (wrought iron, steel) | Solid, industrial, sometimes rustic | Highly durable, can rust without coating | Framing signs, outdoor fixtures | Check for rust, clean with mild detergent | Higher for wrought iron, moderate for simpler metals |
Choosing the right material depends on where you want to place the sign and how you want it to age. Wood offers that classic handmade feel and looks better the more it shows signs of age, especially indoors where it’s less exposed to moisture. Enamel signs are more maintenance-free and suitable for outdoors or places where brightness and sharp graphics stand out. Tin’s light weight makes it easy to hang as personalized gifts or small decorations. Metal frames, particularly wrought iron, can add elegance but also raise the cost significantly.
Good results come from matching your material choice with your wear expectations and decor style. For example, a glossy enamel plaque works well as a collector’s piece thanks to its vibrant graphics and lasting finish. A painted wooden sign fits a cozy farmhouse kitchen but needs regular dusting and no direct water contact. Tin signs are great for humorous or thematic messages that require lighter handling.
Essential Tools and Paints for DIY Vintage Sign Making
To create authentic-looking vintage signs yourself, start with a basic set of tools and paints designed for wood surfaces. You’ll need quality paint brushes with varied shapes, flat ones for background coats and fine-tipped brushes or sponges for details and lettering. Stencils with classic vintage fonts or shapes save time and help get clean lines even without an artistic hand.
Chalk paint and craft acrylic paint are popular choices. Chalk paint offers a matte finish that sands well for distressing, while black craft paint works well for lettering and stenciling on light backgrounds. Choose colors like Old White or muted pastels for that aged feel. Wood stains or tinted waxes can add warmth or age spots after painting.
- Flat and angled brushes (sizes 1/2 to 2 inches) for base coats and larger areas
- Small detail brushes and sponge applicators for lettering and texture
- Reusable stencils in vintage fonts and motifs, preferably plastic or mylar for durability
- Chalk paint in shades like Old White, cream, or pastel tones for authentic matte finish
- Black or dark-colored craft acrylic paint for stencil work and outlines
- Wood stain or tinted wax to create aging effects after painting dries
- Sandpaper (120 to 220 grit) for smoothing and distressing painted surfaces
Work in a well-ventilated area, especially when using stains or paints with strong fumes. Wear gloves to protect your skin and a mask if sanding or working with spray sealers. Clean brushes promptly after use to maintain their shape and effectiveness. Organize your workspace to avoid spills and accidental smudges on your sign or surrounding surfaces.
The process begins with sanding your sign board smooth, then applying a base chalk paint color using a flat brush in even strokes. After drying, use stencils and a small brush or sponge to apply lettering with black craft paint. Let each paint layer dry thoroughly before the next step. Once the design is complete, distress edges lightly with fine sandpaper to simulate wear. Finish with a clear matte sealer to protect your work without adding shine, allowing your vintage sign to last both indoors and outdoors.
Always test your paint and stain on a scrap piece of wood first to confirm color and distressing effects before starting your main sign.
Step-by-Step Process to Create a DIY Vintage Sign
Creating your own vintage sign at home is a rewarding project that typically takes between a few hours and a day, depending on drying times and complexity. The process includes prepping the wood, applying paint layers, adding lettering, and distressing for that authentic aged look. With careful steps, you’ll have a unique sign that fits your décor perfectly.
Preparing the Wood or Surface
Start by selecting your wood surface; new wood works well and can be made to look aged with distressing. Sand it smoothly, focusing on removing rough spots but keeping some natural texture. Clean the surface to remove dust and debris, ensuring paint adheres properly. If using a non-wood surface, like metal or plastic, clean it thoroughly and consider a primer suited for that material.
Preparation is important for durability and a clean finish. Roughly sanding the edges and some central areas later will contribute to the vintage feel.
Applying Base Coats and Layers
Apply a base coat to your wood, usually a solid color like white, cream, or any lighter shade, which provides a good background for your design. Let the base coat dry completely, which can take about 1 to 2 hours depending on paint type and climate. Add a second coat if coverage is uneven.
For a classic vintage look, paint one or two additional layers in contrasting colors, allowing each to dry fully. You might choose earth tones or muted colors typical of vintage signs. These layers set the stage for distressing.
Adding Lettering and Distressing
Use stencils or hand-paint your desired text, names, or phrases with a fine brush or paint markers. Black or dark colors often create strong contrast. Let this lettering dry at least 30 minutes to an hour.
Distressing involves sanding or scraping paint in targeted areas to reveal lower layers or bare wood, mimicking natural wear over time. Focus on corners, edges, and spots where aging would occur naturally. This step can take 20 to 40 minutes depending on the level of distressing you want.
Sealing and Final Touches
Finish with a clear sealant like matte polyurethane to protect your sign from wear and moisture. A single coat usually suffices, but two coats provide greater durability, especially for outdoor signs. Allow sealant to dry for 4 to 6 hours, or as the label directs. Adding dim bulbs or a brushed finish after sealing can add extra character, but this may require additional tools and time. Once sealed and dry, your vintage sign is ready to display indoors or outdoors, with a nostalgic charm that speaks to your personal style.
- Select and sand your wood or surface carefully, clean to prep.
- Apply one or two base coats of paint, letting each dry fully.
- Create your lettering with stencils or paint markers, then dry.
- Distress the paint by sanding edges and random spots.
- Seal the sign with a clear, matte sealant to protect the finish.
Techniques to Distress and Age Signs for Authentic Vintage Look
Distressing a sign properly to achieve an authentic vintage look involves carefully controlled techniques to mimic natural aging without damaging the piece. Start with sanding the surface lightly using fine-grit sandpaper (around 220 grit) to remove the glossy top layer and create a base for paint adhesion. Next, apply a base coat of paint that fits the vintage style you want, such as muted whites, creams, or pastels. After the paint dries for several hours, use a distressing tool like an iron orchid décor large distress stamp with a dab of black craft paint to add realistic worn spots and smudges. This method replicates years of use and exposure without requiring harsh chemicals.
Cracking and fading paint further improve authenticity. To create cracks, apply a crackle medium according to the product instructions, usually one coat before the top coat, and then paint over it. As the top coat dries, it will naturally crack, simulating aged paint. For faded effects, lightly sand edges and flat surfaces until some paint comes off, revealing the base coat or wood underneath. This fade should look uneven to match natural sun bleaching. Let drying times vary from 12 to 24 hours between coats for best results.
- Use a damp cloth to gently wipe off dust between sanding and painting.
- Work in thin layers to avoid paint pooling or over-saturation.
- Add soft patinas with diluted paint washes for subtle color shifts.
- Focus distressing on corners and raised areas where wear naturally occurs.
- Experiment on scrap wood to test the crackle medium and distress stamps first.
- Seal the finished sign with a matte polyurethane if it will be displayed outdoors.
- Wear gloves and work in a well-ventilated area, especially when using paints and mediums.
Failing to allow each layer to dry properly is a common mistake, leading to smudging or uneven cracking. Over-sanding can remove too much paint, resulting in bare patches that look artificial. Avoid applying distressing tools without first testing their effect, since the amount of black paint on the distress stamp impacts how natural the worn areas appear. Also, skipping a sealant leaves signs vulnerable to further damage in outdoor settings. Cost-wise, crackle mediums and distress stamps typically range from $5 to $15, which is affordable and available at most craft stores.
Authentic vintage signs look well-worn but balanced. The cracks should be subtle, paint fading gradual and uneven, and distress marks placed logically where hands or weather would touch. Too much distressing can make the sign look damaged rather than aged, so slow and deliberate layering of effects works best. These techniques let you create vintage-style signs that bring character and nostalgia to any space without the need for decades of actual wear.
Where to Find Authentic Vintage and Reproduction Signs
Authentic vintage signs and their reproductions can be found through a range of sources, from brick-and-mortar shops to specialty online stores and flea markets. Flea markets and antique fairs are classics for discovering genuine vintage signs, usually crafted from wood or metal, which often show natural wear, rust, or minor imperfections. These flaws confirm their age and add to their charm but also reflect the sign’s history. Expect to pay anywhere from $50 to several hundred dollars depending on rarity and condition. Reproduction signs, made to mimic the old styles with deliberate distressing techniques, are widely available online and in some vintage home décor shops. Prices tend to be lower, typically between $20 and $70, making them a budget-friendly option to achieve a vintage look without the risks associated with older signs.
When shopping for authentic signs, it is essential to assess a few key factors to avoid purchasing a reproduction sold as an original. First, examine the material closely. Original vintage signs from the mid-20th century were often made from wood with aged paint that shows cracking, fading, or peeling. Signs made from lightweight or perfectly smooth materials may be reproductions. Look for hardware such as old nails or rusted screws, which are usually hard to replicate authentically. When buying online, ask for close-up photos showing any damage or wear marks. Authentic signs will show uneven, natural wear rather than uniform or artificially applied distress.
Buying from reputable retailers reduces the risk of fraud. Specialty antique dealers, vintage décor shops, and well-reviewed online sellers with clear return policies offer more protection. Online platforms like Etsy allow you to search for handmade reproductions by artisans who apply traditional aging methods for a convincing finish. For authentic vintage signs, sites focusing on collectibles and antiques or auction houses are better options. Always check reviews and ask sellers about the sign’s provenance or history. Sellers providing detailed background on the sign’s origin and vintage era help verify authenticity and value.
Price negotiation usually offers some flexibility at flea markets and antique fairs, but less so online. Take note that authentic vintage signs may require some restoration or sealing to protect them forever in your home environment. Reproductions offer a ready-to-use finish, but often lack the character of genuine weathering. Consider your project goals and budget to choose the best fit. For a low-risk option with assured condition, reproductions work best. Collectors and those seeking an authentic piece will want to invest in original signs, despite the higher cost and need for careful evaluation.
Always closely inspect signs for natural wear patterns and ask for the item’s history to avoid costly mistakes on fake vintage signs.
Customizing Vintage Signs to Add Personal or Business Touches
Customizing vintage signs with personal or business touches allows you to create unique décor or branding that connects deeply with your audience or family. Adding elements like family names, important dates, or custom messages makes a sign feel one of a kind and meaningful. For example, including a cabin name or a favorite phrase can turn a generic vintage sign into something that holds memories or represents your lifestyle. Pairing the sign with a small framed photo or a map of a meaningful location improve this effect by linking the visual piece to your personal story.
For family or personal use, choose fonts and icons that reflect your style. Chalk-style fonts or simple icons like an apple or star work well on wood or metal vintage signs and give a cheerful, handcrafted look. Keep messages short and impactful, nicknames, mantras, or sayings are ideal. Vinyl lettering or hand-painting are common customization methods; hand-painting costs little more in materials but requires patience and steady skill, while vinyl is faster and cleaner but may show wear outdoors.
In business or storefront settings, vintage signs can reinforce your brand’s identity by incorporating logos, taglines, or product names. Use brand colors and logos in a way that maintains the vintage character, such as distressed painting techniques or faded printing styles. For this, start with a high-resolution logo file and reduce saturation to create an aged appearance. If painting by hand, using stencils ensures clean, consistent shapes and letters. Stencils typically cost $10 to $30 for standard sizes, while custom laser-cut stencils may cost $50 or more depending on complexity.
When customizing vintage signs for business use, consider the sign’s location and visibility. Outdoor signs need weather-resistant paints and sealants to preserve the design, especially in direct sunlight or rain. Oil-based enamel paints and UV-resistant clear coats work well, typically requiring 24 to 48 hours drying and curing time. Failing to protect customized elements can lead to fading, chipping, or peeling within months, which diminishes both aesthetic and professional impact.
Personalizing elements like dates can be done simply by painting or applying vinyl numbers below or beside the main text. Make sure to balance spacing so the addition doesn’t overpower the original design. Subtle additions, like a small heart or star icon near a family name, subtly tie the design to you without clutter. For a business, placing your founding year under your logo in a smaller font is an elegant way to add heritage.
Clear communication with your sign maker or friends helping with the project improves results. Provide exact wording, preferred fonts, and measurements. Typical sign sizes range from 12 by 18 inches for smaller displays to 24 by 36 inches for storefronts. Expect custom lettering to add $20 to $100 or more depending on complexity and method. Letting the design dry fully before handling or shipping prevents smudging or damage, preserving the vintage appeal.
Displaying and Protecting Your Vintage Signs Indoors or Outdoors
Hanging and protecting vintage signs properly extends their life and showcases their charm. Choosing the right mounting hardware prevents damage to both the sign and your wall. Applying appropriate protective finishes shields signs from wear indoors and harsh weather outdoors. Proper care depends on where you plan to display the sign and its material.
Mounting Hardware for Different Surfaces
Select hardware that suits the wall type and the sign’s weight to ensure safe, secure hanging. For drywall, use anchors rated for the sign’s weight to avoid pulling out. Concrete or brick walls require masonry screws or anchors. Lightweight wooden signs can hang with picture wire or sawtooth hangers, while heavier metal or wood signs benefit from D-rings or French cleats for better weight distribution.
When choosing screws or nails, measure the sign’s thickness and weight. Signs weighing over 15 pounds need sturdier anchors and multiple support points. For outdoor signs, ensure mounting materials are rust-resistant, such as stainless steel or coated screws.
- Use plastic anchors or toggle bolts for drywall stability
- Choose masonry anchors for brick, stone, or concrete walls
- Employ D-rings or cleats for heavy or large signs
- Opt for rust-proof hardware on outdoor displays
- Use level and measuring tape to ensure straight hanging
- Place screws or hooks into studs when possible for strength
- Consider using adhesive strips for very lightweight signs indoors
A properly mounted sign hangs flat without wobbling, reducing risk of falling or warping. Avoid using thin nails alone for heavy signs as they can loosen over time.
Sealing Finishes for Outdoor Exposure
Protect vintage signs from sun, rain, and temperature changes by sealing them with durable finishes. Use a clear exterior varnish, polyurethane, or marine-grade spar urethane that resists UV damage and moisture. Acrylic spray sealers also offer a quick, even coat for doors or smaller signs. Apply at least two to three coats to build a strong barrier. Follow manufacturer instructions for drying times, usually 4 to 6 hours between coats.
Before applying finish, clean the sign with a gentle brush or cloth to remove dust and dirt. Lightly sanding the surface can help the finish adhere better, especially on metal or wood. Keep in mind that some finishes will deepen colors or add shine, so test on a small hidden area first.
- Choose spar urethane for wood signs in wet climates
- Use UV-resistant sealers to prevent paint fading
- Apply multiple thin, even coats rather than one thick coat
- Allow adequate drying time to avoid sticky finish
- Seal edges and backsides to prevent moisture seepage
- Consider reapplying sealant every 2 years outdoors
- Wear gloves and work in a well-ventilated area
Without sealing, wood or metal signs outdoors can crack, peel, rust, or fade within months. Properly sealed signs preserve their vintage look while resisting environmental damage.
Indoor Display Considerations
Indoor placement protects signs from harsh weather, but signs still face humidity, dust, and sunlight wear. Place signs away from direct sunlight to reduce fading. Consider mounting them in rooms with stable temperatures and low humidity to prevent warping or paint bubbling. Avoid areas near cooking or bathroom steam unless the sign has an appropriate protective finish.
Frame or place signs behind glass or acrylic for extra protection from dust and accidental bumps indoors. Use felt pads or rubber bumpers on the back of the sign to prevent scratching your wall. For vintage LED or neon signs, ensure electrical components are in good condition and mount them on insulated surfaces according to safety guidelines.
- Keep signs out of direct sunlight or near heat sources
- Use dusting cloths or compressed air to clean surfaces gently
- Mount with rubber bumpers to protect walls
- Consider decorative frames for added safety and style
- Ensure vintage lighting is inspected for safe wiring
- Position signs where they won’t be knocked or brushed frequently
- For wooden signs, maintain moderate indoor humidity levels
Indoor displays require less intensive sealing but still benefit from occasional cleaning and careful placement to maintain that authentic vintage character over time.
Avoiding Common Mistakes in Vintage Sign Projects
Common mistakes often happen during the painting, distressing, material choice, and installation phases of vintage sign projects. Using inappropriate materials can lead to poor durability and fading. For example, choosing interior paints for outdoor signs causes them to peel quickly. Always pick paint designed for your sign’s setting. Exterior acrylic paints cost around $10 to $15 per quart and provide lasting results in outdoor conditions.
Poor surface preparation is another frequent issue. If you paint over dirt, grease, or old flaking paint, the new paint won’t adhere properly. Clean the surface with mild soap and water, let it dry, then sand gently with 120- to 220-grit sandpaper to create a smooth base. Skipping these steps often leads to bubbling or chipping paint within weeks.
When distressing signs, the goal is to mimic natural wear without damaging the sign’s structure. Over-sanding or aggressive techniques can make the sign look fake or structurally weak. Instead, use light sanding in areas that would naturally get worn, such as edges or corners. Use fine steel wool or a sanding block, applying gentle, even pressure. Adding thin layers of diluted paint or glaze between distressing steps adds depth to the aged look.
- Choose paint suited for sign location (interior vs. Exterior).
- Always clean and lightly sand the surface before painting.
- Distress with fine sandpaper or steel wool, focus on natural wear areas.
- Seal finished signs with a clear polyurethane or wax to protect paint and wood.
- Install signs securely using appropriate mounting hardware based on wall type.
- Use respirators and gloves when sanding old paint, especially on vintage signs that might contain lead-based paint.
Installation mistakes include inadequate mounting that risks the sign falling and causing damage or injury. Use heavy-duty picture hangers or masonry anchors matched to the sign’s weight and the wall material. Signs over 10 pounds require multiple anchors spaced evenly for stability.
Always wear a dust mask and gloves when sanding or stripping old paint to avoid inhaling harmful particles or exposing your skin to toxins.
Health and safety should be a top priority, especially when working on genuine vintage signs. Many old signs used lead-based paint or toxic finishes. Test kits for lead paint are available for around $10 and can identify risks before you start sanding. Use proper ventilation when painting or sealing, and dispose of old paint chips as hazardous waste according to local regulations.
Inspiring Vintage Sign Themes for Seasonal and Everyday Decor
Seasonal and holiday vintage signs bring warmth and charm to your home, creating focal points that change with the time of year. A rustic wooden board featuring phrases like “Happy Harvest” or “Merry & Bright” fits well on a mantel or front porch during autumn and winter. Enamel signs with elegant script fonts can add a glossy, nostalgic touch to your kitchen or dining area for celebrations like Thanksgiving or Christmas. Vintage floral or garden-themed signs refresh spring and summer decor, perfect for patios or sunrooms.
Decorating with vintage signs for common rooms involves choosing themes that match the space’s function and style. A kitchen sign could display retro advertising for coffee or baked goods, while a vintage bar sign with neon trim or distressed metal lettering suits entertainment areas. For living rooms, signs with vintage family mottos or classic movie quotes build a cozy, personalized atmosphere. Choosing the right sign size matters; a 12-by-24-inch sign works well above a sofa, while smaller 8-by-12-inch plaques are ideal for entryways or bathrooms.
- Winter/Holiday: Enamel “Let It Snow” or rustic wooden “Joy to the World” signs
- Spring: Floral or gardening-themed signs like “Welcome Spring” on weathered cedar
- Summer: Vintage beach or picnic signs with bold colors and playful fonts
- Autumn: Harvest and pumpkin-themed wood signs with warm tones and hand-painted lettering
- Kitchen: Retro advertisements for soda, coffee, or homemade pies with distressed finishes
- Living Room: Classic movie quotes or family motto signs on aged metal or wood
- Bar/Entertainment Area: Neon-style or metal signs with vintage drink logos or witty sayings
Creating your own seasonal vintage sign can start with choosing the right base, such as an 18-by-24-inch pine board from a hardware store costing around $15. Using outdoor acrylic paints for weather resistance and a stencil for script fonts speeds up the process and ensures clean lettering. Applying a light sanding after painting mimics natural wear and improve the vintage look. Cost for paints and brushes usually stays under $20, making this a budget-friendly seasonal update. Proper placement improve impact, hang autumn signs on exterior walls close to your front door, and reserve kitchen-themed signs for wall space near where you cook or entertain.
Step-by-Step Action Plan for Vintage Sign Projects
Follow this plan to start creating or selecting the perfect vintage sign that suits your space and style.
- Before you start: Choose a vintage sign style that matches your decor theme. You’ll know it fits when it complements your existing colors and furniture.
- Day 1: Gather essential materials and tools like wood panels, chalk paint, and distressing brushes. Confirm you have everything you need before beginning.
- Day 2: Sketch your sign design or select an authentic reproduction if you’re buying. Make sure your design feels personal or fits your business message.
- Day 3 to Day 4: Paint and distress your sign using the techniques described. Check that the finish looks naturally aged but the design remains readable.
- Day 5: Apply a protective sealant for indoor or outdoor use depending on your display location. The sign should have a matte or soft sheen to avoid glare.
- Week 2: Install your sign securely in the chosen spot, ensuring it’s level and stable. Your sign will improve the space without damage or safety issues.
- After 1 month: Inspect the sign for wear or fading, and touch up or reseal as needed to maintain its vintage charm.
Frequently Asked Questions
What Are Some Creative Ways to Incorporate Vintage Signs into Modern Home Decor?
Mixing vintage signs with contemporary furniture creates a unique look that blends old charm with new styles. You can hang a vintage diner sign above a modern kitchen island to add character and a retro vibe.
Can Vintage Signs Be Safely Restored Without Damaging Their Value?
Yes, gentle cleaning and using appropriate restoration products can preserve vintage signs without harming their worth. Avoid harsh chemicals and sanding, as these can reduce authenticity and value.
How Do Lighting Choices Affect the Display of Vintage Signs?
Proper lighting highlights the colors and details of vintage signs, improving their visual impact. Using warm LED lights can recreate a cozy, nostalgic atmosphere without damaging the sign’s material.
What Are Some Budget-Friendly Alternatives to Buying Vintage Signs?
DIY projects using reclaimed wood and printed vintage graphics offer affordable vintage sign options. This approach lets you customize size and design while keeping costs low.
Can Vintage Signs Be Weatherproofed for Outdoor Use?
Sealing vintage signs with clear outdoor varnish helps protect them from moisture and UV damage. Be sure to choose products suitable for the sign’s material to avoid discoloration or peeling.
What Should I Consider When Combining Multiple Vintage Signs in One Space?
Balance size, colour, and theme to avoid a cluttered display. Group signs with related styles or eras and leave breathing room between them to create a cohesive vintage-inspired gallery.
The Bottom Line
Vintage signs bring character and history to any room or outdoor area by combining style and storytelling. Start with a clear design idea and methodically work through your project or selection to create a sign that feels timeless and personal. Take the first step today by picking your vintage sign style and setting up your workspace for a satisfying craft or décor upgrade.