Rope Hanging Sign Ideas: 12 Ways to Make and Hang Unique DIY Signs
Rope hanging sign ideas provide a simple, stylish way to add charm and a rustic touch to your home décor. Using rope as the hanging element ensures durability and flexibility, while also offering an attractive natural texture. Start by choosing sturdy wood and the right type of rope to match your design and the weight of your sign.
Key Takeaways
- Choose wood types like cedar or reclaimed planks for a sturdy and visually appealing sign base.
- Select a rope thickness between 3/8″ and 1/2″ braided nylon or twisted cotton for strength and style.
- Drill holes around 1.5 inches from wood ends for balanced rope placement and secure hanging.
- Use knots or wood screws with picture wire to attach rope securely and prevent slipping.
- Sand wood carefully after cutting to avoid splinters and prepare the surface for painting or sealing.
- Consider LED rope lighting accents to add a modern twist and improve the sign’s visibility.
1. What Are Rope Hanging Signs and Why Use Them?
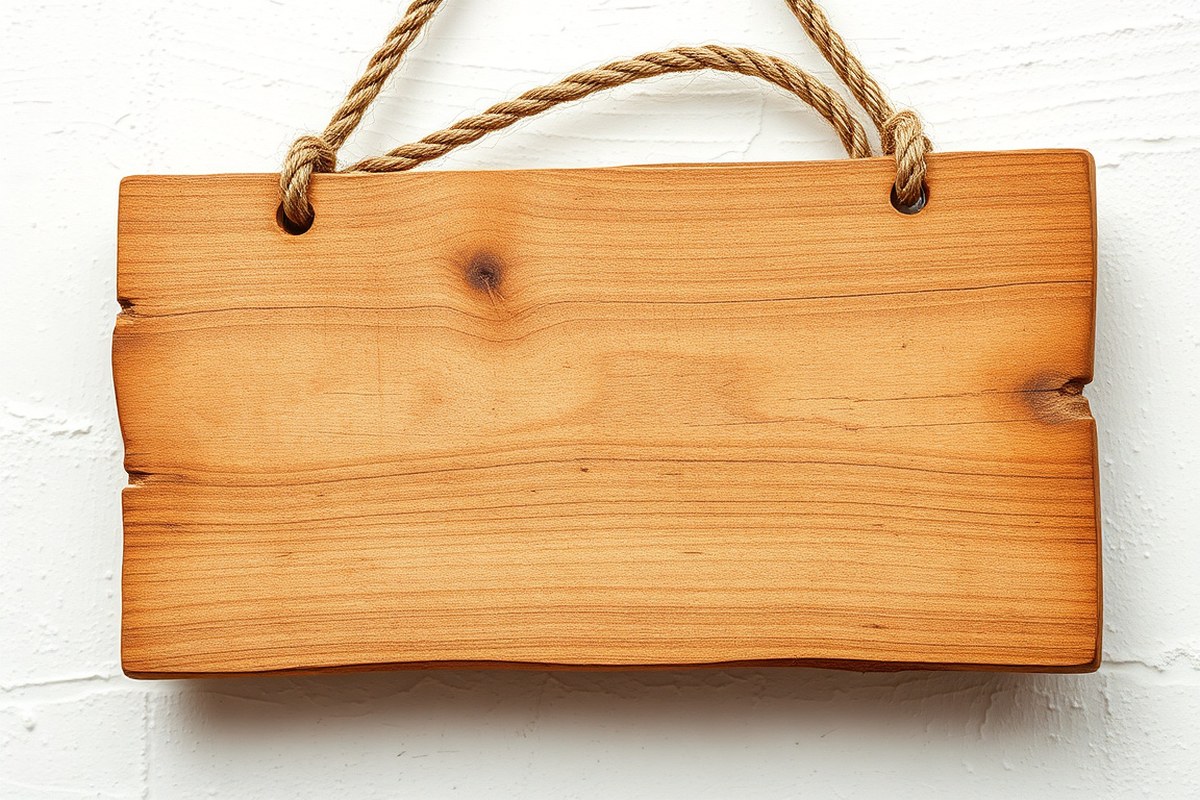
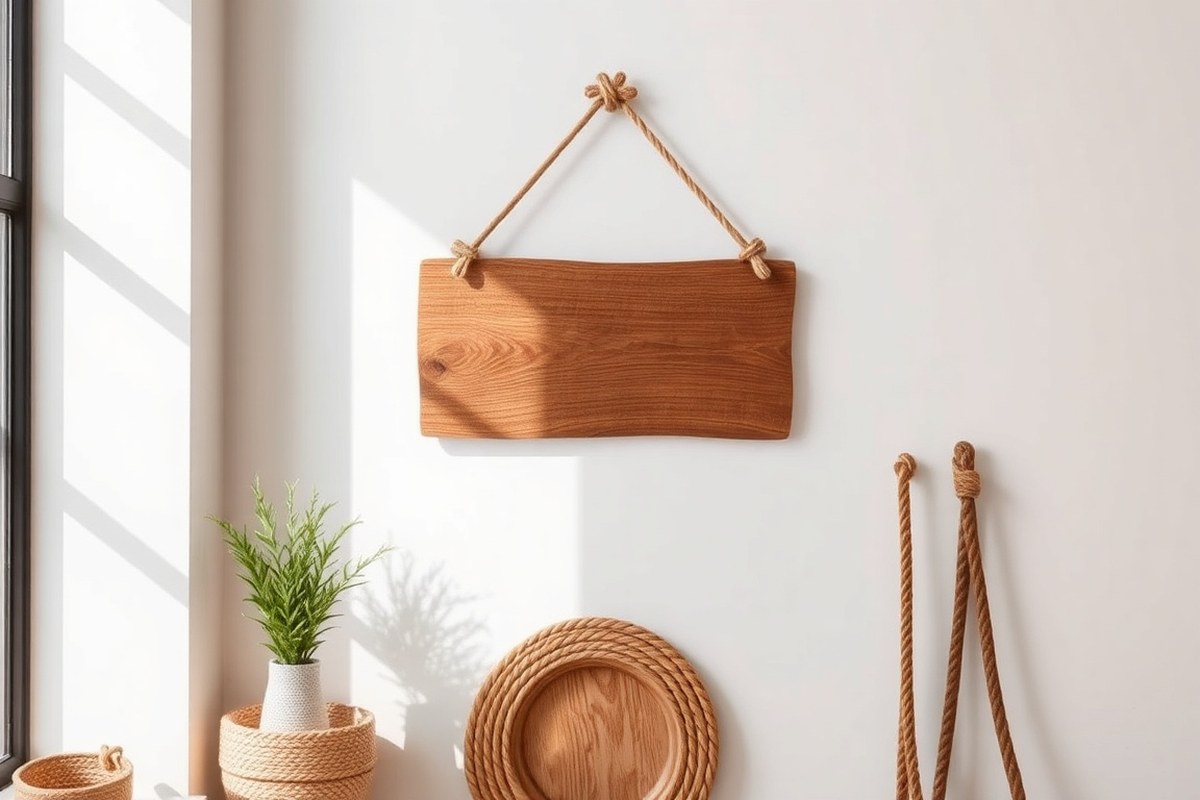
Rope hanging signs are decorative pieces typically made from wood, slate, or other materials combined with sturdy rope to suspend them. The rope serves as both a functional and aesthetic element, creating a rustic, natural look while securely holding the sign in place. These signs often feature personalized messages, house numbers, or names, and they bring an earthy or coastal vibe to your home decor.
Choosing rope instead of traditional metal hooks, chains, or picture wires offers several advantages. Rope adds texture and visual interest that complements wooden signs, creating a handmade appearance ideal for casual or rustic interiors. It’s also easier to customize the hanging length by knotting or adjusting the rope, which lets you tailor the sign’s position without needing extra hardware. Using rope is cost-effective: natural fibers like jute or sisal ropes are often affordable, around $5 to $10 per 10 feet, and simple to install with basic tools like screws or glue.
Rope hanging signs are commonly used in various parts of the home, including living rooms, entryways, kitchens, and outdoor areas such as porches or gardens. For example, a set of DIY hanging rope shelves made from a 1×8 common board and rustic cord can display plants or decorative items and be ready to hang in 10 to 15 minutes. Another popular application is personalized name plaques for front doors or mudrooms, combining wood cutouts with thick rope for easy wall mounting. These signs work well in spaces where you want to add charm and personality without complicated installation.
The process involves preparing the sign base, often by gluing or screwing wood slats together, then threading or knotting the rope through drilled holes on each side. Leaving an extra 20 inches of rope in the middle creates a stable loop for hanging. This method provides versatility for indoor or sheltered outdoor use. A quick setup can cost under $20 in materials and delivers a functional, stylish accent that fits a variety of decorating styles from farmhouse to coastal. However, using ropes requires attention to durability and weight limits; choose thicker ropes and secure fastenings for heavier signs to avoid sagging or accidents.
2. Essential Materials for Making Rope Hanging Signs
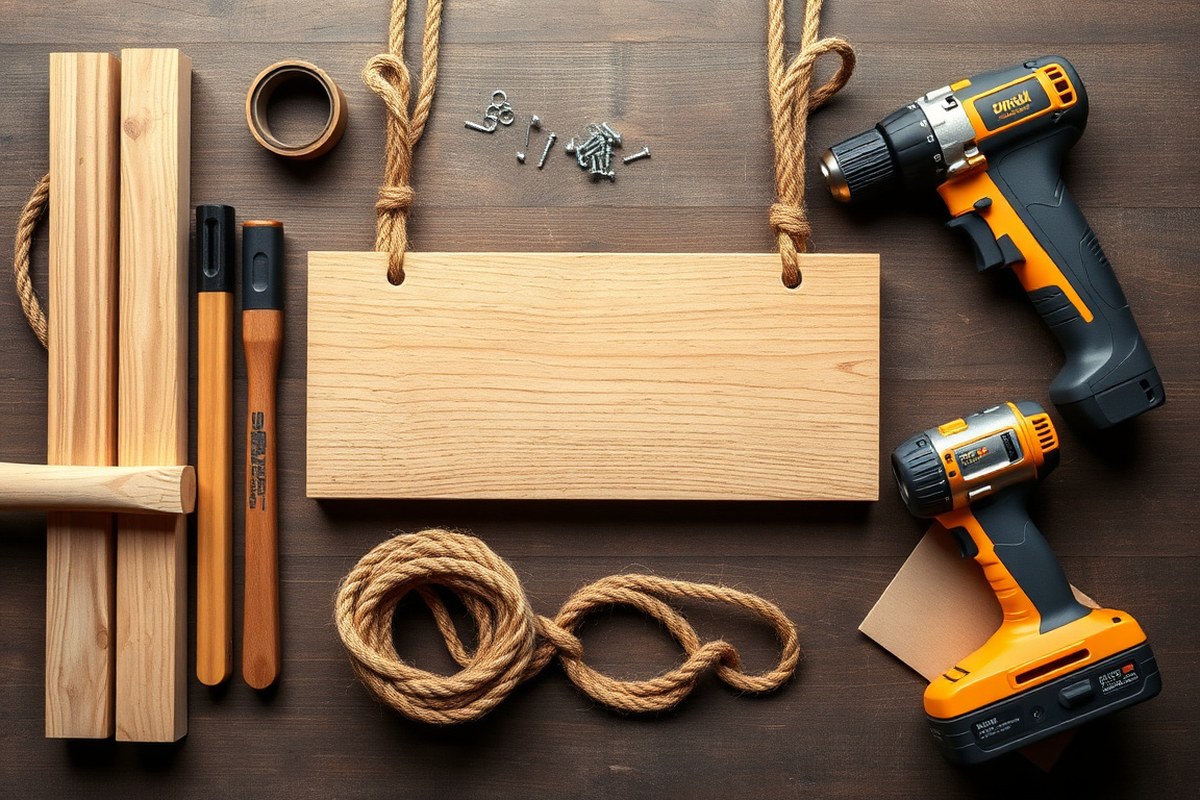
Choosing the right materials is key to making rope hanging signs that look great and hold up well. For the wood base, cedar and pine are popular choices. Cedar offers natural durability against rot and insects, which is helpful if your sign will hang outdoors. Pine is more affordable and easy to paint or stain for indoor signs. Boards sized around 1×6 inches and 24 to 26 inches long give a sturdy, manageable size for most projects.
The rope used must support the sign’s weight and contribute to its style. Braided nylon rope in a thickness around 3/8 inch balances strength and a refined look. Natural fibers like jute or sisal rope provide a rustic aesthetic but may wear faster when exposed to moisture. Cotton rope is soft and decorative, best reserved for lighter indoor signs.
- Wood boards (cedar or pine), cut to approx. 1×6″ by 24-26″
- Rope, 3/8″ braided nylon for strength or natural jute for rustic decor
- Power drill with drill bits sized between 3/8″ and 1/2″ for rope holes
- Wood screws (1 to 1.5 inches) or metal anchors if mounting outdoors
- Scissors or sharp knife to cut rope cleanly
- Clear matte spray sealant for wood protection (optional)
- Small level to ensure the sign hangs straight
Besides material choices, quality tools help achieve precise results. Use a drill bit that matches your rope diameter to make neat holes that prevent rope fraying. Strong wood screws or metal anchors provide secure hanging points, especially if mounting on a wall or fence. If you plan to stain or paint the wood, prepare by sanding smooth and consider a clear sealant to extend the lifespan of your sign.
Using a drill bit too small for your rope can cause excess wear and shorten your sign’s hanging life, match sizes carefully before drilling.
Natural wood often has knots or slight warping, so examine the boards and select the flattest, clearest pieces for the best finish. Rope length depends on your sign’s hanging location, but 15 to 20 feet usually covers most needs, allowing for knots and height adjustments. For a polished look, trim rope ends cleanly and consider sealing fibers with a bit of clear nail polish to prevent fraying.
3. How to Prepare Wood: Cutting, Drilling, and Sanding
Preparing your wood properly involves cutting it to the exact size you want, drilling precise holes for your rope, and sanding the surfaces to ensure a smooth finish. Each step affects the look and durability of your hanging sign, so it’s important to do them carefully and safely.
Measuring and Marking Wood for Signs
Start by deciding on the size and shape of your sign based on the space where you’ll hang it or the text you want to display. Use a measuring tape and pencil to mark the exact dimensions on your wood piece. Measure twice to avoid mistakes that waste material or create uneven edges.
Place marks where you want to drill rope holes, usually near the top corners of your sign to balance the hanging weight. Mark the center points of each spot clearly for drilling accuracy.
Safe Techniques for Drilling Hook and Hanging Holes
Drilling holes requires a steady hand and the right drill bit to create clean openings for your rope. Using a Forstner bit between 3/8 inch to 1/2 inch in diameter works well for threading rope through thick wooden planks. Always clamp your wood securely to a stable surface before drilling to prevent slips or injury.
Wear safety glasses to protect your eyes from wood chips. Drill holes straight and even to make sure the rope fits snugly and the sign hangs evenly. Don’t force the drill; slow steady pressure produces cleaner holes. For extra help, you can insert a barbecue stick through the hole after drilling to guide the rope threading process.
- Clamp the wood piece to your workbench or stable surface.
- Select a Forstner drill bit sized to your rope thickness (usually 3/8 inch to 1/2 inch).
- Mark the exact spots for the holes near the top corners of your sign.
- Wear safety glasses and hold the drill perpendicular to the wood surface.
- Drill slowly through the wood at the marked spots.
- Remove any wood debris from the holes using a brush or air.
- Confirm holes fit your rope by threading a piece through gently.
Sanding and Finishing Wood Surface
Sanding smooths rough edges and surfaces, preventing splinters and improving paint or stain adhesion. Use medium-grit sandpaper (around 120-grit) to even out cuts and drill edges, then follow with fine-grit sandpaper (220-grit) for a polished finish. Always sand along the wood grain to maintain its natural appearance.
Make sure to sand the hole edges as well, so the rope doesn’t fray or get damaged. After sanding, wipe the wood clean with a damp cloth to remove dust before applying paint, stain, or sealant. Proper sanding can cost nothing but time and basic sandpaper but makes a big difference in how professional your sign looks and lasts.
4. Choosing the Right Rope Type for Durability and Look
Choosing the right rope for hanging your sign depends on the sign’s weight, desired look, and your budget. Stronger ropes, like manila or synthetic options, handle heavier signs better, while softer cotton ropes provide a delicate, natural texture but may not last outdoors. Thickness also matters: thinner ropes suit small, lightweight signs, whereas thick ropes give sturdy support for larger wood or neon-backed signs. Here’s a comparison of common rope types focusing on strength, appearance, and cost to help you pick the best fit for your project.
| Rope Type | Strength | Appearance | Typical Cost (per foot) | Best Use |
|---|---|---|---|---|
| Manila (Natural Fiber) | High (up to 600 lbs breaking strength) | Rough texture, classic tan color, rustic look | $0.50 – $1.00 | Heavy wooden signs, outdoor use |
| Cotton (Natural Fiber) | Medium (up to 150 lbs breaking strength) | Soft, smooth texture, natural white or dyed option | $0.75 – $1.20 | Lightweight signs, indoor decorative projects |
| Polypropylene (Synthetic) | High (up to 600 lbs breaking strength) | Smooth, brightly colored or clear options | $0.30 – $0.80 | Outdoor signs, bright colored or neon rope signs |
| Jute (Natural Fiber) | Medium (up to 200 lbs breaking strength) | Coarse with natural tan shade, vintage feel | $0.40 – $0.80 | Rustic indoor signs, short term use |
| Nylon (Synthetic) | Very High (up to 800 lbs breaking strength) | Shiny, smooth, often in solid colors | $0.60 – $1.20 | Heavy signs, long-term durability, color options |
Select rope thickness according to your sign’s size and weight. For signs under 12 inches wide and 2 pounds, 1/4 inch rope offers a clean, unobtrusive look. Larger signs between 12 to 24 inches wide require 3/8 inch diameter rope to avoid sagging. For heavyweight signs over 20 pounds or wider than 24 inches, choose 1/2 inch or thicker rope to guarantee reliable support. Using a thicker rope also boosts the sign’s visual impact if a bold style fits your décor.
Light-colored ropes like cotton or white polypropylene create a bright, airy aesthetic. Darker or rougher ropes such as manila or jute add warmth and texture for a rustic or vintage vibe. Synthetic ropes offer vibrant hues ideal for modern or neon-accented signs, adding color without sacrificing strength.
Purchasing rope from hardware stores or craft suppliers typically costs between 30 cents and $1.20 per foot depending on type and thickness. Planning the exact length needed includes some extra to allow for knots or loops, so measure carefully before cutting. For heavier projects, always test the rope’s strength by suspending weight before finalizing your hanging hardware.
5. How to Attach Rope Securely to Your Sign
Attaching rope securely to your hanging sign matters because it keeps the sign stable and looking sharp over time. A loose or poorly tied rope can cause the sign to tilt, fall, or wear out quickly. Start by drilling holes evenly spaced along the top of the wooden sign, then thread your rope through these holes to distribute the weight evenly. This even distribution balances the sign and prevents it from shifting or sagging.
Several knot types keep rope tight and durable for hanging signs. The Figure Eight Knot is ideal for preventing the rope from slipping through drilled holes; it creates a strong, secure stopper. The Double Overhand Knot adds bulk and strength at the rope’s end, which helps it stay put when threaded through holes. The Bowline Knot forms a fixed loop that won’t tighten or slip, making it perfect for attaching hardware or hooks to hang the sign. For knots that are easier to untie but still hold well, the Slip Knot offers some adjustability.
- Thread rope through drilled holes spaced 6, 12 inches apart for even weight distribution.
- Use a Figure Eight Knot at the ends to prevent rope slippage.
- Secure a Bowline Knot to create fixed loops for hooks or screws.
- Double Overhand Knots add extra bulk and hold tight under tension.
- Slip Knots let you adjust rope length after hanging.
- For a cleaner look, tuck knots inside drilled holes if space allows.
- Apply a drop of wood glue or clear nail polish on knots to stop fraying and looseness.
Alternatives to knots include using clear nylon thread or thin wire to tie rope ends discreetly, especially if you want a minimalist appearance. Some prefer using metal crimps or clamps designed for rope; these require a crimping tool and can create a professional finish but add minor cost and complexity. Looping rope around a wooden dowel fixed inside the sign can offer a sturdy anchor without visible knots. Threading the rope through tightly drilled holes and tying a simple overhand knot on the back side, combined with adhesive, can also keep the rope secure without bulky knots showing.
Test your knots and attachments by applying gentle downward pressure; your sign should stay firmly in place without slipping or shifting for at least a few minutes.
For best results, measure twice before drilling and threading to keep holes aligned horizontally. Use natural fibers like cotton macrame cord for easy knotting and a clean look. Remember that tighter knots last longer but can be harder to adjust if needed, so plan for final adjustments before fully tightening. These steps help ensure your rope hanging sign stays both functional and stylish.
6. Creative Rope Hanging Sign Design Ideas
Rope hanging signs suit many decor styles, from rustic farmhouse to modern boho. These signs can feature natural jute or cotton rope for a casual, relaxed feel. You might choose thick, twisted rope for a sturdy, vintage vibe or thinner braided rope for delicate, refined looks. The rope itself can become part of the design by knotting or looping it into eye-catching shapes like macramé patterns or geometric accents.
Adding personality starts with lettering and paint. Hand-paint your message or design using acrylic paint, which dries quickly and adheres well to wood surfaces. Choose a style that matches your room’s theme, such as bold block letters for industrial style or flowing cursive for a feminine touch. For subtle depth, distress the paint lightly with sandpaper once dry. You can also use stencils or vinyl decals for more precise typography without advanced painting skills.
Lighting offers another way to customize. Installing flexible LED rope tubing around the edges of the sign or framing it inside a rattan or willow hoop creates a glowing, eye-catching effect. These LED ropes often run on USB power or AA batteries, making them easy to integrate without visible cords. Battery packs and small dimmers can be neatly hidden behind the sign, providing adjustable brightness.
Gallery-style signs bring variety to a wall by combining several rope-hung pieces in different shapes and sizes. Arrange them at staggered heights and distances for visual interest. Use a mix of rectangular wooden plaques, circular hoops with rope accents, and small hanging shelves that display plants or books. Budget-wise, you can make multiple signs with about $3 worth of supplies each by using dollar store wood pieces and simple rope.
For a hands-on project, try wrapping your rope around the edges of a wooden sign for natural framing or create a rope grid across the sign’s surface as a decorative anchor for small clips or photos. Floral wire or clear zip ties help secure the rope tightly without harming the wood. These details add texture and make the rope an integral part of the design rather than just a functional hanger.
Good results combine clean lettering, strong rope attachments, and thoughtful arrangement. Loose knots or uneven rope tension can cause signs to hang crooked or slip. Monitor rope length carefully to keep signs centered on the wall. Testing placement before finalizing connections ensures the best balance. Varying rope thickness and colour shades within a gallery grouping can highlight each piece distinctly while maintaining a cohesive look.
7. Safe and Nail-Free Hanging Methods for Rope Signs
For renters or anyone wanting to avoid wall damage, hanging rope signs without nails or drilling requires choosing the right adhesive or hook. The best options are damage-free adhesive hooks, strong double-sided tapes, and multi-purpose construction adhesives like Bostik No More Nails. These provide a firm hold while protecting your walls and can support different weight ranges.
Damage-free adhesive hooks use a special glue that sticks securely yet peels off cleanly. They attach easily to painted drywall or smooth surfaces. Make sure to follow package instructions: clean the wall with rubbing alcohol, avoid textured or uneven walls, press hooks firmly for 30 seconds, then wait an hour before hanging your sign. These hooks usually support up to 5 to 7 lbs, ideal for lightweight rope signs.
Double-sided adhesive tapes are good for smaller signs. Look for heavy-duty tapes designed for indoor use and smooth surfaces. Clean the hanging area and press firmly. Tape tends to be less reliable over time or in humid spaces. It supports lighter weights, generally 1 to 3 lbs.
| Method | Weight Support | Wall Type | Damage Risk | Cost Range (USD) | Removal |
|---|---|---|---|---|---|
| Damage-Free Adhesive Hooks | 5-7 lbs | Smooth painted drywall, tile | None if instructions followed | $5-$15 per pack | Peels off cleanly |
| Heavy-Duty Double-Sided Tape | 1-3 lbs | Smooth, clean surfaces | Low, may peel paint | $3-$10 per roll | May leave residue |
| Bostik No More Nails Adhesive | Up to 20 lbs (with cure) | Various (wood, drywall) | None if surfaces cleaned | $6-$12 per tube | Permanent |
When your rope sign is heavier or has a large surface area, construction adhesive like Bostik No More Nails offers the strongest bond without nails. Apply a thin, even layer on the back of the sign. Press it to the wall firmly for at least one minute and support it with temporary props until it fully cures, usually 24 hours. This method requires careful placement because it’s not reversible without damaging the wall or sign.
Choose the hanging method based on your sign’s weight, wall type, and whether you rent or want to avoid permanent fixtures. Use adhesive hooks or tape for light signs and temporary setups. Use construction adhesive for heavier signs or if you want a permanent, strong hold without drilling. To avoid flaws, always clean surfaces properly, follow curing times, and avoid placing heavy rope signs on textured or damaged walls, as these can reduce adhesive strength or cause wall damage.
8. How to Level and Position Your Rope Hanging Sign Perfectly
Leveling and positioning your rope hanging sign correctly ensures it looks balanced and professional on your wall. Using the right tools and following precise measuring steps prevents crooked hangs, while adjusting rope length helps fix any tilting after installation.
Tools Needed for Proper Sign Leveling
A reliable level tool is essential for ensuring your sign hangs straight. A traditional bubble level or a digital laser level can accurately check the horizontal alignment of your sign. A tape measure helps confirm distances from the floor or ceiling for consistent placement on the wall.
Also, a pencil for marking wall spots and a stud finder to locate secure mounting points improve the stability and safety of the hanging. Use adhesive hooks that can support the weight of your sign to prevent slipping or falling.
Marking and Measuring Wall for Placement
Accurately marking the wall before hanging prevents multiple holes and repositioning. Measure the area where you want the sign and decide on a centered or asymmetrical placement based on your decor style. Use a tape measure to record the desired height, usually between eye level and slightly above for visibility.
With your sign laid flat, measure the distance between the top attachment points on the rope. Transfer these measurements to the wall, marking two spots horizontally aligned and spaced precisely to match the sign. Use a level to ensure these marks are perfectly even before drilling or adhering hooks.
Double-check your marks with a level before drilling to avoid uneven mounting and unnecessary patching.
Adjusting Rope Length and Knots for Balance
Sometimes, the sign can tilt after hanging due to uneven rope lengths. To correct this issue, adjust the length of one rope side by loosening and retightening knots or creating new ones closer or further from the sign. Keep adjustments small, about ¼ inch at a time, to avoid over-correcting.
When knots are adjusted, test the sign’s balance repeatedly by gently nudging to ensure it stays level without leaning toward one side. Sliding knots or adjustable hooks help keep your sign balanced without needing to tie new knots.
- Choose the location on your wall and clean the surface if using adhesive hooks.
- Measure the distance between the rope attachment points on your sign.
- Use a tape measure and pencil to mark matching, horizontally level points on your wall.
- Install wall anchors, hooks, or adhesive mounts at the marked positions.
- Hang the sign by its rope and check if it sits level with a bubble or laser level.
- Adjust rope lengths by loosening and tightening knots if the sign tilts.
- Retest the levelness until the sign hangs straight and balanced.
9. Time and Cost Expectations for DIY Rope Hanging Signs
Creating a rope hanging sign typically takes between 2 to 5 hours, depending on the complexity of your design and your familiarity with the tools. Most of this time goes into preparing the wood by cutting and sanding, which can take about 1 to 2 hours. Attaching the rope and finishing touches such as painting or staining usually require an additional 1 to 3 hours. Allow extra drying time for paint or sealant, which can vary from 2 to 6 hours, but this time does not require your direct involvement.
The material costs for a basic DIY rope hanging sign can range from $20 to $60. Wood pieces suitable for signs often cost between $5 to $20, depending on the type and size. A sturdy, natural-looking rope typically costs about $5 to $15 for a size that fits most small to medium signs. Basic finishing supplies like sandpaper, paint, or wood stain usually add another $10 to $25, especially if you already have some of these items at home. Simple hardware, such as eye hooks or screw-in hooks for securing the rope, usually costs around $3 to $10.
Budget-conscious projects can be completed for as low as $10 to $20 if you source scrap wood or repurpose old furniture pieces and use leftover paint or stains. You can save by choosing rope from discount stores or online bulk purchases, which lower the cost per foot. Skipping extras like elaborate finishes or LED accents also cuts expenses significantly.
A good timeline to follow starts with gathering all your supplies beforehand. Spend your first hour cutting and drilling holes in the wood, then spend the next hour sanding to avoid rough edges and splinters. Attach the rope securely using eye hooks or knots next, giving yourself about 30 minutes to an hour for this step. Allow paint or stain at least 2 to 4 hours to dry, depending on the product instructions and room conditions such as temperature and humidity.
Skipping sanding or using weak rope can result in a sign that looks unfinished or hangs insecurely, which may cause future damage. Staining rather than painting can reduce drying times and highlight natural wood textures but may offer less color variety. Choosing thicker, natural fiber rope tends to offer both durability and the right aesthetic but may cost more than synthetic options.
10. Adding Neon or LED Rope Light Accents to Hanging Signs
Incorporating neon or LED rope lights into your hanging signs can turn a simple piece into a captivating focal point. LED rope lights come as flexible, clear tubes filled with tiny LEDs, often battery- or USB-powered to offer versatile placement without needing complex wiring. To start, choose the right type of LED rope light: for a rustic wooden sign, warm-white or amber LEDs add cozy charm, while bright neon colors work well with modern or boho designs.
First, decide on your sign’s layout. You can laser-cut or hand-score grooves into materials like acrylic or wood to fit the rope lights snugly, which helps the light follow your design precisely, whether it’s a quote, logo, or abstract pattern. For example, pressing neon LED rope tubing into grooves on a clear acrylic panel can highlight your design while providing a polished look. Alternatively, frame the sign with flexible LED rope lighting by attaching it along edges or around woven elements. To attach the lights securely, use mounting clips designed for LED rope lights or high-quality, clear adhesive strips to avoid damaging the sign surface.
Powering your LED rope lights safely is critical. Battery-powered or USB options reduce electrical risks and simplify placement, especially in areas without nearby outlets. Use a power source with built-in overheat protection and ensure connections stay dry, particularly if the sign hangs in a kitchen or bathroom. When wiring is necessary, route cords discreetly along the back or sides, securing them to prevent accidental pulls or damage. Always follow the manufacturer’s instructions for voltage and wattage limits, as overloading can cause overheating.
The lighting effects you can achieve range from subtle backlighting to bold neon outlines that draw attention day and night. For a bohemian aesthetic, combine the glowing rope with macrame or rattan textures, adding warmth and dimension to wall art. Incorporate multiple colors to create gradients or highlight specific words or images on your sign. Soft, flickering effects or slow fades can be programmed with compatible LED controls to add dynamic movement. Keep in mind, however, that overly bright or flashing lights may overwhelm the rustic feel of rope hanging signs, so balance is key.
Installing LED rope lights usually costs between $20 to $50 for a 16-foot strand, depending on quality and power source. Adding mounting clips or adhesives might add $5 to $15. The total investment is reasonable compared to electric neon signs, while offering a similar visual impact and easier installation. Expect setup to take about 1 to 2 hours, including measuring, attaching lights, and testing power, but longer if you score grooves or integrate complex patterns.
Common issues include uneven light distribution if the rope isn’t tightly placed in grooves or along edges, loose attachments causing sagging, and electrical shorts from exposed wiring. Use weatherproof LED rope lights for outdoor or humid locations to prevent damage. Avoid bending the rope lights sharply; the minimum bend radius is often around 4 to 6 inches, as stated on product packaging, to prevent breakage.
11. Common Mistakes in Rope Hanging Signs and How to Fix Them
Slipping ropes and unlevel hanging signs usually result from improper knotting or uneven rope lengths. Use secure knot types such as a bowline or double fisherman’s knot to prevent slippage. Measure and cut the ropes precisely the same length before attaching to the sign. Adjust the knots evenly on both sides after hanging to keep the sign level.
Fraying rope edges can weaken the structure and lead to eventual failure. Apply a small amount of clear-drying glue or rub heat carefully on synthetic ropes to seal the ends. Natural fiber ropes benefit from wrapping the ends tightly with electrical tape or twine to avoid unraveling.
- Use knots designed for load security: bowline, double fisherman, figure-eight.
- Trim rope ends evenly and seal with glue or heat to stop fraying.
- Check mounting brackets and reinforce with wall anchors suitable for your wall type.
- Replace rope immediately if it feels worn or shows visible damage.
- Adjust knots to re-level your sign monthly to accommodate rope stretching.
Mounting hardware that fails often comes from using inadequate anchors or hanging on weak surfaces like drywall without studs. Select anchors rated for your sign’s weight and wall type. Toggle bolts and molly bolts work well for drywall, while screw-in anchors suit plaster or wood walls. Securely tighten all screws but avoid overtightening that can damage the mounting surface.
Regular maintenance improves longevity and appearance of your rope hanging sign. Every few months, check for signs of rope wear, knot looseness, or shifted hardware. Tighten knots or replace components before failure occurs. Signs that tilt or jiggle after installation often need the knots adjusted or the mounting points reinforced.
Do not rely on simple overhand knots for hanging; they are prone to slipping and can cause the entire sign to fall.
12. Decor and Room-Specific Ideas for Rope Hanging Signs
Rope hanging signs adapt well to various rooms by matching their style and environmental needs. Choosing the right design, material, and finish keeps the sign looking great and lasting longer, whether inside or outdoors. Tailoring your sign to its space keeps your decor cohesive and functional.
Kitchen and Dining Room Rope Signs
In kitchens and dining rooms, rope hanging signs often feature welcoming messages, menus, or food-related quotes. Using smooth, sealed wood with a clear polyurethane finish is best to resist humidity and kitchen grease. Matte or satin finishes avoid glare and maintain a cozy look. Choose natural jute or cotton ropes for a rustic or farmhouse style that complements wooden cabinetry and warm tones.
For a modern kitchen, paint your sign with chalkboard paint framed by a rope border. This lets you update menu items or notes regularly. Secure the rope with sturdy knots or metal clamps, since kitchen activity can jostle hanging signs. Expect sealed signs to last years with occasional cleaning by wiping with a damp cloth.
Garden and Outdoor-Friendly Hanging Signs
Outdoor rope signs need durable materials and protective treatments to resist moisture, sun, and insects. Use exterior-grade cedar or redwood, both naturally weather-resistant, along with synthetic polypropylene rope to prevent rot. Treat wood with outdoor sealant or marine varnish that blocks UV rays and water infiltration. This keeps the sign vibrant through rain, humidity, and temperature swings. For garden markers or welcome signs, paint with waterproof acrylic paints designed for outdoor use.
Place your sign under a covered porch or hang it where sun exposure is partial for longer lifespan. Inspect the rope every six months and replace it if signs of fraying appear to prevent sudden falls. Outdoor signs may cost more due to specialized materials, but their longevity avoids frequent replacements.
Kids’ Rooms and Personalized Sign Ideas
Children’s rooms call for playful and colorful rope signs. Light pine or plywood works well for ease of painting or adding decals. Use water-based acrylic paints for safe, non-toxic finishes and seal with a low-VOC varnish to protect from sticky fingers. Soft cotton rope dyed in bright colors can match themes like animals, space, or fairy tales.
Personalize signs with the child’s name or favorite quotes in fun fonts. Rope thickness should be thinner for light weight and easier hanging, but still strong enough to hold securely. Signs should hang out of reach to avoid pulling or accidental damage. Customization makes these signs great gifts or statement pieces that grow with the child.
Step-by-Step Action Plan for Crafting and Hanging Your Rope Sign
Follow these steps to create and display your rope hanging sign with confidence and style.
- Before you start: Gather all materials listed in the article, including wood, rope, and any lighting accents. Check that your workspace is clean and safe.
- Day 1: Cut and prepare your wood sign by drilling holes and sanding edges. Ensure the wood is smooth and holes are evenly spaced for the rope.
- Day 2: Choose your rope type based on the look and durability you want. Test a small length to confirm strength and flexibility.
- Day 3: Attach the rope securely through the drilled holes using knots recommended earlier. The rope should hold firmly without slipping.
- Day 4: Add any decorative touches, such as neon or LED rope lights, and let any glue or paint dry fully before hanging.
- Day 5: Select a nail-free hanging method suitable for your wall type, then hang your sign. Use a level to ensure it hangs straight.
- After hanging: Check stability and adjust knots or supports if the sign tilts or feels loose. Make sure it is secure to avoid falls.
Frequently Asked Questions
What Types of Wood Work Best for Rope Hanging Signs?
Pine, cedar, and plywood are popular for rope hanging signs because they are lightweight and easy to cut. Choose wood without knots or cracks for a smooth surface that supports drilling and sanding without splintering.
Can You Weatherproof a Rope Hanging Sign for Outdoor Use?
Yes, apply a clear outdoor sealant to the wood and use synthetic rope to resist moisture. This helps prevent rot and fading, extending the sign’s lifespan outside.
How Do You Add Custom Lettering to a Rope Hanging Sign?
Use stencils or paint directly on wood, or attach custom-cut cardboard or vinyl letters. Choose contrasting colors to improve readability and personalize the message.
What Is the Best Way to Clean a Rope Hanging Sign Without Damage?
Dust gently with a soft brush or cloth and spot clean rope with mild soap and water. Avoid soaking to protect the wood and rope fibers from weakening.
Can You Repurpose Materials for Making a Rope Hanging Sign?
Yes, old wood pallets or reclaimed wood work well and add rustic charm. Just ensure the wood is sturdy and sanded smooth before use.
Are Rope Hanging Signs Suitable for Weight-Bearing Purposes?
No, they are mainly decorative and not designed to hold heavy items. Use secure anchors and appropriate materials if you need support for weight.
The Bottom Line
Making a rope hanging sign combines creativity with practical skills, letting you add a unique touch to your space. Start with one clear step today, like preparing your wood or choosing rope, to build momentum. The right preparation will help your sign look great and last longer, making the effort worthwhile.