How to Stencil Letters on Wood with Ease 8 Proven Tips for Perfect Results
How to stencil letters on wood cleanly relies on controlling paint bleed and creating crisp edges. Use a light spray adhesive on the stencil’s underside about 12 inches from the wood to hold it firmly without mess. Starting with a smooth, well-prepared wood surface ensures the paint won’t spread under the stencil, giving you neat, professional-looking letters.
Key Takeaways
- Sand wood with 150-grit sandpaper for a smooth surface that holds paint without bleeding.
- Apply a thin, even coat of spray adhesive to the stencil underside to prevent shifting and bleeding.
- Use small foam brushes or cosmetic wedges for controlled paint application and minimal bleed.
- Space 3-inch letters about 1/4 inch apart with 1 1/2 inches between lines and words for balanced text.
- Let paint dry 30 to 90 minutes between coats and seal your project after at least 24 hours.
- Dry mod podge layers thoroughly for at least 40 minutes before adding paint or sealing.
1. The Best Method to Stencil Letters on Wood Without Bleeding

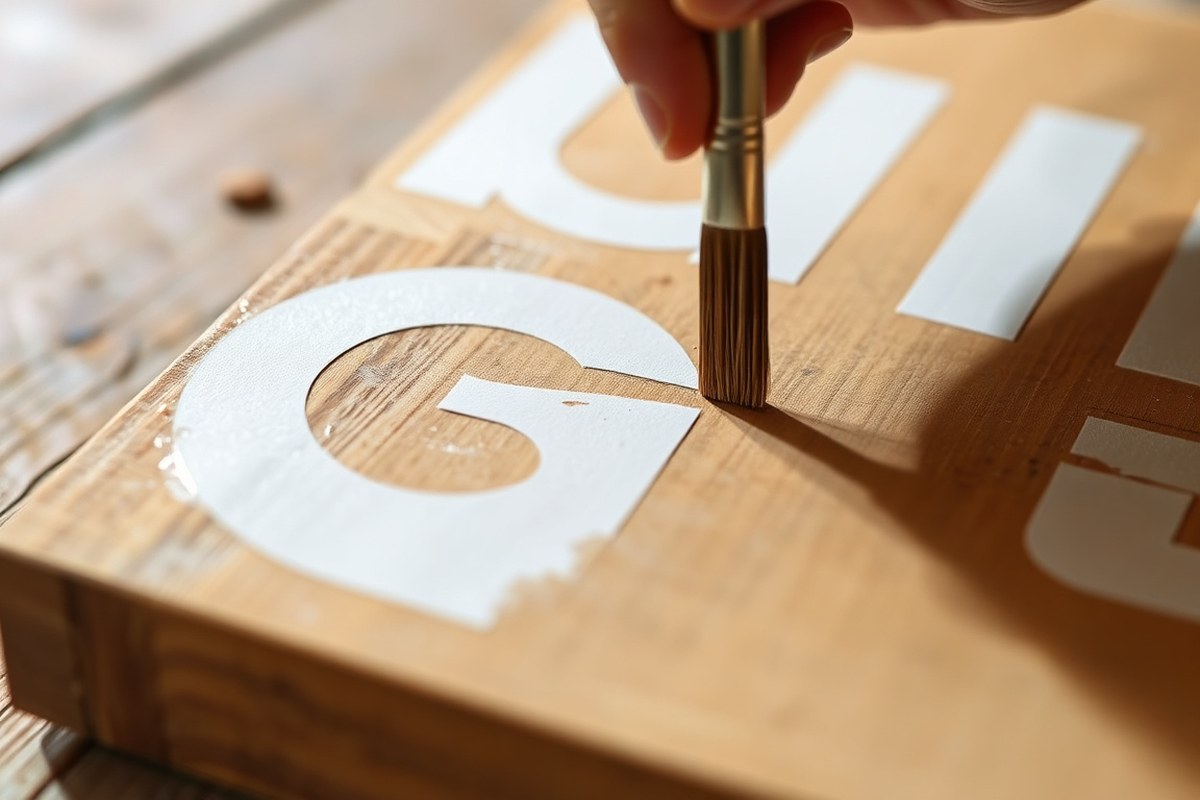
The best way to stencil letters on wood without paint bleeding starts with using the right technique and tools. To get clean, sharp edges, use acrylic paint because it is thicker than other paints and less likely to seep under the stencil. Avoid applying paint heavily. Instead, load your stencil brush or foam roller lightly and apply the paint in thin, multiple layers. This minimizes the chance of excess paint forcing its way under the stencil edges and causing bleed.
Begin by firmly securing your stencil to the wood using painter’s tape or a repositionable adhesive spray designed for stencils. This prevents any shifting that can smear or blur your letters. Before painting, press the stencil’s edges down with a flat tool or your fingers to seal them tightly against the wood surface, especially on rough or uneven wood. For rough wood, applying a clear acrylic sealer on the surface before stenciling can fill the grain and reduce bleed risk.
When you are ready to paint, dab off excess paint onto a paper towel before applying it to the stencil. Use a stippling or very light rolling motion over each letter, building up color gradually. Avoid brushing or swiping paint sideways, which can push paint under the stencil edge. Let each thin coat dry for about 10 to 15 minutes before adding another to reinforce the color without flooding the stencil borders.
Avoid intricate or serif fonts until you’ve practiced more, since thin and delicate lines are harder to keep clean without bleeding. Round, block-style letter stencils work best for beginners aiming for sharp, professional results. After the paint dries, carefully peel the stencil away straight up without dragging it to prevent smudges.
For projects using stained or uneven wood, a light sanding followed by a clear coat can create a smoother base and help seal the wood pores. This step reduces paint absorption and bleed through grain lines. Keep your working environment at room temperature between 65°F and 75°F, as too much humidity or cold can slow drying, increasing the chance of bleeding.
Good results show crisp, well-defined letter edges that contrast cleanly with the wood. Paint bleeding looks like blurry edges, fuzzy halos, or paint spots spreading beyond the letter shape. Avoid these by limiting paint volume on the applicator and sealing stencil edges before every layer. This careful, layered technique takes practice but can cost as little as $10 to $20 for basic acrylic paint, stencil material, and a small foam roller or brush, making it affordable for hobbyists passing simple wood sign projects.
2. Preparing Wood Surfaces for Sharp Stencil Results
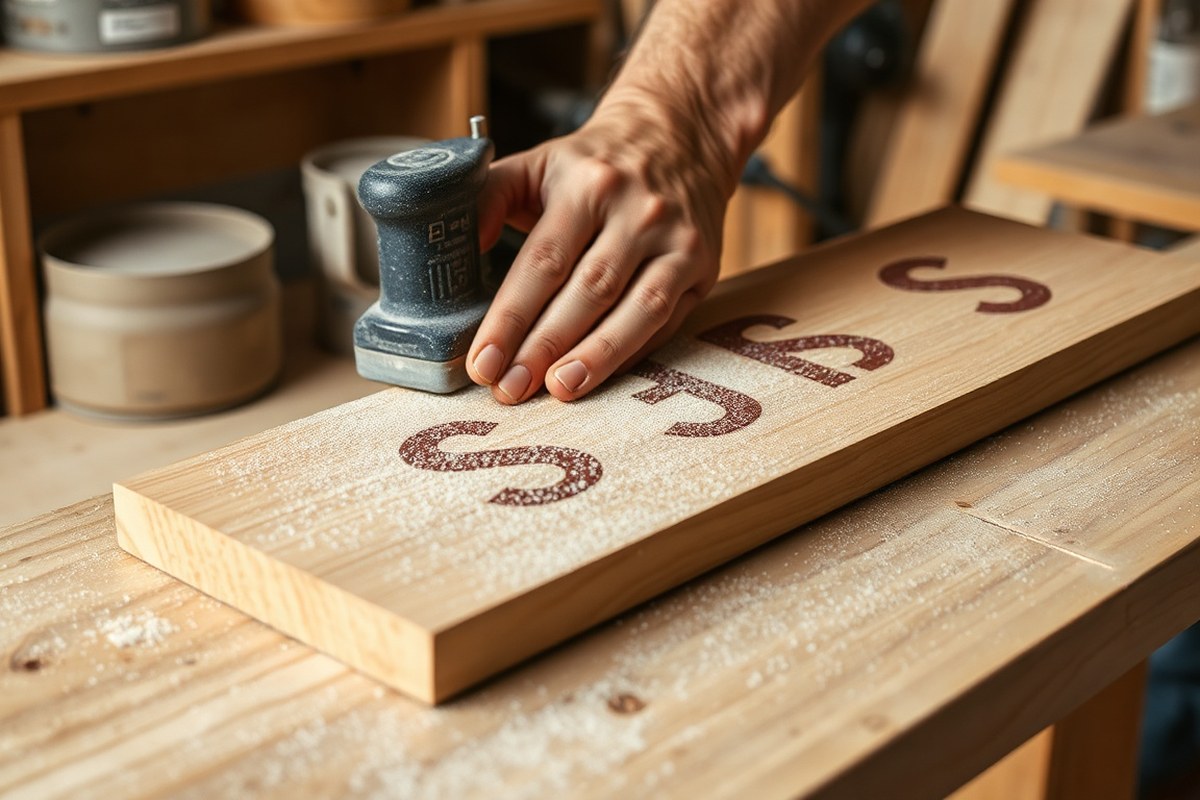
Proper preparation of your wood surface is essential for sharp stencil results because it ensures paint adheres evenly and prevents bleeding or smudging. Begin by sanding the wood to create a smooth base, especially if the wood is rough or has splinters. Use medium-grit sandpaper, around 120 to 150 grit, for initial sanding, then finish with 220-grit for a finer surface. For painted wood, sanding before the first coat of paint improves paint adhesion, but avoid sanding stained wood before stenciling, as this might remove the stain.
Clean the surface thoroughly after sanding to remove dust, oils, or residues that could interfere with paint bonding. Wipe the wood with a damp cloth and allow it to dry completely. For outdoor projects like garden signs or planters, cleaning may include mild soap and water to remove dirt; let the wood dry fully before moving on.
- Sand the wood starting with 120-150 grit sandpaper, finish with 220 grit for smoothness
- Wipe surface with a damp cloth to remove dust and oils
- Allow stained wood to dry fully before stenciling
- Avoid sanding stained wood unless you plan to repaint completely
- Use water-based polyurethane sealer to prevent stencil bleed on rough or uneven wood
Stenciling on stained wood can be tricky. Make sure the stain is fully dry, which can take from 24 to 48 hours depending on humidity and product instructions. If the wood surface is uneven or rustic, consider applying a thin coat of water-based clear coat, such as Varathane Water-Based Clear Coat. This layer creates a barrier that reduces paint bleed under stencil edges and helps delicate details stay clean.
Use a tack cloth or slightly damp microfiber cloth to remove sanding dust before stenciling, leftover dust can cause paint to pool or blur edges.
For reclaimed or antique wood pieces, the wood grain might be deep and uneven, which can affect stencil clarity. Sanding these surfaces gently and sealing them with a clear coat before stenciling improves results, but keep in mind that heavy sanding might remove the character of antique wood. In some cases, applying paint directly over stained or rough wood without full sanding is possible if you use a high-quality stencil paint designed for wood and accept a slightly rustic look.
3. Choosing and Securing Stencils for Precise Wood Lettering
Choosing the right stencil material and securing it firmly makes all the difference in avoiding paint bleed and gaps in your wood lettering. Use smooth, flexible stencils paired with repositionable spray adhesive for the best hold without damage. Spray adhesive covers the entire stencil surface, preventing paint from seeping under edges and keeping details sharp.
Stencil Materials and Their Pros and Cons
Selecting the right stencil material depends on your project’s complexity and the wood surface texture. Smooth wood surfaces work best with thin, flexible stencils that lay flat without gaps. Sturdier materials hold up better for repeating designs or rougher wood but may not conform well to curves.
| Stencil Material | Pros | Cons |
|---|---|---|
| Thin Mylar Sheets | Flexible, reusable, easy to clean, conform well to smooth surfaces | Can tear on rough wood, less rigid for multiple uses |
| Vinyl (cut with Cricut or Silhouette) | Adheres lightly, perfect for intricate letter shapes, repositionable with spray adhesive | Single-use or limited reusability, expensive for large projects |
| Stiff Cardstock or Cardboard | Cheap, easy to cut by hand, good for single projects | Not reusable, warps with paint or moisture, doesn’t lay perfectly flat |
| Reusable Plastic Stencils | Durable, easy to clean, good for repetitive designs | Less flexible on textured wood, edges may lift without adhesive |
Vinyl stencils cut with a Cricut machine or Silhouette Cameo are ideal for precise lettering on wood signs. Their edges sit close to the wood, especially when combined with adhesive, preventing paint seepage. For simpler, budget-friendly options, thin Mylar sheets offer flexibility and reusability on smooth wood.
Using Repositionable Spray Adhesive Step-By-Step
Spray adhesive is key to holding your stencil firmly without damaging the wood or the stencil. Use a repositionable adhesive designed for crafting; avoid permanent sprays that glue the stencil to the surface. Before spraying, work in a well-ventilated area and protect your workspace.
- Shake the adhesive spray can well.
- Hold the stencil so the back faces toward you and spray an even light coat from about 6 to 8 inches away.
- Wait 20 to 30 seconds for the adhesive to become tacky but not wet; this prevents smudging or glue pooling.
- Carefully place the stencil on the wood surface, starting on one edge and smoothing it down to avoid air bubbles or gaps.
- Press the stencil firmly all over to ensure full contact, especially around letter edges and details.
- After painting, remove the stencil gently while the paint is still slightly wet to avoid peeling paint off the wood.
Using repositionable spray adhesive keeps fine stencil details stuck firmly to the wood and ensures clean, sharp lines without shifting. It distributes hold evenly, unlike painter’s tape, which only secures edges and can allow the stencil to lift in the middle.
Alternatives to Spray Adhesive for Stencil Attachment
Painter’s tape works as an option for securing stencils, especially for quick projects or large letter stencils that only need edge hold. Use low-tack painter’s tape to prevent damage to the wood surface or stencils when removing.
For smaller or intricate stencils, some crafters use temporary tack putty or light weights like coins to hold parts down. This method, however, risks paint bleed under unstuck sections.
Spray adhesive is generally the best choice for detailed lettering because it holds the entire stencil flush against the wood. Painter’s tape can work but may cause gaps, and tack putty or weights are best for only short, delicate applications or rough cuts to prevent damage.
4. Mastering Paint Types and Application Tools for Wood Stenciling
Acrylic or latex paints make a solid choice for painting letters on wood, offering even coverage and quick drying without penetrating the surface. Apply paint in thin coats using a stencil brush, foam, or makeup sponge to prevent bleed-through or smears. Creating a stippling or dabbing effect instead of brushing side to side produces sharp, precise edges.
Comparing Acrylic, Latex, and Spray Paints
Acrylic and latex paints are popular choices for wood stenciling due to their ease of use and availability. Acrylic paint typically offers vibrant colors and strong adhesion, making it ideal for detailed stenciling. Latex paint is a good alternative, often chosen for its smooth finish and durability. Spray paint can work but is more suitable for larger, simpler stencils because it’s harder to control and can lead to overspray.
Applying acrylic or latex paints in thin layers is critical. Thick coats increase the risk of paint seeping under the stencil edges. Both paint types clean up easily with warm, soapy water, which is convenient for maintaining stencils and tools.
| Paint Type | Coverage and Finish | Drying Time | Ease of Use for Stenciling | Clean-up |
|---|---|---|---|---|
| Acrylic Paint | Vibrant color, strong adhesion | Dries within 15-30 minutes | Best for detailed stencils with thin layers | Warm, soapy water |
| Latex Paint | Smooth, durable finish | Dries within 30-60 minutes | Good for general stenciling projects | Warm, soapy water |
| Spray Paint | Fast coverage, less control | Dries within 10-20 minutes | Better for large, simple designs | Solvent-based, requires ventilation |
Select paint based on project details. Acrylic is great for fine lettering on furniture or decor, while latex suits broader signs. Spray paint suits quick coverage but demands careful masking to avoid overspray bleed.
Brushes, Sponges, and Rollers: Pros and Cons
Stenciling demands tools that apply paint evenly without pushing it under stencil edges. Stencil brushes have short, stiff bristles ideal for a stippling technique that minimizes bleed. Foam or makeup sponges also work well because they absorb a moderate amount of paint and allow precise dabbing.
Rollers can be used on flat, smooth wood surfaces but risk applying paint too thickly or unevenly if not careful. Regular paintbrushes are less ideal unless you follow the dry brush method, dipping the brush lightly in paint and wiping off most before applying. This reduces paint load and bleeding risk.
Consider the stencil complexity and wood texture. For detailed letters, a stencil brush or makeup sponge gives better control. Smooth surfaces might allow a small foam roller, but rough or grainy wood benefits most from a stippling brush or sponge to work paint into grooves without bleed.
Applying Paint with Minimal Bleeding Tips
Start by securing the stencil firmly with painter’s tape to prevent shifting. Load your brush or sponge with paint, then wipe or tap off excess on a paper towel before dabbing gently onto the wood. Apply paint in multiple thin layers instead of a thick coat to build coverage while maintaining sharp lines.
The key is to use a stippling or tapping motion instead of brushing back and forth. This motion presses paint down rather than pushing it sideways under stencil edges. Let each layer dry for about 15-30 minutes before adding another to avoid smudging.
To prevent bleeding, keep the wood surface slightly roughened with fine sandpaper beforehand, which helps paint grip where you want it. Avoid overloading the brush or sponge since excess paint easily seeps beneath stencil edges. Finally, remove the stencil carefully while the paint is slightly tacky to maintain crisp outlines.
5. Measuring and Spacing Letters Accurately for Wood Signs
To lay out letters on wood with balanced spacing and alignment, start by measuring the total area where your text will appear. Then, calculate even letter and word gaps based on the size of your letters and the length of the text. Mark guide lines and placement points before applying your stencil to ensure clear, straight lines and properly spaced letters on your wood sign.
Tools Needed for Measuring and Marking
You’ll need a few basic tools to measure and mark your wood accurately. A tape measure or ruler helps determine the width and height of your text block. A pencil allows you to lightly mark the wood without causing permanent marks. Painter’s tape, ideally 1 1/2 inches wide, is helpful for creating straight horizontal guide lines to align letters evenly. A combination square or carpenter’s square can help ensure your marks are perpendicular and the layout stays level across the wood surface.
Using these simple, inexpensive tools keeps your layout precise without special equipment and helps avoid repainting due to misaligned text. For best results, choose a pencil hardness that is visible but easy to erase or paint over.
Standard Letter and Word Spacing Guidelines
Proper spacing avoids cramped or splotchy lettering and improves readability on wood signs. Letter spacing, or kerning, generally should allow about 1/4 to 1/3 the width of each letter as space between characters. For example, if your letters are 2 inches wide, aim for roughly 0.5 inch gaps between them.
Word spacing needs to be slightly wider, usually 1 to 1 1/2 times the letter width. So with 2-inch letters, allow around 2 to 3 inches between words. Adjust these numbers depending on your font style and the wood sign’s overall size to maintain visual balance. For longer phrases or multi-line signs, create equal horizontal margins on the sign’s edges to center the text and ensure equal breathing room around the wording.
Aligning Stencils for Straight Text Lines
Mark your layout before painting to avoid crooked or uneven lettering. Use painter’s tape to create a straight horizontal guide line where the base of the letters will sit. Measure and mark this line lightly with pencil across the entire sign surface.
Next, position the stencil so the bottom of each letter aligns with that guide. Secure the stencil with tape or low-tack adhesive to prevent shifting during painting. For multiple lines of text, create parallel guide lines spaced vertically according to your letter height plus spacing (for example, a 3-inch tall letter plus 1-inch space means mark lines every 4 inches). Step-by-step stencil alignment:
- Measure and mark the width and height of your text block on the wood surface.
- Use painter’s tape to create a straight baseline across the sign at the desired height of the letters.
- Position the stencil so the letter bottoms align with the baseline, centering text horizontally between margins.
- Secure the stencil with painter’s tape or stencil adhesive to avoid movement.
- For multiple lines, mark additional parallel baselines spaced to accommodate letter height plus desired vertical space.
- Lightly pencil mark individual letter or word spacing as needed before final taping.
Tip: Avoid heavy pencil lines; light marks reduce the chance of accidentally painting over them or leaving visible shadows under your stencil paint.
6. Preventing and Fixing Common Stencil Bleed and Smudge Issues
Paint bleeding under stencils happens when paint seeps beneath the edges, blurring the sharp lines of your letters. This often occurs because the stencil isn’t flush against the wood, the wood surface has cracks or uneven spots, or the paint is too wet or applied too heavily. Smudges can also appear if the stencil is removed too late or too hastily, dragging wet paint sideways. Fixing and preventing these issues involves careful technique during and after painting. Here’s a checklist and step-by-step process to avoid bleeding and smudging, plus how to fix any stray paint spots once they occur.
- Press the stencil firmly onto your prepared wood surface. Use painter’s tape or repositionable adhesive spray to hold the stencil flat and tight, sealing edges to keep paint from slipping underneath.
- Use a dry or lightly loaded brush or sponge to apply paint. Avoid soaking your brush. Dab or pounce gently and build color in thin layers. Thick or wet paint is a common cause of bleeding.
- Remove excess paint from your tool by dabbing it on a paper towel before applying to the stencil. This limits how much paint can squeeze under the edges.
- Lift the stencil while the paint is still slightly wet. Waiting until the paint fully dries can cause smudging or peeling when removing the stencil. Carefully pull upward at a 90-degree angle for clean edges.
- Fix bleed spots with a small artist’s brush after the paint dries. Use a matching wood stain, paint, or touch-up marker to gently cover any smudges outside of your letters.
- Smooth minor smudges with fine-grit sandpaper once paint is dry before sealing. Sand lightly to avoid damaging surrounding paint or wood finish.
- Practice patience with the drying time between coats or layers to prevent paint buildup that causes drips or bleeds. Chalk paint is a good option because it dries quickly and sticks well to wood.
Following these steps ensures the stencil edges stay crisp and your letters look professional. Taking the time to press the stencil firmly and control paint moisture will reduce bleeding issues dramatically. If spots do appear, a little careful retouching and sanding keeps your project looking clean without starting over. These practices work well for smooth or lightly textured wood, and adjusting pressure and paint loading helps with rougher surfaces.
7. Sealing and Finishing Your Stenciled Wood Project for Durability
Sealing your stenciled wood project after the paint has fully dried is the best way to ensure vibrant letters and long-lasting durability. Avoid sealing before stenciling, as sealants can alter the surface texture, making paint application uneven or prone to bleeding. Instead, plan to wait at least 24 hours after painting, depending on your paint type and temperature conditions, to let the stenciled letters cure completely before applying any sealant.
You have several sealant options to consider based on your project’s location and finish preference. Clear acrylic spray sealants are popular for indoor projects because they dry quickly, cost around $8 to $15 per can, and provide good protection against moisture and fading. For outdoor signs or projects exposed to weather, a water-based polyurethane or spar varnish is more durable. These products usually require brushing on two or three thin coats with light sanding in between, which can take a few days to finish but offer better resistance to UV damage and wear.
Applying the sealant properly makes a big difference. Use a clean brush or a spray in a well-ventilated area and work in thin layers to avoid drips or cloudiness over your letters. Follow the sealant label’s instructions for drying times, typically 1 to 2 hours per coat for spray sealants and up to 6 hours for brush-on finishes. Allow at least 24 hours after the final coat before handling or installing the piece. Skipping this drying time can cause smudging or foggy spots that reduce the crisp look of your stenciled design.
Projects with previously sealed or painted wood surfaces might require a different approach. Lightly sanding the surface before stenciling and using a sealant compatible with the underlying finish will help the paint and sealant adhere properly. Be mindful that some sealants can cause color changes or a glossy sheen that might contrast with your desired aesthetic.
Proper sealing also reduces the risk of your painted letters chipping or fading over time, especially on frequently handled or outdoor wood projects. Depending on where you buy it, high-quality sealants range from $10 to $25 per quart, which covers many signs. While some sealants add a slight gloss, matte or satin finish options preserve a more natural look. Testing your chosen sealant on a scrap piece of wood with painted letters can help you confirm the final appearance and compatibility before committing to the whole project.
8. Advanced Tips for Stenciling on Rough, Stained, or Furniture Wood
Stenciling on rough, stained, or furniture wood requires extra care to get clean, sharp letters without damage or bleed. Rough wood has uneven surfaces that create gaps under the stencil edges, allowing paint to seep through. Stained wood sometimes has a finish that repels paint or causes unexpected spreading. For furniture, damage to the finish or surface can ruin your piece, so gentle but effective techniques are necessary.
Start by sanding rough wood lightly with fine-grit sandpaper (220 grit) to smooth the top layer just enough to reduce gaps without stripping the natural texture. For stained or finished wood furniture, test a small, hidden area first to ensure the paint and cleaning agents won’t harm the finish. Before applying paint, seal rough or stained wood with a clear, matte spray polyurethane or acrylic sealer. Apply two thin coats, letting each dry completely, usually around 2 hours per coat. This step fills the tiny pores and blocks paint from bleeding underneath the stencil edges.
Furniture wood needs gentle handling. Use painter’s tape labeled as safe for delicate surfaces to secure your stencil without damaging the stain or finish. Avoid adhesive tapes that leave residue or strip finishes. Press the stencil firmly but avoid sliding it once placed. Lightly tap paint onto the stencil with a small foam pouncer loaded with minimal paint, dabbing rather than brushing to prevent paint pooling and bleed. Thin your paint slightly with water or acrylic medium for a smoother application on tough surfaces.
Waiting for the paint to dry before peeling the stencil matters even more on textured or fancy finishes. Remove the stencil slowly and at a shallow angle to avoid lifting paint or damaging the finish. If you notice small bleeds, wait until the paint is dry, then carefully scrape with a craft knife or touch up with a fine brush. For larger furniture pieces or outdoor wood, sealing the finished stencil with a satin clear coat improves durability without glossiness.
Costs for these steps include a clear sealer (around $10 to $20 per can), painter’s tape safe for furniture ($5 to $10 per roll), and foam pouncers ($3 each). Plan for extra drying time, sealing and paint layers often need a full day to cure depending on room temperature and humidity. Well-prepared surfaces will show crisp stencil lines with no fuzzy edges, even on challenging wood textures or stains. Signs of trouble include paint bleeding under edges or blotchy patches where stain repels paint, indicating the sealer step was missed or paint was overapplied.
Test the tape and sealer on a hidden spot of your wood furniture first to avoid unwanted finish damage before stenciling large areas.
Step-by-Step Action Plan for Crisp Wood Lettering
Follow this plan to stencil letters on wood with sharp edges and no paint bleed.
- Before you start: Sand and clean your wood surface until smooth and dust-free. Check by wiping with a dry cloth; no dust should come off.
- Day 1: Choose or cut rigid stencils and secure them firmly with painter’s tape or spray adhesive. Press edges flat to avoid paint seeping underneath.
- Day 1: Use high-quality, thick acrylic paint and a stencil brush or foam pouncer. Test on scrap wood to ensure paint applies in thin, pouncing layers without pooling.
- Day 1: Stencil letters by applying paint in light dabs, layering if needed after the first coat dries. Check edges for bleeding immediately and touch up with a small brush if necessary.
- Day 1-2: Let the paint dry completely before removing the stencil to keep edges crisp. Lift stencil slowly and steadily.
- Day 2: Seal with a clear, matte polyurethane using a foam brush. Apply thin coats and allow full drying time between coats to protect your work.
- After 1 week: Inspect seals for damage or wear, especially if the wood will be outside, and reapply the sealant as needed for lasting durability.
Frequently Asked Questions
Can I Stencil Wood Letters Without Paint?
Yes, by tracing the stencil outline with a pencil, you can create wood letters without paint. This allows for a subtle design and is great if you want to avoid mess or drying time.
How Do I Avoid Stencil Letters Peeling Off Wood After Drying?
To keep the stencil firmly in place, use repositionable spray adhesive or painter’s tape. This stops the stencil from shifting and helps create sharp edges when you peel it off after the paint dries.
Is It Better to Stencil on Stained or Raw Wood?
Raw, smooth wood is easier to stencil on than stained wood because stain can bleed under the paint. For stained wood, seal with a clear coat to prevent paint from soaking into the surface.
Should I Use Serif or Sans-Serif Fonts for Wood Stenciling?
Sans-serif fonts work best for wood stenciling, especially for beginners. Serif fonts with fine accents are harder to stencil cleanly on wood due to bleeding and detail loss.
What Type of Spray Adhesive Works Best with Wood Stencils?
Repositionable spray adhesives designed for craft use work best by sticking the stencil firmly without leaving residue. Avoid permanent adhesives, which can damage the wood or stencil.
How Far Away Should I Hold the Spray Adhesive from the Stencil?
Hold the spray can about 12 inches away from the stencil for a light, even coat. This avoids excess adhesive buildup that can cause bleeding or make the stencil hard to remove.
Key Points to Remember
Careful preparation and methodical application are key to clean and sharp stencil letters on wood. Start by securing your stencils tightly and using only thin layers of paint to prevent bleed. Your next step is to stencil a small practice word on scrap wood to hone your technique before your final project.