How to Remove Old Vinyl Lettering from a Truck: Safe, Fast, and Complete Methods
How to remove old vinyl lettering from a truck requires a careful approach to protect the paint and clear coat. The best method uses heat to soften the adhesive, usually by warming the surface to about 160°F, then peeling the vinyl at a 45° angle. Starting with gentle heat loosens the decal and prevents damage to the truck’s finish.
Key Takeaways
- Heat the vinyl lettering to around 160°F before peeling to soften the adhesive effectively.
- Pull the vinyl letters off at a 45-degree angle to reduce stress on the paint surface.
- Use a 3M Stripe Off Wheel with an electric drill for stubborn old decal residue on truck doors.
- Apply a citrus-based adhesive remover after peeling to clean leftover sticky residue safely.
- Decals less than 12 months old often peel off cleanly with heat and patient lifting.
- Steam can be used as a gentle alternative to heat for loosening decals without chemicals.
Best Way to Remove Old Vinyl Lettering from a Truck
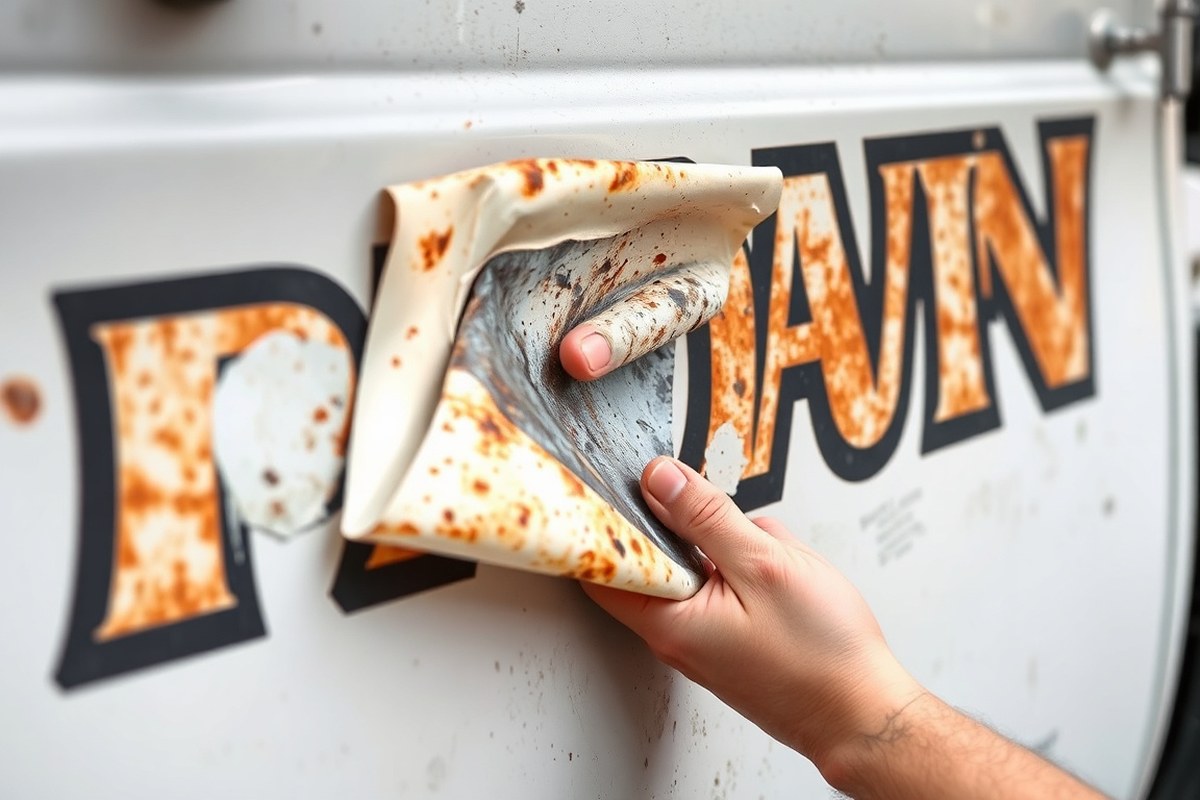
The best way to remove old vinyl lettering from a truck is by using controlled heat to soften the vinyl and adhesive, then peeling it off gently at a 45-degree angle, followed by removing any adhesive residue. Heat makes the vinyl more pliable and loosens the adhesive, preventing damage to the paint or surface underneath. Applying heat carefully and peeling slowly helps prevent tearing and reduces the chance of leaving stubborn adhesive behind.
Start by warming the lettering with a heat source like a heat gun or hairdryer set to medium heat. Keep the device moving to avoid overheating any one spot; aim for a surface temperature of about 120°F to 140°F. This temperature range softens the adhesive without harming the paint or clear coat. Once the vinyl begins to feel warmer and more flexible, begin peeling it up using your fingernail, a plastic scraper, or a similar tool.
Peeling should happen slowly and steadily, pulling at approximately a 45-degree angle relative to the truck’s surface. This angle balances the force applied, allowing the vinyl to come off cleanly without snapping or leaving chunks behind. Avoid pulling straight up or at a sharper angle, which can increase the risk of damaging paint or leaving adhesive residue. Apply heat to the torn area before continuing to peel when the vinyl tears.
- Heat the vinyl lettering evenly using a heat gun or hairdryer set to medium, moving continuously to maintain a surface temperature between 120°F and 140°F. Hold the heat source about 6 to 8 inches from the surface.
- Test the flexibility by touching a corner or edge; it should feel soft and pliable.
- Start peeling the vinyl gently at a 45-degree angle, using your fingers or a plastic scraper to lift an edge.
- Pull slowly and steadily to minimize tearing or leaving adhesive behind.
- Reapply heat to any stiff or torn sections before continuing to peel.
- Remove leftover adhesive using an adhesive remover formulated for vehicles, applying it with a soft cloth and following the product’s instructions carefully.
- Clean and polish the surface after all vinyl and adhesive are removed to restore the truck’s finish.
This method requires patience but minimizes the risk of damaging your truck’s paint or clear coat. The cost mainly involves the items you likely already have or can borrow, such as a heat gun or hairdryer ($15 to $40) and adhesive remover ($10 to $20). Taking time with each step increases the likelihood of a clean, professional-looking result without scratches or residue. When the vinyl is extremely old or brittle, you might need extra adhesive removers or professional assistance.
Essential Tools and Materials for Vinyl Lettering Removal

Removing old vinyl lettering from a truck requires a specific set of tools and materials to ensure the process is effective and safe for the vehicle’s finish. Essential items include heat sources, plastic scrapers, adhesive removers, and cleaning supplies. Using the right tools minimizes damage risk and streamlines the removal.
Basic Tools Needed for Vinyl Decal Removal
The primary tools you’ll need include a heat gun or hairdryer to warm the vinyl and loosen the adhesive, and plastic scrapers to peel the vinyl without scratching the paint. Avoid metal scrapers which can damage the paint or leave marks. You will also want soft microfiber cloths for cleaning residue and gentle wiping.
For some decals, a drill attachment designed to remove decals can speed up the process. These tools usually cost around $15 to $30 and can remove both vinyl and adhesive residue more efficiently than manual scraping.
Safe Solvents and Adhesive Removers
Adhesive removers formulated for automotive finishes help dissolve the sticky residue after peeling off the vinyl lettering. Common products include Goo Gone Automotive, 3M Adhesive Remover, or specialized products like Rapid Remover. These solvents safely break down adhesive without harming paint when used per the label instructions. Here is a comparison of common adhesive removers and their safety tips:
| Product | Effectiveness | Paint Safety | Usage Notes |
|---|---|---|---|
| Goo Gone Automotive | Good for most adhesives | Safe on clear coats if wiped promptly | Apply with cloth, let sit 2, 5 minutes, wipe off |
| 3M Adhesive Remover | High effectiveness on tough residue | Test on small area first; avoid prolonged contact | Use sparingly; allow a few minutes before removal |
| Rapid Remover | Designed for quick removal of decal residue | Formulated for automotive finishes | Apply directly to residue; wipe off within 1 minute |
| Isopropyl Alcohol (70%) | Moderate residue removal | Safe if diluted and used sparingly | Use after vinyl removal; aids in cleaning |
Household Items as Alternatives
You can substitute some household items for commercial products depending on availability. A hairdryer works well in place of a heat gun to soften vinyl before peeling. Rubbing alcohol (isopropyl alcohol) is useful for cleaning leftover adhesive, but it should never replace dedicated adhesive removers if the residue is thick or stubborn.
White vinegar or cooking oil can sometimes break down adhesives but may leave oily films or odors, so they require thorough cleaning afterward. Baking soda paste, a mix of baking soda and water, works as a gentle abrasive to remove small patches of residue.
Checklist of Essential Tools and Materials
Having everything ready before starting helps the process go smoothly. Here is a list of must-have tools and materials:
- Heat source: heat gun or hairdryer to warm vinyl
- Plastic scraper or old credit card to peel decals
- Adhesive remover suited for automotive paint
- Microfiber cloths for cleaning and wiping
- Gloves to protect skin from chemicals
- Optional: drill attachment for faster decal removal
- Mild soap and water for final washing
Organizing these items beforehand ensures you won’t interrupt the removal process to find missing tools or supplies. Each component plays a role in protecting the truck’s paint while removing vinyl lettering.
Tip: Always test solvents on a small, hidden area of your truck’s paint to check for adverse reactions before full application.
Step-by-Step Process to Remove Vinyl Letters Without Damage
Removing vinyl lettering from a truck without harming the paint involves careful preparation, controlled heating, gentle peeling, and thorough cleaning. Using the right tools and techniques prevents damage to the paint and ensures a smooth finish. Follow a clear sequence from prepping the surface to final cleanup for best results.
Preparing the Truck Surface
Begin by washing the area around the vinyl letters with soap and water. This removes dirt and grime that could scratch the paint during removal. Dry the surface completely to ensure good heat transfer and effective peeling.
Inspect the truck’s paint closely. If the paint is old, peeling, or has chips, take extra caution as removal may cause damage. Avoid starting on damaged spots and consider testing a small, hidden area first. Also, work in a shaded, dry place to prevent rapid cooling or moisture issues.
Heating and Peeling the Vinyl Lettering
Applying gentle heat softens the vinyl and adhesive, making peeling easier and reducing the risk of pulling off paint. Use a hair dryer or heat gun set on a low or medium temperature, keeping it about 6 to 8 inches from the surface. Heat each section for 15 to 30 seconds until warm but not hot enough to damage the paint (generally below 140°F/60°C).
Start peeling at a corner or edge using a plastic scraper or your fingernail. Pull slowly at a 45-degree angle to reduce stress on the paint. Stop if the vinyl resists or if the paint feels like it’s lifting, and reapply heat before continuing. Avoid metal tools that can scratch the finish.
- Clean the vinyl area and surrounding paint with mild soap and water, then dry it.
- Inspect for paint damage and test a small corner of the vinyl for ease of removal.
- Warm a small section of the vinyl with a hair dryer or heat gun on low, holding it 6-8 inches away.
- Lift one edge gently with a plastic scraper or fingernail.
- Peel the vinyl slowly at a 45-degree angle, reheating as needed to soften adhesive.
- Stop immediately if the paint lifts or if peeling is too difficult, reapplying heat and trying again.
Cleaning Residual Adhesive and Finishing
After peeling off the vinyl letters, sticky adhesive residue usually remains. Use a surface-safe adhesive remover designed for automotive paint or a mixture of isopropyl alcohol and water (about 50/50). Apply it with a soft cloth and gently rub to dissolve the residue without damaging the paint.
Repeat this process if stubborn adhesive remains, but avoid aggressive scrubbing or sharp tools. Once clean, wash the area again with soap and water, then dry thoroughly. You may want to apply a coat of wax or polish to protect the paint and restore shine.
Why Heat Is Key and How to Use It Safely
Heat softens the adhesive holding vinyl lettering to your truck, making removal easier and reducing the chance of damaging the paint. Applying the right amount of heat at a safe distance prevents overheating the surface. Using common heat sources like heat guns or hair dryers properly ensures good results without harming your vehicle.
How Heat Works on Vinyl Adhesive
Heat affects the adhesive by softening it, which lowers its bonding strength and makes the vinyl easier to peel off. Most decal adhesives become pliable between 140°F and 160°F. Applying heat loosens the grip of the old adhesive, so the vinyl can come away without tearing or leaving large residues. Without heat, forceful removal can damage your truck’s paint or leave behind sticky patches that attract dirt.
The temperature must be controlled carefully. Excess heat can cause the paint underneath the decal to blister or discolor. Keeping the surface at a warm but safe temperature preserves the truck’s finish while making decal removal effective.
Using Heat Guns Safely for Removal
A heat gun is the most effective tool for softening decal adhesive because it delivers a controlled, steady flow of hot air. Set the heat gun to about 75% power to produce a temperature that warms the vinyl without overheating it. Hold the gun roughly an inch away from the surface, moving it in slow, even strokes to heat the entire decal area.
Keep the heat gun moving constantly to avoid focusing heat on one spot. Stopping too long risks blistering the paint or warping trim parts. Wearing heat-resistant gloves can protect your hands from accidental burns. Allow short breaks between passes to let the surface cool slightly if it feels too hot to touch.
Hair Dryers and the Sun as Alternative Heat Sources
If you don’t own a heat gun, a high-quality hair dryer works as an alternative. Hair dryers typically produce lower heat, so plan on heating the decal longer, several minutes per section, to reach effective temperatures. Hold the dryer close but not touching the vinyl, around 1 to 2 inches away, and keep it moving to avoid hot spots.
On warm, sunny days, you can use the sun’s heat to soften decals. Park the truck in direct sunlight for an hour or more, especially after the surface warms above 85°F. This method is slower and less precise but causes no risk of burning paint. It also helps loosen dirt and grime that can interfere with removal.
Common Risks and How to Prevent Damage
Overheating the truck’s paint is the main risk when using heat to remove decals. Paint damage can include discoloration, peeling, or bubbling. Avoid holding the heat source too close or in one spot too long. Keep the heat source moving steadily and check the surface by touch, you should feel warmth, not burning.
Another risk is incomplete heating, which leaves adhesive stubborn and harder to remove. Reheat areas as needed but keep total heating time under a few minutes per section. After removing the vinyl, clean all adhesive residue promptly using a recommended adhesive remover, or dirt and muck will attach and make the surface look worse.
Wear safety glasses to protect your eyes from any debris or heated vinyl particles. Work in a well-ventilated space to avoid inhaling any fumes released from warmed adhesives.
Choosing and Applying Adhesive Removers Effectively
Choosing the right adhesive remover is important for protecting your truck’s paint and achieving clean results. Safe removers are typically designed to break down adhesive without damaging clear coat finishes or base paint layers. Citrus-based and chemical solvent removers both have their uses but differ in strength, safety, and environmental impact.
Citrus-based removers are usually safer for automotive paint because they use natural oils like d-limonene to dissolve adhesive gently. They tend to have lower toxicity and less harsh chemicals, making them preferable when working on sensitive paint surfaces or in enclosed spaces. Chemical solvents such as acetone or mineral spirits are stronger and faster but increase the risk of paint damage if used incorrectly. They also require better ventilation and protective gloves due to their fumes and irritants. The table below compares common adhesive removers used for vinyl lettering on trucks, showing their key features and suitability.
| Remover Type | Effectiveness | Paint Safety | Application Time | Health & Environmental Notes |
|---|---|---|---|---|
| Citrus-based (d-limonene) | Moderate; dissolves adhesive in 5, 10 minutes | Generally safe for all paint types | Apply and wait 5, 10 min, then wipe | Low toxicity, biodegradable, pleasant smell |
| Isopropyl alcohol (70-90%) | Mild; effective on fresh or thin adhesive layers | Safe on most painted surfaces when used sparingly | Apply and wipe immediately or within 3 min | Moderate evaporation rate, requires ventilation |
| Acetone | Strong; removes stubborn adhesive quickly | Can damage paint if left on too long or rubbed hard | Apply briefly (under 1 min), wipe off immediately | Flammable, irritant; use gloves and ventilation |
| Mineral spirits | Strong; dissolves adhesive in 1, 3 minutes | May dull paint if overused | Apply, wait 1, 3 min, wipe gently | Moderate toxicity; good ventilation needed |
| Commercial adhesive removers (e.g., Goo Gone) | Varies; moderate to strong | Formulated for safe use on vehicle paint | Follow label; usually 2, 5 min application | Check specific product for safety and disposal |
Apply adhesive removers in shaded, well-ventilated areas to avoid rapid evaporation and inhaling fumes. Use a soft cloth or sponge to apply the remover in small sections, saturating the adhesive but avoiding runoff to non-painted surfaces. After soaking the adhesive for the recommended time, gently rub or scrape off residue with a plastic scraper or microfiber cloth. Always test the remover on a hidden part of the truck to ensure it does not react with the paint. Avoid extended contact times, especially with chemical solvents, to prevent surface damage.
Environmental considerations include choosing biodegradable or less toxic products to reduce harm if product drips onto soil or water. Dispose of used cloths and residues according to local hazardous waste regulations. Wear nitrile gloves and eye protection when handling chemical solvents or commercial removers to avoid skin irritation and eye injury. Keep a bucket of water and rags handy in case of spills.
Never leave a chemical solvent on your truck’s paint for more than a minute without wiping, it can cause permanent damage.
Here’s a quick checklist for applying adhesive remover safely:
- Work in shade and ventilated space.
- Put on gloves and eye protection.
- Test remover in an inconspicuous spot.
- Apply remover with soft cloth; avoid dripping.
- Wait recommended time (usually 1, 10 minutes).
- Gently wipe or scrape off adhesive residue.
- Wash area with warm water and mild soap afterward.
- Dispose of waste materials per local rules.
The choice between citrus-based and chemical solvents depends on the adhesive’s stubbornness and your sensitivity to chemicals. For older, more permanent adhesives, a commercial remover or mineral spirits might speed the process but use caution. For delicate finishes or environmental preference, citrus-based removers perform adequately though they may require longer soak times.
Handling Difficult, Old, or Damaged Vinyl Decals
Cracked or brittle vinyl decals require a gentle approach to prevent further damage to your truck’s paint. Start by warming the decal with a heat gun or hair dryer set to medium heat about 6 to 8 inches from the surface. This softens the adhesive and vinyl just enough to make peeling easier. However, avoid overheating, which can cause the vinyl to crack or char, especially on sensitive surfaces like painted metal. When the decal remains stubborn, apply heat in short bursts while moving steadily to avoid hotspots.
When heat alone won’t soften an aged or thick decal, mechanical tools can aid removal but must be used carefully. A plastic scraper or an old credit card can help lift the decal edges without scratching the paint. Avoid metal blades unless absolutely necessary, and if you do use them, keep a very shallow angle and work slowly. For areas where the vinyl is rough or torn, gently rubbing with a microfiber cloth soaked in adhesive remover helps loosen glue residue. Always test the remover on a small hidden spot first to make sure it won’t discolor the paint.
Old decals that resist both heat and scraping often benefit from gentle abrasion using a fine-grade sanding sponge or a non-abrasive scrubbing pad. This method works best if adhesive residue remains after peeling off most of the vinyl. Lightly buff the area in circular motions with minimal pressure to avoid removing clear coat or damaging paint. Use this technique only after all other softer methods fail, and wash the area thoroughly afterward.
To avoid damage when dealing with tough, aged decals, work slowly and be patient. Each step should focus on weakening the bond without harming your truck’s finish. Keep the heat source moving and never concentrate it in one spot longer than 15 seconds, as paint can blister around 210°F. Notice paint lifting? Stop right away and switch to a gentler method. Mechanical tools should be reserved for small areas where edges need lifting; overuse can cause scratches or swirl marks.
For decals on glass sections like rear windows or mirrors, avoid heat tools entirely. Instead, rely on solvent-based adhesive removers combined with plastic scrapers to prevent cracking the glass. In all cases, wearing gloves protects your skin from chemical exposure. Removing tough decals typically takes 30 to 60 minutes depending on size and condition, so allocate enough time to avoid rushing and causing damage. Encountering too much resistance or paint damage calls for consulting a professional detailer or body shop to save time and money.
Common Mistakes and How to Avoid Them When Removing Decals
One common mistake when removing vinyl lettering from a truck is using the wrong tools, such as metal scrapers or sharp blades. These tools can easily scratch or chip the paint, causing costly damage. Instead, use plastic scrapers or fingernails to gently lift edges. Peeling too fast is another frequent error. Pulling decals off quickly increases the risk of paint lifting or adhesive residue remaining, which can be tough to clean. Slow and steady peeling, preferably at a 45-degree angle, helps maintain paint integrity.
Incorrect heat use often causes problems. Applying heat that’s too intense or uneven can soften the adhesive excessively, which might not only damage the vinyl but also the paint beneath. Use a heat gun or hairdryer set between 120°F and 150°F, moving it constantly to avoid overheating one spot. Stopping periodically to test the vinyl’s pliability ensures you’re not heating too much.
- Using metal tools instead of plastic scrapers or fingernails
- Pulling decals quickly rather than peeling slowly and steadily
- Applying excessive heat in one spot instead of warming evenly at moderate temperature
- Neglecting to clean adhesive residue promptly after removal
- Skipping protective measures like washing the area before starting
- Failing to test heat or adhesive removers on a small area first
If damage occurs, such as paint peeling or scratches, you can attempt repairs depending on severity. Small scratches may be buffed out with rubbing compound, but deeper paint damage usually needs professional repainting. Residual adhesive on paint can be safely removed using specially designed adhesive removers that won’t harm factory finishes; always test on a hidden area first. Delaying adhesive removal increases chances of paint damage. DIY removal risks paint harm most often when the vinyl is brittle or very old. In those cases, the adhesive is likely stronger and removal might require more care and possibly professional help.
Preventive steps include washing the truck to remove dirt and debris before starting, which prevents scratching during removal. Starting with warming the decal gently and peeling a small corner creates better control. Working in shaded, cool environments limits the vinyl and adhesive from overheating or drying too fast. These careful techniques, taking more time upfront, lead to clean removal without paint damage, saving costly repairs later.
When to Hire a Professional for Vinyl Lettering Removal
Deciding if you should hire a professional to remove vinyl lettering depends on several factors like the age and condition of the decal, the truck’s paint quality, and your own comfort level with tools and solvents. Older decals that have been on the truck for years tend to embed adhesive deeply and might cause paint damage if removed improperly. If the letters are cracked, brittle, or involve multiple layers of vinyl, professionals have the specialized heat tools and chemical solvents to handle those safely. You should also consider a professional if the paint on your truck is delicate, vintage, or already showing signs of wear, as they know how to avoid further harm.
Professional vinyl lettering removal generally involves a combination of controlled heat application, industrial-grade adhesive removers, and sometimes mechanical methods like plastic scrapers or buffer pads. Technicians assess the truck’s surface and decal type to pick the best approach. They also clean and prep the surface afterward, leaving your truck ready for repainting or new decals. This expert touch minimizes damage and ensures a smooth finish that’s hard to replicate with DIY attempts.
The cost for professional vinyl removal varies but usually ranges from $150 to $400 depending on decal size, complexity, and location. Simple, small lettering might cost closer to $150 to $200, while large or layered decals pushing $300 to $400. Additional repairs such as addressing paint damage or reapplying clear coat will add to costs. Compared to the price of a possible repaint from DIY mistakes, professional services can offer good value.
Advantages of hiring a pro include time savings, the right equipment, and reduced risk of paint damage or scarring. Professionals also handle sticky residues more efficiently and can surface-treat afterward to maintain the truck’s look. On the flip side, the main downside is cost, so if the lettering is newer and comes off easily, a DIY approach might be better. You should weigh the time and risk involved versus the service charge.
To choose a reputable service, look for automotive detailers or wrap shops with strong online reviews and before-and-after photos. Ask if they use heat guns, plastic scrapers, and automotive-grade adhesive solvents rather than harsh chemicals that might harm your truck’s finish. Request an estimate that details removal steps and any included paint care. Confirm whether they offer any guarantees on paint protection to avoid surprise costs.
Always test a small hidden area first when using heat or solvents to avoid unexpected paint damage.
Step-by-Step Action Plan to Remove Old Vinyl Lettering from Your Truck
Use this plan to remove vinyl lettering safely and get your truck’s surface clean and smooth.
- Before You Start: Gather heat tools, adhesive remover, plastic scraper, microfiber cloths, and soapy water. Having everything ready ensures a smooth process.
- Day 1: Warm the vinyl lettering evenly using a heat gun set on low or a hairdryer held 6, 8 inches away. The vinyl should soften and lift easily without overheating.
- Day 1: Peel off the softened vinyl slowly at a 45-degree angle using a plastic scraper. Reheat the area and try again when it tears.
- Day 1: Apply adhesive remover to any sticky residue with a microfiber cloth. Let it sit for 2, 3 minutes, then wipe away the residue.
- Day 2: Wash the area with warm soapy water to remove any chemical traces. Check that no adhesive remains and the paint is intact.
- Day 2: Inspect the surface for scratches or damage. Apply polish as needed for a smooth finish, but steer clear of abrasive compounds.
- After 1 Week: Monitor the treated area for any peeling or leftover stickiness to catch problems early.
Frequently Asked Questions
How Do I Avoid Paint Damage When Removing Vinyl Lettering?
Use low heat and gentle adhesive removers to protect paint, avoiding harsh scraping which can damage the truck’s surface. Always test a small area first to check the reaction.
Can I Remove Vinyl Lettering in Cold Weather?
Cold weather makes vinyl stickers more brittle and harder to peel off. It’s best to work in warmer conditions or use a heat gun to soften the vinyl before removal.
What Should I Do If Adhesive Residue Remains After Removing the Lettering?
Apply a quality adhesive remover or rubbing alcohol to the residue. Let it sit briefly, then gently wipe away to avoid scratching the paint.
Is It Safe to Use Household Solvents Like Acetone on Truck Vinyl Lettering?
Household solvents can damage your truck’s paint and should be avoided. Use products specifically designed for automotive use to safely remove vinyl lettering.
Can I Reuse Vinyl Lettering After Removal?
Vinyl lettering usually loses its adhesive and shape during removal, so reuse is not recommended. It’s better to get new decals for a clean and secure fit.
How Long Does It Usually Take to Remove Old Vinyl Lettering from a Truck?
It takes about 20 to 45 minutes, depending on the size and condition of the lettering. Tough, old vinyl may require more time and patience for removal.
Wrapping Up
You can effectively remove old vinyl lettering from your truck by applying the right heat and adhesive remover techniques. Start by warming the vinyl carefully, then peel and clean the surface to prevent paint damage. Try removing a small test patch first to build confidence before tackling larger areas. Taking the time now will save you effort and protect your truck’s finish.