Address Sign Ideas That Stand Out: Materials, Styles & Lighting Tips
Address sign ideas help your home stand out while ensuring visitors and deliveries find you easily. Choosing durable materials like military-grade coated steel prevents rust and fading, while LED lighting keeps your address visible day and night. Start by selecting a style that fits your entryway size and lighting needs to maximize both curb appeal and functionality.
Key Takeaways
- Use vertical orientation for narrow entryways with long five-digit addresses to save space and maintain readability.
- Install LED illumination with adjustable color temperatures (3000K to 6500K) for clear night visibility tailored to your preference.
- Mount numbers 1 to 2 inches away from the surface to create a halo effect that improves daytime legibility and style.
- Consider solar-powered address signs costing as little as $8 for energy-efficient, low-maintenance lighting solutions.
- Choose exterior-grade or marine plywood over Baltic birch plywood for wooden signs exposed to outdoor conditions.
- Use larger letter heights for signs positioned 10 to 80 feet away to ensure they remain readable from the street.
Popular Address Sign Styles and Their Appeal
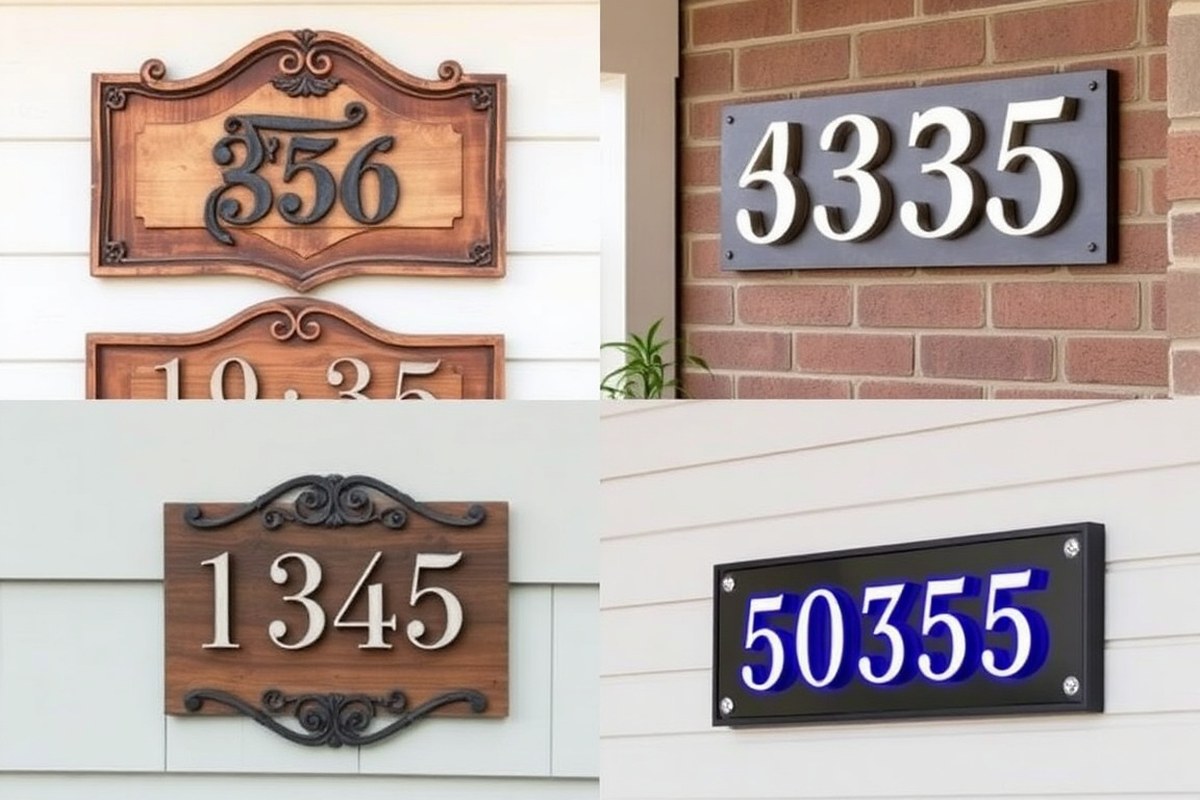
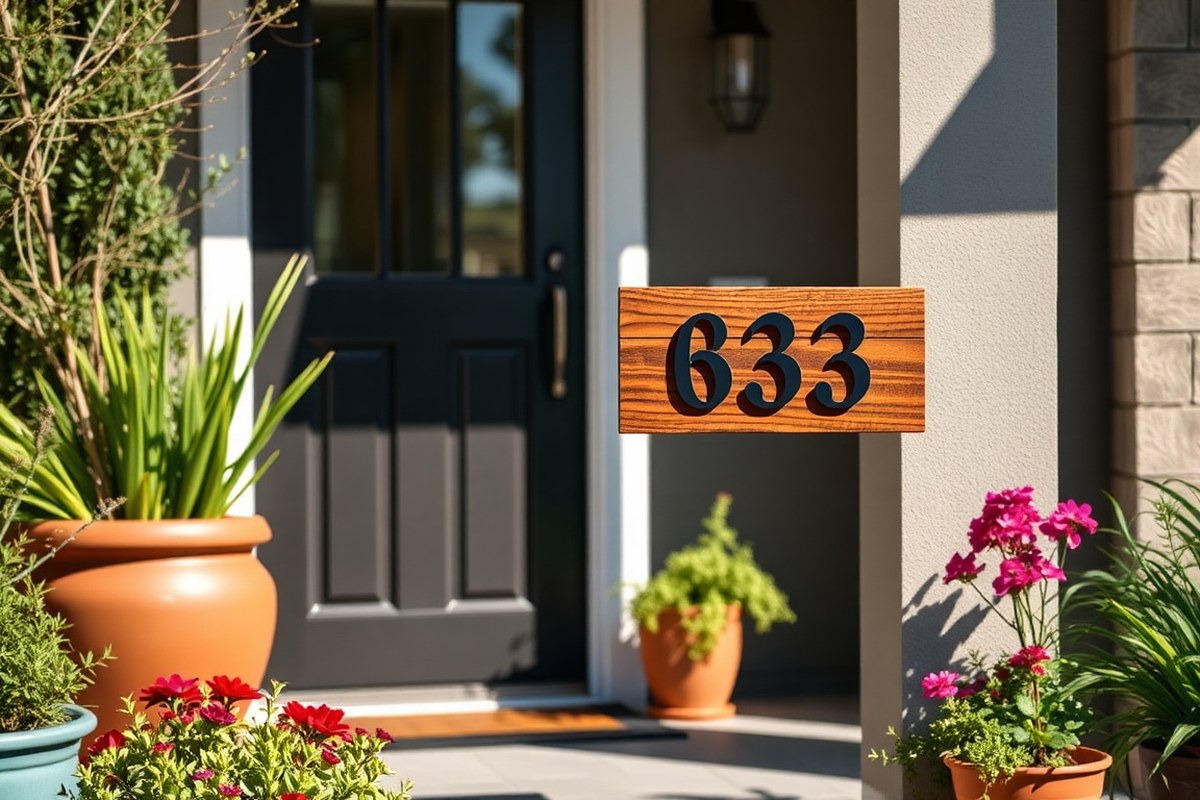
Popular address sign styles cater to a wide range of home aesthetics, from rustic farmhouse to sleek modern designs. For farmhouse-style homes, simple, old-school wooden plaques with hand-painted or embossed numbers suit the setting well. These often use natural wood tones or distressed finishes to improve the rustic charm. For example, a wooden sign made from reclaimed pallet wood with clear, serif numbers can blend smooth with farmhouse decor, adding warmth and personality.
Modern homes tend to favor clean lines and contemporary materials like metal or acrylic. Personalized metal address signs with sans serif fonts offer a minimalist appeal while remaining highly visible. Many metal signs come with lighting options, such as three lighting modes, warm white (3000K), cool white (6500K), and daylight white (4000K), which help maintain visibility at night while matching your specific outdoor lighting needs. This combination of function and sleek style fits perfectly with a modern home’s streamlined look.
For those who prefer a retro or vintage aesthetic, embossed wooden signs with art deco numbers or vintage plaque styles provide a classic charm. These signs often feature elegant borders and detailed craftsmanship to stand out as decorative elements. The retro style works well on brick exteriors or in neighborhoods with older architecture, complementing the traditional vibe while keeping the address easy to spot.
Address signs can also double as decorative features to improve curb appeal. For example, mailbox plaques with customizable numbers and last name toppers add a personal touch that makes your home unmistakable. A planter-integrated address sign can serve both as a welcoming element and a way to incorporate greenery into your outdoor space. Rustic signs mounted near your front door or entrance path create inviting focal points without overwhelming your home’s style.
Choosing the right style means thinking about your home’s materials, colour palette, and existing decor. For a rustic home, opting for natural materials like wood or stone with simple, bold numbers creates an authentic look. Modern homes benefit from polished metal or illuminated signs that stand out without cluttering the facade. Farmhouse designs thrive on handmade or vintage-inspired signs with warm tones and straightforward layouts.
Cost-wise, ready-made metal address signs typically range from $30 to $100 depending on size and customization, while DIY wooden signs can be created for under $50 using pallet wood and paint supplies. Solar-powered address signs, some as affordable as $8, offer energy-efficient light for nighttime visibility but may not match every home’s aesthetic. When you select a style consistent with your home’s character, your address sign becomes both a practical marker and a detail that improve your overall curb appeal.
Choosing the Best Materials for Durable Address Signs
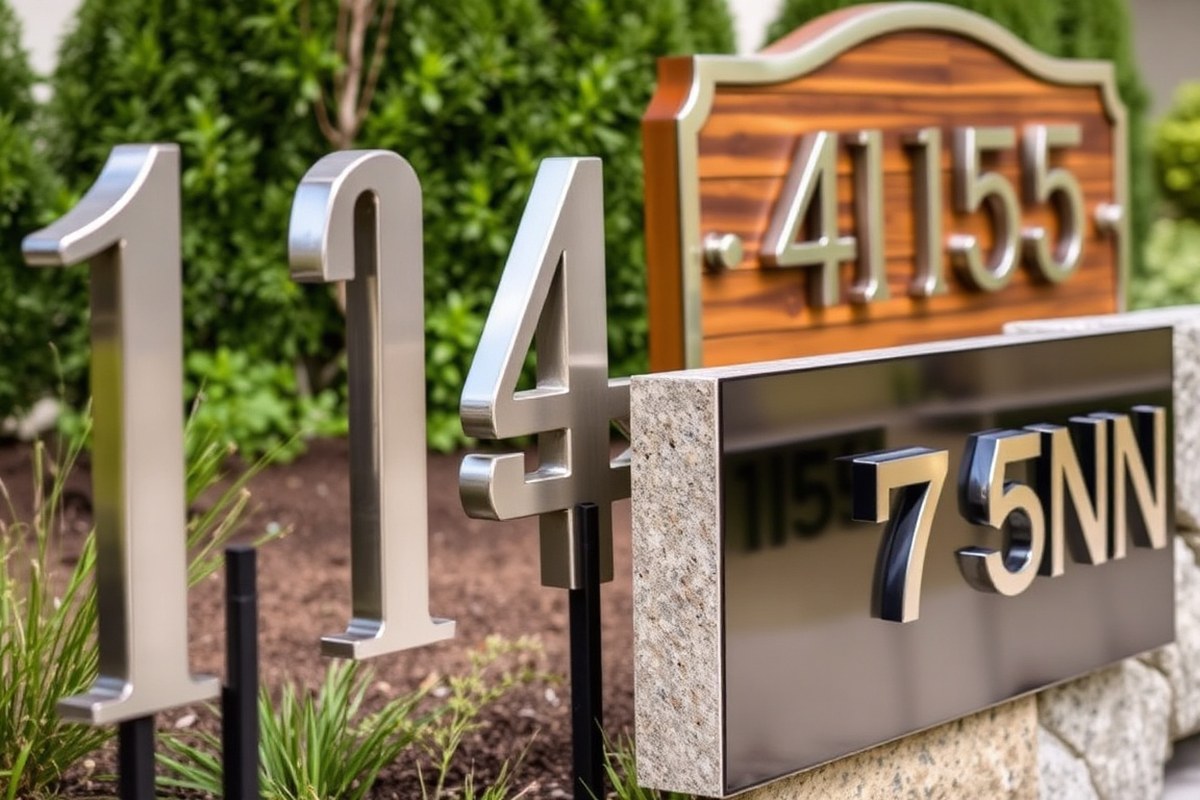
Choosing the right material for your address sign is important for lasting durability, weather resistance, and ease of maintenance. Metal, wood, stone, and acrylic all bring unique qualities that influence how your sign holds up outdoors and how often it needs upkeep.
Metal signs, especially those forged from military-grade coated steel, resist rust and fading even under harsh temperatures from -40°F to 120°F. Zinc alloy numbers with a double-layer backplate provide strength against bending over time. These signs usually require minimal cleaning and keep their sleek look for years without peeling or corrosion, making them ideal for long-term outdoor use.
Wood offers an inviting, natural look that blends well with many home styles. Reclaimed wood, in particular, stands out by showcasing unique weathering, grain, and color that new lumber cannot. However, wood signs demand regular sealing or staining to protect against moisture and sun damage, which can otherwise cause cracking or warping.
Stone signs offer extreme durability and weather resistance, making them excellent for locations exposed to strong elements. Mounting your address numbers on wood attached to stone can add a warm appearance without sacrificing toughness. Stone signs require little maintenance but tend to be pricier and heavier to install.
Acrylic signs deliver a clean, modern look but generally need to be UV-treated to prevent fading and brittleness in intense sunlight. They fit well in contemporary settings but don’t match the rustic charm and resilience of wood or metal under extreme weather.
| Material | Weather Resistance | Durability | Maintenance | Cost Consideration | Best Use |
|---|---|---|---|---|---|
| Military-Grade Coated Steel | Excellent (corrosion and UV resistant) | Very high, withstands -40°F to 120°F | Minimal (occasional cleaning) | Moderate | Long-term outdoor, sleek style |
| Reclaimed Wood | Moderate (requires sealing) | Good, unique weathered look | Regular sealing/staining | Varies (can be affordable) | Rustic, natural aesthetic |
| Stone | Excellent (natural resistance) | Very high, almost maintenance-free | Low | High, installation heavy | High-end, durable property markers |
| Acrylic (UV-treated) | Good (with UV treatment) | Moderate, prone to brittleness over time | Occasional cleaning | Low to moderate | Modern, clean-cut signs |
Using reclaimed wood can add character to your address sign through natural imperfections, but it demands more attention than metal or stone to maintain its integrity. Mixing materials, such as mounting metal numbers on wood or wood on stone, creates unique, personalized signs that balance beauty and functionality.
Tip: Avoid untreated wood in humid or rainy climates without sealing to prevent rapid decay.
How to Optimize Visibility for Day and Night
To make your house number easy to see both day and night, choose large, clear fonts and add effective lighting like LED or solar options. Position your sign at the right height and angle so it’s visible from the street. These steps will help visitors, delivery drivers, and emergency services find your home quickly anytime.
Choosing Font Size and Style
Pick fonts that are simple, bold, and sans-serif for the easiest readability from a distance. Numbers should be at least 4 inches tall when your house is close to the street, and increase size for longer viewing distances. Black numbers on a white or light background offer the highest contrast, which improves daytime legibility. Avoid script or decorative fonts that can be hard to read in passing.
Avoid overcrowding your sign with words or designs; the address should be the focus. Space out numbers and letters to prevent them from blending together. Use uppercase letters for clarity and consistency. This approach reduces the chance of misreading, especially in poor weather or when driving by quickly.
Lighting Options: LED, Solar, and Backlighting
LED lighting is the most reliable way to make your sign visible in the dark, either via direct illumination or backlighting. Backlit signs have letters mounted 1 to 2 inches from the surface, creating a halo effect that improve visibility and adds subtle style. LED strips or fixtures on the front can also highlight large numbers clearly.
Solar lighting offers an energy-efficient alternative that charges during the day and lights your sign at night. It’s ideal if you want to avoid wiring but requires full sunlight exposure to work well. Placement in shaded areas will reduce effectiveness. Expect to pay between $20 and $80 for a solar address light, depending on brightness and design.
- Choose LED lights for consistent, bright illumination all night
- Use backlighting to create depth and reduce shadows on numbers
- Opt for solar lighting when wiring is impractical and your location gets ample sun
- Make sure lighting fixtures are weather-resistant and rated for outdoor use
- Consider motion sensors or timers to turn off lights during daylight hours
Properly lit signs cut down on confusion and missed stops by visitors. Outdoor-rated LED lights generally last thousands of hours and require minimal upkeep. Keep wiring concealed and protected from moisture if you install electric lights.
Best Mounting Height and Placement Rules
Mount your address sign between 4 and 6 feet off the ground, which is roughly at eye level for someone in a car or on foot. This makes it easy to spot without bending or straining your neck. Ensure the sign faces the street clearly, unobstructed by plants, fences, or porch columns.
Placement near the main driveway entrance or at the mailbox increases visibility. Avoid setting the sign too close to streetlights that may cause glare or cast shadows on the numbers. Angle signs slightly toward oncoming traffic to maximize readability.
Avoid neighborhoods or streets with unusual traffic flow by positioning your sign on the side facing the direction most visitors approach from. This minimizes guesswork and quickens house identification.
Creative and Functional Address Signs with Planters
Combining planters with address signs adds charm and functionality, giving your home a unique touch. This approach works well to boost curb appeal while providing a spot for seasonal plants. Proper planning ensures your house numbers remain easy to see alongside healthy greenery.
Selecting Planters for Address Signs
Choose planters that complement the size and style of your address sign without overpowering it. Wall-mounted or hanging planters work well for smaller spaces, while freestanding planters fit address posts. Materials like wood, metal, or resin offer durability outdoors but pick one resistant to weather for longevity.
Look for shallow planters that don’t block numbers from certain angles. For example, a wood crate planter under a vertical sign combines natural texture with clear visibility. If placing plants on a post, pick lightweight pots like resin or plastic to avoid putting strain on the support.
Installation Steps for Combined Signs and Planters
Start by mounting the address sign securely at eye level, about 4 to 5 feet off the ground. Attach the planter directly below or beside it, leaving at least 6 inches between numbers and greenery to avoid obstruction. Use screws or sturdy brackets matching your wall or post type.
When using hanging planters, choose chains or hooks strong enough to hold the soil’s weight when wet. Position planters to receive the right sunlight for chosen plants, morning sun is usually best for asters or other popular porch flowers.
- Measure space carefully before mounting to maintain at least 6 inches clearance from numbers
- Ensure planter edges do not extend beyond sign width to keep focus on numbers
- Use weather-resistant mounting hardware for lasting stability
- Pick lightweight pots or crates to reduce load on porch walls or posts
- Place plants that thrive in your local climate and sun exposure
- Consider removable planters for easy seasonal plant swaps and cleaning
Using these steps prevents common problems like blocked numbers or signs weakening from heavy pots. This approach also allows you to update your planter’s look each season without full reinstallations.
Maintenance Tips to Keep Both Healthy and Visible
Keep plants trimmed and regularly watered to avoid overgrowth covering address numbers. Pruning ensures the greenery improve instead of hiding your sign. Clear any dirt or debris from the sign to maintain its visibility, especially after rain or storms.
Check mounting hardware every six months to tighten any loose screws caused by weather changes. In colder climates, protect plants or swap in hardy varieties to prevent damage. Remove and replace soil as needed to prevent mold or pests that could stain the sign.
DIY Address Sign Projects: Tools, Materials, and Techniques
Creating your own address sign lets you add a personal touch to your home’s curb appeal. You’ll need some basic tools and materials, a clear plan, and a bit of patience. Most DIY projects of this kind take a few hours from start to finish, depending on the materials and design complexity.
Essential Tools and Materials
To build a simple and attractive address sign, gather tools like a hand saw or jigsaw, a drill with bits, sandpaper or a sanding block, and a paintbrush or foam brush. Materials depend on your chosen style but typically include untreated wood or a reclaimed item like a boat paddle for a vintage look. Use waterproof outdoor paint or stain, weather-resistant numbers, and outdoor-grade sealant to protect the sign from the elements. Here’s a basic checklist for a wood-based sign:
- Wood board, 12 to 18 inches wide and 6 to 12 inches tall
- House numbers (metal or plastic, 3 to 5 inches tall)
- Exterior paint or wood stain
- Clear outdoor sealant (polyurethane or marine-grade)
- Sandpaper (medium and fine grit)
- Drill and screws or strong construction adhesive
- Measuring tape and pencil for marking
Other useful additions include stencils for painting numbers and mounting hardware like brackets or stakes if you plan to place the sign in the yard.
Step-by-Step DIY Assembly Process
Start by selecting and preparing your base. Cut the wood to size if necessary and use sandpaper to smooth all surfaces and edges. Apply your chosen paint or stain in thin, even coats; let it dry fully between coats, usually about 4 to 6 hours. This ensures a smooth finish and better durability.
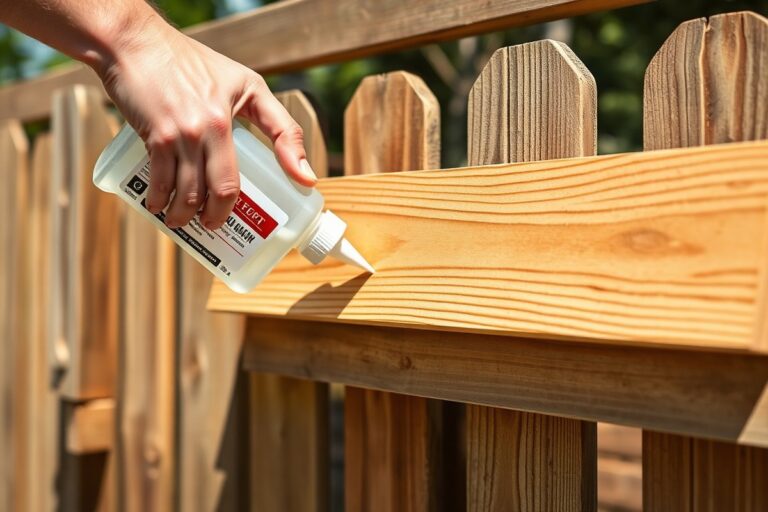
Next, attach the house numbers. Position them evenly centered and use adhesive for a cleaner look or screws for extra security, drilling pilot holes first to prevent wood splitting. Finish by sealing the entire sign with at least two coats of clear outdoor sealant applied with a brush and dried under ideal conditions: temperatures between 50°F and 85°F for 24 hours.
For mounting, decide if your sign will hang on the wall, attach to a post, or free-stand. Use appropriate hardware rated for outdoor use and check that your sign’s placement maximizes visibility from the street.
Common DIY Mistakes and How to Fix Them
One frequent error is skipping the sanding step, which leads to rough, splintered edges and poor paint adhesion. Fix this by thoroughly sanding and cleaning off dust before painting or staining. Another pitfall is using indoor paint or skipping sealant, causing the sign to peel or warp quickly outdoors. Always apply an outdoor sealant, especially in regions prone to rain or humidity.
Uneven number placement is another issue. To avoid or fix it, measure carefully and use painter’s tape or stencils as guides. If numbers are peeling, replace adhesive with rustproof screws, and fill screw holes with wood filler, sanding smooth before repainting.
Allow paint and sealant to dry fully between coats to prevent smudges and bubbling, particularly in humid or cold weather.
Professional Installation Tips and When to Hire Experts
Properly mounting an address sign ensures it stays secure and visible, preventing damage and costly replacements. The mounting method depends on your surface. For wood, use stainless steel screws with wall anchors. Metal surfaces may require drilling pilot holes or adhesive mounts designed for metal, while brick, stone, or stucco demand masonry anchors or expansion bolts. Secure mounting reduces sign movement caused by wind and vibration, which can wear down materials faster.
To mount signs safely, first locate a solid backing behind the surface. Avoid drywall or hollow panels unless you use heavy-duty anchors rated for those materials. Measure and mark the exact spots for screws or bolts, then drill pilot holes slightly smaller than the anchor diameter. Insert anchors flush with the surface. Attach the sign using matching screws tightened enough to hold firmly without cracking or bending it.
Hardware choice affects durability. Stainless steel resists rust, essential in wet climates, while brass hardware offers corrosion resistance with a decorative look. Galvanized bolts are a cost-effective option for outdoor use but check local weather conditions before choosing them.
- Use stainless steel screws and anchors for wood or composite siding.
- Apply masonry anchors or expansion bolts for mounting into brick or stone.
- Check that the mounting surface is solid enough to hold weight without cracking.
- Pre-drill holes to avoid splitting wood or cracking masonry.
- Seal holes with waterproof caulk to prevent moisture intrusion.
- Use a level to ensure the sign sits straight and even.
- Allow for a ½ inch gap behind the sign to prevent moisture buildup.
Hiring a professional is advisable when you lack tools, experience, or when mounting conditions are challenging. Large signs installed 10 to 80 feet from the road may require specialized equipment to fix securely and guarantee high visibility. Professionals also ensure compliance with local regulations on size, placement, and reflectivity for emergency responders.
Costs for professional installation vary widely but expect $100 to $300 depending on site complexity and hardware needed. A solid installation can last 5 to 10 years or more without maintenance. Poorly mounted signs risk falling, fading unevenly, or damage from weather, which can lead to replacement sooner and higher expenses overall.
Improving Curb Appeal with Customized Address Signs
Adding artwork or logos to your address sign can personalize your home’s exterior while serving its practical purpose. Custom designs that incorporate simple motifs like family initials, nature-inspired icons, or geometric shapes give your address a distinct character. Monogram signs combine your house number with an elegant letter or symbol, which can create a welcoming look without sacrificing clarity. To ensure your artwork doesn’t reduce readability, keep designs minimal and use high-contrast colors against the background.
Colors and finishes play a key role in complementing common house styles. For example, a traditional brick home pairs well with deep greens, navy blues, or rich burgundies in matte or satin finishes, which add sophistication without glare. Modern homes benefit from sleek metallic or acrylic signs in contrasting black, white, or silver with glossy or brushed textures, improving a minimalist aesthetic. For coastal styles, soft pastels or weathered wood tones evoke a relaxed vibe. When choosing colors, pick at least two shades with strong contrast between numbers and background to ensure your sign stands out in sunlight and shade.
Balancing personalization with readability requires selecting clear, legible fonts and appropriate sizing. House numbers should be at least 4 to 6 inches tall to be visible from the street, with sans-serif fonts generally easier to read. Using glare-resistant finishes or a matte background helps prevent reflections that obscure details. For backlit or illuminated signs, softer pastel backgrounds with darker numbers improve nighttime visibility without harsh contrasts. Avoid overcrowding the sign with too much artwork or text; keep your street name and house number separated and clearly spaced, typically by at least one inch.
For different situations, customize your approach. If your home sits on a busy street, prioritize bold, high-contrast colors and larger numbers to capture drivers’ attention quickly. In quiet neighborhoods, design aesthetics may take precedence, allowing for more intricate artwork, such as floral motifs or family crests, combined with readable fonts. Budget-friendly options include repainting an old serving tray black and adding white numbers for a striking iconographic sign, costing under $20 with paint and plastic numbers. In contrast, acrylic plates with built-in lighting or metal plaques can range from $100 to $300 depending on size and complexity.
Good results mean your address sign not only improve curb appeal but remains practical under varying weather and light conditions. Signs that blend with your home’s style yet maintain legibility create a pleasant first impression for guests and improve emergency services’ response times. Poor choices, like low-contrast colors or complex fonts, make signs hard to read, defeating their key purpose. Test visibility at different distances and times of day before finalizing your design to strike a perfect balance between personalization and function.
Maintaining and Weatherproofing Your Address Sign
Cleaning your address sign every few months helps maintain its appearance and prevents buildup of dirt or mold. For signs made of wood, metal, or stone, use mild soap and water with a soft cloth or sponge. Avoid harsh chemicals that can erode paint or finish. If your sign shows signs of wear, resealing it every one to two years helps protect it from weather damage and fading.
Applying the right sealants and paints is key for outdoor durability. Look for exterior-grade or marine plywood if your sign is wooden, as interior-grade materials like Baltic birch plywood will delaminate over time even if sealed. Use oil-based exterior paints or specially formulated outdoor acrylics for better fade resistance. A topcoat of exterior polyurethane or spar varnish with UV inhibitors protects wood. For metal signs, rust-resistant primers and clear coats extend lifespan.
Protecting your sign from fading, moisture, and rust involves regular maintenance and careful product choices. Sunlight breaks down pigments, so using UV-protective finishes can reduce color fading. Prevent moisture damage by sealing edges and ensuring your sign is mounted with slight clearance from wet surfaces. For metal signs, inspect for rust spots and sand down any corrosion before recoating. Moss or algae growth can be spritzed with water periodically to maintain a fresh green look, especially for natural-style signs.
- Clean signs with mild soap and soft cloth every 3 to 6 months
- Reseal wooden signs with exterior polyurethane or spar varnish every 1-2 years
- Use rust-inhibiting primer and topcoat for metal signs, reapply as needed
- Spritz mossy wood signs monthly to keep moss green and fresh
- Avoid pressure washing that can damage paint or wood fibers
- Seal plywood edges to prevent water absorption and warping
Overlooking sealing the edges of wood signs often leads to peeling and warping from moisture penetration.
Maintenance costs are generally low but vary by material and size. A quart of exterior polyurethane costs about $15 to $25 and covers up to 200 square feet, plenty for an average sign with multiple coats. Labor can be minimal if you set aside a few hours every year. Successful weatherproofing will result in vibrant paint, no visible cracking or peeling, and no rust or swelling. Avoid skipping maintenance as neglect leads to faded, warped, or rusted signs that undermine your curb appeal and require costly replacements.
Step-by-Step Action Plan to Create Your Ideal Address Sign
Use this plan to design and set up an address sign that combines style, visibility, and durability. Each step helps you progress toward a functional, eye-catching sign.
- Before you start: Measure the area where you want to install your sign and note surrounding features. Confirm adequate space and sightlines for visibility.
- Day 1: Choose a durable material suited to your climate, like metal for rainy areas or sealed wood for dry zones. This ensures longevity and weather resistance.
- Day 3: Pick a design style that matches your home’s exterior, such as modern minimalism or rustic charm. It should improve your curb appeal.
- Day 5: Decide on sign size and text visibility factors: use big, high-contrast numbers and reflectors for night visibility. Check readability from the street.
- Day 7: Build or order your sign. For a DIY project, gather tools and materials; for professional help, book an installer.
- Day 10: Install your sign at a height visible from the road and confirm it is secure and level. Double-check nighttime visibility by using a flashlight or car headlights.
- After 2 weeks: Inspect the sign for weathering or damage; apply additional weatherproofing if needed. This keeps your sign looking fresh and lasting longer.
Frequently Asked Questions
What Are Some Budget-Friendly Address Sign Ideas?
Using solar-powered address signs can be very affordable, costing around $8. These signs are energy-efficient and provide good visibility without drawing electricity from your home.
Can Address Signs Be Both Decorative and Functional?
Yes, address signs with planters combine aesthetics with practical use, adding greenery while displaying your house number clearly. This dual purpose helps improve your home’s curb appeal.
How Can I Make My Address Sign Stand Out to Delivery Drivers?
Using metal letters with unique lighting improves visibility and appeal. Proper lighting ensures your address is easily spotted any time, reducing delivery errors.
What’s the Easiest DIY Technique for a Quick Address Sign?
Hot gluing plastic numbers to a pillow or wooden base creates a simple and effective sign. This approach is cost-effective and keeps the design straightforward.
Can I Integrate My Address Sign with Other Yard Decor?
Yes, pairing your address sign with garden features or pathway elements increases its visual impact. It helps guide visitors while complementing your outdoor style.
What Should I Consider When Updating an Old Address Sign?
Match the new sign’s material and style with your home’s exterior for harmony. Maintaining or improving visibility with lighting is also key for functionality.
Wrapping Up
An effective address sign improves both your home’s look and functionality. Start with a clear plan and materials fit for your environment. Next, focus on visibility to make your home easy to find day and night. Taking these steps brings lasting benefits to your curb appeal and convenience.