How to Make an Address Sign with Step-by-Step DIY Instructions and Pro Tips
Knowing how to make an address sign lets you create a unique, clear marker that stands out day and night. Use durable woods like cedar and add LED lighting for visibility in the dark. Start by measuring the area where your sign will hang to ensure the right size and attachment points.
Key Takeaways
- Choose cedar boards 6 inches wide for a sturdy and weather-resistant sign base.
- Include a 1-inch border for trim around your address sign to create a finished look.
- Cut letters from cardstock at about 11 inches tall to maintain visibility from a distance.
- Plan at least three strong attachment points for signs about 60 inches long by 15 inches tall.
- Mount letters 1 to 2 inches from the surface for a halo lighting effect and improved depth.
- Use a triple-thick polyurethane finish to protect your sign with a single coat drying in 24 hours.
What Materials and Tools You Need for an Address Sign

Choosing the right materials and tools shapes the durability, visibility, and style of your address sign. Wood remains a popular base because it’s versatile and easy to work with. Cedar and shiplap boards are excellent outdoor choices. Cedar resists rot and insects, making it reliable in humid areas or if you face heavy rain. For a standard address sign, 6-inch wide cedar boards or two 8-inch by 8-foot shiplap boards cut to your desired length offer a good balance of sturdiness and aesthetics.
Number style affects how easily people can read your sign. Using numbers that are 4 to 6 inches tall usually works well for signs viewed from the street and balances space use on a 15- to 20-inch tall board. Numbers can come in metal, tile, or painted wood. Tile numbers in a wood-look finish add texture, but metal numbers with a matte black paint can improve visibility, especially if mounted against natural wood. Keep in mind that packaged numbers often come with short screws; longer screws will be necessary to penetrate through your thick wood backing.
Tools you’ll need vary by the materials and design details you choose. A power drill equipped with a diamond drill bit makes installing metal or tile numbers simpler. For wood cutting and shaping, a miter saw or a rotary saw provides clean edges. You might also want sandpaper or a sanding block to smooth rough cuts. A hot glue gun can help hold numbers temporarily in place before securing with screws. In terms of installation, make sure to use at least three attachments on the back of your sign for stability, especially for signs longer than 48 inches.
| Material | Best Use | Durability | Average Cost |
|---|---|---|---|
| Cedar boards (6″ wide) | Outdoor wood signs in all climates | High; rot-resistant | $10 to $15 per board foot |
| Shiplap boards (8″ x 8′ pieces) | Larger, panel-style signs with a rustic look | Moderate to high | $12 to $18 per board foot |
| Metal numbers (painted) | Modern, high-visibility designs | Very high, weather-proof | $5 to $15 per set |
| Wood-look tile numbers | Textured, decorative effects | High; weather resistant | $3 to $10 each |
While choosing your numbers and wood, also take your climate into account. In wetter regions, waterproof sealing is essential, so use marine-grade paints or exterior sealants after assembly. For dry, dusty areas, lighter-colored paint can reduce fading. If you want a modern look, black paint on cedar boards with metal numbers is effective and simplifies maintenance. For a classic or reclaimed wood style, staining with a durable outdoor finish will preserve the wood’s character without sacrificing protection.
- Power drill with diamond drill bit for number installation
- Miter saw or rotary saw for clean board cuts
- Sandpaper or sanding block for smooth edges
- Hot glue gun to temporarily fix numbers before screwing
- Exterior-grade paint or wood stain with sealer
- Longer screws (3/4″ or longer) for attaching numbers securely
- Measuring tape and level to ensure straight alignment
Choosing boards 6 inches wide by your preferred length helps create a sign that’s substantial but manageable. For a sign about 60 inches long and 15 inches tall, assembling multiple boards might be necessary, aligning their edges tightly. Make sure your cutting tools are sharp and your measurements accurate to keep the boards flush. With the right tools and materials, your address sign can stand up to the elements and clearly display your home number for years.
Planning Your Address Sign Design for Maximum Visibility
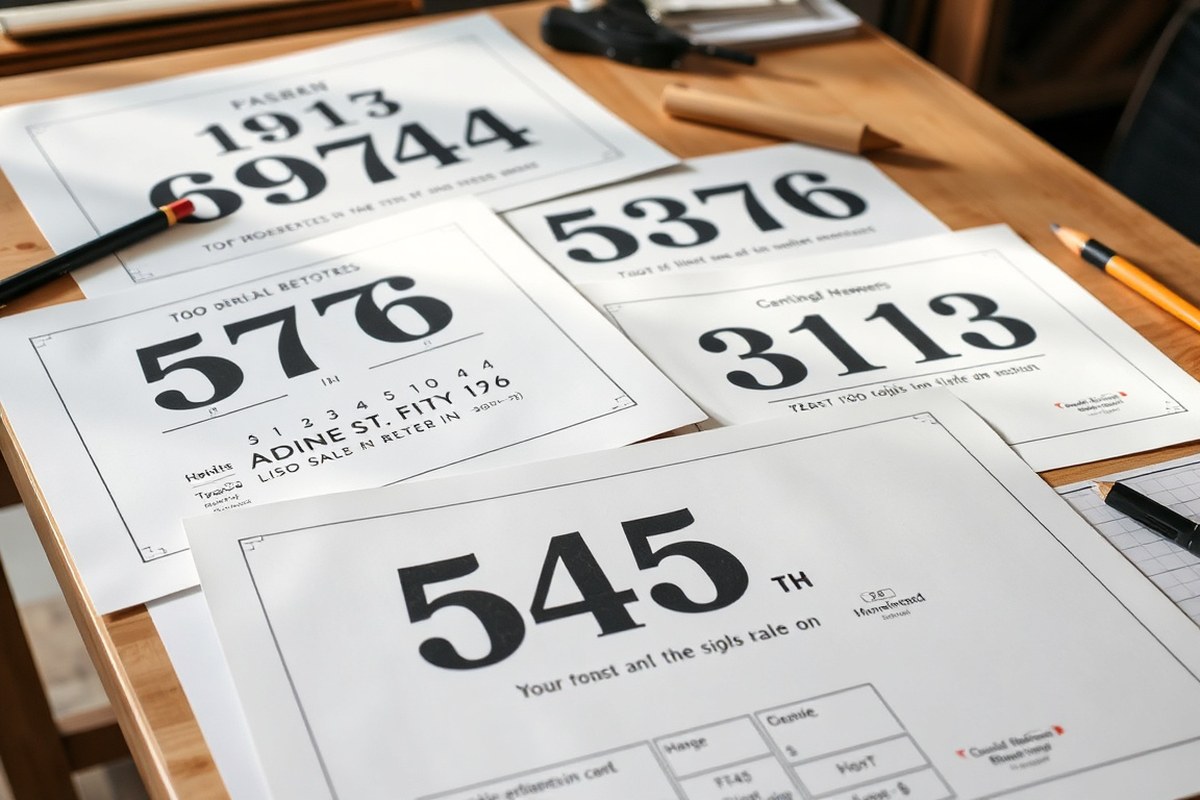
Designing a clear and attractive address sign that matches your home’s style starts with careful planning. You want the sign to stand out for visitors, delivery drivers, and emergency responders who need to see it clearly from the street. Balancing size, font choice, and decorative details ensures your sign looks great and remains easy to read.
Determining the Size and Shape of Your Sign
The size of your address sign depends on where you plan to mount it and how far away it needs to be visible. For signs mounted on or near the front door, a width ranging from 18 to 24 inches is common. Aim for larger dimensions, possibly 24 to 36 inches wide, to make the sign visible from the street. The height typically ranges from 6 to 12 inches, but keep in mind the numbers must have enough clearance and spacing.
Adding a 1-inch border on all sides, especially top and bottom, helps frame the sign and avoid a cramped look. Rectangular shapes work well in most settings, but consider longer horizontal signs if your address has many digits or includes street names.
Size affects cost too. Larger signs use more material and may require sturdier mounting hardware, potentially increasing the budget by $20 to $50 compared to smaller, standard sizes.
Selecting Fonts and Letter Height for Readability
Choose fonts that maximize legibility from a distance. Simple sans-serif fonts like Arial, Helvetica, or Futura work best for house numbers. These fonts avoid extra strokes or flourishes that might blur the shapes when seen from the street.
For number height, the common recommendation is at least 4 inches tall for good visibility from up to 30 feet away. Increase number height proportionally for homes located farther from the road. For example, numbers 6 to 8 inches tall are appropriate when the viewing distance is 50 feet or more. Spacing between numbers should allow at least a half-inch gap but less than the height of the numbers to keep the sign compact and easy on the eyes.
Incorporating Decorative Elements and Style
Your address sign can reflect your home’s character with tasteful design touches. Consider painted or stained wood bases for a natural look, or add floating metal or wooden numbers mounted 1 to 2 inches above the surface to create a subtle shadow effect. This depth improve visibility and adds sophistication.
Lighting choices, such as LED illumination, make the sign visible at night and offer options from backlighting to spotlights, but they increase complexity and cost. Decorative trims or borders that complement your home’s architectural style add visual interest without sacrificing clarity.
Less is more when combining decoration and readability. Avoid overly ornate fonts or busy backgrounds that hide the numbers, especially if visibility is your top priority.
Opt for high-contrast color combinations, like black numbers on a white background, to boost visibility day and night.
Follow this checklist to design your address sign from start to finish:
- Measure the Mounting Location: Note available space above your door or on your mailbox to set sign size limits.
- Choose Sign Dimensions: Pick width and height based on visibility needs and style preferences, allowing for borders.
- Select a Font: Pick clean, sans-serif fonts optimized for legibility at a distance.
- Set Number Height: Ensure numbers are at least 4 inches tall for typical home placement; increase if mounting farther from the street.
- Plan Number Spacing: Keep 0.5 to 1 inch of space between numbers for clarity and neatness.
- Decide on Base Material and Finish: Pick wood, metal, or composite materials matching your home’s aesthetic.
- Add Decorative Elements: Consider borders, floating numbers, or subtle lighting while keeping the design simple.
- Create a Layout Mockup: Draw your sign, including number size and placement, before cutting or painting.
Cutting, Assembling, and Preparing the Base Sign
Start your address sign by measuring and cutting the wood base to the precise dimensions needed. Next, sand and prepare the surface to ensure a smooth finish and proper adhesion of finishes. Finally, assemble any multiple boards with trim and prepare the base for attaching numbers, considering special care if using reclaimed wood. Building and finishing your sign usually takes about one to two days with drying time included.
Measuring and Cutting the Wood Base
Measure the space where you plan to mount your address sign to determine the ideal size. For example, cutting shiplap boards to 73 inches suits a door header, while a plywood base might be cut around 30 inches by 12 inches. Use a pencil to mark your cut lines clearly, including notes for top and side orientations to avoid confusion when assembling.
Use a circular saw or miter saw to make straight cuts. Cut your boards carefully to keep edges clean, which helps the pieces fit together neatly. Using scrap wood from your cuts can be handy for creating trim or spacers during assembly.
- Measure the desired length and width for your sign base based on your space.
- Mark the cut lines on the wood clearly, noting which edge will be the top and sides.
- Set your saw to the proper depth for the wood thickness.
- Cut the wood carefully following the measured lines, ensuring straight edges.
- Save any excess or scrap pieces for trim or assembling multiple boards.
Sanding and Preparing the Surface
Sanding removes roughness and surface imperfections and prepares the wood to accept paint, stain, or sealant evenly. Start with medium-grit sandpaper, such as 120 grit, and finish with finer grit around 220 for a smooth surface. If using reclaimed wood, sanding also helps eliminate loose dirt or old finishes.
After sanding, wipe the surface clean with a damp cloth to remove dust. This step prevents bumps under your finish and promotes good adhesion. Let the wood dry fully before moving on to assembly or finishing, which typically takes about 30 minutes to an hour depending on humidity.
Assembling Multiple Boards and Adding Trim
When the sign’s base consists of more than one board, assemble them using scrap wood as clamps or spacers. Attach the boards by screwing or nailing from behind to keep the front clean. Align edges flush so the face looks smooth.
Adding trim pieces cut from scrap wood improve the frame and covers gaps. Mark each piece clearly for placement, top and sides. Pre-drill holes for screws or nails large enough to let house number screws pass through later without splitting the wood.
- Arrange the boards flat on a work surface and align edges flush.
- Attach scrap wood pieces behind the boards as braces using screws or nails.
- Add trim boards by cutting them to size and marking orientation.
- Pre-drill holes through the sign base where numbers will be mounted.
- Secure trim pieces to front or edges, ensuring all parts are firmly attached.
Tips for Using Reclaimed Wood Safely
Reclaimed wood adds character but requires cleaning and inspection to ensure safety and durability. Remove all nails, staples, or screws and sand to smooth splinters. Check for rot or insect damage and avoid wood that is too degraded.
Treat reclaimed wood with a wood conditioner or sealant if planning to distress paint or add color washes. This preparation helps preserve the wood and achieves the desired finish. Let any applied treatments dry fully, often 4 to 8 hours depending on product instructions, before proceeding with assembly or finishing.
Finishing Techniques: Paint, Stain, Whitewash, and Seal
Choosing the right finish for your outdoor address sign depends largely on the wood type, the desired look, and how much weather exposure it will face. Exterior paint offers bold, lasting color and the best protection against UV and moisture, especially when paired with a primer and a topcoat polyurethane or lacquer. Latex exterior paint is widely available, typically costing $25 to $40 per quart. Stain penetrates wood, highlighting the grain while protecting against water damage. Water-based stains dry quickly and have less odor, while oil-based stains penetrate deeper but take longer to dry. Both usually cost between $20 and $40 per quart. Whitewash adds a light, semi-transparent white layer that visually brightens the wood but allows grain to show, best for a rustic or aged style. It requires prior staining or sealing and less protection than paint or stain alone. Sealing with a clear water-based or oil-based sealer (like Varathane) locks in the finish and adds moisture resistance without changing color.
Weather conditions affect finishes significantly. Hot, sunny climates with strong UV exposure demand UV-resistant paints or stains, plus a quality clear sealer to avoid fading and cracking. Cold, wet climates require finishes that resist moisture penetration and mildew. Choose outdoor-specific products labeled for these conditions. For woods with more open grain like cedar or pine, pre-stain conditioners or wood sealers help prevent blotchiness and uneven staining.
| Finish Type | Weather Protection | Appearance | Cost (quart) | Best Use |
|---|---|---|---|---|
| Exterior Paint (latex or oil) | High (with primer + sealer) | Opaque, vibrant colors | $25, $40 | Maximum durability, high visibility |
| Wood Stain (water or oil based) | Moderate to high | Natural grain visible, tinted | $20, $40 | Highlight wood texture, moderate color |
| Whitewash (stain + diluted white paint) | Low to moderate (needs sealing) | Semi-transparent, aged look | $10, $30 | Rustic style, less intense weather exposure |
| Clear Sealers (urethane, lacquer) | Protects finish, moisture barrier | Clear, glossy or matte | $15, $30 | Protects all finishes |
Begin your finishing by sanding the wood smooth, removing dust before applying a pre-stain conditioner if staining porous woods like pine. This step ensures even application and prevents blotches. For staining, use a brush or clean rag to apply an even coat; wipe off excess stain within 5 to 15 minutes depending on the desired darkness. Let the stain dry for about an hour or until fully dry to touch. Apply a clear outdoor topcoat for moisture and UV protection. For painting, start with a quality exterior primer with a brush or sprayer. Once dry (usually 2 to 4 hours), add 2 coats of exterior latex paint, allowing 4 hours between coats. Finish with a clear protective sealer if extra durability is desired.
To create a whitewash effect, first stain the wood with a gray or brown tone to add depth. After it dries, mix about 1 part white latex paint with 3 parts water for a thin consistency. Apply with a brush or rag, wiping some off immediately to reveal wood grain patterns. Let dry completely, then seal the surface with a clear water-based sealer to protect against weather. Avoid whitewashing bare wood because it won’t have enough base color, and untreated wood is more vulnerable to moisture.
Common issues include uneven staining from missing conditioner, peeling paint without primer, and discoloration from inadequate sealing. To avoid these, follow manufacturer drying times strictly, often more than 24 hours total before outdoor exposure. In areas with heavy rain or snow, adding a second layer of sealer and periodically reapplying every 1 to 3 years extends sign life. In hotter, drier climates, focus on UV-resistant finishes and clear coats that flex with wood expansion. Overall, investing time in proper surface prep and layering your chosen finish assures your address sign stays vibrant and weather-resistant for many seasons.
Attaching and Aligning House Numbers Precisely
Securely attaching and precisely aligning house numbers on your address sign ensures readability and durability. Select materials that match your sign’s style and environment, use stencils or templates for accuracy, and mount numbers properly to prevent shifting or damage over time.
Using Stencils and Measuring for Accuracy
Stenciling helps outline your house numbers cleanly and keeps spacing and alignment consistent. You can create your own stencil with cardstock or purchase ready-made stencils with fonts and sizes that fit your design. Precise measuring is key to making sure your numbers look balanced and are easily visible from the street.
Start by marking the center point of the sign horizontally and vertically. Use a level and ruler to draw faint guidelines, ensuring your numbers line up straight and maintain equal spacing. Dry-fit the numbers on the sign before attaching to confirm placement.
- Measure the width and height of the sign to find the center points.
- Use a level to draw light horizontal and vertical pencil lines through the center.
- Place the stencil or numbers on the sign aligning with the guidelines.
- Adjust spacing so the numbers appear balanced left-to-right and top-to-bottom.
- Trace the stencil or mark drilling points through number mounting holes.
- Double-check alignment with a level before proceeding to mount.
Double-check your pencil marks with a level before drilling or painting to avoid crooked numbers.
Mounting Numbers with Screws or Adhesive
Mounting house numbers securely depends on the material of both your sign and numbers. Screws provide the most reliable hold, especially outdoors, while adhesive can be an option for lighter or decorative numbers. Using the right fasteners is critical for long-lasting attachment that resists weather and tampering.
For screw mounting, drill pilot holes smaller than the screw diameter to prevent wood splitting. Countersink the holes slightly for flush screw heads. Use rust-resistant screws like stainless steel for exterior use. If your numbers lack mounting holes, consider attaching mounting tape designed for outdoor use.
- Mark and drill pilot holes on the sign aligned to each number’s mounting points.
- Insert screws through the numbers into the pilot holes; tighten without overdriving.
- For adhesive mounting, clean both surfaces and press firmly for 30 seconds.
- Allow adhesive to cure per manufacturer’s instructions, usually 24 hours, before hanging.
- Attach d-rings or mounting hardware on the back of the sign as needed.
Screws provide a stronger hold than adhesive alone, especially in windy or rainy locations.
Choosing Between Metal, Wood, and Foam Numbers
| Material | Durability | Appearance | Installation | Typical Cost |
|---|---|---|---|---|
| Metal | High; weather and rust-resistant (stainless steel, aluminum) | Polished or painted finish; sleek, modern | Usually screws; some have adhesive backing | $10-$25 per number |
| Wood | Moderate; may require sealing to prevent rot | Warm, natural look; customizable with stain or paint | Screws or adhesive | $5-$15 per number |
| Foam | Low; less durable outdoors | Lightweight, textured, but less upscale | Adhesive or nails, less secure | $3-$7 per number |
Metal numbers are popular for being sturdy and weather-resistant, making them a top choice for lasting outdoor signs. Wooden numbers add a handcrafted warmth that complements natural landscaping, but need regular sealing. Foam numbers offer budget-friendly options but wear out faster outside.
Your choice depends on your sign’s style, budget, and how much maintenance you want. Metal numbers require less upkeep, while wood needs annual treatments with sealers like Minwax stain to resist moisture and fading.
Adding Optional Lighting and Decorative Features
Adding LED lighting to your address sign can significantly improve its visibility at night and add a modern touch to your home’s exterior. To install LED illumination, start by selecting weatherproof LED strips or small puck lights designed for outdoor use. These lighting options typically cost between $15 and $40 depending on the quality and brightness. Plan the wiring route so it stays hidden, using conduits or mounting the wires along the back of the sign. Attach the LED strips with waterproof adhesive or screw in puck lights on the edges or behind cut-out numbers to create a halo effect.
Connect the LEDs to a low-voltage power source for safety. Outdoor-rated transformers are available at hardware stores and usually cost $25 to $50. It’s best to place the transformer near an existing outdoor outlet to minimize wiring complexity. Make sure to use GFCI-protected outlets and weatherproof covers to prevent electrical hazards. Before finalizing the wiring, turn off the power at the breaker and check all connections with a voltage tester. Securing the sign with d-rings in the upper third will help keep it stable once mounted with lighting attached.
Incorporating decorative textures like raised numbers, brushed metal overlays, or natural materials such as stone veneer can personalize your address sign. For added dimension, you might use epoxy resin to create glossy highlights or embed small mosaic tiles for unique patterns. These elements require sealing to withstand weather, so use an exterior-grade clear sealer compatible with your base material. Decorative metal pieces can be fastened using stainless steel screws or strong construction adhesive to avoid rusting issues.
Safety to consider includes avoiding wiring that touches wet surfaces or direct soil contact. Ensure all electrical components have an IP rating of at least IP65, meaning they are dust-tight and can withstand water jets. Do not exceed the recommended wattage of your transformer or combine multiple LED strips beyond what the power supply can handle. Double-check that your installation complies with local electrical codes and consider hiring a licensed electrician if you are unsure about any step. Good results feature evenly lit signage with no flickering lights, securely mounted decorative features that don’t peel or warp, and wiring that blends smooth into the background, maintaining an overall clean and professional look.
How to Install Your Address Sign Safely and Securely
Installing your address sign securely outdoors prevents damage, keeps it visible, and avoids hazards like falling signs. Outdoor signs face wind, rain, and sun, so you’ll need sturdy mounting to ensure stability. Use materials that resist rust or rot, like treated wood, stainless steel, or heavy-duty plastic anchors, especially if you install on wood, brick, or stone surfaces.
Plan for installation height and location. Signs should be at least 3 to 5 feet off the ground for visibility and to avoid accidental bumps. Avoid placing your sign near busy walkways or areas prone to water pooling, which could weaken mounting points over time. Always wear safety gear like gloves and eye protection when drilling or handling tools outdoors.
- Choose the mounting surface: Pick a flat, sturdy location such as a wooden post, fence, or building wall. Ensure the surface can support the sign’s weight.
- Mark your mounting points: Hold the sign in place at the desired height and use a pencil to mark where screws or bolts will go. Check that the markings match the mounting holes on your sign to prevent misalignment.
- Drill pilot holes: Use a drill bit slightly smaller than the screws you plan to use. This reduces wood splitting or masonry cracking. When mounting on brick or concrete, insert suitable anchors or plastic wall plugs into the holes.
- Attach mounting hardware: Use screws or bolts rated for outdoor use and corrosion resistance. For wood, stainless steel screws with washers are ideal. For masonry, use anchor bolts and a wrench to tighten securely but without overtightening.
- Secure the sign: Position the sign on the mounting points and fasten all screws or bolts evenly. Check that the sign is level using a carpenter’s level before fully tightening all fasteners.
- Test for stability: Gently wiggle the sign to confirm it doesn’t shift or loosen. Should it move, tighten hardware or add additional supports such as brackets or braces, especially for large or heavy signs.
- Maintain the installation: Inspect the mounting annually. Look for rust, loose screws, or wood rot. Replace damaged hardware promptly to avoid future failures.
Common mistakes include using screws that are too short or not rated for outdoor use, mounting on unstable surfaces, and ignoring level alignment. Signs not installed flush can catch wind and loosen. Avoid mounting the sign too low where it can be hit or too high where visibility suffers. Properly sized mounting hardware and thorough inspection can prevent these issues.
Following these steps ensures your address sign stays secure and visible through changing weather. Professional mounting may be worth considering for signs with large letter heights or setback distances over 50 feet to ensure maximum stability and compliance with local codes. Typical outdoor mounting hardware kits cost between $10 and $30, depending on complexity and material quality.
Maintaining and Protecting Your Address Sign Long-Term
To keep your address sign looking fresh and durable, regular cleaning and resealing are essential. Dirt, dust, and pollen accumulate on outdoor signs, which can dull paint or stain over time, especially in humid or rainy climates. Use a soft brush or cloth with mild soap and water to clean the sign every few months. Avoid harsh detergents that might strip the finish. Rinse thoroughly and let it dry completely before resealing.
Resealing depends on the type of finish applied. For wood, apply a clear outdoor sealant like spar urethane or an exterior-grade polyurethane every 1 to 2 years. Signs with paint require touch-up with matching paint before resealing. Signs made from metal or acrylic may benefit from a UV-resistant clear coat to prevent fading. The best time to reseal is during mild, dry weather, ideally in spring or early fall, so the coating can cure properly without extreme heat or moisture. Expect to spend about $15 to $30 for sealant materials, which usually cover several applications.
Seasonal care varies by climate. In snowy regions, remove snow accumulation promptly to avoid moisture damage or ice buildup. Use a soft brush rather than sharp tools to prevent scratching. In hot, sunny areas, consider installing a small awning or sunshade above the sign to reduce UV exposure. For windy locations, make sure the mounting hardware remains tight, checking at least twice a year. During autumn, clear leaves and debris around the sign base to prevent moisture traps and fungal growth.
Common signs of wear include peeling paint, fading numbers, cracked wood, or rust on metal parts. Spot-fix peeling or chipped paint by sanding the area lightly, cleaning, and repainting before resealing. For minor cracks in wood, use exterior wood filler or epoxy putty, then sand smooth before finishing. Rust can be removed with fine steel wool followed by rust-inhibitor spray and fresh paint. These repairs prevent small issues from turning into major replacements.
Perform touch-ups and resealing during dry weather to ensure proper adhesion and avoid trapping moisture under the finish.
Step-by-Step Action Plan
Follow these steps to build and install your custom address sign with confidence and a professional look.
- Day 1: Choose your materials and gather tools. Confirm your wood or metal base is the right size and weather-resistant.
- Day 2: Sketch your design with clear numbers and layout. Verify the numbers are visible from the street at night and day.
- Day 3: Cut and prepare the base sign. Check edges are smooth and dimensions match your plan.
- Day 4: Apply your finish, paint, stain, or seal. Let it dry fully and apply a protective coat if required by label instructions.
- Day 5: Attach house numbers precisely using a level and appropriate fasteners. Ensure numbers are firmly secured and aligned.
- Day 6: Add optional lighting or decorative features. Test electrical components for safety and brightness in low-light conditions.
- Day 7: Install the sign securely on a post or wall using anchors or brackets rated for outdoor use. Confirm stability by applying gentle pressure.
- After 1 Month: Inspect your sign for wear and reapply sealant if the finish shows fading or peeling to maintain durability.
Frequently Asked Questions
What Is the Ideal Size for a Visible Outdoor Address Sign?
A good size is about 60 inches long and 15 inches tall for clear visibility from the road. This size allows you to use large numbers and enough space for design elements without crowds.
How Many Attachment Points Should I Use for a Large Wooden Address Sign?
For a sign around 60 inches long, use at least three attachment points to ensure stability. This helps prevent warping and keeps the sign securely mounted in wind or weather.
Can Reclaimed Wood Be Used to Create a Custom Address Sign?
Yes, you can use reclaimed wood, but treat it properly to avoid decay and pests. Reclaimed wood adds rustic charm but requires sanding and sealing for durability.
What Type of Numbers Work Best on a Large Outdoor Address Sign?
Large, contrasting numbers like 6-inch black or white ones improve readability from vehicles. Using metal or wood-look tile numbers with proper mounting ensures durability and style.
Should an Address Sign Be Mounted Above the Door or on a Post?
Both options work; mounting above the door fits porch styles, while posts offer visibility from the street. Consider your home’s layout and typical sightlines to decide.
How Do I Create a Border Trim Around the Address Sign?
Add a 1-inch wide trim piece on all sides to frame the sign and add depth. Use wood that complements the sign base, and paint or stain for a clean finish.
Wrapping Up
Creating your own address sign lets you add a personal touch that boosts your home’s curb appeal and ensures your address is easy to find. Start with a clear plan and quality materials to build a sign that lasts through all seasons. Your next step is to pick your base material and sketch a design that fits your home’s style and your neighborhood’s visibility needs.