How to Seal a Painted Wood Sign for Long-Lasting Protection: A Complete Guide
How to seal a painted wood sign is a common question for those wanting to keep their artwork looking fresh and protected. Use a clear, durable sealant like polyurethane or polycrylic applied in multiple thin coats after the paint has fully dried. Starting with a clean, dry surface ensures better sealant adhesion and long-lasting protection.
Key Takeaways
- Apply 2 to 4 thin coats of polyurethane or polycrylic over acrylic paint after 24 hours of drying time.
- Thin the first coat by 10 percent on porous woods like pine or cedar for better sealant penetration.
- Maintain application conditions between 50 and 90°F with 40 to 70 percent relative humidity.
- Use even brush strokes at a 45-degree angle along the sign’s surface for a smooth finish.
- Spray sealant from 6 inches away, moving evenly along the sign’s length to avoid drips.
- Lightly sand between coats if drying time exceeds 6 hours to improve adhesion of additional layers.
How to Seal a Painted Wood Sign for Durable Protection
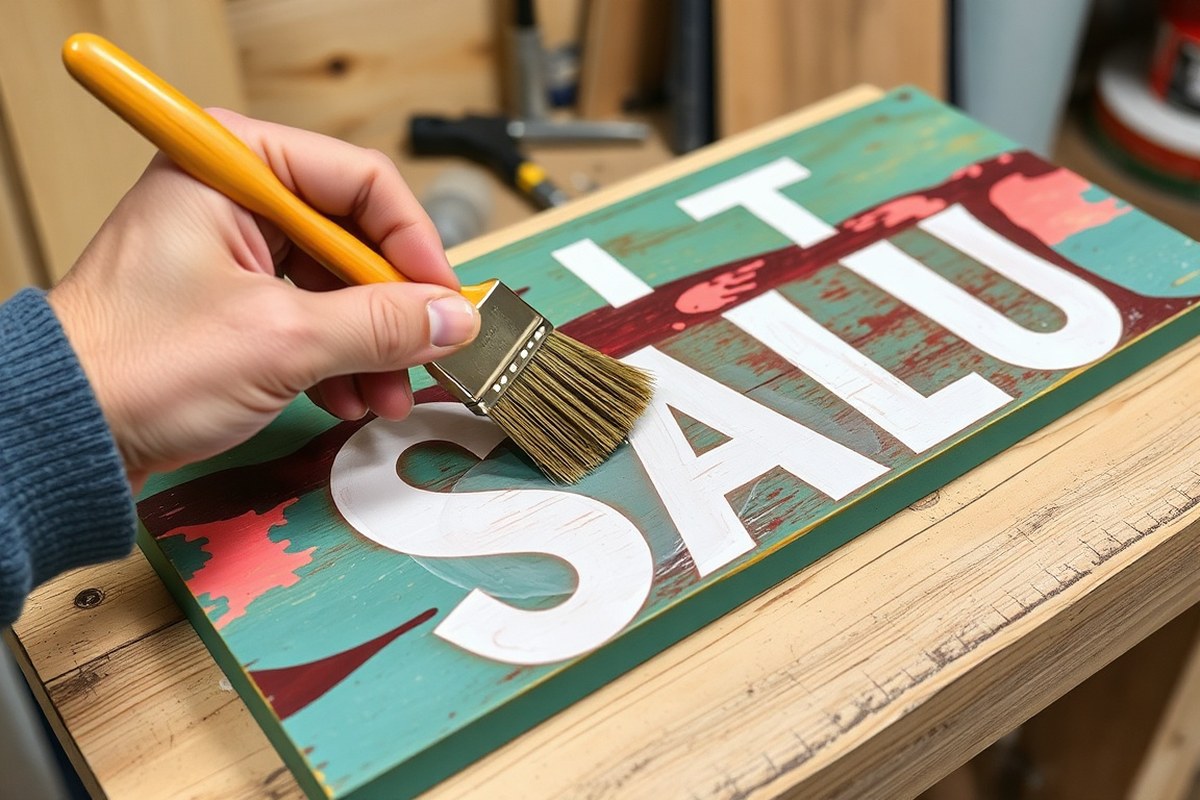
Sealing a painted wood sign for durable protection involves applying a compatible clear sealant over a smooth, clean painted surface. The best sealants for this purpose are water-based or oil-based polyurethanes, with 2 to 4 thin coats applied evenly and allowed adequate drying time between layers. Proper surface preparation and careful application ensure the sealant adheres well and withstands outdoor conditions.
Choosing the Right Sealant for Painted Wood
Sealants designed for painted wood generally fall into three categories: spar urethane, exterior polyurethane, and epoxy clear coats. Spar urethane is oil-based or water-based and includes UV inhibitors, making it flexible and suitable for signs in direct sun and rain. Exterior polyurethane offers a harder finish but may chip or crack outdoors if exposed to harsh sunlight. Epoxy provides a hard shell ideal for areas with standing water but requires a UV-protective topcoat.
| Sealant | UV / Flex Resistance | Typical Lifespan Outdoors | Best For |
|---|---|---|---|
| Spar Urethane (oil-based) | Flexes with wood, UV inhibitors built in | Up to ~15 years | Furniture, doors, full sun exposure |
| Spar Urethane (water-based) | Flexes with wood, UV inhibitors built in | Up to ~5 years | Furniture, doors, full sun exposure |
| Exterior Polyurethane | Harder finish, limited flex | 1, 2 decades if shaded | Shaded porches, covered items |
| Epoxy Clear Coat | Very hard shell, no UV resistance | Long-lasting with UV topcoat | Surfaces exposed to standing water |
Water-based polyurethanes tend to dry faster and remain clear without yellowing, which works well for pale or light-colored painted signs placed in covered outdoor areas. Oil-based variants warm the wood tone and offer longer-lasting UV protection outdoors but may yellow slightly over time and require reapplication every 2 to 3 years. Selecting one depends on your sign’s location, color, and exposure to sun, rain, and temperature changes.
Preparing to Seal: Surface Readiness
Proper preparation helps the sealant stick evenly and prevents peeling or uneven finishes. The painted wood should fully cure before sealing, typically waiting 24 to 48 hours after the final paint coat. Clean the surface to remove any dust, dirt, or grease by wiping it with a damp cloth and letting it dry completely.
Lightly sanding the painted surface with 220- to 320-grit sandpaper smooths out brush marks and rough spots. This step also improves adhesion by giving the sealant a slightly textured surface to grip. Take care not to sand too aggressively to avoid damaging the paint layer.
- Wait 24, 48 hours for paint to cure thoroughly.
- Clean the painted surface with a damp cloth to remove dust and oils.
- Lightly sand with 220- to 320-grit sandpaper, applying gentle pressure.
- Remove sanding dust by wiping with a tack cloth or damp rag.
- Ensure the surface is fully dry before applying sealant.
Applying Sealant: Best Practices
Applying the sealant evenly and in thin coats ensures a durable, clear finish. Using a high-quality synthetic brush or a fine sponge, brush in one direction to prevent bubbles and streaks. Wear eye protection and work in a dust-free environment to avoid imperfections.
Allow each coat to dry for 2 to 3 hours, depending on humidity and temperature. After drying, lightly sand the surface with 320-grit sandpaper to smooth any raised texture or dust particles. Remove sanding residue with a tack cloth before applying the next coat.
For most outdoor painted wood signs, plan on 3 to 4 coats. This number balances protection and finish thickness, creating a flexible and UV-resistant barrier without cracking. Fewer coats may reduce durability, while more than 4 usually adds little benefit and risks a cloudy surface.
- Stir the sealant gently to avoid bubbles; do not shake.
- Apply the first thin coat evenly with a synthetic brush or fine sponge.
- Wait 2 to 3 hours for the coat to dry completely.
- Lightly sand the surface with 320-grit sandpaper and clean off dust.
- Apply additional coats (2 to 3 more) repeating drying and sanding between each.
- Allow a final cure of 24 hours before handling or outdoor exposure.
Preparing Painted Wood Signs for Sealing
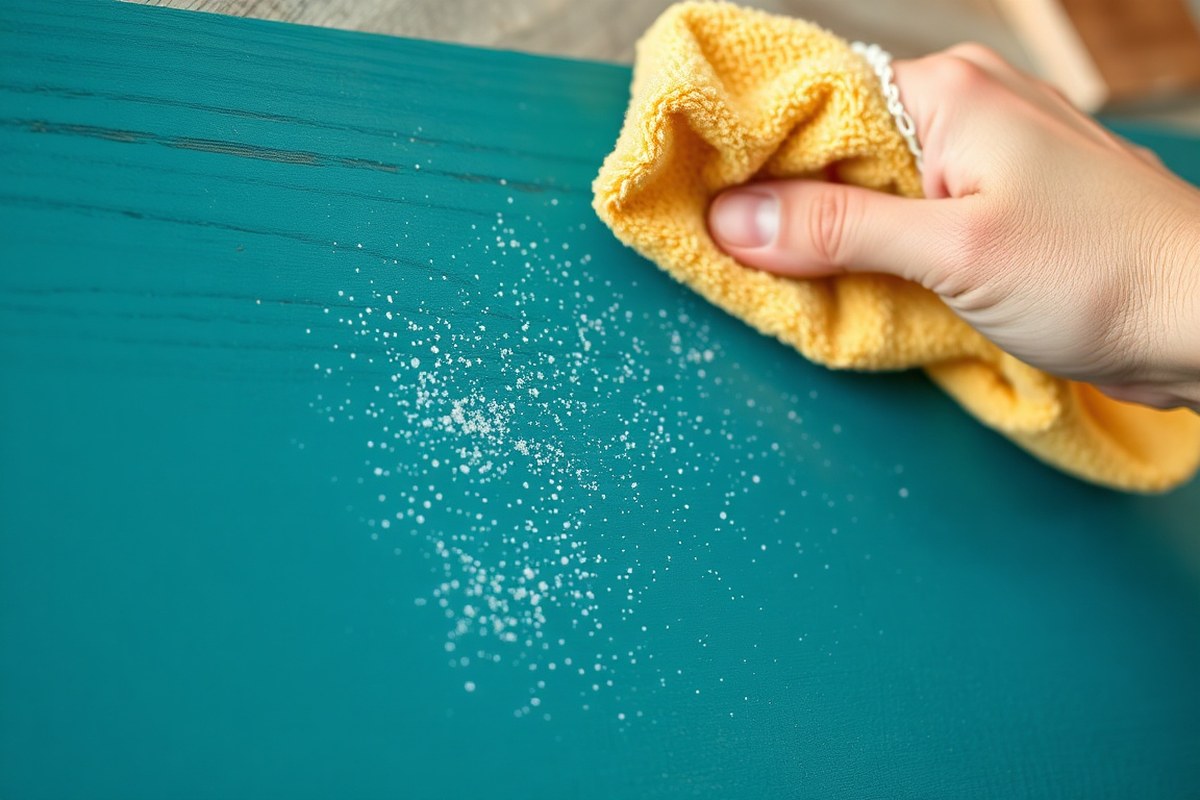
Before sealing a painted wood sign, it’s essential to thoroughly clean, sand lightly, and allow the paint to cure fully. Proper preparation ensures the sealant adheres well, protects the paint, and extends the life of your project.
Cleaning the Painted Surface
Start by removing all dirt, dust, and debris from the painted surface. Use a soft cloth or sponge dampened with mild soap and water to gently clean the sign. Avoid abrasive cleaners or scrubbing too hard, which can damage the paint.
Allow the surface to dry completely before moving on to sanding. Any leftover moisture can affect sealant adhesion and cause bubbling or lifting later.
Light Sanding Guidelines
Light sanding is important to create a slightly textured surface that helps the sealant bond to the paint. Attach 220-grit sandpaper to a sanding block and sand gently in the direction of the wood grain.
Focus on the face and edges of the sign, applying only light pressure to avoid cutting through the paint to the bare wood. Sanding after paint is dry also removes any rough spots and smooths brush strokes.
Paint Curing Time
Allow the paint to dry and cure fully before sealing. Acrylic paint typically needs at least 24 to 48 hours to dry to the touch, but full curing can take up to 7 days depending on thickness, temperature, and humidity.
Applying sealant before the paint fully cures may cause the sealant to peel off, especially on parts frequently touched. Letting the paint dry thoroughly provides a solid base for the sealant to adhere properly.
Preparation Checklist Before Sealing
Follow these steps to prepare your painted wood sign effectively:
- Remove dust and dirt with a damp cloth and mild soap, then let the surface dry thoroughly.
- Lightly sand the surface and edges with 220-grit sandpaper, moving with the grain.
- Inspect for any paint flaws that need touching up, then allow any repairs to dry fully.
- Ensure the painted surface has cured at least 48 hours, ideally up to a week.
- Use a tack cloth to remove sanding dust before applying any sealant.
- Confirm the work area is clean, dry, and dust-free to avoid contaminating the sealant.
Preparation Do’s and Don’ts
Proper surface prep avoids problems and improve sealant performance:
- Do use fine grit sandpaper (220-grit or higher) for light scuffing only.
- Do clean gently with mild soap rather than harsh chemicals.
- Do allow ample curing time based on paint brand and conditions.
- Don’t sand too aggressively and remove the paint layer.
- Don’t apply sealant over wet or tacky paint surfaces.
- Don’t skip cleaning; dust and oils reduce sealant adhesion.
Applying sealant before paint is fully cured can cause peeling and damage, especially in high-touch areas.
Sealant Types and Their Best Uses on Painted Signs
Choosing the right sealant for your painted wood sign depends heavily on where the sign will be displayed and the finish you want to achieve. For outdoor signs, exposure to sunlight, moisture, and temperature changes demands a sealant that offers strong UV resistance and flexibility to prevent cracking. Indoors, durability against wear is important, but UV protection is less critical and you can focus more on the desired finish, like gloss or matte.
Water-based sealants are popular for outdoor wooden signs because they resist mildew and mold while providing decent UV protection. These sealants usually dry clear and maintain a natural wood look, making them a good choice if you want to preserve the paint color without yellowing. On the other hand, oil-based polyurethane is a common choice for indoor signs due to its toughness and ease of application. While it creates a durable layer, it may yellow over time and is not recommended for prolonged outdoor exposure because UV rays break it down faster.
| Sealant Type | Best Environment | UV Resistance | Finish Options | Durability & Maintenance |
|---|---|---|---|---|
| Water-Based Polyurethane | Outdoor and Indoor | Good, protects painted surfaces from sun damage | Matte, Semi-gloss, Gloss | Requires periodic reapplication every 1-2 years outdoors; easy cleanup |
| Oil-Based Polyurethane | Indoor only | Poor, deteriorates quickly with UV exposure | Gloss to Satin | Durable indoors; may yellow; less frequent touch-ups indoors (several years) |
| Acrylic Sealers (Water-Based) | Outdoor | Excellent, often made with mildewcide and UV blockers | Clear matte, satin, or gloss | Needs annual inspection and reapplication in harsh climates |
| Wax or Oil Finishes | Indoor | Minimal UV protection | Matte to low sheen | Requires frequent reapplication and buffing; not suitable for outdoor use |
Proper application matters for every sealant type. Clean the sign first and allow paint to cure completely, usually about 24 hours. Use a brush or foam applicator designed for your sealant type, applying thin, even coats. For outdoor signs, multiple thin layers build better protection than a single thick coat. Let each layer dry completely according to the product’s specified drying time. Expect to reapply water-based sealants outdoors every one to two years to maintain protection, especially where weather is harsh or moisture is high.
The finish look is a major factor too. High-gloss finishes give more visibility and repel water better, making them practical for outdoor displays. Matte finishes reduce glare and may suit indoor or decorative signs where a subtle appearance is desired. Maintenance is easier when sealants are applied correctly; failed seals lead to peeling paint or wood damage, especially outside. Regularly check your sign for signs of wear or dullness and touch up spots before damage sets in.
Step-by-Step Sealant Application for Painted Wood
To seal a painted wood sign effectively, apply multiple thin coats of sealant with careful sanding between each. Start only after the paint has fully cured for at least 24 hours. Light sanding after each coat smooths out imperfections and promotes good adhesion, while the final curing should take place indoors over a few days to ensure a durable finish.
Applying the First Coat
Allow the paint to dry and fully cure for a full 24 hours before sealing to avoid streaks that won’t sand away. For woods like pine or cedar that absorb more, dilute the initial sealant coat by roughly 10 percent to boost how well it soaks in and sticks. Choose a good-quality 1-inch brush and spread thin, even coats to stop drips and visible brush lines.
- Verify that the paint has been drying for no less than 24 hours and has completely cured before moving on.
- For porous woods, thin your sealant by mixing in 10% water or appropriate thinner.
- Use a clean, quality brush sized around 1 inch for better control.
- Apply a thin, even coat following the direction of the wood grain.
- Watch for runs or pooling and level them out immediately with light brush strokes.
- Allow the first coat to dry thoroughly, typically 2 to 4 hours, before proceeding.
Sanding Between Coats
Light sanding between sealant coats is essential for a smooth, professional finish and better adhesion of subsequent layers. Use fine sandpaper, such as 220 grit or finer. Sand gently with medium pressure, always moving in the direction of the wood grain to avoid scratches. This removes dust nibs, small imperfections, and brush marks without damaging the paint or the sealant.
- Choose 220 grit sandpaper or finer for sanding between coats.
- Apply gentle, even pressure to avoid sanding through the sealant.
- Sand only when the sealant is fully dry, usually after 2 to 4 hours of drying.
- Brush or blow off dust thoroughly before applying the next coat.
Applying Additional Coats and Final Curing
Apply 2 to 4 thin coats of sealant total for optimal protection and smoothness, allowing each coat to dry completely before the next application. After the final coat, keep the sign indoors at room temperature for at least 48 to 72 hours to cure properly. Avoid direct sunlight and extreme temperatures during this curing time to prevent defects such as bubbling or uneven gloss.
- Apply the second coat using the same thin, even brushing method.
- Let each coat dry for 2 to 4 hours before sanding lightly and applying the next.
- Repeat this for 2 to 4 coats until you achieve complete, even coverage.
- After the final coat, avoid sanding and keep the sign inside at 65°F to 75°F.
- Let the sign cure undisturbed for at least 48 hours, 72 hours is ideal.
- After curing, you can lightly sand again with 220 grit to remove any minor imperfections if desired.
- Keep the sealed sign indoors and away from moisture or direct sunlight during curing.
Environmental Factors Affecting Sealant Success
Temperature and humidity play key roles in how well a sealant dries and performs on a painted wood sign. Ideal conditions usually range between 60°F and 80°F with humidity between 40% and 60%. Within this range, most sealants cure evenly and achieve full hardness within the expected time frame. Temperatures below 50°F can slow down drying, leading to a tacky or uneven finish. High humidity above 70% increases drying time and can cause the sealant to remain sticky or attract dust and debris during curing.
Sunlight exposure affects the sealant’s durability after it cures. Ultraviolet (UV) rays from the sun break down sealants over time, causing fading, chalking, or surface breakdown. A clear UV-resistant sealant protects the paint and wood from sunlight damage, but even these need reapplication every 1 to 3 years depending on how much direct sunlight the sign receives. Applying sealant away from direct sun during the curing period helps to avoid issues like blistering, bubbles, or uneven drying caused by rapid evaporation of solvents.
Weather conditions can indeed ruin sealant application. Rain or excessive moisture during drying can wash away or cloud the sealant, while strong winds may deposit dirt onto the wet surface, compromising the seal. Cold weather slows curing and can trap moisture beneath the film, weakening the seal. To avoid these issues, apply sealant in a well-ventilated, sheltered space with controlled temperature and humidity whenever possible. If working outside, monitoring the weather forecast and picking a calm, dry day within the ideal temperature and humidity range will improve results.
Recognizing the importance of environment means controlling temperature and humidity before and during application. For example, using a portable heater or dehumidifier in your workspace can maintain conditions in the 65°F, 75°F and 45%, 55% humidity range. Avoid sealing signs early in the morning or late evening when dew or high humidity can be present. Thin, multiple coats applied in these conditions dry more uniformly than a single thick layer, which can trap moisture and lengthen cure time.
Apply sealant in the shade or indoors on cool, dry days to avoid rapid drying problems and maximize longevity.
Good sealing results look smooth and hard without tackiness. Signs sealed in the wrong environmental conditions might show peeling, dull spots, or uneven sheen. These defects reduce protection and can require sanding and resealing, costing extra time and materials. Taking a few extra steps to control temperature and humidity will prevent common problems and help your painted wood sign keep its color and finish longer under sun and weather exposure.
Protecting Edges and Corners for Full Seal Integrity
Edges and corners of painted wood signs are more vulnerable because they face direct exposure to weather and wear. These areas often have thinner paint coverage and are prone to chipping or peeling, allowing moisture to seep in. This can lead to wood swelling, paint failure, and eventually water damage. For full seal integrity, sealing these sections carefully prevents paint deterioration and prolongs the life of your sign.
Applying sealant on edges requires a gentler, more detailed touch than flat surfaces. Use a small, high-quality angled brush to work the sealant into corners and along edges thoroughly. Thick brush strokes or sprays may miss narrow areas where water can enter. Take extra time to coat all exposed surfaces on the edges, including the top, bottom, and sides of the wood.
Tools designed for precision improve corner sealing. A foam brush can help smooth the sealant evenly without leaving brush marks, especially in tight angles. For sharp corners, wrap a small piece of soft cloth around the brush tip to press sealant firmly into crevices. Allow at least 2 hours drying time between coats on edges to ensure full cure and avoid trapping moisture inside. Applying two or three thin coats specifically to edges strengthens their protection.
- Use an angled brush or small foam brush for detailed edge work
- Apply multiple thin coats, allowing 2+ hours drying per coat
- Wrap cloth around brush tips to push sealant into corners
- Seal all exposed wood surfaces on edges, including underneath
- Check edges for missed spots before final curing
- Protect sealed edges from rain or moisture during curing
- Consider spar urethane outdoors for flexible and UV-resistant sealing
In some situations, such as signs exposed to direct sunlight, spar urethane provides a seal that flexes with the wood and prevents yellowing. For signs displayed out of direct sun but outdoors, exterior polyurethane can suffice. Keep in mind standing water exposure may require epoxy for edge protection, as it creates a waterproof barrier. Regularly inspect edges for any signs of peeling or cracking and reseal as needed to maintain a water-tight finish. Investing effort here not only defends your paint but also reduces costly repairs later.
Maintaining and Resealing Painted Wood Signs over Time
Resealing a painted wood sign every 1 to 3 years helps maintain its protection, especially if the sign is outdoors. Signs of sealant failure include peeling, cracking, dullness, or water soaking into the wood instead of beading on the surface. These issues indicate the sealant no longer provides a waterproof barrier, leaving the paint and wood vulnerable to damage.
Sealant failure happens due to exposure to sun, rain, temperature swings, and physical wear. UV rays can break down the sealant’s chemical bonds, while moisture causes it to swell and crack. Dirt, dust, and debris also wear down the surface over time. A properly applied sealant delays these effects but won’t last forever without occasional maintenance.
To maintain your sealed painted wood sign, clean the surface every few months using a soft brush or cloth and mild soap diluted in water. Avoid harsh chemicals or high-pressure washing, which can strip away the sealant. After cleaning, check for roughness or loss of shine as early signs of sealant breakdown.
If your sign shows wear, sanding lightly with fine-grit sandpaper (220-grit works well) removes damaged sealant without harming the paint. Remove dust with a tack cloth before applying a new sealant coat. Reapply a compatible topcoat sealant in thin, even layers, following the product’s instructions about drying times and temperature conditions. Typically, apply two coats for full protection, allowing 2 to 4 hours drying time between coats at temperatures above 50°F.
Signs located in shaded or less exposed areas may need resealing closer to the 3-year mark, while those facing direct sunlight and harsh weather might require yearly maintenance. Indoor signs used in humid rooms such as kitchens or bathrooms may also benefit from resealing every 2 to 3 years to prevent moisture damage.
Consistent maintenance ensures your sign maintains its color vibrancy and structural integrity without costly repairs or full repainting. Investing around $10 to $25 in sealant every few years keeps your project looking fresh and extends its lifespan by protecting against fading, warping, and cracking. Paying attention to environmental factors, such as placing signs under eaves or in sheltered spots, minimizes sealant stress and prolongs the time between resealing.
Step-by-Step Action Plan for Sealing Your Painted Wood Sign
Follow these steps to protect your sign and keep it looking great for years. Each phase ensures your sealant lasts and provides the best defense.
- Before you start: Clean the painted surface with a damp cloth to remove dust and dirt. It should look clean with no residue.
- Day 1: Lightly sand the painted surface with fine-grit sandpaper (220 grit) to help sealant adhesion. You’ll see a smoother texture without dulling the paint colors.
- Day 1: Apply the first thin coat of your chosen sealant (like a clear acrylic spray or brush-on polyurethane). It should appear evenly glossy or matte depending on the product.
- Day 2 (after 24 hours): Check if the first coat is dry and hard. Lightly sand again if instructions say so, then apply a second coat. The surface should feel smooth and protected.
- After 48 hours: Inspect the seal for full coverage, including edges and corners. Touch up any missed spots. The entire sign should have an even finish.
- After 1 week: Place your sign in its intended environment to test resistance to humidity and sunlight. Look for any signs of peeling or wear.
- After 3 to 6 months: Reseal the sign with a maintenance coat to extend protection. The surface should remain intact and sealed.
Frequently Asked Questions
Can You Weatherproof a Wooden Sign?
Yes, you can weatherproof a wooden sign by sealing it with an appropriate outdoor sealant to protect against moisture and UV damage. Proper preparation and maintenance help extend the sign’s life in outdoor conditions.
Can I Just Paint over Old Paint on Wood?
You can paint over old paint on wood, but you should clean, sand, and prime the surface first to ensure better adhesion and a smooth finish. Skipping these steps may cause peeling or uneven coverage.
Can I Use Olive Oil to Seal Wood?
Olive oil is not a recommended sealant for wood because it can go rancid and does not provide durable protection. Use a clear wood sealant designed for painted surfaces for lasting results.
How to Protect Painted Wood Outside?
Protect painted wood outside with a waterproof sealant suited for outdoor use, such as exterior polyurethane or epoxy resin. Ensure the paint is fully cured before sealing to avoid lifting or peeling.
How to Seal a Painted Wood Sign?
To seal a painted wood sign, clean and lightly sand the surface, then apply a clear sealant in thin, even coats, allowing proper drying time between layers. This protects the paint and wood from weather damage.
What’s the Best Time of Year to Seal a Painted Wood Sign?
Seal painted wood signs during mild, dry weather to ensure the sealant cures properly without trapping moisture or dust. Spring or fall usually offers the ideal conditions for sealing.
Final Thoughts
Sealing your painted wood sign properly prevents damage from weather and wear while preserving appearance. Start by cleaning, sanding, and applying sealant carefully, paying attention to edges. Next, plan to check and maintain the seal over time to keep your craftsmanship looking its best for years. For your next step, select the sealant that matches your sign’s exposure and finish preference, then prepare your workspace to begin the sealing process.