How to Make Wedding Signs: A Complete Guide with Practical Tips & Materials
How to make wedding signs starts with choosing the right materials and clear design. Use lightweight boards like foam insulation or acrylic sheets for easy handling and durability. Begin by selecting signs sized appropriately for their purpose, such as 5×7 inches for table numbers, to ensure they stand out and are easy to read.
Key Takeaways
- Pick foam insulation board or clear acrylic for sturdy, lightweight wedding signs that last.
- Size table number signs at least 5×7 inches for visibility within crowded table settings.
- Invest in quality paint and primer to create smooth, vibrant surfaces that hold lettering well.
- Apply paint in thin layers, allowing 2 hours between coats for proper drying and finish.
- Use vinyl lettering or a Cricut machine for precise, professional-looking text on your signs.
- Plan your lettering and colors to match your wedding theme for a cohesive look.
Which Materials Work Best for Wedding Signs?
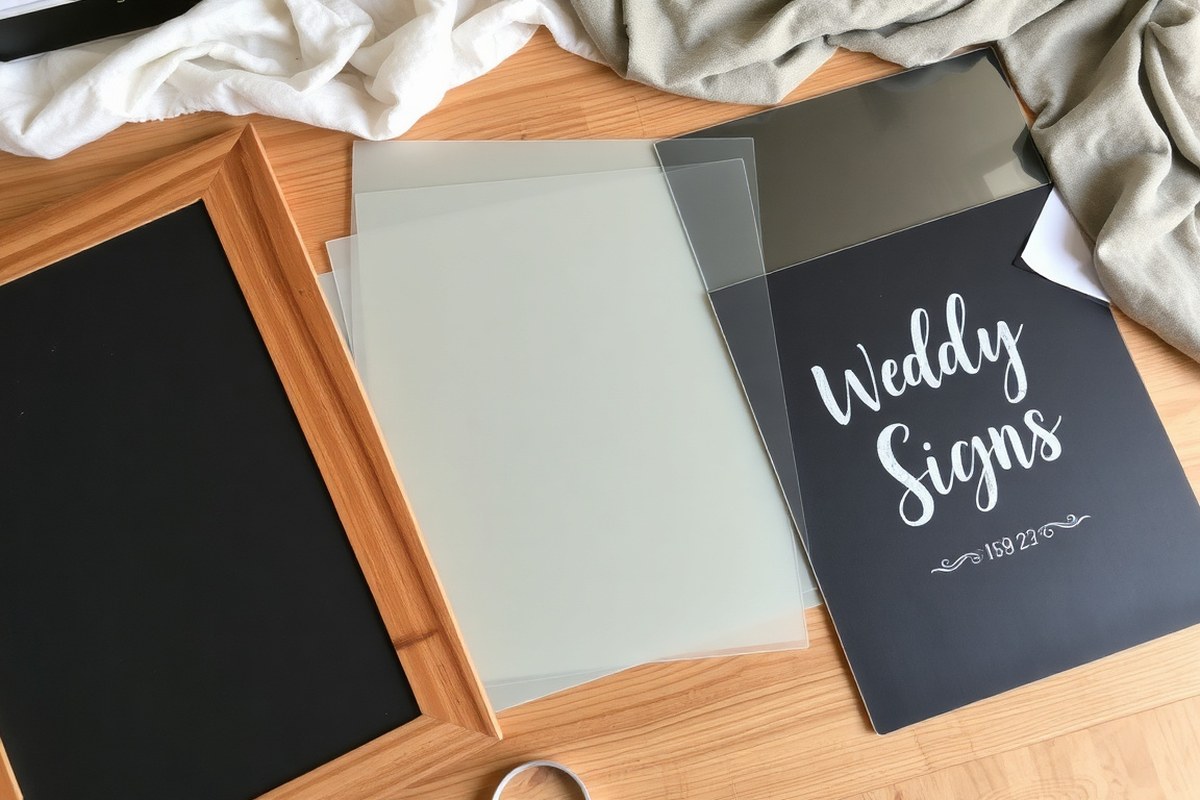
Wood is a popular choice for wedding signs because it offers a rustic, timeless look that fits many themes. Scrap wood or plywood can be an affordable option, often costing $5 to $15 for small pieces. Wooden signs are durable and work well both indoors and outdoors if sealed properly with paint or waterproof varnish. They’re easy to decorate using decals, paint, or markers. For outdoor use, make sure to protect your wood from moisture to avoid warping.
Acrylic signs provide a modern, sleek appearance. Clear or colored acrylic sheets cost around $10 to $40, depending on size and thickness. These are lightweight and water-resistant, making them good for outdoor use, but they can scratch easily. Acrylic works well with paint pens or vinyl decals for clean lettering and graphics.
Fabric signs offer softness and versatility, especially with iron-on decals or fabric paint. They often use burlap or canvas, which typically costs $5 to $15 per yard. Fabric signs are lightweight and easy to hang, but they’re not ideal for windy or rainy outdoor settings unless covered or sheltered. Fabric works well for welcoming guests or photo backdrops.
Chalkboard signs bring a casual, customizable feel. You can buy chalkboard panels for $10 to $30 or transform wood with chalkboard paint. Chalkboards let you write and erase messages easily, which is great for menus or directions. However, they’re vulnerable to rain and humidity, so keep them indoors or under cover.
| Material | Cost Range | Durability | Weather Resistance | Ease of Use | Best Use |
|---|---|---|---|---|---|
| Wood (Plywood, Scrap Wood) | $5 – $15 | High (with sealing) | Good (if sealed) | Easy to paint, use decals | Rustic outdoor and tabletop signs |
| Acrylic | $10 – $40 | Medium (scratches easily) | High | Moderate (paint pens, vinyl) | Modern indoor/outdoor signs |
| Fabric (Burlap, Canvas) | $5 – $15 per yard | Low | Low | Easy (iron-on decals, paint) | Indoor decor, photo backdrops |
| Chalkboard (Painted Wood or Panels) | $10 – $30 | Medium | Poor | Easy to write, erase | Menus, directions, indoor use |
Mixing materials can add interest and variety to your wedding décor. For example, pairing a wooden directional sign with a clear acrylic welcome sign provides contrast and functionality. Take weather into account, especially for outdoor weddings. Wood and acrylic stand up well outdoors if properly treated, but fabric and chalkboards need protection from rain and high humidity.
Choosing the right material also depends on your design skills and equipment. Wood is forgiving for beginners who want to paint or use decals. Acrylic requires a steady hand or vinyl cutters for best results. Fabric signs need attention to ironing and decals, while chalkboards suit those who prefer changeable messages easily written on site.
How to Design Wedding Signs That Match Your Theme
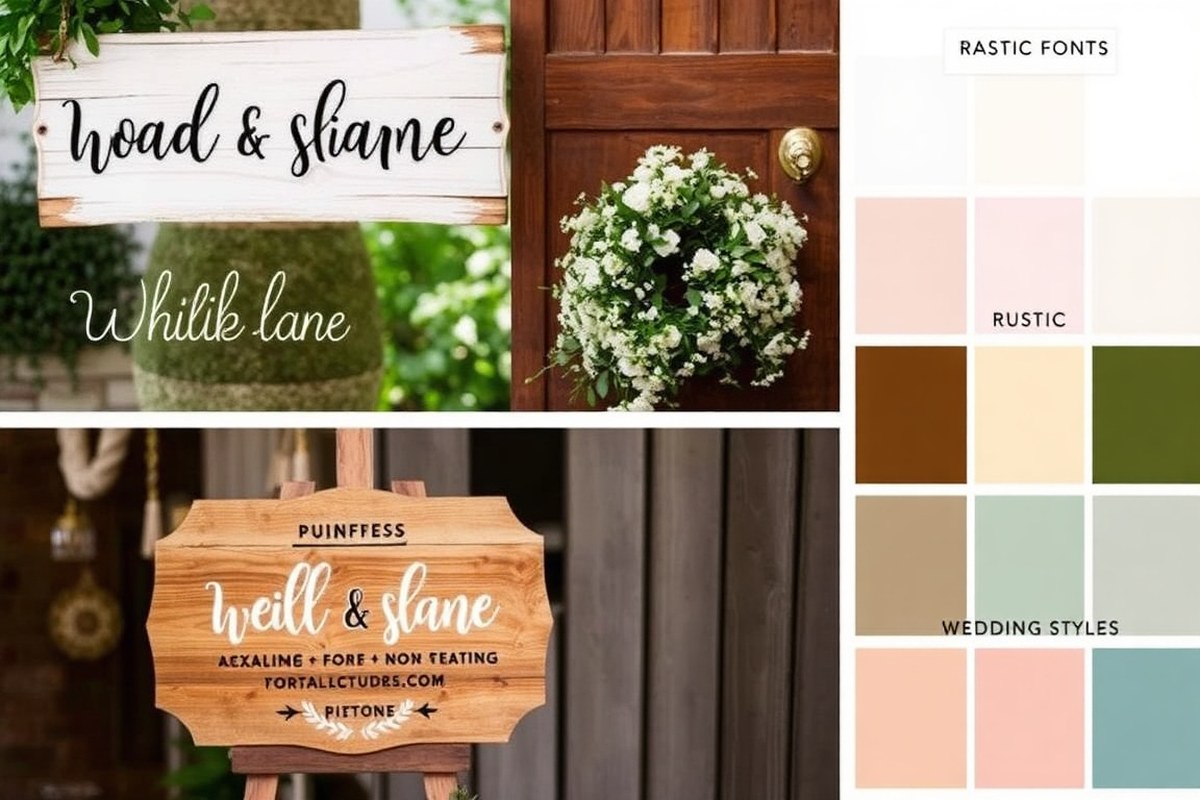
Matching your wedding signs to your theme creates a cohesive look that welcomes guests and improve your day. Choosing the right fonts, colors, graphics, and layouts ensures your signs are not just beautiful but also easy to read from a distance. Adding personal touches like photos, decals, or floral accents connects your signage to your unique style while keeping guests informed.
Picking Fonts That Reflect Your Wedding Style
Select fonts that fit the mood of your wedding. For a classic or formal theme, elegant serif fonts like Times New Roman or Garamond work well because they convey sophistication and are easy to read. A casual or rustic wedding suits hand-lettered or script fonts, such as Brush Script or Pacifico, which add warmth and personality. Avoid using more than two fonts on a single sign to maintain clarity.
Choose typefaces with good legibility. Fonts with clear letterforms prevent guests from struggling to read signs at a glance. For directional signs, simple sans-serif fonts like Arial or Helvetica are best. Size matters: your main message should be at least 2 inches tall if the sign will be viewed from 6 to 10 feet away. Subtext or smaller instructions can be reduced but keep them no smaller than 1 inch high to maintain visibility.
Choosing Colors to Match Your Wedding Palette
Your signs should use colors from your wedding’s palette to blend with your venue and décor. If your theme features soft pastels, pick gentle background colors and contrasting text hues like charcoal or navy for readability. Bold colors like navy, burgundy, or emerald green work well for more formal or dramatic themes with white or light backgrounds to keep the text clear. Avoid low-contrast combinations such as pale yellow text on white, which makes reading difficult under any light.
For outdoor weddings or venues with varying light, matte finishes on the sign surface reduce glare and keep your colors vivid. Painting a wooden sign in your theme’s main color before adding lettering ties the sign into your theme visually. Faux flowers or greenery that match bouquet colors can frame or accent signs to add depth and texture without overpowering the words.
Incorporating Graphics and Personal Details
Adding graphics or photos can make your signs stand out and personalize your wedding. Use simple icons that represent your theme, for example, floral illustrations for a garden wedding or vines for a rustic barn celebration. Keep graphics minimal so they don’t interfere with text. Including a photo of you as a couple on welcome signs or seating charts helps guests connect with your celebration from arrival.
Decals and stickers are easy ways to add patterns or small images that match your theme. A few well-placed floral decals or geometric shapes create visual interest while maintaining legibility. For a DIY touch, attach faux peonies or greenery in your wedding colors along the sign’s edges or corners, securing them with hot glue or floral wire depending on the base material.
Arranging Layouts for Maximum Readability
Organize your signs with clear visual hierarchy to guide the viewer’s eye naturally. Place the most important information, such as “Welcome” or “Ceremony This Way,” in large, bold fonts at the top or center. Keep supporting details smaller and towards the bottom or side. Group related text together with ample spacing to avoid clutter, which can confuse guests.
Spacing letters and lines evenly improves ease of reading, especially from a distance. Use templates or sketch your sign layout on paper before working on the final material. For multi-part signs, keep consistent font sizes and colors so guests can recognize them as part of the same design. Tri-fold signs used on tables benefit from balanced text and graphics on each panel so guests can read from any angle.
Visibility Checklist for Effective Wedding Signs
Place signs where guests will naturally look, such as entrances, pathways, or near seating areas. Size your signs according to viewing distance: welcome signs often stand 24 inches high to be seen from 15 to 20 feet, while table signs can be smaller, around 8 by 10 inches. Use high-contrast text and backgrounds for better visibility outdoors or in dim lighting.
Test readability by stepping back 8 to 15 feet during setup to ensure your message is clear. Add lighting like string lights or spotlights for evening or indoor weddings with low light. Laminating or sealing signs protects them from moisture and smudging. Using waterproof markers like Artista Pro prevents fading if signs might get wet.
Keep font sizes large and contrast high to ensure guests can easily read all signs, even from a distance or in dim settings.
Essential Tools and Supplies Needed for DIY Wedding Signs
Before you start creating your wedding signs, gather a few basic tools and supplies to make the process smoother and more enjoyable. Essential items include a sturdy base for your sign, quality paint or markers, and tools for lettering or transferring designs. Choosing the right materials upfront can affect both the look and durability of your signs, especially if they will be displayed outdoors.
For lettering, painting with acrylic paint or using paint pens offers good control and vibrant colors. Paint brushes in various sizes help you create precise strokes or fill larger areas. You can also use stencils or printed designs to transfer your text or graphics onto the sign surface. Stencils are particularly helpful for clean, uniform lettering and can save time while ensuring consistency.
- Wooden board or sturdy canvas (size based on your design)
- Acrylic paints and paintbrushes of varying widths
- Paint pens or permanent markers for fine details
- Printable stencil sheets or adhesive vinyl stencils
- Painter’s tape for securing stencils and clean edges
- Sandpaper to prep wooden surfaces
- Clear sealant spray for outdoor protection
Start by sanding the wood to create a smooth base for painting. Apply a base coat of paint if you want a colored background and let it dry completely. If using stencils, tape them carefully onto the sign and paint inside the cut-out areas. Remove stencils immediately after painting to avoid smudging. For printed designs, you can trace the outlines lightly with a pencil before painting.
Work in a well-ventilated space and wear a dust mask when sanding. Protect your work surface with newspapers or plastic sheeting to avoid unwanted stains. Keep brushes clean by rinsing them immediately after use. Prices for supplies can vary: a basic wooden board might cost $5 to $15, a set of acrylic paints around $10 to $20, and paint pens about $2 to $5 each. Investing in quality paints and brushes results in cleaner lines and longer-lasting signs.
Step-by-Step Guide to Creating Popular DIY Wedding Signs
Making popular DIY wedding signs like welcome signs, directional signs, and table numbers involves choosing the right materials, preparing the surface properly, applying paint or lettering with care, and finishing with decorations and sealants. Clear layering and drying times are essential for smooth, long-lasting results regardless of the material you use. Planning your steps in advance helps avoid mistakes like uneven paint or smudged lettering.
Preparing Your Sign Base Material
Begin by selecting the base material: wood, chalkboard, acrylic, or even upcycled picture frames all work well for wedding signs. Preparation depends on your pick. For wood, sand the surface lightly with fine-grit sandpaper to smooth rough spots and remove dust. Chalkboards should be cleaned with a damp cloth and allowed to dry fully before painting. Acrylic or glass surfaces need to be wiped with rubbing alcohol to remove oils that can prevent paint adhesion.
Next, prime the sign if required. Wood benefits from a coat of white or clear primer to help paint stick and colors pop. Chalkboards don’t require primer but do need chalkboard paint applied evenly with a roller. Acrylic or glass pieces need special paint designed for smooth surfaces or an adhesive base layer like Mod Podge. Let primers dry for 1-2 hours in a dust-free area before moving on to painting.
Applying Paint or Lettering Safely
Once the base is prepped and primed, applying paint or lettering follows a layered approach. With stencils or hand painting, apply a thin first layer of paint and wait 5-10 minutes for it to set but not fully dry. This slight drying helps prevent smudging when you add your second coat or outline. For chalkboards, roll on two to three thin coats of chalkboard paint, waiting 30 minutes between coats for proper drying according to manufacturer instructions.
When painting letters directly or over stickers, go slowly and use fine brushes or paint pens designed for the surface. With acrylic or glass, let letters dry fully for at least 1 hour before handling to avoid smearing. If using decals or stickers, press firmly and seal edges carefully. Avoid painting in high humidity or low temperatures below 50°F, as this can increase drying times and cause uneven finishes.
- Clean and sand your sign base material carefully.
- Apply primer if needed and let it dry for 1-2 hours.
- Use stencils or paint brushes to apply the first thin layer of paint.
- Wait 5-10 minutes for the paint to partially dry.
- Add a second coat of paint or detail your lettering cautiously.
- Let the final paint dry fully, typically 1-2 hours depending on material and paint type.
- Add decals, stickers, or other lettering layers once the paint is completely dry.
- Handle the sign gently to avoid smudges until sealed or finished.
Adding Final Decorations and Sealants
Once your paint or lettering is dry, decorate the sign with stickers, ribbons, or flower accents to match your wedding theme. Use glue suitable for your sign’s surface, like decoupage glue for wood or clear-drying craft glue for paper elements. Apply decorations sparingly to avoid covering the lettering and maintain readability.
Seal your sign with a clear spray sealant designed for your material type. This protects paint or chalk markings from wear and moisture during the event. Apply 2-3 thin coats in a well-ventilated area, allowing 20-30 minutes drying time between coats. For chalkboards, gently season the surface with chalk after sealing to prevent ghosting. Store finished signs flat and away from sunlight until your wedding day.
How to Budget and Save Money When Making Wedding Signs
DIY wedding signs typically cost between $10 and $50 per sign when you handle most of the work and materials yourself. In contrast, professionally made signs often range from $50 to $100 each, depending on size and design complexity. While the per-sign savings might seem modest, doing multiple signs yourself can add up, especially if you shop smart and reuse materials.
Budgeting starts with knowing what you need and setting a clear spending limit for each sign or the total signage budget. Prioritize which signs need higher-quality materials or intricate designs, and which can be simpler. It helps to list every sign you want, estimate costs by material and detail, then add a cushion for unexpected expenses.
| Sign Type | DIY Cost Range | Professional Cost Range |
|---|---|---|
| Small directional signs | $10 – $20 | $40 – $80 |
| Welcome or seating chart signs | $20 – $50 | $60 – $100 |
| Large statement signs (e.g., ceremony backdrop) | $40 – $100 | $100 – $200 |
Materials greatly influence your budget. Look for affordable sources like thrift stores or dollar stores, where you can find frames, wooden boards, or decorative items for less. Using paint you already have or buying small sample pots can reduce costs compared to specialty sign paints. Printing templates at home on card stock for smaller signs limits expensive custom lettering or calligraphy.
Maintaining quality on a budget means focusing on neat execution rather than costly materials. Using stencils for lettering ensures consistent, professional-looking fonts without paying a designer. Going with rustic or vintage styles can embrace slight imperfections and save money on costly finishing. Give yourself enough time to experiment and correct mistakes, as rushed signs might end up costing more in wasted materials.
Thrift unique pieces to turn into signs; this saves money and adds one-of-a-kind charm to your wedding décor.
Common DIY Wedding Sign Mistakes and How to Avoid Them
One common mistake with wedding signs is using the wrong size. Signs that are too small get overlooked, while oversized signs can overwhelm your venue or seem out of place. To make sure your signs are visible from the right distance, choose dimensions based on location. For example, roadside directional signs should be at least 18 by 24 inches so drivers can read them easily from 20 to 30 feet away. Indoor signs like seating charts can be smaller, around 11 by 14 inches, but still large enough that guests won’t need to squint or gather too closely.
Confusing or unclear fonts cause a lot of problems too. Script or decorative fonts might look pretty but can be hard to read, especially in dim lighting or for older guests. Stick to clear, simple fonts with good contrast against the sign background. Avoid light pastel colors for text on light wood or white signs. Before painting or printing, test your text by holding the design about 6 feet away to see if it’s legible under typical lighting conditions.
Rushing the painting or lettering process is another trap. Smudges, uneven strokes, and unclear spacing make signs look unprofessional and hard to decipher. Take your time and use painter’s tape or stencils to get clean lines. Allow paint to dry completely before handling the sign, which usually takes at least 1 to 2 hours depending on the paint type and weather. Working indoors in a room with good air circulation and moderate temperatures (around 65 to 75°F) will improve drying times and finish quality.
- Choose sign sizes based on the viewing distance: 18×24 inches for outdoor, 11×14 inches for indoor signs
- Use clear, simple fonts like Arial or Helvetica with high color contrast
- Test font legibility at 6 feet away before finalizing design
- Apply painter’s tape or letter stencils to maintain neat edges
- Allow paint to dry at least 1 to 2 hours in a well-ventilated, moderate temperature space
- Double-check spelling and layout before starting to paint or print
- Use lightweight materials for hanging signs to avoid damage or sagging
Ignoring these factors often means guests struggle to follow your wedding flow. A poorly sized roadside sign may send visitors down the wrong route, while an illegible seating chart leads to confusion and delays. Your goal is clear communication that helps guests feel welcomed and oriented. Proper sizing, font choice, and careful execution ensure your DIY wedding signs fulfill their purpose with style and ease.
How to Plan Your DIY Wedding Sign Timeline Effectively
Creating wedding signs requires careful time management to avoid last-minute stress and ensure quality results. Knowing how long each step takes helps you set a clear schedule, giving yourself enough buffer. Most couples should start the process at least 6 to 8 weeks before the wedding date for a stress-free experience.
Design and Planning Phase
The design phase typically takes 1 to 2 weeks, depending on the complexity of your signs and your experience with design tools or hand lettering. This phase includes choosing fonts, layouts, and wording that match your wedding theme. For more intricate signs like hand-painted mirrors or multi-layered wood signs, factor in extra time to finalize your design ideas.
Starting this phase 6 to 8 weeks before the wedding gives you time to make adjustments based on feedback from your partner or wedding planner. When planning to print items like vinyl lettering, allow 2 to 3 days for creating and testing print sizes.
Production and Drying Phase
The physical creation of signs spans several days and involves multiple steps, each with its own time requirements. Painting a wooden or acrylic sign can take 2 to 3 days: 1 day for applying the base coat, another day for lettering or decoration, and then 24 to 48 hours just for drying. Mirror signs require extra care as paint layers must dry fully to avoid smudging.
Allow at least 4 days for production and drying to ensure durability and avoid damage during handling. Using adhesives or sealants requires extra drying time, with some sealants needing up to 72 hours to cure. Rushing this stage can result in uneven finishes or an unstable sign.
Final Assembly and Transport Phase
Final touches like mounting signs on stands or framing take 1 to 2 days. Assembly includes attaching hooks, finishing edges, or combining multiple components. Allocate enough time for testing stability and rehearsing set-up to avoid surprises on event day.
Transporting signs safely usually takes 1 day but requires packing them properly to prevent scratches or breakage. It helps to transport signs no later than 1 day before the wedding, especially if you’ll rely on a delivery service or are setting up with the venue in advance. A buffer of 2 to 3 days between finishing and the event accounts for unforeseen delays or last-minute repairs.
- Choose your design style and wording to reflect your wedding theme.
- Create or source templates for precise lettering and layout.
- Prepare sign materials and test paints or adhesives on small samples.
- Paint or apply lettering in stages, allowing drying between coats.
- Apply sealants or protective layers and let them cure.
- Assemble stands or frames and secure all parts firmly.
- Pack the signs carefully for transport, keeping them flat and cushioned.
- Deliver signs to the venue at least 1 day ahead of the wedding.
When to DIY Wedding Signs and When to Hire Professionals
Choosing whether to DIY your wedding signs or hire a professional depends on balancing your budget, time, skills, and the overall importance of each sign at the wedding. Start by listing the signs you need, such as welcome signs, directional signs, seating charts, menu displays, and ceremony programs. Essential signs include those that guide guests around the venue and provide key information, while optional signs can be decorative or personalized for extra flair. A practical rule is to DIY signs that are straightforward and less time-sensitive, and hire professionals for complex or highly visible signs where polished presentation matters most.
Use a decision rule chart to help you prioritize. For example, assess each sign by how critical it is for guest experience, the complexity of design, and the time required to create it. Signs needed early in the day, like welcome or directional signs, generally benefit from professional input or early DIY completion to avoid last-minute stress. More decorative or smaller signs can be delegated to you or your helpers. This approach keeps your day running smoothly and your stress levels down.
Delegating tasks is another key step. If you have a wedding party, consider assigning specific handmade sign projects based on each person’s interests and skills. For example, a friend good with calligraphy can handle the seating chart, while someone comfortable with crafting tools can assemble directional signs. Provide clear instructions and templates to keep styles consistent. Check in often but keep the process fun and flexible so helpers don’t feel overwhelmed.
Budget and timing are also important. Custom professional signs often range from $50 to $200 each depending on size and detail, according to wedding decor pricing reports, which can add up quickly. DIY signs may cost under $20 each for materials like chalkboard paint, wood, or vinyl, but factor in your time and any required tools. Plan a realistic timeline, starting sign projects at least 6 to 8 weeks before the wedding, to allow for multiple practice attempts or fixes.
Start with creating essential directional and welcome signs professionally or early DIY, then assign decorative signs to helpers using simple templates to maintain consistency and reduce last-minute anxiety.
Keep in mind that poorly designed or rushed signs can confuse guests and distract from your wedding’s atmosphere. Clear lettering, appropriate sizing, and weather-resistant materials matter most. For outdoor weddings, waterproof finishes or professional-grade materials may be worth the investment. The quality of your signs reflects on the event flow, so balance personalization with professionalism where it counts.
Step-by-Step Action Plan for Making Your Wedding Signs
Follow this action plan to create charming wedding signs that fit your theme and budget without stress.
- Week 1: Select Your Sign Materials, Choose materials that match your wedding style and budget, such as wood for rustic or acrylic for modern. Confirm your choice feels sturdy and suits your venue.
- Week 2: Finalize Your Sign Designs, Sketch or use simple design tools to draft your text and layout. Make sure the text is readable from a distance appropriate for your event space.
- Week 3: Gather Your Tools and Supplies, Collect paint, brushes, stencils, mounting hardware, and other basics based on your design. Verify that you have everything before starting to avoid interruptions.
- Week 4: Create a Prototype Sign, Make one sample sign to test colors, lettering, and durability. Adjust your techniques if the prototype does not look professional or clear.
- Week 5: Produce Your Final Wedding Signs, Use your prototype feedback and assemble all signs, giving each proper drying and setting time. Ensure each sign is consistent and durable.
- Two Weeks Before Wedding: Inspect and Plan Placement, Check each sign for any damage or touch-ups. Verify sign placements with your venue to confirm visibility and safety.
- Wedding Day: Set Up Signs, Install signs early with helpers to avoid last-minute issues. Confirm each sign is secure and facing the right direction.
Frequently Asked Questions
How Do I Weatherproof Outdoor Wedding Signs?
Use waterproof sealants and UV-resistant paints to protect signs from rain and sun. Applying multiple coats ensures longer durability outdoors.
What Font Styles Are Easiest to Read on Wedding Signs?
Choose clean, simple fonts like sans-serif or block lettering for clear visibility. Avoid overly decorative fonts that can confuse guests.
Can I Reuse DIY Wedding Signs for Other Occasions?
Yes, you can design signs with neutral colors or themes for reuse. Customizable elements like removable decals make this easier.
How Do I Transport Large DIY Wedding Signs Safely?
Use sturdy packaging like cardboard boxes and bubble wrap to prevent damage. Carry signs flat or upright to avoid bending or breakage.
What Lighting Options Work Best to Highlight Wedding Signs?
Soft string lights or spotlights can improve sign visibility without glare. Position lighting at an angle to reduce shadows on text.
Are Chalkboard Signs Practical for Weddings?
Chalkboards offer a charming, customizable option but can smudge in windy or wet conditions. Seal with fixative spray for better weather resistance.
The Bottom Line
Making your own wedding signs puts a personal touch on your celebration and can save money. Begin by picking your materials today, using your chosen theme as a guide. This focused step will move your project forward and get you closer to welcoming your guests with signs that reflect your unique style.