How to Make Pallet Signs: Complete Steps, Design Tips & DIY Safety
How to make pallet signs starts with sourcing clean, nail-free pallet wood cut into manageable boards, usually around 3 feet long. You’ll then prepare the wood by sanding and cleaning it for a smooth surface. Use simple tools like a saw, hammer, paint, and stencils to create custom designs on the assembled boards.
Key Takeaways
- Remove all nails and broken edges from pallet boards before starting your project for safety and better appearance.
- Cut pallet boards to size early, typically about 20 to 36 inches long, to fit your design plans.
- Use sample paint sizes from hardware stores to test colors without buying large cans.
- Applying stencils requires peeling back 2-3 inches of backing to position precisely on the boards.
- Screwing or using brad nails will make your sign stronger, though glued joints can hold if monitored.
- Adding a 3D element, like carved letters or attached objects, boosts the visual impact of your sign.
What Are Pallet Signs and Why Use Pallet Wood?
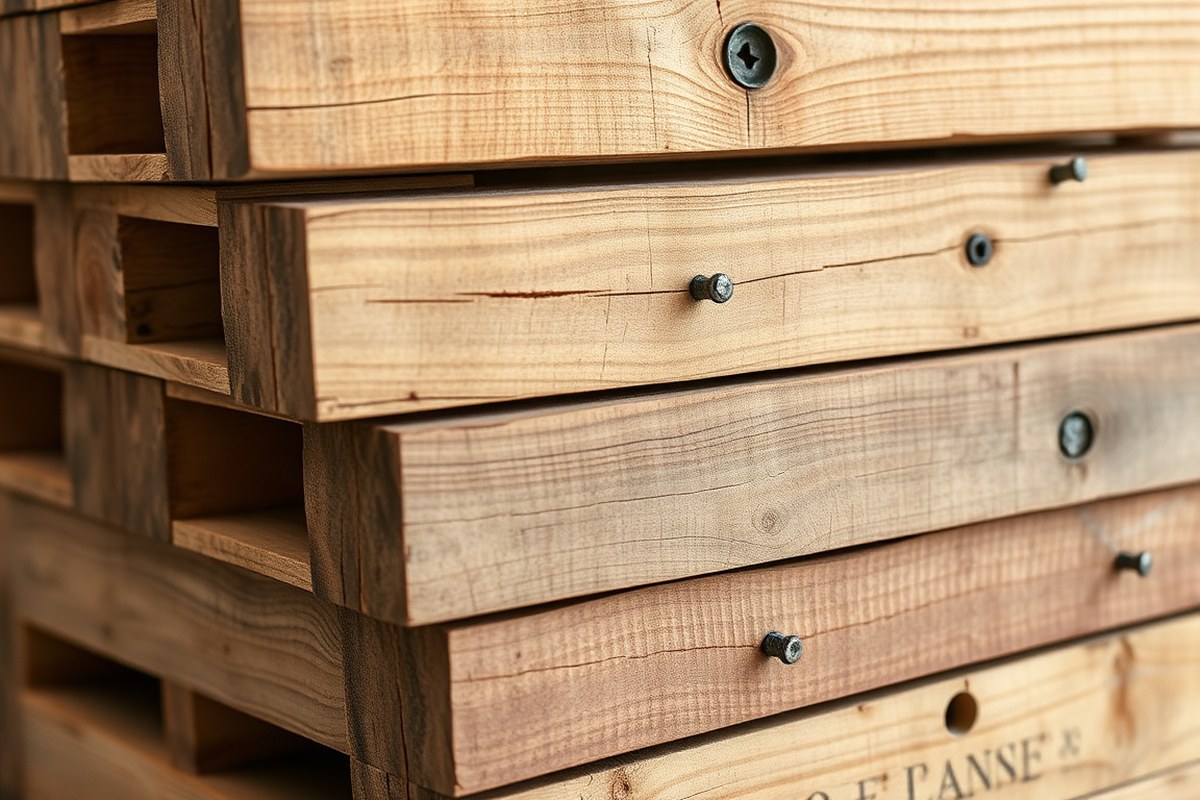
A pallet sign is a decorative piece made from reclaimed wooden pallets, often featuring painted words, images, or designs that add a rustic or vintage appeal to your space. These signs typically consist of multiple wooden slats from pallets arranged horizontally or vertically, serving as a canvas for creative expression. Pallet signs can range from simple, single-word phrases like “Home” or “Welcome” to more detailed scenes or customized messages. Their charm lies in the natural, weathered look of the pallet wood combined with personalized design elements.
Choosing pallet wood for your DIY signs comes with several advantages. First, pallet wood is widely available, often free or very low-cost, which helps keep project expenses under $10 or so when using recycled materials. This makes pallet signs an affordable option compared to buying new lumber or commercial signs. Sustainability also plays a key role since sourcing wood from pallets recycles material that might otherwise be discarded, reducing waste and environmental impact. The rough texture and natural imperfections of pallet wood contribute to the authentic rustic style that appeals to many home decorators and crafters. Its sturdy construction lets you create decor that lasts both indoors and outdoors.
Styles of pallet signs vary from simple painted lettering to designs improve with decals, 3D elements like spoons or layered wood, and even industrial-inspired looks. These signs work well in many settings, including front porches, kitchens, weddings, or as thoughtful handmade gifts. For example, a mini pallet sign with a heartfelt message can serve as a personalized present that carries sentimental value. Larger signs can be functional and decorative for marking gardens or house numbers. The diversity of styles lets you tailor your project to your skill level, taste, and the space you want to decorate.
Creating a pallet sign involves selecting pallet wood that is safe and sound, then arranging the slats into the desired shape. Many DIY pallet signs feature simply nailed or glued boards that you paint or stain before adding your design. You can apply paint with brushes, stencils, or transfer techniques to achieve crisp lettering and images. The slightly uneven surface of pallet wood can make intricate painting a bit challenging, but it adds character to the final piece. A well-made sign will have smooth edges without splinters, evenly spaced slats, and a balanced design that complements the wood’s texture. Avoid using pallets treated with harmful chemicals or those in poor condition, as this can affect both safety and appearance.
Tools and Materials Needed for Pallet Sign Projects
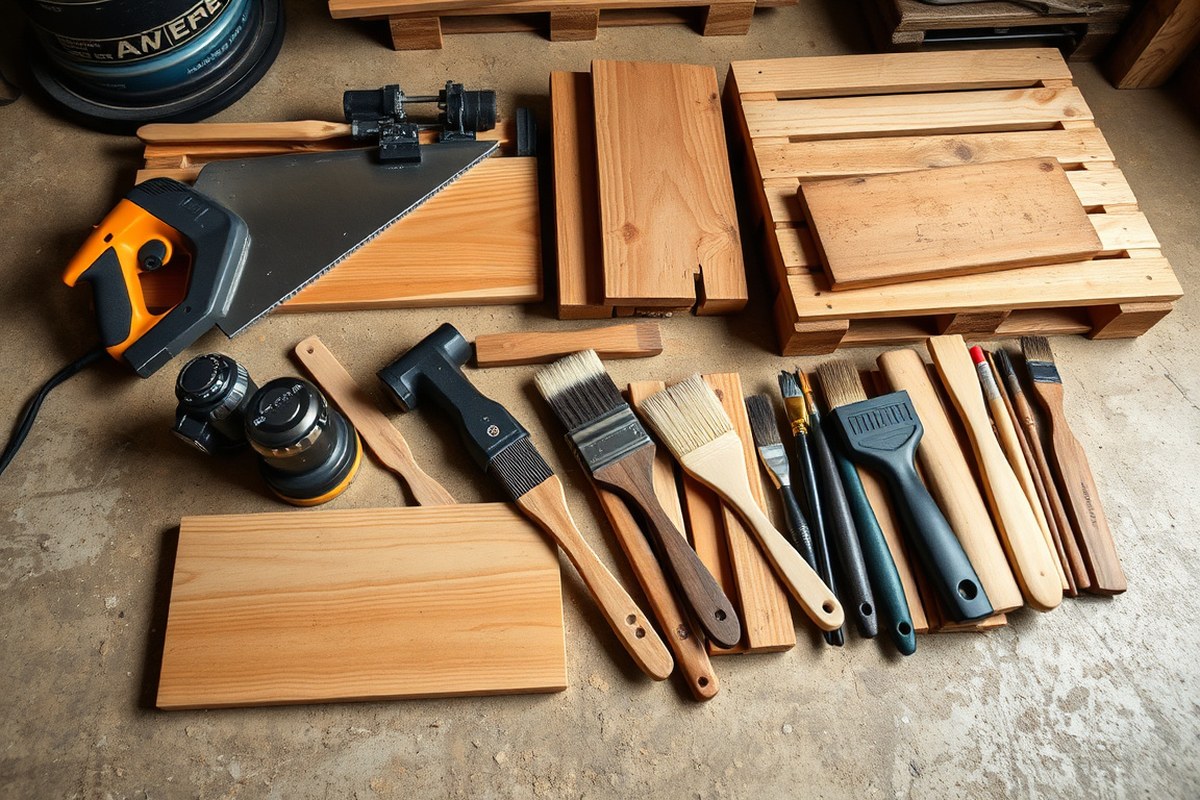
Successful pallet sign projects depend on using the right wood and having the essential tools and materials on hand. Quality pallet wood, suitable paints, and proper brushes, combined with basic tools, ensure your sign looks great and lasts. Knowing the specific wood specifications and tool choices helps you avoid common problems.
Selecting Pallet Wood with the Right Specifications
Choose pallet wood that is dry, smooth, and free of hazardous chemicals. Look for wood thickness between 1/2 inch and 3/4 inch; thicker wood holds paint and nails better but may be harder to cut. Length varies by project but 12 to 24 inches long pieces are common for small to medium signs. Make sure the wood’s moisture content is below 20% to reduce warping and mold risk; this often means letting the wood dry for several days or weeks after dismantling the pallet.
Wood with uneven surfaces or heavy splinters will require more sanding, which adds time and effort. Avoid pallets treated with methyl bromide (usually marked with “MB”) due to toxicity. Look instead for HT (heat treated) pallets to keep your project safe and healthy.
Essential Tools for Pallet Sign Making
Basic hand tools and a few power tools cover most needs. Start with a handsaw or small circular saw for cutting wood to size. A power drill with screwdriver bits helps assemble the wood pieces with screws or nails. Sandpaper or a power sander smooths rough edges and surfaces. A brad nailer or hammer with nails secures pieces firmly and quickly. For painting, have brushes and a paint tray ready, and consider adding stencils or vinyl lettering for design.
- Handsaw or circular saw for cutting pallet boards
- Drill with screwdriver bits for assembly
- Sander or sandpaper (80 to 120 grit) for smoothing wood
- Brad nailer or hammer with finishing nails
- Paint brushes of various sizes (flat and detail brushes)
- Drop cloth and painter’s tape to protect work surfaces
- Stencil or transfer paper for painted designs (optional)
Keep affordable and basic tools in mind; for example, a handsaw costs about $15 to $30, while a power drill ranges $40 to $100. You can rent expensive tools like a brad nailer if you don’t want to buy one.
Choosing Paints and Brushes for Best Results
Use acrylic or latex paints for their durability and quick drying. Acrylic is water-based and can work well on wood with a clear finish to protect it. Latex paint also offers weather resistance if you plan to hang the sign outdoors. Opt for paints labelled for exterior use if relevant to your project.
Brush choice impacts detail and coverage. Flat brushes between 1 and 3 inches cover large areas smoothly. Smaller round or angled brushes work for lettering and detail work. Synthetic bristle brushes resist fraying with acrylic paints. Avoid foam brushes, which may leave uneven textures.
Wear a mask when sanding old pallet wood to avoid inhaling dust or mold spores.
Gathering Materials for Assembly and Finishing
Besides wood and paints, gather nails or screws sized around 1 to 1.5 inches to assemble the sign securely. Clear wood sealant or polyurethane adds protection and improve paint durability. Painter’s tape helps mask areas for sharp paint lines. Fine steel wool or tack cloth can clean dust before painting to improve adhesion.
Consider using wood glue for extra hold between boards, especially if you want fewer nails visible. Protective gloves and goggles add safety during cutting and painting.
Preparing Pallet Wood: Safe Removal and Cleaning Steps
Preparing pallet wood properly is key to making a durable and attractive pallet sign. Safely dismantle the pallet, remove nails carefully to avoid damaging the wood, and clean and sand the boards thoroughly. Check the wood for moisture and defects to ensure a stable base for your project.
Removing Nails Without Damaging Wood
Removing nails from pallet boards requires patience and the right tools to avoid splitting or gouging the wood. Using a pry bar or claw hammer with a nail puller attachment helps you use the nail out slowly. Start by working the tool under the nail head gently, moving it back and forth to loosen the nail before pulling it out.
Always wear gloves and safety glasses to protect yourself from sharp nails and splinters. If nails are deeply embedded or rusted, cutting them with a reciprocating saw or side cutters might be necessary. Avoid using excessive force which can crack or chip the wood.
- Place the pallet on a stable surface to prevent slipping.
- Slide a pry bar or claw hammer under the nail head carefully.
- Gently rock the tool back and forth to loosen the nail.
- Pull the nail straight out to minimize wood damage.
- For stubborn nails, use nail puller pliers or cut them flush with the wood.
- Dispose of removed nails safely to avoid injury.
Cleaning and Sanding Pallet Boards
Cleaning pallet wood removes dirt, oils, and possible contaminants, which improves paint and sealant adhesion. Start by brushing off loose debris with a stiff brush. Then, wipe down boards with a mild detergent solution. Avoid soaking the wood, as excessive moisture can cause warping. Allow the wood to dry completely, ideally for 24 to 48 hours in a dry, ventilated area.
Sanding smooths out rough surfaces and removes splinters while keeping some texture to retain the rustic look. Use a medium-grit sandpaper (around 80 to 100 grit) first, followed by finer grit (120 to 150) if you want a smoother finish. Sand along the wood grain to prevent scratches. Wear a dust mask and safety glasses during sanding to protect your lungs and eyes.
Checking for Wood Moisture and Defects
Wood moisture content affects paint adhesion and wood stability; aim for 15% moisture or lower for outdoor pallet signs. Use a moisture meter to test the boards before building. High moisture levels risk warping or cracking after assembly.
Inspect each board for signs of damage like rot, cracks, knots, or insect holes. Reject any boards that are soft, crumble under pressure, or show extensive decay. Look for color consistency and structural soundness to ensure a durable sign base. Mark usable boards clearly to avoid mixing them with compromised pieces later.
Assembling Your Pallet Sign: Methods and Tips
Securing pallet sign boards properly ensures your project lasts and looks great. The three main fastening options are screws, nails, and wood glue. Screws provide strong, long-lasting hold, especially for thicker pallet wood. Nails are quicker to use but offer less grip and may loosen over time. Wood glue works well for thinner boards or when combined with screws or nails to add extra bonding strength.
Generally, use wood glue on the edges of each plank and then fasten them together from the back side with screws or nails spaced about every 6 to 8 inches. This method prevents the fasteners from showing on the front and keeps the sign stable. For thin pallet boards, rely more on wood glue and fewer screws or nails to avoid splitting the wood.
| Fastening Method | Pros | Cons | Best For |
|---|---|---|---|
| Screws | Strong hold; durable; easy to remove if needed | Requires pre-drilling; visible if not placed on back | Thicker wood; outdoor signs |
| Nails | Quick to install; less splitting risk | Can loosen over time; less holding power | Indoor signs; quick projects |
| Wood Glue | Invisible fastening; bonds even thin boards | Needs drying time; less strong alone | Thin boards; combined with screws/nails |
When assembling your sign, align the planks carefully with about 1/8-inch gaps for wood expansion, especially if the sign will be outdoors. Use clamps or weights during drying if you apply wood glue. For outdoor signs, rust-resistant screws work best to avoid corrosion. After fastening, check for wobbling or unevenness and adjust by tightening screws or adding extra fasteners if needed.
Remember to fasten boards on the back side, hidden from view, to keep the sign’s front clean for painting or decoration. Adding horizontal support boards behind vertical planks can improve stability for larger signs. This support prevents warping and helps maintain a flat surface over time.
Designing and Decorating Pallet Signs Creatively
Applying paint, stencils, freehand lettering, and 3D decorations allows you to make your pallet sign truly unique. Each method suits different skill levels and styles, helping you design an eye-catching sign that fits your space or occasion. Combining these techniques can add depth and charm to a rustic pallet sign.
Choosing and Preparing Stencils or Templates
Using stencils or templates simplifies adding precise letters and designs, especially if you’re not confident in freehand painting. You can buy ready-made stencils or create your own with a cutting machine like a Cricut or Silhouette Cameo. Alternatively, print out letters or graphics on paper and trace them onto the wood for a custom look.
Prepare your stencil by trimming it to the size of your pallet board or desired area. Use painter’s tape to hold it firmly in place, preventing smudging. If your stencil has delicate cut-out parts, back it with a piece of thin cardboard or plastic for extra support.
- Print or purchase stencils that match your desired font size and style.
- Trim the stencil to fit your pallet sign area.
- Use painter’s tape to secure the stencil tightly to the pallet wood.
- Seal edges with additional tape or light pressing to avoid paint bleeding.
- Test the stencil on scrap wood to ensure clean lines.
Always remove the stencil carefully while the paint is still slightly wet to avoid peeling or smearing your letters.
Painting Techniques for Sharp and Clean Letters
Start with a base coat on your pallet wood to create a smooth surface and improve paint adhesion. Acrylic paints work well indoors, but choose outdoor paint if your sign will face weather. Applying two or more layers often helps the design pop against the background.
For stencil or freehand painting, use a foam brush or stencil brush with a small amount of paint. Dab the paint instead of brushing to prevent bleeding under the stencil edges. For freehand lettering, sketch letters lightly in pencil first, then fill in with steady, controlled strokes. Let the base coat dry fully, which usually takes 30 minutes to an hour, before painting letters or designs.
- Apply a base coat of paint to the pallet wood and let dry completely.
- Lightly sketch your design onto the wood if painting freehand.
- Use a small foam or stencil brush loaded sparingly with paint.
- For stencils, dab paint gently over openings; for freehand, use smooth strokes.
- Let each paint layer dry before adding another to build opacity.
Be patient with drying times; rushing can cause smudges or uneven paint coverage.
Adding 3D Elements and Embellishments
Three-dimensional decorations bring extra texture and interest to pallet signs. Options include wooden letters glued onto the surface, small objects like spoons or buttons, or layering additional pieces of wood or metal. These can tie into your design’s theme, like rustic spoons for a kitchen sign or golden letters for a festive touch.
Prepare the pallet surface by ensuring it’s clean and dry. Use strong craft glue or a hot glue gun to securely attach items. For heavier objects, small finishing nails or screws may be necessary. Position elements thoughtfully to balance the sign without overcrowding.
- Select 3D items that complement your design and fit your pallet sign’s size.
- Clean and dry the pallet surface where you plan to attach embellishments.
- Apply a strong adhesive to the back of each 3D element.
- Press firmly onto the pallet wood, holding in place until secure.
- Consider adding a clear sealant over glued items for extra durability outdoors.
Test adhesives on scrap wood before applying to ensure a strong hold without damaging pallets.
Finishing and Protecting Your Pallet Wood Sign
Choosing the right finish and sealant for your pallet wood sign depends largely on whether it will be displayed indoors or outdoors. For outdoor signs, the best protection comes from using a clear exterior-grade polyurethane or spar urethane. These finishes are designed to resist moisture, UV rays, and temperature changes, which help your sign last longer without peeling or fading. Interior signs need less heavy-duty protection but still benefit from a clear varnish or a water-based polyurethane to protect against dust, fingerprints, and minor spills.
Applying your finish starts by making sure your sign is clean and dry. If you’re using a stain, apply it first with a brush or rag, following the wood grain, and allow it to dry for at least 24 hours. After staining, or if you skip staining for a natural look, apply your clear coat in thin, even layers using a high-quality synthetic brush or a foam brush. For outdoor signs, apply at least two coats of spar urethane, sanding lightly with fine-grit sandpaper (around 220 grit) between coats to smooth the surface and improve adhesion. Avoid applying finishes below 50°F to ensure proper drying and curing.
Clear acrylic spray sealants offer an easier alternative for indoor signs, providing quick drying and lower chemical fumes. For outdoor signs, avoid these sprays because they typically offer only light protection. The cost of typical sealants ranges from $10 to $25 per quart, and a quart usually covers about 100 to 150 square feet with two coats, making them affordable for most pallet sign projects.
Monitoring your pallet sign’s finish helps maintain its appearance and durability. For outdoor signs, check the surface every six months. Signs that start to feel rough or show signs of fading or peeling should be lightly sanded and resealed with another coat of spar urethane to restore protection. Indoor signs may only need annual touch-ups if they see heavy handling or spills. Avoid exposing finished signs to standing water or direct ground contact to extend the finish’s life.
Good results look like a smooth, even surface with a slight sheen that improve the wood grain or paint underneath without any sticky or cloudy patches. Common issues include blotchy finishes from uneven application, bubbling from applying too thick a coat, or premature cracking and peeling due to skipping sanding between coats or applying finish in humid or cold conditions. Taking your time with multiple thin coats and the right temperature conditions prevents these problems and ensures your pallet sign will look great for years.
Common Mistakes Making Pallet Signs and How to Fix Them
One common problem with pallet signs is warped or cracked boards. Warping happens when the wood is exposed to moisture or uneven drying. This makes it harder to assemble smooth, flat signs. Check each board by placing it on a flat surface before starting. Notice significant bends? Replace the board or gently clamp it flat for at least 24 hours with heavy weights or clamps. Avoid using heavily warped boards as they often cause uneven gaps and weak joints.
Peeling paint or flaking finishes often appear when the wood isn’t properly prepped or sealed. To fix peeling paint, start by sanding the affected areas with medium-grit sandpaper (like 120 grit) until smooth. Remove dust with a dry cloth, then apply a primer made for wood surfaces. Lightly sand again after the primer dries before repainting. This extra prep helps paint stick better and last longer.
Poor assembly is another frequent issue. Signs of weak attachment include loose boards that shift or squeak when handled. Nails or screws that don’t grip well might strip or pull out over time. Strong mechanical fastening with screws instead of nails usually works better for pallet signs. Pre-drilling screw holes prevents wood splitting. You want boards snug but not forced together to avoid cracks.
- Inspect all wood carefully for damage or rot before cutting or assembly.
- Sand rough surfaces and edges thoroughly to prevent splinters and paint issues.
- Use clamps during gluing or screwing to hold boards flat and aligned.
- Test screw placement on scrap wood to determine proper depth and spacing.
- Seal any knots or exposed ends with an outdoor wood sealer to reduce moisture damage.
- Allow paints and sealers to dry fully between coats, this usually takes 2-4 hours depending on product instructions.
- Practice your design layout on paper or with removable marks on the wood before painting or attaching decorations.
Skipping thorough preparation can lead to frustrating rework later. Take time to clean pallets well, remove nails carefully, and dry the wood fully indoors or in a warm, dry place to avoid mold or mildew. Planning your design carefully prevents awkward spacing or overcrowding on the boards. An uncluttered layout also helps your sign look professional and rustic.
The cost of fixing small flaws is minimal but adds time. For example, a small can of wood primer costs about $10 and covers a few signs, making it a good investment for durability. Using quality screws ($5, 10 per box) instead of nails also improves strength without raising project cost much. Being patient with each step results in a sign that lasts and looks great.
How Long Does Making a Pallet Sign Take and Cost?
Making a pallet sign typically takes about 3 to 6 hours from start to finish. This range depends on how detailed your design is and the drying time for paints or finishes. For example, a simple name sign with hand-painted letters can be done in an afternoon, while more intricate designs may require additional time.
Your budget will mostly cover pallet wood (which can often be sourced for free or low cost), paint or stains, brushes, and any additional decor elements you want to add. You can reduce expenses by reusing materials you already have, like leftover paint or basic brushes, and by choosing simpler designs that require less finishing work. Here’s a breakdown to help you plan your costs:
| Item | Typical Cost | Notes |
|---|---|---|
| Pallet Wood | $0 – $15 | Many free from local shops, or buy for under $15 |
| Paint or Stain | $5 – $15 | Sample size or basic craft paint recommended |
| Brushes and Tools | $5 – $20 | Reusing or borrowing tools lowers cost |
| Decorative Elements | Optional $0 – $10 | Stencils, stickers, or hardware for mounting |
| Finish (sealer/varnish) | $5 – $10 | Protects sign; optional but recommended outdoors |
A practical timeline example for a basic pallet sign might look like this: spend 1 hour cleaning and prepping the wood, 1 to 2 hours painting or applying your design, and 1 hour waiting for the paint to dry before applying a finish. Adding a sealer takes about 30 minutes to apply plus at least 1 hour drying time. Planning to spread the project over a weekend helps avoid rushed work.
Using leftover paint or salvaged pallet wood can save both time and money without sacrificing the rustic charm of your sign.
Limiting your tools to essentials shortens setup and cleanup time. For instance, opting for hand-painting instead of multiple stencils reduces preparation and makes the painting step faster. If you buy a small pack of paintbrushes instead of a single high-end brush, you save money and get options for different techniques.
Choosing a smaller sign size or a simple message is a great shortcut. It means less wood to sand and fewer letters to paint. Conversely, detailed stenciling or adding embellishments like nails or hooks can double the time and increase costs, so budget accordingly if you want those features.
Step-by-Step Action Plan for Making Your Pallet Sign
Follow these steps to create a rustic pallet sign that fits your style. Each phase builds on the last to keep your project organized and manageable.
- Day 1: Select and Prepare Pallet Wood, Choose pallets with minimal damage and clean them thoroughly. Make sure the wood is dry and free of debris before moving on.
- Day 2: Disassemble and Sand, Carefully remove the pallet boards using a crowbar or hammer. Sand all surfaces until smooth to reduce splinters and prep for painting or staining.
- Day 3: Assemble Your Sign Base, Arrange your boards in your desired layout and attach using nails or screws. Check for a sturdy structure that won’t shift easily.
- Day 4: Design and Paint, Sketch your design on paper or directly onto the wood with pencil. Use your paint or stain to apply the design carefully; let each coat dry completely.
- Day 5: Apply a Protective Finish, Coat your sign with polyurethane or outdoor sealant to protect against weathering. Confirm even coverage to prevent peeling or damage.
- Day 6: Add Hanging Hardware, Attach hooks or a wire on the back so you can hang the sign securely. Test the hanging mechanism to ensure it supports the weight.
- Day 7: Display Your Pallet Sign, Find a spot in your home or yard to showcase your work. Check for stable mounting and enjoy your personalized décor.
Frequently Asked Questions
What Is the Easiest Design for a Beginner Making Pallet Signs?
Simple stencil or painted lettering designs are easiest to start with. They require minimal tools and allow you to practice basic techniques while achieving a clean look.
How Can I Display My Pallet Sign Outdoors Without Damage?
Use exterior-grade sealant and keep the sign in a shaded or covered area. This helps protect the wood and paint from sun and rain, extending its lifespan.
Can I Use Pallet Signs to Create Holiday Decorations?
Yes, pallet signs can be customized seasonally with paint and decals for holidays. Change designs easily while reusing the same wood base year-round.
What Type of Paint Works Best on Pallet Wood?
Acrylic paint is best for pallet signs because it adheres well and dries quickly. It offers vibrant colors and is water-resistant once sealed.
Is It Safe to Use Old Pallet Wood for Making Signs?
Yes, if you clean and sand it well. Avoid pallets treated with chemicals, often marked with “MB” for methyl bromide. Proper prep reduces risks from dirt or residues.
Do Pallet Signs Require Special Tools for Assembly?
No, basic hand tools like a saw, hammer, and nails are enough. A power drill and sander can speed up the process but are not necessary.
Before You Go
Making a pallet sign gives you a practical way to add rustic charm to any space with personalization you control. Start with selecting good-quality pallet wood and follow through with careful design and sealing for a durable finish. Begin your project today by locating a clean, sturdy pallet you can use for your first sign.