How to Make Bathroom Signs: Simple Steps and Creative Ideas That Work
How to make bathroom signs starts with choosing the right materials and tools that fit your space and style. Creating a custom sign is simple by picking a design you like and using beginner-friendly methods like painting or printable templates. Starting with clear measurements and a solid plan helps the project stay quick, often done within 1-2 hours.
Key Takeaways
- Gather basic materials like plywood, wood trim, paint, and stencils for durable bathroom signs.
- Use printable designs sized to fit standard frames for easy wall art placement.
- Try the reverse canvas technique to create unique and stylish sign backgrounds.
- Include playful or humorous phrases to add personality without overwhelming the space.
- Cut your wood or canvas precisely and unload your mat promptly if using a cutting machine.
- Allow adequate drying time after painting to ensure a long-lasting finish.
Essential Materials and Tools for Bathroom Signs
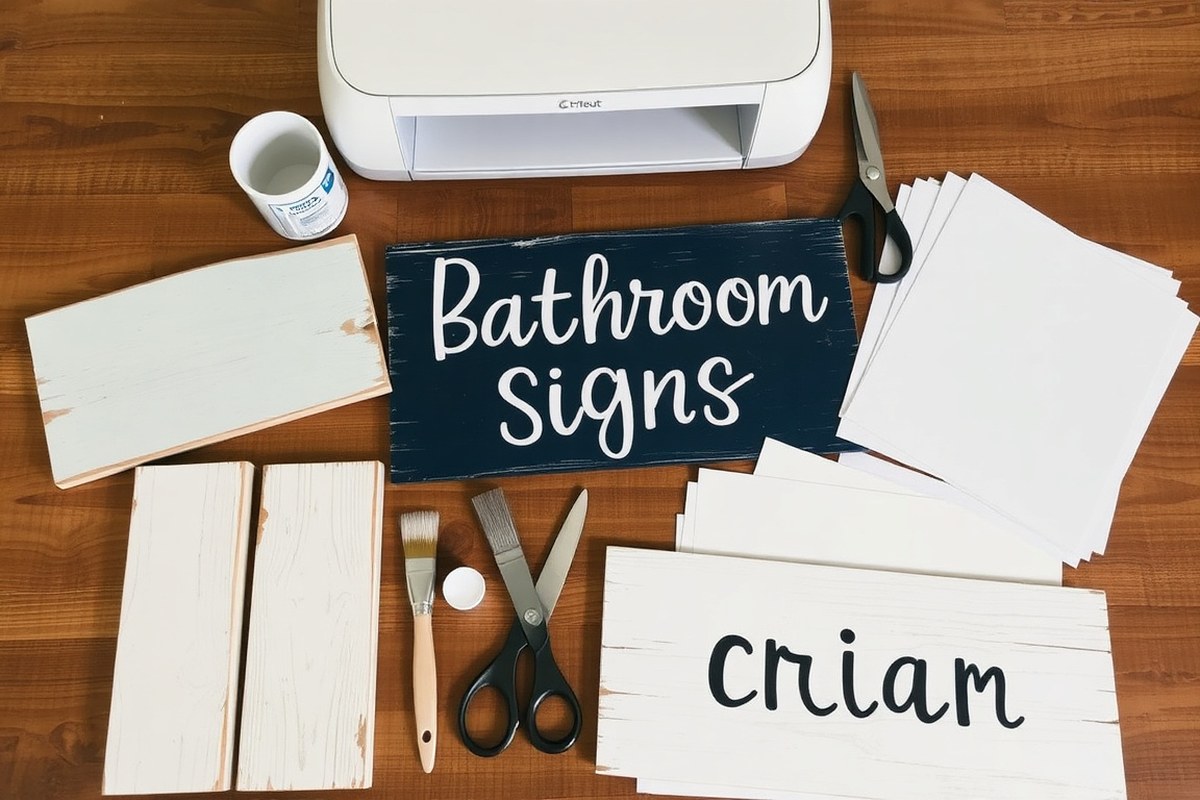
To start making bathroom signs, gather materials that match your chosen style and crafting method. Common bases include wood plaques, canvas panels, or sturdy cardstock. Wood offers durability and a classic look, while canvas and cardstock provide a lighter, easier-to-handle option. Consider pre-primed wood or smooth surfaces to ensure paint or vinyl adheres well. Quality materials help your sign last in moist bathroom environments without warping or peeling.
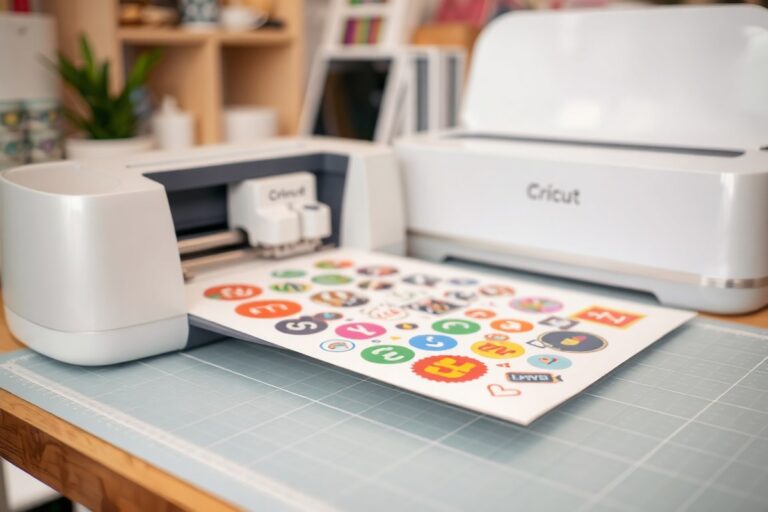
Essential tools vary but generally include paintbrushes or foam brushes for applying paint, sandpaper for smoothing wood edges, and stencils or vinyl for clean lettering. A Cricut or other cutting machine is especially useful for creating precise vinyl decals or stencils. It simplifies cutting intricate designs or fonts and works well with materials like adhesive vinyl, cardstock, and even thin wood veneer. Investing in a Cricut machine can save time and improve the professional look of your signs. A basic checklist of materials and tools to have on hand:
- Wood plaques or canvas panels (sizes like 8″x10″ or 12″x12″ fit standard frames)
- Acrylic paint in your chosen colors
- Paintbrushes or foam applicators for smooth coverage
- Sandpaper (120 to 220 grit) for prepping wood surfaces
- Adhesive vinyl sheets and transfer tape, especially if using a cutting machine
- Cricut machine or manual cutting tools (craft knives, scissors)
- Stencils or printable templates for lettering guidance
- Sealer spray or clear coat to protect your finished sign from moisture
Choosing quality supplies matters because bathroom conditions can damage cheap paint and paper-based signs. Look for acrylic paints labeled “water-resistant” and vinyl made for outdoor or durable indoor use. Opting for thicker wood avoids warping, and using a clear sealer helps protect your artwork from steam and humidity. Prepare your wood by sanding to remove splinters and create a smooth surface for paint or adhesive vinyl. If using a Cricut, make sure your vinyl matches the machine compatibility and check its cutting settings for material thickness.
Using these materials and tools, you can create bathroom signs that are not only attractive but built to withstand everyday bathroom humidity. A Cricut machine, while a bigger initial investment (starting around $200), unlocks a wider variety of design possibilities with precision and ease. For a simple start, basic paint supplies, wood, and stencils are enough, costing well under $20 for each completed sign.
Creative Methods to Make Bathroom Signs
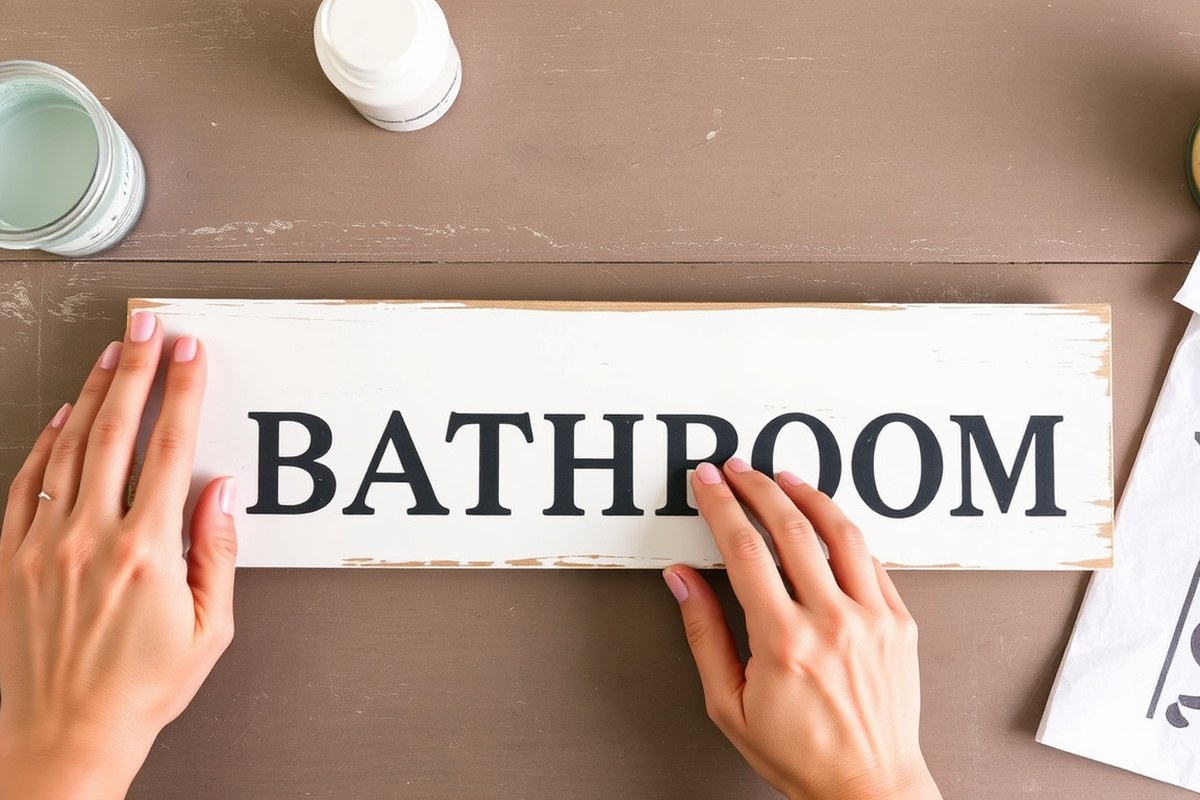
Creating bathroom signs can be a simple or detailed project depending on your choice of method. Four popular approaches include wood painting, vinyl cutting, printable signs, and adding 3D embellishments. Each offers a unique look and suits different skill levels, budgets, and time commitments.
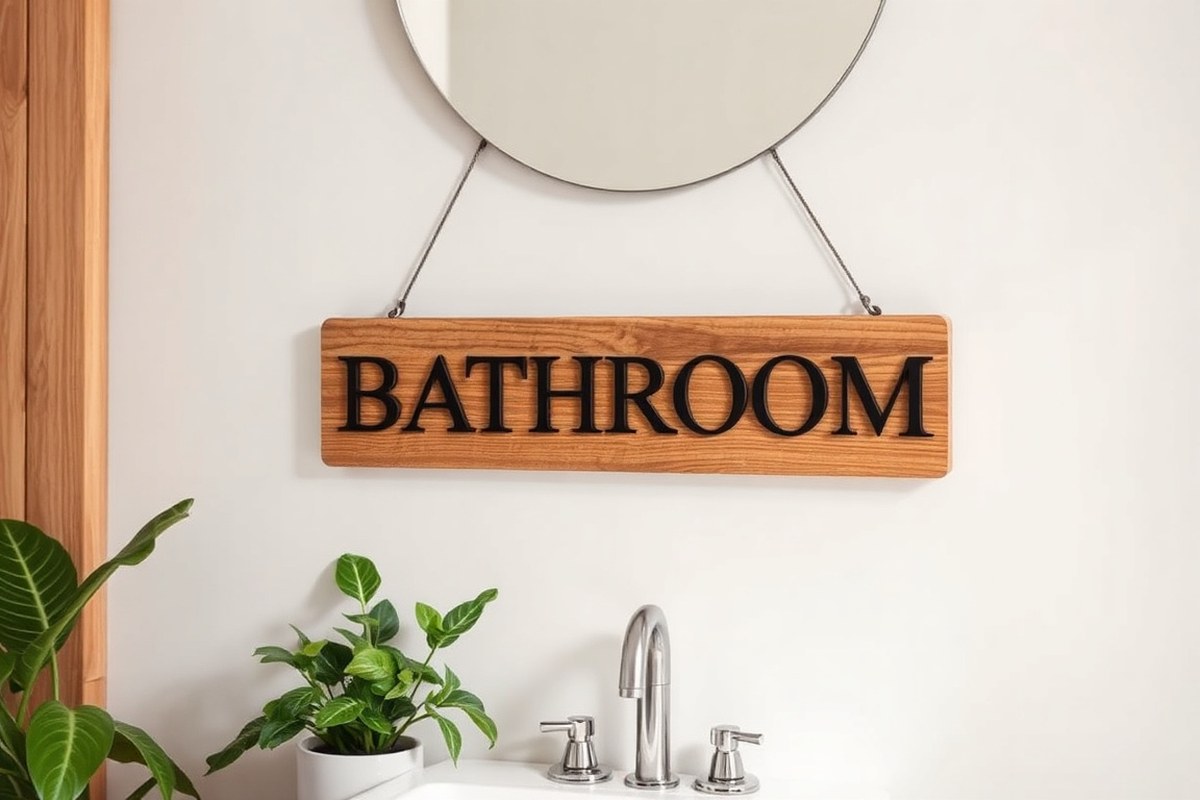
Wood painting delivers a rustic, durable sign. Start with a smooth wood piece, sand it, and apply a base paint layer. After drying, use stencils or freehand your design with acrylic paint. Seal with a clear finish to protect against moisture. Expect to spend about $10 to $25 on materials, and allow 2 to 4 hours including drying time. This method suits those who want a long-lasting, customizable sign with tactile depth.
Vinyl cutting uses a cutting machine like a Cricut to produce precise text or shapes on adhesive vinyl. Cut your design from sheets that cost around $1 to $3 each. Apply the vinyl to wood or acrylic backing. This approach is cleaner and quicker than painting and yields professional results. Basic knowledge of design software and a cutting machine is required, making it moderately difficult.
Printable bathroom signs offer an affordable and fast way to personalize your bathroom décor. Download or create a digital design, then print on sturdy paper or card stock using a home printer or local print shop. Prices range from free (if using online templates) to a few dollars for premium prints. Laminate or frame your print for durability. This method is perfect when you want to change signs seasonally or for special occasions.
To create 3D or textured bathroom signs, layer materials like wooden cutouts, fabric scraps, or small decorative elements. Start with a flat base, glue raised pieces arranged in patterns, letters, or shapes. Fabric adds softness, while wood or plastic adds dimension. This approach takes more time but gives a tactile and eye-catching result that standard flat signs don’t achieve.
| Method | Cost Range | Skill Level | Main Materials | Typical Time |
|---|---|---|---|---|
| Wood Painting | $10 – $25 | Beginner to Intermediate | Wood board, acrylic paint, sealer | 2 – 4 hours |
| Vinyl Cutting | $3 – $10 (vinyl sheets) | Intermediate | Vinyl sheets, cutting machine, backing board | 1 – 2 hours |
| Printable Signs | Free – $5 | Beginner | Paper or card stock, printer, frame or laminate | 15 – 60 minutes |
| 3D / Textured Signs | $10 – $30 | Intermediate | Base board, fabric scraps, wood cutouts, glue | 3 – 5 hours |
Following clear steps often helps avoid common mistakes. For wood painting, make sure your base is fully sanded smooth to prevent paint peeling. In vinyl cutting, ensure the surface is clean before applying the vinyl to avoid bubbles. Printable signs should be printed on quality paper and protected by laminating or framing to prevent moisture damage in the bathroom.
Allow paint and glue to dry completely between each step when making 3D or painted signs to avoid smudges and ensure a professional finish.
Step-by-Step Guide to Designing and Crafting Signs
Making a bathroom sign involves choosing a design that fits your style, preparing the base material properly, crafting the lettering or graphics, and finishing with protective coatings. The whole process typically takes 1 to 2 hours, spread over a few sessions to allow drying. Careful preparation leads to a cleaner, longer-lasting sign that complements your bathroom decor.
Designing Your Bathroom Sign Concept
Start by deciding what message or image your bathroom sign will display. This might be a funny phrase, a simple word like “Relax” or “Wash,” or even a vintage graphic. Match the wording and style to your bathroom’s theme, whether it’s modern, rustic, or playful. Consider the size and shape of the sign based on where you plan to hang it, such as above the toilet or near the sink.
You can use a computer program to draft your design or sketch it by hand. Choosing clear, readable fonts or stencils ensures your sign will be legible. To add humor or personality, choose phrases that create a neat statement and match the vibe of your bathroom.
Preparing Materials and Workspace
Proper preparation of materials ensures the best results and prevents issues like paint peeling or colors fading quickly. For wooden plaques, sand the surface with medium-grit sandpaper to remove rough spots and create a smooth painting surface. When using canvas or a similar base, ensure it is clean and free of dust before starting.
Set up a clean, well-lit workspace with all your tools in reach. Gather your plaque or canvas, paints (acrylic or chalk), brushes, stencils or stickers, sandpaper, pencil, ruler, and hanging hardware. Protect your work area with newspaper or a plastic sheet to catch drips or dust.
Crafting and Applying Design Elements
The crafting phase involves transferring your design onto the sign base and adding color or texture. Lightly sketch the design on the surface with a pencil if freehand painting. Stencils or letter stickers can make lettering easier and cleaner, especially for beginners. For vinyl decal users, carefully apply the vinyl onto a flat, clean surface, smoothing out bubbles.
Take your time in this step to avoid mistakes. Paint or apply your decals steadily and evenly. Choosing a layered look works well with decorative borders or small graphics surrounding your main text. This step usually takes 30 to 45 minutes depending on the design’s complexity.
Painting, Sealing, and Finishing
Use acrylic or chalk paint for your design, applying thin layers to avoid drips. Allow the paint to dry between coats. For rustic or distressed looks, sand lightly on edges after painting. Once the paint is completely dry, seal the sign with a clear water-based polyurethane or sealant designed for your paint type. This protects the sign from moisture, especially important in bathrooms.
Sealing usually adds 15 to 30 minutes to the project but greatly improves durability. Attach hanging hardware like hooks or string while the sealer cures. Good finishing is what makes your sign last and look professional.
Drying and Curing Times
Plan for about 1 to 2 hours total time to complete the sign, spread out so paint layers can dry. Acrylic paint generally dries to the touch within 20 to 30 minutes but needs at least an hour before handling. Sealing coats similarly take 30 minutes to dry to the touch and a few hours to fully cure.
Keep the sign on a flat surface in a dust-free, warm room during drying to avoid smudges or dust sticking. Avoid hanging or using the sign until the sealant fully cures to ensure it won’t chip or peel prematurely.
- Choose your sign’s message and design style to match your bathroom décor.
- Sand the wooden plaque or clean the canvas to prepare a smooth painting surface.
- Set up your workspace with all needed materials and protective coverings.
- Sketch or apply stencils/letter stickers to lay out the design on your sign base.
- Paint your design with thin, even coats; let each coat dry before the next.
- Apply a clear sealant to protect your finished design from moisture.
- Attach hanging hardware after the sealant dries and before full curing.
- Allow the sign to dry and cure fully before hanging or use, typically 1 to 2 hours overall.
Adding Humor and Personal Touch to Your Signs
Adding humor and personal touches to your bathroom signs makes the space feel more inviting and lively. A funny or customized message can reflect your personality or greet guests with a smile. This creates a more welcoming bathroom that stands out from typical, plain signs.
Choosing Humorous Messages That Fit Your Style
Funny bathroom signs are popular because they add charm and lighten the mood. Choose phrases that match your household’s sense of humor or the bathroom’s audience, like guests or kids. Classic sayings such as “Please remain seated for the entire performance” or “Wash your hands, you filthy animal” deliver a playful vibe without being offensive. Nautical-themed signs might say “Seas the day” or “This way to the beach,” tying humor to a coastal style.
The key is to keep humor friendly and brief enough to read at a glance. Avoid jokes that might confuse visitors or feel out of place in a shared bathroom. Short, clever phrases generally work best on signs because they’re easy to read and make an impact quickly.
How to Personalize Signs with Meaningful Details
Personalizing bathroom signs transforms them from generic decorations to reflections of your home’s character. You can include family names or nicknames with phrases like “The Johnson Family Restroom” or “Emma’s Clean Zone.” Use paint or vinyl lettering to add these details in a color that complements your bathroom’s palette. Another approach is to display messages that relate to your hobbies or favorite sayings, making the space feel more unique.
Decorative touches such as ribbons, buttons, or seashells glued to the frame add texture and a personal flair. Custom shapes like speech bubbles signal the message is intended to be playful. These small design choices cost under $10 if you shop craft supplies smartly and can take less than an hour to apply, making personalization an affordable upgrade.
Popular Phrase Ideas to Inspire Your Sign
Several phrases have proven popular across guest and family bathrooms because they balance humor and approachability. Examples include “If you sprinkle when you tinkle, be a sweetie and wipe the seatie,” which encourages cleanliness with a smile. For a kids’ bathroom, “Tiny hands make sparkling sinks” reminds children gently to wash up. A guest bathroom sign might humorously say, “You never know what you’ve got till it’s gone, wash your hands!”
Unique phrases like “Please don’t do coke here” or “Restroom Rules: No singing in the shower” offer edgy humor but work best when your guests share your sense of fun and it fits the room’s vibe. You can also create a custom line using a simple script: “Welcome to [Name]’s Bathroom, Where smiles are mandatory.” This balances personalization with warmth.
Steps to Make Humorous and Personalized Signs
Start by choosing a base material like wood or canvas, then select your phrase and font style. Use stencils or printable templates to transfer the text clearly. Once painted or printed, add decorations such as small shells or ribbon borders that connect to the message or bathroom theme.
Let each coat of paint dry for at least 2 hours between layers to prevent smudging. Finish with a clear sealant spray to protect your work. The entire process can take a few hours, depending on drying times, but it’s a fun weekend project that leaves lasting results.
What Makes a Sign Successful or Missed the Mark
A great sign is easy to read and strikes the right tone for your household or guests. Humor should invite smiles without causing confusion or discomfort. Faded paint or overly complex fonts can make it hard to read, while too generic messages won’t add much personality. Avoid signs that try too hard to be funny at the expense of clarity.
Consider who uses the bathroom and tailor your wording and style accordingly. For example, playful quotes work well in a family bath, but a guest bathroom may do better with light humor that appeals to varied ages and tastes. Proper finishing and mounting prevent the sign from looking cheap or worn too quickly.
Painting Techniques and Finishing Tips for Longevity
Using the right paint and finishing methods is important for making bathroom signs that withstand humidity and frequent cleaning. Waterproof paints like acrylic and protective sealers help prevent peeling, bubbling, and fading. Proper preparation and sealing techniques extend your sign’s lifespan in a damp environment.
Choosing the Best Paint for Bathroom Signs
Acrylic paint is the top choice for bathroom signs because it is water-resistant, dries quickly, and adheres well to common sign materials such as wood, MDF, and canvas. Acrylics also come in a wide range of colors and finishes, allowing you to create durable designs that hold up in humid conditions. Oil-based paints offer strong adhesion but take longer to dry and require solvents for cleanup, which might not be ideal for beginners.
Markers with waterproof, fade-resistant ink can work well for smaller details or lettering, especially on smooth surfaces like glass or sealed wood, but they aren’t as durable as acrylic paint over large areas. Choose paints labeled specifically for outdoor or exterior use when possible, as these are formulated to resist moisture better.
Preparing Surfaces for Long-Lasting Paint
Clean and sand your sign’s surface before painting to improve paint adhesion. Remove dust, grease, or existing flaking paint by lightly sanding the wood or material until smooth. This step helps prevent bubbling or peeling later. Use a damp cloth or rag to remove sanding dust and let the surface dry completely before applying any paint.
Applying a primer designed for your sign’s material, such as a wood primer for wooden signs, gives the paint a strong base and reduces moisture absorption. Primers also improve color vibrancy and longevity by creating a uniform surface for paint to bond securely.
Applying the Paint and Finishing Layers
Apply two to three thin coats of acrylic paint, allowing each coat to dry fully before adding the next, typically about 20 to 30 minutes per coat in a well-ventilated area. Thin coats avoid drips and ensure smooth coverage. For intricate lettering or designs, use fine brushes or waterproof paint markers to avoid bleeding.
After painting, use a clear sealer designed for humid areas, such as a polyurethane or acrylic clear coat labeled as water-resistant or waterproof. Spray sealers provide even coverage and reduce brush marks, but brush-on sealers allow more control around detailed areas. Seal your sign with 2 to 3 coats, allowing drying time as directed on the product, generally 2 to 4 hours per coat.
Fixing Peeling Paint and Bubbling Vinyl
Peeling paint usually results from poor surface prep or moisture penetrating the substrate. To fix peeling, gently scrape off loose paint, sand the surface to smooth edges, then clean and re-prime before repainting. Avoid thick paint layers that trap moisture and cause further peeling.
Vinyl bubbling often means the vinyl wasn’t applied properly or the surface was too moist. After placing vinyl, press firmly with a squeegee or similar flat tool to smooth air bubbles, working from the center out. Check after 40 seconds to ensure the vinyl has fully adhered and press bubbles again if needed. If bubbles persist, carefully lift the vinyl and reapply, making sure the surface is dry and clean.
Always let each paint and sealer coat dry completely before touching or applying the next layer to avoid trapping moisture and causing peeling or bubbling.
Safety Tips and Working with Kids on Bathroom Signs
Handling wood and paints safely requires careful preparation and attention to detail. When working with wood, wear safety goggles and a dust mask to protect against sawdust. Use sandpaper gently to smooth edges and avoid splinters. Paints should be non-toxic and low in fumes, especially in enclosed spaces. Choose water-based acrylic paints rather than oil-based alternatives for easier cleaning and safer indoor use.
Including kids in bathroom sign projects can be both fun and safe with the right approach. Always supervise children closely, especially when cutting wood or using sharp tools. Let kids handle tasks like painting or applying stickers where risks are minimal. Set up a workspace that’s easy to clean and use drop cloths to protect surfaces from spills.
- Wear safety gear: goggles, gloves, and masks during sanding and cutting
- Opt for low-VOC, non-toxic paints to minimize harmful fumes
- Keep sharp tools and adhesives out of children’s reach
- Limit children’s tasks to painting, decorating, or framing
- Work in a well-ventilated area to reduce inhalation of dust and paint vapors
- Prepare work surfaces with newspaper or plastic covers to catch spills
- Keep a first aid kit nearby in case of minor cuts or scrapes
Costs for safety supplies like goggles and gloves are generally under $10 at hardware stores, making them an essential and affordable investment. Using the right tools and materials ensures good results without risk. Cuts or splinters are common when sanding without protection, while fumes from improper paint choices can cause headaches or allergic reactions.
For kids, the best outcomes come from clear roles and constant supervision. They enjoy painting custom designs or adding decals to a pre-cut wooden sign. This involvement creates personal connection and pride in their work while keeping them safe from hazards. You can even frame finished signs in simple frames that fit your bathroom style, rustic wood or sleek black frames help complete the look without involving any extra tools or chemicals.
How to Hang and Style Your Bathroom Signs Effectively
To hang bathroom signs effectively, choose spots that grab attention without cluttering the space. Position signs near the door, above the towel rack, or beside the sink where they naturally catch the eye. These locations encourage immediate reading and tie the sign into everyday routines. Keep signs at eye level, roughly 57 to 60 inches from the floor, to ensure easy visibility. Use lightweight frames or mounting options like command strips to avoid damaging walls, especially in rental bathrooms or humid environments. Avoid hanging signs too low or high, which can make them less noticeable or awkward to read.
Size matters for bathroom signs, balancing readability with bathroom scale. For small to medium bathrooms, choose signs around 8 to 12 inches wide and 5 to 8 inches tall. Larger bathrooms allow bigger signs up to 16 inches wide and 12 inches tall to avoid being lost in the space. Keep in mind that font size should be clear and bold enough to read from a few feet away. Oversized signs can overwhelm compact bathrooms and make the space feel crowded.
Framing improve the sign’s look and protects it from moisture. Simple wooden or metal frames in neutral or matching tones work well in most bathroom styles. Glossy or semi-gloss paint finishes ward off water damage, while sealed glass or acrylic covers protect printed or painted signs. Consider rustic frames for farmhouse styles, brushed metal for modern spaces, or distressed wood for vintage vibes. Frame depth of about 1 inch is sufficient to prevent warping and maintain a sleek profile.
Styling bathroom signs alongside other decor helps tie your design together. Place signs near matching accessories, like soap dishes, toothbrush holders, or decorative towels in complementary colors. Coordinate colors and fonts with your existing decor; soft pastels suit tranquil spaces, while bold typography energizes minimalist bathrooms. Group smaller signs in clusters above shelves or next to mirrors for a gallery effect. Pair signs with plants or candle holders to create a cozy atmosphere. Avoid overcrowding; leave enough space for each item to stand out. Use symmetry for balance, such as centering a sign over the toilet or aligning multiple signs along a wall. Mixing materials like wood with metal or ceramic adds texture and interest without overcomplicating the look.
Good results come from thoughtful placement and harmonious styling. Signs should look intentional, not thrown together, and feel like a natural part of the bathroom decor. The right size, framing, and spot can make a simple sign feel like a custom piece. Watch out for placing signs where moisture collects, such as directly above the shower or sink backsplash without protection, which can lead to damage or fading over time. Test lightweight adhesives on your wall surface first to avoid peeling. Adjust placement based on bathroom layout, what works for a long narrow space might not suit a square room.
Common Problems and How to Fix Them When Making Signs
Peeling paint is a common issue when making bathroom signs because moisture in bathrooms can cause paint to lose adhesion. To prevent peeling, use a high-quality primer before painting and choose paint designed for humid spaces, such as outdoor or bathroom-specific paint. For signs already peeling, lightly sand the surface to remove loose paint, then apply primer and repaint. Avoid thick paint layers, which can crack and peel over time.
Vinyl lifting or bubbling happens when the surface isn’t properly prepared or the vinyl isn’t applied evenly. Always clean your sign’s surface with rubbing alcohol before applying vinyl to remove oils and dust. Applying vinyl at room temperature (60 to 80°F) helps it stick better. If you notice bubbles after applying vinyl, use a pin to gently prick the bubble and smooth it out with a squeegee or credit card from the center outward.
Uneven cuts in your sign materials, especially wood or acrylic, can spoil the final look. When cutting by hand, use a steady guide or a saw fence for straight lines, and ensure your blades are sharp to prevent rough edges. For vinyl lettering, use a sharp craft knife and replace the blade frequently. Uneven edges can be carefully sanded or trimmed with fine scissors for a cleaner finish.
Durability concerns often come from poor sealing and exposure to water or steam. Applying a clear waterproof sealant designed for your material, such as polyurethane for wood or a clear acrylic spray for plastic signs, protects against humidity and cleans easily. Let the sealant dry fully, usually 24 hours, and avoid placing signs directly under water streams to extend their life.
- Use a mild detergent and soft cloth to clean signs; avoid harsh chemicals that degrade paint and vinyl.
- Check signs regularly for peeling or lifting and address issues early with sanding or reapplication.
- Store unused vinyl in a cool, dry place to keep its adhesive fresh.
- Allow paint and sealants to cure completely before hanging the sign in a humid bathroom.
- Maintain tools like blades and sandpaper to ensure clean cuts and smooth finishes.
For best results, always test paint and vinyl on a small piece before working on the final sign to check adhesion and color in your bathroom environment.
Step-by-Step Action Plan
Follow these steps to create your own custom bathroom signs with confidence and style.
- Before you start: Gather all essential materials and tools such as wood or acrylic boards, paint, brushes, stencils, and hanging hardware. Check that everything works well and is safe to use.
- Day 1: Choose your design and decide on text and style. Sketch or print a template to guide your painting or lettering. Confirm your design fits the size of your sign board.
- Day 2: Prepare your sign surface by sanding and cleaning. Apply a primer or base coat if needed. Let it dry thoroughly before moving on.
- Day 3: Transfer your design using stencils or freehand painting. Use light strokes to avoid smudging. Confirm lines are clear and neat before the paint dries.
- Day 4: Add details, humor, or personal touches with smaller brushes or paint pens. Allow each color to dry completely to prevent bleeding.
- Day 5: Apply a clear sealer or finish to protect your sign from moisture and wear. Choose a finish suitable for bathroom conditions, such as waterproof or semi-gloss.
- Day 6: Attach hanging hardware or adhesive strips based on your wall type. Test the sign’s stability to ensure it hangs securely and straight.
- After 1 week: Evaluate the sign’s durability and appearance. Touch up any areas where paint chipped or finish dulled. This keeps your sign looking fresh for longer.
Frequently Asked Questions
What Materials Work Best for Waterproof Bathroom Signs?
Waterproof acrylic paint and sealed wood or plastic make durable bathroom signs that resist moisture. Using a clear sealant adds extra protection against steam and splashes.
Can I Use Stencils to Personalize My Bathroom Signs?
Yes, stencils help create neat, consistent lettering or shapes. They’re ideal for beginners who want precise designs without advanced freehand skills.
How Do I Incorporate Humor Without Offending Guests?
Use light, playful jokes like “Open 24 Hours The Bathroom Seat Yourself” that keep the tone friendly and avoid sensitive topics.
What’s a Good Way to Create Vintage-Style Bathroom Signs?
Try the Victorian style with decorative fonts and ornate borders. Distress the paint slightly to give an aged, antique look.
How Can I Safely Work on Bathroom Signs with Kids?
Choose non-toxic paints and kid-safe tools. Supervise closely during messy steps like painting or sanding.
What Framing Options Suit Printed Bathroom Signs?
Standard-sized frames are perfect for printable signs. They provide neat edges and make it easy to swap designs seasonally or by mood.
The Bottom Line
Creating your own bathroom signs lets you tailor the look to your space and personality. Take your time with each step to ensure a polished and durable final product. Start by picking a simple design and materials today, then build your skills as you go. Your custom sign will brighten your bathroom in no time.