How to Make a Stone Sign: A Complete Guide with Proven Steps
Making a stone sign starts with selecting the right type of stone and designing it for clear visibility and lasting durability. Carving techniques vary by stone hardness, so prepare your tools accordingly. Proper installation ensures your sign remains stable and easy to see from key viewpoints.
Key Takeaways
- Choose a stone that suits your climate and desired durability, like granite for harsh weather resistance.
- Design your sign with clear, readable fonts and consider the size to improve visibility from the roadway.
- Add 8 to 10 inches to the stone’s height to allow for a secure in-ground installation.
- Dig a hole at least 3 feet deep to provide stable support for larger stones.
- Sandblast letters at least 1/8 inch deep for a sharp, long-lasting engraved look.
- Check sight lines from main property approaches to ensure your sign is easily visible.
Choosing the Best Stone for Your Sign
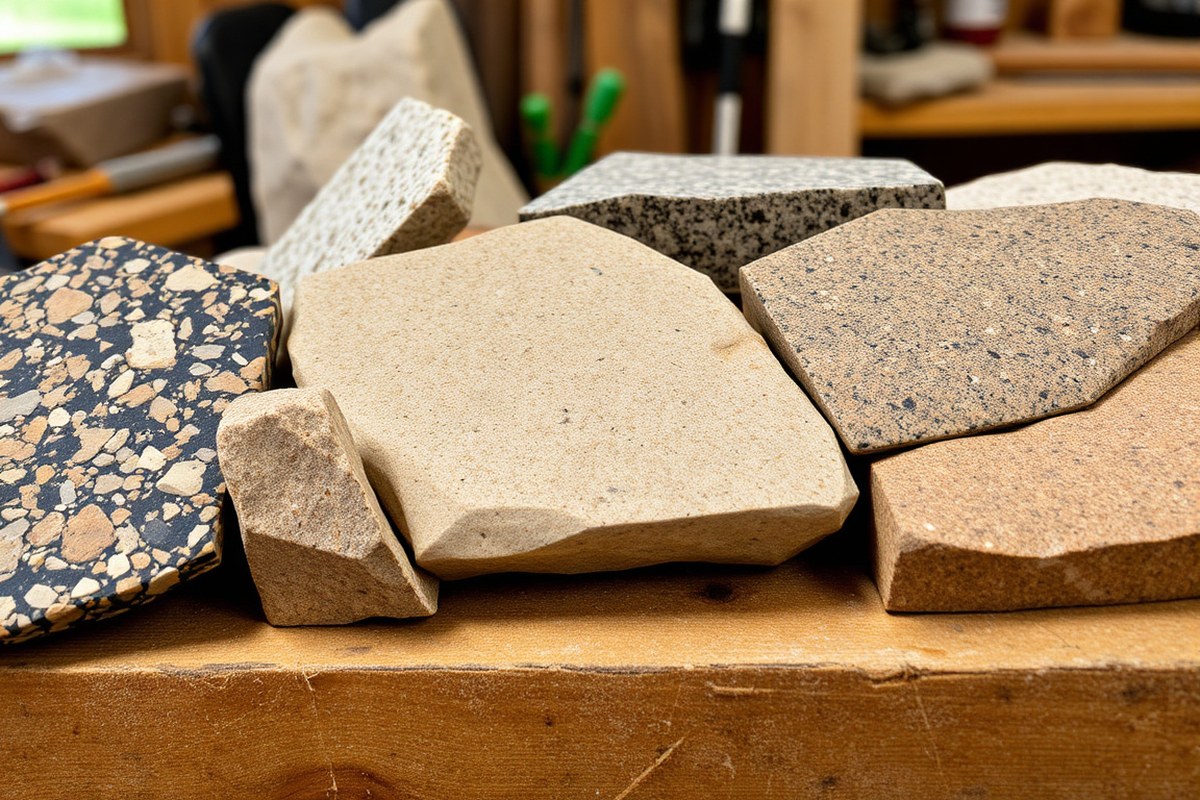
Choosing the right stone for your sign depends mostly on durability, appearance, and ease of carving or sandblasting. Common stones for outdoor signs include natural stones like granite and sandstone, as well as manufactured options like cast stone. Each type has distinct qualities that affect how long the sign lasts, how clear the lettering appears, and how difficult the crafting process will be.
Granite is one of the most durable natural stones, resistant to weathering, scratches, and fading. It holds up well outdoors and shows carving details sharply, making it excellent for signs that need to last decades with minimal maintenance. Sandstone is softer and easier to carve but less resistant to erosion and can lose detail over time. Cast stone, a manufactured mix that mimics natural stone, offers high durability and consistent coloration. It can be formed precisely in molds, allowing for clear text and smooth finishes. Cast stone is highly weather-resistant but may accumulate dirt or moss if not cleaned periodically.
Ease of carving or sandblasting matters because it affects your tools, time, and costs. Softer stones like sandstone and cast stone require less powerful tools and less effort, while granite demands diamond-tipped tools or specialized sandblasting setups. Cast stone’s consistent texture makes it especially suited for detailed sandblasting, including decorative designs or house numbers. Natural stones vary in hardness and grain, influencing how cleanly the letters cut or etch. The table below summarizes these key differences for homeowners planning a durable, readable, and attractive stone sign.
| Stone Type | Durability | Appearance | Carving/Sandblasting Ease | Typical Uses |
|---|---|---|---|---|
| Granite | Very high; resists weather, scratches, fading | Speckled, polished or honed finish; sharp carved details | Hard; requires diamond tools or powerful sandblasting | Long-lasting address signs, memorial plaques |
| Sandstone | Moderate; can erode or chip over time | Natural, earthy tones; softer textures | Easy; hand tools or standard sandblasting | Decorative signs, rustic look |
| Cast Stone | High; resistant to wear and weather | Uniform color; customizable textures and colors | Very easy; molds allow detailed designs, smooth finish | House numbers, custom decorative signs |
Using cast stone often simplifies the process since it is poured into molds and cured, providing consistent results in size, shape, and color. This material is a solid choice for homeowners seeking a durable and visually appealing sign with less need for specialized carving tools. Natural stones like granite offer a classic appearance and unmatched longevity but may require professional carving services and installation, especially when signs exceed 3,000 pounds according to Fischer Stone’s recommendations. Lighter signs under this weight can sometimes be a DIY project, but always ensure stable placement to prevent tipping or damage.
Designing Your Stone Sign for Maximum Impact
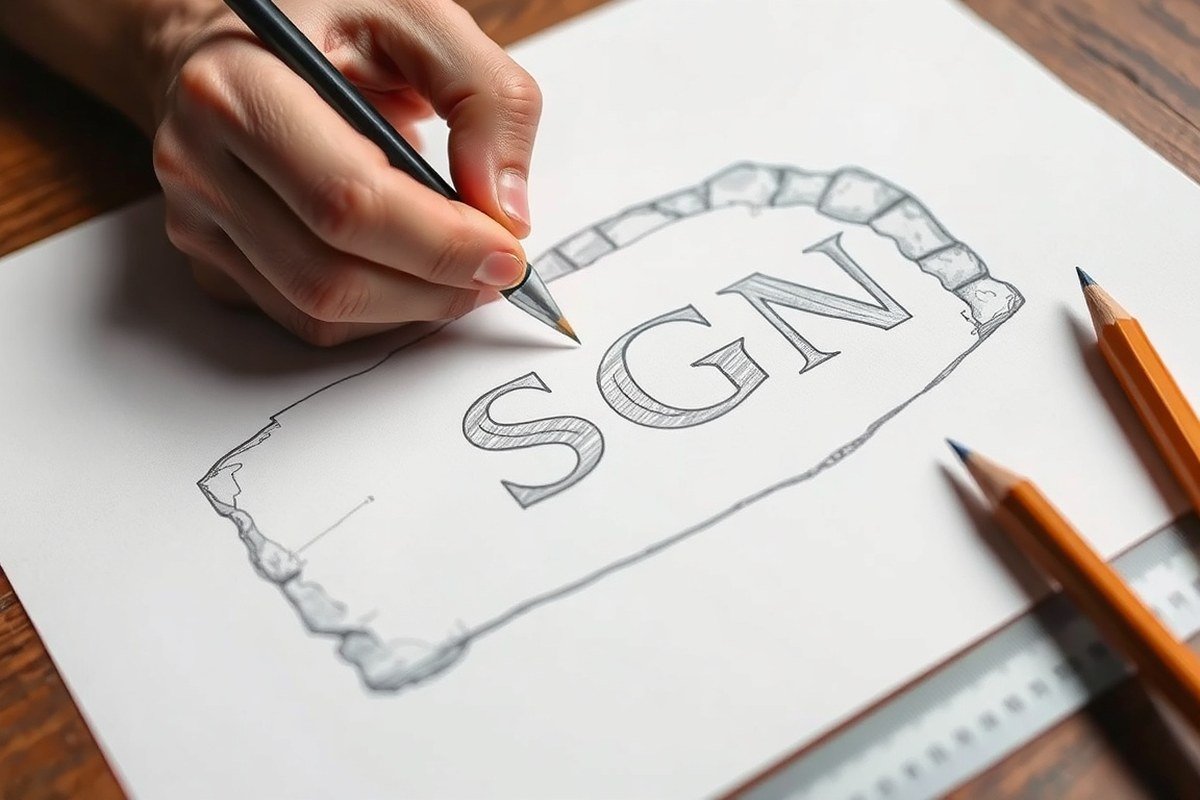
To create a stone sign that stands out clearly and looks attractive, focus on designing with readability, size, and the location of the sign in mind. Your choice of fonts, letter sizes, and the engraving depth should match the stone type and how much text you plan to display. Planning a precise layout before carving ensures a balanced and durable final product that complements its surroundings.
Selecting Fonts and Letter Sizes
Choosing the right font is critical for readability on stone surfaces. Sans-serif fonts with clean lines, such as Arial or Helvetica, often work best because they stay legible even when carved. Letter height should generally be at least 2 inches for visibility from a moderate distance. For longer text, increase the spacing between letters and lines to prevent crowding.
Avoid overly intricate or script fonts, as fine details may blur or chip over time with weather exposure. Black or dark paint fills on engraved letters usually provide the strongest contrast. The size of your letters influences pricing as larger or more letters require more stone removal and labor.
Planning the Layout and Text Placement
Effective sign design begins with creating a clear template that fits the stone’s dimensions and the sign’s intended location. Plan enough margin space around the text to avoid crowding the edges, typically leaving at least 1.5 to 2 inches of blank space on all sides. The total sign size should be proportional to the viewing distance, larger signs for front yard displays, smaller signs for doorframe placements.
A good layout balances text, any images or logos, and negative space. Use centered or left-aligned text depending on the shape of the stone and the general aesthetics of the location. Longer text demands a wider and taller stone to remain easily readable and attractive from a distance.
- Measure the stone’s face and note usable space after accounting for installation margins.
- Draft your text, deciding on the exact wording and any dates or numbers to include.
- Choose a font that suits the stone texture and desired style, testing sizes for readability.
- Sketch the text placement on paper or use design software to arrange letters and images.
- Check the layout visibility by holding a printout at the intended sign location distance.
- Adjust spacing or font size if necessary, ensuring no crowding or oversized gaps.
- Finalize the design template for transferring to the stone.
Preview your design at the actual viewing distance to prevent text that’s too small or overly crowded.
Choosing the Depth and Texture of Engraving
Engraving depth affects both the aesthetic and durability of your stone sign. A typical depth ranges from ¼ inch to ½ inch, enough to create clear shadows that aid readability but avoid excessive weakening of the stone surface. Depth should be consistent across all letters for a uniform appearance.
The texture of the engraving also plays a role: a smooth-faced carved letter creates a subtle, elegant look, while a more textured or rough cut highlights the text in varied lighting. Cast stone surfaces can be polished, burnished, or left matte, influencing how well the engraving stands out visually.
Deeper and more textured engravings tend to hold paint better and resist wear, but they require more labor and can increase costs. Match engraving depth and texture with the environment, areas exposed to weather may benefit from deeper carvings and protective paint fills, while indoor or sheltered signs can use shallower etching.
Essential Tools and Materials for Stone Sign Making
Making a stone sign requires specific tools and materials for carving, etching, mounting, and finishing to ensure durability and a clean look. You’ll need power tools for precision work, stencil and sandblasting supplies for design application, and the right paints and sealants to protect your sign from weather and wear. Knowing what to use and how to use it helps achieve professional results and long-lasting beauty.
Power Tools for Drilling and Carving
A hammer drill with masonry bits is essential to drill mounting holes in stone. Use one with variable speed and a strong motor to handle dense materials safely. For carving, angle grinders with diamond-tipped blades or rotary tools with carbide bits allow you to carve out letters and shapes accurately. These tools let you create clean edges and detailed inscriptions, which is critical for readability and a polished look.
Wear protective gear like goggles and dust masks while using power tools to avoid injury from stone dust and flying debris. Drilling holes should be done slowly and with steady pressure to prevent stone cracking. Expect to pay around $50 to $150 for a decent hammer drill and $20 to $60 for quality rotary bits. Good results show smooth, well-defined grooves without chips or breaks.
Stencil and Sandblasting Supplies
Stencils are used to outline your design on the stone before etching or sandblasting. You can create waterproof vinyl or adhesive stencils that hold tightly to the stone surface for clean lines. Sandblasting uses abrasive material, such as aluminum oxide grit, propelled by compressed air to etch the stone following the stencil’s pattern.
Using silicone caulk helps seal stencil edges to keep abrasive grit from undercutting your design, which maintains sharpness. Sandblasters vary in size and price, starting around $100 for a hobbyist model. The abrasive grit typically costs about $15 to $25 per 5-pound bag and may last through multiple signs. Effective sandblasting produces crisp, consistent etch depths, while poor technique can cause uneven or blurred edges.
- Vinyl adhesive stencils for detailed designs
- Silicone caulk for sealing stencil edges
- Sandblaster with adjustable pressure
- Aluminum oxide or similar abrasive grit
- Compressed air source compatible with the sandblaster
- Protective gloves and respirator mask
A clean workspace and proper preparation will help the stencil stick properly and the sandblaster operate safely and efficiently.
Painting and Sealing Materials
Choose exterior-grade acrylic or mineral-based paints designed for masonry to add color or highlight carved letters. These paints adhere well to textured stone and resist fading and peeling. For sealing, use a breathable stone sealer with water repellency properties to protect against moisture, mold, and freeze-thaw damage without trapping water inside.
Apply sealant with a brush or roller after the paint is thoroughly dry. One application a year is usually enough to maintain the stone’s appearance and prevent issues like mold or paint flaking. Sealers typically cost $20 to $50 per gallon and cover 250 to 400 square feet per coat. Proper sealing results in a slightly glossy or matte finish with no peeling or white buildup over time.
Carving and Etching Techniques for Stone Signs
Carving or etching letters, numbers, and designs into stone requires choosing the right method for the job and ensuring clear visibility and durability. The three main techniques include hand carving, sandblasting, and laser etching. Hand carving involves chiseling the stone directly and allows for deep, textured engravings, typically around 1/4 inch deep, which remain visible over time. This method offers a traditional look but requires skill and time. Sandblasting uses high-pressure air mixed with abrasive material to etch the surface. It is efficient for repeating patterns and lettering with depths ranging from 1/16 to 1/8 inch, offering crisp and clean results. Laser etching is good for fine details and shallow engravings but usually only about 1/32 inch deep, which may fade faster outdoors.
| Method | Pros | Cons | Recommended Depth |
|---|---|---|---|
| Hand Carving | Traditional, deep, textured, highly durable | Time-consuming, requires skill, expensive tools | ¼ inch or more |
| Sandblasting | Efficient, clean edges, suitable for most stones, replicable | Needs stencil prep, requires equipment, moderate cost | 1/16 to 1/8 inch |
| Laser Etching | Fine detail, fast, minimal dust | Shallow depth, less durable outdoors, costly | About 1/32 inch |
Accurate transfer of your design onto the stone is critical for a professional look. Stenciling is a common transfer method, especially for sandblasting. First, create a stencil by printing your design reversed onto adhesive vinyl or similar durable material. Cut out the letters and shapes, then clean the stone’s surface thoroughly using a mild detergent and water to remove dust and oils. After the stone dries completely, apply the stencil firmly, smoothing out any bubbles. Check alignment by stepping back to ensure visibility and reading comfort from the main approach to your property. Mask the surrounding area to prevent accidental abrasion during sandblasting.
To etch by sandblasting, wear proper safety gear including eye protection, gloves, and a respirator mask. Connect your sandblaster to a compressor with air pressure set between 70 and 100 psi, depending on stone hardness. Grit such as aluminum oxide or silicon carbide should be loaded according to the manufacturer’s instructions. Hold the sandblaster nozzle about 4 to 6 inches from the stencil, moving it at an even pace to achieve the desired depth without undercutting or over-etching. For letters and numbers, a depth around 1/8 inch is usually visible from a distance and resists wear. After blasting, wash the stone to remove residual grit and remove the stencil.
Hand carving involves marking the outline of your design using a pencil or chalk. Use a hammer and specialized chisels of different sizes and shapes, starting with a shallow outline before deepening the cuts. Carve slowly and test visibility regularly. Deeper cuts, about 1/4 inch or more, improve longevity but require more effort. You can improve visibility further by painting or filling the carved areas with weather-resistant paint once carving is complete and stone is clean and dry.
Installing Your Stone Sign for Stability and Visibility
Proper installation of your stone sign is essential for safety, durability, and clear visibility. You need to dig a sufficiently deep and wide hole, create a solid base with roadstone or gravel, and carefully position the sign where it can be easily seen. Following these steps will ensure your sign withstands weather and remains stable over time.
Preparing the Ground and Digging the Hole
Start by selecting a location that offers good visibility from the street or approach path, avoiding areas with heavy foliage or obstructions. The hole you dig needs to be deep enough to anchor the sign securely, typically about 3 feet deep. Make the hole slightly wider than the base of your stone sign to allow space for base materials and minor adjustments.
A wider and deeper hole prevents tilting or sinking over time, which can create safety hazards or damage the sign. Avoid filling any part of the hole with loose dirt, as it does not provide the required support.
Setting a Stable Base with Roadstone or Gravel
Use 3 to 4 inches of roadstone or crushed gravel at the bottom of the hole to form a firm base. Roadstone provides excellent drainage and compacts well, reducing the chance of settling or shifting. You can place bricks on top of the roadstone if your sign needs additional height or a level platform.
Compact the roadstone thoroughly using a tamper or by applying pressure with a heavy tool. This compaction creates a stronger foundation that prevents movement. Avoid substituting with loose dirt or sand as these materials will settle unevenly.
Positioning and Securing the Stone Sign
Position the sign facing the main viewing direction, usually toward the street or driveway entrance. The height should be high enough to avoid grass or snow covering the sign’s message, generally 3 to 5 feet above ground. Use a level to check vertical alignment and adjust the stone before filling around the base.
Once positioned, backfill around the base using the excavated soil mixed with some gravel for extra drainage. Tamp the soil firmly in layers to eliminate air pockets and ensure stability. If possible, fence or mark the area for 24 hours afterward to allow settling before heavy contact or weather exposure.
- Choose a visible spot near entrances or paths with clear sightlines.
- Dig a hole about 3 feet deep and slightly wider than the stone’s base.
- Pour 3 to 4 inches of compacted roadstone into the hole to form a solid base.
- Place bricks on roadstone if needed, to level or raise the sign.
- Set the stone sign on the base, ensuring it faces your desired viewing angle.
- Level the sign vertically with a carpenter’s level.
- Backfill the hole with a mix of soil and gravel, tamping down in layers.
- Mark or fence the area for a day to allow the soil to settle.
Never fill the hole with only loose dirt; this weakens support and can cause your sign to lean or fall over time.
Adding Color and Finishing Touches to Stone Signs
To add paint or sealant to your stone sign for improved appearance and weather protection, start by selecting high-quality exterior paint designed for masonry or concrete surfaces. Acrylic latex paint is a good choice because it adheres well to stone, resists fading, and withstands outdoor conditions. Use a small angled brush to carefully paint details like numbers or letters, ensuring clean lines and better visibility. Applying paint in thin, even coats helps prevent peeling and flaking. Allow each coat to dry fully before adding another, which typically takes a few hours depending on temperature and humidity.
Before painting, make sure the stone is completely dry and free of dust or debris; moisture on the surface can cause paint to lift or bubble. To improve durability, lightly roughen smooth stone areas with fine-grit sandpaper to improve paint adhesion. Avoid painting when the temperature is below 50°F or above 85°F, as extreme temperatures can affect drying and bonding.
Once your paint has dried and you are satisfied with the coverage, apply a breathable concrete sealer over the entire stone surface. This step protects your work from moisture infiltration, UV damage, and dirt accumulation without trapping moisture inside the stone, which can lead to deterioration. Concrete sealers are available in most hardware stores and paint centers, usually costing around $15 to $30 per quart. Apply the sealer evenly with a clean brush or spray, following the manufacturer’s instructions. Allow it to dry completely, which typically takes 24 hours.
For a finishing texture that improve the sign’s visual appeal, opt for a matte or satin sealer rather than a glossy finish, which can look artificial and may highlight imperfections. Polishing natural stone surfaces before sealing, using a stone-specific buffer or fine sanding pads, can give a smoother, more refined appearance if you prefer a subtle sheen. Avoid using standard polyurethane sealants intended for wood, as these can trap moisture, causing paint to flake or stone to degrade.
Good results show as sharp, vibrant paint lines with no visible peeling over several months. You can expect the paint and sealer combination to last at least three months without flaking, according to Fischer Stone’s 90-day warranty against paint flaking, but regular inspection and touch-ups may be needed in harsh climates. Signs exposed to heavy rain or direct sun might require resealing every one to two years to maintain protection.
Failures usually happen when paint is applied over damp stone, or if the wrong type of paint or sealer is used. Low-quality paint tends to chip quickly, while sealers that are too thick or non-breathable cause moisture buildup and peeling. Following these precise steps will help your stone sign maintain its color, clarity, and structural integrity for years outdoors.
Maintaining and Protecting Stone Signs over Time
Stone signs endure outdoor conditions that can dull their appearance or cause damage over time, so regular maintenance is key to keeping them looking their best and lasting longer. Cleaning stone signs gently removes dirt, grime, and biological growth without harming the surface or the carved details. Use a soft-bristle brush or sponge with mild soap and water. Avoid harsh chemicals or wire brushes that can scratch or erode the stone. Rinsing thoroughly with clean water prevents residue buildup. Cleaning once or twice a year, ideally during spring and fall, balances upkeep with avoiding excess moisture exposure.
Applying a sealant every few years protects stone signs from water penetration, staining, and frost damage, especially in climates with freeze-thaw cycles. Sealants designed for natural stone typically last 3 to 5 years. Before resealing, the sign must be clean and completely dry. Test the sealant on a small hidden area first to check for any discoloration. Similarly, repainting carved or etched designs refreshes their visibility but should be restricted to when paint starts fading or chipping. Use exterior-grade paints formulated for stone and follow manufacturer directions for application and drying times.
Preventing moss, lichen, and dirt buildup reduces moisture retention that accelerates erosion and weakening. Keep the area around your stone sign clear of overhanging branches, leaf litter, and dense vegetation to improve airflow and sunlight exposure. Trim plants and avoid soil or mulch mounding up against the sign’s base, which can trap moisture. If moss or algae appear, apply a diluted bleach solution (1 part bleach to 10 parts water) with a sponge, then rinse well after 10 minutes. Protective measures reduce permanent damage and costly repairs.
- Clean the sign gently with a soft brush and mild soap twice a year
- Rinse thoroughly and allow the stone to dry completely before sealing
- Reseal stone signs every 3 to 5 years according to sealant recommendations
- Repaint carved areas only when paint fades or flakes, using stone-compatible exterior paint
- Keep the area around the sign clear of overgrown plants and debris
- Trim nearby vegetation to improve sunlight exposure and reduce moisture
- Treat moss and algae with a diluted bleach solution followed by rinsing
Performing a seasonal inspection during cleaning helps identify small cracks, chips, or loose pieces early. Catching these early allows timely repairs and prevents bigger problems. Avoid power washers or ice scrapers that can damage the stone. Low-maintenance natural stones like granite need less frequent intervention than softer stones like limestone. Recognizing these differences guides your maintenance frequency and protects your investment in a long-lasting stone sign.
Safety Precautions and When to Hire Professionals
Carving and installing stone signs involves handling heavy materials and specialized tools, which makes safety gear essential. You must wear safety goggles that shield your eyes from flying chips and dust. Respirators or dust masks are important to prevent inhaling fine stone dust that can harm your lungs. Sturdy gloves protect your hands from sharp edges and rough surfaces. Hearing protection is also important if you’re using power tools like grinders or chisels.
Understanding specific hazards can help you avoid injuries. Stone dust can cause respiratory problems without proper ventilation or masks. Power tools can kick back or slip, leading to cuts or bruises, so maintaining a firm grip and stable stance is necessary. Heavy stones pose risks of crush injuries during lifting or positioning. To avoid accidents, always clear your workspace of tripping hazards and work on a stable surface.
- Wear safety goggles, dust mask, gloves, and hearing protection during carving.
- Check all power tools before use for damage or loose parts.
- Secure the stone firmly to a non-slip work surface before carving.
- Lift heavy stones with help or use mechanical aids like hoists or dollies.
- Ensure good ventilation or work outdoors to reduce dust buildup.
- Keep children and pets away from the work area.
- Follow manufacturer instructions for installing adhesives or anchors.
Avoid dry cutting stone without dust control, wet cutting or properly ventilated spaces reduce hazardous airborne dust.
Deciding whether to hire a professional depends on the project’s complexity and your experience. Deep or detailed carving, cutting large stone slabs, or installing heavy signs on masonry or concrete foundations are tasks often best left to experts. Professionals have specialized tools like pneumatic hammers and diamond blades, plus the know-how to prevent stone cracking or improper mountings that cause early failure.
Costs for professional help vary widely. A skilled stone carver may charge between $50 and $150 per hour. Installation specialists typically charge $300 to $700 depending on sign size, site access, and mounting method. If you lack the right tools or aren’t confident in safely handling power tools and heavy materials, hiring is a safer and more efficient choice.
Use this decision guide: choose DIY if your project involves small, simple engravings with hand tools and you have a proper workspace. Opt for a professional if the stone is large, the design is intricate, installation requires anchored mounting to walls or posts, or your safety gear and tool skills are limited.
Step-by-Step Action Plan for Making Your Stone Sign
Follow these steps to create a durable and attractive stone sign you can proudly display at home.
- Day 1: Select Your Stone, Choose a stone suitable for outdoor use, like granite or limestone. Verify it’s free of major cracks or flaws to ensure durability.
- Day 2: Plan Your Design, Sketch your sign layout with clear lettering and spacing. Confirm the design fits the stone size and will be easily visible from a distance.
- Day 3: Gather Tools and Materials, Collect carving tools, safety equipment, sealants, and paint. Check that all equipment functions properly before starting.
- Days 4-5: Carve or Etch the Design, Carefully follow your design using the appropriate carving or etching techniques. Periodically check progress for accuracy against your plan.
- Day 6: Add Color and Seal, Apply paint to carvings if desired, then seal the whole surface with an outdoor sealant. Confirm coverage is even and allow drying time.
- Day 7: Install Your Sign, Secure the stone sign in a stable location using concrete or suitable mounting hardware. Test stability and visibility from typical viewing angles.
- After 1 Month: Inspect and Maintain, Clean the sign gently and check the sealant condition. Reapply sealant if water absorption or fading appears to maintain its appearance.
Frequently Asked Questions
What Is the Best Way to Ensure My Stone Sign Won’t Fall over Once Installed?
Lean your stone sign against a stable immovable object or another stone to keep it secure. This method prevents the sign from tipping over without complex anchoring systems.
Can I Create a Cast Stone Sign at Home Without Special Equipment?
Yes, you can make a cast stone sign by mixing and pouring the mixture into a mould. It needs careful preparation and curing time but doesn’t require bulky machinery.
How Do I Decide the Ideal Size for My Stone Sign?
Choose a size based on visibility needs and space, usually influenced by property scale. Larger signs need special consideration for installation and often require professional assistance.
Are Custom Fonts Important When Designing a Cast Stone Sign?
Yes, selecting the right font affects both readability and style, making your sign attractive and easy to read. Simple, bold fonts generally work best for outdoor stone signs.
When Should I Get a Professional’s Help for Stone Sign Installation?
If your stone sign weighs over 3,000 pounds, a landscape engineer’s plan and professional installation are recommended for safety. Heavy signs require specialized equipment and expertise.
Can Cast Stone Signs Be Made in Different Colors and Finishes?
Cast stone signs come in various colors, textures, and finishes like smooth, burnished, or polished for matte or slightly reflective surfaces. This allows customization to match your property.
Final Thoughts
Creating your stone sign involves careful selection, precise carving, and careful finishing to stand up to outdoor conditions. Starting with a clear design and taking your time on each step will deliver the best results. Begin by selecting the right stone today, and take the next step toward crafting a sign that adds permanent character to your home. Taking these measured actions leads to a sign you can maintain and enjoy for years.