How to Make a Trail Sign: A Complete Guide with Durable DIY Methods
Knowing how to make a trail sign starts with choosing durable materials that hold up to weather and clear paint or carving for easy reading. Use wood or heavy plastic and add reflective paint or deep routed letters filled with paint for visibility. Begin with a simple design that lets hikers quickly understand directions or warnings.
Key Takeaways
- Use paint blazes like the Appalachian Trail’s 2-by-6-inch rectangles for simple, effective trail markers.
- Route letters about 1/4 inch deep in wood and fill them with bright paint for long-lasting clarity.
- Choose materials like weather-resistant wood or heavy plastic to ensure trail signs last outdoors.
- Design signs with clear symbols and legible fonts to help hikers easily handle the trail.
- Place mileage markers to assist hikers and enable quick emergency location by 911 operators.
- Install signs securely using posts or mounts to withstand wind and possible vandalism.
How to Make a Durable and Clear Trail Sign
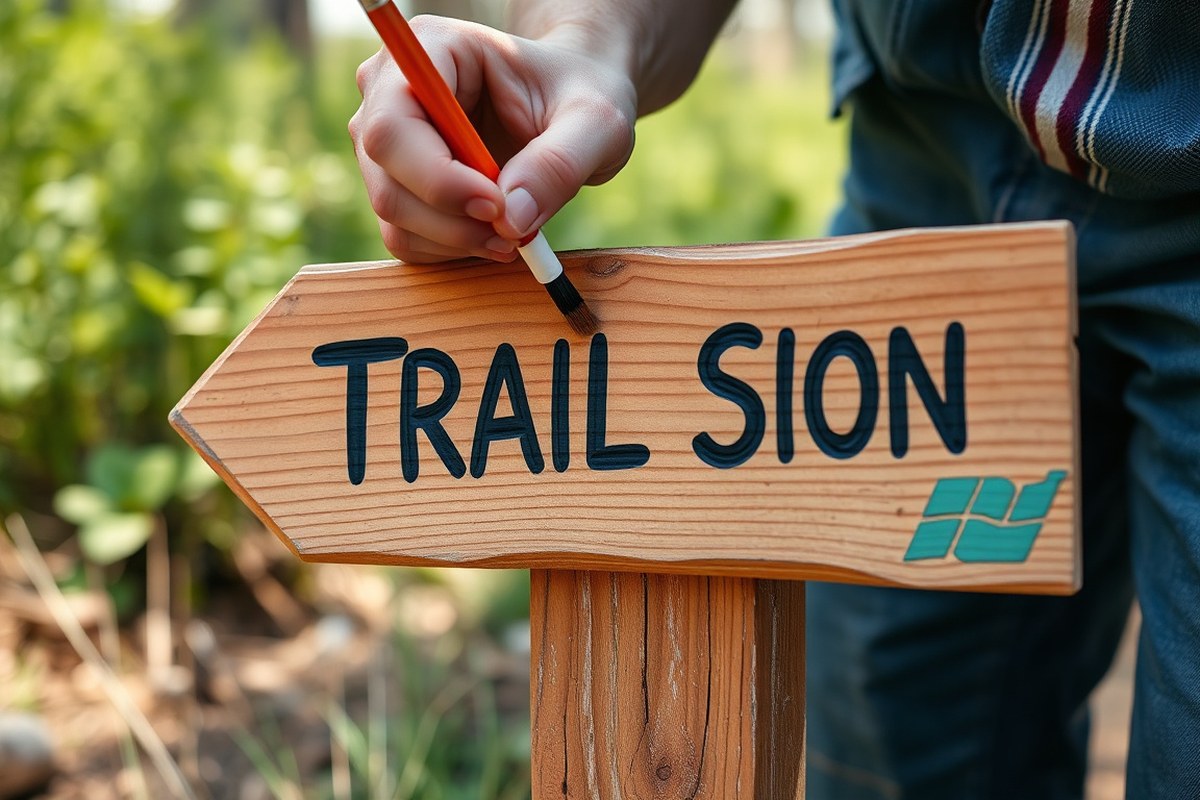
A clear, visible trail sign starts with choosing materials that stand up to outdoor conditions like sun, rain, and temperature changes. Wood or composite boards work best because they hold paint and resist weathering. Use outdoor-grade paint and sealant to protect your design. Tools such as a saw, sanding block, paintbrushes, and, if you want a professional finish, a Dremel for routing letters or shapes will help. Making one sign usually takes about 15 minutes once you get used to the tools.
Before you start, pick a smooth board, about 12 by 18 inches, that fits your message. Lighter colors contrast well with dark paint for readability. Clear signs help hikers make safe trail choices and minimize confusion that can cause accidents or stress. Follow these steps to create a durable, readable trail sign:
- Cut and sand your wood or composite board to size, smoothing edges to avoid splinters.
- Design your layout by marking letters or symbols lightly in pencil where you want them.
- Carve or route the design using the Dremel tool if available, for precision raised or recessed letters. Without a router, paint works well over the pencil marks.
- Paint the letters and background using outdoor-grade, weather-resistant paint. Use contrasting colors so the sign is easy to read from a distance.
- Apply a clear sealant over the entire sign once paint is dry. This protects against moisture and fading. Allow 24 hours to dry thoroughly.
- Attach mounting hardware such as brackets or screws that won’t rust, depending on your installation method.
- Check visibility by placing the sign where hikers will encounter it and ensure it’s readable in different light conditions.
For trail signs exposed to heavy sunlight or rain, UV-resistant paint and marine-grade sealants increase lifespan. Avoid using signs made only of paper or untreated wood that warp or fade quickly. Keep a master list documenting your signs, materials used, and maintenance dates to track their condition. Durable signs save you time and effort in upkeep and keep your trail system reliable for hikers.
What Types of Trail Signs Should You Use and Where
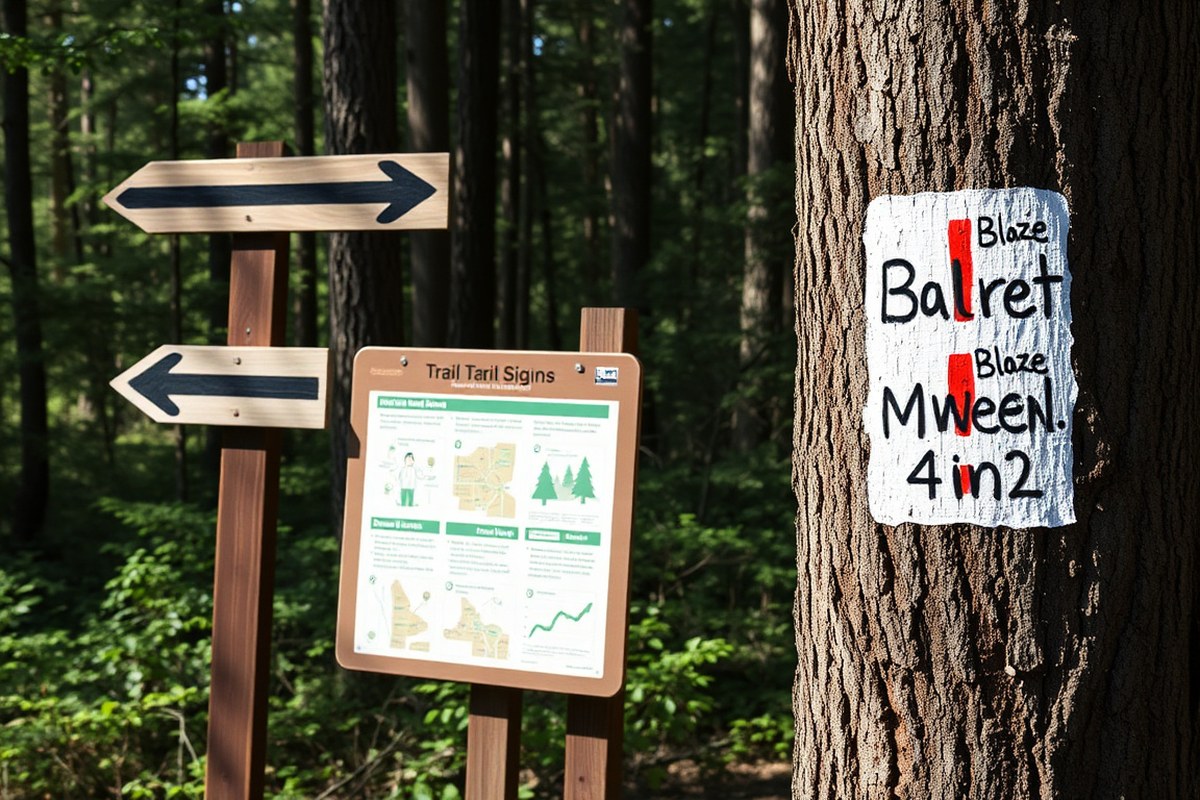
Trail signs vary by purpose, from marking starting points and junctions to confirming the trail and providing safety information. Using the right type of sign in the right spot keeps hikers on track and informed, preventing confusion and improving the outdoor experience. Proper placement, at trailheads, junctions, and critical decision points, is key to effectiveness and should match the function of each sign type.
Trailhead Signs and Identifiers
Trailhead signs serve as the main introduction and information hub for hikers. These include kiosks, bulletin boards, or display panels that state the trail name, key map details, rules, and any regulatory notes. Placing them prominently at the trail start lets hikers gather necessary information while they prepare, making these signs highly visible and usually large enough to accommodate multiple posts or brochures.
These signs matter because many trail users spend time here gearing up or waiting for rides, ensuring the information is noticed. Including dimensions when requesting or planning trailhead signs is important to make sure the text and images are readable at a distance. Trailhead signs can cost more than smaller markers due to size and materials, but their value for orientation and safety is significant.
Directional Signs and Arrows
Directional signs guide hikers at junctions and points where the trail splits or bends. They show trail names, directions, and distances to important waypoints or destinations. These signs help hikers make decisions quickly and reduce the risk of getting lost, especially in areas with multiple intersecting trails.
Place directional signs at all junctions and fork points, as well as before challenging trail sections where hikers might hesitate. Use arrows painted on wood or metal signs, or removable arrow inserts on posts, ensuring the paint or materials used are weather-resistant to last several seasons. These signs should be placed at eye level and positioned so the arrows clearly point down the correct path.
Blazes and Paint Markings
Blazes are painted marks on trees, rocks, or posts that confirm hikers are staying within the trail corridor. They do not replace directional signs but act as reassurance markers where trails are difficult to follow, such as through dense woods or along winding routes. Common blaze colors and shapes communicate the trail identity or specific warnings according to local standards.
Apply blazes at regular intervals, such as every 50 to 100 feet where the path may be unclear. They are inexpensive and quick to apply but require periodic maintenance because paint fades and trees grow. Blazes are important for continuous visual confirmation and can be used alongside small wooden or metal posts in open areas. Use contrasting colors to stand out from the natural environment.
Informational and Safety Signs
Informational signs include messages about points of interest, trail etiquette, or warnings about upcoming trail difficulty. Safety signs inform hikers about hazards such as steep slopes, wildlife, or unstable ground. These signs improve decision-making and trail safety by providing hikers with relevant, timely information.
Place these signs before dangerous sections or at notable spots along the trail where hikers naturally slow down, such as overlooks or campsites. Their size can vary depending on the message but should be readable from a distance of 10 to 15 feet. Use clear symbols and concise language to make sure the meaning is immediately apparent, even to those with limited hiking experience. Here is a summary of the main trail sign types with typical placement and purpose to help decide which to use where:
| Sign Type | Purpose | Typical Placement | Material/Size Notes |
|---|---|---|---|
| Trailhead Signs | Name, rules, maps, info | At trail entrances | Large kiosks or bulletin boards, visible and durable |
| Directional Signs | Show directions, trail junctions | Junctions, splits, before tricky sections | Arrows on posts or wood; eye level; weather-resistant |
| Blazes | Confirm trail corridor, reassure hikers | Along trail every 50, 100 feet in unclear terrain | Paint marks on trees, rocks, or posts; contrasting colors |
| Informational/Safety Signs | Warnings, points of interest, guidelines | Before hazards, points of interest, campsites | Readable at 10, 15 feet; clear symbols; concise wording |
Good results depend on placing the right sign type in the best location. Signs too close together or in overly remote spots may go unnoticed or be ignored. On the other hand, too few signs create confusion and frustration. Using a mix of these types lets hikers prepare, stay on course, and enjoy safer, more informed outings.
Place directional signs immediately before trail junctions and at decision points to prevent hikers from missing a turn or going off-route.
How to Design Trail Signs That Hikers Easily Understand
Trail signs should be instantly readable and clearly understood at a glance. This means focusing on size, font, color, symbols, and text that work well for hikers in diverse conditions. Effective designs follow proven principles that improve visibility, guide interpretation, and account for all trail users.
Choosing Size and Font for Visibility
Sign size depends largely on where and how far away it will be viewed. For trailheads or major junctions, use larger signs, around 18 by 24 inches, to catch the eye quickly. Smaller signs, like trail blazes or markers along the route, can be 6 by 9 inches or less, as hikers see them up close.
Font choice affects legibility. Sans-serif fonts such as Helvetica or Arial work best because their clean lines improve readability on signs viewed from several feet. Letter height should be at least 1 inch tall for signs read from 10 to 15 feet. Avoid decorative or condensed fonts that might blur or look crowded when printed.
Using Color Codes and Symbols Correctly
Colors must stand out against the natural background but also convey meaning. Use high-contrast color pairs, like white text on dark green or black on yellow. Blue, red, green, and yellow are common choices for trail categories, but more important than color alone is combining it with symbols or text. This helps hikers who are color-impaired.
Symbols reduce language barriers and speed recognition. Arrows for directions, dots or shapes for trail difficulty, and pictograms for amenities (like water or restrooms) are practical. Choose simple, clear icons consistent with established trail sign standards in your area.
- Use white or light-colored text on dark backgrounds for better contrast
- Keep color coding consistent throughout the trail system
- Incorporate directional arrows and universally understood symbols
- Reserve red or bright colors for warnings or important notices
- Test sign visibility in different lighting conditions, including shade and dusk
Applying these principles improves wayfinding and safety, especially at critical points like trail junctions or potential hazards.
Making Signs Inclusive and Unambiguous
Design for all hikers means accounting for those with color vision deficiencies and varying literacy levels. Combining colors with shapes or symbols and including brief, clear text helps avoid confusion. For example, pairing a blue circle symbol with the word “Loop Trail” makes the sign accessible to more users.
Keep messages concise and use plain language. Avoid long sentences or technical jargon. Use all-capital fonts sparingly and prefer title case or sentence case for easier reading.
Good signs maintain consistent layouts and mark consistent landmarks, so hikers learn to trust and understand the system. For instance, placing trail difficulty at the top left and destinations below right on every sign helps hikers find information quickly before proceeding.
Step-by-Step Installation of Trail Signs
Installing trail signs securely and legally ensures they remain visible and intact while respecting the environment and property rules. Many areas, including states like Florida, prohibit mounting signs on living trees to prevent damage. Use posts instead to comply with guidelines and provide a sturdy, long-lasting support. Choosing the right tools and following precise steps lowers the risk of sign failure or environmental harm.
Begin with selecting a durable post material such as treated wood or rust-resistant metal. Your supplies should include a shovel or post hole digger, a level, screws or bolts suitable for outdoor use, a drill or screwdriver, and protective gloves. Prepare by checking local regulations about permit requirements and allowable locations to avoid legal issues. Follow these key steps to install your trail sign securely and respectfully:
- Choose the location: Pick a visible spot along the trail away from natural obstacles. Avoid trees and private property unless you have explicit permission to install signs there.
- Dig the post hole: Use a shovel or post hole digger to create a hole 18 to 24 inches deep, depending on the expected post height. A deeper hole increases stability, especially for taller signs.
- Set the post: Place the post in the hole and fill it with soil, tamping it down firmly. Adding gravel at the base can improve drainage and reduce wood rot. Use a level to confirm the post is straight before finalizing.
- Attach the sign: Position your pre-drilled sign onto the post at a height readable by most hikers, generally around 5 to 6 feet from the ground. Secure it with corrosion-resistant screws or bolts using a drill or screwdriver.
- Verify stability: Wiggle the post gently to ensure solid footing. Reinforce with additional soil or consider concrete if the ground is loose or the trail faces frequent heavy use.
- Inspect for compliance: Make sure your sign doesn’t block visibility on the trail and meets any local or park regulations for size, content, and placement.
- Maintain clear surroundings: Trim back brush or branches that could hide the sign over time. Clear paths help hikers spot signs quickly, improving trail safety.
Proper installation usually requires one to two hours depending on ground conditions and sign complexity. Costs vary, with treated wood posts costing between $10 and $30 each and outdoor-grade hardware around $5 to $15. Using posts avoids harming trees and offers a professional appearance seen in trails like those in the Spanish Fork River area, where metal and stainless steel signs maintain durability and visibility.
Signs installed incorrectly may lean, fall, or rot prematurely. Posting directly on trees risks the sign falling as the tree grows or suffers damage, violating regulations and harming the environment. Solid installation on posts protects your investment and ensures hikers benefit from clear, safe trail guidance for years.
How to Maintain and Update Your Trail Sign System
Regular inspection of trail signs is essential to keep them visible, legible, and safe for users. Conduct visual checks at least twice a year, ideally in spring and late fall, to catch wear from weather or vandalism before it worsens. More frequent inspections are needed in high-traffic areas or those exposed to harsh sun, heavy rain, or snow. Use a simple checklist: verify the sign’s mounting is secure, check for fading or peeling paint, clean off dirt or moss, and look for any structural damage like cracks or rot in wood signs.
Cleaning signs extends their life and improves readability. Use mild soap and water with a soft brush or cloth to remove dirt and biological buildup. Avoid harsh chemicals that can strip protective coatings. After cleaning, inspect painted signs for chips or fading. Small areas of paint loss can be touched up using exterior-grade paint matched to the original colors. For wooden signs, applying a clear weatherproof sealant every 2 to 3 years prevents moisture damage and sun bleaching.
Volunteers can manage minor repairs like tightening or replacing screws, repainting faded letters, resealing wooden surfaces, and reattaching loose sign panels. Always use weather-resistant hardware such as stainless steel screws or bolts. If a signpost leans or shifts, reset it firmly in the ground or in concrete, if applicable. Complex repairs involving structural damage, graffiti removal requiring special cleaners, or electrical components for lit signs call for a professional. Safety must come first, especially when working on signs near roadways or steep trails.
Signs should be replaced when damage affects their visibility, durability, or the accuracy of the information they convey. Cracked, warped, or severely faded signs that need repeated repairs are less cost-effective to maintain than to replace. Signs older than 10 years, or that use obsolete trail symbols, may require updates both to materials and design standards. New materials might offer longer life or better visibility, such as reflective paint or composite panels resistant to cracking and fungal growth.
A basic maintenance routine might follow this script: check mounts and surfaces; clean with soap and water; assess paint and wood conditions; apply touch-up paint and sealant as needed; tighten fasteners; document condition with photos and notes; schedule next inspection. Depending on trail location and materials, maintenance costs vary but plan on budgeting $10 to $40 per sign annually for cleaning supplies, paint, sealants, and hardware.
Keep a maintenance log for each sign to track inspection dates, work done, and any issues found; this helps plan timely repairs and replacements efficiently.
Common Mistakes in Making Trail Signs and How to Fix Them
Trail signs often fail because they are hard to see or confusing. Signs placed too low or tucked behind foliage become invisible to hikers. Using unclear symbols, small fonts, or faded colors can leave hikers guessing, increasing the chance of getting lost. Ensuring signs are large enough, with contrasting colors and simple, universally understood symbols is essential for clear navigation.
Another frequent error is installing signs without considering legal rules. Many public trails are on protected land where unauthorized signs can lead to fines or removal. Always check local regulations and get permission before installing signs. This prevents legal issues and helps preserve natural habitats. Improving the visibility and comprehension of trail signs requires a practical checklist of common fixes:
- Place signs at eye level, roughly 5 to 6 feet above ground, for easy spotting.
- Use reflective paint or materials to keep signs visible in low light conditions.
- Choose high-contrast colors like black text on a white or yellow background.
- Keep text simple, no smaller than 1 inch tall, and avoid jargon.
- Line up signs so they face the trail entrance or junction for direct sightlines.
- Remove overgrowing plants regularly to maintain clear lines of sight.
- Confirm all signs comply with local trail management and landowner permissions.
Erasing confusion means going back to the design and placement. For instance, if hikers report missing a junction, reposition the sign closer to the fork or add an arrow pointing clearly. Worn-out signs should be refreshed with new paint or replaced every few years, especially if exposed to sun and rain. Using weather-resistant materials helps reduce frequent replacements.
Another fix to consider is standardizing symbols across your trail system. Different styles or fonts on multiple signs can puzzle users. Selecting a few basic icons for restrooms, water sources, or danger areas and using them consistently improves recognition. Hikers will rely on the signs more if they feel confident understanding each one at a glance.
Following these steps costs little beyond time and basic materials. Simple changes, like trimming brush or increasing font size, are free or low expense. Installing regulated, durable signs around $50 to $150 each, depending on size and materials, fits many budgets. The payoff is safer, more enjoyable hiking experiences and fewer calls to park services for trail assistance.
Using Natural and Temporary Materials for Trail Marking
You can use natural materials like rocks, sticks, and logs to safely mark trails for short-term use without harming the environment. These low-impact markers help hikers follow the path while leaving minimal trace. For example, stacking small stones into cairns on stable ground or arranging sticks to point in the intended direction works well for clear visibility without permanent alteration. Natural markers suit temporary or minimalist needs such as short hikes, events, or maintenance detours.
Paint blazes offer a more visible but still low-impact alternative. Use quick-drying, water-based paint made for outdoor use. Apply paint in small, consistent shapes like rectangles or circles on trees or large rocks about 4 to 5 feet from the ground, height that fits the average hiker’s line of sight. The standard blaze size is 2 by 6 inches. Paint blazes are better than natural markers when visibility in dense vegetation or fog is necessary. Avoid using paint in protected areas with rules against marking living trees.
Start by surveying your trail and noting natural features such as large boulders, unique tree shapes, or forks that work as natural waypoints. Use lightweight materials so you can dismantle your markers easily when finished. Place cairns where soil erosion won’t be affected and avoid stacking unstable rocks that could fall and cause accidents. Sticks arranged in arrow shapes should be clearly aligned with the trail direction and not obstruct paths or fragile vegetation.
Costs for natural and temporary markers are minimal. You may only need a small supply of biodegradable flagging tape or natural twine to bind rocks or sticks if required. Paint and brushes can cost around $10 to $20 per trail section, depending on length. Checking your markers regularly prevents them from being missed or displaced by weather or animals.
Results look best when markers are spaced consistently every 100 to 200 feet in open areas and closer near intersections or confusing spots. Signs should be instantly noticeable but blend into the environment to avoid disturbing wildlife. Poor results happen if markers are too small, placed inconsistently, or hidden by undergrowth. Also, using bright, unnatural materials can disorient or clutter the natural setting.
For winter or snowy conditions, natural markers struggle as snow covers ground-level signs. Bright paint blazes or flagging tied to branches at 6 feet or higher can guide hikers better. On rocky terrain where stacking stones is easy, cairns work well year-round. In heavily wooded areas, paint blazes on trees provide reliable navigation points but remove them when the trail closes to avoid long-term visual pollution.
Safety and Legal Considerations for Trail Sign Installation
Installing trail signs requires permission from the appropriate landowners or managing authorities and a clear understanding of local regulations to avoid legal issues. Including safety and emergency details on signs helps protect hikers and supports quick responses in urgent situations. Following best practices prevents environmental harm and respects property boundaries.
Obtaining Landowner and Authority Permissions
Before placing any trail signs, you must secure permission from the landowner or the agency managing the land. Public lands often fall under the jurisdiction of agencies like the National Park Service or local forest districts, which have specific sign approval processes. For private property, contact the landowner directly and obtain written consent that outlines the location and type of sign allowed. This avoids legal disputes and ensures ongoing trail access.
The process may take several weeks, depending on the authority’s review policies. You may need to submit your sign design and proposed locations for approval. Expect to follow certain standards for sign materials and wording to maintain consistency with existing trail markers. Document all permissions carefully for future reference.
Including Emergency and Contact Information
Trail signs should include clear emergency instructions and contact information to improve hiker safety. At minimum, display a phone number for local emergency services or park rangers along with directions to the nearest help station or trailhead. If cell service is unreliable, post an estimated distance to the nearest location where help can be found.
Adding information on common hazards, such as steep sections or wildlife warnings, helps hikers prepare for conditions. Keep the information concise and prominent to avoid cluttering the sign. Use symbols or icons recognized universally by hikers for quick comprehension, especially in remote areas.
Avoiding Trespassing and Environmental Damage
Locating signs only within authorised trail corridors prevents trespassing on private or sensitive areas. Avoid placing signs where they encourage shortcuts or off-trail detours that can damage vegetation or disturb wildlife habitats. Consult local land-use maps and coordinate with land managers on allowable placements.
Use removable or low-impact fasteners and install signs at heights that minimize damage to surrounding plants. Regularly inspect signposts for erosion or weakening supports, especially in high-traffic or wet areas. Keeping signs well maintained also reduces the risk of vandals or careless removal leading to trail confusion or accidental trespassing.
Avoid installing signs where they might direct hikers into restricted or environmentally sensitive zones, as this can cause legal issues and habitat destruction.
Step-by-Step Action Plan for Your Trail Sign Project
Follow these steps to start making and installing effective trail signs that serve hikers well and hold up outdoors.
- Before You Start: Choose the type and location of your trail signs based on the trail’s layout and user needs. Success means your signs address common decision points and hazards.
- Day 1: Design your sign with clear symbols and concise text using contrasting colors for visibility. Confirm readability from a typical walking distance of about 10 feet.
- Days 2, 3: Gather your materials, use weather-resistant wood, metal, or approved plastics. You’ll know you’re ready when your sign materials withstand a water spray test without damage.
- Day 4: Assemble and paint or carve your sign using durable outdoor paint or engraving tools. The sign should resist scratches and fading from sun exposure.
- Day 5: Install your sign securely using appropriate tools, ensuring it is stable and clearly visible along the trail. Test visibility from multiple approach angles.
- Week 2: Walk the trail to check sign placement for clarity and usefulness during regular hiking conditions. Adjust positions if hikers hesitate or miss signs.
- After 1 Month: Inspect your signs for wear or damage, and perform maintenance like repainting or tightening fixtures. Effective upkeep is shown by signs remaining legible and stable.
Frequently Asked Questions
How to Make a Trail Sign?
Making a trail sign involves choosing durable materials, designing clear symbols, and securely installing it on site. Use weather-resistant wood or composites and consider simple arrows or icons that hikers recognize quickly.
What Materials Are Best for Homemade Trail Signs?
Weather-resistant wood and composites work well for trail signs, as they handle outdoor conditions. Laminating paper signs protects them but only for short-term use.
Can Children Help Make Trail Signs?
Yes, making arrow trail signs is simple and perfect for kids, combining crafting with learning. They can paint or decorate pre-cut wood pieces safely.
How Can I Create Temporary Trail Markers?
Natural materials like sticks or rock piles can mark trails temporarily, useful for short hikes or events. Use distinct shapes or colors to stand out without harming the environment.
Do Trail Signs Need Specific Symbols or Codes?
Many trail systems use standard symbols like arrows, danger signs, or camping markers, often explained in guides like those from the Girl Scouts to keep communication consistent.
How Can I Make My Trail Sign Stand Out on Busy Paths?
Bright colors and clear symbols help trail signs stand out. Reflective paint or mounting signs at eye level also improves visibility in dense or popular areas.
The Bottom Line
Creating and installing trail signs takes careful thought about design, materials, and placement to help hikers navigate safely. Start by picking the right sign type and location on your trail today. Clear signs will improve everyone’s outdoor experience and reduce confusion or accidents along the path.