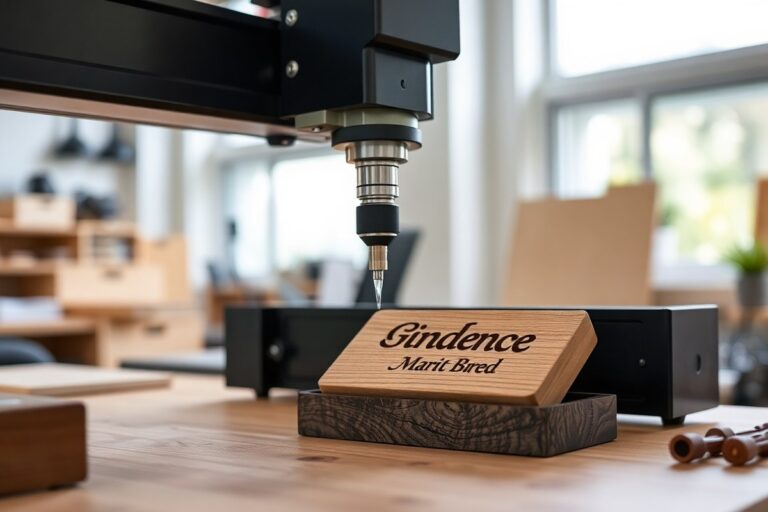
How to Laser Engrave Leather Patches: A Complete Guide for Fast, Quality Results
Knowing how to laser engrave leather patches starts with choosing the right laser and leather type, alongside the best settings for crisp, lasting designs. Use a CO2 laser for detailed work on genuine or vegetable-tanned leather and adjust speed and power for contrast and depth. Begin by prepping your leather with a heat-activated adhesive to stabilize patches during engraving and cutting.
Key Takeaways
- Use a desktop CO2 laser for small batches of leather patches for precise and clean engraving.
- Select vegetable-tanned or genuine leather for high-contrast, detailed laser engraving results.
- Start engraving settings at 1500 mm/min speed and 85, 95% power for optimal clarity on leather.
- Apply heat-activated adhesive sheets before engraving to keep leather patches secure and flat.
- Consider fiber or Galvo lasers for faster production and higher-volume leather patch engraving.
- Diode lasers offer good engraving on genuine and vegetable-tanned leather but cut slowly compared to CO2.
How to Laser Engrave Leather Patches Step-by-Step

Successfully laser engraving leather patches requires a careful workflow to ensure your design appears clean and detailed. Preparing your patch properly and handling it during each stage plays a big role in the result. Selecting the right material and keeping the leather flat reduces issues like warping or charring. Taking your time with testing and cleanup helps your finished patch look professional and durable.
- Prepare the leather patch surface. Before engraving, apply a thin coat of heat transfer adhesive to the leather’s surface. This minimizes soot and charring by protecting the leather during the laser process. Ensure the patch is clean and free of dust or oils to improve engraving quality.
- Secure the patch flat in the laser bed. Use a flat metal or aluminum plate underneath the patch or a jig designed for small items. This prevents the leather from warping or shifting and keeps the focus sharp. Clamps or weights can also help hold the patch steady during engraving.
- Upload and position your design. Import your optimized design file into the laser software. Position it accurately on the virtual workspace to match the physical patch location. Preview the placement and size to avoid engraving off-center or cutting unwanted areas.
- Test on scrap leather. Run your laser settings on a piece of similar vegetable-tanned leather before engraving your final patch. Note engraving depth, speed, and power to get crisp details without burning through or over-darkening the leather.
- Start the engraving process. Use a CO2 or diode laser suitable for your volume and patch size. For hobbyists, expect about 5 to 15 minutes per patch depending on design complexity. Keep ventilation on to remove smoke and prevent soot buildup.
- Handle the patch carefully post-engraving. The leather will be hot and fragile immediately after engraving. Let it cool fully before moving it. Use a soft brush or compressed air to remove any loose burnt residue gently without damaging the engraved surface.
- Cut the patch if needed. If your design requires cutting, do this after engraving in the same session. This order avoids burning the edges during engraving and ensures the shape remains exact. Confirm your laser’s cutting settings are adjusted to cleanly cut your leather thickness.
- Finish the patch surface. Apply a light conditioner or leather sealant after engraving and cutting to protect the surface and improve durability. Avoid over-wetting the patch, which can distort or stain the leather.
Which Types of Leather Work Best for Laser Engraved Patches?
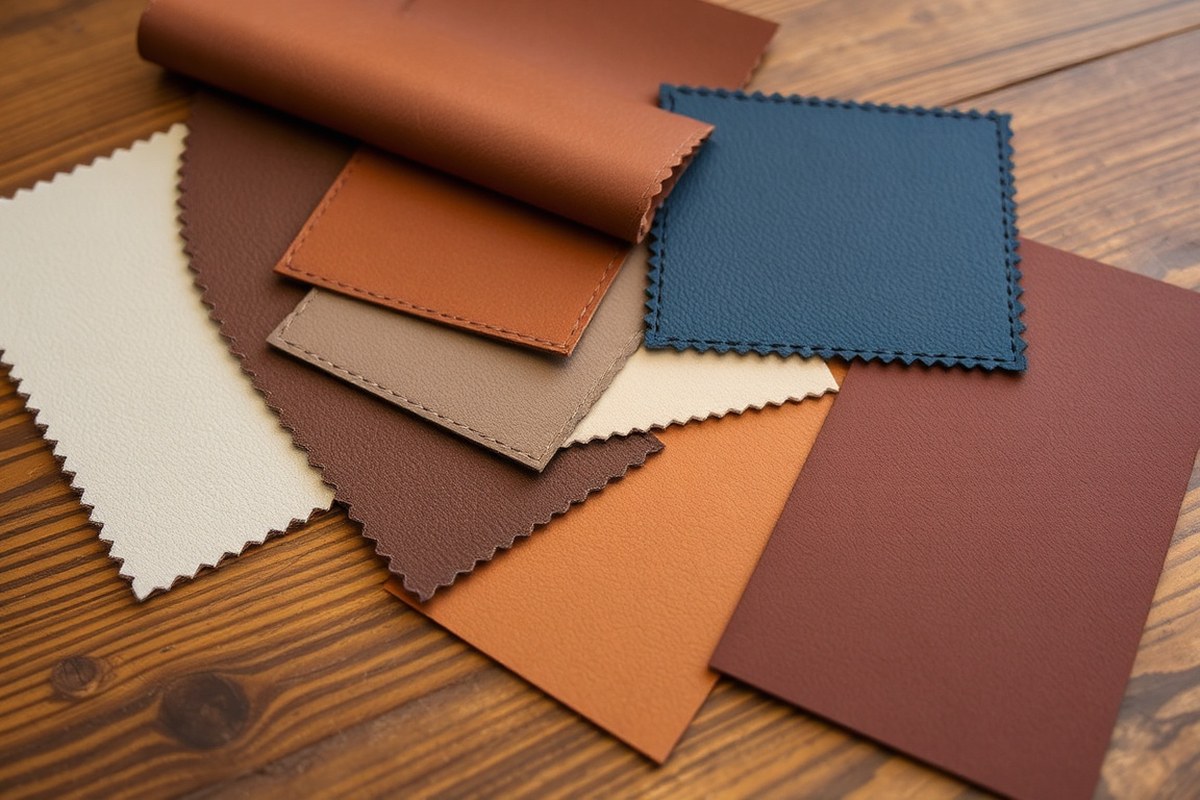
Vegetable-tanned leather generally produces the best results for laser engraved patches because it offers strong contrast and clean lines. This type of leather reacts well to laser energy, revealing darker engraved marks without excessive burning. Genuine leather also works well, but synthetic options vary widely in quality and compatibility.
Vegetable-Tanned Leather Benefits
Vegetable-tanned leather is made using natural tannins from plants, which makes its surface ideal for laser engraving. It absorbs laser energy evenly, creating dark, consistent marks that really stand out on a patch. This leather often has a smooth finish, which helps the laser etch clean details without ragged edges or excessive scorching.
It’s best to use vegetable-tanned leather that is between 2 to 5 ounces (1/8 to 3/16 inch thick) for patches. This thickness allows enough material depth for clean engraving without causing heat buildup or warping. Thinner pieces may burn through too quickly, while thicker pieces need more laser passes or higher power, which risks rough edges.
Genuine vs PU Leather Differences
Genuine leather, which includes both vegetable-tanned and chrome-tanned varieties, generally produces superior engraving contrast compared to synthetic leather (PU leather). Genuine leather engraves with rich, dark burn marks, especially when it’s vegetable tanned. Chrome-tanned leather may look slightly faded or mottled because its chemical finish resists uniform burning.
PU leather patches can work if they are specified as laser-safe, but these often reveal two-tone patterns rather than deep engraving. The plastic content in PU can release harmful fumes during engraving and may result in inconsistent marks or melting edges. Avoid faux leathers containing PVC or vinyl, as these are not laser-safe and pose toxic risks.
Leather Thickness and Cutting Limitations
Leather patches for laser engraving typically range from 2 to 6 ounces in thickness (about 1/8 to 1/4 inch). For cutting, most diode lasers (10W, 22W) can cleanly cut up to 4 ounces (approximately 1/5 inch) thick leather with multiple passes and moderate speed. CO2 lasers, on the other hand, handle thicker leather up to 6 ounces or more with faster speeds and stronger air assist.
Engraving deeper marks on thicker leather requires increasing laser power or running multiple passes, but this also raises the chance of excessive burning and curling. Softer leathers like suede or nubuck have to be approached delicately because too much laser power can damage their texture. Testing samples at increasing depths helps find the best balance between detail and material integrity.
Always verify that the leather patch you use is laser-safe and free of harmful coatings or finishes to avoid damage to the material and your equipment.
Choosing the Right Laser Engraver for Leather Patches
Choosing the right laser engraver depends on your production volume and the detail needed for your leather patches. Diode lasers suit hobbyists or very small runs due to lower power and slower cutting. CO2 lasers provide the best balance for small businesses with moderate to high volumes by offering powerful, detailed engraving and efficient cutting. Galvo lasers excel at very high-speed engraving and cutting, ideal for professional businesses with large-scale production.
Diode Lasers for Beginners and Small Runs
Diode lasers usually range from 10 to 20 watts and are affordable options under $1,000. They work well for engraving thinner leather and smaller projects because they offer detailed engraving with a slower speed, typically between 100 to 200 mm/s for engraving. Cutting thicker leather requires multiple passes at low speeds (5, 10 mm/s) and full power, which means the process can be slow and less efficient.
Models like the Longer B1 or LaserPecker LP2 Plus are popular among hobbyists and those just testing the patch market. They are compact, easy to use, and low cost but can struggle with leather thicker than 1.5 mm or with more complex cutting tasks. Low air assist requirements and moderate engraving power (30, 50%) keep the leather safe from burning when carefully adjusted.
CO2 Lasers for Detail and Volume
CO2 lasers with power between 40 and 60 watts offer the best value for small business owners who need both speed and precision. At 300, 500 mm/s engraving speed with 15, 30% power, they create clear, intricate designs on 2, 3 mm vegetable-tanned leather without charring. Single-pass cutting is possible on thinner leatherette (around 1.5 mm) at slower speeds (15, 25 mm/s) and higher power (50, 70%).
The OMTech Polar Lite 55W Desktop CO2 laser stands out for crafting leather patches because it combines sufficient power, speed, and dependable performance, typically costing between $2,000 and $3,000. It needs a dedicated area with proper airflow to operate safely while delivering steady results in medium to large batch runs. Engraving works best with low air assist, but cutting requires strong air assist to avoid scorching the leather.
Galvo Lasers for Speed and Efficiency
Galvo lasers use galvanometer scanners to move the laser beam rapidly, allowing engraving speeds much faster than typical diode or CO2 lasers. Available in 20 to 50 watts, these machines can reach engraving speeds over 1,000 mm/s, ideal for high-volume businesses like custom hat manufacturers producing thousands of patches quickly. They come with a high mean time to failure (over 100,000 hours), reducing downtime and maintenance cost.
Galvo units excel at engraving logo details instantly but have weaker cutting capacity on leather alone, sometimes needing to be paired with diode modules or require pre-cut blanks. Examples like the OMTech Galvo Laser series or similar fiber/dual lasers often cost above $2,000 and focus on speed rather than cutting power. These machines suit businesses looking for fast turnaround and volume, not beginners or hobbyists.
Optimizing Your Design for Laser Engraving on Leather
Preparing and adjusting your patch designs ensures clear detail and good contrast when laser engraving on leather. Proper software selection, design settings, and a focus on size and layout help you create sharp, professional-looking patches. This approach supports clean engraving and avoids common issues like low contrast or blurred details.
Recommended Software for Leather Patch Design
Using the right software makes a big difference in how well your design converts to a laser engraving. LightBurn is a popular choice for leather patches because it supports both vector and raster images, allows precise control over engraving order, and integrates directly with many laser machines. Another option is Adobe Illustrator, ideal for creating or editing vector designs that maintain sharp lines at any size. CorelDRAW also works well, especially for detailed vector editing and colour management.
All these programs let you set your canvas size to match your patch, usually between 2 and 4 inches wide, so you work exactly at the scale needed. With LightBurn, you can import your design, position it on the virtual patch, and set the laser to engrave the artwork first before cutting the patch outline, which optimizes the workflow and prevents damage during cutting. Make sure to save your project in formats supported by your laser, typically SVG or DXF for vectors and PNG or BMP for raster images.
Adjusting Contrast and Detail for Engraving
Leather engraving captures variations in tone by burning the surface, so high contrast between light and dark areas in your design is important. Avoid fine lines or tiny text smaller than 0.1 inch (2.5 mm), as these often merge or disappear during engraving. Bold lines, simple shapes, and solid fills tend to come out clearer than intricate details. Using high-contrast black-and-white designs helps the laser create distinct scorches for better visibility.
Adjust your image resolution to around 300 dpi to balance detail and file size, which allows crisp edges without slowing down the machine or causing burning. When working with raster images, convert colours to grayscale and increase contrast in your software before engraving. When the engraving looks too light, raise the laser power a bit or slow down the speed; if it’s too dark or burnt, lower the power or speed up the passes. Testing on a scrap piece of the same leather can help you dial in the right balance.
Sizing and Layout Tips for Patch Dimensions
Start by setting your design canvas to the actual patch size, typically between 2 and 4 inches wide. This ensures that your artwork does not scale unexpectedly and fits within the patch boundaries. Place key elements centrally and avoid positioning important details within 0.1 inch (2.5 mm) of the edges to prevent cutting errors or incomplete engraving from leather movement or machine focus issues.
Choose patch shapes that suit your design and leather piece, such as round, rectangular, shield, or oval. Laser machines often cut and engrave in the same run, so layout your design to engrave before the cut path to minimize damage and alignment issues. Flat, smooth leather surfaces yield the most even depth and detail. When your patch design includes colours, turn them into grayscale values that the laser interprets as power levels to keep the engraving consistent.
Finding the Best Settings for Engraving Leather Patches
Setting the right power, speed, and DPI when laser engraving leather patches is important for achieving sharp, clean designs without damaging the material. Begin your tests with low to moderate power, typically between 20% to 40% of your laser’s total output. For example, a 25-watt CO2 laser works well at about 25% power for medium-weight vegetable-tanned leather. Pair this with a moderate speed around 200 to 300 millimeters per second to balance engraving depth without scorching. Increasing power darkens the engraving, but too much risks burning or melting the leather, while lowering speed will give the laser more dwell time, deepening and darkening the mark. To reduce burning or bubbling, increase speed or drop power slightly.
DPI, or dots per inch, controls the resolution of your laser engraving. Leather doesn’t require very high DPI to look good because its texture naturally softens fine details. An ideal range lies between 200 and 300 DPI. Higher DPI settings can cause excessive heat buildup, melting leatherette top layers or creating unwanted bubbles. For synthetic or thinner leathers, stay closer to 250 DPI to avoid damage, while thicker natural leather can handle around 300 DPI for more defined detail. Avoid going above 300 DPI, as the benefits diminish and risk increases.
Testing your settings systematically before committing to a full project is essential. Cut a small scrap of your leather type and prepare your laser with the starting power and speed values. Run a simple engraved shape like a grid or line test with varying power levels in increments of 5% and speeds varied by 50 mm/s steps. Observe how dark and crisp the engraving looks and whether any burning, bubbling, or discoloration occurs. Keep notes for each variation. You might see a brown halo around the design, which usually means smoke residue has settled; add masking tape or improve air assist to fix this. Signs of melted or bubbled surfaces indicate too much power or too high DPI, so reduce those accordingly. The engraving might look faint or incomplete; try increasing power by 2 to 3% or do a second pass at high speed. Make adjustments until you find a balance that reveals color contrast clearly, leaves no charred edges, and maintains the leather’s integrity.
For different types of leather, adjust settings based on thickness and composition. Vegetable-tanned leather generally requires slightly lower power and slower speeds compared to chrome-tanned leather to avoid excessive burn marks. Thin leather patches may need speed increased above 300 mm/s and power reduced to avoid warping. Thick or heavily finished leather can often handle higher power up to 40% and slower speeds around 150-200 mm/s to bring out deeper engravings without burning through.
Always perform test engravings on small scraps of your specific leather and document each setting’s effects before working on final patches to ensure consistent and quality results.
Preparing and Finishing Leather Patches Post-Engraving
After laser engraving your leather patches, cleaning and conditioning them properly helps maintain their appearance and longevity. Smoke residue and fine dust often settle in the engraved areas, which can dull the design and affect adhesion. Applying the right adhesive and preparing the patches correctly ensures a strong bond whether you’re mounting them on hats, apparel, or other accessories.
Cleaning smoke residue and dust is essential for a crisp, professional finish. You can use a soft brush or an air blower to remove loose debris gently. For stubborn residue, lightly wipe the surface with a damp cloth or a cotton swab dipped in water or isopropyl alcohol. Avoid saturating the leather, as excess moisture can cause warping or damage.
Conditioning the leather after engraving isn’t mandatory but recommended, especially for natural leather patches. Leather conditioners or finishes replenish oils lost during engraving, making the patch more supple and improving color contrast. Use a small amount of a quality leather conditioner and apply it with a soft cloth, allowing it to absorb fully before handling or mounting.
For attaching patches, heat-activated adhesive sheets like HeatnBond or double-sided 3M tape work well. If you haven’t applied tape before engraving, you can still use heat adhesives afterward by carefully following manufacturer instructions. Proper adhesive application prevents peeling and ensures your patch stays securely in place. Follow these steps to clean, condition, and apply adhesive to your laser-engraved leather patches:
- Brush off loose residue. Use a soft-bristled brush or compressed air to remove dust and smoke particles from the engraved grooves. This prevents buildup that dulls your design.
- Wipe engraved areas gently. Lightly moisten a cotton swab or soft cloth with water or isopropyl alcohol and clean the surface. Avoid soaking the leather, allowing it to dry completely before continuing.
- Apply leather conditioner (optional). Dab a small amount of conditioner onto a soft cloth and rub it into the leather in circular motions. Let the patch sit for 10 to 15 minutes to absorb the conditioner, then buff off excess.
- Cut adhesive sheets to size. Trim heat-activated adhesive or double-sided tape to match your patch’s back, ensuring full coverage without excess overlap.
- Apply adhesive to patch backing. Press the adhesive firmly onto the back of the patch, smoothing out air bubbles or wrinkles for even attachment.
- Heat-set the adhesive if required. Use an iron or heat press at the adhesive manufacturer’s recommended temperature, typically around 300°F for HeatnBond, pressing for 10 to 15 seconds with firm pressure.
- Allow to cool before mounting. Let the patched adhesive fully cool to ensure the bond sets properly before attaching it to hats, jackets, or bags.
Common Leather Engraving Mistakes and How to Fix Them
Burning or scorching on leather patches usually results from using too much laser power or moving the laser head too slowly. Leather, especially vegetable-tanned varieties, darkens significantly when exposed to heat, so high power settings or slow engraving speeds risk charring the surface. To prevent this, try lowering power to 15, 25% on a CO₂ laser or reducing diode laser power to under 20W while increasing speed to at least 150 mm/s for lighter engraving.
Poor contrast or unclear engraving often happens when the focus is off or the design doesn’t translate well to the leather’s texture. The laser must be sharply focused on the patch’s surface to ensure crisp lines and details. Run a focus test routinely before each run. Designs with fine lines may need simplification or thicker strokes to remain visible after engraving.
Uneven or poor cutting can occur from incorrect power, speed, or trying to cut leather that is too thick for your machine. Vegan or vegetable-tanned leather between 2 and 4 mm thick typically cuts best at 40, 70% power with a CO₂ laser in a single pass, or 10, 20W diode lasers working slowly with 1, 3 passes. Uneven cutting might mean your leather isn’t lying flat or the laser’s focus isn’t consistent across the patch.
- Excessive power and slow speed cause burning; balance power (15, 25% CO₂ or under 20W diode) with speed (150, 300 mm/s) for clean engravings.
- Out-of-focus laser leads to blurry designs; check and adjust focus carefully before each job.
- Complex or fine designs can lose detail; simplify or thicken lines to maintain clarity on leather’s grain.
- Improper cutting settings cause jagged or incomplete cuts; use correct power and passes for leather thickness.
- Uneven leather placement creates inconsistent engraving; ensure patches are flat and secured firmly.
Beyond settings adjustments, conditioning the leather patch surface can influence results. Some crafters lightly clean patches with a damp cloth to remove dust or oils before engraving. Avoid overly wet surfaces to prevent drying issues. For cutting thicker leather, multiple passes at lower power help prevent overheating and charring.
Fine-tuning these factors takes some trial and error but prevents ruining expensive patches. Good results show smooth, even engraving with clear contrast and distinct edges, while problems look like blackened spots, unclear details, or rough cuts. Testing on scrap leather pieces matching your patch’s thickness and type helps dial in the right settings for each batch.
Safety Tips and Best Practices for Laser Engraving Leather
Wearing protective gear is essential when laser engraving leather to guard against fumes, debris, and accidental contact with the laser beam. Safety glasses rated for CO₂ lasers are the minimum requirement to protect your eyes. Gloves made of heat-resistant, non-flammable material can shield your hands when handling hot or partially burnt leather. A respirator or mask with organic vapor cartridges helps prevent inhaling smoke and harmful compounds released during engraving, especially when working with synthetic or dyed leathers.
Maintaining proper ventilation is critical. Leather engraving produces smoke containing aromatic amines and other irritants. Use an exhaust system that vents outdoors or a laser machine with built-in air filtration that can remove particulate and chemical fumes. A fan directing smoke away from your breathing zone adds further safety. If your workspace lacks external venting options, invest in an activated carbon filter designed for laser fume extraction. For example, commercial laser fume extractors designed for CO₂ lasers start around $200 and can improve air quality significantly.
Laser engraving leather poses a fire risk. Leather can ignite due to the laser’s heat, and nearby materials may catch fire. Keep a fire extinguisher rated for electrical and chemical fires within reach. Avoid placing flammable items close to the laser bed. Never leave the laser unattended while operating. Regularly clean the laser lens and the machine’s interior to prevent dust and residue buildup that can catch fire.
- Wear CO₂ laser-rated safety glasses and heat-resistant gloves
- Use a respirator with organic vapor cartridges or a fume extractor
- Ventilate your workspace with an exhaust fan or vent outdoors
- Keep a multipurpose fire extinguisher nearby
- Clean the laser machine regularly to prevent residue accumulation
- Remove flammable materials from the immediate area
- Never leave the laser unattended during operation
Always test a small piece of leather first to check for excessive smoke or flare-ups before committing to your full project.
Routine maintenance is necessary to keep your laser engraver safe and efficient. Clean the optics with approved solutions and check the alignment regularly. Replace filters in your ventilation or fume extraction system according to the manufacturer’s schedule. Inspect electrical cords and connections for wear or damage. Efficient machine operation reduces engraving time, which in turn lowers the risk of overheating or fire.
Step-by-Step Action Plan for Laser Engraving Your Leather Patches
Follow these steps to start laser engraving leather patches with confidence and quality results.
- Before you start: Choose a vegetable-tanned leather patch for the best engraving contrast. Confirm the leather surface is clean and dry to ensure crisp engraving.
- Day 1: Set up your laser engraver with recommended settings for your leather type, including power, speed, and resolution. Test on a scrap piece to check for a clean, uniform burn without scorching.
- Day 1 (continued): Prepare your design file in a vector format. Adjust contrast to emphasize engraving details before sending it to the laser.
- Week 1: Begin engraving on sample patches, noting any changes in depth or clarity. Adjust laser settings if engraving is too light or too deep until details are sharp and edges smooth.
- After engraving: Gently wipe off residue with a damp cloth and apply a leather conditioner to prevent dryness and preserve the patch’s look and feel.
- Week 2: Create finished patches with your finalized settings. Inspect each for uniformity and consistency in engraving quality.
- After 2 weeks: Offer samples to customers or use personally to gauge durability and appearance over time, making adjustments if needed for future batches.
Frequently Asked Questions
Can Laser Engraving Damage Leather Patches?
Yes, too much laser power can burn or char leather. Use recommended settings and test on scraps to avoid damage.
How Do I Prevent Smoke Marks on Leather When Laser Engraving?
Clean the leather before engraving and use proper ventilation. Lower laser power and slower speed can reduce smoke stains.
Can I Use Dyed Leather for Laser Engraved Patches?
Dyed leather can work but colors may affect engraving contrast. Vegetable-tanned leather offers the best results for clear designs.
Is It Possible to Engrave Leather Patches with a Cheaper Diode Laser?
Cheaper diode lasers can engrave leather but with less precision and range. CO2 lasers are better for quality and depth.
Should I Seal Leather Patches After Engraving?
Sealing is optional but recommended to protect the design and leather from moisture and dirt. Use a clear leather finish spray.
How Long Does It Take to Laser Engrave a Leather Patch?
Engraving takes about 30 seconds to a few minutes depending on design complexity and machine settings. Test times vary by device.
Final Thoughts
Laser engraving leather patches creates custom pieces with professional appeal when you match the right materials and settings. Focus on testing and fine-tuning your process for the sharpest results. Start today by preparing a single patch and experimenting with your laser’s settings to see your designs come to life clearly and cleanly.