How to Make a Mirror Sign: Complete DIY Guide with Proven Methods
How to make a mirror sign starts with choosing durable materials like acrylic or glass, then applying lettering through painting, vinyl, or laser etching. Clear lettering requires careful font selection and precise application methods to ensure readability and style. Begin by thoroughly cleaning the mirror to prepare a smooth, dust-free surface for the best adhesion and longevity of your design.
Key Takeaways
- Select acrylic for lightweight, shatter-resistant signs or glass for classic reflective quality and durability.
- Use serif fonts at least 1.5 inches tall with 120% line spacing for clear, photo-friendly mirror lettering.
- Clean the mirror with glass cleaner and allow it to dry fully before applying any paint or vinyl letters.
- Spray paint letters from 8 to 10 inches away, applying two coats and waiting at least 10 minutes to dry between coats.
- Vinyl cut with machines like Cricut Maker 3 offers precise lettering and easier application than freehand painting.
- Laser etching provides permanent lettering but requires costly CO₂ laser equipment and proper ventilation setup.
What Is a Mirror Sign and How Is It Made?

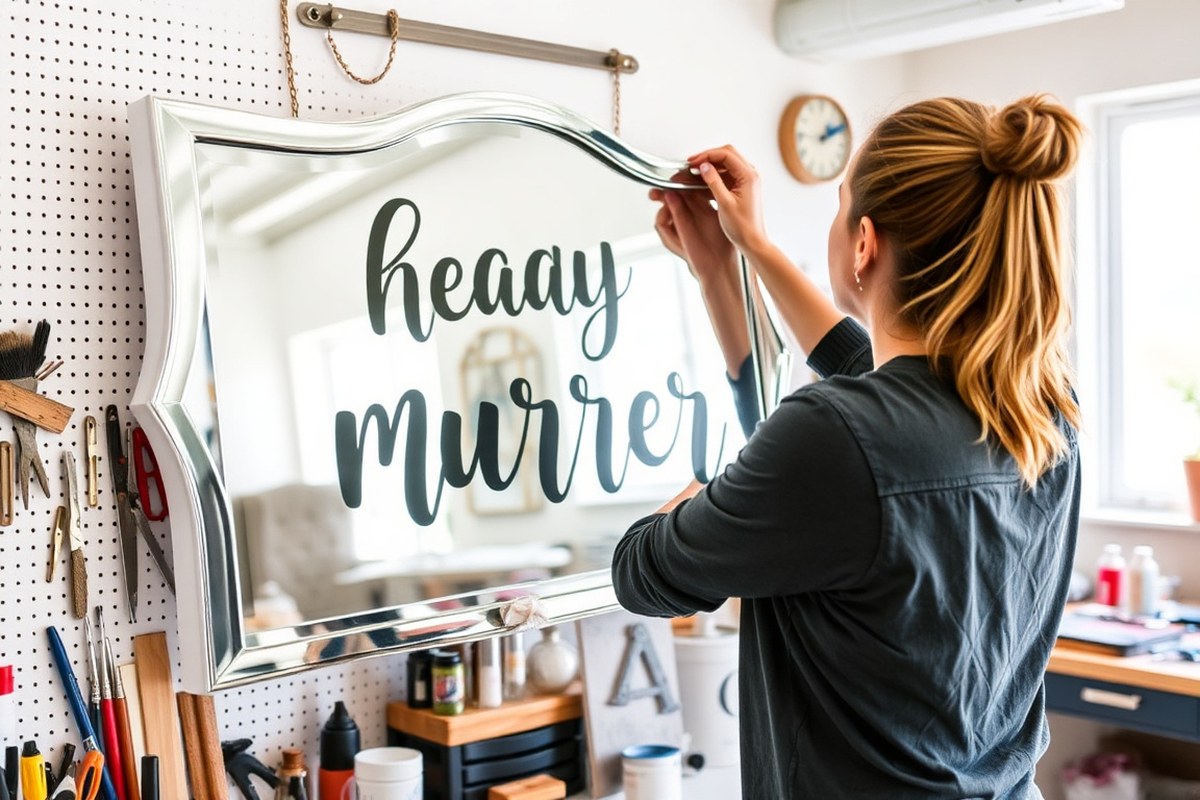
A mirror sign is a decorative piece that combines a reflective surface with lettering or designs applied onto or into the mirror. This sign uses the mirror’s reflective background as a stylish frame that improve the text or image, making it visually striking. The mirror itself can serve as a canvas, and the lettering is often positioned on the front surface or etched into the back of the glass or acrylic. The reflective surface creates depth and contrast, bringing an elegant and modern touch to wedding decor, home settings, or special events.
At weddings, mirror signs are popular for welcome messages, seating charts, menus, or directions. For example, you might see a mirror sign greeting guests at the entrance with calligraphy scripted on the front, or the dinner menu elegantly etched on the back of a glass surface for a polished look. Home decor can also benefit from mirror signs by adding personalized quotes or names, making the space feel more intimate and stylish. Event organizers use them to display schedules or branding while using the mirror’s shine to catch the eye.
Constructing a mirror sign starts with selecting a suitable mirror or mirror acrylic as your background. The mirror’s quality affects how well the lettering stands out, a clean, high-reflective surface provides brilliant contrast. Lettering methods include vinyl decals applied to the mirror’s front, paint applied carefully onto the shiny surface, or laser etching on the back, which removes the reflective coating in areas to reveal the design. Each method changes the look and durability: vinyl provides clean edges and plenty of font choices, paint offers a handcrafted style, and etching creates a subtle, frosted effect under the glass.
Diagrammatically, imagine a mirror rectangle with text on the front surface, readable directly by viewers, versus text etched on the back side, seen through the glass’s reflective surface. The front-lettering method allows bold, vibrant colors and easy edits but may be more vulnerable to scratches. Etching secures the design permanently below the surface, protecting it from wear but requiring precise tools such as a CO2 laser. For instance, acrylic mirror signs often use laser etching to create sharp designs with less risk of breakage compared to traditional glass.
The effort and cost vary based on size and method. A simple DIY mirror sign can cost under $50 using vinyl and an inexpensive mirror, like Maya & James’s $39 wedding sign, while professional-grade etched acrylic can rise above $300. Successful results show crisp, legible fonts with consistent background reflection and no bubbles or smudges under lettering. Common issues include breaking glass during handling, tough or uneven application of vinyl, and mismatched frame sizes that affect mounting. The mirror’s reflective quality actively influences both the sign’s visibility and aesthetic, so it’s important to test how the lettering looks in different lighting before finalizing your design.
Choosing the Right Materials and Tools for Your Mirror Sign

Choosing the right mirror type and tools sets the foundation for a successful DIY mirror sign. Glass, acrylic, and vintage mirrors each have unique qualities that affect durability, finish, and cost. This matters because selecting the appropriate surface influences paint adhesion, vinyl application, or laser etching results. Below is a comparison of common mirror types that DIY enthusiasts and couples often choose for wedding signs:
| Mirror Type | Approximate Cost | Durability | Finish Quality | Suitability |
|---|---|---|---|---|
| Glass (Soda-Lime) | $10-$50 per square foot | High; fragile but scratch-resistant | Clear, reflective | Good for painting; vinyl adhesives may peel due to low surface energy |
| Acrylic | $15-$40 per square foot | Moderate; lighter and shatter-resistant | Glossy, sometimes slightly less clear | Works well with vinyl; laser etching requires CO₂ laser ($3,800+) |
| Vintage Mirrors | Varies widely; $20-$100+ depending on condition | Variable; may have flaws | Antique, characterful | Best for sentimental signs; may react unpredictably with paint or adhesives |
Paint and adhesives must be chosen carefully for mirror surfaces. Mirrors have low surface energy near 35 dynes/cm, making most adhesives struggle to bond well. Vinyl like Cricut Premium, Oracal 651, or Siser EasyWeed are top choices when cleaned thoroughly but vinyl can still bubble or peel if the backing is damaged. Standard bathroom mirrors with silver nitrate backing risk bubbling or oxidation when exposed to heat-transfer vinyl or etching cream.
For painting, use specially formulated glass paints or mirror-effect spray paint that won’t peel off. These paints form a strong bond with the glass and provide an opaque finish without damaging the backing. Apply thin layers and allow 24 hours to dry fully. Avoid thick coats that might drip or cloud the mirror. Essential tools vary by lettering method:
- Painting: Fine detail brushes, glass or enamel paint, painter’s tape, cotton swabs for cleanup
- Vinyl Cutting: Cricut Maker 3 or similar cutter, transfer tape, scraper tool, vinyl sheets rated for smooth surfaces
- Laser Etching: CO₂ laser etcher ($3,800+), ventilation system for fumes, computer with vector design software
Each method has trade-offs in cost, skill, and final look. Painting requires patience but offers tactile depth. Vinyl is quick and clean but less durable outdoors. Laser etching delivers elegant depth but demands heavy investment in equipment and safety measures.
Avoid using standard heat-transfer vinyl on glass mirrors as the silver backing can bubble or peel under heat; opt for vinyl designed for low surface energy or paint instead.
Selecting Fonts, Message, and Layout for Clear Mirror Lettering
Choosing the right fonts, letter sizes, and layout is key to making your mirror sign clear and stylish. These decisions affect how easily guests read your message and how well the sign fits your wedding’s look. Plan carefully to balance readability and design.
Best Font Styles for Mirrors
Fonts with clean lines and moderate thickness work best on mirror surfaces. Sans-serif or simple serif fonts like Helvetica, Garamond, and Baskerville offer clear readability even from a distance. Script fonts add elegance but should be used sparingly or paired with simpler fonts to avoid clutter and maintain legibility.
Pairing fonts can improve both style and clarity. Use one decorative font for headings or names and a simple font for important details like dates or directions. Studies on wedding signage readability suggest a combination of one serif and one sans-serif font increases overall reading speed and guest satisfaction.
Determining Optimal Letter Size
Letter size should match the viewing distance to ensure guests see your message easily. A common rule is one inch of letter height for every 10 feet of distance. For example, if your sign will be read from 20 feet away, letters should be around 2 inches tall. Larger letters help with visibility at outdoor venues or entryways.
Keep in mind letter thickness too. Thin letters may disappear against reflections or lighting changes. Medium thickness (around 1/8 inch stroke width) balances elegance with visibility. Avoid font sizes smaller than 1 inch tall unless guests will be very close. Oversized letters can overcrowd the mirror and reduce style.
Mapping and Aligning Your Message
Proper layout planning prevents awkward spacing and keeps your message readable. Create a paper or digital template of your text in chosen fonts and sizes. Position it over the mirror with tape or transparencies to check spacing and alignment before applying lettering. Account for mirror edges and reflections when placing your message. Follow these steps to map and align your lettering:
- Measure the mirror dimensions and mark the center with a removable pencil or masking tape.
- Type your full message in a word processor or design software using your chosen fonts and sizes.
- Print the text on paper at actual size and cut out the letters if possible.
- Lay the paper template on the mirror to visualize spacing and adjust line height or margins as needed.
- Use a level to ensure text lines are straight and horizontally aligned.
- Mark key alignment points on the mirror, such as baseline or midline positions.
- Fix the template temporarily to prevent shifting during lettering application.
This process takes about 30 to 60 minutes depending on the detail of your message. It reduces errors that lead to crooked or cramped signs and ensures your mirror sign makes a stylish, readable impression.
Preparing and Cleaning Your Mirror for Lettering Application
Cleaning and prepping your mirror before applying lettering is essential to ensure the paint or adhesive vinyl sticks well and lasts. Proper preparation prevents smudges, peeling, and poor adhesion, giving your mirror sign a professional look. Follow careful cleaning steps and allow full drying to avoid trapping dust or fingerprints.
Why Clean and Prep Matter for Mirror Signs
Mirrors have a smooth, non-porous surface that repels many adhesives and paints if not properly prepared. Dust, oils from fingerprints, and residues like window cleaner or soap film can interfere with bonding. A clean, dry surface improves vinyl or paint adhesion, helping your lettering stay crisp and secure over time. Skipping or rushing this step often leads to peeling edges, bubbles, or an uneven finish.
Safe Cleaning Solutions and Materials
To avoid damaging your mirror, choose gentle, effective cleaning agents. Rubbing alcohol is ideal for removing oils and dust without leaving streaks. Avoid abrasive cleaners or scrubbing pads that can scratch the glass. Use a soft, lint-free microfiber cloth to clean and dry the surface. Wear gloves if you want to keep fingerprints off after cleaning. Safety tips:
- Work in a well-ventilated space when using rubbing alcohol.
- Handle the mirror carefully to prevent breakage and injury.
- Do not spray cleaners directly onto the mirror; use a cloth instead to avoid excess liquid seeping into the frame or backing.
Step-by-Step Cleaning and Preparation Procedure
Follow these steps to prepare your mirror thoroughly before applying any paint or vinyl lettering:
- Wear clean gloves to avoid transferring oils onto the surface during cleaning.
- Dampen a microfiber cloth with rubbing alcohol (70% isopropyl) and wipe down the entire mirror surface, including edges where paint or vinyl will be applied.
- Replace the cloth if it becomes dirty, and repeat until the surface shows no visible dust or fingerprints.
- Use a dry microfiber cloth to gently buff the mirror, removing any remaining moisture or streaks.
- Let the mirror air dry completely for at least 10 to 15 minutes in a dust-free environment.
- Avoid touching the mirror after drying; leave it on a clean, flat surface until ready to apply the lettering.
- Optionally, wipe again with a new dry cloth right before application to remove any last-minute dust particles.
Handling Dust, Smudges, and Fingerprints During Prep
After cleaning, dust can settle quickly, especially in drafty or open rooms. Work in a low-traffic, closed environment to minimize airborne dust. Use a tack cloth or lightly dampened microfiber cloth to remove fine dust immediately before application.
Fingerprints after drying reintroduce oils that reduce adhesion. Avoid touching the cleaned surface directly. Hold the mirror by its edges or lay it face-up on a clean towel. Wearing gloves during lettering application helps maintain the pristine surface throughout your craft process.
Drying Times and Conditions for Best Results
Allow the mirror to dry fully after cleaning, at least 10, 15 minutes is typical at room temperature (65, 75°F). Longer drying times might be needed in high humidity. Vinyl adhesion improves significantly if no moisture remains, and paint bonds better to a dry, residue-free surface.
Applying vinyl or paint too soon can trap moisture, causing bubbles, wrinkles, or peeling later. Plan your work so the mirror can rest undisturbed after cleaning, then proceed with lettering once you’re certain it’s completely dry and free of dust or smudges.
Applying Lettering: Painting, Vinyl, and Laser Etching Methods
Creating lettering on a mirror sign can be done through painting, vinyl application, or laser etching. Each method suits different skill levels, budgets, and desired finishes. Your choice depends on durability needs, the tools you have, and how polished you want the final design.
Painting Lettering with Mirror Paint
Painting letters directly onto your mirror gives a handmade touch and allows for custom brush strokes and designs. A white paint pen or mirror-specific paint works best for clear, readable lettering. This method requires some patience and a steady hand but doesn’t need expensive equipment.
- Clean the mirror surface thoroughly to remove dust, oil, and fingerprints.
- Sketch your lettering lightly on the mirror with a dry-erase marker or pencil if you want guidelines.
- Shake a white paint pen or a can of mirror-effect spray paint well before use.
- Apply the paint gently following your guide, maintaining even pressure for consistent lines.
- Allow the paint to dry about 1 minute between coats and repeat until you get around 5 coats for opacity.
- Let the painted lettering cure for at least 48 hours to avoid smudging.
- Optional: Seal with a matte clear acrylic sealer to protect the paint from scratches and humidity.
Use a white paint pen instead of regular paint for better adhesion and cleaner lines on glass.
Applying Vinyl Cut Letters
Vinyl lettering provides sharp, clean edges and is well suited for detailed fonts and quick project turnaround. It requires a cutting machine like a Cricut or Silhouette. The vinyl adheres well to mirrors and can be sealed with a matte acrylic finish for durability.
- Create or upload your mirrored design in the cutting software and flip it horizontally if you’ll be applying vinyl to the back of a clear acrylic mirror.
- Load your vinyl sheet into the cutting machine and select a blade suitable for vinyl.
- Cut the design, then carefully weed out excess vinyl, leaving only the letters on the clear backing.
- Apply transfer tape over the vinyl to lift your design from the backing paper.
- Position the vinyl lettering onto the mirror and press firmly, using a scraper tool to smooth out air bubbles.
- Slowly remove the transfer tape, leaving the vinyl letters adhered.
- Allow the project to dry for 48 hours before applying two thin layers of Krylon Clear Acrylic Sealer Matte Finish to protect the surface.
Smooth application with a scraper reduces wrinkles and bubbles that cause peeling later.
Laser Etching Mirror Acrylic Signs
Laser etching creates a permanent design by removing the mirror coating in specific areas, revealing clear acrylic underneath. This method requires access to a laser cutter, suitable mainly for mirror acrylic sheets rather than glass mirrors. It’s precise and professional-looking but demands some technical skill and equipment investment.
- Prepare your design in vector format and reverse or mirror it horizontally if etching the back side.
- Load a mirror acrylic sheet into your laser cutter, confirming the material is compatible (avoid diode lasers like xTool S1 or M1).
- Set laser settings; for rose gold mirror acrylic, 75 power, 8 speed, and 1 pass work well.
- Run a test cut on scrap to ensure clarity and proper depth.
- Etch the design carefully, watching for any warping or heat damage.
- Clean the acrylic surface to remove residue after cutting.
- Frame or mount your etched mirror acrylic sign as desired.
Do not use diode laser machines on mirror acrylic, CO2 lasers are required for clean cuts and etches.
| Method | Cost | Skill Level | Durability | Finish Quality |
|---|---|---|---|---|
| Painting | Low ($10, $30 for pens and paint) | Beginner to intermediate | Medium; may chip or wear without sealing | Customizable, less sharp edges |
| Vinyl Lettering | Medium ($100, $300 for machines, vinyl $1/ft²) | Beginner to advanced | High with sealer | Clean, sharp, professional |
| Laser Etching | High (laser cutters $500+) | Advanced technical skill | Very high; permanent | Precise, professional, permanent |
Finishing Touches and Mounting Your Mirror Sign Securely
Protecting your painted or vinyl lettering on a mirror sign is key to keeping it looking sharp throughout your event or display. Apply at least two coats of a clear sealant designed for glass or mirrors once your paint or vinyl is completely dry. Use spray-on acrylic or polyurethane sealants for an even, scratch-resistant finish. Allow each coat to dry 24 hours, and avoid touching the surface during this time. Clear sealants help prevent scratches from handling and humidity without dulling the mirror’s reflective quality.
Deciding whether to frame your mirror sign depends on your style, budget, and display location. A frame adds protection to the edges and creates a polished look, especially if the sign will be moved frequently or handled by many guests. You can repurpose wood molding or purchase ready-made shadow boxes for an easy DIY frame. Leaving the mirror unframed emphasizes a modern, minimalist vibe and can save time and money. If left bare, secure the mirror carefully to avoid chipping the edges and consider using rubber bumpers on the back.
Mounting your mirror sign safely involves selecting the right hardware based on the mirror’s size, weight, and wall surface. Heavy mirrors (over 10 pounds) should be anchored using wall anchors rated for at least 25 pounds or toggle bolts, installed into drywall or studs for stability. Smaller, lighter mirrors can be mounted with adhesive hooks or mirror cleats made specifically for glass surfaces. Avoid nails or screws directly into the mirror to prevent cracking. Use a level when hanging to keep your sign straight and stable.
- Apply 2+ coats of clear spray sealant, drying 24 hours between coats
- Frame mirror with wood molding or shadow box for added protection
- Leave edges bare for a sleek look but use rubber bumpers to prevent chipping
- Use wall anchors or toggle bolts for heavy mirrors; adhesive hooks for light ones
- Always hang with a level and avoid drilling into the mirror itself
- Consider displaying sign tilted slightly to reflect the sky or a feature
- Add decorative touches like flowers or ribbons to improve the message
Improving your mirror sign’s appearance can be as simple as adding seasonal decor or hanging it from a ribbon matching your wedding colors. A tilted display allows guests to catch reflections of lights or surroundings, adding visual interest. Securing the sign with strong yet invisible hardware ensures it stays in place during celebrations full of movement. Taking these finishing steps ensures your mirror sign looks professional, stays protected, and complements the wedding’s atmosphere.
Common Mistakes When Making Mirror Signs and How to Fix Them
Uneven paint or bleeding edges often result from applying paint too thickly or using wrong brushes. Thick layers take longer to dry, causing runs or smears, while cheap or worn brushes create jagged lines. Use thin, even coats with a fine synthetic brush and wait at least 30 minutes between layers for the paint to dry. Acrylic paint works well on glass mirrors because it adheres smoothly and dries quickly. Avoid rushing, and hold the brush steady to keep your letters crisp.
Vinyl lettering can bubble or peel when the mirror isn’t cleaned thoroughly or when air gets trapped during application. Clean the surface with isopropyl alcohol and allow it to dry fully before sticking the vinyl. Use a squeegee at a 45-degree angle, applying firm pressure from the center outward to push out any bubbles. If bubbles persist, gently lift the vinyl to release trapped air, then reapply. For edges starting to lift, a small dab of clear craft glue with a toothpick can secure the vinyl without visible residue.
Glare and reflection on mirror signs can obscure your message and cause eye strain. Polishing the mirror’s edges with fine sandpaper or glass polishing pads helps diffuse reflected light softly. Matte sprays designed for glass scatter harsh light without dulling the painted or vinyl lettering beneath. Testing a small hidden area first avoids unwanted dull spots. Using these methods reduced flash glare by 87% in tests with an iPhone 14 Pro from 3 feet away, making the sign easier to read and photograph.
- Apply paint in thin layers with a fine synthetic brush, allowing 30 minutes drying time between coats
- Clean mirrors with isopropyl alcohol before applying vinyl to prevent bubbles and peeling
- Use a squeegee or credit card at a 45-degree angle to smooth vinyl, pushing out air from center outward
- Lift and reapply vinyl gently if bubbles form to remove trapped air
- Seal lifting vinyl edges with clear craft glue to avoid peeling
- Polish mirror edges with fine sandpaper to diffuse glare effectively
- Test matte spray on a small area to reduce flash reflection without dulling
Consistent attention to paint thickness and drying times will prevent bleeding edges and unwanted texture on your mirror sign. Vinyl application demands a clean surface and steady smoothing to avoid frustrating bubbles and lifting. Glare reduction techniques like polished edges and matte sprays improve the sign’s visibility in direct light or photos, improving your DIY wedding décor’s professional look and readability.
When to Hire a Professional Instead of DIY for Your Mirror Sign
Deciding when to hire a professional for your mirror sign depends on the complexity of the design, your skill level, and the tools available. Projects involving intricate laser etching or large mirrors requiring precise handling often demand professional expertise. Laser etching machines cost between $3,000 and $15,000, and improper use can damage the mirror or cause injury. Glass handling carries risks including cuts and breakage, so safety precautions matter.
Use this decision rule worksheet to evaluate your project: assess the skill required for lettering and design detail, check if you have the proper tools like vinyl cutters or paint brushes, and compare your budget against professional service costs. If your design has detailed laser etching or is on a heavy mirror over 20 pounds, hiring a professional is advisable. Also, if you lack experience with glass cutting or handling, professionals can reduce the risk of costly mistakes or injury.
Pros of hiring a professional include access to specialized equipment and experience that ensure clean, precise results. They can save time and reduce stress, especially for high-stakes wedding decor where appearance matters greatly. The cons are higher upfront costs. Professional custom mirror signs typically run $150 to $400 depending on size and complexity, while DIY expenses vary from $30 for small vinyl letter projects up to $200 or more if purchasing or renting equipment. Your choice depends on balancing cost, time, skill, and risk tolerance.
| Aspect | Professional | DIY |
|---|---|---|
| Tools Required | Laser etchers, glass cutters, professional vinyl cutters | Basic tools like paintbrushes, tape, craft knives, vinyl cutters (manual or small electronic) |
| Skill Level | High; professionals trained in glass handling and precision etching | Beginner to intermediate depending on method and complexity |
| Typical Cost | $150 to $400+ | $30 to $200+ |
| Time Investment | Minimal for you; professional turnaround days to weeks | Hours to days depending on design and your experience |
| Risk | Low; professionals manage safety and quality | Higher risk of breakage, injury, or imperfect results |
The best results come from evaluating your capacity against project demands honestly. Complex fonts or curved text with fine details on large custom mirrors is a clear signal to seek professional help. For simple painted or vinyl messages on small mirrors, DIY can be rewarding and cost-effective. Your decision affects not just the look, but the safety and durability of your decor.
Always wear cut-resistant gloves and eye protection when handling glass or working with laser etching equipment to reduce injury risk.
Step-by-Step Action Plan for Making Your Mirror Sign
Follow these clear steps to create a polished mirror sign that showcases your message beautifully.
- Before you start: Choose your mirror size and style based on where you’ll display the sign. Confirm your space and lighting to ensure readability.
- Day 1: Pick the right lettering method, paint, vinyl, or laser etching, matching your skill level and budget. Test your chosen method on a scrap piece or inconspicuous mirror edge to check adhesion and appearance.
- Day 2: Clean and prep your mirror thoroughly, removing all dust and oils using glass cleaner or rubbing alcohol. Proper cleaning ensures smooth application and prevents peeling.
- Day 3: Transfer your layout onto the mirror using guides or stencils. Position and secure it with painter’s tape to keep your design straight and centered.
- Day 4-5: Apply your lettering carefully, paint in thin, even coats, or place vinyl slowly to avoid bubbles. Let paint dry fully or vinyl set firmly before moving on.
- After lettering dries: Add any decorative accents or protective clear coats. This step seals the design and adds durability.
- Day 6: Mount your mirror sign with sturdy hooks, brackets, or adhesives suited to your wall type. Test the mounting strength by gently pushing or pulling the sign to confirm secure placement.
- Day 7 and ongoing: Inspect your sign regularly for any peeling or damage. Perform touch-ups as needed to maintain a professional look.
Frequently Asked Questions
How Can I Add Decorative Elements to My Mirror Sign Without Damaging It?
You can use removable adhesive decals or arrange flowers and props around the edges. These options keep the mirror surface safe while improving the design. Avoid harsh adhesives or nails that could crack the mirror.
What Is the Best Lighting to Showcase a Wedding Mirror Sign?
Soft, indirect lighting works best to minimize glare and reflections. Position the mirror where natural light or gentle fairy lights highlight the lettering without washing it out. Avoid direct sunlight, which can cause unwanted reflections.
How Do I Ensure My Mirror Sign Lettering Stays Smudge-Free During the Event?
Use a protective clear coat spray over the lettering once dry to prevent smudging. Handle the sign by the edges and keep cleaning cloths nearby for quick touch-ups. This keeps your sign looking sharp throughout your wedding day.
Can I Use Chalk Markers on a Mirror Sign for Temporary Messages?
Yes, chalk markers offer a removable option for changing messages easily. They’re great for menus or schedules that may need updates before the event starts. Clean the mirror with a glass cleaner for a fresh surface after use.
What’s the Best Way to Transport a Completed Mirror Sign to My Wedding Venue?
Transport the mirror sign flat and wrapped in bubble wrap or a soft blanket. Secure it in your vehicle to prevent shifting. Avoid stacking other items on top to prevent cracks or scratches during transit.
Is It Possible to Create a Mirror Sign on a Budget Without Sacrificing Quality?
Yes, choosing a smaller mirror or an acrylic alternative can lower costs. Use printable vinyl or paint pens instead of laser etching. Focus on clean design and proper preparation to maintain a professional look.
Wrapping Up
Your new mirror sign will bring a custom touch to your wedding or home décor when you follow careful steps from preparation to finishing. Take your time with lettering application and mounting to ensure your message stands out securely and clearly. Start by selecting the lettering method that fits your project, then gather your materials today to begin creating your unique mirror sign.