How to Make a Halloween Sign by Hand: Simple Steps and Creative Ideas for Beginners
How to make a Halloween sign by hand starts with choosing the right materials and a simple design to match your skill level. Use a wooden plank about 12×18 inches, paint it with craft paint, and let it dry thoroughly. Starting with a clear concept and quality wood sets a strong foundation for a lasting handmade sign.
Key Takeaways
- Select wood sizes like 12×18 or 8×24 inches for ease of handling and visual impact.
- Use craft paint to cover your wood plank evenly and allow it to dry for 10 to 20 minutes initially.
- Plan your sign phrase carefully, searching specific keywords like “Halloween Sign SVG” to refine ideas.
- Add 3D elements such as raised letters to give your sign extra depth and interest.
- Protect the final piece with a sealant to ensure durability for outdoor display throughout the season.
- Allow at least 24 hours drying time after painting before adding decorations or handling.
Essential Materials and Tools for Handmade Halloween Signs
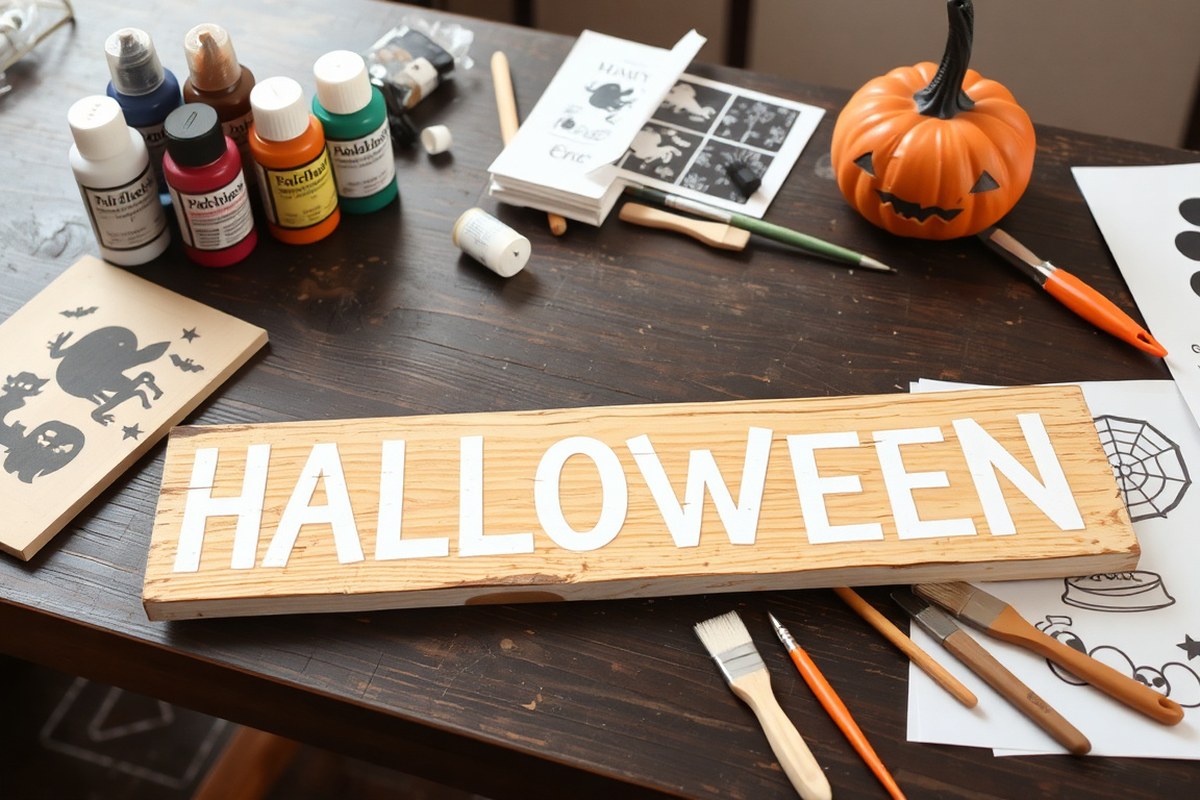
Making a Halloween sign by hand requires some basic materials and tools to get started effectively. The foundation is a wood sign blank, ideally around 12 by 18 inches, which you can find as rustic or reclaimed wood. These choices add character and authenticity to your decoration, with prices typically ranging from $10 to $30 depending on the finish. Choose FSC-certified or reclaimed wood to support sustainable craft choices and achieve a charming rustic look.
For hand-painting or using stencils, a set of good-quality acrylic paints in Halloween colors like black, orange, white, and purple will give you vibrant, long-lasting results. Brushes of various sizes are essential: thin liners for detailed lettering and wider flat brushes for backgrounds. Quality brushes cost between $5 and $15 each but provide better control and smoother finishes.
Stencil use simplifies flawless lettering, especially for beginners. You can create custom stencils using a Cricut machine or buy pre-made ones with common Halloween phrases like “Hey Boo” or “Happy Halloween.” Using stencils reduces mistakes and speeds up the painting process. Apply the stencil with painter’s tape to keep it secure, then dab paint gently to avoid bleeding underneath. Let the paint dry fully between layers, usually about 20 to 30 minutes for acrylics.
- Wood sign blank, preferably 12×18 inches, rustic or reclaimed for authenticity
- Acrylic paint set in traditional Halloween colors
- Assorted paintbrushes, including fine liner and flat brushes
- Stencils for lettering and shapes, either purchased or custom-cut
- Painter’s tape to hold stencils in place
- Sandpaper (120-220 grit) for smoothing wood surface
- Clear sealant spray to protect finished sign from weather
Using recycled materials such as old pallet wood or salvaged signs can work well if treated properly. Sand the surface smooth to remove rough spots or splinters. This ensures paint adheres evenly and prevents uneven lines or bleeding around stencils. Recycled wood often provides a more weathered look, improving the Halloween vibe. You may want to use a wood conditioner or primer if the wood is particularly porous. This helps the paint color stay true and last longer outdoors.
Some materials and tools do require careful handling. Paints contain pigments and chemicals that can irritate skin or eyes, so working in a well-ventilated area and wearing gloves if sensitive is advisable. Painter’s tape should be removed slowly once paint dries to avoid peeling off paint from the wood. The total cost for basic supplies can vary from $20 to $50 depending on which materials you already have and how elaborate your design is. Taking time to gather the right tools and materials sets you up to create a durable, eye-catching Halloween sign that adds charm to your home decor.
Preparing Wood and Other Surfaces for Your Halloween Sign
Preparing your base material is key to a professional-looking Halloween sign. Proper prep ensures paint and decorations stick well and that your sign can handle display conditions. Wood is the most popular choice, but you can also use canvas, paper, or recycled materials depending on your budget and style.
Choosing the Right Wood Type and Size
Pick a wood type that suits your display location. Pine, cedar, and plywood work well for indoor signs, while cedar and treated wood are better outdoors because they resist weather. The size should match where you plan to hang your sign, small pieces (around 8″x12″) are perfect for tabletops or shelves, while larger signs (12″x24″ or bigger) stand out on walls or doors.
Thickness matters too; a ¾-inch thickness offers good stability without being too heavy. You can find affordable wood boards at local hardware stores for $5 to $15 depending on size and type.
Sanding and Cleaning for Smooth Surface
Creating a smooth, clean surface lets paint and vinyl stick properly and prevents peeling or chipping over time. Skip sanding, and your sign’s finish will look rough and uneven.
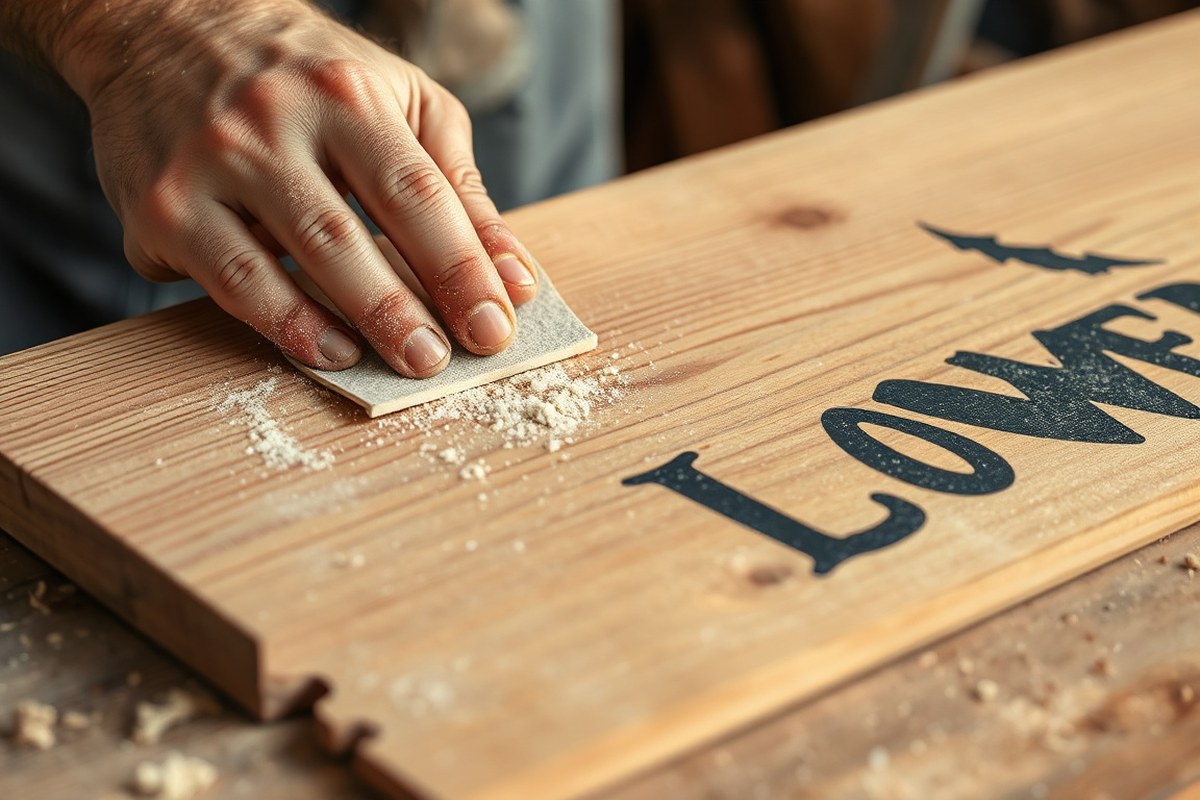
Use medium-grit sandpaper (120- to 150-grit) to level rough areas, then fine-grit (220-grit) for a smooth finish. After sanding, wipe the wood with a damp cloth or tack cloth to remove dust. Allow it to dry fully before painting.
- Use a sanding block or electric sander to smooth the wood’s surface, focusing on edges and splinters.
- Sand in the direction of the grain to avoid scratches.
- Remove all dust with a damp cloth or tack cloth.
- Let wood dry completely before applying paint or vinyl decals.
Don’t skip the dust removal step, dust left on the surface can cause paint to bubble or vinyl to peel.
Alternatives: Canvas, Paper, and Recycled Materials
If wood isn’t in your budget or you want a lightweight option, canvas boards and heavy cardstock are great fillers. Canvas provides a textured base that accepts acrylic paints well and usually costs $5 to $10 per panel.
Recycled materials like old cardboard, wooden pallets, or scrap wood can also serve as budget-friendly bases. Before painting, seal cardboard or pallets with a primer layer or gesso to prevent moisture from warping the material and to create a smoother surface.
Size decisions here depend on the available materials and display space. Choose a size you can handle comfortably while painting and showing off your design.
Creative Design Ideas and Phrases for Halloween Signs
Creative Halloween signs start with fun phrases and bold designs that capture the spooky spirit. Using the right fonts, colors, and themes helps your hand-painted sign stand out and match your home decor style. Customizing your sign lets you mix classic looks with personal touches, making your porch or wall uniquely festive.
Popular Halloween Phrases and Fonts
Short, catchy phrases work best for Halloween signs. Choose words that fit the vibe you want, whether playful, spooky, or welcoming. Popular phrases include “Boo,” “Trick or Treat,” “Happy Halloween,” “Spooky,” and “Beware.” For a seasonal twist, try “Pumpkin Spice and Everything Nice” or “Falling Leaves & Haunted Nights.” You can also personalize by adding your family name, like “The Smiths’ Haunted House.”
Fonts are as important as words. Use vintage-style or script fonts for a farmhouse or rustic look. Bold block letters with sharp edges create a spooky vibe. You can find free or paid Halloween-themed fonts online that suit your style, or use tools like Cricut Design Space for custom cut files. Hand-painting letters is easier if you trace stencils or use letter transfer paper to maintain clean lines.
Color Palettes That Pop
Traditional Halloween colors like black and orange instantly create a festive mood. Black provides a strong contrast that makes fonts and images pop on wooden signs. Orange adds warmth and ties everything together with Halloween’s pumpkin theme. You can add vibrant white, purple, or green accents for a playful effect.
Try muted tones and vintage colors for a more subtle, elegant style. Dusty orange, creamy beige, deep navy, and olive green blend well if you want a sign that works beyond just Halloween. For signs that flip between Halloween and Thanksgiving, use reversible paint layers: one side black and orange, the other side with warm browns and yellows, allowing your sign to look fresh through fall.
- Classic: Black and bright orange with white accents
- Vintage: Muted orange, cream, olive green, and navy
- Playful: Purple, lime green, and neon pink
- Neutral farmhouse: Black letters on natural wood or whitewashed board
- Two-sided: Black/orange for Halloween; brown/yellow for Thanksgiving
Using acrylic paint ensures strong colors that dry quickly and resist fading. Expect to spend $3 to $7 per small bottle of craft paint depending on your color choice and brand.
Theme-Based Design Variations
Choose your sign’s theme based on what aspect of Halloween you want to highlight. For a classic haunted house look, include silhouettes of bats, witches, or black cats with matching fonts and dark backgrounds. Add 3D elements like mini spiders or cobweb textures for extra effect.
For a more lighthearted or modern farmhouse style, use cheerful fonts and whimsical pumpkin or ghost illustrations. Customize your sign to fit your entryway by including family names or local neighborhood references, which makes your decor feel personal and inviting.
- Spooky graveyard: Ghosts, tombstones, and eerie fonts
- Witchy vibe: Hats, broomsticks, and a “Hocus Pocus” spell motif
- Vintage farmhouse: Muted colors with pumpkins and fall leaves
- Kid-friendly: Cute ghosts and “Boo” with smiley faces
- Double-sided seasonal: Flip between Halloween and Thanksgiving themes easily
Customize the size and shape depending on where you’ll place your sign. Larger boards (12” x 18” or bigger) let you add detailed illustrations, while smaller signs (6” x 12”) work well for front porch shelves or hanging on doors.
Step-by-Step Painting Techniques for Handcrafted Signs
Painting a Halloween sign by hand involves simple yet effective techniques like hand lettering, using stencils, and layering paint to add depth and professionalism. These methods let you create spooky or festive designs without expensive tools, focusing on clear steps for good results.
Hand Lettering Basics and Tips
Hand lettering gives your Halloween sign a personal touch, using your own style to make messages stand out. Use a pencil to sketch your design lightly before painting, ensuring spacing and alignment look good. Choose paint suitable for wood or your surface, typically acrylic craft paint in Halloween colors like black, orange, or white.
Control your brush by applying thin layers, letting each dry for 10 to 20 minutes to avoid smudging. Use a fine brush (size 0 or 1) for details and wider brushes for filling shapes. Practice consistent pressure and steady strokes to keep letters uniform, and correct small mistakes by gently scraping with a toothpick or touching up with the base paint.
Stencil Usage and Pattern Transfer
Stencils help transfer complex or repetitive designs without a cutting machine. You can buy Halloween-themed stencils or create your own by printing a design, taping it to cardboard, and cutting out the shapes with a craft knife. Proper positioning and securing the stencil prevent paint bleed and uneven edges.
For transferring without a cutting machine, use transfer paper or the graphite method: shade the back of a printed design with pencil, place it face up on your sign, then trace over the lines with a pen. This leaves a faint pencil outline on the surface to guide your painting.
Apply paint in thin layers with a sponge or stencil brush, dabbing rather than brushing to avoid pushing paint under the stencil. After letting the paint dry for at least 15 minutes, carefully remove the stencil. Clean reusable stencils immediately with warm soapy water to maintain crisp edges for future use.
Adding Shadows, Highlights and Layering Paint
Layering colors adds dimension and a professional look. Start with a solid base color, such as orange or white, and let it dry completely, typically 20 to 30 minutes. To add shadows, paint a thin black outline slightly offset behind letters or shapes. This drop shadow effect makes text pop. Apply shadows with a small angled brush, following the shape’s edges.
Highlights on the opposite side of shadows simulate light. Use a lighter shade of your base color or white, applied sparingly with a fine brush. Adding multiple paint layers, base, shadow, highlight, should be done with drying times of at least 15 minutes between coats to prevent smudging.
Layering works well for rustic signs across multiple wood slats: paint each slat individually with base colors, then add lettering or designs in stages. Good layering shows clear edges without paint bleeding and depth in colors, while errors include muddy colors or uneven layers caused by paint applied while still wet.
- Sketch your design lightly with pencil on the prepared surface.
- For hand lettering, use thin coats of acrylic paint with fine brushes; let dry between layers.
- Create or position stencils; secure with tape to the sign.
- Use sponge or stencil brush to apply paint with a dabbing motion for stenciling.
- Let stenciled paint dry at least 15 minutes; then remove the stencil carefully.
- Apply a base color layer if adding shadows or highlights; dry for 20-30 minutes.
- Add shadows with black paint offset slightly from letters or shapes; dry thoroughly.
- Apply highlights with lighter paint on the opposite edge of shadows; allow final drying.
Adding 3D Elements and Textures to improve Your Sign
Adding dimension to your hand-crafted Halloween sign makes it stand out and gives it a more polished, festive look. You can achieve 3D effects by using raised letters, textured materials, and other craft embellishments that add depth and interest. This approach transforms a flat surface into a tactile, eye-catching piece that draws attention from different angles.
Raised letters work particularly well for achieving this effect. You can use pre-cut wood letters, available at craft stores or online, and paint them before attaching them to your sign. Arrange the letters with small spacers or foam pads underneath to raise them slightly off the surface. Use strong craft glue or hot glue for a secure hold. For instance, you could create a phrase like “It’s just a bunch of Hocus Pocus” using script wood letters to add charm and texture. The cost to buy these letters varies but typically ranges from $1 to $3 per letter, depending on size and material.
If you prefer a budget-friendly option, try cutting letters or shapes out of thick craft foam or cardboard. Paint these cutouts with acrylic paint, then glue them onto your sign. Foam sheets often cost around $5 for a pack of assorted colors and sizes. Adding several layers or combining different materials can increase the dimension further. For example, layering foam letters over painted backgrounds or combining foam with vinyl decals can create contrast and depth.
Textured embellishments like small wooden shapes, nails, or even googly eyes can add character and interest to your sign. Use tiny nails and metal spacers to lift metal letters or decorative elements off the surface, creating subtle shadows and tactile variety. This technique works well for outdoor signs, providing durability while adding visual intrigue. When placing nails or other hardware, make sure the spacing is even and secure to avoid loose pieces. You can glue elements such as wooden bats, pumpkins, or lantern shapes to the sign and then paint over or around them to blend them into your design.
Hot glue is helpful when working with irregular or delicate pieces. You can add extra dabs of hot glue around the edges after gluing down your elements to reinforce the bond. This is especially useful for heavier or oddly shaped pieces that the initial glue may not hold well on its own. Keep in mind that using hot glue requires caution, avoid burns by handling the glue gun carefully and set your sign on a protective surface while working.
For creating a standout focal point, consider using oversized 3D objects like giant googly eyes, which are available in craft stores or online for around $2 to $5 each. Attach them securely with hot glue on your sign to add a playful spooky touch. Combine these with layered paint techniques and textured accents for a multidimensional effect that stays firmly attached in outdoor conditions.
Use spacers or foam pads under raised letters to prevent them from sticking flat, creating better shadowing and a more noticeable 3D look on your sign.
Protecting and Finishing Your Halloween Sign for Durability
Sealing your Halloween sign is essential to protect it from moisture, UV rays, and temperature changes, especially if you plan to display it outdoors. A good finish prevents paint from peeling and wood from warping. Applying a clear sealant also extends the life of your sign indoors by guarding against dust and minor scratches.
Start by ensuring your paint is completely dry, which usually takes 24 hours for most acrylic paints. Use outdoor acrylic paint for the best weather resistance. After drying, turn your sign over and paint the back with a matching paint or primer to seal all sides, reducing the chance of moisture damage.
Applying a clear spray sealant designed for outdoor use offers the easiest way to protect your sign. Look for a water-based polyurethane or acrylic spray with UV protection. Thoroughly spray in a well-ventilated area, holding the can 8 to 12 inches from the surface. Use multiple thin coats rather than one heavy coat, letting each dry for at least 30 minutes. Generally, two to three coats provide solid weather resistance without cloudiness or tackiness.
For stronger protection, brush-on clear outdoor varnish or spar urethane can be applied. This takes more time and care to avoid brush marks but offers a thicker, tougher finish. After applying, allow 24 hours for curing before outdoor use.
- Use outdoor acrylic paint to start with a weather-resistant base layer.
- Paint the sign’s back to seal and prevent moisture from entering.
- Apply 2, 3 thin coats of clear spray sealant with UV protection, allowing 30 minutes drying time between coats.
- Alternatively, use brush-on spar urethane for thicker protection; allow 24 hours curing time.
- For signs exposed to rain or snow, consider placing them under a covered porch or using weatherproof hardware to secure them.
- Inspect the sealant annually and reapply as needed to maintain protection.
Cost for spray sealants typically ranges from $6 to $15 per can, depending on brand and size. A can usually covers several signs. Brush-on varnishes cost about $15 to $25 per quart but provide more coverage and durability. Avoid sealants not labeled for outdoor use, as they can yellow or crack over time.
Signs left unsealed or sealed only on the front often suffer peeling paint, swelling wood, or mold spots. Excessive sealant in one coat can cause cloudiness or sticky surfaces, so patience and thin layers matter. Properly finished signs should feel smooth, look glossy or semi-glossy, and resist moisture with no paint lifting after rain exposure.
Planning and Timing Your Halloween Sign Project
Organizing your Halloween sign project timeline helps avoid frustration and errors like smudged paint or unclear lettering. By scheduling dry times and layering properly, you ensure your sign looks crisp and lasts through the season. Planning also means you can manage your craft time efficiently, especially when juggling other fall activities.
Each step in making a hand-painted sign takes its own time, mostly due to drying between layers. Paint drying can vary by type and temperature but expect 30 minutes to an hour for acrylic paint in a room around 70°F. This may stretch to several hours if the air is cool or humid. Not accounting for dry times often leads to muddy colors when you layer paint too soon.
Starting with a clear timeline avoids these common pitfalls by giving each layer time to set. A typical hand-painted Halloween sign may take two or three days, breaking down prep, base painting, detail work, and sealing. You’ll want to sketch your design first, then start applying paint in stages to build up color and details. Follow these steps to plan your project timeline:
- Sketch Your Design or Choose a Pattern: Spend 30-60 minutes drawing or tracing your design on your sign surface to guide your painting.
- Apply Base Paint Layer: Paint a background layer in the desired base color. This usually takes about 10-15 minutes, then allow it to dry for at least 1 hour. Dry time depends on paint type and room conditions.
- Add Large Color Blocks or Background Elements: Use broader strokes for large design areas or shapes. Each layer takes about 15-30 minutes to apply. Follow with a 1 to 2 hour dry period to avoid mixing colors unintentionally.
- Paint Details and Text: Use a fine brush and take your time, plan for around 1-2 hours depending on the complexity. Paint in thin layers for better control and let each so-called detail layer dry for 30 to 60 minutes before adding the next.
- Apply Additional Layers or Highlights: Build depth with shading or highlights, requiring about 30 minutes for application and drying time similar to detail layers. Avoid rushing through these layers to keep paint crisp.
- Seal Your Sign: After all paint layers are fully dry (typically after about 24 hours from the last paint layer), apply a clear sealant or varnish to protect your work. Allow 2 to 4 hours to dry completely before handling.
- Final Inspection and Touch-ups: Review your sign under good lighting. Lightly sand areas needing corrections, then repaint and reseal those spots, letting them dry as before.
You can adjust drying times based on your workspace conditions: warmer, less humid rooms speed drying, while cold or damp areas slow it down. Planning for extra drying time reduces the risk of ruining a layer or waiting longer than necessary. Spacing each step over several days usually keeps the process manageable and enjoyable.
Common Mistakes and Safety Tips When Making Halloween Signs
One common mistake for beginners making Halloween signs by hand is rushing the drying time for paint and glue. Paints and adhesives need several hours, sometimes up to 24, to fully set. Skipping this step can cause smudging or weak bonds, which reduce your sign’s durability, especially if it will be displayed outside. Make sure you place your sign in a dust-free, dry area while it dries to avoid imperfections.
Using the right glue is important. Professional hot glue designed for outdoor use works better than cheaper varieties, especially in hot climates like Texas. Regular glue may soften or fall apart in heat. When gluing pieces onto dowel rods or wood, apply a generous amount and let the glue cool completely before handling your sign. This ensures a stronger hold and prevents parts from coming loose.
Handling hot glue guns requires caution. The tip of the gun and the glue itself can reach temperatures above 250°F, which can cause burns. Always place the glue gun on a heat-resistant surface when not in use and never touch the glue directly until it cools. Wearing heat-resistant gloves helps, especially if you’re working on detailed areas or need to hold glued pieces in place during setting.
Painters often make the mistake of not preparing their tools and workspace properly. Use brushes or sponges that are easy to clean and lay down protective paper or old cloth to catch spills. Work in a well-ventilated area to avoid inhaling paint fumes or glue vapors. If you use spray paints, do so outside or in a spray booth, and wear a mask to protect your lungs.
Power tools like saws are sometimes necessary for cutting wood or dowels to size. Beginners often underestimate the safety risks. Always wear protective goggles and a dust mask, and secure your wood firmly with clamps to avoid slipping. Use a saw with a sharp blade meant for your wood type to reduce the effort needed and prevent jerky cuts. Never rush a cut; steady pressure yields cleaner edges and fewer accidents.
Dust and sharp edges from cutting should be smoothed with sandpaper to prevent splinters. Splinters can cause injury and make painting or gluing more difficult. Sand the area thoroughly and wipe it clean before moving on to the next step.
Keep a small first aid kit nearby and never leave hot tools unattended, especially if children or pets are present.
The cost for these safety and quality steps varies. A professional hot glue gun can cost $20 to $40 but lasts longer and performs better outdoors. A good quality saw suitable for beginners ranges from $30 to over $100 based on features. Sandpaper and safety gear add roughly $10 to $30 depending on what you need. Investing in the right materials and taking time for safe practices improves your results and keeps you injury-free.
Step-by-Step Action Plan to Make Your Halloween Sign
Follow these steps to create your handmade Halloween sign from start to finish. Each phase helps you move closer to a durable, eye-catching decoration.
- Day 1: Gather Supplies, Collect your wood, paints, brushes, and any 3D elements you plan to use. Make sure you have everything before beginning to avoid interruptions.
- Day 2: Prepare Your Surface, Sand and clean your wood or chosen material until smooth and dust-free. The surface should feel even and ready to accept paint.
- Day 3: Sketch Your Design, Lightly draw your design or phrase onto the wood using a pencil or stencil. Confirm it fits well and matches your vision.
- Day 4: Paint Base Layers, Apply your base colors and let them fully dry; this may take several hours depending on paint type. You’ll know it’s ready when the wood is no longer tacky.
- Day 5: Add Details and 3D Elements, Paint smaller details and attach textures like mini pumpkins or twine. Check that all pieces are secure before moving on.
- Day 6: Apply Protective Finish, Use a clear sealant or varnish to protect your sign from weather and wear. Wait for the recommended drying time per product instructions.
- Day 7: Display Your Sign, Choose a spot safe from direct moisture and strong winds, hang or place your sign securely, and enjoy your handmade Halloween decor.
Frequently Asked Questions
What Type of Wood Is Best for Making a Halloween Sign by Hand?
Pine and cedar are good choices because they are easy to cut and paint. They also hold up well outdoors if sealed properly.
How Can I Create a Vintage Look on My Handmade Halloween Sign?
Use sanding techniques to distress edges and apply a wash of watered-down paint for a worn effect. This gives signs a rustic, aged appearance.
What Paint Type Works Best for Outdoor Halloween Signs?
Acrylic latex paint is ideal because it’s water-resistant and durable outside. Seal the sign afterward to protect the paint from weather.
Can I Use Stencils for Lettering on My Halloween Sign?
Yes, stencils make lettering uniform and professional looking. Secure them well and use a sponge brush to avoid paint bleeding.
How Long Should I Let My Halloween Sign Dry Before Adding a Sealant?
Allow paint to dry for 24 hours before sealing. This ensures complete dryness and prevents smudging or peeling.
What Is a Quick Way to Add Halloween-Themed 3D Elements to My Sign?
Hot glue small items like plastic spiders or leaves directly onto the sign. These add texture without needing complex tools or skills.
Final Thoughts
Creating a handmade Halloween sign adds a personal touch to your seasonal decorations. Taking your time with each step ensures a striking result that lasts year after year. Start by picking your favorite design and gathering materials today, so you can begin your crafting project with confidence.