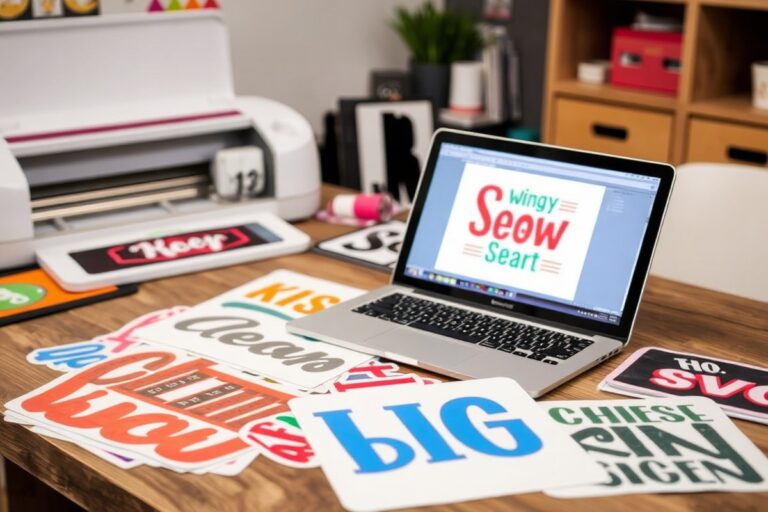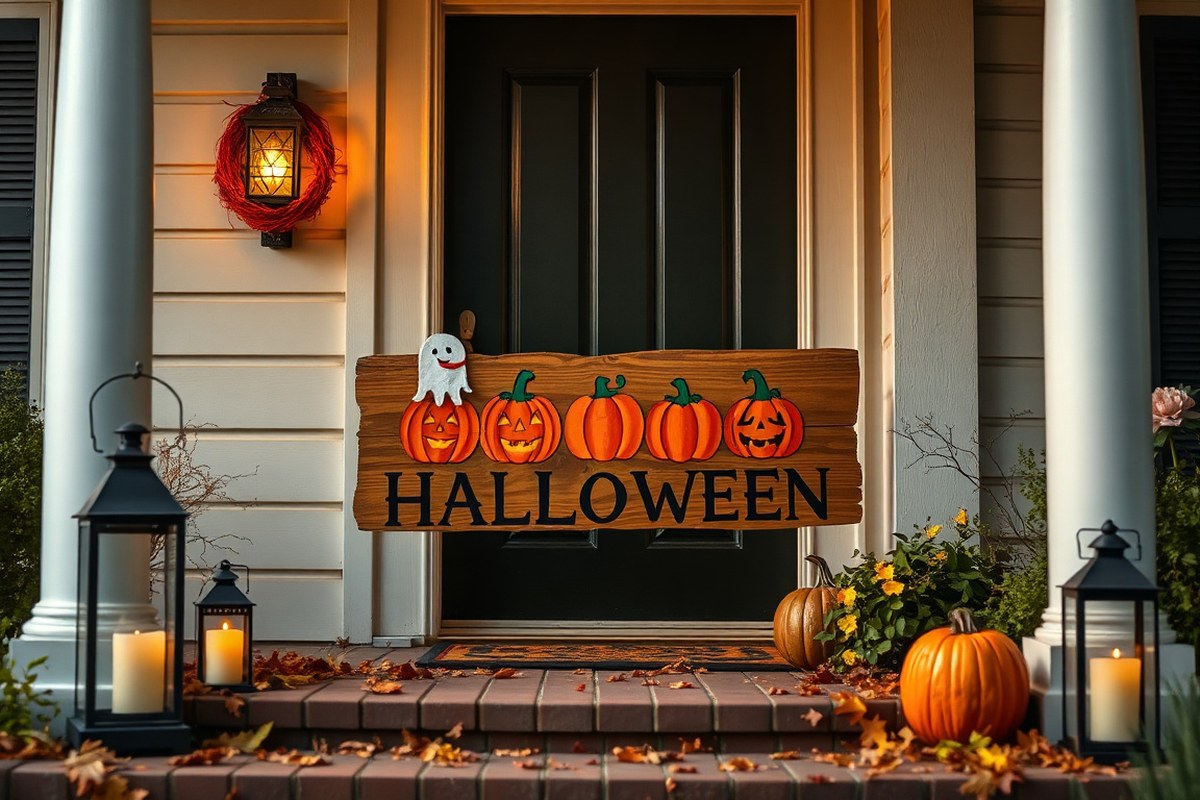
How to Make a Halloween Sign with Easy Steps and Creative Ideas
Learning how to make a Halloween sign starts with choosing the right materials and tools, like wood planks, vinyl, paint, and stencils. You can create a striking sign by painting and adding layered lettering or 3D elements. Begin by picking a base size and design that fits your space and style to make the process smooth and enjoyable.
Key Takeaways
- Select wood boards around 12×18 or 8×24 inches for a manageable and decorative sign size.
- Use craft paint to color your wood base and wait 10 to 20 minutes for it to dry before decorating.
- Vinyl and stencils simplify Halloween lettering and allow precise, clean designs on your sign.
- Add dimension by attaching raised letters or 3D decorations like skeleton hands for a bold effect.
- Include lighting effects such as string lights to improve your sign’s nighttime visibility and spooky vibe.
- Expect 30 minutes to a few hours to complete your sign, depending on complexity and drying times.
What Materials and Tools Are Needed to Make a Halloween Sign?
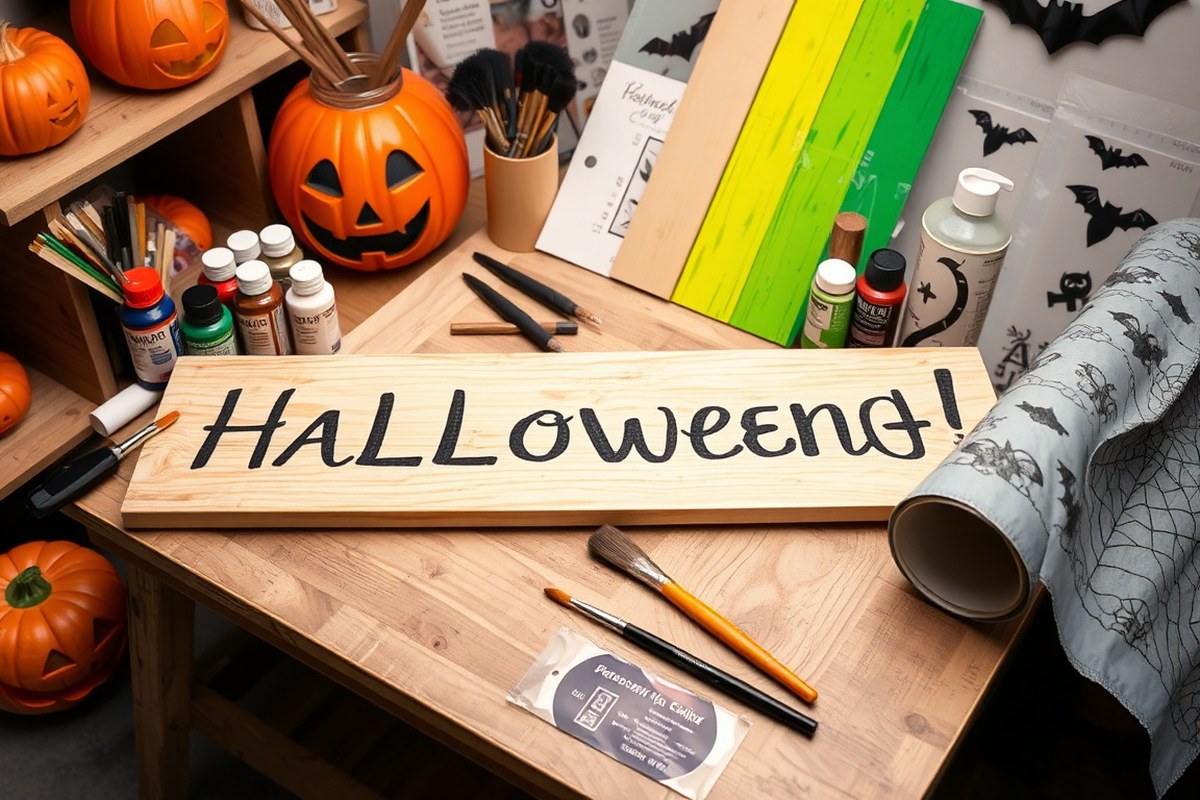
Making a Halloween sign requires a mix of basic supplies and tools, as well as some optional materials depending on your design and base. Wood is a popular choice for the sign itself, either a smooth plywood panel or scrap wood pieces. You’ll need paint, typically acrylic for its fast drying and indoor/outdoor use. A paintbrush or foam brush helps you cover your base evenly. For adding lettering or shapes, vinyl sheets and a cutting machine like a Cricut will let you create precise stencils or decals. Without a cutter, you can rely on adhesive vinyl peel-and-stick letters or hand-paint your design.
Budget-friendly alternatives include pallet wood or reclaimed scrap wood, which often costs nothing to very little. Craft paint can replace specialty sign paints and still produce bold colors. Instead of vinyl, use paper stencils cut with scissors or printed designs taped in place as a guide for hand-painting. For brushes, simple household foam brushes or even a sponge can work. The key is to prep your base by sanding rough areas if using wood and applying a primer or base coat for paint adhesion.
Safety equipment matters when working with tools and chemicals. Use gloves for paint, especially spray paint or glitter spray, to avoid skin irritation. Wear a dust mask while sanding wood to prevent inhaling particles. Eye protection can prevent small wood chips or paint splatters from getting into your eyes. Use power tools like a cutting machine or electric sander following the manufacturer’s instructions. Work in a well-ventilated space to avoid inhaling fumes from paints or adhesives.
- Smooth or scrap wood panel for the base
- Acrylic paint and foam or bristle brushes
- Vinyl sheets and a cutting machine or adhesive vinyl decals
- Transfer tape and weeding tools for vinyl application
- Sandpaper (medium grit) to prep wood
- Protective gloves, dust mask, and safety goggles
- Optional: glitter spray, paper stencils, painter’s tape
When working with vinyl, remember to use transfer tape to lift and position your cut design carefully on the wood base. Peel the backing slowly to avoid ripping the vinyl. For painting, allow each coat to dry fully, usually about 20, 30 minutes, before adding details or stencils. This ensures crisp lines and prevents smudging. Store extra paint and materials in sealed containers to keep them usable for future projects. A clean, clutter-free work area also helps keep your sign making safe and efficient.
How to Choose the Best Base Material and Size for Your Halloween Sign
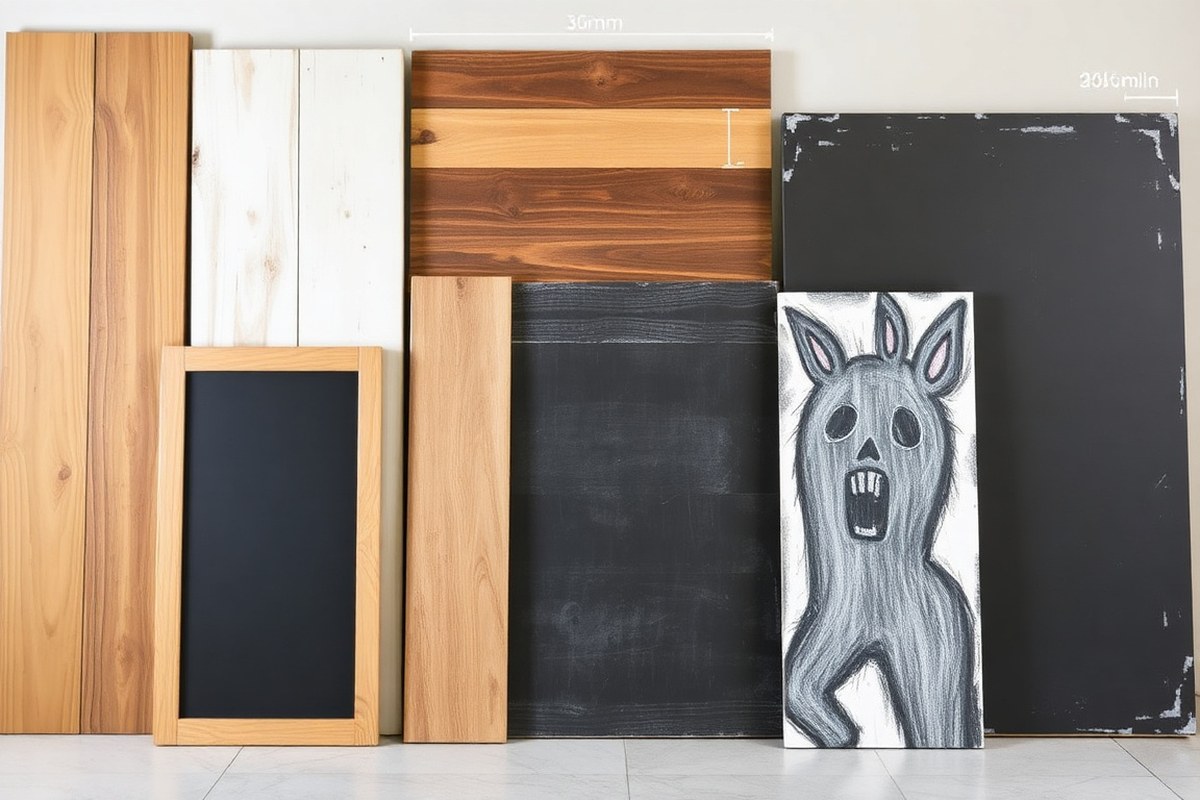
The best base material for your Halloween sign depends heavily on where you plan to display it. For outdoor signs, sturdy and weather-resistant materials like plywood or treated wood are ideal. They handle moisture and wind better than cardboard or paper. Indoor signs can use lighter, more delicate bases such as foam board or thin plywood since they won’t face the elements. The size and shape of the sign should also fit the available space and keep your design balanced and visible.
Choosing the right size means measuring your intended location first. Porch railings or walls often suit rectangular boards between 12×18 inches and 8×24 inches, offering enough room for clear lettering or graphics. For tighter spaces like apartment doors or indoor shelves, smaller signs or unique shapes like hexagons can create charm without overcrowding.
| Base Material | Ideal Location | Pros | Cons | Preparation Needed |
|---|---|---|---|---|
| Plywood | Outdoor, Porch | Durable, weather-resistant, good surface for paint | Heavier, may need sealing | Sand smooth, apply outdoor primer and sealant |
| Foam Board | Indoor | Lightweight, easy to cut, inexpensive | Not weatherproof, fragile | Minimal prep; clean surface for paint or vinyl |
| Cardboard | Indoor | Cheap, easy to find and shape | Not durable, not moisture-resistant | Use craft paint; avoid outdoor use |
| Plastic (PVC or Acrylic) | Outdoor/Indoor | Weatherproof, rigid, smooth surface | More expensive, needs special paints | Clean with rubbing alcohol; use suitable paint |
| Wooden Board (smooth, untreated) | Indoor | Natural look, easy to paint/stencil | Less durable outdoors without sealing | Sand, prime if painting |
Sealing and priming your wooden or plywood base protects it from moisture and fading, extending its life outdoors. Foam board and cardboard work well for indoor signs without extra protection but won’t last outside. Plastic bases need the right paint for adhesion and durability. You can use double-sided or reversible designs effectively for signs that show Halloween on one side and another holiday like Thanksgiving on the other. This saves space and keeps your decor versatile.
Plan your sign’s size and base based on exactly where it will sit; oversized signs can feel cramped, while too-small ones might go unnoticed.
For a reversible sign, pick a sturdy, flat base such as plywood or thick plastic. Paint both sides before adding your designs, allowing full drying time between coats. Attach hangers or stands that support flipping the sign without damage. This approach keeps your seasonal decorations fresh and efficient, perfect for porches or entryways that host multiple holidays.
Step-by-Step Guide to Making a Halloween Wood Sign
To make a Halloween wood sign that looks great and lasts, start by properly preparing the wood, then paint in layers for clear, vivid designs, and finish by sealing the sign to protect it from wear and weather. Each step matters to avoid chipping, fading, or warping. Following specific drying times and using the right products helps you achieve polished results with durability suitable for indoor or outdoor display.
Preparing and Sanding the Wood
Begin with a clean, smooth wood surface. Sanding removes rough patches and splinters, ensuring the paint sticks well. Use medium-grit sandpaper (around 120 grit) first to smooth out major roughness, then finish with fine-grit sandpaper (220 grit) for an even surface.
After sanding, wipe the wood with a damp cloth to clear dust, which can interfere with paint adhesion. Let it dry fully before moving to painting. Preparing the wood well costs little but saves time fixing imperfections later.
Painting Base Coats and Detail Work
Use craft paint or acrylic paint recommended for wood surfaces. Apply the base coat evenly with a wide brush or foam brush; this typically takes 1 coat per side for indoor signs. For outdoor signs, paint both front and back to prevent warping. Let each coat dry for 10 to 20 minutes at room temperature before applying the next.
Once the base is dry, add your Halloween message or design using stencils, vinyl, or freehand painting. Thin brushes help with lettering details. If you make a mistake, quickly wipe it off while the paint is wet to avoid extra layers. Two coats of detail paint usually give the best coverage and sharp look, again allowing 10, 15 minutes drying time between coats.
Sealing and Finishing for Weather Resistance
Seal your sign with a clear protective finish to prevent fading and moisture damage, especially if it will be outside. Use a water-based polyurethane or outdoor varnish designed for wood. Apply at least two thin coats, allowing 2 to 4 hours to dry between applications per the product’s label.
For indoor signs, a satin or matte finish gives a nice look. Outdoor signs benefit from a glossy or semi-gloss finish for better waterproofing. Avoid heavy coats, which can cause peeling or cloudy surfaces. Let the final coat cure for 24 hours before hanging or exposing your sign to the elements to maximize durability.
- Sand the wood thoroughly using 120 grit then 220 grit sandpaper; wipe off dust and let dry.
- Apply one coat of craft or acrylic paint to the front (and back if outdoor); dry 10, 20 minutes.
- Paint your Halloween design or lettering with thin brushes; let each coat dry 10, 15 minutes.
- Repeat detail painting for full opacity and clean edges; dry between coats.
- Seal the painted sign with water-based polyurethane or outdoor varnish; apply 2 coats.
- Allow 2 to 4 hours drying time between sealant coats and 24 hours before use.
How to Use Vinyl and Stencils to Create Halloween Lettering and Designs
Using vinyl cut files or stencils is an excellent way to create sharp, professional-looking Halloween lettering on your signs. Both methods allow you to customize your design while making it easier to achieve clean, crisp lines. Vinyl offers reusable decals for smooth surfaces, while stencils work well with painted wood or textured bases.
Selecting and Preparing SVG Files
Start by choosing the right SVG cut files to fit your Halloween theme and sign size. Free and paid options are available on sites like Creative Fabrica, Etsy, or Design Bundles, offering themed collections such as “Fall Porch Sign SVG Pack” or individual spooky lettering sets. Select something simple enough for your skill level but with enough detail to add seasonal charm.
Next, upload your SVG file into Cricut Design Space. To resize it, click the image, and enter your sign dimensions in the size boxes on the top menu, making sure the aspect ratio stays locked to maintain proportions. Ideally, keep your design within the printable area of your vinyl, commonly 12 by 24 inches on a Cricut cutting mat.
Cutting and Weeding Vinyl Decals
Once the design is sized, load adhesive vinyl onto the cutting mat, sticky side up, smoothing out any wrinkles. Choose vinyl colors that contrast well with your sign background for visibility. Select “Make It” in Design Space and set the material to vinyl, then cut the design.
After cutting, carefully peel away the excess vinyl around your design, a process called weeding. Use a weeding tool or a craft pick for small interior parts of letters or shapes. This step prepares the vinyl for smooth transfer onto your sign.
- Place the vinyl sheet on the cutting mat with the shiny backing facing down.
- Upload and resize your SVG file in Design Space to match your sign dimensions.
- Set your Cricut to vinyl material and send the design to cut.
- Remove the vinyl from the machine and weed out unwanted vinyl pieces.
- Cut a piece of transfer tape slightly larger than your design.
- Remove the backing from the transfer tape and lay it sticky side down over the vinyl decal.
- Use a spatula or scraper tool to firmly rub the transfer tape over the vinyl.
Applying Vinyl or Stencils Without Errors
Before applying vinyl or a stencil, make sure your painted sign surface is fully dry and clean from dust or oils. Position the design where you want it, using painter’s tape to hold stencils temporarily or to help place vinyl accurately before sticking.
When transferring vinyl, first firmly rub the vinyl through the transfer tape using a spatula or the back of a ruler. This pressure helps the vinyl adhere to the tape and not the backing paper. Slowly peel the backing paper straight back at a 180-degree angle to avoid lifting the vinyl. Take your time, especially around intricate details to prevent tearing or stretching.
Stencils require careful taping at edges and using smooth, even paint strokes with a stencil brush or sponge to avoid paint bleeding under the edges. Multiple thin coats give the best crispness. Remove stencils gently while paint is still slightly damp to avoid lifting.
Removing Transfer Tape Cleanly
Once the vinyl is stuck to your sign, slowly remove the transfer tape by peeling it back close to the sign’s surface at a sharp angle. Do this gently to avoid pulling off the vinyl pieces. In case any vinyl lifts with the tape, press it down firmly and rub once more before attempting again.
The transfer tape can usually be reused a few times if it remains clean and sticky, especially for simple shapes. To clean, remove any vinyl residue and dust with gentle rubbing alcohol on a lint-free cloth, but note repeated use will reduce tackiness.
Keep leftover vinyl and stencils stored flat in a cool, dry place. Stencils made from thicker materials like mylar are more durable and can be washed gently after use for reusability. This approach lets you create matching signs yearly or try new designs with the same tools.
Creative Halloween Sign Ideas with 3D and Lighting Effects
Adding 3D elements, glitter, and lighting to your Halloween sign instantly brings it to life and boosts its visual appeal. These effects create dimension and catch attention, making your sign stand out both day and night. You can achieve this by selecting the right materials, securing embellishments properly, and choosing suitable lighting for indoor or outdoor displays.
Choosing Materials for 3D Embellishments
Materials like craft foam, wooden cutouts, thick cardstock, and lightweight plastic shapes work well for raised effects. Craft foam and wood add sturdy dimension, especially for letters or shapes like pumpkins and bats. Foam is easy to cut with scissors and paint, while wood pieces may require small nails or strong glue. For glitter accents, apply craft glue or mod podge before sprinkling the glitter to ensure it sticks firmly.
Glitter works best on smooth surfaces and should be sealed with a clear spray sealer after drying to prevent flaking. Use outdoor-rated sealers to protect decorations from moisture and wear when placing your sign outside.
Attaching and Sealing 3D Elements
Start by arranging your 3D pieces on the base board to find the best layout. Use hot glue or wood glue for wood or foam shapes, pressing firmly to ensure a tight bond. Let glue dry completely, usually 30 minutes to 1 hour. To secure smaller embellishments like glitter sections or lightweight decorations, double-sided craft tape or tacky glue can work well.
After attaching all elements, seal the entire sign with a clear spray sealer to protect paint, glitter, and glued pieces. Choose an outdoor acrylic spray sealer if your sign will face rain or humidity. Apply 2 to 3 light coats about 15 minutes apart, allowing full drying between coats.
Using too much glue at once can cause warping or uneven drying, apply glue in thin layers to avoid this problem.
Lighting Options for Indoor and Outdoor Signs
LED string lights wrapped around or behind your sign offer soft illumination perfect for both indoor and porch displays. Battery-powered LED puck lights taped to the back create glowing halos around 3D shapes. For outdoor signs, use waterproof LED strips or solar-powered garden lights to avoid electrical hazards.
Glow-in-the-dark paints or stickers are simple additions that charge during daylight and emit a spooky glow at night. Incorporate these into lettering or around the edges to highlight features without wiring. For a subtle effect, flickering LED candles placed nearby add atmosphere.
Combining Paint and Special Effects Safely
Painting your sign first with outdoor acrylic paint ensures bright, weather-resistant colors. Let the paint dry fully, usually 1 to 2 hours, before adding glitter, 3D pieces, or lighting. Applying glue and embellishments over wet paint can cause smudging or poor adhesion. After you finish decorating, seal everything to lock in both paint and special effects.
This sequence keeps colors vibrant and prevents peeling or flaking in outdoor conditions. Avoid using oil-based paints with acrylic sealers, as incompatible chemistry may cause cloudy finishes.
Creative Ideas to Boost Your Halloween Sign’s Impact
- Attach foam bats or spiders raised ½ inch from the board for a floating effect.
- Add glitter accents around “Boo!” letters, sealing well to prevent mess.
- Outline carved pumpkins with battery LED string lights for glowing edges.
- Use glowing paint inside “evil eyes” shapes that charge in daylight and shine at night.
- Glue small foam tombstones layered for a graveyard theme.
- Wrap thin LED strips behind wooden letters to create a halo light effect.
- Seal all surfaces with waterproof clear spray to protect outdoors.
Applying these ideas requires patience but results in a standout sign that welcomes guests with festive, spooky charm.
How Long Does It Take to Make a Halloween Sign and Factors That Affect Timing
Making a Halloween sign typically takes anywhere from a few hours to a couple of days, depending on your design and materials. Painting the base layer usually requires at least one hour, followed by drying time that can range from 1 to 4 hours for each coat, depending on the paint type and humidity. Multiple coats might be necessary to achieve vivid colors and full coverage, so factoring in at least 24 hours for full drying before adding stencils, vinyl, or 3D elements ensures better results and avoids smudging or damage.
Design complexity significantly influences how long the project will take. A simple painted sign with basic lettering may be done in half a day, while signs with intricate stencils, vinyl cut-outs, layered paint, or lighting effects could extend the timeline to two or more days. Adding details like layering different paints, applying multiple stencil patterns, or installing lighting means you must allow extra time for precision work and drying. Take your time applying multiple coats and let each dry thoroughly to avoid mistakes that’ll cost more time later.
For more efficient crafting, quick projects focus on fewer colors, simpler lettering, or premade vinyl decals. Using vinyl cuts or stencils can speed up the process by eliminating the need for freehand painting. Also, repurposing materials like old wood signs or pre-painted boards can shave hours off your project. Quick Halloween signs can also use chalkboard paint, allowing you to write and erase messages without the need for long drying times.
Common delays include extended drying times due to cooler temperatures or high humidity, waiting for precise vinyl cuts, or correcting errors that happen when rushing. Planning ahead by checking local weather and working indoors when necessary helps avoid holding your project up. Prepare all your materials before you start to streamline steps and reduce downtime. Setting up your workspace with good lighting and ventilation speeds drying and helps prevent mistakes.
One time-saving tip is to choose projects with a vintage or rustic look, which often embrace minor imperfections and uneven paint, so you won’t need perfect layers. For example, hanging a sign with repurposed chains can add charm without extra work on finishing. Solid planning and patience create better Halloween signs that last longer and look more festive, even if they take a bit more time than a quick craft.
Common Mistakes to Avoid When Making Halloween Signs and How to Fix Them
Paint bubbling or peeling usually happens when the wood surface hasn’t been prepped properly or if moisture gets trapped underneath the paint. To prevent this, always sand your wood base lightly and wipe away dust before painting. Allow the wood to dry completely if it’s freshly cut or has absorbed moisture. Use a primer designed for wood to seal the surface and promote paint adhesion. When bubbling occurs, gently scrape off the bubbled paint, sand the area smooth, and repaint using thin layers, letting each dry completely.
Misaligned vinyl or paint mistakes can throw off the entire look of a Halloween sign. When working with vinyl decals, avoid rushing the application. Peel back the backing paper slowly, and use a ruler or painter’s tape to mark straight lines for guidance. Notice vinyl misalignment after application? Carefully lift one corner and reposition it immediately before pressing down firmly. For paint errors, paint over them with the base color after the paint dries, then repaint the design carefully using stencils or painter’s tape to get sharp edges. Patience in layering and drying between coats saves time fixing mistakes later.
Signs that warp or crack usually suffer from improper material choice or exposure to changes in weather or humidity. Using thin wood or untreated lumber increases this risk. To fix mild warping, clamp the wood flat with some moisture for a few days and let it dry naturally while clamped. Cracks that are small can be filled with wood filler or exterior-grade caulk before sanding smooth and painting. Choose a wood type with some natural resistance to warping, like cedar or pine, and apply a waterproof sealant after painting to help maintain shape and durability.
Wasting materials often happens when cutting the base or vinyl without measuring or planning layout. To avoid this, sketch your design on paper or use a stencil before cutting anything. Measure twice and cut once to reduce scrap. Save vinyl backing scraps to use smaller decals or decorations like bats or letters in different areas. Mixing leftover paint colors lightly is fine for accent areas, but keep the main sign colors consistent for the best look.
- Sand and prime wood to prevent paint peeling or bubbling.
- Use painter’s tape or a ruler to align vinyl decals before applying.
- Immediately reposition vinyl if placed off-center.
- Fill small cracks with wood filler and seal to avoid warping damage.
- Plan and measure layout carefully before cutting materials.
- Seal the finished sign with waterproof spray to protect against weather.
Taking these steps helps your Halloween sign hold up longer and look sharp. Small errors like bubbling or misalignment often come down to prep and patience. Keeping materials dry and working slowly lets you correct mistakes early without wasting wood, paint, or vinyl. This approach lets you enjoy a festive, spooky sign on your porch or yard without frustration or extra cost.
Tips for Weatherproofing and Maintaining Your Halloween Sign
Protecting your Halloween sign from sun, rain, and wear keeps it looking sharp for years. Choose a clear outdoor sealant suitable for your sign’s material. For wood, a polyurethane or spar varnish with UV protection shields against sunlight and moisture. Acrylic spray sealants work well on painted surfaces or paper decoupage. Apply at least two coats on both the front and back, letting each dry fully between coats.
Painting the sign’s back and edges with exterior-grade paint prevents moisture from seeping in, which can cause warping or cracking over time. Use a small brush to cover every edge thoroughly after the front design has dried. This step is especially important if your sign will face rain or heavy humidity.
Signs exposed to sun fade faster, so refreshing the sealant every 1 to 2 years helps maintain color and protection. Check the sign annually for peeling paint or signs of water damage and reapply sealant on worn spots as needed. Touch-ups can cost $5 to $15 for spray sealant, making it an affordable way to extend your sign’s life.
For storage, keep your sign in a dry place away from extreme temperatures to avoid cracking or warping. Wrap it in bubble wrap or place it between cardboard sheets to protect painted surfaces. Avoid stacking heavy objects on top to prevent dents. You can reuse chalk to write new messages on signs with chalkboard paint, giving your decoration fresh life each fall.
- Use exterior polyurethane or spar varnish for wooden signs
- Apply two coats of sealant front and back, including edges
- Paint backs and edges with outdoor paint to block moisture
- Refresh sealant every 1, 2 years, inspecting for damage annually
- Store signs flat in a dry, cool place wrapped in protective materials
- Use sturdy hooks, nails, or zip ties to secure outdoor signs firmly
- Switch out messages yearly with chalk on chalkboard-painted surfaces
Sealant must dry completely before applying the next coat; rushing causes bubbles and uneven protection.
Securing your sign outdoors prevents damage from wind or rain. Use hooks or nails strong enough to hold your sign’s size and weight. Zip ties work on fences or poles and provide extra stability. Taking these precautions reduces the risk of your sign falling or getting damaged during storms. Proper sealing and storage make your Halloween sign a reliable part of your seasonal decorations for many years.
Step-by-Step Action Plan
Follow these steps to make your Halloween sign manageable and enjoyable. Each phase helps you track progress and make timely adjustments.
- Before you start: Gather all materials and tools needed for the project, such as wood boards, paint, brushes, stencils, vinyl, and lighting elements. Check that you have everything to avoid interruptions during crafting.
- Day 1: Choose and prepare your base material by sanding wood or priming surfaces. Smooth surfaces ensure that paint and adhesives stick well.
- Day 2: Sketch your design on paper or use a computer to create a stencil or vinyl cut file. Having a clear plan prevents mistakes in painting or cutting.
- Day 3: Apply paint and/or vinyl cutouts to your sign base following your design. Let each paint layer dry completely to avoid smudging.
- Day 4: Add any 3D or lighting features such as raised wood shapes or battery-operated LED lights. Test lighting to confirm it illuminates evenly and safely.
- Day 5: Seal and weatherproof your sign with a clear coat spray. This will help maintain your sign’s look in outdoor conditions.
- After 1 week: Inspect your sign for any wear or damage, touching up paint or reapplying sealant as needed to keep your decoration looking fresh.
Frequently Asked Questions
Can I Use Other Materials Besides Wood for a Halloween Sign?
Yes, you can use materials like metal, plastic, or canvas for your Halloween sign. Choose based on durability and where you plan to display it to ensure weather resistance and the look you want.
How Do I Add a Double-Sided Design to My Halloween Sign?
Apply designs to both sides of the base material, like wood or plastic. This allows you to have different themes on each side, such as a reversible Fall and Halloween sign, perfect for switching up your decor.
What Are Some Simple Halloween Sign Ideas for Beginners?
Try making a basic porch sign with painted lettering or adhesive vinyl letters. Start with easy designs like “Trick or Treat” or a simple pumpkin silhouette to build your crafting confidence.
Can I Use Digital Files Like SVGs for Halloween Sign Designs?
Yes, using Halloween Sign SVGs helps you create precise and detailed designs with a cutting machine. Searching specific terms like “Fall Front Porch Sign SVG” narrows down your options for exactly what you want to create.
How Do I Safely Light Up a Halloween Sign?
Use battery-operated LED lights or fairy lights around or behind your sign to avoid electrical hazards. Make sure all wiring is properly insulated and weatherproof if placed outdoors.
What Finishing Touches Make a Halloween Sign Stand Out?
Adding 3D elements like small decorations or lighting effects can improve your sign. A coat of weatherproof sealant also boosts durability and helps maintain your design’s brightness outdoors.
The Bottom Line
Making a Halloween sign yourself lets you create a unique decoration that fits your style and space perfectly. Start by picking a simple design that excites you, and tackle one step at a time. Once you finish your sign, place it where it will get attention and enjoy your handiwork every Halloween season.