How to Make a Garden Sign: 12 Essential Steps for Beautiful Durable Results
How to make a garden sign starts with choosing durable materials, designing clear lettering, and properly sealing the finished piece for weather resistance. Begin by selecting a sturdy base like untreated wood or recycled metal to ensure your sign lasts outdoors. A clean, smooth surface improves paint adhesion and helps your design stand out.
Key Takeaways
- Select weather-resistant materials such as cedar or composite wood for longevity outdoors.
- Keep letter height about 1 inch per 10 to 12 feet of expected viewing distance for readability.
- Space lines around 60 to 80 percent of letter height to prevent overlap of descenders.
- Use outdoor acrylic paint for vibrant colors that resist fading in sunlight and rain.
- Seal your sign with a clear waterproof sealant after painting to protect against moisture.
- Recycle materials like old wooden boards or garden flag blanks to reduce cost and add charm.
1. How to Make a Garden Sign Step-by-Step
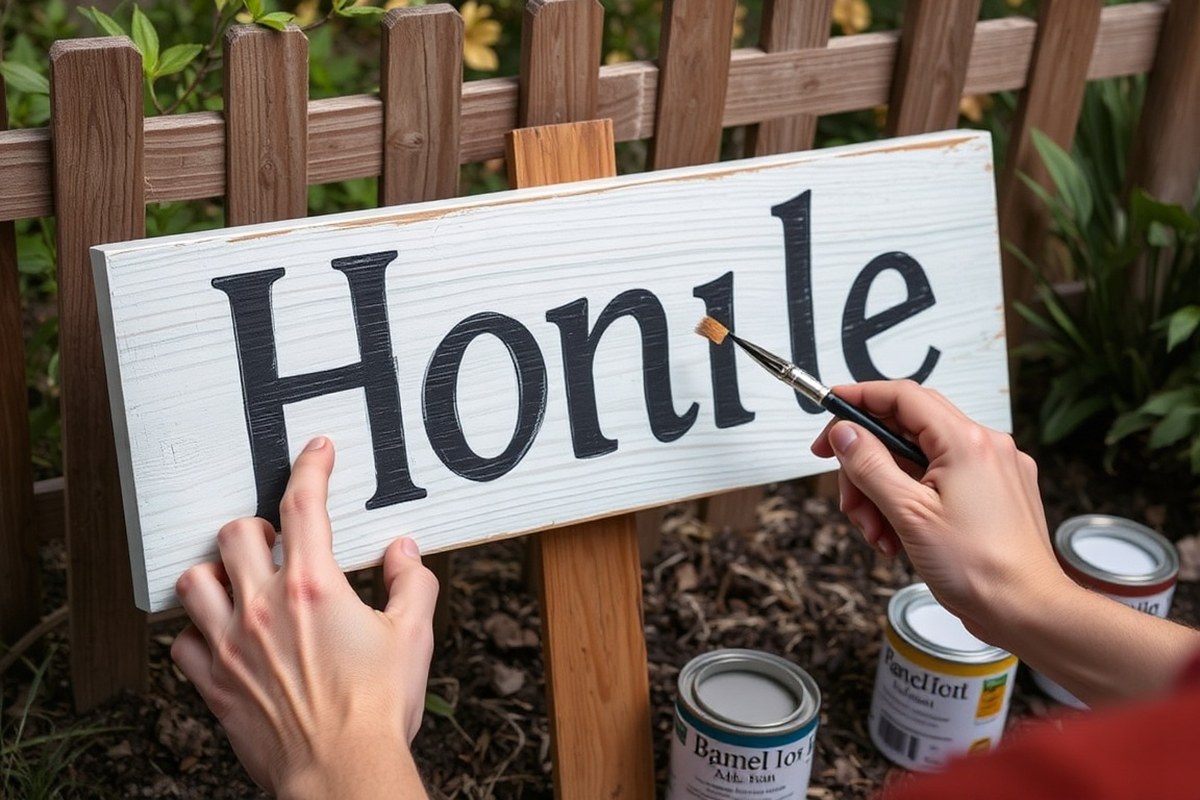
Making your own garden sign is an enjoyable project that lets you add a personal touch to your outdoor space. To begin, gather simple materials like a piece of plywood or suitable wood, garden stakes, paint, brushes, screws, and basic tools such as a screwdriver or drill. This setup will keep your project affordable and straightforward; many basic signs can be made for under $10.
The process typically takes from a few hours to a day, considering assembly and drying times. Paint usually needs at least 2 to 4 hours to dry to the touch, but allowing 24 hours for full curing ensures durability before placing it outside. If you’re sealing or weatherproofing the sign, add extra drying time as recommended on the product label.
- Choose and prepare your wood: Select a smooth piece of plywood or untreated wood about 1/2 inch thick. Cut it to your desired sign size, for example, 12 by 18 inches, and sand the edges and surface lightly to remove splinters. A smooth surface improves paint adhesion and prevents damage.
- Attach support stems: Screw wooden garden stakes or thin strips of wood vertically on the back as support and to enable planting the sign into the ground. Use two supports spaced about 10 to 12 inches apart to ensure stability.
- Apply base paint: Using exterior-grade acrylic paint, apply one or two coats for a base color. Let each coat dry for 2 to 4 hours. A solid background helps lettering stand out and protects the wood from moisture.
- Add your design: Sketch or transfer your design onto the sign with a pencil. Paint your letters and decorations carefully with acrylic paint or permanent markers. Thin brushes or paint pens give better control for detailed work. Allow painted designs to dry fully, usually 2 to 4 hours.
- Seal for protection: Brush on a clear, waterproof outdoor sealant or Mod Podge to protect the sign from weather damage. At least two thin coats are recommended, waiting 1 to 2 hours between layers. This step extends your sign’s lifespan outdoors.
- Let the sign cure completely: Store the sign in a dry, ventilated space for 24 hours after sealing to ensure all layers dry and cure properly before installation. A fully cured sign is less likely to chip or fade in outdoor conditions.
This plan uses common supplies and straightforward techniques suitable for beginners. Customizing your sign with personal messages or garden themes makes the process rewarding and the result special. Avoid rushing drying times to ensure the sign lasts well through changing weather. For quicker projects, use fast-drying paints and sealants designed for outdoor crafts.
2. Choosing the Best Materials for Garden Signs
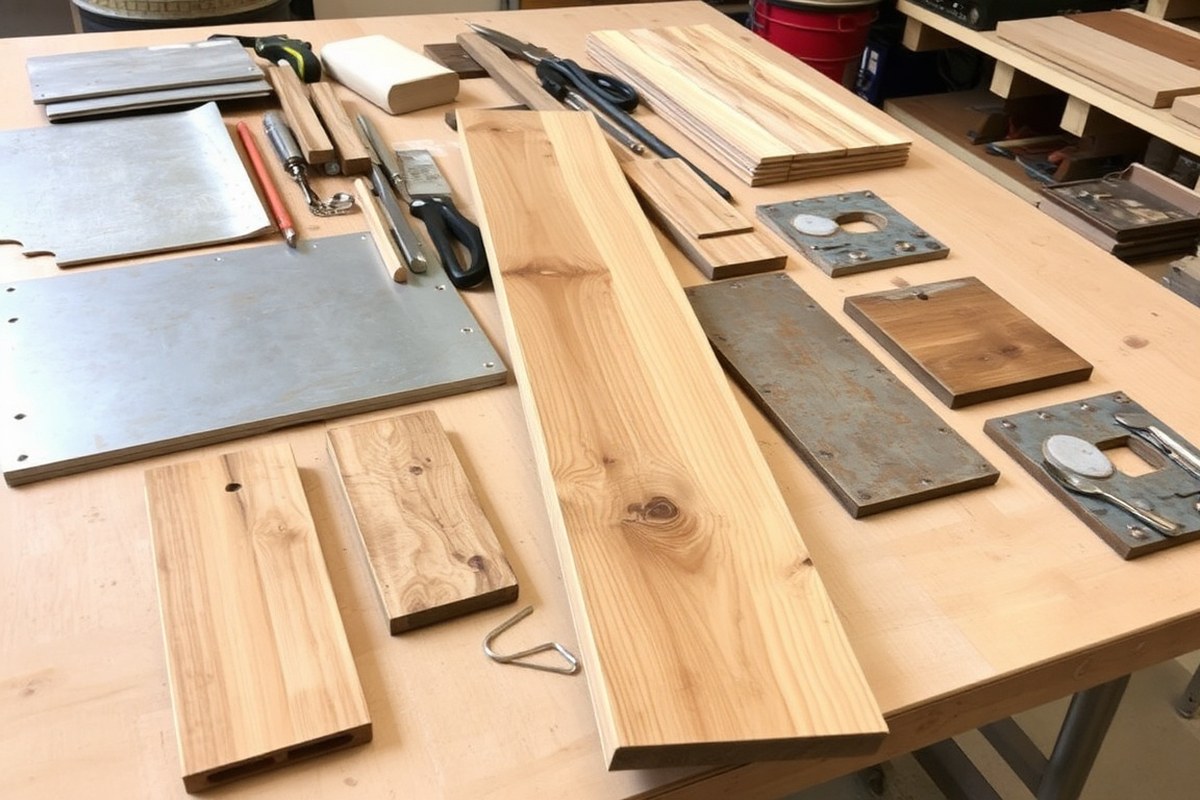
Choosing the right material for your garden sign depends on how long you want it to last, the style you want, and your budget. Cedar and cypress boards are popular because they naturally resist rot and are easy to cut. They take paint well, making them great for rustic or small plaque-style signs. Exterior-grade plywood, like marine or medium-density overlay (MDO), provides a smooth surface ideal for crisp lettering and larger signboards. It’s stable, but cheaper plywood may degrade quickly outdoors unless sealed properly.
Metal options like aluminum sheets are lightweight and won’t rust, offering a long lifespan. Aluminum thickness around 0.040 to 0.063 inches works well for signs that need to stand up to the elements and still remain easy to mount. Recycled materials, such as high-density polyethylene (HDPE) sheets, are waterproof and kid-friendly. These are excellent near irrigation systems or in gardens where you want a durable, low-maintenance label.
Cost varies widely. Cedar and cypress usually fall in the mid-range; you might spend around $10 to $25 for a board sufficient for several small signs. Marine plywood costs about $20 to $40 for a 4×8 foot sheet but can produce many signs and have a smoother finish for painting. Aluminum sheets generally cost more upfront, $50 or more per sheet depending on size, but last longer without maintenance. Recycled materials might reduce cost to near zero if you find leftover sheets or scrap wood suitable for repurposing.
| Material | Pros | Best Use | Approximate Cost |
|---|---|---|---|
| Cedar or Cypress Boards | Wood naturally resists rotting, is simple to saw through, and readily accepts paint. | Bed headers, small plaques, rustic signs | $10 – $25 per board |
| Exterior-Grade Plywood (Marine or MDO) | Stable panel, smooth face for clean lettering | Larger flat signs, arrows, map boards | $20 – $40 per 4×8 sheet |
| Recycled HDPE Sheet | Waterproof, won’t split, easy to clean | Labels near irrigation, kid-friendly gardens | Often free to low cost (scrap material) |
| Aluminum Sheet (0.040, 0.063 in.) | Lightweight, rust-free, long service life | Perimeter signs, wayfinding panels | $50+ per sheet depending on size |
Choosing a material that matches your sign’s purpose and location ensures it holds up over time and looks good. Wooden signs lend a natural, charming look but need sealing against moisture and fading. Metal signs resist weather but require tools for cutting and shaping. Recycled materials cut costs and help the environment but may need more prep for a smooth finish.
Use exterior-grade paint and protective sealants tailored to your chosen material to extend your garden sign’s life and maintain vibrant colors.
3. Designing Your Garden Sign for Style and Readability
Designing a garden sign to be both stylish and easy to read depends mainly on choosing the right font, letter size, and spacing based on how far people will view it. You want your sign’s letters and decorations to complement your garden’s style while standing out enough to catch attention at a glance.
Lettering Styles That Boost Readability
For garden signs, fonts that are clear and simple work best. Sans-serif fonts like Arial or Helvetica offer good readability because their clean edges prevent blurring from a distance. Avoid overly decorative or script fonts for main text, as these can be hard to read outdoors or from far away. However, using a farmhouse-style script font works well as an accent, especially when paired with block letters for contrast. For example, a rustic garden sign can combine bold, blocky letters for plant names and a flowing script for decorative phrases or the garden’s name.
Stenciled letters often produce sharp, neat edges, perfect for ensuring clarity. The potting shed sign example using Fusion Mineral Paint shows how stenciled floral images paired with readable fonts can improve the garden theme without sacrificing legibility. Custom-painted letters using colorful sharpie pens also stand out well if the colors contrast strongly with the background.
Choosing Letter Size and Spacing by Viewing Distance
Letter size should increase with the distance people will view the sign. A simple rule of thumb is to allow one inch of letter height for every 10 feet of viewing distance. For example, seed-bed labels that you’ll see up close can be as small as 1 inch tall. Signs placed closer to a walking path can range from 3 to 6 inches tall, while larger path signs designed to be seen from 20 to 30 feet usually require letters 6 inches or taller.
Letter spacing is just as important for readability. Keep spacing proportional to letter size, too tight, and the words blur together; too loose, and the message becomes disjointed. A general guideline is that the space between letters should be about 20% to 30% of the letter height. This spacing helps maintain clarity without crowding the design. For signs with multiple words, ensuring adequate spacing between words allows viewers to easily separate and recognize each phrase.
Matching Design Styles to Your Garden Theme
Choosing a design style for your garden sign should reflect the atmosphere you want to create. Rustic garden signs thrive on reclaimed wood planks and natural textures like twigs or an old rake head, which add character and blend naturally with outdoor settings. These signs often use muted colors and hand-painted or stenciled lettering combined with small painted details like butterflies or strawberries.
Farmhouse-style signs work well in gardens that aim for warmth and charm. This style often features distressed wood, soft colors, and painted script fonts that look handmade. These signs bring a cozy, nostalgic vibe similar to a warm hug from Grandma, as seen in signs decorated with swoon-worthy farmhouse lettering and floral accents. Vintage-style signs with single wooden planks and overwritten letters also offer a classic, timeless look that suits many garden themes.
For Victorian or more formal garden styles, painted wood stenciling and sharply finished letters create a neat and refined appearance. Adding colors that complement your garden beds can help the sign stand out without clashing. Choose designs that incorporate small, elegant motifs like flower pots or garden tools to tie into the style.
Color, Contrast, and Decorative Elements
Good contrast is essential to ensure your sign’s readability. Using light letters on a dark background or dark letters on a light background creates clear separation that’s easy to read from a distance. Sharpie pens and mineral paints in vibrant colors add brightness but keep them balanced so the sign is inviting but not overwhelming.
Decorative elements should support your garden’s story without distracting from the message. Hand-painted flowers, vines, or rustic charmers like twigs glued into lettering shapes can add texture. Use these sparingly around the edges or beside main text to keep focus on the words. For instance, a small painted butterfly or a stenciled flower pot near the sign’s title can enrich the style while maintaining legibility.
Common Design Pitfalls to Avoid
Too many fonts or overly fancy script fonts make signs hard to read. Limit yourself to one or two complementary fonts. Avoid overcrowding the sign with drawings or text; white space helps your message breathe.
Letter sizes that are too small for the viewing distance create unreadable signs. Similarly, poor color contrast or faded paint can blend your sign into the background, defeating its purpose. Trees, shrubs, or other garden elements shouldn’t block the sign’s view; place it in a clear spot where it can be easily seen.
4. Preparing and Finishing Your Garden Sign Surface
Preparing and finishing your garden sign properly ensures a smooth surface for decoration and extends its life outdoors. Wood and metal require different prep steps such as sanding and priming to help paint or stain stick well. Adding distressing techniques can also create a charming vintage look without compromising durability.
Sanding and Surface Preparation for Wood Signs
Start with sanding your wooden sign to remove rough edges, splinters, and any old finishes, creating a smooth, even surface. Use 80- to 120-grit sandpaper for initial sanding, followed by 150- to 220-grit for a fine finish. Sand with the grain of the wood to avoid scratching the surface. After sanding, wipe off dust with a tack cloth or damp rag and let the wood dry completely before applying any primer or paint.
Cleaning and Priming Metal Sign Surfaces
Metal surfaces need thorough cleaning to remove dirt, grease, and rust traces. Use a degreaser or soapy water and scrub with a brush, then rinse and dry thoroughly. If rust is present, sand it down with medium-grit sandpaper (such as 120 grit) before priming. Apply a rust-inhibiting metal primer to improve paint adhesion and prevent corrosion. Use a brush or spray primer designed for metal, letting it dry according to the label, generally 1 to 2 hours. Priming also helps the decoration stand out and last longer outdoors.
Priming and Base Coats for Durable Decoration
Applying an appropriate primer seals the surface and provides a uniform base for paints or stains. For wood, acrylic or latex primers work well, blocking tannins and preventing paint peeling. One thin, even coat is usually sufficient; allow 2 to 4 hours drying time between coats. For metal, use specially formulated metal primers that resist rust and improve paint binding. White or light-colored primers are best for brighter paint colors, while tinted primers can boost darker shades. Avoid skipping primer as paint may chip or fade quickly in outdoor conditions.
Steps to Prepare and Finish Your Garden Sign Surface
Follow these basic steps to get your wood or metal surface ready for decoration and ensure lasting results:
- Sand the surface: Use appropriate grit sandpaper (wood: 80-220 grit; metal: 120 grit) to smooth the surface and remove old finishes or rust.
- Clean the surface: Wipe dust from sanding and clean metal with degreaser or soapy water; dry completely.
- Apply primer: Choose a wood or metal primer and apply an even coat; let it dry fully.
- Apply base coat: Paint a base color if desired and let dry; this helps decoration stand out.
- Add decoration: Once base coats dry, add letters or designs.
- Seal and protect: After decoration dries, apply a clear sealer for outdoor durability.
Distressing Techniques for a Vintage Look
To give your sign a rustic, aged charm, gently distress the paint with light sanding after it dries. Use 60- to 100-grit sandpaper focusing on raised edges, corners, and areas that would naturally wear over time. Avoid sanding through to bare wood unless you want a highly weathered effect. Another option is to apply a dark wax or stain unevenly over the painted surface to mimic years of dirt and wear. Distressing doesn’t affect protective finishes applied after decoration, so seal the sign afterward to keep it weather-resistant while showing vintage character.
5. Techniques to Add Letters and Decoration to Signs
You can add letters and decorations to your garden sign using painting, stenciling, wood burning, or transfers, each with different skill needs and looks. Painting offers color flexibility, wood burning creates a permanent etched look, stencils help keep letters clear and uniform, and transfers let you apply precise designs easily. Choosing the right method depends on how much detail you want, your tools, and how durable you want the lettering to be.
Freehand Painting: Colorful and Customizable
Painting letters by hand lets you pick any color or style, making signs bright and personal. Use acrylic craft paint for good coverage and weather resistance. Start by lightly drawing your letters with a pencil or chalk to plan placement. Then apply paint with a small brush, several thin coats work better than one thick layer. Let each coat dry 15 to 30 minutes before adding the next. This method costs $5, $15 for basic paint and brushes. Hand-painting may be less precise, especially for curved or small text. Using a primer or painting on a base coat like Fusion Mineral Paint in Casement, a cool white, helps the colors stand out and prevents paint peeling.
Painting works well if you want bold, colorful signs and don’t mind spending a bit more time perfecting details. Avoid painting directly on bare wood without sealing first, because moisture inside the wood can cause the paint to peel and the surface to rot.
Stencils: Clear Letters with Beginner-Friendly Steps
Stencils give sharp edges and consistent font shapes without advanced painting skills. You can buy or cut custom letter stencils yourself using a Cricut machine, which cuts designs on thin plastic or cardstock to your exact specifications. Tape the stencil firmly on the sign surface and use a small sponge or stencil brush to dab paint over the cutouts. Apply paint sparingly to avoid bleeding under the edges. Remove the stencil while paint is still wet for clean lines. Stencils cost about $10 to $30 depending on size and materials, plus paint.
Using stencils works well for beginners since it reduces freehand errors and speeds up creating multiple signs with the same lettering style. Keep stencils clean and dry for reuse. If using transfers or vinyl letters from a Cricut instead, these apply like stickers and avoid any brush stroke texture entirely, but they may peel outdoors over time without proper sealing.
Wood Burning: Permanent and Rustic Letters
Wood burning uses a heated pen to etch letters directly into the wood, creating a durable and natural look. This technique requires a wood burning tool (about $20, $60) and practice to keep letter sizes and shapes consistent. Before burning, sketch letters lightly in pencil. Hold the wood burner with steady hands, and gently trace over your pencil lines. Different tips allow you to make varied line widths for decoration. This method doesn’t require paint but can be combined with staining or sealing for added contrast.
Wood burning is more permanent and weather resistant than paint, making it great for outdoor signs. Mistakes are harder to fix, so test your technique on scrap wood first. Wood burning works best on softer woods like basswood or pine where the heated tip can create clear, dark lines.
Transfers and Vinyl Letters: Precision and Ease
Transfers or vinyl lettering produced by machines like Cricut offer precise text or images that stick to the sign surface. You create the design digitally, then cut it on vinyl sheets. After weeding excess vinyl, use transfer tape to lift and position the letters on the wood. Press firmly and peel back the tape. These letters come ready-made in various fonts and colors and are suitable for beginners who want clean, uniform graphics without hand skills.
This method costs around $20 or more for a starter Cricut machine and materials. It’s quick and results in smooth, paint-free finishes. However, vinyl must be sealed with varnish or outdoor-rated spray to avoid peeling due to sun or rain exposure.
Tips for Best Results and Avoiding Mistakes
Different methods fit different projects: paint brightens and decorates with flexibility, stencils add neatness for repeat designs, wood burning offers durability and rustic charm, and transfers produce professional precision. Before starting, prepare the wood surface by sanding and applying a primer or base coat to help paint and transfers stick better.
For stencils, reduce paint bleeding by using a light touch and dabbing motions instead of brushing. Practice with scrap wood. With transfers, clean the surface thoroughly to remove dust or oils for better adhesion. Wood burning demands patience; err slowly and check your work often. Avoid rushing any step, as details like uneven paint or misplaced letters are hard to fix once dry or burned in.
Keep your painting and stenciling surfaces dry and clean before starting, and always test new techniques on scrap wood to avoid costly mistakes on your actual garden sign.
6. Weatherproofing and Sealing Garden Signs for Longevity
Protecting your garden sign from sun, rain, and fading starts with choosing the right sealant designed for outdoor use. Clear polyurethane or specialized outdoor wood sealants work well to guard against moisture and UV damage. These sealants form a protective layer that prevents cracking, warping, and color fading, preserving your sign’s appearance through changing weather.
Applying protective coatings should come after your paint or decorative finish is fully dry. Wait at least 24 hours before sealing to avoid trapping moisture or altering the paint’s look. Use a clean brush or foam applicator to evenly coat the entire surface, including edges and the back of the sign, to ensure consistent protection. One to two coats are usually enough; allow each coat to dry completely, usually 4 to 6 hours, before applying the next. This timing can vary based on temperature and humidity.
- Choose a clear, outdoor-rated sealer like spar urethane or marine varnish
- Apply sealant in a dust-free, shaded area for best adhesion
- Use a soft brush or foam applicator to avoid streaks and bubbles
- Seal all sides of the sign, including edges and back
- Allow each coat to dry 4-6 hours before applying another
- Plan to reapply the sealer every 1-2 years, depending on weather exposure
- Store unused sealant tightly sealed away from heat and sunlight
Maintaining your sign’s finish requires regular checks and occasional reapplication of sealant. After a year or two, signs exposed to full sun and frequent rain may show signs of dulling or small cracks. Lightly sand the surface with fine-grit sandpaper before adding a fresh coat of sealant. This simple maintenance helps extend the life of your garden sign, keeping it looking crisp and colourful for seasons to come.
Costs for outdoor sealants vary, typically $10 to $20 per quart, which covers several garden signs depending on their size. Investing time and materials in proper sealing is worthwhile because untreated signs can deteriorate within a year in harsh outdoor conditions. Remember to follow label instructions on your sealant for specific application temperatures and safety guidelines, and consider wearing gloves and working in a well-ventilated space.
7. Creative Ways to Use Recycled and Upcycled Materials
Reusing scrap wood or old tools for garden signs is a smart way to save money and add character to your outdoor space. Start by selecting wood that’s still solid, avoiding pieces with extensive rot or cracking, as these can break down quickly when exposed to weather. Scraps from pallets, old furniture, or storm-damaged lumber often work well and can provide a charming rustic look at little to no cost. Sand the wood lightly to remove splinters but leave some texture for a worn, natural appearance.
Old gardening tools like rakes, shovels, or even worn-out spades can transform into unique, eye-catching signs. For example, an old rake head can serve as a frame for hanging small plant signs or garden tags. Secure wooden boards to the backs of tool handles with screws or heavy-duty wire to create a mixed-material sign. Always wear gloves when handling rusty metal to avoid injuries and thoroughly clean tools before repurposing to prevent dirt and rust from spreading.
Using repurposed materials matters because it reduces waste and often results in a more personalized, visually interesting garden décor. Wine corks, for instance, can be glued onto a wooden base to form letters or shapes that spell out garden-related words. This option suits small signs near herb patches. Another creative approach is using spindles from old furniture as posts or decorative frames for your garden signs.
It helps to plan your project based on the final location and use. For outdoor signs exposed to rain and sun, treat scrap wood with an outdoor wood sealer or weatherproof paint. Unsealed wood absorbs water and rapidly deteriorates. Signs made mainly of metal tools need a protective clear coat spray to prevent further rust. When securing components, use galvanized screws or stainless steel nails to resist corrosion.
Be aware of some pitfalls. Old wood may contain nails or staples that damage tools or cause injuries during preparation. Use a metal detector or carefully inspect material before cutting. Variations in thickness and texture can make it tricky to attach letters or decorations evenly, so measuring twice before drilling holes is essential. Also, reclaimed wood might take longer to dry out if freshly salvaged, so allow at least a week in a dry, ventilated area before painting or sealing.
Practical examples include attaching letters made from repurposed metal cutouts onto a scrap plank for a strong herb garden sign, or using a reclaimed wooden drawer front as a mini sign with a chalkboard paint finish for easy updates. For a whimsical touch, old garden gloves stuffed with straw can become miniature scarecrows holding small signs. Costs vary widely; scrap wood and tools can be free sourced from your home or neighbors, while sealers and paints typically cost $10 to $30 per container but last many projects.
Overall, upcycled garden signs offer an affordable and environmentally friendly way to add personality to your garden. By cleaning, prepping, and sealing materials properly, and incorporating safety precautions like protective gear and sturdy fasteners, your signs can last through seasons while telling a story about reuse and creativity.
8. Creating Seasonal and Changeable Garden Signs
Creating garden signs that you can update every season keeps your outdoor space fresh and inviting. Chalkboard signs and fabric or canvas signs offer simple, reusable options. Chalkboards allow you to write or draw new messages with liquid chalk markers, making it easy to change text or designs without starting from scratch. Fabric signs, such as those made from natural burlap or garden flag blanks, can be painted or stenciled with fabric paint and swapped out or refreshed according to the season.
Chalkboard signs are practical because they are weather-resistant when sealed and provide a clean slate for customizing your garden message anytime. Fabric signs add a farmhouse-style charm and are lightweight enough to hang or stake into the ground. Using vivid tile paint pens or warm-toned Sharpies allows you to add detailed designs that stand out on natural fabrics. Follow these steps to make your own changeable chalkboard and fabric garden signs:
- Choose your base. Select a smooth wooden board, metal sheet, or purchased chalkboard panel around 12 by 18 inches for easy visibility and handling.
- Prepare the surface. Sand wooden or metal surfaces lightly for paint adhesion, then clean them thoroughly to remove dust or oils.
- Apply chalkboard paint. Brush on two to three coats of matte chalkboard paint, allowing each coat to dry fully (about 1 hour) for a durable writing surface.
- Condition the chalkboard. Rub a piece of chalk over the surface and wipe it off to prevent permanent ghosting and improve erasability.
- Create fabric signs. For a rustic option, cut natural burlap or plain garden flag fabric to size and stretch it over a wooden frame or backing.
- Add designs. Use fabric paint in seasonal colors like sunny yellows and oranges or tile paint pens to personalize your fabric sign. Let paint dry according to manufacturer instructions, usually 24 hours.
- Protect fabric signs. Spray with a fabric sealant to repel moisture and extend outdoor life.
- Update messages easily. Write seasonal greetings or garden reminders on chalkboards with liquid chalk markers; change fabric signs each season or layer with interchangeable inserts for flexibility.
Keep chalkboard signs in a shaded area or under a covered porch to prolong the life of paint and make writing last longer in moist weather.
9. Safe Tool Use and Workshop Practices
Working safely with tools and materials when making garden signs is essential to avoid injuries and ensure a smooth process. When cutting wood or canvas fabric, wear safety goggles to protect your eyes from dust and flying splinters. Gloves provide grip and hand protection but avoid bulky ones that reduce tool control. For drilling, always secure the material firmly on a stable surface and use appropriate drill bits for the material type. Keep fingers clear of the drill area and avoid loose clothing that could get caught.
Painting and burning letters on signs require good ventilation to prevent inhaling fumes. Outdoors is best, ideally on a calm, dry day to avoid dust settling on wet paint. If working inside, open windows and use fans to circulate air. When burning letters with wood burners or hot tools, wear heat-resistant gloves and never leave the tool unattended. Allow the tool to cool completely on a non-flammable surface before storing.
- Safety goggles or glasses for eye protection
- Protective gloves suited to the task (cut-resistant for cutting, heat-resistant for burning)
- Dust mask or respirator when sanding or painting
- Secure clamps or vices to hold materials during cutting or drilling
- Work in well-ventilated areas, preferably outdoors for painting and burning
- Keep a first aid kit nearby for minor cuts or burns
- Wear clothes that fit well and avoid loose sleeves or jewelry
Handling power tools safely starts with reading and following the tool’s instructions. Check cords and blades for damage before use. Use steady, controlled motions and do not rush cuts or drilling. Set your workpiece up to avoid kickbacks or slips by keeping it stable and aligned with the tool’s path. Take breaks to reduce fatigue, which can lead to mistakes.
When painting garden signs, use water-based or low-VOC paints that minimize toxic fumes. Let paint dry fully outside or in a well-ventilated space, which usually takes a few hours to overnight depending on temperature and humidity. Burning letters or designs on wood should be done in a dry area free from flammable materials, with a fire extinguisher or water source nearby as a precaution.
10. Installing and Securing Your Garden Sign Outdoors
Choosing the right spot for your garden sign is key to making sure it grabs attention and lasts through all weather conditions. The location should be visible from the main paths or entrances and avoid areas where plants might grow too tall or block the view over time. Consider sunlight exposure as well, since signs placed in full sun might fade faster without proper weatherproofing.
Securing your sign firmly into the ground prevents it from leaning or falling during wind or storms. Typically, burying the post at least one-third of its length below ground provides good stability. For example, if your post is 3 feet tall, bury 12 inches deep. Use a level to check that the post is perfectly vertical before fixing it in place to keep the sign straight and easy to read.
Weatherproofing plays a major role in making sure your sign stays looking good for years. Choose paint and adhesives designed for outdoor use to resist rain and temperature changes. Strong backing like treated wood or metal posts also helps handle moisture and sun exposure over time without warping or rusting.
- Select a location that is visible, clear of obstruction, and in a spot where the sign can be securely anchored.
- Dig a hole deep enough to bury about one-third of the post length, roughly 10 to 14 inches for a standard 3- to 4-foot signpost.
- Insert the post into the hole and use a level to make sure the post stands perfectly straight both vertically and horizontally.
- Add soil or gravel around the post to fill the hole. Compact the soil firmly by tamping it down as you fill to prevent shifting.
- Check level again before fully settling the soil to ensure the post hasn’t moved during filling.
- Attach the sign using weather-resistant screws or brackets designed for outdoor use to ensure durability and hold through weather conditions.
- Apply any additional weatherproofing sealants or protective coatings to the edges and hardware to help prevent water damage and rust.
For signs placed on walls or fences instead of posts, use weatherproof anchors and check that the surface is intact and dry before mounting. Always allow fresh paint or sealant on your sign to dry fully before installation, usually 24 hours, to prevent smudging or peeling outdoors.
11. Choosing the Right Size and Lettering Height
Choosing the right size for your garden sign and its lettering is key to making sure your message is clear from the intended viewing distance. Letters that are too small get lost, while oversized ones can look clumsy and consume too much space. A simple rule of thumb is about 1 inch of letter height for every 10 to 12 feet of distance between the sign and the reader. This helps maximize readability without wasting material or space.
| Viewing Distance | Minimum Letter Height | Notes |
|---|---|---|
| 2, 4 ft | 0.5, 0.75 in. | Seedlings, herb pots, bed corners |
| 5, 10 ft | 1, 1.5 in. | Small bed headers and row labels |
| 10, 20 ft | 2, 3 in. | Path arrows and welcome boards |
| 20, 40 ft | 3, 4 in. | Perimeter or wayfinding panels |
Seedbed labels and small plant markers typically need smaller letters, around half an inch to three-quarters of an inch tall, because you look at them from close up. For path signs or welcome boards, letters that range from 2 to 3 inches work well since people are standing several feet away. Larger perimeter signs require letters at least 3 inches tall to catch attention at larger distances.
Letter and line spacing also impact legibility. Letter spacing that is too tight can cause the words to appear jumbled, while too loose spacing wastes space and makes reading harder. For spacing between lines of text, aim for about 60 to 80 percent of the letter height. For example, if your letters are 2 inches tall, line spacing should be around 1.2 to 1.6 inches. This prevents descenders, the parts of letters like “g” or “y” that extend below the baseline, from touching the line beneath.
Signs with proper sizing and spacing don’t just look professional, they’re easier to read at a glance. Overcrowded lettering or too-small fonts cause frustration, and signs might go unnoticed. Take measurements before you start, keeping the viewer’s average distance in mind, and remember that bigger letters require more material and paint but improve visibility.
Test your sign’s readability by viewing it from the intended distance before finalizing, better to adjust sizing early than redo the whole sign later.
12. Troubleshooting Common Mistakes with Garden Signs
Paint cracking or peeling on outdoor garden signs usually happens because the surface wasn’t properly prepared or the paint isn’t suited for exterior use. Moisture, sun exposure, and temperature swings also cause paint to fail. To avoid this, always clean and sand the wood before painting. Use outdoor acrylic paint designed to resist UV rays and moisture. Apply at least two thin coats of paint, allowing each to dry fully, usually 2 to 4 hours, before adding another. Then, seal the sign with a clear outdoor varnish or polyurethane to lock in the paint and protect against weather. This step helps paint last for several seasons, often 2 to 3 years depending on climate.
Uneven or poorly shaped letters reduce the sign’s legibility and overall appeal. Hand-painting letters can be tricky, especially on rough or uneven surfaces. To improve results, sketch your design with a pencil or use stencils before painting. To get smoother edges, use small foam brushes or paint pens instead of standard brushes. Lettering guides or templates printed on cardstock can also help maintain size and shape consistency. For touch-ups, gently sand rough edges with fine-grit sandpaper and repaint as needed. Taking your time and layering thin paint improves control and finish.
- Common causes of peeling paint: poor surface prep, low-quality paint, exposure to moisture and sun
- Fix peeling by sanding off loose paint, cleaning surface, repainting with outdoor acrylic paint, and sealing
- Uneven letters improved by using stencils, pencil guides, and small foam brushes or paint pens
- Regularly check signs for wear and apply an extra clear coat annually for longer life
- Repair damage like cracks or dents with wood filler, sand smooth, repaint, and reseal
- Consider repositioning signs to less exposed spots to reduce weathering
Rapid weathering or damage might mean the protective sealant wore off or the wood is naturally prone to cracking. Signs placed in direct sunlight, heavy rain, or near sprinklers need extra protection. When the sign looks faded, clean it gently with water and a soft brush, then lightly sand and repaint just the faded sections before resealing. Severely damaged wood can be patched with waterproof wood filler or replaced entirely. Scheduling resealing every year at the start of spring helps maintain paint and wood condition. Using a good-quality, outdoor-rated varnish can add about $10 to $20 to the project cost but dramatically extends sign life. With these steps, your garden sign can stay clear and appealing from one season to the next without extra effort.
Step-by-Step Action Plan to Make Your Garden Sign
Follow these steps to create a personalized garden sign that lasts outdoors and stands out visually.
- Before you start: Choose durable materials like cedar or recycled wood to ensure your sign withstands weather. Confirm surface is smooth and prepared.
- Day 1: Draw your design on paper or use a stencil to plan lettering size and layout. This helps maintain good readability in your garden space.
- Day 2: Transfer your design onto the prepared sign surface carefully with a pencil or carbon paper. Check alignment and spacing before proceeding.
- Day 3: Apply letters and decoration using paint or wood burning, practicing safety with tools. Finish with a clear sealant once dry to protect the artwork.
- Day 4: Attach hooks, stakes, or brackets suitable for your sign’s weight and location. Test stability by gently shaking the installed sign.
- Week 1: Check the sign after rain or heavy sun for any wear. Touch up paint or reseal spots starting to fade or crack.
Frequently Asked Questions
What Are Some Budget-Friendly Ideas for Garden Signs?
Many budget-friendly garden signs use simple wood or recycled materials, costing under $10. Choosing low-cost supplies lets you create unique signs without breaking the bank.
How Can I Make My Garden Sign Double as a Gift?
Personalize your garden sign with the recipient’s name or favorite plants. Adding quirky sayings or seasonal themes makes the sign a thoughtful gift for gardeners.
What Tools Do I Absolutely Need to Start Making Garden Signs?
Basic tools include a saw, sandpaper, paintbrushes, and markers. Starting with these ensures you can cut, smooth, and decorate your sign effectively.
Can I Use Non-Wood Materials to Make Garden Signs?
Yes, materials like metal, plastic, or slate are durable alternatives. They offer different textures and weather resistance for unique sign designs.
How Do I Protect Painted Garden Signs from Fading?
Apply a UV-resistant clear sealant to block sun damage. This helps your sign’s colors stay bright season after season.
What’s a Quick Method to Add Letters Onto a Wooden Garden Sign?
Stenciling with outdoor paint is fast and produces clean, readable letters. It’s ideal for beginners seeking a neat look.
Key Points to Remember
Your garden sign showcases your style while marking your space. Focus on proper material choice, clear lettering, and secure placement to make a sign that lasts. Start by picking your favorite wood or recycled item today and sketch your design to bring your garden sign to life.