What Materials Can You Laser Engrave: A Complete Guide for Beginners
What materials can you laser engrave? You can engrave a wide range of materials including wood, leather, acrylic, anodized aluminum, coated metals, glass, slate, stone, cardboard, paper, and rubber using standard diode or CO2 lasers. Bare uncoated metal usually requires a marking compound or a specialized fiber laser for effective engraving. Start with materials like wood or acrylic to get clear, detailed results with common CO2 laser machines.
Key Takeaways
- Wood engraves beautifully and cuts well with CO2 lasers, making it a top choice for beginners.
- CO2 lasers are versatile and work best on non-metal materials such as leather, plastic, and glass.
- Engraving bare metal needs either a marking compound or a dedicated fiber laser for clear marks.
- Plastics like acrylic (PMMA) engrave cleanly on CO2 lasers but may release fumes requiring ventilation.
- UV laser technology allows cold marking on glass and jewelry without heat damage.
- Organic materials absorb laser beams instead of melting, ensuring precise cuts on wood, paper, and textiles.
What Materials Can You Laser Engrave? The Complete List
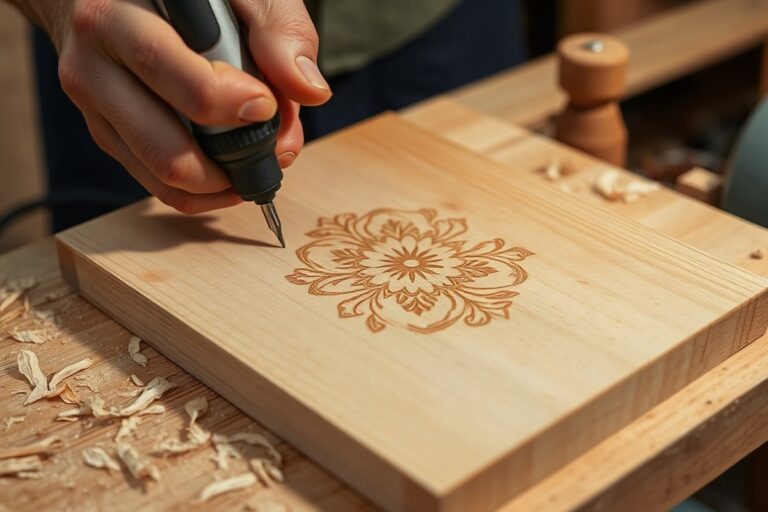
Laser engraving works best on a variety of materials across several categories, including organics, plastics, metals, stone, and fabrics. Wood is one of the most common and versatile materials, suitable for both cutting and engraving with CO2 or diode lasers. Woods like maple, cherry, oak, and walnut offer rich textures and clear contrast when engraved. Softer woods such as basswood and balsa produce finer details but burn easily, so controlling laser power and speed is important for quality results.
Plastics like cast and extruded acrylic are popular for laser engraving, especially with CO2 lasers. Cast acrylic is ideal for white engraving effects, while extruded acrylic cuts cleanly with polished edges. Materials such as Delrin (acetal) and ABS are also engravable but require proper ventilation due to fumes. Avoid plastics like PVC and vinyl, as they release toxic gases and damage the laser machine.
Leather and fabrics respond well to laser engraving using a CO2 laser. Natural leather shows clear, dark engravings due to material charring, while synthetic fabrics can create tone-on-tone or faded visual effects. Laser cutting can prevent fabric fraying by sealing edges. Always choose flat, stable fabric pieces for consistent results and adjust laser power to prevent burning.
Metals generally require fiber laser technology for precise engraving, especially for stainless steel, aluminum, copper, and brass. Marking anodized aluminum or coated metals can be done with CO2 lasers, but engraving bare metals needs fiber lasers operating typically around a 1064 nanometer wavelength. This method produces fine, durable markings without damaging the metal.
Stone, glass, and ceramics can also be laser engraved, mostly with UV or CO2 lasers adapted to the specific materials. Stone with a flat surface works best for showcasing detailed engravings. UV cold light lasers allow engraving on glass without causing heat damage, preserving delicate items like glass jewelry. Some stones engrave well with CO2 lasers, resulting in white or frosted effects depending on texture.
Paper, cardboard, and rubber are additional materials suited for laser engraving and cutting using CO2 lasers. Paper yields quick, clean results but requires careful power settings to avoid burning. Rubber engraving is often used to create stamps, producing crisp negative images. Cork behaves similarly to wood and cuts or engraves cleanly.
Materials that produce the best quality engravings generally share stable surfaces and predictable reactions to laser heat, such as hardwoods, cast acrylic, and anodized metals. Engraving attempts on toxic, highly flammable, or heat-sensitive materials can lead to poor results and safety hazards. Always check material safety data sheets to confirm suitability and follow ventilation and safety guidelines. Choosing the right laser type and adjusting settings like speed, power, and frequency ensure clean, detailed, and consistent engraving outcomes on these materials.
How Laser Type Affects Material Compatibility and Results
The type of laser you use affects which materials you can engrave or cut and how well it works. This mainly depends on the laser’s wavelength, which determines how the beam interacts with different substances. Shorter wavelengths like fiber and UV lasers focus energy in a way that works efficiently on metals and some plastics. Longer wavelengths from CO2 and diode lasers suit organic and non-metal materials because they absorb the beam differently.
CO2 lasers emit light around 10,600 nanometers, ideal for wood, acrylic, leather, fabric, paper, and glass. They can cut and engrave these materials well but struggle with bare metals because the beam passes through or reflects off metals without causing enough damage. You can mark anodized aluminum with CO2 lasers, but bare metal requires a special marking spray or a fiber laser.
Diode lasers share similar wavelengths with CO2 machines but usually at lower power and are best for wood, leather, dark acrylic, and coated metals. They can mark some metals with coatings but cannot cut through metal. They are a budget-friendly option for beginners focusing on organic materials and some coated metals.
Fiber lasers operate around 1,000 to 1,100 nanometers, shorter than CO2 and diode lasers. This makes them highly effective at marking and engraving metals like stainless steel, aluminum, brass, and titanium. They also work with some hard plastics, producing durable, precise marks without needing coating sprays. Fiber lasers are generally more expensive, starting around $2,000 for entry-level units, but they provide direct metal engraving, usually faster and deeper than CO2 or diode lasers with marking sprays.
UV lasers use a much shorter wavelength (around 355 nanometers), allowing them to engrave delicate materials like certain plastics, glass, and thin coatings without burning or melting the surface. They can target materials invisible to longer wavelengths, making them valuable for specialized applications like microelectronics or fine glass etching, but they are less common in hobbyist setups.
| Laser Type | Best for These Materials | Common Applications | Metal Engraving Ability |
|---|---|---|---|
| Diode | Wood, leather, fabric, coated metal, dark acrylic | Custom logos, personalized wallets, glass etching | Marks coated metal only; can’t engrave bare metal |
| CO2 | Wood, clear acrylic, glass, rubber, leather | Cut shapes, rubber stamps, glass awards | Marks anodized aluminum; no bare metal engraving |
| Fiber | Stainless steel, aluminum, brass, titanium, hard plastic | Jewelry, part markers, metal business cards | Direct, deep engraving on bare metal |
| UV | Special plastics, glass, thin coatings | Microelectronics, fine glass etching | Can engrave coated metals and delicate surfaces |
To get good results, match your material with the right laser type. For example, use CO2 or diode lasers for cutting and engraving plywood or leather. For marking steel or aluminum parts, a fiber laser is best. Processing parameters like power, speed, and focus settings vary for each material and laser type, so testing is key. A CO2 laser might require 10 to 40 percent power at slower speeds for deep wood engravings, while fiber lasers use higher power and speed to mark metals without damage.
Some machines can only handle certain materials because they lack the right wavelength or power. Using the wrong laser type may cause weak marks, material damage, or no effect at all. For instance, clear acrylic doesn’t absorb diode laser light well, so engraving is often ineffective. Dark acrylic works better because it absorbs light and melts or vaporizes cleanly.
Using a marking spray on bare metal with a CO2 or diode laser creates only surface marks that can fade; fiber lasers provide permanent metal engraving without extra chemicals.
Organic Materials Ideal for Laser Engraving
Organic materials such as wood, leather, paper, and fabric respond well to CO2 laser engraving, producing clear designs with good contrast. These materials absorb the laser’s energy efficiently, allowing precise engraving and cutting at appropriate thicknesses. Choosing proper wood types and thicknesses, selecting safe leather and fabrics, and adjusting your laser settings will help you achieve the best brightness, detail, and edge quality.
Common Woods and Plywood Varieties
Woods like maple, cherry, walnut, and high-quality plywood such as Baltic birch are ideal for laser engraving due to their smooth surfaces and consistent colour. Engraving naturally chars the wood’s surface, creating high contrast designs with crisp edges. Typical thicknesses range from 1/8 inch (about 3 mm) to 1/2 inch (12 mm), but thinner sheets (1/8 to 1/4 inch) cut more easily on desktop CO2 laser machines.
Use lower power settings for softer woods, as they engrave faster but may burn unevenly. Hardwoods produce sharper details but often require slightly higher power and slower speed to avoid excessive burning. For plywood, select types without glue containing formaldehyde to minimise toxic fumes and preserve machine components.
Types of Leather and Recommended Thickness
Laser engraving works well on both genuine and artificial leather, with typical thicknesses between 1 and 3 mm for cutting. Genuine leathers such as vegetable-tanned or chrome-tanned varieties offer deep, clear engraving as the laser slightly chars the surface, improving contrast. Artificial leathers designed for laser use provide consistent engraving and a variety of colours while producing minimal smoke.
Ensure leather is free from finishes containing PVC or chlorine, which can release hazardous gases when cut or engraved. Cleaning the surface before engraving improves brightness and detail. Adjust laser power and speed to avoid excessive burning or melting; start with lower power for thinner leather and increase gradually for thicker pieces.
Safe Fabrics and Textiles for Laser Work
Natural fabrics like cotton, linen, wool, and felt are safe and suitable for engraving and cutting. These materials absorb CO2 laser energy well, producing clean edges and detailed engravings without melting. Typical fabric thickness for cutting ranges up to 3 mm, with tightly woven textiles performing better for cutting tasks since they resist fraying.
- Use 100% natural fabrics to avoid toxic fumes (check labels for synthetic blends with PVC)
- Pre-wash fabrics to remove sizing or coatings for better engraving results
- Start with low power and higher speed settings to prevent scorching
- Test small fabric samples to adjust parameters and reduce edge charring
- Use air assist if available to keep the cutting line clean and reduce smoke residue
For paper or cardboard, thinner sheets (up to 0.1 inch, 2.5 mm) typically cut and engrave well but may require slower speeds to avoid burning edges. Heavier fabrics like denim can be engraved but may need multiple passes or increased power.
Plastics and Acrylics: Best Practices and Risks
Choose plastics carefully when laser engraving because some release hazardous gases or damage your machine. Acrylic, also called PMMA, is a top choice for CO₂ lasers, offering clean engraving and cutting options. Clear acrylic cuts with smooth, polished edges, while extruded acrylic engraves with less contrast but withstands cutting better. Avoid plastics with chlorine like PVC and vinyl since they emit hydrogen chloride gas, which harms equipment and requires ventilation beyond typical workshop setups.
Laser engraving PVC or PVC-backed materials is unsafe. These release chlorine-based fumes that corrode optics and metal parts, and can pose health risks. No airflow or filter setup fully contains these gases. Other plastics such as polycarbonate also don’t work well; they tend to char, yellow, or ignite instead of cutting cleanly. Identifying the exact plastic type before engraving is essential, especially when dealing with unlabeled sheets or mixed materials.
Clear acrylic is invisible to diode lasers, which limits your options depending on your machine. CO₂ lasers handle clear and opaque acrylic well, but diode lasers may require marking sprays or special settings. Ventilation is mandatory for any plastic engraving. Always use a high-quality exhaust system capable of at least 100 cubic feet per minute (CFM) airflow for small machines. For larger operations, aim for 300 CFM or more to prevent fume buildup.
| Material | Category | What Goes Wrong | What to Check First |
|---|---|---|---|
| PVC, PVC-backed vinyl, faux leather | Do not laser | Releases hydrogen chloride gas, corrosive and toxic fumes | Ask supplier for polymer type; avoid unlabelled plastics |
| Polycarbonate (Lexan, Makrolon, PC) | Do not laser | Yellows, chars, can ignite instead of clean cutting | Check sheet marking; confirm not polycarbonate if unsure |
| Extruded Acrylic (PMMA) | Safe for cutting and engraving | Engraving produces transparent, low-contrast marks | Laser type: best with CO₂; engraving less clear with diode |
| Cast Acrylic (PMMA) | Safe for laser | Engraves with high contrast and smooth edges when cut | Use CO₂ laser for best results |
| PTFE and other fluoropolymers | Do not laser | Produces highly toxic decomposition gases | Avoid completely for engraving |
When engraving plastics, run tests on scraps to dial in engraving speed and power. Cast acrylic typically engraves at 10-20% power and 200-300 mm/s speed with a CO₂ laser, but vary these based on thickness and color. Use multiple passes for deeper engraving rather than higher power that risks melting. Always wear protective eyewear and operate your machine in a well-ventilated area or use an exhaust system with activated carbon filters designed for organic chemical vapors.
To reduce hazards, only buy plastics labeled for laser compatibility or known materials like cast acrylic. Avoid any sheets without manufacturer specs or unclear markings. A clean exhaust path and regular machine maintenance help prevent corrosive damage and ensure consistent performance.
Engraving Metals: When and How It Works
Directly engraving bare metal with CO2 or diode lasers generally does not work well because these lasers mostly reflect off metal surfaces. Instead, you need to apply a marking compound like Cermark or Thermark, which forms a thin 10-20 micrometer coating that the laser can interact with to create visible marks. This process is more surface-level and produces a mark rather than a deep engraving. It’s common to use these compounds on stainless steel, brass, or raw aluminum if you only have a CO2 or diode laser.
Fiber lasers, on the other hand, excel at engraving bare metals because their 1064 nm wavelength couples efficiently into metals like stainless steel and titanium. This efficient absorption means fiber lasers can produce deep, permanent, and high-contrast marks much faster than CO2 or diode lasers. If you want clean, durable engraving on bare metal without coatings, you’ll need a fiber laser system. Fiber laser machines do come at a higher price, generally starting at several thousand dollars more than typical CO2 or diode setups. However, the speed, depth, and quality of the marks often justify this investment for metal-focused work.
Choosing the right laser depends on your material and project goals. Use CO2 or diode lasers with marking compounds for occasional metal marking or if you work mainly with coated metals, anodized aluminum, or painted surfaces that the laser can engrave directly. Many hobbyists and small-business engravers find that applying a marking spray is a cost-effective way to personalize metal parts without buying a fiber laser. For frequent or professional-grade bare metal engraving, fiber lasers offer clear advantages despite the higher upfront cost.
Fiber lasers can also mark anodized or powder-coated metals without additional compounds. That versatility makes them ideal if you need to work on various metal finishes. CO2 lasers can efficiently mark anodized aluminum by stripping the surface coating to reveal contrast but cannot penetrate bare metal beneath. This difference explains why fiber lasers handle raw stainless steel or brass deeply and permanently, while CO2 systems require coatings to leave a lasting mark.
Be sure to apply marking compounds evenly and let them dry completely before engraving with CO2 or diode lasers to avoid uneven or faint marks.
Stone, Glass, and Ceramics: Special Engraving Considerations
Laser engraving on stone, glass, and ceramics requires careful choice of material and technique to avoid cracking and achieve clear detail. Thinner glass poses the highest risk of shattering, while certain stones like slate and marble offer better contrast. UV lasers, operating at 355 nm, enable precise glass marking even inside the material, without heat damage or surface prep.
Glass Engraving Tips and Thickness Requirements
Glass can shatter if exposed to excessive heat or uneven energy distribution during engraving. To avoid this, work with thicknesses of at least 1/8 inch (3 mm). Thicker glass increases durability and reduces cracking risk. Keep laser power moderate and speed relatively high to minimize heat buildup.
Engraving glass without coating or spray prep works best with UV lasers that photochemically mark the surface. For CO2 or diode lasers, applying a wet paper towel or engraving spray can help distribute heat. Multiple shallow passes also reduce stress versus a single deep pass.
- Use glass thickness of 3 mm or more for safer engraving
- Limit power to prevent overheating and cracking
- Maintain engraving speed above 200 mm/s on CO2 lasers
- Apply wet paper or special coating for non-UV laser engraving
- Use multiple passes with light energy for deeper marks
Frosting or etching effects can be achieved by defocusing the beam slightly, creating a wider, shallower mark to soften the engraving and prevent sharp heat spots.
Types of Stone and Slate for Engraving
Natural stones like slate, marble, and granite are preferred for laser engraving because they produce visible contrast when marked. Darker stones typically show clearer contrast against the engraving line, while lighter or highly reflective stones might require additional surface prep.
Stone thickness of 1/4 inch (6 mm) or more is common to prevent cracking during engraving or cutting. Softer stones like soapstone can be engraved at thinner thicknesses but are more delicate overall. Slate coasters, tiles, and plaques are popular beginner projects given their availability and engraving quality.
- Slate, marble, granite, best for visible engraving contrast
- 1/4 inch or thicker preferred for durability and crack prevention
- Darker stones provide better contrast with laser marks
- Soapstone engraves well but is fragile at thin sizes
- Polished stone may require surface cleaning before engraving
Pay attention to the stone’s fracture toughness. Engraving with moderate power and speed minimizes microcracks that can expand over time, especially on brittle materials.
Using UV Lasers for Advanced Glass Engraving
UV lasers at 355 nm wavelength use photochemical ablation rather than heat to engrave glass cleanly and precisely. This enables detailed marking on glass surfaces with no preparation and minimal risk of cracking or discoloration. Unique to UV lasers is the ability to engrave inside the glass, not just on the surface.
Machines like the xTool F2 Ultra UV (costing around $4,299) demonstrate this capability by etching crystal and performing inside-glass engraving previously impossible with CO2 or diode lasers. This technology is ideal for delicate glass items and those requiring intricate internal designs, such as jewelry or decorative glassware.
- UV laser replaces heat with photochemical ablation for no-heat engraving
- Capable of engraving inside glass, not just surface marking
- No prep needed like masking or coating before engraving
- Works well on heat-sensitive materials including ceramics and plastics
- Precision suitable for fine details and small cylindrical parts
Choosing UV laser engraving adds upfront cost but unlocks advanced applications unavailable with other laser types. It also reduces safety concerns related to thermal cracking and heat dispersal.
Key Safety Precautions and Ventilation for Laser Engraving
Materials like PVC, polycarbonate, and PTFE (Teflon) produce toxic fumes when laser engraved, making proper ventilation essential. PVC releases chlorine gas, which is harmful and corrosive. Polycarbonate tends to catch fire easily and generates thick soot. PTFE emits dangerous fumes that can cause serious respiratory effects. Organic materials such as wood and leather also produce smoke, but primarily require ventilation to manage particulate matter and odors.
A well-planned ventilation system helps remove smoke, fumes, and airborne particles generated during engraving. For small hobby setups or occasional engraving, an exhaust fan coupled with a sealed enclosure may suffice. In these cases, aim to vent air directly outside through ductwork. Budgeting between $800 and $2,000 for a dedicated fume extractor system is typical for small business or frequent use, as it improves air quality significantly and protects both user health and laser equipment.
Fume extractors become mandatory when engraving frequently, working with materials known to emit hazardous gases, or using open-frame diode lasers that lack enclosures to contain smoke. Extractors contain activated carbon and HEPA filters that trap particulate matter and neutralize odors. Regular maintenance, including timely filter replacement and cleaning ducts every 3 to 6 months, ensures the system operates effectively and prevents buildup that could become a fire hazard.
Fire risks vary by material, requiring different safety precautions. Polycarbonate and some plastics can ignite quickly. Wood and leather may char or burn through if the laser settings are too high or the material is too thin. Using a fireproof mat beneath the material and never leaving the laser unattended helps reduce fire risk. Keep a fire extinguisher rated for electrical and chemical fires nearby as a precaution.
- Avoid materials like PVC, polycarbonate, and PTFE without proper fume extraction
- Install ducting to vent fumes outside, maintaining 150, 300 CFM airflow depending on machine size
- Use a commercial fume extractor with carbon and HEPA filters for frequent or hazardous material engraving
- Replace filters as recommended, typically every 3 to 6 months
- Keep fire-resistant surfaces under engraved materials
- Never leave the laser running unattended during a job
- Have an appropriate fire extinguisher within reach
Ensuring your workspace follows these safety guidelines protects your health, extends your laser’s service life, and reduces the risk of property damage. Proper ventilation setup depends on your engraving volume and material choices. For occasional users working only with wood or leather, basic venting may be enough. High-volume or multi-material engraving demands a professional extraction system installed according to manufacturer recommendations and local regulations.
Choosing Beginner-Friendly Materials and Avoiding Common Mistakes
Beginners should start with soft, uniform materials like wood and acrylic that respond well to low power and high speed settings on a CO2 laser. Understanding typical mistakes such as incorrect power levels or speed settings helps avoid poor quality engravings and wasted materials. Adjusting focus, power, and speed while testing small projects leads to clearer, more lasting results.
Top 5 Beginner Materials
Wood stands out as the easiest material for beginners to engrave. Its natural grain reveals detail without requiring precise power adjustments. Medium-density hardwoods and plywood sheets around 1/8 inch thick allow fast, clean engravings from 10% to 20% laser power and moderate speeds near 300 mm/s. Acrylic also suits beginners if you pick cast acrylic rather than extruded type, which can melt unevenly. Work with sheets about 1/8 inch thick at low power, around 15%, and faster speeds to avoid melting.
Other beginner-friendly options include untreated leather, untreated cork sheets, coated paper or cardstock, and anodized aluminum for those ready to try metal. These materials offer visible contrast and react predictably to a CO2 laser. Avoid thin or reflective materials at first because they can burn through or cause scattering.
Common Errors and Quick Fixes
Many beginners make these frequent mistakes:
- Using too high laser power, causes burning, charring, or melting.
- Running too slow on dense materials, leads to over-burning and rough edges.
- Incorrect focus height, engraving appears blurry or shallow.
- Skipping test runs, wastes material and time.
- Uneven material surfaces, results in inconsistent depth and detail.
- Engraving coated surfaces without removing or prepping, causes poor contrast.
- Failing to clean debris during engraving, interferes with laser path.
Fix these issues by lowering power by 5% increments or increasing speed by 50 mm/s when burn marks appear. Always check and adjust the laser focus within millimeter accuracy from the surface. Run small test pieces before committing to a final project. Remove coatings or clean the surface with isopropyl alcohol to improve contrast. Wipe away burnt residue between passes to keep lines crisp.
Always keep the laser head clean and properly focused; a tiny misalignment can ruin detailed engravings.
Tips for Consistent Engraving Quality
Consistency comes from controlling variables. Use flat, uniform materials and clamp them if possible to avoid shifting during engraving. Repeat the same laser settings only after confirming they work well on the specific batch. Take notes about power, speed, and focus distance for each material type. This record helps troubleshoot variations caused by humidity, color, or thickness differences.
Use software features like raster dithering or vector engraving modes appropriately for the image type. Raster works better for photos and shaded artwork, while vector engraving is cleaner for lines and text. Maintain ventilation to clear smoke and particles, as buildup can degrade both laser performance and engraving quality over time.
Step-by-Step Action Plan for Your First Laser Engraving Projects
Start by selecting materials that match your laser type and skill level. Follow these steps to ensure safe and effective engraving results.
- Before you start: Check your laser engraver’s specifications to confirm compatible materials. Test engraving on a small sample piece to verify settings.
- Day 1: Begin with organic materials like untreated wood or leather, which engrave easily for beginners. Confirm clear engraving marks without material damage.
- Week 1: Try acrylic or plastics labeled safe for laser use, ensuring proper ventilation. Look for clean cut edges or detailed engraving without melting.
- Week 2: Experiment with metals only if your laser supports fiber or has metal engraving attachments. Use marking sprays or tapes if needed and check for visible contrast.
- Week 3: Test engraving on glass or stone using recommended slower speeds and multiple passes. Evaluate clarity and avoid cracks or descaling.
- Ongoing: Maintain a well-ventilated workspace and regularly clean your laser’s optics and exhaust system to keep performance consistent.
- After 1 month: Document material settings and results for future reference to refine your process efficiently.
Frequently Asked Questions
Can You Laser Engrave Fabric Materials?
Yes, many fabrics like cotton, felt, and denim can be laser engraved effectively, but natural fibers work best. Test small samples first to avoid burning or melting.
Is It Possible to Engrave Coated Metals with a CO2 Laser?
Yes, coated metals can be engraved with a CO2 laser by removing the coating, revealing the metal underneath. Bare metal usually requires a fiber laser or marking compound.
Can Laser Engraving Cause Toxic Fumes?
Some materials like ABS plastic release toxic fumes when laser engraved, so proper ventilation and safety gear are necessary to protect your health.
How Does Laser Engraving Affect the Strength of Wood?
Laser engraving removes surface material but does not significantly weaken the wood structural integrity. Keep cuts shallow if strength is critical.
Are There Eco-Friendly Materials Suitable for Laser Engraving?
Yes, organic materials like bamboo, cork, and untreated wood are environmentally friendly and engrave nicely with CO2 lasers.
Can Laser Engraving Work on Painted Surfaces?
Laser engraving can remove paint coatings to reveal the base material but results vary with paint type and thickness. Test first to avoid damage.
The Bottom Line
Choosing the right materials that match your laser type is key to successful engraving projects. Starting with beginner-friendly options and progressing carefully helps build your skills while keeping safety in check. Begin by testing small pieces today to see how your laser handles different materials and adjust your approach accordingly.