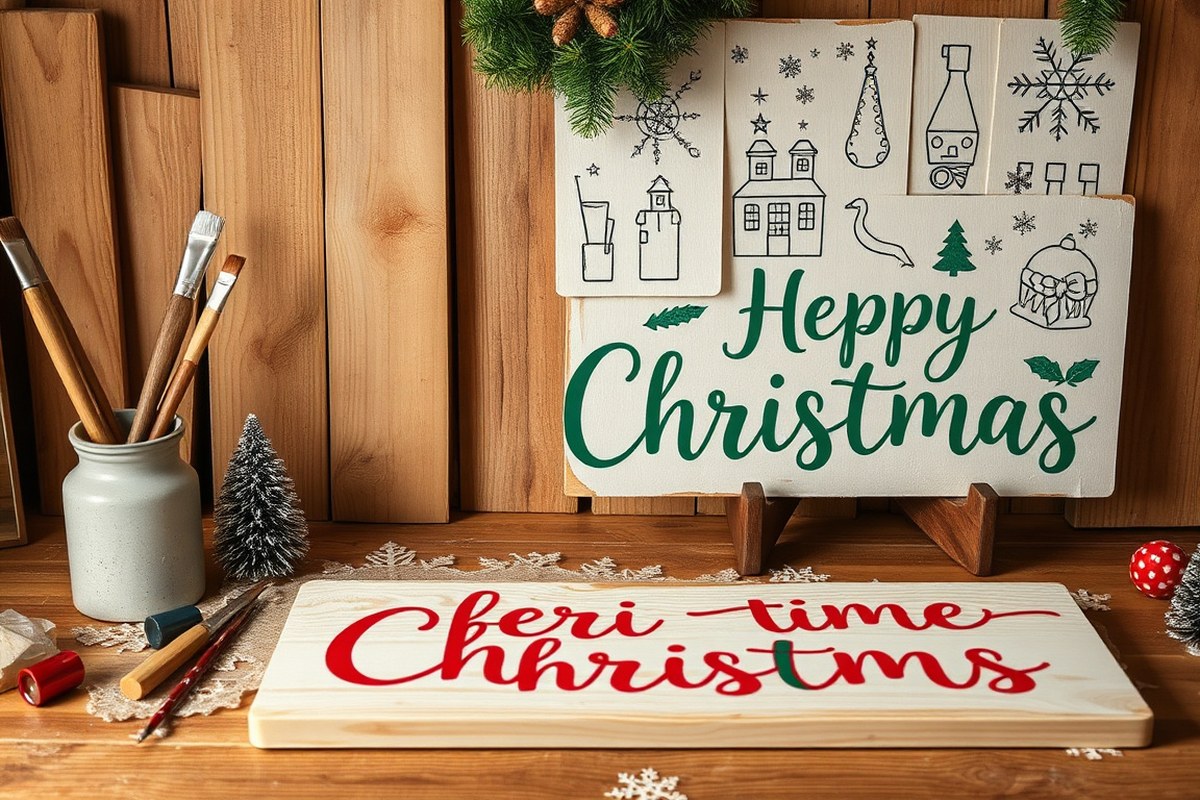
How to Make a Christmas Sign: Complete Guide with Easy Steps & Pro Tips
Knowing how to make a Christmas sign starts with choosing the right materials and tools to match your design and skill level. Starting with a sturdy base like a plywood panel cut to your preferred size ensures durability and ease of painting. Using stencils or a Cricut machine can give your sign a clean, professional look, even if you’re new to crafting.
Key Takeaways
- Use a ½″ thick plywood panel cut to size for a strong, easy-to-paint sign base.
- Select paints such as Fusion Mineral Paint for vibrant, long-lasting color that adheres well to wood.
- Create or buy stencils to achieve precise, consistent lettering and images on your sign.
- Cut your base to manageable dimensions, like 14″ tall by 38″ long, for easier handling and display.
- Try making vinyl stencils with a Cricut for detailed designs or layered effects.
- Incorporate 3D elements like cedar strips or wooden crates for unique, textured Christmas signs.
Essential Materials and Tools for Making Christmas Signs
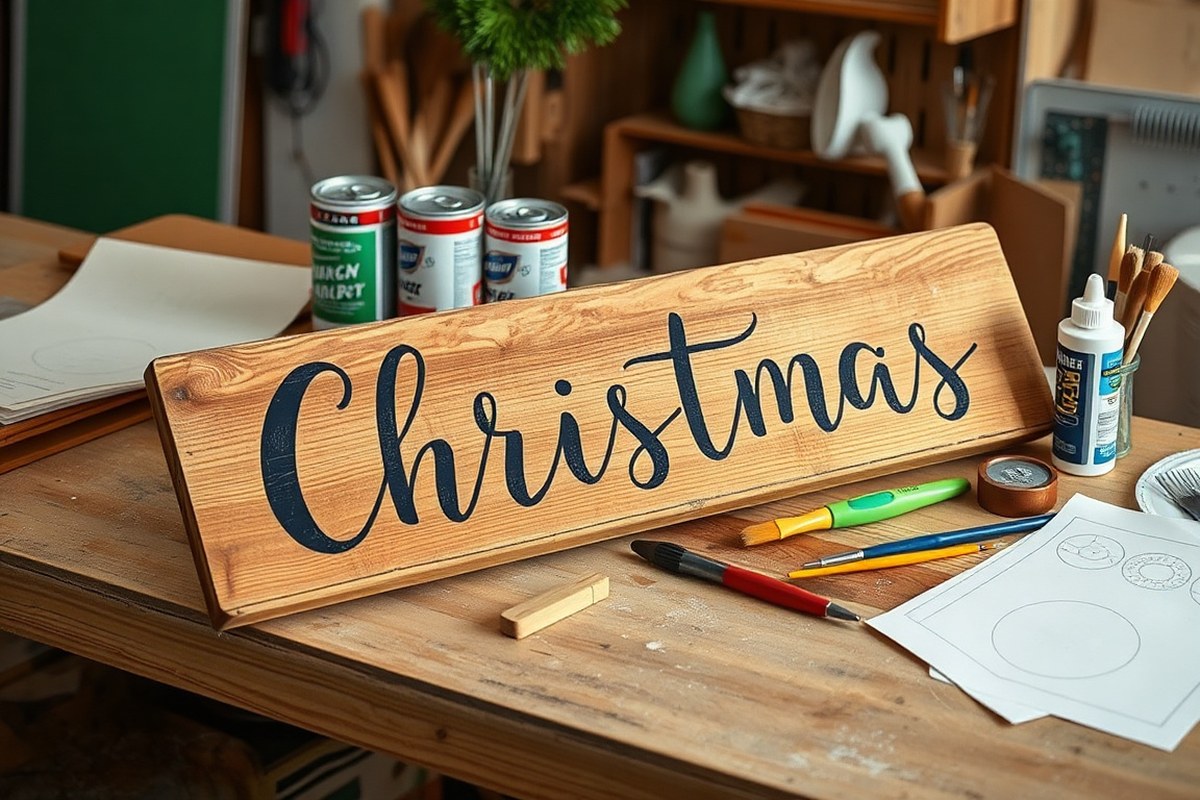
Choosing the right materials and tools is key to making a Christmas sign that fits your skill level and desired look. Bases like wood, canvas, and metal each come with pros and cons depending on your experience and style. Wood offers a rustic feel and is very versatile; beginners benefit from using smooth plywood or pallet wood as it’s easy to paint and widely available at hardware stores for $10, $20 per board. Canvas lends itself well to vibrant painted designs and is lighter, approximately $10 to $15 for a 16×20 inch frame, but it may require more careful handling. Metal bases, such as old cookie sheets or repurposed tin signs, create a unique look but can be tougher to paint and need special primers.
For beginners, wooden or canvas bases are easier to work with. Advanced crafters might experiment with layering different materials or adding 3D elements on wood or metal bases for texture. Repurposing materials like old wood crates, pizza pans, or fabric scraps promotes sustainability and cuts costs while adding charm. Using fabric scraps, for example, can create festive shapes like Christmas trees on your sign and give it a homemade touch. Here’s a checklist of bases and their typical characteristics:
- Wood: Affordable, sturdy, great for painting and stenciling; smooth plywood or pallet wood are beginner-friendly.
- Canvas: Holds paint beautifully; lighter but less durable; best for wall-hanging signs.
- Metal: Vintage or industrial look; use primer and oil-based paint; harder to work with.
- Fabric: Ideal for embellishments or layered accents; can be glued or sewn onto base.
- Recycled items: Pizza pans, crates, scrap wood; eco-friendly and budget-wise.
Essential tools for Christmas sign making include acrylic paints in festive colors, paintbrushes of various sizes, stencils or vinyl lettering for crisp shapes, and sandpaper to prep wood surfaces. A hot glue gun is useful for attaching decorations, while painter’s tape helps create clean lines. Optional items like a Cricut machine or heat gun can speed up stenciling and drying time but aren’t required. Most supplies can be found at craft stores or discount retailers like Dollar Tree, where you can often score inexpensive bases and decoration materials.
Look for non-toxic, water-based paints especially for indoor signs, and read labels to ensure materials suit your project type. When selecting or repurposing materials, avoid those that will warp easily or contain harmful chemicals. Sanding wood to a smooth finish and applying a base coat primer helps paint adhere better and prevents peeling.
How to Choose the Right Base for Your Christmas Sign
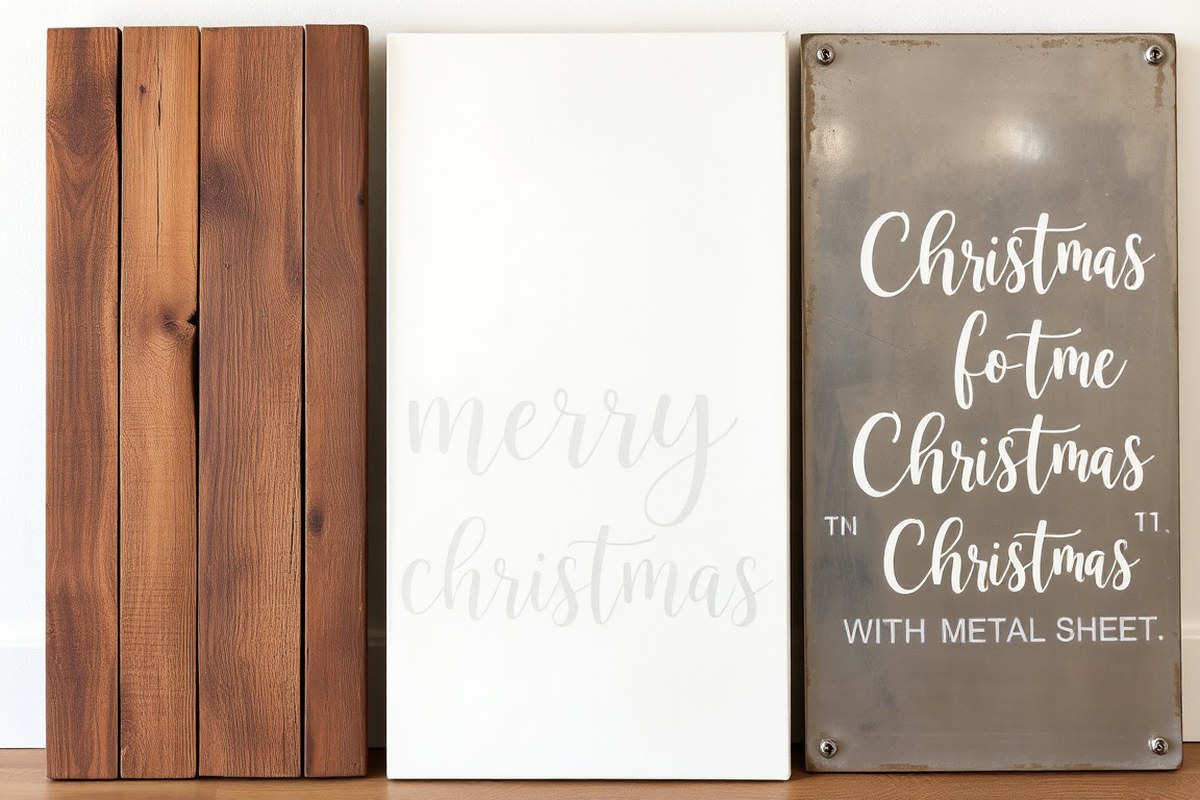
Choosing the right base is critical for your Christmas sign’s appearance and durability. Wooden bases offer a rustic, farmhouse style that works well indoors or outdoors when sealed properly. Canvas provides a smooth, lightweight surface ideal for indoor signs with detailed stenciling or vinyl applications. Metal bases are sturdy and weather-resistant, perfect for long-lasting outdoor displays but require rust protection and more prep work.
The durability and finish depend heavily on the material. Wood can warp or crack if exposed to moisture but gives a natural, warm look that you can distress or paint in layers. Canvas can stretch or sag over time and is best kept dry, but it offers a clean surface for crisp, colorful designs. Metal is strong and sleek but may dull or rust if left untreated, making it better for protected outdoor spots or covered porches.
| Material | Price Range | Ease of Use | Durability | Finish Options | Ideal Use |
|---|---|---|---|---|---|
| Wood | $5, $20 (per 12×12″ board) | Moderate (sanding, sealing required) | Medium (weatherproof sealing needed outdoors) | Paint, stain, distress, vinyl | Indoor or outdoor (with sealing) |
| Canvas | $10, $30 (stretched 12×16″) | Easy (paintable, vinyl appliqué) | Low (best indoors, avoid moisture) | Paint, vinyl decals | Indoor signs with detailed designs |
| Metal | $15, $40 (12×12″ sheet) | Hard (requires rust protection, prep) | High (weather-resistant if coated) | Paint, vinyl, powder coat | Outdoor signs in protected areas |
Use the decision rule based on placement: for outdoor signs exposed to rain or snow, select sealed wood or treated metal bases. Choose wood for a warm, rustic feel that can be customized by sanding or adding vinyl stencils. Canvas is best for indoor projects where you want bright colors and fine details without heavy prep work. Treat all wooden and metal bases with weatherproof sealers if they face outdoors to prevent damage.
Ensure your wooden sign is fully dry before applying paint or vinyl to avoid warping and peeling over time.
Particular projects like a rustic wooden Christmas tree sign or a chippy barn wood JOY sign lean heavily on wood for its texture and ease of distressing. If smooth, modern aesthetics suit you better, canvas or metal provides a sleek finish but demands extra care in handling and storage. Prices vary by size and quality, so plan your budget and crafting time based on the material choice and intended location.
Creating and Using Stencils for Professional-Looking Christmas Signs
Using stencils can give your Christmas signs a polished, professional look while saving time on intricate designs. For wood signs, mylar stencils and vinyl cutouts work best because they hold up well to paint and provide sharp edges. Along with easy-to-find free or paid designs, Cricut machines offer a precise way to create custom vinyl stencils that fit your holiday theme perfectly. Proper stencil application is key to avoiding paint bleed and achieving clean lines.
Types of Stencils Suitable for Christmas Signs
Mylar stencils are a top choice for wooden Christmas signs. They are reusable, flexible, and resist paint well. You can find mylar sheets in thicknesses of 7 to 10 mil, which is durable enough for multiple uses without losing shape. Vinyl stencils, made from adhesive vinyl sheets, work great for single or limited use projects on wood, glass, or smooth surfaces. Cardstock stencils are less durable but suitable for paper or light decorating.
Choosing between reusable mylar and single-use vinyl depends on your project size and frequency. For intricate holiday designs or text, vinyl’s adhesive backing ensures the stencil stays put, reducing paint bleeds. Mylar stencils require repositioning carefully but allow for many sign projects using the same template.
Making Vinyl Stencils with Cricut Machines
A Cricut cutting machine is excellent for creating detailed vinyl stencils for Christmas signs. You can cut festive phrases, holiday icons, or custom designs easily from adhesive vinyl. The machine cuts precise edges that help keep your paint in place. Here’s how to create and apply a vinyl stencil with your Cricut:
- Choose or upload an SVG design related to Christmas on your Cricut software, such as “Merry Christmas” or holly leaves.
- Set the material type to adhesive vinyl and load your vinyl sheet into the machine.
- Cut the design, then use a weeding tool to remove excess vinyl, leaving only the parts to paint.
- Apply transfer tape to the stencil, then carefully place the stencil onto your wooden sign’s surface.
- Press down firmly and slowly peel off the transfer tape, ensuring the vinyl sticks well.
- Paint over the stencil with a small brush or sponge, using light coats to reduce bleeding.
- Let the paint dry partially, then gently peel off the vinyl stencil for a sharp finish.
Free and paid SVG cut files for holiday signs are available on craft sites like Etsy, Creative Fabrica, and Design Bundles, often starting around $1. Free designs can be found through Cricut’s design library or craft blogs.
Avoiding Common Stenciling Mistakes
Paint bleeding is the most common stencil problem. To prevent it, secure the stencil properly with low-tack painter’s tape or a spray adhesive designed for stencils. Use a small foam brush or stencil brush and apply paint with a gentle dabbing or swirling motion instead of heavy brushing. Applying thin layers of acrylic paint, letting each dry before adding more, significantly reduces smudges.
Another tip is to remove the stencil while the paint is still slightly tacky but not wet. This avoids smearing and helps maintain crisp edges. Avoid stretching your stencil when applying it to avoid distorted shapes. For repeated stencil use, thoroughly clean mylar stencils after each project with warm soapy water and dry flat to maintain their shape and adhesion.
Step-by-Step Guide to Painting and Decorating Your Christmas Sign
Making a Christmas sign involves careful preparation, painting, and finishing touches that bring your festive vision to life. You start by prepping and priming the wood for a smooth surface, followed by applying base colors and lettering with attention to neatness. Adding 3D decorations like berries, bows, or ornaments gives your sign extra charm and dimension. A typical project takes a few hours spread over drying times.
Preparing and Priming Your Wood or Base
Good results start with a smooth, clean base. Sand your wood thoroughly with medium-grit sandpaper (around 120 grit) to remove rough edges or splinters, then finish with fine-grit sandpaper (220 grit) for an even surface. Wipe away dust with a damp cloth to avoid paint clumping.
Priming the wood helps the paint adhere better and makes your colors pop. Use a white or clear primer suitable for wood, such as an acrylic-based wood primer. Apply with a foam brush or small roller, covering all visible surfaces evenly. Let it dry for at least 2 hours, or follow the primer’s label instructions for drying times.
Painting the Base and Adding Lettering
Choose holiday-inspired colors like reds, greens, whites, or golds for a warm, festive look. Acrylic paints work well because they dry quickly and have vibrant pigments. Apply at least two thin coats with a wide, flat brush, letting each coat dry for 30 minutes to 1 hour. Avoid thick layers to prevent drip marks.
Lettering or stenciling should come after your base is dry. Use painter’s tape to hold stencils securely. For clean edges, employ a small foam brush or stencil brush dabbed lightly in paint rather than loaded and brushed on heavily. Let the paint dry completely before removing stencils, typically 15 to 30 minutes. Freehand painting with a detail brush takes more practice but can offer a personalized touch.
Adding 3D and Decorative Elements
Attach 3D items like miniature pinecones, faux berries, ribbon bows, or small ornaments to create a textured, festive effect. Hot glue works well for wood and craft supplies, holding items firmly in place. Follow these steps to add decorations safely and attractively:
- Select embellishments that complement your paint colors and holiday theme, such as red berries or gold ribbons.
Adding 3D details usually extends your project time by about 30 minutes, including drying and placement. The entire process from sanding to decorating typically takes 3 to 5 hours, spread over several drying periods.
Creative Christmas Sign Styles and Design Ideas to Inspire You
Choosing the right style and design for your Christmas sign shapes its holiday spirit and fits your home decor. Rustic signs often use natural wood with visible grain, paired with warm colors like deep reds, forest greens, and creams. Farmhouse designs share this warmth but lean on whitewashed or distressed wood bases, simple serif or hand-lettered fonts, and seasonal icons like pine trees or stars. Rustic and farmhouse signs usually call for fonts that look handmade or vintage, such as script fonts or slab serifs that add a cozy, inviting feel.
Modern Christmas signs focus on clean, uncluttered design with bold fonts and minimalistic graphics. Opt for sleek sans-serif fonts like Futura or Helvetica and a chic color palette with monochrome black and white, accented by metallic gold or silver. Acrylic or smooth wood bases work great here to highlight the contrast of crisp letters against a smooth backdrop. These signs benefit from simple phrases like “Joy” or “Peace” in large lettering to keep the look fresh and contemporary.
Vintage styles channel nostalgia and often use ornate fonts with flourishes, paired with classic color schemes such as muted reds, greens, gold, and ivory. Signs using old-fashioned script or typewriter fonts with a distressed paint finish fit this style well. Adding decorative touches such as holly motifs, berries, or antique bell silhouettes deepens the vintage vibe. Layering paint with slight sanding afterward can create an aged look reminiscent of an old Christmas postcard.
To add lighting or special effects, integrate battery-operated LED string lights around the edge of your sign or behind cut-out letters for a glowing halo effect. Warm white LEDs complement rustic and vintage styles, while cooler whites or multicolor LEDs highlight modern designs. For an extra touch, sprinkle faux snow or glitter on your sign after painting to catch light and add sparkle. Adding a small wreath or pinecone garland can frame the sign nicely and offers texture and fragrance.
Colors matter because they evoke mood and coordinate with your existing decorations. Rustic and farmhouse palettes lean warm and inviting, using shades like cranberry red, pine green, beige, and soft white. Modern palettes keep sharp contrasts, featuring black, white, and metallic tones. Vintage palettes choose muted, warm tones, often with gold accents. Match your fonts accordingly: hand-drawn or serif fonts for rustic and vintage, clean sans-serif fonts for modern. Mixing styles, for example, using modern lettering on a rustic wood base, can work if balanced carefully.
When adding LED lights, choose battery-operated options to avoid visible cords and make your sign easy to place indoors or outdoors without electrical hazards.
Tips to Avoid Common Mistakes in Making Christmas Signs
Common mistakes when making Christmas signs include uneven stenciling, paint bleeding, and misaligned letters. These errors can make your project look less polished and take away from its festive charm. Addressing these issues early helps you achieve a cleaner, more professional result that lasts through the holiday season.
Uneven stenciling often happens when the stencil shifts or paint is applied too heavily. To avoid this, secure the stencil firmly with painter’s tape or stencil adhesive. Use a small amount of paint on a stencil brush or sponge, applying it with a gentle dabbing motion rather than brushing. This controls paint flow and reduces smudging.
Paint bleeding under the stencil ruins crisp edges and usually occurs because the paint is too wet or applied too thickly. To fix bleeding, lightly blot any excess paint with a paper towel before it dries. After the paint has dried, you can carefully clean up the edges using a fine-tipped brush and matching base coat or sign background color.
- Use painter’s tape or spray adhesive to hold stencils firmly in place.
- Apply paint in thin layers with a dry brush or makeup sponge, dabbing instead of brushing.
- Wait 10-15 minutes between paint coats to avoid over-saturating the stencil.
- Check stencil alignment before painting and mark placement lightly with a pencil if needed.
- If letters look misaligned, gently lift the stencil, reposition, and try again after the paint dries.
- Clean stencils promptly with warm water to prevent paint buildup affecting detail.
- Use a steady hand and a ruler or straightedge to guide freehand lettering corrections.
Misaligned letters often result from rushing or not double-checking the placement. Before painting, lay out all your stenciled letters on the sign surface and line them up with a ruler. Light pencil marks can help maintain spacing and straight lines. Avoid painting over pencil marks as they fade or can smudge beneath paint layers.
Fixing common errors after painting requires patience. For minor paint bleeds, once dry, gently scrape excess paint off with the edge of a craft knife or clean the edges with a small brush dipped in paint thinner or matching background paint. For uneven coverage or spots that look dull, add a second thin paint layer but allow sufficient drying time to prevent lumpy textures.
Taking these steps adds only a few extra minutes but makes a big difference in the final look. A well-prepared surface, careful paint application, and checking your layout ensures your Christmas sign stands out beautifully among your holiday décor.
Finishing Techniques to Protect and Display Your Christmas Sign
Protecting your Christmas sign with the right finishing technique extends its beauty and ensures it withstands the season, especially if you plan to display it outdoors. Sealants and varnishes serve as the primary guards against moisture, dirt, and fading. Use clear acrylic spray sealants for indoor signs; they dry fast, costing around $6 to $10 per can, and apply with 2 to 3 light coats, allowing 15 to 30 minutes of drying between each. For outdoor use, opt for an outdoor-grade polyurethane or marine varnish designed to resist UV rays, rain, and temperature changes. These finishes usually cost between $15 and $25 for a quart and require 2 to 3 coats applied with a synthetic brush in a dust-free environment, with 4 to 6 hours of drying time per coat. Avoid thick coats that can cause cracking or a cloudy finish.
How you mount or display your sign influences its longevity, especially outside. Using sturdy, rust-resistant hardware like stainless steel hooks or outdoor-rated picture hangers will prevent corrosion. For porch displays, consider a weatherproof shelf or a lattice backdrop to keep your sign improve and dry. Lean it on a shelf indoors with felt pads underneath to prevent scratches and moisture buildup. For lightweight signs, command strips rated for outdoor use offer easy removal and won’t damage surfaces.
Outdoor Christmas signs face wind, rain, and colder temperatures that can warp or fade the wood and degrade paint. Using a primer designed for outdoor wood before painting helps seal the surface, reducing moisture absorption. For painted signs, choose exterior acrylic paint as it resists fading and cracking better than interior paints. These steps minimize warping and Maintain vibrant colors.
After the holiday season, proper storage is key to reusing your sign. Clean off any dirt or dust gently with a damp, soft cloth and allow the sign to dry completely. Wrap your sign in acid-free tissue paper or bubble wrap to protect the surface and keep it in a sturdy, ventilated container to avoid moisture buildup that can cause mold or warping. Store it in a cool, dry place, ideally between 50°F and 70°F. Avoid basements or garages that frequently experience humidity or temperature swings.
Taking these precautions guarantees your Christmas sign will stay festive and fresh year after year, whether it brightens your mantel indoors or welcomes guests on your front porch. Applying the sealant carefully, using the right mounting method for your display spot, and storing the sign thoughtfully protect your creative work and investment in holiday cheer.
Budget-Friendly Christmas Sign Projects You Can Make Quickly
Creating a Christmas sign on a budget and with limited time is achievable using simple materials and straightforward steps. These projects take under two hours and require minimal tools, making them perfect for beginners or last-minute decorators. You can get festive results without spending much or needing advanced skills.
Simple Pallet Wood Signs
Pallet wood is an economical choice that offers rustic charm ideal for Christmas signs. You can find free or cheap pallets at hardware stores or recycling centers. To make a quick Merry Christmas sign, lightly sand a pallet piece, then paint your message using stencils or freehand with acrylic paint. This method usually takes about 60 to 90 minutes from start to finish.
Start with a small pallet section roughly 12 by 24 inches. Paint the background with white or a festive color, letting it dry for 15 minutes. Position letter stencils or use your own handwriting with a fine brush to spell “Merry Christmas” or another holiday phrase. Allow another 30 minutes for the paint to dry before hanging. This quick pallet sign is budget-friendly, costing $5 to $15 depending on paint and stencil use.
Canvas and Chalkboard Holiday Signs
Canvas signs use inexpensive artist canvases or stretched canvas frames, which cost around $5 each. You can paint directly on them with holiday motifs or use a chalkboard paint base for reusable designs. Painting simple Christmas words or images takes about 45 minutes to 1 hour per canvas, plus drying time.
To create a chalkboard sign, apply 2 coats of chalkboard paint on a blank canvas, waiting at least 30 minutes between coats. After it cures for a few hours, write your holiday message with chalk markers. For painted canvases, sketch your design with pencil then fill in with acrylic paint. This option offers flexibility, you can erase and change the message on chalkboard versions or keep the painted canvas as long-term decor.
Using Dollar Store Supplies Creatively
Your local dollar store can be a treasure trove for sign-making materials. Wooden plaques, craft sticks, and festive napkins can transform into charming Christmas signs with simple Mod Podge techniques. This project takes around 30 to 45 minutes, making it an excellent quick craft.
Try decoupaging a holiday-themed napkin onto a wooden plaque. Start by lightly sanding the wood surface, then apply Mod Podge with a foam brush. Lay the napkin flat, smooth wrinkles gently, and cover with another Mod Podge layer. Add embellishments like small craft sticks to frame the sign or glue on dollar store Christmas stickers for a personalized touch.
- Wooden plaque or craft stick base
- Holiday-themed napkins or tissue paper
- Mod Podge or similar decoupage glue
- Foam brush for applying glue
- Acrylic paint for optional accents
- Dollar store decorative items (stickers, ribbons)
- Sandpaper for prepping surfaces
Allow each layer of Mod Podge or paint to dry fully before adding the next to avoid bubbling or peeling.
Step-by-Step Action Plan for Making Your Christmas Sign
Follow this action plan to create your Christmas sign confidently and efficiently.
- Day 1: Gather Your Supplies, Collect your base material, paints, brushes, and stencil materials. Make sure you have everything on your list before starting your project.
- Day 2: Prepare the Base, Sand and clean your sign’s surface. A smooth, dust-free base ensures your paint adheres well and looks professional.
- Day 3: Design Your Stencil, Choose or create a stencil design that fits your style and size. Test it on scrap wood to confirm the design is clear and fits your sign.
- Day 4: Apply the Stencil and Paint, Secure the stencil, then use thin coats of paint to avoid bleeding. Paint edges should be crisp and even after drying.
- Day 5: Add Decorative Details, Use smaller brushes or markers for accents and highlights. Check that decorations complement your main design without overcrowding.
- Day 6: Seal Your Sign, Apply a clear waterproof sealer suitable for indoor or outdoor use. Wait until fully dry to ensure lasting protection.
- Day 7: Display Your Sign, Attach hardware or stands as needed. Your sign should be stable and positioned to catch attention safely.
Frequently Asked Questions
Can I Make a Christmas Sign Without a Cricut Machine?
Yes, you can create Christmas signs without a Cricut by using stencils, hand painting, or tracing cutouts onto wood or hardware cloth. These methods still create professional-looking designs, especially if you carefully select your materials and tools according to your style.
How Do I Create a 3D Effect on My Christmas Sign?
Use cedar strips or thin wooden crates layered on your sign base to add depth and a 3D effect. Attaching these materials securely before painting makes your sign stand out with a festive texture.
What Type of Wood Is Best for Outdoor Christmas Signs?
Cedar or pallet wood works well because it’s durable and resists weather better than softer woods. Always seal your finished sign with a protective finish for longer outdoor use.
Can I Make a Christmas Countdown Sign Easily?
Yes, a chalkboard base painted with chalkboard paint and decorated with modge podge lets you easily update numbers for a countdown. This interactive approach adds fun and reusability.
Are Reclaimed Wood Signs Suitable for a Rustic Christmas Look?
Reclaimed wood is perfect for a farmhouse or rustic style, giving unique character and texture. Combining it with chippy paint or vintage stencils improve the cozy holiday charm.
What Finishing Products Help Protect Painted Christmas Signs?
Clear acrylic sealer or outdoor varnish shields your paint from moisture and fading. Choose a non-yellowing finish and apply multiple light coats for best results.
Final Thoughts
Making a Christmas sign combines creativity, preparation, and careful finishing to give you a personalized decoration for the holiday season. Start by gathering your essential materials and take each step methodically to create a sign you’ll proudly display for years. Begin your project today by selecting the perfect base that matches your style and space.