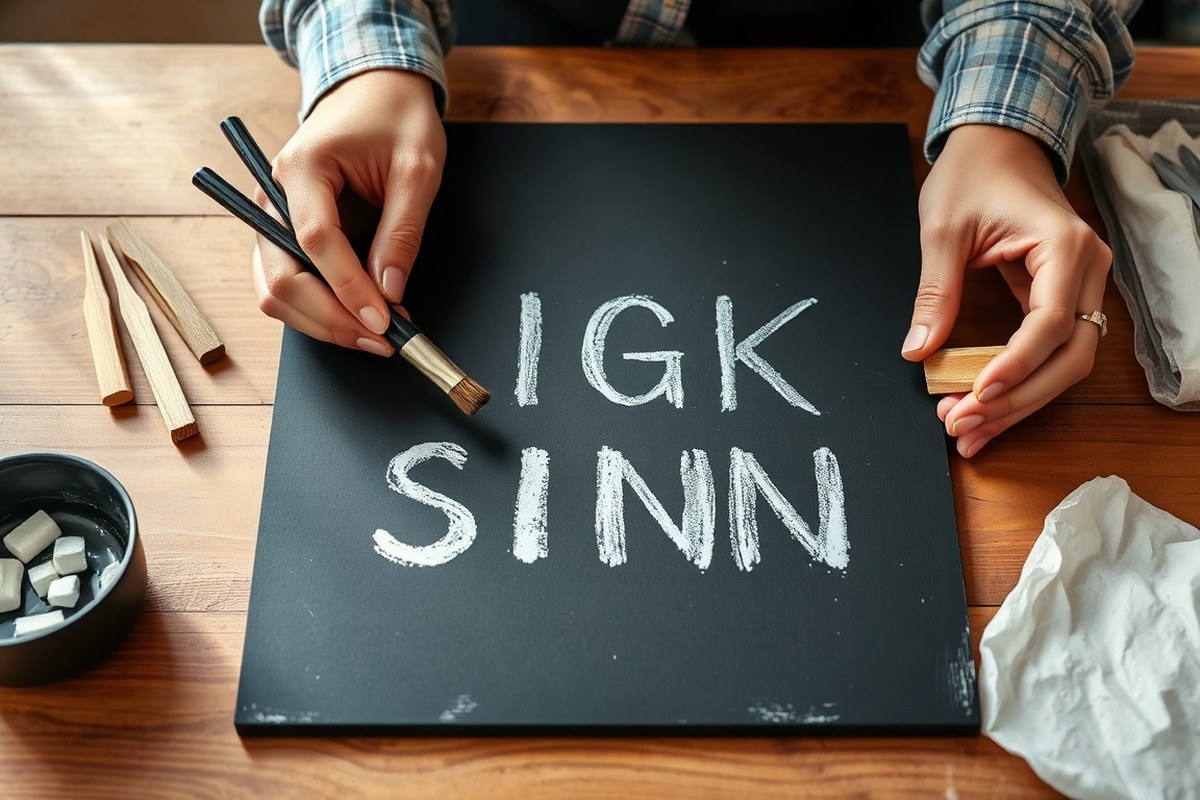
How to Make a Chalkboard Sign by Hand a Complete Guide with Pro Tips
How to make a chalkboard sign by hand starts with choosing or creating a smooth, clean surface to write on, like a wooden board painted with chalkboard paint. Use simple tools like chalk markers or classic chalk and transfer your design using tracing, stencils, or freehand drawing. The first step is prepping your board properly to ensure your lettering stands out clearly and lasts.
Key Takeaways
- Prep your chalkboard surface by applying two coats of chalkboard paint for a smooth, writable finish.
- Use carbon paper or a printed stencil to transfer your design accurately onto your chalkboard.
- Choose fine-point chalk markers for cleaner, more precise lettering that’s easy to correct.
- Correct mistakes by wiping gently with a damp cloth before the chalk dries.
- Seal your finished chalkboard sign with a clear matte spray to preserve your design longer.
- Build your own chalkboard sign for under $10 using affordable materials like plywood and chalkboard paint.
Step-by-Step Process for Making a Chalkboard Sign

Making a chalkboard sign by hand requires patience and attention to detail through several key stages. These include selecting your materials, preparing the board surface, transferring your design, lettering your sign, and adding finishing touches to preserve your work. The entire process generally takes a few hours, with drying time included, but the results are rewarding and customizable.
- Choose your chalkboard base: Start with a smooth, flat surface like a pre-made chalkboard or a wood board coated with chalkboard paint. A typical size for home crafts is around 15 by 12 inches. Costs can range from $10 for a small DIY painted board to $20 for a ready-made one.
- Prepare the board surface: To prevent ghosting and help your chalk stick, “season” the chalkboard by rubbing the side of a piece of chalk all over the surface, then wipe it clean with a dry cloth. This seals the porousness of the paint and lets your lettering stand out. Allow the board to dry completely before the next step.
- Plan and transfer your design: After deciding on your design, use one of these three common methods to transfer it: tracing with carbon paper, freehand sketching with light pencil, or using chalk transfer paper. Each method suits different skill levels. Tracing ensures accuracy, while freehand allows more creativity but needs a steady hand.
- Letter your sign: Use high-quality chalk markers or thick chalk sticks for bold, clear letters. Start with the main text, and work slowly to avoid smudging. Holding the chalk at a slight angle helps with smoother strokes. If you make a mistake, clean it immediately with a damp cloth for the best correction.
- Let the lettering dry: Chalk markers usually dry within 15 to 30 minutes, while chalk sticks dry instantly but can smear easily. To prevent smudges, stay clear of the sign until it’s fully dry and set.
- Erase pencil marks carefully: Once the chalk is dry, remove any guiding pencil lines with a soft eraser or cloth. Doing this gently prevents removing any chalk lettering.
- Seal the chalkboard sign: Apply a clear chalkboard sealer spray to protect your artwork from smudging if you plan to keep it long term. Wait at least 24 hours for the sealer to dry thoroughly before handling or displaying the sign.
Materials and Tools Needed for Your Chalkboard Sign

To create a handmade chalkboard sign, you need chalk or markers, a suitable board surface, and some design and lettering tools. Picking the right materials influences your sign’s look, ease of writing, and how long it lasts. Using markers instead of traditional chalk can give your sign sharper, more vibrant lines.
Types of Chalk and Chalk Markers
Traditional chalk is inexpensive and easy to erase but often lacks bright, bold colors. Chalkboard markers provide more vivid, consistent lines that stand out well and erase cleanly with a damp cloth. Some markers can leave faint residue or permanent marks, so check the label and test on a scrap board first.
Chalk sticks are best for beginners learning lettering because they allow simple corrections with a dry cloth. Chalk markers speed up the process and reduce dust but tend to cost more and may require special cleaners to remove stubborn marks.
Boards and Frames Options
Common chalkboard surfaces are wood panels painted with chalkboard paint and pre-made chalkboard panels. Wood panels cost $10 to $25 depending on size and quality, while ready-to-use chalkboards range from $15 to over $40. Chalkboard paint offers flexibility for DIY shapes, but requires 2 to 3 coats and 24 hours to cure.
Framing your board improve its durability and style. Choose lightweight wood frames for indoor signs or metal frames for outdoor use. Budget-friendly frames can be found for under $15, but custom framing typically raises the cost significantly.
Essential Tools for Design and Lettering
To transfer and refine your design, you need a few simple tools: transfer paper, a mechanical pencil, and cleaning supplies. Transfer paper helps trace your design onto the chalkboard cleanly. A mechanical pencil is ideal for lightly sketching outlines before going over them with chalk or markers.
Have Q-tips or a small paintbrush handy to fix small mistakes with water. Hairspray can set finished chalkboard lettering to minimize smudging, especially if your sign will be handled frequently or displayed outside.
| Material | Cost | Durability | Ease of Use | Notes |
|---|---|---|---|---|
| Traditional Chalk Sticks | $1 to $4 per pack | Low (easily erased) | Easy for beginners | Less vibrant colors, dusty |
| Chalkboard Markers | $5 to $8 each | Medium (smudge resistant) | Smoother, more precise lines | Some leave faint residue |
| Wood Panel (with chalkboard paint) | $10 to $25 | High when sealed | Customizable shape and size | Requires drying and curing time |
| Pre-made Chalkboard Panel | $15 to $40+ | High | Ready to use | Less customizable |
| Transfer Paper | $5 to $10 per sheet | N/A | Helps precise design transfer | Reusable if handled carefully |
Choosing materials depends on your budget and how detailed your design will be. For sharper lines and longer-lasting signs, chalk markers on a sealed chalkboard surface work well. Traditional chalk and painted wood boards offer a budget-friendly route with flexibility but require patience during preparation.
Test chalk markers on a scrap board first to avoid permanent stains on your chalkboard sign.
How to Prepare or Make Your Own Chalkboard Surface
Creating your own chalkboard surface allows you to customize the size and look of your sign. You can paint wood or other smooth surfaces with chalkboard paint or repurpose objects like old frames or trays. Preparing the surface correctly ensures the chalk shows up well and erases smoothly.
Painting Your Own Chalkboard Surface
Chalkboard paint is a simple way to turn wood, metal, or even glass into a writable surface. The paint is specially formulated to dry with a matte, porous finish that chalk can cling to and erase from cleanly. Using a smooth, clean surface is key to avoiding rough spots that make writing uneven. Follow these steps to apply chalkboard paint for a durable, consistent surface:
- Sand the surface lightly with fine-grit sandpaper until smooth and dust-free.
- Wipe clean with a damp cloth and let dry completely.
- Apply painter’s tape around the edges to protect areas you don’t want painted.
- Stir the chalkboard paint thoroughly to mix any settled pigment.
- Use a high-quality foam roller or brush to apply a thin, even coat of paint.
- Wait the recommended drying time on the paint can, usually 1 to 2 hours.
- Apply a second coat and let it dry fully, 24 hours is best before use.
- Season the surface by rubbing the side of a piece of chalk over the entire area and then erasing it; this prevents ghosting.
Cost varies but a small can of chalkboard paint typically runs $10 to $20 and covers about 25 square feet. Avoid thick layers, which can cause cracking or uneven texture.
Repurposing Items as Chalkboards
Old picture frames, cabinet doors, trays, or even wooden pallets work well as the base for chalkboards. Choose items with mostly smooth surfaces to ensure chalk writes clearly. Remove glass from frames and replace it with painted wood or craft a chalkboard directly onto the backboard.
After prepping the selected item by cleaning and sanding, apply chalkboard paint as described above. Using a frame adds a polished, classic look without much extra work. You can also hinge two boards to make a double-sided chalkboard for signs or events. This recycle-friendly approach reduces cost and adds rustic charm.
Prepping for Outdoor Use
Outdoor chalkboards need extra protection from moisture and sun exposure to last longer. Start by choosing weather-resistant surfaces such as treated wood or metal. After painting with outdoor-grade chalkboard paint, seal the surface with a clear chalkboard sealer or outdoor polyurethane to protect the paint from rain and fading.
Allow all coatings to dry fully according to product instructions, this often means waiting 2 to 3 days before first use. Keep the sign sheltered or under an awning if possible. Re-sealing annually helps maintain functionality. Properly prepared outdoor chalkboards can brighten up your yard, porch, or garden with messages that wipe off easily.
Best Methods to Transfer Your Design Onto the Chalkboard
Transferring your design onto a chalkboard can be done through several reliable methods, each suited to different needs and skill levels. Using transfer paper gives a clean, faint outline you can trace over. Tracing freehand works well for simpler designs or when you want a personal touch. Projectors and lightboxes help replicate complex designs accurately. Your choice depends on your tools, confidence, and project size.
Using Graphite or Carbon Transfer Paper
Graphite or carbon transfer paper is a popular way to get a precise outline of your design on the chalkboard. The transfer paper has a carbon layer that leaves a faint pencil mark on the board when you trace over your design. This makes it easier to replicate complex shapes and lettering without drawing freehand directly on the chalkboard.
For the best results, cover the entire back of your printed design with graphite pencil thoroughly. Tape the design with the graphite side facing down onto the chalkboard. Then, trace firmly over your design with a mechanical pencil to transfer the outline. Check the faint markings on the board after removing the paper before moving on to chalk or paint.
This method usually costs around $5 to $10 for a pad of transfer paper, available from craft stores or online. It works well on both small and larger chalkboards and helps avoid common errors from freehand drawing.
- Print or draw your design on regular paper.
- Rub a soft pencil (4B works well) all over the entire back of the paper.
- Place graphite side down onto the chalkboard and secure with tape.
- Trace the design using firm pressure with a mechanical pencil.
- Remove the paper and faintly check the transferred design on your board.
- Touch up any missed spots by hand before filling in with chalk.
Tracing Freehand with Pencil
Sketching your design freehand directly onto the chalkboard with a pencil suits those comfortable with drawing or tackling simple designs. It is a cost-free option but requires patience and a steady hand.
Turn off the lights to reduce glare, which helps you see the chalkboard surface clearly and avoid mistakes. Use a regular pencil for easy erasing and cleaning up. This method works well when you want to avoid extra materials and keep your process flexible.
Replacing the pencil with white chalk or chalk markers happens after you’re satisfied with the pencil sketch. Use a soft eraser for corrections, and remember less pressure means easier removal if you want to change your design during the process.
- Turn off overhead lights to reduce shine on your chalkboard.
- Lightly sketch your design with a regular pencil.
- Make corrections with a clean eraser as needed.
- Once happy with your sketch, go over it with chalk or a chalk marker.
- Use a damp cloth to erase any pencil smudges carefully without disturbing chalk outlines.
Using a Projector or Lightbox
A projector or lightbox lets you project your design onto the chalkboard surface for easy tracing. This method is ideal for large signs, complicated artwork, or when you need perfect scaling and positioning.
Using a projector involves setting up your digital design on a phone or computer and sizing it on the board through projection. Then, trace the image with a pencil or chalk over the projected lines. A lightbox requires printing your design on translucent paper and placing the chalkboard over it to trace the design using the backlight.
This technique may require an upfront investment for a projector or lightbox, generally ranging from $30 to $150 depending on quality. It saves time on detailed work and ensures accuracy but needs power and space to set up.
- Set up your digital design on your device or print on translucent paper.
- Position the projector or lightbox so the image fits your chalkboard size.
- Trace the projected or backlit design on the board lightly with pencil.
- Confirm all lines are traced before going over with chalk or marker.
- Clean up any stray pencil lines once your final chalk design is complete.
| Method | Cost | Accuracy | Best For | Common Pitfalls |
|---|---|---|---|---|
| Graphite Transfer Paper | $5, $10 per pad | High | Complex designs, clients wanting exact replicas | Incomplete graphite coverage; faint outlines hard to see |
| Freehand with Pencil | Free | Medium | Simple, quick signs; personalized style | Smudging; uneven lines; fewer corrections |
| Projector or Lightbox | $30, $150 | Very high | Large signs, detailed art, precise scaling | Setup space; requires electricity; shadows if not angled properly |
Techniques and Tips for Chalkboard Lettering
Choosing the right chalkboard lettering style shapes how your sign grabs attention and conveys its message. Start by mixing serif fonts, which have small decorative strokes, with clean sans-serif ones. This contrast adds visual interest and hierarchy, helping important words stand out. Try a bold serif for headings and a simple sans-serif for details. Use script fonts sparingly for accents or names to add a personal touch without compromising readability.
Spacing plays a critical role in neat, readable lettering. Keep letters evenly spaced, aiming for about 1/8 to 1/4 inch between characters, and slightly more between words. Use a ruler or lightly draw horizontal lines as guides to keep letters uniform in height. Higher spacing or irregular letter sizes create a cluttered or messy look that’s hard to read. Leave enough margin around the sign edges, usually at least one inch, to prevent the design from looking crowded and to give it a balanced appearance.
Hierarchy means arranging text so readers can easily understand the order of information. Make your main message the largest and boldest text, with subheadings or dates smaller but still clear. For example, write the event name in 2-inch tall letters centered at the top, with details in 1-inch font below. Using all caps on the main headline or highlighting it with an underline or different color chalk can draw eyes where you want them.
Adding decorative flourishes can improve your chalkboard sign from simple to professional. Small elements like swirls, dots, stars, or borders frame your message and tie the design together. Sketch flourishes lightly with chalk pencil before committing, and balance decorations so they don’t compete with your text. Illustrations related to your sign’s theme, like leaves for a farmhouse sign or utensils for a kitchen menu, add character without overwhelming the lettering.
Common lettering mistakes include inconsistent letter size, crooked lines, and uneven spacing. Fix uneven letters by gently wiping away part of the chalk with a damp cloth or chalkboard eraser, then redraw carefully. For crooked lines, use a ruler as a guide or draw faint pencil lines you erase after finishing. Avoid overworking letters since too much rubbing can damage the chalkboard surface or cause smudging.
Lightly sketch your design with a chalk pencil and a ruler first; this lets you correct spacing and alignment before finalizing with heavier chalk.
Correcting and Cleaning Chalkboard Lettering Mistakes
Fixing chalk lettering mistakes requires gentle care to avoid damaging the overall design. For small errors, use a damp cotton swab or a small paintbrush with water to lightly wipe away the unwanted chalk. Avoid rubbing hard, as this might smudge surrounding letters or remove other parts of your work. Larger mistakes benefit from a slightly damp microfiber cloth pressed gently on the area, lifting off the chalk without disturbing nearby lines. Wait a few seconds for the spot to dry before reapplying chalk to prevent uneven textures that distract from the lettering.
Cleaning your chalkboard sign without causing damage means avoiding harsh chemicals or abrasive scrubbers. Start by gently tapping the board to loosen dry chalk dust, then erase remaining chalk with a felt chalkboard eraser using light, even strokes. For more thorough cleaning, use a soft cloth dampened with plain water or a solution of equal parts water and white vinegar. Wipe the surface slowly and gently in circular motions, then dry immediately with a clean microfiber cloth to prevent streaking or water damage.
Repeating this cleaning process is generally safe as long as you keep moisture low and avoid soaking the chalkboard. Excess water can cause warping or damage paint layers on homemade chalk surfaces. If you notice ghosting, faint chalk marks that won’t erase completely, a quick rub with a chalkboard cleaner or a paste made from baking soda and water can refresh the surface. Always test any cleaner on a small, hidden spot first to make sure it won’t harm your finish.
Maintaining a chalkboard sign starts with regular light cleaning after each use to prevent buildup. Avoid leaving chalk dust on the board for extended periods since it can eventually fade the surface’s quality. Store your chalkboard upright and away from direct sunlight or humidity, which may cause warping or mildew, especially on wooden-framed boards. Resealing with a chalkboard sealer every few months can also keep your sign reliable for repeated use, but only apply it when the board is fully clean and dry to prevent trapping dirt beneath the seal.
Common mistakes include pressing too hard with erasers or using rough cloths, both of which scratch or dull the chalk surface. On the other hand, too much water can lift the chalkboard paint or cause bubbling on homemade surfaces. When fixing errors, patience is key: allow small wet areas to dry before rewriting to avoid uneven chalk absorption and maintain crisp, clean lines. Consistent care extends the life of your chalkboard sign and keeps your lettering crisp through countless projects and daily use.
Sealing and Preserving Your Chalkboard Sign
Chalk designs usually aren’t permanent on a traditional chalkboard surface because the chalk can easily smudge or wipe away. To make your chalk artwork last, especially for display or outdoor use, sealing the chalkboard sign is necessary. Some sealants allow you to keep the chalk’s look while adding durability, while others make the design completely permanent by locking the chalk in place.
Spray sealants are a popular choice for protecting chalkboard signs. A clear acrylic spray sealant works well for making chalk designs semi-permanent. It resists smudging but still preserves the chalk’s texture. When applying, hold the spray can 8 to 12 inches away, sweeping a light, even coat over the surface. Let the first coat dry for 15 to 30 minutes, then add a second coat if desired. Prices for clear acrylic sprays typically range from $6 to $12 for a 6-10 ounce can.
Using chalk markers instead of regular chalk is another way to create lasting designs. However, chalk marker ink can stain the chalkboard surface if you try to erase it later, so it’s closer to permanent. To seal chalk marker artwork, use a clear epoxy resin or polyurethane spray for lasting durability. These sealants create a hard coating that protects the sign from moisture and wear, ideal for outdoor signs. Expect to pay $10 to $20 for these sealants. Follow label instructions carefully because some require multiple coats and curing times of 24 hours or more.
For outdoor chalkboard signs, protect your work by sealing with a weather-resistant clear topcoat. Polyurethane sprays or marine varnishes offer strong protection against rain, sun damage, and temperature changes. Before sealing, make sure the chalkboard surface is completely dry and free of dust. Apply the coating in a well-ventilated area and avoid heavy layers to prevent bubbling or streaking. Outdoor signs typically need two to three coats spaced 2 to 4 hours apart for best results.
A step-by-step sealing process could look like this: start with a clean, dust-free chalkboard design created either with chalk or chalk markers. Test a small area first with your chosen sealant to check for any adverse reaction. Shake the spray can well, then spray a thin, even layer from 8-12 inches away. Let it dry according to the label, usually 15 to 30 minutes. Apply a second coat if needed. For outdoor signs, repeat the application two or three times for full protection. Avoid handling the sign until the final coat fully cures to prevent smudging or damage.
Expect sealed chalk designs to last much longer and resist wear, but no sealant completely guarantees permanence under heavy outdoor use or rough handling. Signs exposed to direct rain or intense sun will degrade faster despite sealing, so occasional touch-ups or reapplications may be necessary. Also, permanent sealants make erasing or changing the design impossible without sanding or repainting, so choose your method based on whether you want to reuse the sign or keep a fixed message.
Sealing your chalkboard sign extends its life and protection by months or even years. Acrylic sprays suit indoor or short-term outdoor displays with chalk art that you might want to change. Epoxy and polyurethane finishes are better for permanent chalk marker designs or signs facing all weather conditions. Careful application and patience during drying are key to a smooth, clear finish that keeps your sign looking fresh.
Creative Chalkboard Sign Design Ideas for Occasions
Chalkboard signs shine at weddings and events when designed with elegance and clarity. For weddings, focus on cursive lettering paired with soft decorative touches like vines, delicate stars, or floral elements to provide a romantic and graceful look. Use white or pastel chalk pens for subtle contrast against a dark background. Typically, keep the layout centered with the main message, such as “Welcome to Our Wedding” or the couple’s names, at the top, followed by event details in smaller, clear type below. A good rule for size is around 12 by 18 inches, large enough to read from a few feet away but still manageable to place on an easel or table.
Party and seasonal themes work well when you customize your chalkboard’s design to reflect colors and motifs relevant to the occasion. For example, autumn signs could include hand-drawn leaves, pumpkins, and warm tones like orange and gold using colored chalk. For a holiday party, incorporate simple icons like snowflakes, ornaments, or holly sprigs while keeping lettering bold and festive. Seasonal decor doesn’t have to be complicated; a farmhouse style with block letters and a rustic border can match the cozy atmosphere of fall or winter events. When creating menu boards for parties or cafes, organize the text in clear sections with headers such as “Appetizers,” “Main Dishes,” and “Desserts.” Use block lettering for easy readability and add subtle decorative borders or small illustrations like utensils or cups to improve appeal.
Decorative elements should support the overall message without overcrowding the sign. Borders, swirls, and small illustrations can frame the text nicely but keep them simple, especially if your lettering is intricate. For weddings, thin vines or soft geometric borders work well; they add elegance without distracting. For menus or event signs, bolder lines or simple icons clarify sections and keep the reader’s eye moving smoothly. To customize your sign, start with a rough sketch on paper to arrange text and decorations, then transfer it lightly to the chalkboard. Keep in mind that adding too many colors or overly complicated drawings can make your sign harder to read and less attractive.
Try drafting your design in chalk first and erase as needed before finalizing with a chalk pen to avoid permanent mistakes and ensure balanced spacing.
Sample templates might include a wedding welcome sign that reads: “Welcome to the Wedding of Anna & Mark” in flowing cursive at the top, with the date below in smaller block letters and a trailing vine border at the bottom. For a fall party sign, use block letters for “Harvest Fest” centered, surrounded by simple leaf sketches along the edges. Menu boards could have “Today’s Specials” in bold at the top, with each dish listed beneath in clean, easy-to-read lettering, framed by a thin rectangle border. These layouts provide clear visual hierarchy and are easy to replicate with your own wording.
Step-by-Step Action Plan for Your Custom Chalkboard Sign
This plan helps you create a custom chalkboard sign with clear steps and goals to check your progress.
- Before you start: Gather all materials and tools listed for your chalkboard sign. Check that your chalkboard surface is smooth and clean to ensure the best lettering results.
- Day 1: Prepare the chalkboard surface or paint your own chalkboard area. Let it dry completely and rub chalk all over to season it, then wipe off to prevent ghosting.
- Day 2: Transfer your chosen design onto the chalkboard using your preferred method (chalk tracing, stencils, or carbon paper). Confirm the design outlines are clearly visible but light enough for easy correction.
- Day 3: Begin lettering using your selected chalk or chalk markers, starting with the main text. Check for smooth, consistent strokes and correct any errors promptly with a damp cloth.
- Day 4: Add decorative elements and accents to complete your design, ensuring balance and readability. Step back to view the sign from a distance to confirm visual appeal.
- Day 5: Seal your chalkboard sign with a clear matte sealant to preserve your design. Ensure the sealant dries fully as indicated on the product label to avoid smudging.
- After 1 week: Display the sign in your desired location and test cleaning a small area with a damp cloth to make sure the sealant protects your work properly.
Frequently Asked Questions
How Do You Make a Chalkboard Sign by Hand?
Start with a smooth surface like wood or a board, then paint it with chalkboard paint. Let it dry fully before adding your design using chalk or chalk markers for a clean finish. Season the board by rubbing chalk all over and wiping it off to prevent ghosting.
What Can I Spray on Chalk to Make It Permanent?
You can spray a clear acrylic sealer or fixative to make chalk designs permanent. This protects your artwork from smudging but loses the erasable feature of typical chalkboards. Test spray on a small area first to ensure no damage to your sign.
What Were Old School Chalkboards Made Of?
Traditional chalkboards were made from slate, a smooth and durable stone surface. This natural material allowed chalk to write clearly and wipe off easily, though modern chalkboards now use painted wood or special coatings to mimic slate.
Can You Create a Do-It-Yourself Outdoor Chalkboard?
Yes, use weather-resistant materials like treated wood and outdoor chalkboard paint. Seal the chalkboard surface to protect it from moisture and wear. Place your sign in a sheltered spot to extend its life, especially in harsh weather.
How Do Manufacturer Make Chalkboards?
Manufacturers typically apply a special slate or fiberboard base with multiple layers of chalkboard paint for a smooth, non-porous surface. This process ensures the board is both erasable and durable for repeated use.
What Is the Best Chalk for Vibrant Colors on Chalkboards?
Chalkboard markers provide more vibrant, long-lasting colors compared to traditional chalk. They reduce dust and smudging but require sealing for permanence. Use them to make your DIY signs pop with bright, clear lettering.
Wrapping Up
Creating a handmade chalkboard sign lets you add a personal touch to any space or event. Take your time with each step and enjoy the process of turning your design into a lasting piece. Now that you have your sign ready, try experimenting with different lettering styles or adding seasonal decorations to keep your craft fresh and inviting.


