How to Make a Cabin Sign with Cricut: A Complete Guide with Proven Tips
How to make a cabin sign with Cricut begins by selecting the right wood size and designing in Cricut Design Space for precise cuts. Use exterior-grade black permanent vinyl for lasting outdoor durability. Start by prepping a 1/2″ plywood piece sized to fit your sign frame to ensure a strong, smooth base.
Key Takeaways
- Measure and cut 1/2″ plywood to your desired sign size minus the frame perimeter.
- Design and size your letters carefully in Cricut Design Space, accounting for zoom limits.
- Choose black permanent vinyl rated for exterior use to last up to 3 years outdoors.
- Paint your wood and let it cure fully for 24 to 48 hours before applying vinyl.
- Wait at least 48 hours after painting if applying vinyl directly to ensure adhesion.
- Use 1 x 2 lumber to build a frame around your sign, reinforcing edges and adding dimension.
Materials and Tools Needed for Cabin Signs with Cricut
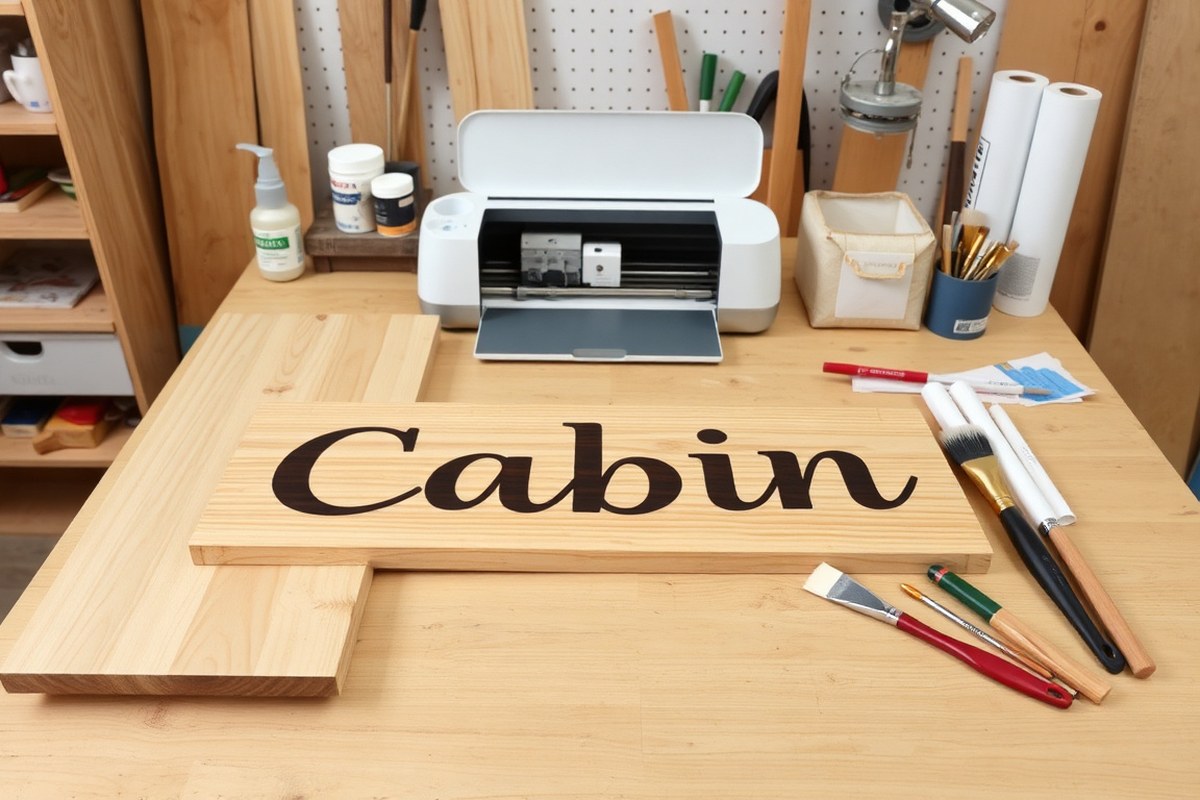
Choosing the right materials and tools sets the foundation for successful cabin sign projects with your Cricut. For the wood base, lightweight softwoods like pine or cedar are popular because they’re easy to cut and paint, and they range in size from 8” x 12” to 12” x 24” for manageable craft signs. Hardwood options like birch plywood give a smoother surface but can be tougher to handle. Look for wood boards around ½ inch thick to balance sturdiness with ease of cutting or applying vinyl.
Your Cricut machine model impacts design complexity and material options. The Cricut Maker is the most versatile, able to cut basswood and balsa wood up to 3/32” thickness using the Knife Blade, making it ideal for rustic signs needing intricate wood cuts. The Explore Air 2 handles thinner wood like balsawood (up to 2mm thick) with the Fine Point Blade but won’t cut thicker wood. The Cricut Joy works best for small vinyl decals and simpler projects, as it doesn’t cut wood at all. Here’s a quick comparison:
| Machine Model | Wood Cutting | Blade Type | Max Wood Thickness | Ideal Use |
|---|---|---|---|---|
| Cricut Maker | Yes, various woods including basswood | Knife Blade | 3/32” (about 2.4 mm) | Intricate wood cuts and layered designs |
| Cricut Explore Air 2 | Yes, mainly thin woods like balsa | Fine Point Blade | 2 mm | Vinyl and thin wood signs |
| Cricut Joy | No | Fine Point Blade | Not applicable | Vinyl decals and small signs |
For vinyl, choose permanent vinyl brands with outdoor durability if your cabin sign goes outside. Options like Oracal 651 perform well for weather resistance and color longevity. For indoor signs or temporary decor, removable vinyl such as Oracal 631 is easier to change later. Stencil vinyl also works well when you plan to paint your design on the wood. Paint types matter too, acrylic craft paint is versatile for wood and dries quickly in about 20 to 30 minutes. Use matte or satin finishes for a rustic look, and avoid gloss if you want an authentic farmhouse feel.
- Wood board: pine, cedar, or birch plywood; ½ inch thick, 8”x12” to 12”x24”
- Cricut machine: Maker (best for wood), Explore Air 2 (thin wood, vinyl), or Joy (vinyl only)
- Blades: Knife Blade for thick wood; Fine Point Blade for vinyl and thin wood
- Vinyl: Oracal 651 for outdoor permanence; Oracal 631 for removable indoor use
- Stencil vinyl for painting letters and designs
- Acrylic paint in matte or satin finish
- Extra tools: transfer tape, scraper tool, painter’s tape, sanding block, and brushes
Extra tools help refine your sign’s look and ease assembly. Transfer tape makes applying vinyl smooth and accurate. A scraper tool removes air bubbles from vinyl. Painter’s tape holds stencils steady for sharp paint lines. Sanding blocks smooth wood edges before painting, ensuring better adhesion. Fine synthetic brushes suit detail work on stenciled designs. Having these on hand reduces errors and speeds up your process.
How to Design and Size Your Cabin Sign in Cricut Design Space
Designing and sizing your cabin sign in Cricut Design Space lets you create custom, well-fitted patterns that perfectly match your wood surface. Upload or choose your images, adjust the dimensions to your wood’s size, and prepare cutting paths including registration marks for accurate alignment. Managing larger designs on smaller mats requires splitting and layering but is straightforward once you follow precise steps.
Uploading and Organizing Design Files
Start by opening Cricut Design Space on your computer or tablet. You can upload SVG files, which are ideal because they maintain crisp lines and layers for editing. Alternatively, use built-in images or create text directly in the software to add specific phrases or iconography for your sign’s theme.
After uploading, organize your design elements into groups or layers to control cutting order and colors, especially if using different materials like vinyl and cardstock. Using offsets is helpful for creating outlines or shadows around text or images, adding depth to your design.
- Sign into Cricut Design Space and create a new project.
- Click “Upload” and browse to your SVG file, then insert it onto the canvas.
- Use the layers panel to name and group related elements for easy selection later.
- Add offsets by selecting an element, clicking “Offset,” and adjusting the distance (usually 0.05” to 0.1” works well).
- Ungroup components if you need to adjust sizes or colors individually.
- Save your organized project with a clear name for future edits.
Make sure to check if your SVG file has unwanted layers or nodes that can increase cutting time and complicate your stencil.
Sizing Designs to Fit Your Wood Sign
Measure your wooden board carefully, noting its width and height to set your canvas appropriately in Design Space. Your design should leave a small border around the edges, about 0.25” to 0.5”, to prevent vinyl or paint from peeling at the edges and to maintain a balanced look within a frame.
Resize your design elements by selecting the group or layer and dragging the corner handles or entering precise dimensions in the toolbar. Confirm that the overall size fits within your measured dimensions. If your board has a frame or border, factor this in by reducing size accordingly.
- Measure the height and width of your wooden sign surface.
- Set a new canvas size in Cricut matching your wood, or use “Set Canvas” with a custom shape and size for visual reference.
- Select your entire design and resize it to fit within your measured dimensions, leaving margins for frame borders.
- Use the zoom function to verify details and proportions look good at the final size.
- Add registration marks or cutting guides as a small square or circle near corners, offset from your main design.
- Group design elements with registration marks to keep them aligned for cutting and weeding.
Design sizes that overlap edges often lead to paint bleeding or vinyl lifting, so double-check your final size against your wood.
Handling Large Designs and Cutting Mats
Large cabin sign designs can exceed the 12″x12″ standard Cricut mat size, especially if your wood piece is oversized. A 12″x24″ mat is recommended for bigger designs, but if you only have a smaller mat, split your design into manageable sections.
Use the Slice or Duplicate tools to divide the design into parts, then cut and apply each section sequentially on your wood. Registration marks help you align these parts perfectly. Alternatively, focus on using adhesive vinyl, which can be trimmed after cutting to fit smaller mats better.
- Open your full design in Design Space and decide where to split it based on your available mat size.
- Duplicate your design and use the Slice tool or crop elements to isolate sections matching mat size limits.
- Add registration marks on each section’s edges for alignment during application.
- Cut each section on your Cricut using the appropriate mat and material settings.
- Apply sections one at a time on your wood sign, carefully matching registration marks.
Cutting large signs in sections increases assembly time but prevents design distortion and waste from forcing an oversized cut on a small mat.
Preparing Wood and Painting Tips for Durable Cabin Signs
Preparing the wood and applying paint correctly are essential steps to make your cabin sign last and to hold vinyl decals firmly. Proper sanding removes surface imperfections and helps paint stick better. Using suitable primer and paint, plus allowing enough drying and curing time, prevents peeling and paint bleed under stencils.
Sanding and Cleaning the Wood Surface
Start by sanding the wood to smooth out rough spots and remove any finishes or dirt. Sanding opens the wood pores for better primer and paint adhesion. Use a medium grit sandpaper like 120 grit first, then finish with a finer 220 grit for a smooth surface.
After sanding, remove all dust using a vacuum or tack cloth. Any remaining dust will cause the paint or vinyl to stick unevenly, leading to peeling or bubbling.
Applying Primer and Paint Coats Properly
Applying primer seals the wood and creates a uniform base that helps paint and vinyl adhere better. Opt for a high-quality acrylic primer designed for wood, which resists moisture and improves paint durability. Avoid oil-based primers if you plan to use vinyl, as they dry slower and can interfere with adhesion.
After the primer dries (usually 1 to 2 hours), apply your paint in thin, even coats. Use acrylic latex paint or outdoor enamel for durability, especially if your sign will be outside. Apply 1 to 2 coats, allowing each coat to dry fully before applying the next to prevent runs and peeling.
To prevent paint seepage under stencils, apply paint using a stencil brush or sponge in a dabbing motion with minimal paint. Remove excess paint on a paper towel before applying. A light, buildable coat works better than heavy brushing. Let the paint dry partially but not completely before removing the stencil to avoid pulling.
Timing Your Paint Drying and Curing Process
Let paint dry thoroughly for at least 24 hours before applying vinyl decals. This drying period ensures the paint is firm enough to prevent vinyl from peeling but not fully cured.
For best adhesion and long-term durability, allow the paint to cure for 48 hours or more. Temperature and humidity affect drying times, paints dry faster at 70°F and moderate humidity but slower in colder or more humid conditions. Adjust timing accordingly, especially during winter or rainy seasons. Here is a step-by-step checklist for wood preparation and painting before applying vinyl:
- Sand the raw wood with 120 grit sandpaper, then finish with 220 grit.
- Thoroughly remove all sanding dust using a vacuum and a tack cloth.
- Apply one coat of acrylic latex primer and let dry 1 to 2 hours.
- Paint the sign with thin coats of acrylic latex or outdoor enamel paint; allow each coat to dry before applying the next.
- Use a stencil brush or sponge with minimal paint to avoid seepage under stencils.
- Let the final paint coat dry at least 24 hours before applying vinyl decals.
- Allow 48 hours or more for the paint to fully cure before handling or sealing your sign.
How to Cut and Apply Vinyl or Stencils to Your Wood Sign
For wood signs, permanent adhesive vinyl works best because it sticks well to painted wood and resists peeling or fading. Cutting vinyl or stencils with your Cricut requires proper settings for clean edges and careful transfer techniques to avoid air bubbles. Both vinyl decals and stencils have pros and cons, and reusing stencils is possible with careful cleaning, while vinyl decals are typically single-use but leftover pieces can be stored for small projects.
Cutting Vinyl or Stencil Materials Accurately
Choose permanent adhesive vinyl if you want long-lasting, weather-resistant cabin signs. For stencils, select stencil vinyl or thin cardstock that can handle paint without curling. Your Cricut Explore Air 2 can cut vinyl directly on the mat or, in some cases, without a mat for shorter pieces. Use the recommended blade setting for vinyl, typically the fine-point blade, and mirror your cut if using iron-on vinyl.
Set your Cricut Design Space cutting pressure to ‘Default’ for vinyl; increase slightly if the cut isn’t completing through. Double-check size and design placement before cutting. Test small scraps if you’re trying a new material to avoid wasted vinyl. After cutting, carefully weed your design by removing extra vinyl around your letters or shapes to prepare for transfer.
Applying Vinyl Decals Smoothly and Securely
Applying vinyl decals cleanly involves several key steps to prevent bubbles and peeling. Use transfer tape to lift your weeded vinyl off its backing. Smooth the transfer tape over the vinyl firmly with a scraper tool or credit card, then peel the backing slowly from the transfer tape, ensuring the vinyl sticks to the tape.
- Clean the painted wood surface with alcohol and let it dry completely.
- Cut a piece of transfer tape slightly larger than your vinyl design and apply it over the vinyl.
- Use a scraper tool or credit card to firmly press the transfer tape onto the vinyl, removing air bubbles.
- Peel the vinyl backing off slowly at a 45-degree angle, keeping the vinyl on the transfer tape.
- Position the vinyl and transfer tape on the wood sign, aligning it carefully before pressing down.
- Use the scraper tool to press the vinyl onto the wood, starting from the center and moving outward.
- Peel the transfer tape off slowly at a sharp angle, leaving the vinyl adhered to the wood.
- Press over the vinyl again lightly to ensure full adhesion.
Allow 24 to 48 hours for vinyl to fully set before exposing your sign to moisture or handling heavily. Avoid repositioning vinyl once applied to prevent weakening the adhesive and causing peeling.
Stencil Placement and Removal Without Damage
Stencils require careful handling to keep edges sharp and avoid paint bleed. Cut your stencil material with Cricut, then use a low-tack stencil or painter’s tape to secure the stencil on the painted wood surface.
Apply paint with a dry brush or sponge in light layers, holding the stencil tightly to the surface. Avoid heavy or wet paint application, which can seep underneath. After painting, remove the stencil immediately while the paint is still wet or tacky to prevent peeling paint together with the stencil.
You can reuse stencils by rinsing with warm water and mild soap, then drying flat. Store them flat or rolled loosely without folding to prevent warping. Leftover vinyl pieces also store well on the original backing paper at room temperature, away from direct sunlight or dust.
| Feature | Vinyl Decals | Stencils |
|---|---|---|
| Application | Adhesive, peel and stick | Paint through cutouts |
| Durability | Long-lasting, water-resistant | Depends on paint and surface |
| Reusability | Typically single-use | Can be washed and reused |
| Detail | Sharp edges, crisp lines | Slightly softer edges with paint |
| Risk of Peeling | Higher if applied improperly | Low if removed carefully |
Best Practices to Avoid Paint Seepage and Vinyl Peeling
Paint seepage occurs when paint slips under the edges of your stencil, creating blurry lines and ruining the sharp look of your cabin sign. This happens mostly because the stencil or vinyl isn’t sealed tightly against the wood surface. To stop paint bleed, you should seal the edges before painting. Apply a thin layer of clear acrylic sealer or Mod Podge over the edges of your stencil, then let it dry completely. This creates a barrier that blocks the paint from slipping underneath. Using painter’s tape to secure your stencil or vinyl firmly to the wood also helps keep every edge well-sealed and in place during painting.
For best results, apply paint in thin layers rather than one heavy coat. Let the first color dry for at least 30 minutes before adding a second. Two or three light coats reduce the risk of paint pooling and bleeding under edges. Waiting longer between layers, about one hour, can be beneficial on raw wood, which soaks up moisture more quickly and can cause uneven drying. Darker or rougher wood may need an extra sealing coat before painting, so the paint sits on the surface rather than soaking in and bleeding.
Vinyl adhesion on painted or raw wood depends on the vinyl quality and the wood preparation. You want vinyl made for outdoor or craft signs, like Oracal 651, which has strong adhesive properties and lasts longer on wood. Before applying vinyl, make sure your paint is fully cured. This usually takes 24 to 48 hours depending on the brand and temperature. The vinyl sticks best on smooth surfaces, so sanding the wood lightly and using a primer or paint base coat can improve grip. If you’re applying vinyl to raw wood, use a primer first to create a more even, less porous surface.
Environmental factors can make or break your adhesion. Heat, cold, and humidity affect the drying and bonding of both paint and vinyl. Adhesion works best when the temperature is between 65°F and 85°F, and humidity is below 50 percent. Higher humidity can slow drying and cause the vinyl adhesive to stay tacky longer, making it peel off sooner. Avoid applying vinyl right after it rains or in very cold conditions, as moisture and temperature shocks reduce stickiness.
Secure vinyl edges with painter’s tape and wait at least 24 hours after painting before applying vinyl to ensure proper adhesion and avoid peeling.
Sealing, Finishing, and Protecting Your Cabin Sign for Longevity
Using the right sealant is essential to protect your cabin sign from wear, especially if it will be outside. Acrylic sealers, including those with a gloss finish, are popular because they offer a clear protective coating that won’t yellow or crack over time. Spray-on acrylic sealers provide even coverage and reduce the risk of disturbing any vinyl lettering or painted designs on your sign. Polyurethane sealants are another option, offering strong protection against moisture and UV rays; however, some types can yellow or be too thick and rough when applied over vinyl or detailed paint work.
To apply sealant without damaging your vinyl or paint, wait at least 24 hours after painting or applying vinyl to let everything fully dry and cure. Use a light, even spray coat if you choose an acrylic spray sealant, holding the can at least 8 to 12 inches away from the surface. Apply multiple thin layers, allowing 15 to 20 minutes of drying time between coats. Avoid brushing sealant directly on vinyl as it can cause peeling. If using a brush-on sealer like polyurethane, select a water-based version for better compatibility with vinyl and avoid heavy or uneven applications. Apply in thin coats and do a light sanding with fine-grit sandpaper (around 220 grit) between coats once dry to keep the surface smooth.
Outdoor durability depends on properly sealing the sign and the environment it faces. A well-sealed wooden cabin sign, especially one coated with multiple layers of acrylic spray sealant or water-based polyurethane, can last one to three years outdoors without major damage, according to common craft and woodworking practices. Keep in mind heavy rain, intense sun exposure, or extreme weather may shorten this timeline. Signs placed in covered porches or shaded areas tend to last longer. For maximum protection, choose sealants with UV blockers and water resistance.
Re-sealing your cabin sign every 12 months outdoors helps maintain its appearance and protection. Signs used indoors or in sheltered environments may only need resealing every 2 to 3 years. When you notice fading, peeling, or rough surface texture, it’s a good sign more sealant is needed. Before resealing, gently clean your sign with a soft cloth and mild soap to remove dirt and debris, then ensure it’s dry. Follow the same light-coating application process as before to avoid damage to your designs.
Sealing protects your wood sign’s paint and vinyl while preventing moisture absorption that can cause wood to warp or crack. Choosing acrylic spray sealants usually costs between $6 and $15 per can, offering a budget-friendly and easy-to-use option that works well for most DIY wood signs. Water-based polyurethane typically ranges from $10 to $20 per quart and is ideal when you want stronger moisture and scratch protection. Both options allow your cabin sign to maintain its color vibrancy and durability for longer periods when applied correctly.
How to Add 3D Effects and Layered Designs Using Cricut
Adding 3D effects and layered designs to your cabin sign using Cricut can transform a simple project into something eye-catching and professional looking. The Cricut Maker offers the Knife Blade, which is designed to cut thin wood, chipboard, or basswood up to 2.4 mm thick. This capability allows you to create sturdy, three-dimensional elements that will add depth and texture to your rustic wood sign.
Layering vinyl colors and materials involves cutting each color or material separately and then applying them in sequence with precision. You’ll need standard or strong grip mats depending on the material you’re cutting. For vinyl, a standard grip mat works well, but for chipboard or wood cutouts with the Knife Blade, use a strong grip mat to keep the material stable during the longer cutting process.
To assemble a multi-layered sign securely, use tacky wood glue or a heavy-duty craft adhesive designed for wood and vinyl. Double-sided adhesive tape can help position vinyl layers before final adhesion. Consider clamps or weights while glue dries to avoid shifting, especially with heavier 3D pieces. Proper alignment and adhesive choice are key to a durable and neat finish. Follow these steps to create your 3D layered cabin sign:
- Design each layer separately in Cricut Design Space, organizing cut lines by material (vinyl, chipboard, wood). Make sure each layer fits the base sign size and aligns for a neat stacked effect.
- Select the Knife Blade for chipboard or thin wood cuts. Load the material onto a strong grip mat. The slower cut speeds and increased passes of the Knife Blade require patience, typically around 30-60 minutes per cut depending on size and thickness.
- Cut vinyl layers on a standard grip mat using the fine-point blade. Weed the excess vinyl carefully, keeping the details intact for precise layering.
- Apply transfer tape to each vinyl layer to position it accurately over the wood base or layered chipboard, starting from the bottom layer up. Peel the transfer tape slowly to avoid lifting underlying vinyl.
- Glue wood or chipboard layers using wood glue suitable for your materials. Apply glue sparingly to avoid seepage, and clamp or weight the pieces for at least an hour for maximum bond strength.
- Layer vinyl colors by applying the lightest colors first or the order you designed to ensure no colors get covered incorrectly. Use a scraper tool to press vinyl firmly for a consistent bond.
- Check alignment and touch-up any edges with craft paint or a fine paintbrush to mask any glue spots or gaps, keeping your sign looking sharp and polished.
Cutting chipboard or thin wood with the Knife Blade requires a good machine calibration, and cutting times can be lengthy, so make your design as simple as possible while maximizing visual impact. Vinyl layering demands patience in weeding and application to avoid wrinkles or bubbles. Using the right adhesive and clamping technique ensures your 3D elements stay attached through temperature changes and outdoor conditions common in cabins.
Common Mistakes and How to Fix Them When Making Cabin Signs
Paint bleeding under a stencil often happens when too much paint seeps beneath the edges. To fix this, wait until the paint dries and carefully scrape away the bleed with a sharp craft knife or fine-grit sandpaper. Next time, apply thinner layers of paint using a stippling brush or foam roller, and allow each layer to dry before adding another. Press the stencil firmly and consider using stencil vinyl with a low-tack adhesive to minimize gaps.
Vinyl peeling after application usually results from using removable or regular 631 vinyl instead of permanent vinyl, which is critical for outdoor or cabin signs exposed to weather. When vinyl starts to lift, gently lift the peeling edge and reapply transfer tape to press it back down firmly. For stubborn edges, use a craft heat tool or hairdryer on low heat to warm the vinyl slightly before smoothing down. In cases where large sections peel off, cutting replacement vinyl pieces from leftover material and reapplying over the damaged areas is the best fix.
When your design cuts at the wrong size or is cut incorrectly, double-check your settings in Cricut Design Space. Select “Custom” as the material setting, then choose the correct material, such as “Stencil Vinyl” for stencils or permanent vinyl for decals. When your cuts are off, reload the material and recalibrate your machine’s blade depth and pressure before recutting the design. Take a sample cut on scrap material before cutting the full design to avoid wasting supplies. Resize the design directly in Design Space by dragging the corners or entering exact dimensions to fit your wood sign.
For scratches or paint chips on finished signs, lightly sand the affected area with fine-grit sandpaper to smooth the surface. Clean any dust, then touch up with matching acrylic paint applied in thin layers. Allow at least 30 minutes to dry between coats to prevent uneven texture. When vinyl is scratched, small scratches can sometimes be rubbed gently with your finger or a soft cloth to smooth them out. For significant vinyl damage, cut a replacement patch matching the design and carefully adhere it over the damaged spot using transfer tape.
Always use permanent vinyl for cabin signs, especially those exposed to the elements, to avoid peeling problems and ensure your design lasts for years.
Step-by-Step Action Plan
Follow these steps to create your cabin sign with your Cricut and achieve a durable, eye-catching result.
- Before you start: Gather all materials and tools, including wood, paint, Cricut vinyl or stencil material, and sealant. Confirm everything is ready to avoid interruptions.
- Day 1: Design your sign in Cricut Design Space, sizing the layout to your wood piece and selecting layers for 3D effects if desired. Preview the design to ensure proper fit.
- Day 2: Prepare the wood by sanding and cleaning it thoroughly, then apply base coats of paint. Check that the surface feels smooth and paint is evenly applied.
- Day 3: Cut your vinyl or stencil on the Cricut, then carefully apply it to the dried painted wood. Inspect edges to ensure good adhesion and alignment.
- Day 4: Paint over the stencil or vinyl, applying thin coats to prevent seepage. Remove the stencil or vinyl before the paint fully dries for clean lines.
- Day 5: Touch up any paint bleed or vinyl lifting using a fine brush or additional adhesive. Verify the corrections blend well without noticeable flaws.
- Day 6: Seal the sign with a compatible clear coat for outdoor protection. Make sure the sealant dries to a firm, smooth finish without cloudiness.
- Day 7: Hang or display your finished cabin sign in your chosen spot. Check the mounting method keeps the sign secure and level.
Frequently Asked Questions
Can I Make a Rustic Christmas Cabin Sign with a Cricut?
Yes, you can create a rustic Christmas cabin sign using your Cricut by cutting vinyl or stencils to add cozy holiday designs. These signs add a warm, festive touch to your home decor perfectly suited to the season.
How Do I Make a 3D Cabin Sign Using the Cricut Knife Blade?
Use the Cricut Knife Blade to cut chipboard shapes for layered, 3D effects on your cabin sign. This technique adds dimension and makes your sign stand out with farmhouse-inspired style.
Can I Make Cabin Signs with Any Cricut Model?
Yes, cabin signs can be made using Cricut Maker, Explore Air 2, or even Cricut Joy, though larger signs require larger mats or models. Choose your machine based on the size and materials of your project.
What Are Good Fonts for Designing Cabin Signs in Cricut Design Space?
Rustic, handwritten, or serif fonts often suit cabin signs well and add charm. Experiment with Cricut’s font library to match your cabin’s style and ambiance.
How Do I Use Transfer Tape Effectively When Applying Vinyl to a Cabin Sign?
Smooth the transfer tape over your vinyl with a tool or credit card, then pull it away carefully to prevent peeling. This ensures vinyl adheres cleanly to the wood surface.
Can I Create Layered Text and Graphics Easily for My Cabin Signs?
Yes, layering vinyl or chipboard cutouts adds depth, making your text and graphics pop. Planning layers in Design Space helps with precise placement.
Wrapping Up
Creating a cabin sign with your Cricut requires patience, careful preparation, and attention to detail at each step. By following a clear plan and using quality materials, you’ll produce a sign that looks professional and lasts through seasons. Start by designing your unique message in Cricut Design Space and prepare your workspace to keep your project on track from the start.