How to Engrave Metal by Hand a Complete Guide with Tools, Tips, and Techniques
How to engrave metal by hand involves using a sharp graver held at about a 45-degree angle to carve thin curls of metal gently. This method removes metal to create precise recessed lines or designs. Starting with a clean, stable workspace ensures better control and detail in your engraving.
Key Takeaways
- Position your graver so it meets the metal surface at about a 45-degree angle, ensuring better control during cutting.
- Apply steady, even pressure to push the graver forward, cutting shallow curls of metal.
- Choose metals like sterling silver, brass, or copper, which respond well to hand engraving.
- Keep your workspace clean and well-lit to prevent mistakes and maintain accuracy.
- Secure your metal piece firmly to avoid slips while engraving delicate designs.
- Start with simple straight lines before attempting intricate scrollwork or monograms.
What Is Hand Engraving on Metal and How It Works
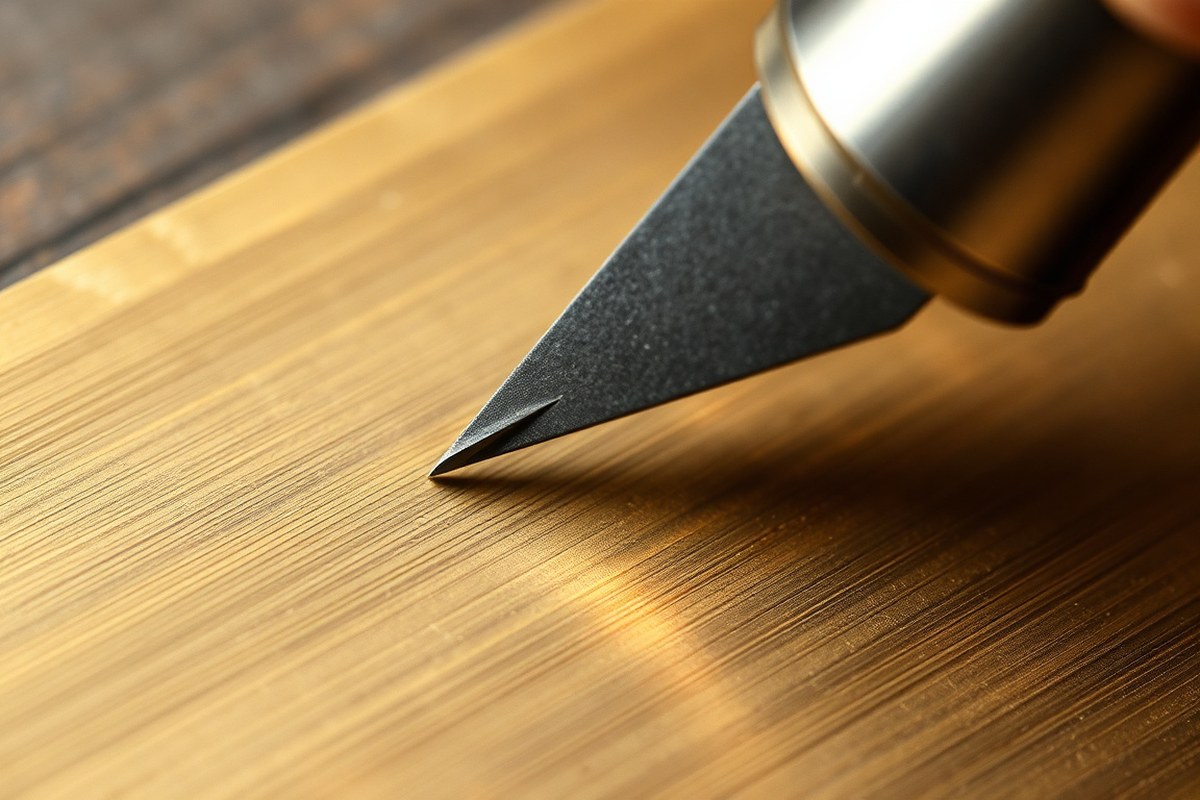
Hand engraving on metal involves physically cutting small grooves or lines directly into a metal surface by using sharp tools called gravers. This traditional art form dates back centuries and remains highly valued for its precision and delicate detail, especially in jewelry and decorative objects. Unlike chemical etching or laser engraving, hand engraving relies entirely on the skillful manual control of the tool to carve each mark into the metal, making it unique with every piece.
The process works by pressing and pushing a graver, a small chisel with a sharpened steel or carbide tip, at a controlled angle into the metal. This angle typically ranges around 30 to 45 degrees, allowing the tool to shave away thin slivers of metal smoothly and cleanly. By carefully adjusting the direction and pressure, you create crisp, recessed lines that form the design, pattern, or text. Each cut removes a tiny amount of material, and the depth usually varies between a few thousandths of an inch to noticeable grooves depending on the style and metal thickness.
A common technique to better understand involves imagining the graver held like a pen but tilted to one side to scoop out metal. The tool is pushed forward, and the metal curls away beneath the cutting edge. Good results show sharp, clean lines with smooth walls and consistent depth. Rough edges or tearing happen if the tool angle is too shallow or if the metal is too hard without proper preparation. Harder metals require sharper gravers and often more effort, but softer metals like silver are easier for beginners.
Hand engraving differs from power-assisted methods because it does not use electricity, lasers, or computer guidance. This means you have full control over every stroke without relying on preset patterns or machine precision. The ability to vary line thickness, curve smoothly, and add complex textures by hand sets hand engraving apart as a craft. Many artisans spend years mastering the consistent pressure and motion needed. The cost is generally limited to acquiring a set of gravers ($20 to $100+ depending on quality) and a suitable workbench or vise setup, compared to machines that cost hundreds or thousands of dollars.
Although time-consuming, hand engraving offers an unmatched connection between the artist and metal, allowing you to create heirloom-quality pieces with fine scrolls, monograms, and decorative textures that machines struggle to replicate. It demands patience, steady hands, and practice, but the outcome is a permanent, elegant design physically etched beneath the surface that will not fade or wear off easily.
Choosing the Right Tools, Materials, and Metals

Choosing the right tools and materials is key to successful metal hand engraving. Selecting manageable metals and having the proper equipment helps you control detail and avoid frustration. Preparation and finishing materials improve the final look and durability of your work.
Essential Hand Engraving Tools
You need precise, sharp tools to cut clean lines into metal surfaces. Hand gravers with hardened steel blades come in various shapes, such as square, round, and V-shaped, to create different line styles. Sharpening stones maintain the edge, which is important since dull tools slip and cause uneven cuts. A graver holder offers a comfortable grip and steady control, reducing hand fatigue during detailed work.
Safety gear is important to protect your eyes and hands. Safety glasses shield your eyes from tiny metal shavings, while thin gloves can prevent cuts without sacrificing dexterity. A bench pin or engraving block stabilizes your workpiece, keeping it secure and minimizing vibration.
- Hand gravers: varied blade shapes for different cuts
- Sharpening stones: fine-grit stones (600 to 1000 grit) to keep tools sharp
- Graver holder: ergonomic handle to hold gravers firmly
- Safety glasses and gloves: eye and hand protection
- Bench pin or block: secures the metal while engraving
- Metal files: trims burrs and smooths edges after engraving
Best Metals for Beginners and Experts
Soft metals are easier to engrave and help you learn cleaner strokes with less force. Copper, brass, silver, and gold have lower hardness ratings, which reduce tool wear and let you correct mistakes more easily. Harder metals demand sharper tools and steadier hands, so reserve those once you build skill. The table below compares common engraving metals by hardness (Mohs scale), ease of engraving, and typical uses:
| Metal | Mohs Hardness | Ease of Engraving | Typical Use |
|---|---|---|---|
| Gold | 2.5 – 3 | Very easy | Fine jewelry, decorative art |
| Silver (Sterling) | 2.5 – 3 | Easy | Jewelry, flatware, ornaments |
| Copper | 3 | Easy | Crafts, decorative plates |
| Brass | 3 – 4 | Moderate | Hardware, instruments, plaques |
| Aluminum | 2 – 3 | Easy | Diy projects, lightweight parts |
| Steel (mild) | 4 – 5 | Difficult | Tools, knives, industrial parts |
Starting with metals like copper or brass helps you gain control because they require less force and sharpen the tip less often. Save steel or harder alloys for experienced engraving to avoid tool damage and fatigue.
Materials for Preparation and Finishing
Before engraving, clean the metal surface to remove oils and dirt with isopropyl alcohol or mild soap. Rusty or stubborn spots need light sanding or wire brushing for a smooth start. After engraving, polishing compounds and buffing wheels restore shine and remove scratches.
Files and sandpaper smooth any burrs left after engraving. Using fine-grit sandpaper (400 to 600 grit) gently refines edges without dulling details. Finally, protective coatings like clear lacquer or wax prevent tarnishing and wear, especially on softer metals.
Protect your eyes by wearing safety glasses whenever you sharpen tools or do metal engraving to block tiny metal shavings.
Step-by-Step Guide to Engraving Metal by Hand
Engraving metal by hand involves careful preparation, precise transfer of your design, correct handling of your graver, steady carving technique, and thorough inspection. Each step affects the final outcome, so following a clear process ensures sharper lines and cleaner details on your piece.
Preparing and Cleaning the Metal Surface
Start with a clean, smooth metal surface. Oils, dirt, or oxidation can interfere with both design transfer and engraving quality. Cleaning also helps your design stay visible and your tool glide smoothly.
Use a non-abrasive cleaner like rubbing alcohol or a mild detergent to remove grease and grime. Rub the surface gently with a lint-free cloth. Lightly polish the metal with fine steel wool or sandpaper (400 to 600 grit) to smooth out any scratches or marks on the surface. Then wipe clean again to remove dust. Secure your metal piece firmly on your workspace to prevent slipping. A stable, well-lit area is essential for precision.
Transferring and Sketching Your Design
Getting your design accurately onto the metal makes engraving easier and reduces mistakes. You can either sketch freehand directly or use transfer methods for more complex patterns.
For a precise transfer, print your design on regular paper in the exact size needed. Place it on the metal and dab acetone with a cotton swab over the paper to soak the ink onto the surface. Alternatively, use carbon paper underneath your design to trace it onto the metal with a stylus. Temporary adhesives like painter’s tape can hold your stencil in place without damaging the metal. For quick guides, light sketching with a fine-tip permanent marker or scribing with a sharp tool works well on smooth metals.
Proper Graver Handling and Engraving Technique
Hold the graver at about a 30 to 45-degree angle to the metal surface to allow the tip to dig in just enough to cut thin curls of metal. This angle varies slightly depending on the tool’s grind but staying shallow prevents gouging.
Apply steady, even pressure while pushing the graver forward. Start with light strokes to create a shallow line, then deepen it gradually if needed. Avoid forcing the tool quickly; controlled motion produces cleaner cuts and better line quality. Maintain a firm but relaxed grip, holding the graver like a pencil with your thumb and index finger guiding and your middle finger stabilizing. Practice small, consistent strokes along straight and curved lines before working on your final piece. Consider testing the motion and pressure on a scrap piece of the same metal to adapt to its hardness and texture.
- Secure the metal workpiece to your stable workspace to prevent movement.
- Hold the graver at a 30, 45° angle to the metal surface.
- Apply gentle, steady forward pressure to carve thin curls of metal.
- Start with shallow lines and deepen them gradually as needed.
- Use short, controlled strokes for curves and longer, even strokes for straight edges.
- Maintain a relaxed but firm grip to guide the tool precisely.
- Frequent your position and wrist to keep consistent angles and pressure.
- Test your technique on scrap metal to adjust for material hardness.
Inspecting and Touching Up Your Engraving
Regularly stop to inspect your work under good lighting. Look for uneven depths, rough edges, or missed spots. Sharp, clean lines should be consistent without jerky or broken marks. Use a magnifying glass if details are very fine.
Make small corrections by carefully rerunning the graver over shallower areas or smoothing any burrs with a fine needle file or polishing stick. Avoid over-engraving since metal removed cannot be replaced. Compare symmetrical parts of the design to keep the elements balanced.
Keep your metal clean by wiping away dust or metal curls during breaks. This helps you see the engraving clearly and prevent accidental scratches while working.
How to Avoid and Fix Common Hand Engraving Mistakes
Uneven lines or skipped cuts in hand engraving usually happen because of inconsistent pressure or a dull tool. Applying uneven force causes the engraving bit to dig too deep or barely touch the surface, while a worn bit fails to remove metal cleanly. You can fix minor unevenness by going over the line again with steady, controlled strokes. Using a sharper tool helps prevent skipped cuts and results in clear, crisp lines. Securely clamping your metal piece also stabilizes your work, reducing the risk of tool slipping and fluctuating depth.
Burrs and rough edges form when small metal fragments lift or tear during engraving. These imperfections make finished work look messy and can cause cuts or snags if worn. After engraving, remove burrs by gently brushing off chips with a soft brush or blowing them away using compressed air. Follow that by carefully filing the edges with small, fine files or smoothing them with abrasive pads designed for metal. Polishing compounds help bring out clean, sharp details in the engraved lines while reducing visible tooling marks.
Tool slipping and metal damage often occur due to poor workholding or incorrect tool angle. Holding the engraving tool at a shallow angle, about 15 to 30 degrees from the surface, helps maintain control and prevents the bit from catching suddenly. Avoid engraving very thin or damaged metal to prevent cracking or bending. To stop slipping, clamp your metal piece tightly using a bench vise or specialized workholding device. This reduces vibration and keeps the surface steady.
- Use a sharp engraving bit and replace it when dull
- Clamp the metal securely to prevent movement
- Apply consistent, moderate pressure with steady hand movements
- Hold the tool at a shallow angle for better control
- Remove burrs with small files or fine abrasive pads post-engraving
- Clean away metal chips using a soft brush or compressed air
- Avoid engraving very thin or damaged metal pieces
These tips help you troubleshoot common issues quickly while developing smoother technique. Taking small corrective steps right after spotting a problem improves the look of your engraving without extensive rework. Consistent practice combined with attention to detail during and after engraving builds cleaner, more professional results as you gain experience.
Safety Tips and Workspace Setup for Hand Engraving
Start by selecting essential safety gear to protect your eyes, hands, and respiratory system. Wear safety glasses or goggles to prevent metal shards and dust from causing eye injuries. Use cut-resistant gloves to shield your hands, but choose ones thin enough to still feel the engraving tool for precision. A dust mask or respirator keeps fine metal dust out of your lungs, especially when working with softer metals or dry engraving. These items typically cost between $10 and $30 each and are an important investment to avoid injuries that could delay or stop your work.
Set up your workspace so that you can work comfortably and safely for extended periods. Use a sturdy bench or table at about waist height to avoid stooping or straining your back. Arrange your tools within easy reach to maintain good posture and prevent repetitive stress injuries. Position a bright, adjustable light source directly over your work area to reduce eye strain and clearly see fine details. Secure your metal piece firmly using clamps or a strong grip mat to prevent any slipping, which can cause tool slips or mistakes.
Maintaining your engraving tools in excellent condition is important for both safety and quality. Regularly check your tools for signs of wear or damage, such as chipped tips or bent shafts. Sharp tools require less force and reduce the chance of slipping, so hone your gravers or chisels frequently using a sharpening stone or fine diamond file suited for engraving tools. Clean your tools after each session to remove metal particles and oils, using a soft cloth and a mild solvent if needed. Store tools in a toolbox or protective case to avoid accidental injuries and preserve their integrity.
Ergonomics also include how you hold your tool. Use a comfortable grip that doesn’t squeeze too tightly to keep your hands relaxed and reduce fatigue. Support your wrist by resting it lightly on the bench or a padded surface so that your movements remain steady but not strained. Take short breaks every 30 to 45 minutes to stretch your fingers, hands, and shoulders, which helps prevent repetitive strain injuries over time.
Always double-check that your workpiece is securely clamped before you start engraving to avoid sudden slips that can harm your hands or ruin your design.
Finishing, Cleaning, and Preserving Hand Engraved Metal
After completing your hand engraving, take time to properly clean, polish, and protect the metal surface. These steps improve the engraved details’ visibility and ensure the piece remains in good condition over time. Burrs and sharp edges from the engraving process need careful removal to avoid injury and achieve a professional look. Polishing restores shine by smoothing surface irregularities while protective coatings prevent tarnish and corrosion, especially on metals like silver, copper, or brass. Follow these steps for effective finishing, cleaning, and preserving your hand-engraved metal:
- Remove the metal piece from your workspace carefully. Handle it gently to avoid adding fingerprints or dropping debris into the engraving lines. Place it on a clean, stable surface.
- Use a soft nylon flap brush or a fine, soft brush. Gently sweep the surface to dislodge metal shavings and burrs left from engraving. This step removes sharp edges that can catch on fingers or clothing and improves the smoothness of the piece.
- Wipe the metal with a clean, lint-free cloth dampened with mild soap and warm water. This removes oils, dirt, and tiny particles. Avoid harsh chemicals that could damage the metal or dull the finish. Let the piece air dry or pat dry with a soft cloth.
- Apply a metal polish suitable for your metal type. Use a small amount on a polishing cloth and rub in small circular motions over the surface, avoiding excessive pressure inside engraved lines to preserve detail. Suitable polishes for silver, brass, or steel are widely available for $5 to $15 at craft stores.
- Buff the metal with a clean, dry cloth. This improve shine and evenly distributes the polish. Repeat polishing steps if needed, but stop once the engraving details remain sharp and visible.
- Consider applying a clear protective coating. For long-term protection, thin layers of clear lacquer, microcrystalline wax, or metal sealants help prevent oxidation and tarnishing. Apply with a soft brush in a well-ventilated area, following product instructions carefully. Allow the coating to cure fully, usually 24 to 48 hours.
- Store the engraved piece properly. Keep it in a dry, cool place away from humidity and avoid direct sunlight to extend the life of both the metal and protective coatings.
Removing burrs and polishing increase the clarity of your design by making lines crisp and surfaces smooth, which highlights your craftsmanship. Protective coatings keep moisture and contaminants from dulling or damaging the metal, saving restoration work later. Avoid harsh scrubbing during cleaning to prevent scratching the surface or wearing down fine details. Using gentle tools like nylon brushes and soft cloths strikes a balance between cleanliness and preservation. This routine works well for common hand engraving metals like copper, brass, steel, and silver, each benefiting from tailored polishing products designed for their specific chemistry.
When to Choose Hand Engraving or Alternative Methods
Hand engraving offers unmatched artistic control and a traditional, tactile connection to metal. This technique excels with softer metals like copper and brass or works requiring delicate, variable depth lines. Laser engraving, by comparison, produces sharp, precise results rapidly and suits harder metals such as stainless steel and titanium. Fiber lasers provide deeper, more detailed marks than infrared lasers, which mainly affect the metal surface with marking compounds. Rotary tools fit between these, allowing you to carve metal by hand with powered assistance, but require steady skill to avoid slips and surface damage.
Outsourcing engraving is advisable when you need highly consistent, complex designs or professional finishes that rely on advanced equipment. Laser engraving services offer this at a cost commonly ranging around $50 to $200 for typical small projects depending on design complexity and metal type. Use professional services for jewelry, firearms, or commercial-grade items where precision and certification matter most. Hand engraving fits hobby projects, personalization, and experimental work that values craftsmanship over speed. Rotary tools suit quick modifications or beginners progressing from simple hand engraving.
| Method | Cost Range | Speed | Detail Level | Skill Required | Best For | Metal Suitability |
|---|---|---|---|---|---|---|
| Hand Engraving | Low (hand tools $10-$100) | Slow (minutes to hours) | High artistic detail | High (steady hand needed) | Personalized, artistic designs | Softer metals and alloys |
| Rotary Tools | Moderate ($50-$200 for tools & bits) | Moderate | Medium (depends on bit and user) | Medium (practice reduces errors) | General engraving, beginners to intermediate | Mostly softer metals, some harder |
| Laser Engraving (Fiber) | High (service fees $50+ per project) | Fast | Very high precision and depth | Low (user designs, operator runs machine) | Commercial, complex, and repeatable designs | Wide range including stainless steel, titanium |
| Laser Engraving (Infrared) | High (similar to fiber services) | Fast | Lower depth, surface marking only | Low | Basic surface etching with marking compound | Limited to metals compatible with marking compounds |
| Professional CNC | Very high ($100+ per hour machine time) | Fast and consistent | Extremely precise and repeatable | Low to medium (CAD skills recommended) | Industrial quality, complex shapes | Most metals, including hardened alloys |
The choice hinges on your project’s complexity, budget, and desired finish. For detailed, freehand artistry on softer metals, choose hand engraving to control depth and line variation. Use rotary tools to speed up the process when you can handle moderate precision and improve with practice. Laser engraving suits metals requiring sharp, consistent, and deep markings, especially harder metals. Outsource when you lack equipment or skills for high-quality, repeatable results. Professional CNC is best for industrial or complex three-dimensional designs beyond hand or laser capabilities.
Practicing and Improving Your Hand Engraving Skills
Building steady control and muscle memory is key to achieving clean, consistent hand engraving on metal. Practicing simple shapes and lines repeatedly helps you develop your grip strength and tool precision. Gradually increasing complexity in your designs sharpens your skills and confidence over time.
Basic Drills for Line and Curve Control
Start by engraving straight lines and curved arcs on a soft metal like copper or brass. Focus on maintaining even depth and a steady hand pressure. Try engraving a series of parallel lines spaced about 1/8 inch apart to build control over speed and force. Next, practice smooth curves by drawing shallow circles or semi-circles, keeping your tool angle consistent to avoid scratches or uneven cuts.
Another useful drill is to create intersecting lines, forming grids or simple check patterns. This helps you gauge alignment and develop wrist stability. Practice controlling the tool’s movement by engraving wavy lines or zigzags, which train your hand to follow flowing designs. These exercises strengthen the precise motions needed for lettering and decorative detail.
- Engrave straight parallel lines about 1/8 inch apart
- Trace shallow, smooth circles or arcs around 1 inch in diameter
- Create grids or crisscross patterns with intersecting lines
- Practice continuous wavy or zigzag lines to build fluid motion
- Engrave simple geometric shapes like triangles and squares
- Repeat initials or basic letters focusing on consistent depth
Recommended Practice Routine
Consistent practice accelerates improvement. Aim to spend at least 20 to 30 minutes per session, 3 to 5 times per week. Regular, focused drilling helps your brain and muscles sync to refine motion and pressure control. Avoid rushing through exercises; slower, deliberate movements will yield more progress than fast but sloppy attempts.
Treat early mistakes as signals for adjustment rather than failures. Use inexpensive metal tags or scraps for practice so you can repeat designs without wasting costly materials. Periodically review past attempts and compare to recent work to track subtle improvements in line smoothness and depth consistency.
Keep your engraving tool sharp and clean to maintain crisp lines; dull tips cause slips and uneven cuts.
Progressing to Complex Patterns and Lettering
Once basic shapes feel comfortable, start incorporating more detailed designs such as floral patterns, scrollwork, or decorative borders. These patterns require combining straight lines, curves, and finer textures. Working on symmetrical designs teaches precision and patience, while asymmetrical motifs challenge your creative control.
Focus on engraving letters and numbers, starting with simple block fonts before trying cursive or serif styles. Lettering drills build skill in controlling line width and depth, important for legibility and aesthetic appeal. Use tracing paper or lightly scored guide lines to maintain alignment and spacing as you engrave.
Gradually take on smaller-scale projects like initials or dates on inexpensive rings or metal tags to simulate real-world engraving tasks. This helps translate practice skills to finished pieces, reinforcing muscle memory needed for consistent quality results.
Step-by-Step Action Plan for Hand Engraving Metal
Start with simple tasks to build your confidence in hand engraving metal. Follow this timeline to develop your skills steadily.
- Day 1: Gather essential tools like a basic graver set, a magnifying glass, and a soft metal plate such as copper. Confirm you can hold and control the tools comfortably.
- Week 1: Practice straight and curved lines on scrap copper to develop steady hand control. You’ll know it worked when your lines are consistent and clean.
- Week 2: Try simple patterns or letters on scrap metal, focusing on pressure and depth. Successful practice results in uniform cuts without slips or jagged edges.
- Week 3: Select a small, clean metal piece for your first project. Transfer a basic design using a stencil or pencil markings and begin engraving.
- After 1 Month: Review your work for common mistakes like uneven cuts or tool skips and fix them by reshaping or deepening lines as needed.
- After 6 Weeks: Experiment with metals of increasing hardness, such as brass, to adapt your grip and pressure for different materials.
- Ongoing: Regularly clean engraved pieces with a soft brush and preserve them with an appropriate finish to protect your work.
Frequently Asked Questions
Can Hand Engraving Damage Soft Metals Like Gold?
Hand engraving can leave marks on soft metals like gold if too much pressure is used. Use light strokes and sharpened tools for delicate control to avoid deforming the metal surface.
How Do Temperature and Humidity Affect Hand Engraving?
Temperature and humidity can cause metal to expand or contract slightly. Stable, moderate conditions help maintain consistent engraving depth and prevent tool slippage. Avoid extremely cold or humid environments when working.
What Maintenance Do Hand Engraving Tools Require?
Regular sharpening and cleaning keep hand engraving tools effective. Dull gravers cause rough cuts and require more force, increasing mistake risk. Store tools in dry cases to prevent rust.
Can Hand Engraving Be Done on Painted or Coated Metal?
Hand engraving on coated metal works if the coating is thin and hard enough to withstand tool pressure. Thick paints may chip unpredictably; remove coating first for cleaner cuts.
Is Hand Engraving Louder Than Machine Engraving?
Hand engraving is generally quieter than rotary or laser engraving machines. It produces soft scratching sounds without motor noise, making it suitable for noise-sensitive environments.
Do You Need Magnification for Detailed Hand Engraving?
Magnification aids fine detail work but is not mandatory for beginners. Using a jeweler’s loupe or magnifying lamp helps with precision and reduces eye strain during intricate designs.
Wrapping Up
Hand engraving metal demands patience and steady practice. Tackling small projects first helps you refine your technique and avoid frustration. Pick a simple design for your next engraving and focus on controlling your tool for clean lines. This hands-on approach is the best way to improve and enjoy your craft.