How to Make a Cabin Sign: Step-by-Step Guide for Lasting Rustic Style
How to make a cabin sign starts with choosing the right materials and design to ensure durability and style. Use weather-resistant wood like cedar or redwood for a long-lasting base, and add raised or carved letters for a personalized touch. Begin by planning your design precisely, as a clear layout helps transfer lettering and graphics smoothly.
Key Takeaways
- Select cedar or redwood for your cabin sign to resist outdoor weather and aging.
- Create your design on paper first to visualize and adjust before starting the transfer.
- Use stencils or craft glue with natural materials like birch branches to form durable lettering.
- Apply at least two coats of a quality primer to protect the wood before painting.
- Achieve a rustic weathered look by sanding, staining, and layering paint in three simple steps.
- Seal the finished sign with waterproof outdoor sealant to extend its lifespan.
What Materials Are Best for a Durable Cabin Sign?
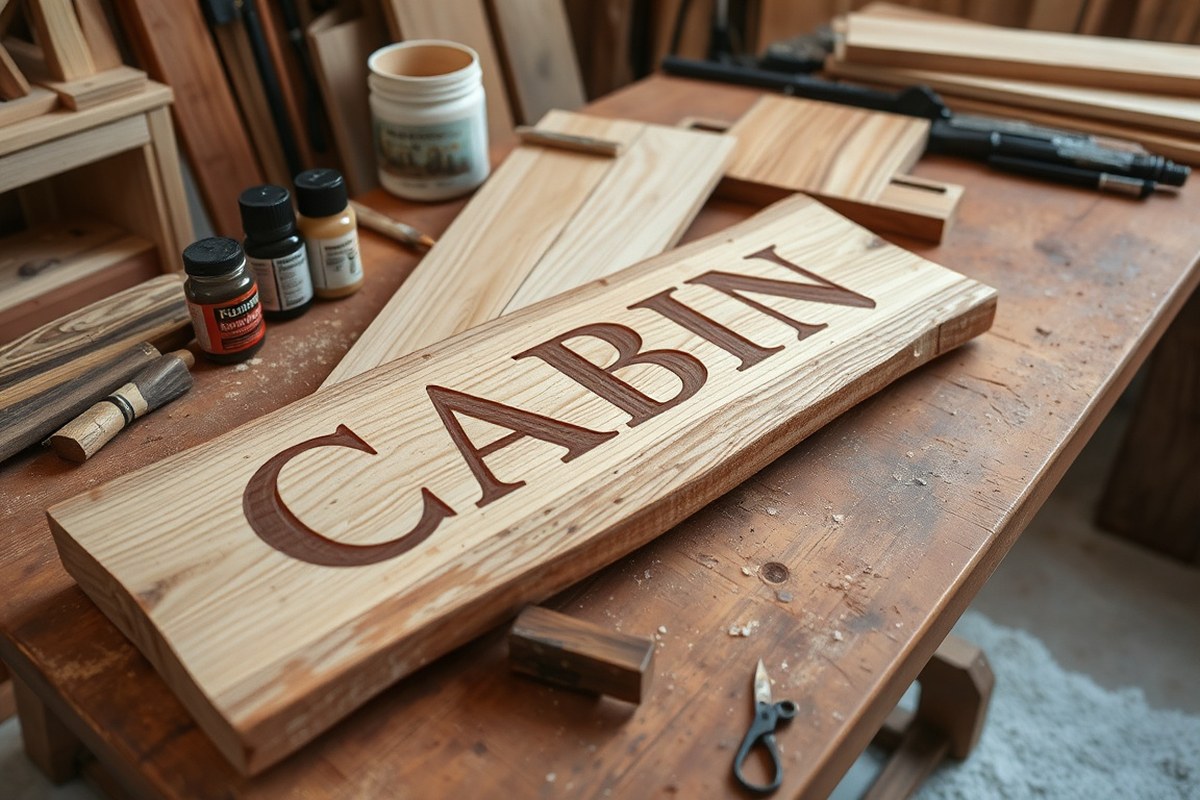
Choosing the right wood for a cabin sign affects both its lifespan and appearance. Cedar stands out as a top choice for outdoor signs thanks to its natural resistance to moisture, insects, and decay. It holds paint and stain well, which helps maintain vibrant colors. Pine is more affordable but less durable outdoors; it needs extra sealing. For very long-lasting signs with intricate designs, carved high-density urethane (HDU) wood grain panels offer a weatherproof alternative that resists cracking and fading.
Paint and stain choice also determines how long your sign’s colors last. Exterior-grade acrylic latex paints deliver strong UV resistance and flexibility to avoid cracking. Stains penetrate wood fibers, improving the natural grain while providing moderate protection. Transparent or semi-transparent stains let wood grain shine through but need reapplication every 2 to 3 years. Solid stains offer the longest-lasting color yet cover wood texture. Brands like PPG Proluxe, formerly Sikkens Cetol SRD, are often used on cedar signs for their proven outdoor durability and UV protection.
Finish options protect your sign from moisture, sun, and temperature swings. Clear, oil-based spar urethane or marine varnish seals on painted or stained signs create a hard, waterproof layer. These finishes should be applied in multiple thin coats, at least three, with sanding between coats to ensure adhesion. Signs installed in full sun may require finishes with UV blockers to prevent fading and chalking. If your cabin sign faces heavy rain or snow, a penetrating oil finish that soaks into the wood, such as tung or teak oil, adds water repellency but needs more frequent maintenance. The table below compares wood types, paint or stain, and finishes based on durability, appearance, cost, and maintenance needs:
| Material | Durability | Appearance | Cost | Maintenance |
|---|---|---|---|---|
| Cedar Wood | High (natural rot resistance) | Rich grain, warms with age | Moderate ($20, 40 per sign panel) | Re-stain or seal every 3-5 years |
| Pine Wood | Moderate to low (needs sealing) | Light wood, easy to paint | Lower ($10, 25 per panel) | Frequent sealing every 1-2 years |
| HDU Wood Grain Panels | Very high (weatherproof) | Detailed, consistent wood look | Higher ($50+ for carved designs) | Minimal; clean as needed |
| Exterior Acrylic Paint | High UV and water resistance | Bright opaque color | Moderate ($30+ for quality exterior paint) | Touch-up every 5+ years |
| Exterior Wood Stain | Moderate UV and water protection | Transparent or solid color | Moderate ($20, 40 per gallon) | Reapply every 2-4 years |
| Oil-Based Spar Urethane Finish | High water and sun protection | Glossy or satin clear coat | Moderate to high ($25, 50 per quart) | Recoat every 3-5 years |
For best results, start by sanding the wood surface smooth with 120- to 150-grit sandpaper. Apply your chosen stain or paint in thin, even coats, following manufacturer drying times, usually 4 to 6 hours between coats. Protect painted or stained surfaces with two to three coats of spar urethane or marine varnish, sanding lightly with 220-grit between coats after each dries, typically 24 hours. In shaded or less exposed spots like covered porches, maintenance intervals can be longer. But in open sun, expect to refresh finishes every 3 years to keep colors and protection intact.
Signs exposed to harsh weather need extra care to avoid peeling or fading. Plan your budget and time based on the wood type and finish you select. Cedar with PPG Proluxe finish balances natural beauty and durability, often lasting 5 to 10 years outdoors when properly maintained. Lighter woods like pine will require more frequent upkeep and repainting. HDU panels offer a worry-free option if upfront cost and precise carving are priorities.
How to Design a Custom Cabin Sign That Reflects Your Style
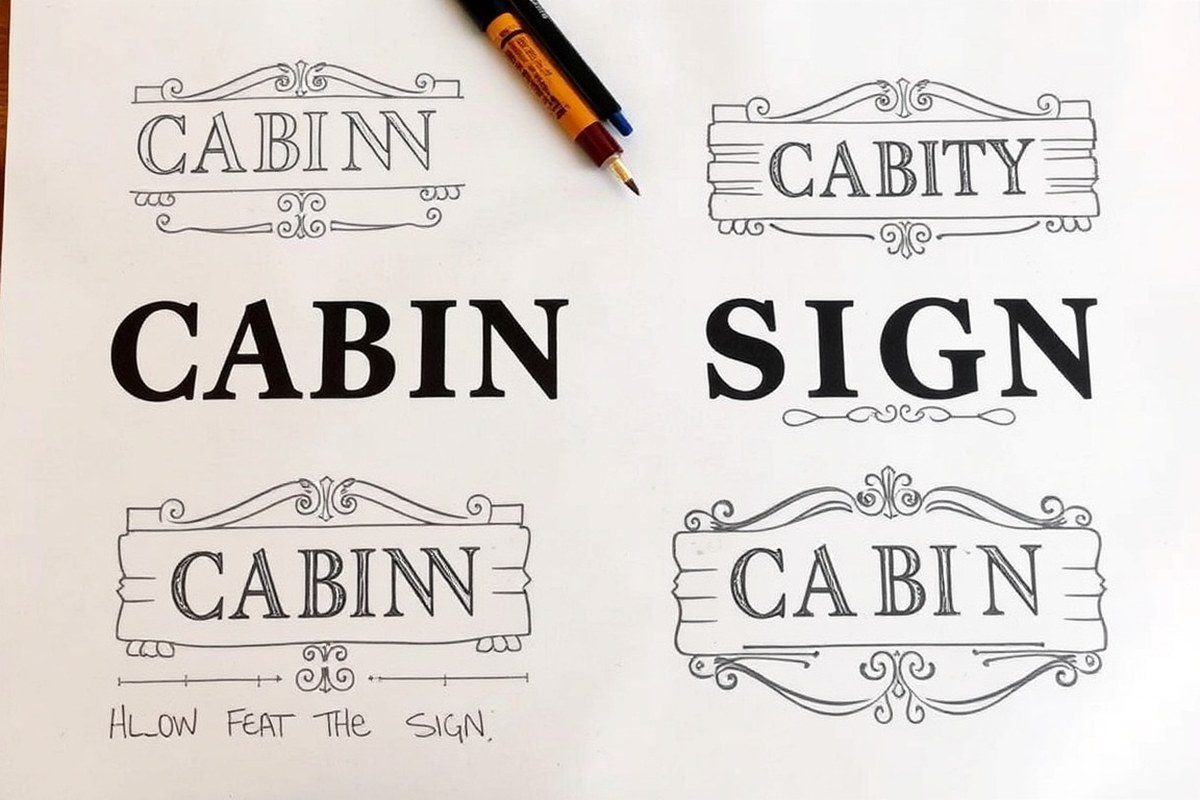
Designing a custom cabin sign that reflects your personal style requires careful choices in fonts, layouts, size, colors, and artwork. Each element should fit the rustic or modern vibe you want, improve readability, and incorporate family names or motifs that make the sign truly yours. Planning these details upfront avoids common pitfalls like cluttered text or colors that fade quickly outdoors.
Selecting Readable Fonts for Outdoor Signs
Start by choosing fonts that are easy to read from a distance, especially since cabin signs are usually viewed outdoors. Sans-serif fonts with clean lines or simple serif fonts work well because they keep letters distinct. Avoid overly decorative or script fonts for the main text, as intricate details can blur or fade with weather exposure.
Consider the sign’s size when picking font size: large letters, at least 3 to 4 inches tall, ensure visibility from 20 feet away. Mixing a bold font for the cabin or family name with a smaller, simpler style for any tagline or address balances emphasis. Keep letter spacing moderate to prevent the text from looking cramped or too spread out.
For a rustic feel, fonts with slight distressing or subtle irregularities can work if they remain clear. Modern designs favor clean, geometric fonts in bold weights. Some carved cabin signs feature raised or sandblasted lettering to add texture, which also affects font choice. Choosing fonts that carve well prevents edges from chipping or blurring.
Balancing Text and Decorative Elements
Your layout should integrate text and artwork, such as pine cones, trees, animals, or mountain scenes, without overcrowding the sign. Place the cabin or family name centrally or prominently, with artwork either as a border or in corners to frame without overwhelming. Make sure the size of artwork does not compete with the main text but complements it visually.
Adding personal motifs like a family symbol, initials, or seasonal icons adds character but work these into negative space or corners. Measure the sign’s width and height and sketch multiple arrangements using graph paper or digital tools to find a balanced composition. Leave a margin around the edges equal to at least 10% of the sign’s height to avoid a crowded look.
Signs with multiple text lines look best when the main line is the largest and subsequent lines decrease slightly in size to show hierarchy. Avoid too many fonts, stick to one or two styles maximum to keep the design cohesive. Balance bold text with softer artwork tones or vice versa to guide viewers’ eyes naturally.
Choosing Colors That Complement Natural Wood Grain
Wood has warm tones with natural grain patterns, so choose paint or stain colors that either highlight or contrast well with your wood species. Earth tones like dark greens, browns, and off-whites blend with a rustic setting and tend to fade less noticeably. Bright colors such as deep reds or navy blues stand out clearly but should be UV-rated paints designed for outdoor use to resist fading.
When painting carved letters, consider filling the grooves with a contrasting color to increase readability, white or cream against dark stained wood works well. Avoid metallic or neon paints that may clash with natural textures and quickly lose their appeal outdoors.
Test your color scheme on a wood sample before starting the full sign. Natural light varies, and a color that looks vibrant indoors might appear dull or overly bright outside. Complement artwork colors with your text colors to create unity, for example, use shades of green in pine tree artwork that match green lettering accents.
Plan your color choices before applying paint since correcting a faded or off-color on outdoor wood often requires sanding and repainting. Use colors with proven outdoor durability for longer-lasting signs.
Step-by-Step Methods for Transferring Lettering and Designs
Transferring your design onto wood for a cabin sign can be done in several ways, each with its benefits and challenges depending on your skills and tools. Popular techniques include using stencils, freezer paper or chalk transfer, and carving. Choosing the right method depends on factors like the level of detail you want, your comfort with tools, and whether you want raised or flat lettering.
Using Stencils for Beginner-Friendly Lettering
Stencils are a straightforward way to get clean, uniform letters on your cabin sign. You can buy pre-made letter stencils or print your own on stencil sheets. To use, place the stencil on your wood surface and secure it with tape. Trace the outline of each letter with a pencil or paint directly through the stencil openings using a brush or sponge. This method helps ensure sharp edges and consistent size, especially helpful if you’re new to lettering.
Stenciling requires only basic tools like scissors or a craft knife to cut the stencil, painter’s tape, and paint suitable for outdoor wood, which typically costs $5 to $15 per small tube or can. The main challenge is aligning letters perfectly and preventing paint bleed, so applying paint around edges lightly is key. Drying time depends on the paint but plan for at least 1 to 2 hours before handling the sign.
Freezer Paper and Chalk Transfer Methods Explained
Freezer paper transfer is great if you want to replicate a computer-designed image onto wood. Print or draw your design on the shiny side of freezer paper, then iron that side onto your wood. The heat temporarily sticks the paper, allowing you to trace the design’s lines onto the wood with a pencil. This method works best on flat, smooth wood surfaces and is more precise for detailed images than stencils. A pack of freezer paper costs roughly $5.
Chalk transfer uses a similar principle but is ideal for larger artwork. Lay your design on paper coated with chalk on the back, then tape it face up on the wood. Trace over the front lines firmly with a pen or pencil, transferring chalk outlines to the wood. This works well for rougher wood, although chalk lines can smudge during painting, so apply paint soon after transferring.
Basics of Hand Carving and Raised Letter Techniques
Carving your letters into wood or high-density urethane (HDU) signs creates a classic, durable look popular for cabins. You’ll need carving tools such as gouges, a mallet, and sharp chisels. For beginners, practice on wood scraps first since carving requires steady control to avoid gouging too deep or uneven edges. Raised letter signs involve carving away the background so letters stand out in relief, while engraved signs have letters recessed into the surface.
Carving takes more time and skill than tracing but yields a professional, tactile sign. HDU material, commonly used for outdoor signs, costs about $15 to $30 per square foot and is easier to carve than some hardwoods. You can paint recessed or raised letters after carving to improve visibility. Keep tools sharp and follow safety guidelines as carving tools can cause injury if used carelessly.
How to Create a Rustic Weathered Look for the Sign
A rustic weathered look gives your cabin sign an authentic, timeless charm, making it feel like it’s been part of the landscape for years. Creating this effect means combining sanding, staining, painting, and distressing techniques to mimic natural wear and aging. The right approach balances preserving the wood’s character while protecting it from further damage. You’ll want basic tools like sandpaper, a brush or rag, wood stain, paint, and sealant to simplify the process and get consistent results.
Follow these steps to achieve a convincing weathered look that suits outdoor cabin décor. Adjust the intensity depending on how aged or worn you want the sign to appear. Light distressing works well for newer wood, while heavier distressing fits reclaimed or older wood better. Use protective coatings recommended for exterior use to maintain durability without sacrificing style.
- Sand the wood surface. Start with medium-grit (around 120-grit) sandpaper to smooth the surface and remove any rough patches or splinters. Follow with fine-grit (220-grit) sandpaper to soften edges and corners, creating a gently worn feel. Focus sanding on areas that would naturally show wear, like corners and raised sections.
- Apply a wood stain. Choose a stain color that mimics aged wood, such as walnut, chestnut, or gray tones. Apply the stain with a brush or rag in thin coats, wiping off excess to avoid blotches. Let the wood dry fully, usually 4 to 6 hours depending on temperature, before moving on.
- Paint selectively for contrast. Use a light dry brush technique with white, cream, or muted pastels to add faded paint effects. Dip a dry brush into paint, wipe most off on a cloth, then brush lightly over the surface, leaving uneven coverage to simulate peeling or sun-bleached paint.
- Distress the wood. Gently hit the wood with chains, hammers, or screwdrivers to create dents and small gouges. Scrape some areas with a metal brush or steel wool to roughen the grain. Avoid overdoing this; light distressing on prominent spots looks natural and improve the rustic feel.
- Sand again for age blending. Lightly sand over the painted and distressed areas with fine-grit sandpaper to soften marks and blend colors. This step brings together the stain, paint, and distressing for a cohesive weathered appearance.
- Seal the sign for protection. Use an exterior-grade matte or satin polyurethane or spar varnish to maintain the rustic look while protecting against sun, rain, and temperature changes. Apply two thin coats, allowing 24 hours drying time between coats, for best results.
The key to a great weathered look is balancing the signs of wear with protective finishes to ensure your sign lasts outdoors. Avoid thick paint layers that can peel quickly or heavy distressing that compromises the wood’s integrity. Depending on the wood type and your local climate, you may need to reseal the sign every 1-2 years to keep the rustic style intact while providing ongoing protection.
Protecting and Sealing Your Cabin Sign for Outdoor Use
Protecting and sealing your cabin sign is essential to keep it looking sharp and lasting through weather changes. Outdoor signs face moisture, sun exposure, and temperature swings that can cause wood to warp, crack, or fade. Applying the right sealant acts as a barrier, preventing water absorption and blocking damaging UV rays. You want a finish that is waterproof but also allows the wood to breathe, avoiding trapped moisture that leads to rot.
The best sealants for outdoor wooden signs include spar urethane, exterior-grade polyurethane, and marine varnish. Spar urethane is popular because it flexes with the wood as temperatures change, minimizing peeling or cracking. Look for products labeled “exterior” or “marine” for UV protection and waterproofing. Apply at least two to three coats, sanding lightly between each for better adhesion. Allow each coat to dry fully, usually 24 hours, before applying the next. This process typically takes about 3 to 5 days from start to finish depending on temperature and humidity.
For signs exposed to harsh sunlight, consider adding a UV-blocking finish. Some clear sealants have UV inhibitors built in, or you can use a tinted spar varnish to reduce sun damage while still letting the carved details show. Areas with heavy rain or snow will benefit from marine varnish, which offers a tougher waterproof coat. Avoid regular latex paint on your sign for outdoor use, since it tends to crack and peel with weather changes.
Expect to reapply protective coatings every two to three years for signs constantly outdoors, especially those in full sun or heavy rain. Before recoating, inspect the sign for peeling, discoloration, or rough spots. Lightly sand faded or rough areas, clean off dust, and apply fresh sealant coats. If you notice cracking wood, repairs before resealing will extend durability.
Routine maintenance includes cleaning your sign with a soft brush or cloth and mild soap when dirt or mildew appears. Avoid pressure washing, which can damage paint and wood fibers. Keep vegetation trimmed around the sign to reduce moisture buildup and insect activity. Protective finish and regular upkeep can keep your cabin sign striking and structurally sound for many years.
Test your chosen sealant on a scrap piece or inconspicuous area first to ensure it bonds well and improve your sign’s appearance without cloudiness or yellowing.
Common Mistakes When Making Cabin Signs and How to Fix Them
Uneven lettering is a common issue when making a cabin sign, often caused by inconsistent spacing or improper transfer techniques. This matters because uneven letters distract from the sign’s visual appeal and can make the message hard to read. To fix lettering mistakes, lightly sand the area once the paint is dry, then carefully repaint the letters using painter’s tape or stencils. Using a small artist’s brush with steady strokes can also help keep lines clean. If the spacing is off before painting, erase pencil guidelines and redraw them with a ruler or letter-spacing template for accuracy.
Paint issues such as chipping or bubbling usually result from surface preparation errors or applying paint too thickly. To prevent this, start with clean, dry wood and use a primer suited for outdoor use. Should bubbles appear, allow the paint to dry completely, sand the affected area gently to smooth it out, and apply a thin, even coat of paint. Chipped paint can be touched up in the same way. Using high-quality exterior paint costs between $15 and $30 per quart and lasts several years when applied correctly, protecting your sign from weather damage.
Wood cracks or warping often happen if the wood isn’t properly dried or shielded from moisture and temperature swings. This can ruin the sign’s durability and appearance. Fix small cracks by filling them with exterior wood filler, then sand smooth once dry. For warping, try to clamp the wood flat using a gentle pressure setup and let it rest in a dry, shaded area for several days. Choosing a hardwood like cedar or redwood, priced roughly $5 to $10 per board foot, helps reduce warping due to its natural resistance.
- Check lettering layout with a ruler before painting to avoid uneven spacing.
- Smooth wood thoroughly before painting to reduce bubbling or chipping.
- Use exterior primer and paint designed for wood to improve durability.
- Fill cracks with weatherproof wood filler and sand for a smooth finish.
- Clamp warped wood flat and dry slowly in shade to minimize damage.
- Seal the finished sign with a waterproof clear coat to prevent moisture issues.
Addressing these problems quickly keeps your cabin sign looking sharp and extends how long it lasts. Regularly inspect the sign for early signs of wear and treat any damage promptly. Signs correctly painted and sealed can maintain their rustic charm and withstand outdoor conditions for several years without major repairs.
Best Ways to Hang or Mount Your Finished Cabin Sign
Choosing the right hardware and placement for your cabin sign ensures it looks great and lasts. Heavy wooden signs require sturdy mounting methods like hanging wire, screws, or brackets. Securing the sign properly minimizes damage from wind and weather while placing it where it’s most visible and protected adds to its charm and lifespan.
Hanging Wire and Hooks Installation Tips
Hanging wire offers a flexible and relatively simple way to display your cabin sign, especially if it’s moderately heavy. Use a galvanized steel wire rated for double the weight of your sign to ensure safety. Attach D-ring hooks or eye screws securely to the back of the sign on opposite sides. Thread the wire tightly between these hooks, twisting the ends firmly so the wire doesn’t loosen over time.
Keep the wire close to the sign’s surface to reduce sway in moderate wind. When hanging, use a heavy-duty wall hook or screw anchored into a stud or masonry with an anchor plug to support the weight. Hanging wire allows slight movement that can help prevent cracking or warping, but it may not be best for very heavy or large signs, as excessive swinging might cause damage.
Using Screws, Nails, or Brackets for Permanent Mounting
For heavy wooden signs, screws and brackets offer the strongest and most secure mounting. Use exterior-grade stainless steel or coated screws sized at least 1.5 to 2 inches long to anchor into solid wood, studs, or masonry. Installing two or more screws evenly spaced can support the sign’s weight and help keep it flush against the mounting surface.
Mounting brackets add extra stability, especially for very large or deeply carved signs. Metal L-brackets or custom wooden cleats fixed to both the sign and cabin wall distribute the weight and prevent movement. Pre-drill holes in the sign to avoid splitting the wood, and use weather-resistant washers under screw heads for long-term durability.
This method is best for permanent placements but requires more careful measuring to ensure the sign hangs level. Avoid nails for heavy signs, as they may loosen over time and offer less holding power than screws or brackets. Always check that the mounting surface can handle the combined weight of the sign and hardware.
Choosing Optimal Locations for Visibility and Protection
Select a location on your cabin or property where the sign is clearly visible from the main approach, such as near the front door, by the driveway, or on a prominent porch wall. Placing the sign at eye level or slightly above makes it easier for visitors to read without straining. Avoid spots where shadows or direct bright sunlight obscure the text during peak viewing times.
To protect the sign from harsh weather, mount it under an eave, awning, or porch overhang if possible. This shelter reduces exposure to rain, snow, and sun, all of which can fade and damage the wood or paint. Keep the sign away from sprinkler systems or areas where water pools to prevent moisture buildup.
Also, consider security and stability. Mount signs so they can’t be easily knocked down by wildlife, falling branches, or heavy winds. If the sign faces prevailing winds, choose hardware and places that minimize swinging or vibration, which could loosen hardware or cause wear.
Tools and Supplies Checklist for Making a Cabin Sign
Start with a sturdy wood board, typically cedar or pine, measuring around 12 by 24 inches for a manageable size. Choose carving tools such as chisels or a wood-burning pen depending on your preferred style of lettering and artwork. A set of paintbrushes in various sizes is important for applying paint and sealants neatly. For finishing, you’ll need sandpaper (120 and 220 grit) to smooth the edges and surface before sealing. Quality exterior-grade paint and a waterproof sealant will protect your work from the elements and ensure longevity.
Safety gear is essential to protect yourself while working, especially if using power tools or chemical sealants. Use safety glasses to shield your eyes from wood chips and dust. A dust mask, preferably rated N95 or above, reduces inhalation of sawdust during sanding. Gloves can protect hands from splinters and chemicals, but ensure they allow for precise work with brushes and carving tools. Ear protection is advisable if you operate loud rotary tools or sanders. Here’s a practical checklist of tools, materials, and safety gear to keep on hand before you start:
- Wood board (cedar or pine, 12×24 inches)
- Wood chisels or wood-burning pen
- Variety of paintbrushes (small detail and wide brushes)
- Sandpaper (120 and 220 grit)
- Exterior-grade paint and waterproof sealant
- Safety glasses, N95 dust mask, gloves
- Optional: rotary carving tool or sander
Look for supplies at home improvement stores, craft shops, or online retailers that specialize in woodworking. Prices vary but expect to spend $10 to $30 on a decent paintbrush set and around $5 to $15 for quality sandpaper packs. A small wood-burning pen or carving set often runs between $20 and $50. Buying a gallon of exterior paint and sealant costs approximately $25 to $40 each but lasts for multiple projects.
Taking time to gather the right tools and protective gear will help your cabin sign project go smoothly. Improper tools can make carving or painting messy and frustrating, while skipping safety precautions risks injury or irritation.
Wear your dust mask whenever sanding to avoid breathing in fine wood particles that can harm your lungs.
Step-by-Step Action Plan to Make Your Cabin Sign
Follow these steps to create a lasting cabin sign that shows your personality and stands up to outdoor conditions.
- Before you start: Gather all materials and tools from your checklist, including durable lumber, weatherproof paint, brushes, and sealing products. Having everything ready avoids delays and ensures a smooth project.
- Day 1: Design your sign on paper or a digital tool, focusing on size, font style, and any graphics you want. Confirm your design with a clear, bold layout that fits your cabin’s style.
- Day 2: Prepare your wood by sanding it thoroughly to remove rough spots and ensure paint adherence. The surface should feel smooth and free of dust.
- Day 3: Transfer the lettering or design onto the wood using carbon paper or stencils. Check that all letters and images align before painting.
- Day 4: Paint your design with weather-resistant paint, using multiple thin coats. Let each coat dry completely; the colors should look solid and even.
- Day 5: Add a rustic weathered effect by lightly sanding edges or applying a light glaze according to your preference. Confirm you like the worn look before sealing.
- Day 6: Apply at least two coats of a clear outdoor sealer to protect your sign from moisture and sun damage. The finish should be smooth with no sticky spots when dry.
- After 1 week: Mount your sign using strong hardware appropriate for exterior use, such as rust-resistant screws and anchors. Ensure it hangs securely and in a visible spot.
Frequently Asked Questions
How Do I Choose the Right Wood for Carving a Cabin Sign?
Select wood that resists weather and decay like cedar or redwood; these hold paint and stains well and last outdoors. Avoid softwoods that may crack or warp over time.
Can I Use Stencils for Consistent Lettering on Cabin Signs?
Yes, stencils help keep lettering uniform and neat. Use adhesive spray or tape to hold them in place, then paint or carve over them carefully.
What’s the Best Way to Fix Mistakes in Hand Painting Cabin Signs?
Lightly sand the area to remove paint, then repaint after drying. This smooths out mistakes without damaging the wood surface.
Should I Seal My Cabin Sign Before or After Painting?
Paint or stain first, then apply a clear outdoor sealer to protect your work from moisture and sunlight. Sealing last locks in the color and adds durability.
How Long Does It Take to Finish a Typical Cabin Sign Project?
Most cabin signs take between a few hours to a couple of days depending on design complexity and drying times for paint and sealers. Plan for extra time when layering finishes.
Can I Add Personal Carved Artwork to My Cabin Sign?
Yes, carving custom images like pine cones or wildlife adds character. Use sharp tools and work slowly to preserve details.
The Bottom Line
Making a cabin sign yourself lets you add a personal touch that lasts for years. Start by choosing a clear design that fits your cabin’s style and use materials suited for outdoor exposure. Take your time on each step, especially sealing, to keep the sign durable and attractive. Your next move is to sketch your design and pick the best wood for your climate.