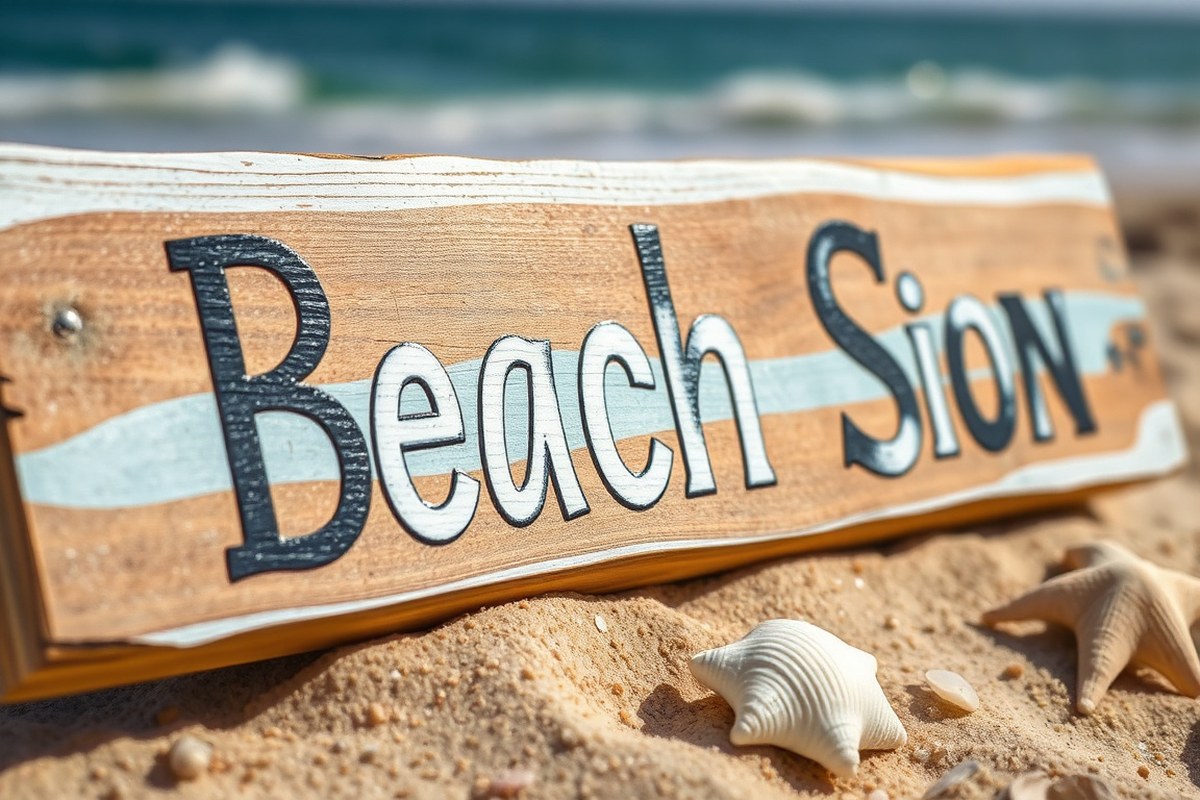
How to Make a Beach Sign by Hand: A Complete Step-by-Step DIY Guide
Knowing how to make a beach sign by hand means you can create a unique, budget-friendly decor piece that fits your style perfectly. Start by gathering old wood pieces around 1 to 2 inches thick and some basic painting supplies. This approach cuts costs and lets you customize your sign’s size and message before putting paint to wood.
Key Takeaways
- Choose wood slats between 4 to 7 inches wide and about 3 inches tall for ideal sign dimensions.
- Look for reclaimed wood to save money and add rustic character to your beach sign.
- Sand your wood thoroughly to ensure paint adheres smoothly and lasts outdoors.
- Use stencils or transfer designs with carbon paper to keep lettering neat and consistent.
- Apply outdoor-grade acrylic paint or weather-resistant spray paint for durability.
- Seal your finished sign with a clear waterproof varnish to protect against sun and moisture.
What Materials and Tools Do You Need to Make a Beach Sign?
To make a durable and attractive handmade beach sign, start with solid wood. Cedar and pine are popular because they resist moisture reasonably well and cost between $5 and $10 per board foot at craft stores or lumberyards. You can also use scrap wood or reclaimed wood to keep costs low and add a rustic look. Wood that’s 1 to 2 inches thick works best, it provides a sturdy base and is easy to sand and paint.
For paint, choose exterior acrylic paint designed for outdoor use. These paints stand up to sun and water better than regular craft paint. A small set of bright beach colors plus white and black for lettering gives you plenty of options. Brushes should be high-quality synthetic bristles in sizes ranging from a flat 1-inch brush for broad strokes to a fine round brush for details. When you’re on a budget, clean and reuse brushes you already have instead of buying new ones.
Cutting and smoothing the wood require a few basic tools. A handsaw or a circular saw will help you cut the wood to size. Sandpaper with grit from 80 (coarse) to 220 (fine) or a sanding block smooths rough edges. To achieve a more uniform surface, use a power sander. Having a ruler or measuring tape and a pencil for marking wood edges ensures your cuts are straight and the design fits perfectly. Budget-friendly substitutes include borrowing or renting saws and sanding tools from local tool libraries or friends.
Sealing your sign is essential to protect it from weather damage. A clear outdoor sealant spray, like a UV-resistant acrylic sealer, prevents fading and water damage. A can costs around $8 to $15 and covers several projects. Apply two thin coats in a well-ventilated area, letting each coat dry for at least an hour. Without sealing, the paint will peel or fade, and the wood may rot.
- Wood: Cedar or pine boards 1 to 2 inches thick; scrap or reclaimed wood as a budget choice
- Paint: Exterior acrylic paints in beach colors plus white and black
- Brushes: Synthetic bristle brushes, 1-inch flat and fine-tipped for lettering; reuse old brushes
- Cutting tools: Handsaw or circular saw, ruler, pencil
- Sanding tools: Sandpaper (80 to 220 grit) or sanding block; consider borrowing equipment
- Sealant: UV-resistant clear acrylic spray for outdoor protection
Materials like canvas or lightweight plywood can substitute for solid wood if you prefer a lighter or different texture sign. However, these may need extra support to prevent warping outdoors. Instead of buying new paints, acrylic craft paints you already own can work if you apply a strong clear coat outside. For cutting, a fine-toothed hand saw can replace power tools if you take your time and mark carefully.
How to Choose and Prepare Wood for Your Handmade Beach Sign
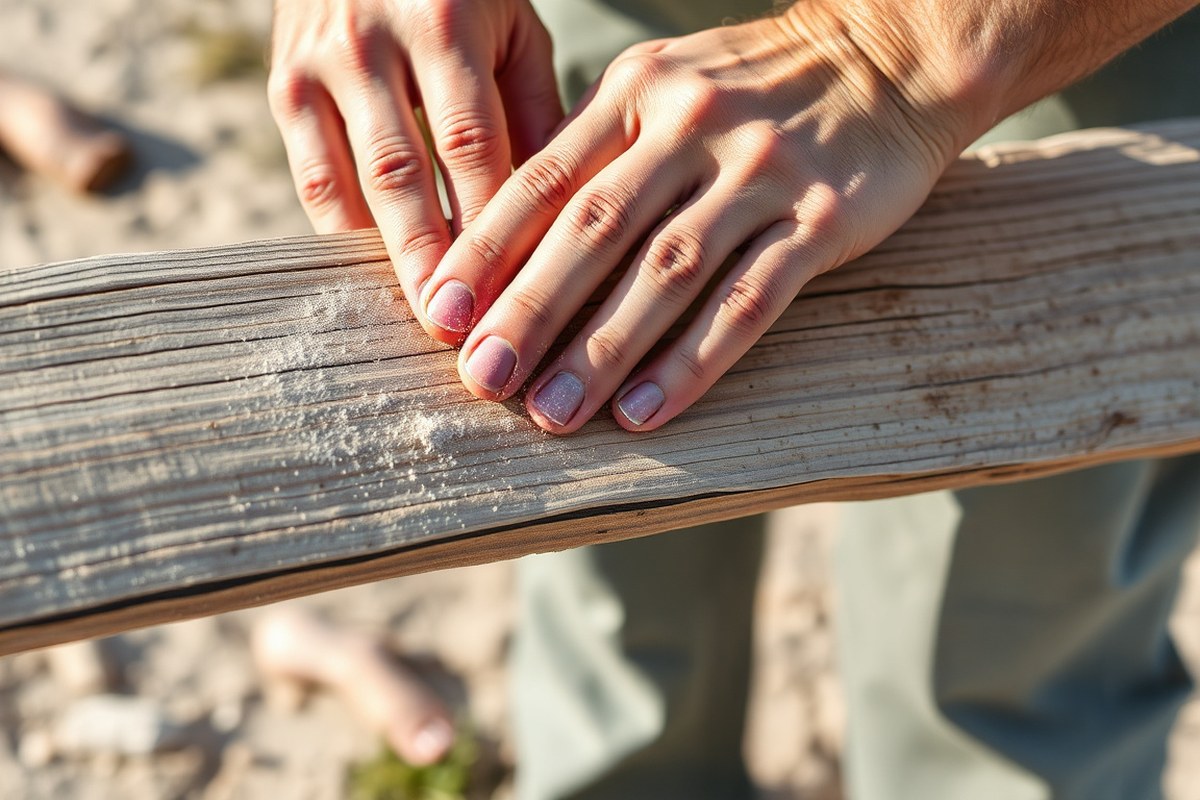
Choosing the right wood is the first important step to make a beach sign that lasts and looks good. Driftwood, pallet wood, and lumber each have strengths and drawbacks. Driftwood offers a natural, weathered look and can be free if you find it on a beach. It’s usually irregular in shape and size, which can add charm but may require more cutting and sanding. Pallet wood is easy to find at hardware stores or for free from businesses, is relatively inexpensive, and often comes in planks of consistent size, but it may contain nails or chemicals that need removal. Lumber from a home improvement store gives you clean, uniform boards in various sizes with no hidden hazards, but it costs $5 to $20 or more per board depending on type and size.
| Wood Type | Pros | Cons |
|---|---|---|
| Driftwood | Unique weathered look, usually free | Irregular shape, may have dirt or pests |
| Pallet Wood | Affordable, uniform planks | May have nails, chemical treatments |
| Lumber | Clean, smooth, consistent sizes | Costs money, less “rustic” appeal |
After selecting the wood type, cleaning it thoroughly prevents dirt, dust, and old paint from ruining the finish. For driftwood or pallet wood, start by rinsing the pieces with water and use a wire brush or stiff-bristled brush to remove remaining dirt and small splinters. Let the wood air dry completely, ideally for 24 hours in a dry, shaded area. Avoid painting on damp or green wood, as moisture can cause peeling or warping.
Sanding is key to smooth edges and surfaces. Use medium-grit sandpaper (around 80 to 120 grit) to sand the face and edges, taking care to remove any rough spots that could cause splinters. Then switch to a finer grit (150 to 220) for a smooth finish. A power sander can speed this up, but hand sanding works well for small signs. Pay special attention to corners and ends to make the wood safe to handle and ready for paint.
Cutting the wood to size depends on your design preference. Uniform boards around 1 to 2 inches thick work best for durability and ease of painting. Lengths from 12 to 24 inches are common, but you can go larger for bigger signs. You may use natural shapes, especially with driftwood, for a rustic look, but cut flat edges will make painting and mounting easier. Use a saw suitable for your wood type, hand saws, jigsaws, or circular saws all work well.
Removing splinters and rough edges ensures your sign is safe and professional-looking. After sanding, inspect the wood for remaining splinters or rough areas. Use the wire brush gently to clean these spots, and repeat sanding if needed. Always wear gloves to protect your hands during this step.
Before painting, check that the wood is completely dry and smooth to avoid paint bubbling and peeling later on.
How to Design and Transfer Lettering for Your Beach Sign
Designing and transferring lettering for your beach sign requires picking the right font, sizing it to fit your wood board, and using a transfer method that matches your skill and tools. You can either freehand your letters, use stencils, or print templates to trace. Adding simple graphics like arrows or shells can improve the sign without crowding the design.
Choosing Fonts and Graphics
Fonts with a relaxed, coastal vibe suit beach signs best. Look for casual script or block letters that are easy to read from a distance. Avoid overly thin or fancy fonts because they can be hard to paint accurately. Bold, rounded letter shapes work well. You can also mix two fonts, such as a cursive word paired with block letters, to create interest.
Adding simple graphics like starfish, seahorses, or waves can personalize your sign. Use cardboard stencils to cut out these icons for easy tracing. Keep the graphics small so they support the text instead of overpowering it.
Preparing and Printing Your Design
Start by using a program like Word to type the words you want on your sign. Set the font size so the lettering fills your wood board but leaves about 1 to 2 inches margin on all sides. Print the words as large as possible to maintain crisp edges. You can print each word separately to match the size of individual slats if using a multi-piece sign.
For a hand-lettered look, practice the lettering on plain paper first. Then draw lightly with pencil to guide your transfer. You may want to print the letters to use as a stencil or tracing template for perfect symmetry and spacing. This step is helpful for beginners who want accurate layouts without guessing.
Transferring Letters to Wood
Transferring your design carefully is key to clear and tidy lettering. Choose a method based on what tools you have and your confidence with freehand work. Graphite paper, stencils, and direct sketching each has benefits and drawbacks. Follow these steps for a common and effective transfer method using printed templates and graphite paper:
- Clean your wood surface with a dry cloth to remove dust or dirt.
- Print your design at the right size for your wood piece.
- Place a sheet of graphite transfer paper shiny side down on the wood.
- Position your printed design on top of the graphite paper exactly where you want the lettering.
- Use a ballpoint pen or stylus to trace around each letter, pressing firmly to transfer the graphite onto the wood.
- Remove the paper and graphite sheet to check your transferred design.
- Use a pencil to lightly go over any parts that didn’t transfer clearly.
- You can sketch any small graphics or arrows freehand or with stencils before painting, if you want.
This method ensures your design is visible enough for precise brushing but light enough to erase or paint over cleanly. You also have the option to create cardboard stencils of letters and shapes, then hold or clamp them to trace the outline directly on the wood.
Freehand sketching is another option that works well if you enjoy drawing and want a natural, handcrafted look. Practice lettering on paper, then lightly draw the design on the wood with a pencil before painting. This saves time on setup but can be less uniform.
Step-By-Step Guide to Painting Your Beach Sign by Hand
Use acrylic or chalk paint for coverage and weather resistance when painting a beach sign. Start with a solid background color, carefully hand-paint or stencil the letters, and finish by applying vintage effects through layering and distressing. Proper drying time between coats ensures neatness, and light sanding adds the rustic charm typical of beach décor.
Painting the Base Layer
Acrylic paint works best for outdoor signs because it offers durable, water-resistant coverage when sealed properly. Chalk paint can create a soft matte finish suitable for weathered looks but needs sealing for lasting protection outdoors. Choose a light or medium background color that complements your beach theme, like white, sand beige, or soft blue.
Apply paint in thin, even coats. This prevents drips and uneven texture. Use a wide, flat brush or a foam roller to cover the wood surface smoothly. Allow each coat to dry fully; depending on temperature and humidity, drying takes about 30 minutes to an hour. Applying two or three coats often delivers the richest base color, blocking out wood grain and previous colors.
Hand-Painting or Stenciling Letters
Hand-paint letters by carefully filling in the traced outlines with a small, angled brush for precision. A stencil saves time and helps keep shapes uniform, but be sure to secure it firmly and dab paint lightly to avoid bleeding underneath. Use acrylic paint here for crisp lines and durability.
Painting tip: hold your brush perpendicular to the surface and use short strokes. Avoid overloading your brush to prevent drips. A steady hand and a magnifying lamp can improve neatness. Let the base coat of letters dry at least 30 to 45 minutes before considering a second pass or adding details. A second coat usually deepens color richness without thick buildup.
- Prepare your brush and paint, load only a small amount.
- Follow the outlines closely, painting inside the lines.
- Apply light coats to avoid runs or pooling of paint.
- Allow at least 30 minutes for the first coat to dry before assessing coverage.
- Add a second coat if needed for opacity.
- Clean your brush between colors to keep lines sharp.
- Use a fine detail brush for edges and small areas.
Adding Weathered and Vintage Effects
To create a beach-worn look, start with a white primer or painted base, then apply a thin, watered-down coat of a darker or contrasting paint over it. This technique leaves some of the white exposed, simulating natural wear. Another approach is mixing chalk paint colors like gray, blue, and beige to resemble driftwood tones.
After the paint dries, lightly sand edges and spots on flat surfaces with fine-grit sandpaper. This removes some paint selectively, mimicking years of weather exposure, and helps reveal layers underneath. For added texture, try applying a white vintage effect wash over the entire sign. Mix paint with water to a thin consistency, brush it on, then wipe off excess quickly to create a soft, translucent finish reminiscent of salty sea air.
Make sure to wait at least 1 hour after painting before sanding or washing. Weathered effects develop best when the paint is fully cured but still workable. Protect your work later with a suitable outdoor sealer to keep your beach sign looking good through sun, humidity, and rain.
How to Protect and Finish Your Beach Sign for Outdoor Use
Protecting your handmade beach sign from sun, rain, and coastal salt air is essential to keep it looking fresh for years. Use an exterior-grade clear sealant or varnish designed for wood. Options like spar urethane or marine-grade varnishes offer UV protection and waterproofing, which prevent fading and peeling. Acrylic spray sealants are a good alternative if you want an easier application with less odor, though they may need more frequent reapplication.
Start by letting your paint dry completely, at least 24 hours in a well-ventilated space. Lightly sand the surface with 220-grit sandpaper to smooth out any brush strokes or raised paint areas. Then, apply your first coat of sealant using a synthetic bristle brush or a foam brush, spreading it evenly along the grain. Avoid thick layers as they can drip or dry cloudy. Allow the first coat to dry for about 4 to 6 hours or follow the product’s label directions. After drying, lightly sand the sign again with fine sandpaper to help the next coat adhere better.
Apply at least two to three thin coats of sealant for best results. This layering builds a durable waterproof barrier without clouding your paint colors. A marine varnish might cost between $15 and $30 per quart, enough for several small signs. Choose a product labeled for both UV and moisture protection for the most reliable shield. To give your sign a naturally weathered look, dust it lightly with cinnamon or let the wood age gently before sealing; just know this might need more maintenance down the line.
Maintaining your beach sign means inspecting it once or twice a year. After heavy sun exposure or storms, wipe it down gently and check for any cracking or peeling in the sealant. Spot damage? Clean the surface, sand the area lightly, then add another coat of sealant to touch it up. Signs that face direct sunlight might need resealing every 1 to 2 years. Signs in more sheltered locations can last longer between treatments.
Touch-ups are straightforward. Use the same sealant product and apply it directly over worn spots without sanding the entire sign. Keep extra paint on hand for occasional lettering touch-ups. This approach prevents peeling and water damage from spreading and avoids the need for a full repaint. Always store your sign indoors during extreme weather or winter for maximum life.
Wait until each coat of sealant dries completely before adding another to avoid cloudy or sticky finishes that won’t harden properly.
Creative Ideas to Personalize and improve Your Beach Sign
Popular beach-themed words and phrases add charm and character to your handmade sign. Consider text like “Welcome,” “Beach,” “Family,” “Surf’s Up,” or “Ocean Breeze.” Personal touches like family names or important dates, such as a cottage’s establishment year, make your beach sign distinctly yours. You can hand-paint these using stencils or freehand after preparing letter outlines for a neat finish.
Adding arrows or multiple signboards on a post brings a directional and layered look. Use galvanized screws or weatherproof wood glue to securely attach each arrow or board at angles you like. Drill pilot holes first to prevent wood splitting. Space the boards evenly along a sturdy vertical post, and paint each with contrasting colors such as Country Blue and Black for visibility and style.
- Include beach symbols like starfish, whales, or surfboards using cardboard stencils and paint for simple embellishment.
- Wrap natural rope tightly around the post base and secure it with a waterproof adhesive or small staples for a nautical feel.
- Incorporate glued-on seashells or small driftwood pieces, sealing them afterward to withstand weather exposure.
- Add a finial, such as a pineapple or hibiscus flower, at the top of the post to create a polished, tropical look.
- Paint each directional board in a different pastel or muted tone for a soft beach vibe or bold coastal colors for a pop.
Natural elements like shells and rope boost texture and authenticity but require firm attachment and sealing to last outdoors. Use clear outdoor varnish over shell glue points to protect against moisture and preserve appearance. Finishing your boards with durable paint colors that fit common beach decor, soft blues, sandy tans, coral pinks, or classic white, helps your sign blend smoothly with beach house aesthetics or yard landscaping.
For multi-board directional signs, plan your layout beforehand. Arrange the longest boards near the bottom for stability and create symmetrical or staggered spacing. Label each board with a destination or message, and fasten on a strong post set deep in the ground or a weighted base. Secure rope wraps and decorative accents last, checking all parts for wind resistance and weather endurance.
How to Safely Work with Materials and Avoid Common Mistakes
Wearing the right protective gear is essential when making a beach sign by hand. Use safety goggles to protect your eyes from sawdust and wood chips during cutting and sanding. A dust mask or respirator prevents inhaling fine particles, especially when sanding or handling paint with chemicals. Gloves protect your hands from splinters and irritation from paints or sealants. Work in a well-ventilated area or outside to avoid harmful fumes, particularly when using oil-based paints or wood sealers.
Splinters often happen when sanding untreated or rough wood. Sand lightly with fine-grit sandpaper (220 grit or higher) along the grain to smooth the surface without damaging it. Avoid sanding too aggressively, which can cause uneven spots that will show through paint. Keep your fingers clear of the blade when cutting wood and secure the wood firmly to prevent slipping.
Warping or cracking results from too much moisture or rapid drying. Store your wood flat and dry before starting, and apply paint or sealer evenly to protect it from environmental changes. Avoid applying thick layers of paint; thin coats dry more evenly and reduce the chance of cracking. You can prevent warping by soaking your finished sign with a wood sealer on all sides, including edges and back, so moisture cannot enter and expand the wood fibers.
- Wear goggles, dust mask, and gloves whenever cutting, sanding, or painting
- Sand smoothly along the wood grain using 220-grit sandpaper or finer
- Cut wood using a stable work surface and keep fingers clear of blades
- Work outside or in well-ventilated areas to avoid inhaling paint or sealer fumes
- Apply paint and sealer in thin, even coats and allow each to dry fully before the next
- Seal all sides of wood to prevent warping and cracking
- When lettering smudges, wait until the paint is nearly dry before carefully touching up with a fine brush.
Smudged lettering before drying usually happens when the paint is still wet but pressure is applied. To fix this, let the paint dry for 10 to 15 minutes until it is tacky, then carefully retouch letters with a small, fine brush dipped in matching paint. Avoid adding too much paint, which can cause blobs. For deeper mistakes, gently sand the area smooth after drying, wipe away dust, and repaint the letters. Blot the paint rather than drag your brush to prevent further smudging.
Common painting errors include streaks, bubbles, or uneven coverage. These often come from using old paint or applying paint too thickly. Stir paint well before use and strain it if necessary. Apply thin layers with a good-quality synthetic brush to minimize streaks, and allow each coat to dry completely, usually about an hour, before adding the next. When bubbles appear, lightly sand the surface after it dries, then repaint.
How to Mount and Display Your Finished Beach Sign Effectively
Mounting your beach sign properly ensures it withstands outdoor conditions and looks great. Choosing the right hardware and method depends on where you want to display the sign, on a wall, fence, post, or as a portable piece. Securing signs well, especially near the beach, means using rust-resistant materials and protecting mounting points from weather damage.
Wall Mounting Options and Steps
Wall-mounted beach signs work well on home walls, fences, or doors and add coastal charm without taking up ground space. Choose mounting hardware based on the wall material, drywall, wood, or masonry. For wooden surfaces, use screws or nails made of stainless steel or galvanized metal to avoid rust. Masonry walls require masonry anchors or screws with plugs.
To mount your sign on a wooden wall or fence, start by pre-drilling holes in the sign and the wall to prevent wood splitting. Use corrosion-resistant screws with washers for a secure hold. Hanging hardware like D-rings or sawtooth hangers attached to the back of the sign allows for easy wall placement using hooks or nails. Protect mounting points with a sealant or outdoor paint to reduce moisture damage and prolong life.
| Mounting Hardware | Best for | Durability Tips |
|---|---|---|
| Stainless steel screws | Wood walls, fences | Pre-drill holes; use washers; seal around screw heads |
| Masonry anchors and screws | Brick, stone, concrete walls | Select correct plug size; use waterproof sealant |
| Picture hangers (D-rings, sawtooth) | Indoor covered porches, doors | Attach securely to sign; avoid outdoor exposure if possible |
| Adhesive hooks | Temporary indoor display | Use weatherproof types; not recommended for heavy signs |
Installing a Beach Signpost Securely
A freestanding signpost looks great anywhere outside, but sandy soil by the beach can be tricky. Use sturdy pressure-treated wood or weather-resistant posts and set them deep for stability. Dig a hole about 2 feet deep for every 6 feet of post height to prevent tipping. Follow these steps to install a signpost in sandy soil:
- Choose a pressure-treated wooden post suitable for outdoor use, typically 4×4 inches.
- Dig a hole 2 feet deep and about 12 inches wide using a shovel.
- Place the post in the hole and check it is vertically level using a carpenter’s level.
- Fill the hole with rocks around the base of the post to improve drainage and add stability.
- Pour quick-setting concrete or packed soil around the post in layers, tamping down firmly.
- Allow concrete to cure for at least 24 hours or ensure soil is compacted tightly.
- Attach your painted signboards to the post using stainless steel screws or galvanized nails.
Use quick-setting concrete for the most durable post installation, especially in sandy environments where soil shifts easily.
Arranging Multiple Signs on One Post
Directional signposts with several boards pointing different ways add fun and function. Plan the sequence before mounting to ensure each sign is visible and evenly spaced. Attach signs at varying angles to maximize readability from multiple directions.
Start by deciding how many signs you want on the post. Space them approximately 8 to 12 inches apart vertically. Use two screws at each end of the signboard to prevent twisting. Label the post at or near eye level with a decorative cap or unique top to finish the look.
For portability, consider a base you can move or a post that sits in a heavy container filled with sand or rocks instead of digging. This option works for temporary beach events and makes it easier to reposition or store the signs during bad weather.
Step-by-Step Action Plan
Follow these focused steps to create your handmade beach sign, ensuring each phase is completed before moving on. This will help you stay organized and achieve a great result.
- Day 1: Choose and prepare your wood by sanding it smooth and removing dust. Check by running your hand over the surface to feel no rough spots.
- Day 2: Sketch your design on paper, then transfer the lettering onto the wood using graphite paper or stencils. Verify placement looks balanced and fits the board.
- Day 3-4: Paint the base coat and let it dry fully. Apply your lettering or artwork carefully, making steady strokes. Confirm paint is even with no smudges.
- Day 5: Apply a clear outdoor sealant or varnish in thin coats, letting each dry thoroughly. Test by touching the surface to ensure it feels dry and hardened.
- Day 6: Add personal touches like shells, rope hangers, or distressing effects. Make sure attachments are secure and aesthetic.
- Day 7: Choose your mounting method, such as hooks, stakes, or rope hangers. Install carefully and test stability to avoid the sign falling outdoors.
Frequently Asked Questions
How to Make a Beach Sign by Hand?
Start by choosing wood, designing your text, painting, and sealing it for protection. Use simple tools and layer your paint for the best look.
What Kind of Paint Works Best for Outdoor Beach Signs?
Acrylic paint is ideal because it resists fading and handles moisture well. Use outdoor-grade acrylics for longer durability.
Can I Use Recycled Wood for My Beach Sign?
Yes, recycled wood adds character and is eco-friendly. Make sure to sand and seal it to prevent splinters and weather damage.
How Do I Fix Mistakes When Painting Letters on a Beach Sign?
Wait for the paint to dry, then lightly sand the area and repaint. This helps keep edges crisp and clean.
Is It Necessary to Add a Protective Finish to My Beach Sign?
Yes, a clear waterproof sealant will protect your sign from the elements and keep colors vibrant longer.
How Do I Prevent My Beach Sign from Tipping over Outdoors?
Secure it with a sturdy base or anchor it in the ground about 1 to 2 feet deep for stability.
Final Thoughts
Making a handmade beach sign lets you add a personal touch to your outdoor decor. Focus on each step with care to get smooth paint, clear lettering, and lasting protection. Grab your materials and start with sanding your wood today to get your project underway.