Diy Light Up Sign: Complete Guide to Build Your Own with Pro Tips
A diy light up sign makes an eye-catching decoration using LED strips or neon rope lights attached to a wooden or acrylic base. It works by connecting low-voltage lights to a power source, often with a dimmer or switch for control. Starting with a clear design and basic tools lets you create a bright, custom sign without spending much.
Key Takeaways
- Choose durable materials like stained wood or acrylic to make your light-up sign last longer indoors.
- Measure your sign size carefully; a typical DIY sign might be around 36 inches wide by 17 inches high.
- Use LED strips or neon rope lights powered by safe low-voltage sources such as coin batteries or adapters.
- Create mitered edges on wood frames by cutting at a 45° angle for a clean and professional finish.
- Wait 20-30 minutes for any wood stain to dry fully before assembly to prevent smudging.
- Include a dimmer switch in your wiring to adjust brightness and extend the life of your LEDs.
What Is a DIY Light Up Sign and How Does It Work?
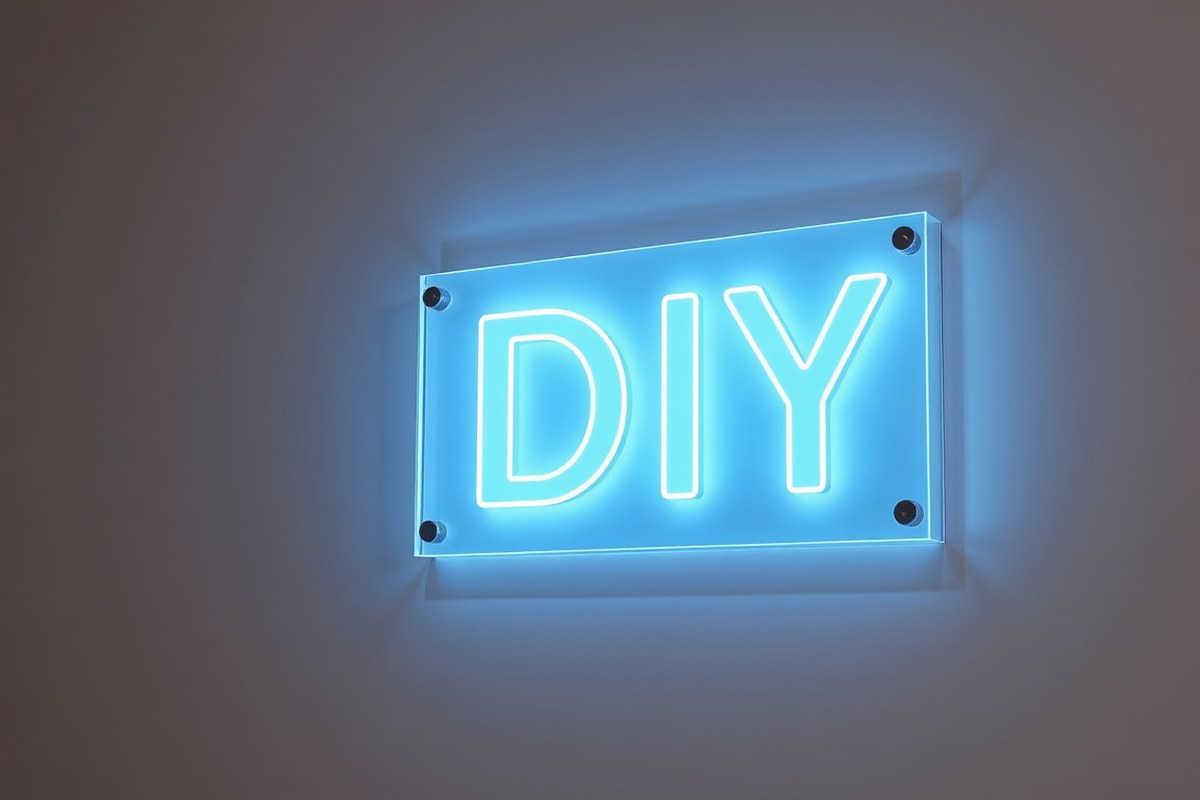
A DIY light up sign is a custom-made display that uses LED lights to illuminate letters, shapes, or designs you create at home. The core idea is to build a sign that glows, usually by placing LEDs behind or inside a translucent material like an acrylic sheet. This backlighting gives your sign a sharp, bright look that stands out in any room or outdoor space. The main components include a base or frame, LED light strips or neon rope lights, and a diffuser, often made from 4mm or thicker opal white acrylic sheet, which spreads the light evenly to avoid harsh spots.
LEDs power these signs because they use very little energy and last a long time, often up to 50,000 hours. LED strips are especially easy to work with since they come with adhesive backing and can be cut every few inches, usually every 3 LEDs, to size your project. Connecting the lights involves running wires behind the diffuser and using power supplies matched to your LED strip’s voltage, with some projects including a dimmer or power switch to control brightness.
The diffusion is important for a smooth, soft glow. Using an opal white acrylic sheet works well because its semi-opaque surface scatters the LED light and stops it from blinding through a single spot. This makes the whole sign look evenly lit. Positioning the LEDs close to the diffuser surface while hiding wires behind the frame helps you achieve a clean, polished appearance.
DIY illuminated signs can vary in style widely. Simple light box signs use a wooden or metal frame holding the acrylic sheet at the front, with LEDs inside to light up text or shapes cut or printed onto the diffuser. Alternatively, marquee signs use LED bulbs or neon rope lights shaped into letters or symbols for a retro look. For a glowing tube effect similar to neon signs, flexible LED neon kits are a popular choice. Choosing between these types depends on your design goal, available tools like a 3D printer or cutting service, and budget, which can be as low as $5 for a simple acrylic sign with a dimmer and switch.
The setup usually begins by cutting your backing frame from wood or stainless steel, then fixing the LED strips inside and wiring them through holes drilled to allow wire routing without showing. Gluing wires down prevents them from moving or showing through the front. A power supply connects the LED circuit to a wall outlet, with optional dimmers for adjusting light intensity. Good results look like crisp, evenly lit surfaces with no visible bulbs or wiring from the front. Poor diffusion or uneven placement can cause hot spots or dark patches, which ruin the effect. Hiding hardware and ensuring proper spacing between LEDs and diffuser are keys to success.
Essential Materials and Tools for Your Light Up Sign Project
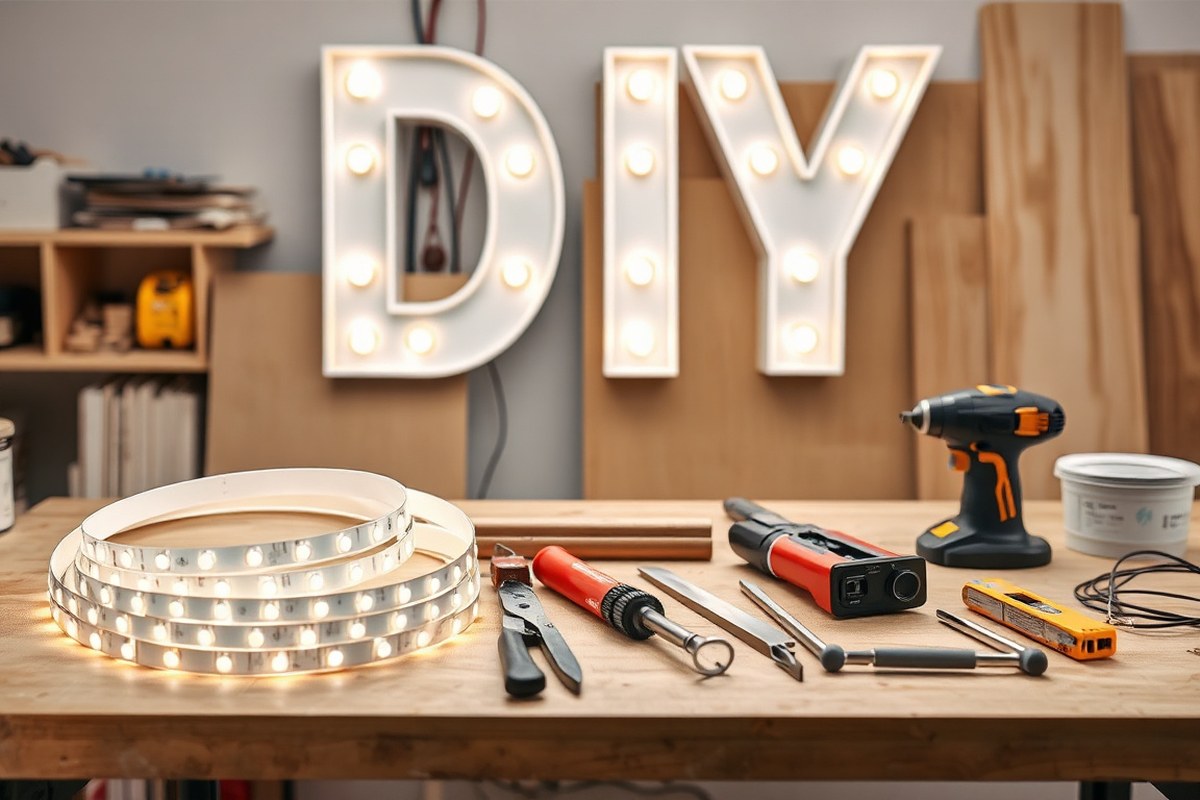
To create a successful DIY light up sign, you’ll need the right base materials, LED lighting, and tools that fit your project style and budget. The choice depends on your sign’s location, design, and how bright you want it. Knowing which materials and tools are mandatory versus optional can save time and money while producing a clean finish.
Base Materials: Wood, Acrylic, and Metal
Wood offers a classic, warm look ideal for indoor signs. It’s easy to cut and shape with basic tools, making it beginner-friendly. Consider plywood or pine priced around $15 to $30 per 2×4-foot sheet. Wood is great for painted or stained signs.
Acrylic is a smooth, lightweight plastic that diffuses LED light nicely, especially in frosted or opal finishes to soften glare. Sheets range from $20 to $50 per 2×4-foot panel depending on thickness and quality. Acrylic suits modern, sleek designs and works indoors or under covered areas.
Metal bases such as stainless steel offer durability and weather resistance for outdoor signs. They’re heavier, costlier ($50+ per panel), and need power tools for cutting. Metal is best if you want a solid, long-lasting exterior sign, often paired with LED modules for focused lighting.
Types of LED Lighting: Strips, Rope, and Modules
LED strip lights (like 5050 type) are flexible, bright, and easy to attach to flat or curved bases. Strips provide even illumination, especially under diffusers like frosted or opal acrylic to reduce glare. They usually cost $10 to $25 per 16-foot roll.
LED rope lights are encased in plastic tubing, offering ruggedness and water resistance ideal for outdoor signs. They are less bright than strips but last longer outdoors with prices around $15 to $35 per 16-foot length. Rope lights suit larger or rounded designs.
LED modules are individual bulbs spaced along wiring. They provide pinpoint lighting excellent for signs with cut-out letters or detailed designs. While more complex to wire, modules give precise control and brightness. Expect around $20 to $40 per 10-module pack.
| Type of Diffuser | Description | Applications |
|---|---|---|
| Frosted | Diffuses light to create a soft glow while minimizing harsh glare. | Homes and businesses, LED strips, linear lighting. |
| Opal | Gives smooth, even light, great with LED strips. | Homes and businesses, blending light sources. |
| Prismatic | Applies patterned designs that manage light flow, decreasing glare and increasing luminance. | Offices, stores, LED lights. |
Tools Needed: Cutting, Wiring, and Assembly
Essential tools include a utility knife or saw for cutting wood and acrylic cleanly. Wire strippers and a soldering iron are mandatory for connecting LED wires securely and ensuring safe electrical contact. A drill or screwdriver is needed to assemble the sign parts.
Optional but helpful tools include clamps to hold pieces in place, a heat gun for bending acrylic or shrinking wire covers, and a multimeter to check electrical continuity before powering up. These reduce mistakes and improve durability but might increase your initial investment by $20 to $50.
- Utility knife or jigsaw for cutting materials
- Wire strippers and soldering iron for wiring LEDs
- Drill or screwdriver for assembly
- Clamps to secure parts during gluing or screwing
- Heat gun for acrylic shaping and wire insulation
- Multimeter for electrical testing
Always wear safety glasses when cutting or soldering to protect your eyes from debris or sparks.
How to Design Your Light Up Sign for Best Visibility and Aesthetics
Creating a DIY light up sign that stands out means carefully planning its size, design, and lighting. Start by selecting the right size for easy reading from the intended distance, using bold colors and fonts that maximize contrast. Place lights evenly behind or around the lettering for a consistent glow that highlights your message without glare or dark spots.
Determining Sign Size and Lettering
Choose a sign size based on where it will be placed and how far away viewers will be. A good rule of thumb is that every inch of letter height offers readability from about 10 feet away. For example, 3-inch tall letters work well for signs viewed at 30 feet or less. Avoid making letters too small, as this reduces visibility, especially in low light.
Layout your letters with enough spacing to prevent crowding, which hurts readability. Keep designs simple and clear to avoid confusing your audience. Using a printed template or stenciled lettering can help you preview proportions and spacing before you start cutting or drilling.
Choosing Colors and Fonts for Contrast
High-contrast colors improve visibility under different lighting conditions. White letters on a dark background or dark letters on a white or light background work best. This sharp contrast makes your sign readable from a distance and against surrounding distractions.
Fonts with clean, bold lines increase legibility. Avoid overly complex or thin fonts because they lose clarity when backlit or illuminated by LED lights. Calligraphy-style fonts can work well, but pick ones with fewer breaks to reduce the number of light connections needed, making installation easier.
- Use large, bold fonts with minimal flourish
- Pick contrasting colors like black on white or white on navy
- Test your colors against the LED light’s color temperature
- Keep text simple and avoid overcrowding
- Match font choice to the sign’s style and viewing distance
Choosing the right colors and fonts not only boosts readability but also adds to the sign’s aesthetic appeal.
Planning LED Placement for Even Illumination
Even lighting prevents bright spots and shadows that make your sign look unprofessional. Light placement depends on your sign’s design, backlit signs require placing LEDs evenly behind the letters or shapes, while outline signs need lights along edges or inside cutouts.
To create consistent illumination, mark where each LED or bulb will go using a pen to make small indentations on the material. Space your lights so the glow surrounds or backs up each letter evenly. For LED strips, keeping them no more than 1 to 2 inches apart within the sign can reduce dark gaps.
Consider adjustable brightness features. This lets you change light intensity based on ambient lighting conditions or the time of day, saving energy and extending component life.
Step-by-Step Assembly and Wiring of a DIY Light Up Sign
Begin by cutting and prepping your sign materials carefully, then wire the LEDs with attention to safety and neatness. Integrate any dimmer or remote controls using the right components and install the finished pieces securely. This approach guarantees a functional and stylish DIY light up sign that works reliably and looks great.
Cutting and Preparing Materials
Start by selecting the right materials suitable for your sign’s design and lighting method. Commonly, wood or acrylic layers are popular. Use a fine-tooth saw for wood or a laser cutter for acrylic to get clean edges. Sand the edges smooth to avoid splinters or rough surfaces that can cause wiring issues.
Mark the locations for LED holes or light channels with a pencil. Drilling or routing evenly spaced holes allows the light to shine through consistently. Clean the layers thoroughly to remove dust and debris before assembly. Preparing each layer with precision improves the final look and prevents electrical shorts.
Wiring LEDs and Installing Power Components
Wiring LEDs requires patience and attention to detail for both safety and performance. Use a low-voltage DC power adapter matched to your LED strip requirements, typically 12V or 24V. Cut the LED strip to length at marked points. Strip the wire ends about 1/4 inch and tin them with a soldering iron heated to about 700°F (370°C) to prepare for secure connections.
Keep the polarity correct by attaching positive wires to the LED’s positive terminals and negative wires to negative terminals. Use heat-shrink tubing on solder joints to avoid short circuits and add strain relief. To add dimming, insert a basic LED dimmer circuit that includes a 22K resistor and a 10K potentiometer between the power source and the LED strips. Remote dimmers often need an IR receiver placed in a spot where the signal can reach it, but placing the power supply inside the sign might block the remote signal.
Use wire management options like cable channels or small conduit tubes where wiring crosses or bends. Ensure all connections are secured in junction boxes if inside walls or use surface conduit systems visible within the sign base, maintaining neatness and compliance with any local electrical codes.
Assembling and Securing Sign Layers
Layer your sign carefully to align cutouts and LED placements. Use strong wood glue or acrylic cement for bonding layers where permanent adhesion is desired. Clamp flat signs to ensure even adhesion and allow drying according to the adhesive’s instructions, typically 30 minutes to an hour.
For easier maintenance, use velcro strips or small screws to attach layers so you can access wiring or replace LEDs later. Position your power supply in a ventilated area within or behind the sign to avoid heat buildup. Check all wiring before final assembly to avoid disconnects or shorts later on.
- Measure and mark your sign layers precisely for cuts and LED placements.
- Cut the materials using appropriate tools: saw for wood, laser cutter for acrylic.
- Sand edges smooth and clean the layers thoroughly before assembly.
- Solder LED strips carefully, maintaining polarity and covering joints with heat-shrink tubing.
- Install the dimmer circuit or IR receiver according to the wiring schematic.
- Organize wires neatly with managing channels or conduit for protection and appearance.
- Glue or attach sign layers securely, allowing adhesives to dry completely.
- Test the entire setup with the power on and adjust wiring or connections if needed before mounting.
Common Mistakes When Making Light Up Signs and How to Fix Them
Uneven lighting often results from poor placement or insufficient spacing of LED strips or bulbs inside your light up sign. Light sources clustered too close can cause bright spots, while gaps leave dark areas. To fix this, space LEDs evenly, generally about 1 to 2 inches apart depending on your sign size. Also, use a diffuser material such as frosted acrylic or parchment paper to soften the light and spread it more uniformly across the sign surface.
Wiring shorts and power issues mainly come from loose connections, exposed wires touching, or using the wrong gauges for LED current. Secure all connections tightly using soldering or quality connectors, and insulate exposed wiring with heat-shrink tubing or electrical tape. Following the LED strip’s specific voltage and amperage requirements prevents overheating or flickering. Use a multimeter to check all connections before final assembly.
Durability suffers when the frame or backing isn’t strong enough to hold components firmly. Thin or flexible materials cause lights to shift or wires to pull loose with handling or vibration. Choose sturdy backing like ¼-inch plywood or rigid plastic to mount LEDs securely. Attach wiring with cable clips or zip ties, not just tape. Sealing edges with silicone prevents moisture damage and keeps everything tight.
| Common Mistake | Cause | How to Fix |
|---|---|---|
| Uneven Lighting | LEDs too close or too far apart | Space LEDs 1-2 inches apart; use diffuser material |
| Wiring Shorts | Exposed wires touching or loose connections | Solder connections, insulate wires, check with multimeter |
| Power Issues | Incorrect voltage/amperage for LEDs | Follow LED specs; use correct power supply |
| Poor Durability | Weak backing and unsecured wiring | Use sturdy backing; secure wires with clips or ties |
| Light Leakage Inside Sign | Improper sealing of sign edges | Seal edges with silicone to block internal light leaks |
Using a diffuser is especially helpful for signs with larger surface areas or when you use multiple LED clusters. The diffuser cost usually runs $5 to $15 depending on size but can transform harsh light spots into smooth illumination. Avoid cheap tapes or adhesives on wiring under constant movement as they fail quickly; investing in cable clips or zip ties adds long-term reliability. Double-check all power ratings before connecting your sign to ensure safety and function.
Always insulate every soldered joint with heat-shrink tubing to prevent shorts and keep your light up sign working safely and reliably.
Customizing and Finishing Your Light Up Sign for a Professional Look
Painting your DIY light up sign demands products that suit the materials for the best finish and durability. For wood surfaces, use a high-quality acrylic latex paint. It dries faster than oil-based paints, resists cracking, and offers vivid colors that stand out under light. Apply a primer first to seal the wood and prevent blotchiness, waiting at least one hour before the paint. For acrylic parts, use spray paints labeled safe for plastics to avoid melting or warping. Several thin coats with 15 minutes drying time between each prevent runs and peeling, creating a smoother final look.
Adding vinyl graphics or custom text is a straightforward way to boost your sign’s branding or personality. Cut vinyl letters or logos with a vinyl cutter or order pre-cut from local print shops for about $7 for a moderate-size design like “The Smiths.” Choose colors that contrast well with your background for maximum visibility. To apply, clean the surface with rubbing alcohol, then use transfer tape to position and stick the vinyl carefully, smoothing out air bubbles with a plastic scraper. For multi-line text created on separate wires, leave an extra one to two meters of wire after each line to allow flexible placement and connection to the power supply.
Sealing edges helps protect your sign from dust and moisture, especially around wood joins and acrylic panels. Use clear silicone sealant along seams, smoothing it into a neat line with a damp finger or plastic tool. Allow it to cure completely, typically 24 hours, before handling or finishing further. This step adds to the sign’s longevity and maintains a clean, professional appearance, avoiding visible gaps or rough edges that catch dirt.
Concealing wires and components is important for aesthetics and safety. Route wires through channels cut in the sign’s frame or behind acrylic layers to keep them out of sight. Secure wires with small clips or double-sided tape to prevent sagging or movement. Use black or white electrical tape to wrap exposed sections for a neat finish matching the sign’s color scheme. Installing wire end caps before connecting lights prevents frayed wires, ensuring a polished finish and reducing electrical hazards. The part of the sign that measures about 1-1/16″ in thickness usually hides wiring effectively when designed as a recessed frame or backing panel.
How to Choose Power Supplies and Lighting Controls Safely
You need to choose a power supply that matches the voltage and current requirements of your LED type to avoid damage or poor performance. Most LED strips run on 12V or 24V DC power supplies. For example, a common 12V LED strip will need a 12V power supply with enough amperage to handle the total length of the strip. Calculate amperage by adding the current consumption per foot (often listed as 0.3 to 0.5 amps/foot) multiplied by the strip length, then add a 20% margin for safety. Using a power supply with lower voltage or insufficient amps can cause dim lights or early failure.
| Power Source | Voltage | Applications | Typical Cost | Pros | Cons |
|---|---|---|---|---|---|
| 12V DC Adapter | 12V | Standard LED strips, small signs | $10-$20 | Easy to find; affordable | Limited to 12V strips |
| 24V DC Adapter | 24V | Longer LED strips, higher brightness | $15-$30 | Supports longer runs; less voltage drop | Must match strip voltage precisely |
| Battery Packs | Varies (normally 3.7V-12V) | Portable signs, temporary setups | $10-$25 | Portable; no wiring needed | Limited runtime; higher cost per hour |
| Smart Power Supplies | 12V or 24V | Signs with remote or app control | $25-$50 | Integrated control; dimming features | More complex installation |
Dimmers and remote controls improve your sign’s versatility. To install a dimmer, choose one compatible with your LED power supply and wiring type (common anode or cathode LED strips). Wire the dimmer inline between the power supply and the LED strip, following the manufacturer’s wiring diagrams exactly. Installing dimmers rated too high for your current risks overheating. Remote controls with infrared or RF technology offer wireless convenience and can include multiple brightness presets and color effects.
Smart lighting controllers that link to Wi-Fi or Bluetooth can also work, but you must verify compatibility with your LED strip type and power supply voltage. Many smart controllers are designed for specific LED brands or require a constant voltage supply. Using a smart controller allows you to set schedules, animation patterns, or sync multiple signs from your phone. This adds cost, with smart power supplies or controllers ranging from $25 to $50 or more depending on features.
- Check LED strip voltage and current specs before buying a power supply
- Allow 20% more power capacity for safety and future upgrades
- Use dimmers rated for LED loads to avoid damage
- Follow wiring instructions carefully when installing dimmers or remotes
- Confirm smart controller compatibility with your specific LED strips
- Keep power supplies away from moisture and allow airflow to prevent overheating
- Use UL-listed power supplies for added electrical safety
For safety, always unplug your setup before wiring or modifying controls. Use insulated connectors or soldered joints with heat shrink tubing to prevent shorts. Avoid overloading circuits by checking your power supply’s wattage rating against the total wattage of your LED strips. If unsure about electrical work, consult a licensed electrician to review your plans or help install your power supply and controls.
Maintenance, Troubleshooting, and When to Ask for Professional Help
Maintaining your DIY light up sign helps keep it looking great and working safely for years. Start by unplugging the sign before cleaning. Use a soft, dry cloth to gently wipe off dust and avoid any moisture near the bulbs or wiring. For stubborn dirt, a slightly damp cloth can be used but never spray liquids directly onto the sign or lights. Check the bulbs regularly for any that are dim, flickering, or burnt out and replace them promptly with the same type and voltage to avoid damage. Start troubleshooting your sign’s flickering or non-working lights by following these steps:
- Ensure the power supply or plug is securely connected and switched on.
- Inspect each bulb for damage and replace any broken or burnt-out bulbs.
- Look for loose wires or disconnected strands behind the sign and secure them firmly.
- Test the power outlet by plugging in another device to rule out electrical issues.
- Try a different compatible power source or light strand to isolate the problem.
When these checks don’t resolve the problem, decide your next step based on how comfortable you are with electrical work. Troubleshooting can usually be done safely if you follow instructions carefully. Avoid forcing any components or working with live wires.
Always unplug your light up sign before checking or replacing bulbs to prevent electrical shock and damage.
Professional help is needed if your sign shows signs of electrical faults beyond simple bulb replacements, such as persistent sparking, burning smells, or if wiring appears damaged or exposed. Hiring a licensed electrician is advisable for complex wiring rewiring or if you need to install new power outlets safely. Expect professional service costs to vary between $100 and $250 depending on the complexity and location. Use this quick decision guide:
- Bulbs or plugs causing trouble can usually be safely replaced by you.
- Frayed wiring or connections inside sealed sign parts require a professional’s help.
- Sparks, smoke, or burning smells mean shut off power right away and call an electrician.
- Unsure about electrical repairs? Always reach out to a professional before continuing.
Step-by-Step Action Plan for Your DIY Light Up Sign
Follow these steps to confidently design, build, and complete your light up sign project with safety and style in mind.
- Before You Start: Gather all essential tools and materials listed for your sign design. Confirm you have the correct LED type and power supply to match your design.
- Day 1: Finalize your sign design focusing on visibility and aesthetics. Test a small light layout on paper or a digital tool to ensure spacing looks good.
- Day 2: Cut and prepare the sign base, then arrange the lights following your design. Check that all wiring paths are accessible and safe before soldering.
- Day 3: Assemble and wire the components carefully, double-checking polarity and connections. Use a multimeter to verify continuity before powering up.
- Day 4: Install the power supply and lighting controls securely. Test the system by powering on and adjusting brightness or modes to confirm functionality.
- Day 5: Customize the sign’s finish with paint or trim for a professional look, ensuring nothing obstructs the lights.
- After 1 Week: Perform a maintenance check for any loose connections or dim lights. Troubleshoot or replace faulty parts as needed.
Frequently Asked Questions
What Safety Precautions Should I Take When Working with Electrical Components?
Always unplug your power source before handling wires to avoid shocks. Wearing insulated gloves can add protection, and double-check your connections to prevent shorts or fires.
Can I Use Battery Power Instead of Plugs for My DIY Light Up Sign?
Yes, battery power makes signs portable but runs out faster than plugs. Choose rechargeable batteries for convenience and consider how often you’ll need to replace or recharge them.
How Do Humidity and Weather Affect Outdoor DIY Light Up Signs?
Moisture can damage electrical parts and cause corrosion, so seal your sign well. Use weatherproof materials like IP65 rated LED panels to make it last longer outdoors.
What Is the Best Way to Hide Wiring in a Light Up Sign?
Glue wires neatly behind or inside your sign’s frame to keep them hidden. Use clip fasteners or channels to secure wires so they don’t shift and stay out of sight.
Can I Use Colored LED Lights to Change the Sign’s Mood or Theme?
Colored LEDs are great for creating mood lighting or themes in your sign. You can mix colors or install a color changer to switch looks easily for different occasions.
How Long Does It Typically Take to Build a Basic DIY Light Up Sign?
Building a simple light up sign usually takes a few hours to a day, depending on design complexity. Planning your layout before assembling speeds up the process and reduces errors.
Wrapping Up
Building your own light up sign requires attention to detail from design through wiring to finishing touches. Take your time assembling and testing each part to ensure a safe, attractive final product. Start by sketching your design on paper tonight to get a clear plan before gathering materials tomorrow.