DIY Garden Sign Ideas: Complete Guide to Durable, Stylish Yard Decor
A DIY garden sign lets you add a personal, stylish touch to your outdoor space while marking plants or sharing a message. Making your own garden sign can be simple and affordable using materials like wood, fabric, or recycled items. Start by choosing durable materials and tools that suit your garden’s weather conditions to ensure the sign lasts.
Key Takeaways
- Use weather-resistant wood like cedar or birch plywood for sturdy, long-lasting garden signs.
- Cut outdoor canvas fabric to size and paint or iron-on your design for lightweight, colorful signs.
- Repurpose sticks, twigs, or old wooden pallets for creative and budget-friendly garden sign bases.
- Etch lettering with a wood-burning tool or laser engraver for clear, elegant plant labels.
- Seal painted signs with outdoor polyurethane spray to protect against sun and rain exposure.
- Select standard plaque dimensions such as 8 or 10 inches wide and 4 or 6 inches tall to create clear, concise labels that are easy to read.
What Is a DIY Garden Sign and Why Make One?
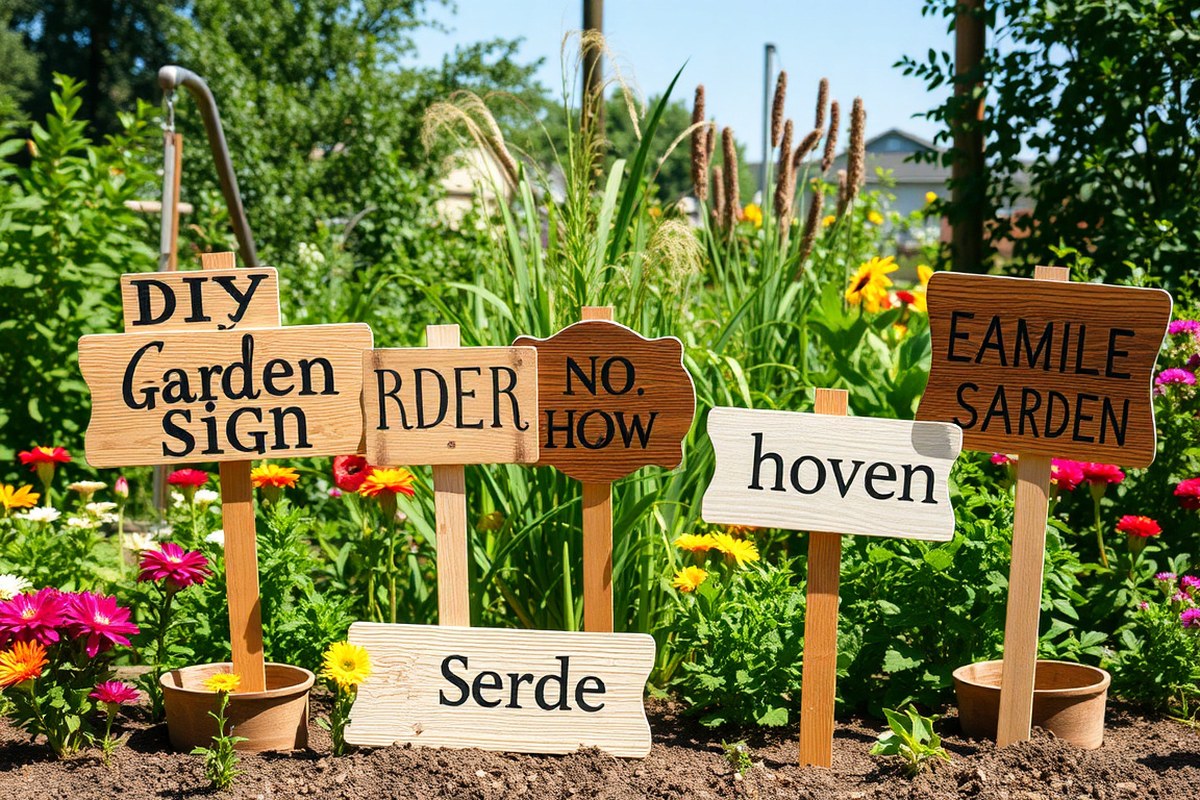
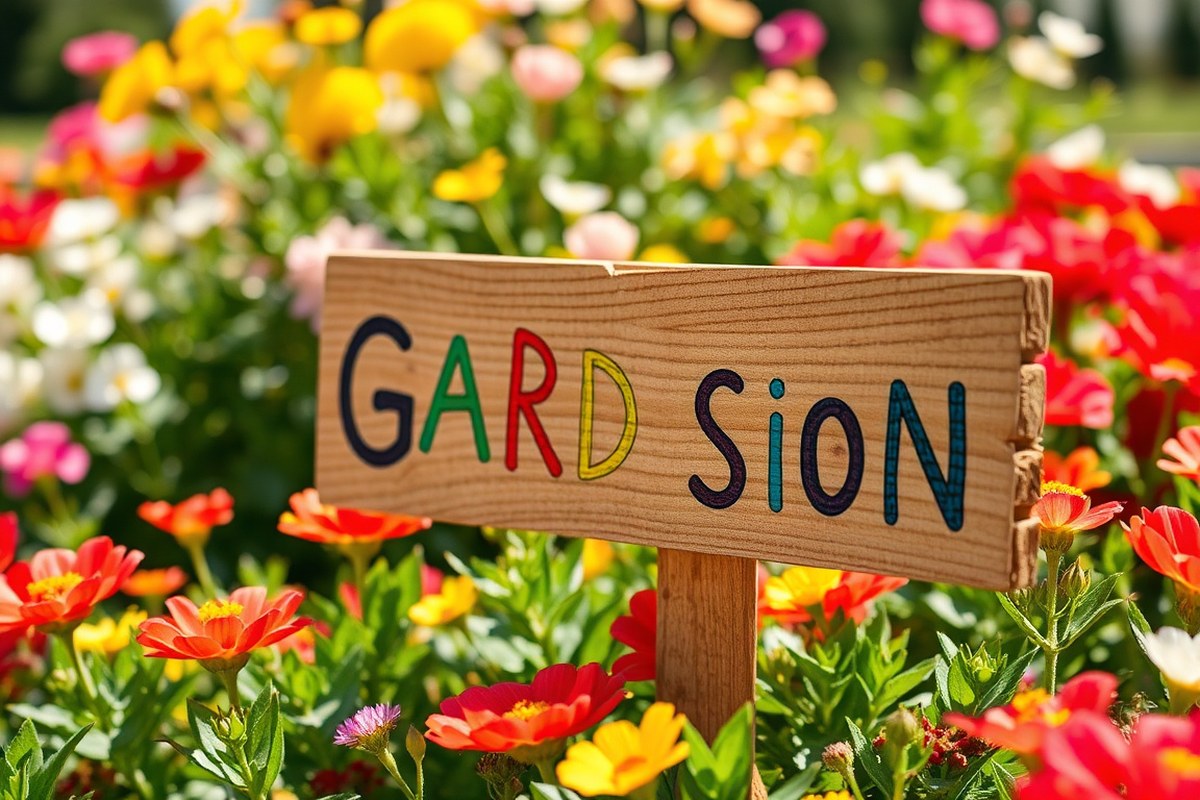
A DIY garden sign is a handmade decoration designed to add charm, personality, or function to an outdoor space. These signs often use materials like wood, slate, clay, or recycled items, and you can customize them with colors, lettering, or sayings that fit your garden’s style. For example, a simple wooden sign painted with a welcoming phrase or labeled with plant names helps personalize the area and makes your garden truly your own.
Creating your own garden signs rather than buying them allows you to choose every detail, from size to message to color, ensuring the sign matches your space exactly. It often costs less, many DIY signs can be made for under $10 using affordable materials or thrift store finds. This budget-friendly approach also turns into a fun project that builds a deeper connection to your garden. Instead of mass-produced labels, your handmade sign speaks directly to your style and gardening goals, whether that’s whimsy, humor, or clear plant identification.
Signs add personality by giving your garden a unique voice. Using humorous texts like “Gnome Sweet Gnome” or artistic textures with clay can make the space feel welcoming and lively. Also, garden signs serve practical purposes, such as marking vegetable rows or herbs to help you stay organized during planting and harvesting. They also invite guests to engage with your garden space in a personal way, making your outdoor area stand out visually.
Making a DIY garden sign starts with selecting a base material and a clear design idea. You might craft a rustic pallet wood sign or use a slate kit for durability. Then, add lettering or decoration with paints, markers, or even stamps. Proper sealing and protection keep the sign looking fresh through sun and rain. What good results look like is a sign that fits proportionally in the garden, has legible writing, withstands seasonal weather, and clearly expresses your intended message or style.
Some people make the mistake of choosing materials that don’t last outdoors or applying paint without a protective coat, leading to fading and damage. Also, overly intricate designs can be hard to read from a distance, reducing the sign’s effectiveness. Balancing decoration, durability, and readability ensures your garden sign provides lasting value and adds the personal touch you want.
Best Materials for Creating Durable Garden Signs
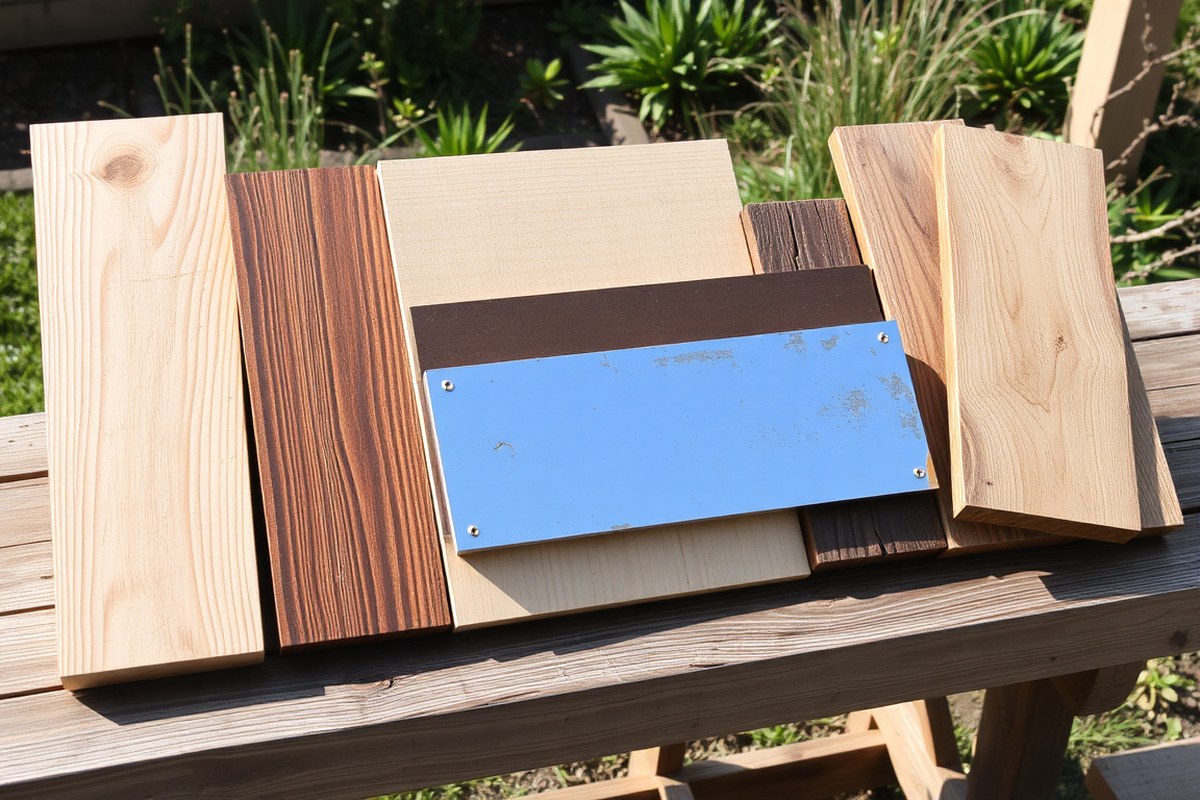
Choosing the right material for your garden sign affects how long it lasts and how well it withstands weather and pests. For wood options, cedar and redwood are excellent because they naturally resist rot and insects. Avoid boards with large knots or uneven grain, which can weaken the sign over time. Exterior-grade plywood offers a smooth, stable surface but requires sealing all edges well to prevent moisture damage. Pressure-treated wood stakes work well for signs that need to stay in contact with soil; just be sure to pre-drill holes before nailing and wear gloves to handle the treated wood safely.
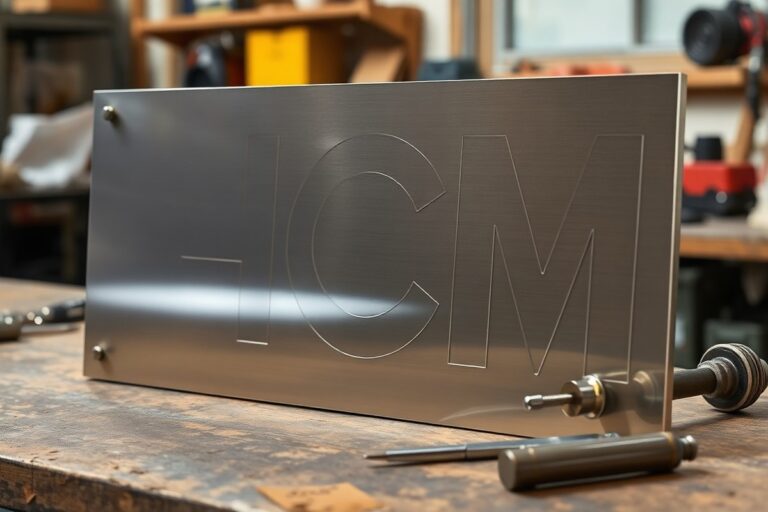
Metal signs bring a durable, rustic look and resist warping or rot. Thin metal sheets or repurposed metal boxes can be painted and adapted into vintage-styled garden signs with proper preparation. However, metal may become hot in direct sunlight, so placing the sign in shaded areas helps avoid paint peeling or burns. Composite materials and recycled items can be safe outdoors if they are sealed to block water and UV rays, but their longevity varies depending on the original material’s quality.
| Material | Why It Works | Notes |
|---|---|---|
| Cedar or Redwood Board | Resists rot and insects | Buy straight grain; avoid big knots |
| Exterior-Grade Plywood | Stable and flat | Seal edges thoroughly to prevent moisture |
| Pressure-Treated Stake | Durable for ground contact | Pre-drill holes; wear gloves when cutting |
| Rustic Metal Sheets | Weatherproof and stylish | Paint with exterior primer; avoid direct sun heat |
| Recycled Materials | Eco-friendly and cost-effective | Seal and protect thoroughly for outdoor use |
To ensure your sign lasts, start by prepping all surfaces with an exterior primer, especially on tannin-rich woods like cedar to block stains and improve paint adhesion. Opt for flexible, acrylic or latex exterior paint with satin or semi-gloss finishes, which clean more easily and hold color well under sun and rain. After painting, apply a protective sealant designed for outdoor use to guard against moisture and wear.
Handle pressure-treated wood with gloves and pre-drill nail holes to prevent splitting and exposure to chemicals.
Costs vary widely, with cedar boards often costing $10 to $30 per 1×6 foot plank, exterior plywood around $15 to $25 for a 4×8 sheet, and metal sheets depending on thickness starting near $20. Recycled materials might be free but demand more prep work. Wood signs generally require repainting every 2 to 3 years in harsh climates, while metal signs can last longer but should be inspected regularly for rust or paint chipping. The best choice depends on your budget, style preference, and how much maintenance you’re prepared for in your garden.
Tools and Supplies Needed for DIY Garden Signs
Start with basic hand tools for most DIY garden signs: a hammer, nails or screws, a saw for cutting wood, and sandpaper to smooth rough edges. These tools let you create simple wooden signs without much investment. A small paintbrush and acrylic paint are essential for painting letters or designs that last outdoors. You can typically find these tools for under $30 at a hardware store or reuse them from your shed.
Power tools are helpful but not required. A cordless drill speeds up screwing and can create starter holes, reducing the chance of splitting wood. A jigsaw or power sander offers cleaner cuts and finishes faster, which is handy for curved or detailed shapes. However, if you prefer to avoid power tools, hand saws and sanding blocks work well if you take your time. Always wear safety goggles and gloves when handling saws or drills to prevent injuries.
Wood burning tools add a rustic, personal touch by engraving letters or patterns. They operate by heating a fine tip to about 650°F (343°C), burning the wood’s surface. Use these tools in a well-ventilated area, clear of flammable materials. Wear a heat-resistant glove on the hand not holding the tool for safety. Turn the tool off immediately after use and store it out of reach of children. Wood burning kits usually cost $20 to $50 and include various tips for different effects. For best results, practice on scrap wood to control the depth and consistency of your design.
- Hammer and nails or screwdriver with screws for assembly
- Hand saw or jigsaw for cutting shapes from wood planks
- Sandpaper or power sander to smooth edges
- Paintbrushes and outdoor acrylic paint for lettering and decoration
- Wood burning tool with temperature control for engraved designs (optional)
- Drill with various bits to create guide holes (optional)
- Safety gear: goggles, gloves, dust mask when sanding or burning wood
Check that your work area is clean and well-organized before starting. Use clamps to hold wood steady when cutting or burning to prevent slips. Keep cords from power tools clear of your path. Take frequent breaks to avoid hand fatigue, especially when working with hand tools. Following these steps reduces the risk of accidents and improves the quality of your finished garden sign.
Step-by-Step Guide to Making Wood Garden Signs
Creating durable wooden garden signs involves cutting smooth wood to size, painting with weatherproof outdoor paints, adding clear lettering or designs, and sealing the surface for outdoor use. Using UV-resistant paint preserves vibrant colors through seasons, while a protective sealant shields your sign from rain and sun. The process balances careful preparation, precise decoration, and thorough finishing to ensure lasting beauty and readability.
Preparing and Cutting Wood Safely
Start with smooth wooden sign blanks, available in various shapes and sizes around 6×18 inches, which give a clean surface for painting. Use untreated wood suitable for outdoor projects like cedar or pine. Cut the wood to your desired dimensions using a fine-toothed handsaw or electric jigsaw, depending on your comfort and tool availability. Always work on a stable surface, clamp the wood securely, and wear safety goggles to protect your eyes from dust and splinters.
After cutting, sand the edges and surfaces lightly with fine-grit sandpaper to smooth rough spots. This step helps both the paint and sealant adhere well and prevents splinters. Dust off the wood with a dry cloth before painting. Avoid cutting overly thin or narrow signs, as these may warp or break outdoors.
Painting Techniques: Stencils vs. Freehand
Choose weatherproof outdoor paint that is UV-resistant and rain-proof to keep colors vibrant through multiple seasons. Starting with a solid base coat in a light color, such as light green or white, works well for contrast. For lettering or detailed designs, stencils give clear, uniform shapes, especially useful for beginner painters or intricate fonts. Secure stencils firmly and use a small, stiff brush or sponge with light dabbing motions to avoid paint bleeding.
Freehand painting suits experienced crafters confident with brush control. Use outdoor acrylic paints and tile paint pens for fine details and lettering, these provide vivid colors and durability. After the paint dries, distressing the sign with sandpaper creates a vintage look if desired. Remember that multiple thin coats of paint yield better coverage and avoid cracking.
Applying Protective Outdoor Sealants
Sealing your wooden sign is critical to protect it from weather elements like rain, sun, and temperature changes. Use a clear outdoor wood sealant compatible with your paint type. Apply at least two coats with a clean brush, allowing each coat to dry fully, usually 4 to 6 hours depending on temperature and humidity. Cover all surfaces, including edges and back, to prevent moisture penetration.
For extra durability, choose sealants that offer UV resistance to prevent fading. Avoid sealants with a glossy finish unless that style fits your design. Matte or satin finishes often blend better with painted signs and reduce glare, improving legibility. Regular reevaluation and resealing every couple of years extend the life of your sign.
- Secure your wood blank on a stable surface and cut it to the desired size with a handsaw or jigsaw, wearing safety goggles.
- Sand all edges and surfaces smooth using fine-grit sandpaper, then wipe away dust with a dry cloth.
- Apply a base coat of weatherproof outdoor paint, such as light green or white, and allow it to dry completely (4-6 hours).
- Use stencils or freehand techniques with outdoor acrylic paint or tile paint pens to add your lettering and designs.
- Optionally distress painted areas lightly with sandpaper for a vintage effect after paint dries.
- Apply the first coat of clear outdoor wood sealant thoroughly on all sides, let it dry.
- Add a second sealant coat for extra protection and allow it to dry fully before outdoor use.
Creating Fabric and Canvas Garden Sign Options
Making lightweight, colorful garden signs with outdoor fabric, canvas flags, or banners lets you add charm and personality to your garden without heavy materials. Using weather-resistant fabrics and simple painting or iron-on techniques ensures your signs stay vibrant through the seasons. Mounting these signs on poles or attaching them to garden structures secures them well for all weather conditions.
Choosing Weather-Resistant Fabrics
Select fabrics like outdoor polyester, acrylic canvas, or marine-grade vinyl that resist fading, mildew, and water. Plain garden flag blanks measuring around 12×18 inches often come pre-cut from outdoor polyester, ideal for small garden signs. Cotton or untreated canvas tend to absorb moisture and fade quickly, so avoid those for outdoor use. A tight weave and UV-resistant coating extend the life of your fabric sign against sun and rain exposure.
Colors matter too; opt for bright shades like sunny yellows and oranges to keep your sign visible and cheerful. Choose a fabric that is sturdy but still lightweight enough to attach to a pole or garden stake without sagging or tearing.
Painting and Design Transfer Methods
Fabric paint designed for outdoor use works best to keep your colors crisp and long-lasting. You can find paints specially made for textiles that offer waterproof and weather-resistant finishes. Iron-on transfers or adhesive vinyl decals provide cleaner edges for intricate designs but require a heat source and proper transfer paper.
To get a neat painted design, stretch the fabric over a flat surface and secure it in place with tape or clips. Use fabric paint with a small round brush or sponge applicator for clear lines and avoid thick layers that might crack when dry. Heat setting the paint according to the manufacturer’s instructions usually involves ironing the back side of the fabric for about 3-4 minutes or using a hair dryer to cure the paint.
Test your paint or transfer on a scrap piece of fabric first to ensure it won’t crack or peel under outdoor conditions.
Hemming and Installing Fabric Signs
Finishing the edges with a simple hem or using fabric glue prevents fraying in windy weather. Fold the edges over by about ¼ inch and sew or glue the hem firmly. Leaving a sleeve at the top or side of the sign allows you to slide in a wooden dowel, metal rod, or garden stake for stable mounting.
To install your sign, secure it onto reusable garden sign stakes that stand about 2 feet tall, placing the sign at eye level for easy reading amidst your plants. For banners or flags, hanging loops or grommets along the edge provide points to attach string or hooks to fences or trellises.
- Cut your fabric to the desired size and shape using fabric scissors.
- Paint or apply your design using fabric paint or transfer methods; allow to dry fully.
- Heat set the paint following product instructions for durability.
- Fold edges to create hems, then sew or glue to prevent fraying.
- Create a fabric sleeve or attach grommets for mounting.
- Insert a wooden dowel or a metal rod through the sleeve if applicable.
- Attach your finished sign to a garden stake or hang it using loops or hooks.
Using Recycled and Upcycled Materials Creatively
Scrap wood, broken tools, and old tiles can all be fantastic materials to repurpose into unique garden signs. Start with a sturdy plank of scrap wood as your sign’s base. Wood from pallets, old furniture, or leftover fence boards usually works well. Smooth rough surfaces with sandpaper, especially if the wood has splinters or cracks, to ensure safe handling and a clean painting surface.
Broken garden tools like rakes or trowels add rustic charm and character. Remove rust using steel wool and wipe clean before attaching them to your sign. For example, an old rake head works perfectly as part of a sign’s border or frame. Secure these items with screws or strong outdoor adhesive to withstand weather changes. Ceramic tiles and colored glass can bring vibrancy and texture. Mosaic art using tile pieces glued onto the wood creates eye-catching patterns or letters. Use waterproof grout to fill gaps between tiles so the sign stays intact through rain and watering.
Safe preparation of recycled materials is essential. Clean all pieces thoroughly to remove dirt and debris. Wear gloves and eye protection when cutting or sanding rough wood or glass to prevent injuries. Test paint and adhesive on scrap pieces first to ensure good adhesion and appearance before working on your main sign. This practice reduces mistakes and wasted materials, making the process more efficient.
Recycled signs fit well with informal, rustic, or whimsical garden styles. Think cottage gardens with playful gnome illustrations painted alongside lettering. Mosaic tile signs suit vibrant, colorful gardens that embrace a crafty look. Using tools like rakes or shovels pairs well with vegetable or herb beds for a functional theme.
- Use a 6×6 inch scrap wood block for the sign’s main base and smaller scraps for detail work.
- Sand wood surfaces gently with 120-grit sandpaper to smooth splinters and prepare for paint.
- Remove rust from metal parts with steel wool and apply a clear outdoor sealant to protect them.
- Glue broken glass or ceramic tile pieces with waterproof outdoor adhesive, then grout gaps with outdoor grout paste.
- Paint lettering and decorations using weather-resistant acrylic paint for clear, durable results.
- Practice your design and lettering on scrap wood to avoid mistakes on your finished sign.
- Secure heavy or awkward recycled elements with outdoor screws or strong outdoor glue for stability.
Costs depend on what materials you already have on hand and any supplies you need to buy, like outdoor adhesive or sealant, which usually costs around $5 to $15 per project. Good results include weather-resistant finishes, clean lettering, and securely attached embellishments. Signs that aren’t prepped properly may experience peeling paint, loose mosaic pieces, or rust spreading from metal parts. Taking time to prepare and protect each material keeps your garden sign looking great season after season.
Lettering and Painting Tips for Clear Garden Signs
For garden signs, readability depends a lot on letter size and clarity. Letters should be at least 1 inch tall for viewers standing a few feet away. For signs meant to be read from 10 feet or more, use letters that are 3 to 4 inches tall. Larger letters stand out better among outdoor garden foliage. Choose simple fonts or basic block letters for best legibility. Avoid fancy scripts that get lost on textured materials like wood or canvas.
Lettering methods include freehand painting or using stencils. Freehand works well if you have steady hands and some brush skills. Use fine brushes and acrylic or outdoor paint for crisp strokes. Stencils are a safer choice for perfect, uniform letters and prevent mistakes. Letter stencils can cost between $5 to $20, depending on size and complexity, and they save time when making repetitive or multiple signs.
Paint bleeding is common, especially on rough surfaces like wood or fabric. To avoid this, lightly sand wood surfaces before painting to smooth fibers. Apply a primer designed for outdoor use to seal porous materials. When using stencils, secure them with painter’s tape or repositionable spray adhesive to keep edges tight. Use a dry brush technique: dip your brush lightly into paint and remove excess before tapping gently over the stencil. This limits paint seepage beneath stencil edges.
Fading happens from sun and rain, so use high-quality acrylic or outdoor latex paint designed for weather resistance. Let paint dry fully between coats, usually 1 to 2 hours in ideal temperatures between 50°F and 85°F. After painting, seal the whole sign with a clear waterproof sealer, such as a spray or brush-on polyurethane designed for outdoor use.
| Technique | When to Use | Cost Range | Key Tip for Best Results |
|---|---|---|---|
| Freehand Painting | Small signs, creative fonts, personal touch | Under $10 (paint and brushes) | Use fine brushes and steady hands, multiple thin coats |
| Letter Stencils | Uniform lettering, multiple signs, beginner-friendly | $5 to $20 per stencil set | Secure stencil firmly, dry brush technique prevents bleed |
| Sanding and Priming | Rough wood or fabric surfaces | $5 to $15 for primer and sandpaper | Lightly sand, then prime to seal for smooth paint application |
| Weatherproof Paint and Sealer | All outdoor signs for longevity | $10 to $25 per quart | Use outdoor acrylic paint plus a UV-resistant clear sealant |
Combining these techniques depends on your materials and goals. For example, painting a simple herb label on a small recycled wood scrap might only require freehand and outdoor craft paint. A larger welcoming garden sign or directional arrow benefits from stenciled letters and several protective layers. Clear, legible paint that stands out in your garden keeps visitors informed and adds charm to your space.
Common Mistakes in DIY Garden Signs and How to Fix Them
Signs often fade or peel quickly because they lack proper weatherproofing and use the wrong materials for outdoor exposure. Using untreated wood or regular paint invites moisture and sun damage, causing colors to dull and surfaces to flake. Applying a high-quality outdoor sealer or marine varnish after the paint dries creates a durable protective layer. This layer blocks UV rays and water, extending your sign’s lifespan significantly, sometimes up to five years, depending on your climate.
Uneven lettering and paint drips usually stem from rushing or using unsuitable brushes and paints. To fix this, start by sanding the sign smooth before painting to create a flat surface. Use fine-tipped brushes or paint markers made for outdoor use to control lines better. Practice on scrap wood to steady your hand, and apply multiple thin coats rather than a single thick one. If drips happen, let the paint dry completely, then lightly sand the affected area and repaint for a clean finish.
Warping and cracking typically occur in wood signs that haven’t been properly sealed or acclimated before installation. Wood absorbs moisture and expands or shrinks with temperature changes. To prevent this, store your wood indoors for 48 hours before painting. Seal all sides, front, back, and edges, before adding lettering to keep moisture out. For repairs, use a wood filler or epoxy for cracks and clamp warped pieces after moistening to reshape, then reseal once dry.
- Sand the wood smooth before every paint application to improve adhesion.
- Apply at least two coats of a UV-resistant outdoor sealer, allowing 24 hours drying time between coats.
- Use acrylic outdoor paints or enamel paint designed for metal or wood for long-lasting color.
- Choose brushes with synthetic bristles to avoid streaks and drips.
- Seal all edges of the sign, including the back, to prevent moisture intrusion.
- Practice lettering with stencils or painter’s tape to keep lines crisp and even.
- Check weather conditions; paint in dry weather above 50°F (10°C) for best results.
Protect your sign by applying a clear coat of outdoor polyurethane or spar varnish after painting; this step prevents rapid fading and peeling.
Fixing common mistakes takes patience and the right materials. High-quality paints, proper sealing, and careful application matter more than speed. These corrections help your garden sign remain a charming and clear feature in your outdoor space for years.
Displaying and Installing Garden Signs Securely
Securing garden signs properly ensures they last longer and stay visible without tipping over or getting damaged. The right stakes, screws, and hanging hardware matched with careful placement will stabilize your sign in various garden settings, whether it’s mounted in soil, on wood, or attached to a gate.
Choosing Stakes and Support Materials
Choosing the right stakes or support depends on the size and weight of your garden sign. Wooden stakes made from 2×2 lumber can handle heavier signs securely and can be sealed with polyurethane for weather resistance. For lighter signs, sturdy wooden or metal stakes work well and can be pushed directly into the soil. Floral craft wire also adds flexibility for securing irregularly shaped signs or reinforcing with stakes.
In situations where you want to hang a sign, cup hooks combined with 1/2-inch wood screws offer reliable support, especially for wooden boards or pallet-style signs. Using existing structures like fences or gates lets you use hooks or wire without needing ground-based stakes, which is ideal for better visibility or when the ground is too rocky or compacted.
Using Screws, Hooks, and Wire Safely
Proper hardware installation prevents damage and improves sign stability. Use screws that are long enough to hold securely but not so long that they split wood, 1/2-inch wood screws usually work well for medium thickness boards. Place screws near the edges for better grip and use two hooks or screws spaced evenly to avoid wobbling.
Floral craft wire can be wrapped tightly around stakes or support beams to stabilize signs that might catch the wind, but avoid overtightening as this can warp or tear delicate materials like fabric or thin wood. When hanging signs, ensure hooks are firmly screwed into solid wood or studs. Avoid attaching into weak or rotten wood, which won’t support weight and can cause signs to fall.
Tips for Placement and Visibility
Place your garden sign where it complements the landscape but remains easy to see without obstructing plants or paths. For ground stakes, push them at least 6 to 8 inches deep to prevent tipping. In windy areas, consider adding a brace or using heavier stakes. Placing signs near eye level, such as hanging on gates or fences, improves visibility for guests and passersby.
Think about sun exposure and weather too. Signs placed on the south side of your garden might face more sun, requiring weatherproof finishes. Position signs where they won’t be damaged by garden tools, regular watering, or foot traffic to keep them in good shape longer. Follow these steps to mount your garden sign securely for the best combination of stability and visibility:
- Measure the size and weight of your sign to determine the required support method.
- Select stakes or hanging hardware suited to the sign’s material and your garden setting (wood stakes, metal stakes, cup hooks, or floral wire).
- If using stakes, drive them vertically at least 6-8 inches into the ground for stability.
- Attach the sign to the stakes using screws or wrap tightly with floral craft wire for extra support.
- When hanging, screw cup hooks into solid wood structures like gates or fences.
- Hang the sign on hooks ensuring it hangs evenly and check for secure fit.
- Apply a protective sealant to wood before installation to guard against weather damage.
- Place the sign in a visible spot clear of obstructions, with easy access for maintenance.
Protecting Garden Signs from Weather and Wear
Protecting your garden signs from weather and wear means choosing the right sealants and finishes. Outdoor conditions such as sun, rain, wind, and temperature changes cause wood and paint to fade, crack, or peel over time. Applying a durable outdoor sealant gives your garden sign a longer lifespan and keeps your design looking fresh. Water-based polyurethane and spar varnish are two popular sealants for wooden signs because they resist moisture and UV rays. Spar varnish offers more flexibility and is better for signs exposed to direct sun, but it takes longer to dry and often costs between $10 and $20 for a quart.
Eco-friendly options include natural oils like tung or linseed oil, which soak into the wood and provide water resistance without harsh chemicals. These oils require more frequent applications, about every 6 to 12 months, and they offer a subtler finish than synthetic sealants. For painted or vinyl-covered signs, a clear acrylic spray can protect colors and lettering without clouding the design.
- Clean the sign’s surface thoroughly before sealing to remove dirt and dust
- Apply sealants or finishes in a well-ventilated area, following product instructions on temperature and drying time
- Use at least two thin coats rather than one thick coat for better protection
- Reseal wooden signs every 1 to 2 years depending on exposure and product type
- Touch up paint or lettering yearly to prevent fading and cracking
- Cover or store signs indoors during harsh winter months if possible
Maintenance routines involve inspecting your garden signs seasonally. Check for signs of wear such as peeling, blistering, or cracking. Light sanding before resealing helps maintain a smooth surface and improves sealant adhesion. DIY gardeners often find that refreshing the protective coating every fall after the growing season balances effort and lasting protection. Avoid sealants with strong solvents if the sign is near edible plants, and always wear gloves and a mask when applying chemicals.
Signs made with reclaimed wood will generally require thorough drying and sanding before sealing. Their aged surface can absorb oils and varnishes unevenly, so expect to apply multiple coats for uniform protection. The cost of sealants varies widely, so seek options priced between $10 and $30 per quart for balancing quality and budget. A well-protected garden sign should repel water, retain color vibrancy, and show minimal wear after a full season outdoors.
Personalized and Themed Garden Sign Ideas
Personalizing your garden signs makes your outdoor space more inviting and reflects your personality. Adding popular sayings like “Grow with love,” “Herbs for health,” or “Garden of dreams” brings warmth and charm while clearly marking areas. You can also include family names or phrases, such as “The Wilson Family Garden” or “Mom’s Herb Patch,” to tie the plants to your home and make your garden feel unique.
Garden signs can be both functional and fun. Since they often label herbs, vegetables, or flowers, using different lettering styles like calligraphy or stencil fonts can improve legibility and style. Besides identifying plants, consider humorous or playful messages like “Plant Whisperer” or “Bee Kind” to make visitors smile. Using various materials like wood or metal allows custom shapes and sizes that fit your garden’s theme, whether rustic, modern, or whimsical. To get started, try these creative wording and style ideas:
- Etch plant names on a 3×8 inch birch plywood plaque using a wood-burning tool or laser engraver for an elegant, durable look.
- Stencil family names or seasonal greetings with acrylic paint on weather-resistant wooden boards stained for a rustic feel.
- Add small metal cutouts of herb or vegetable names to place stakes in potted plants or herb beds.
- Create ceramic signs with garden-related quotes or plant labels to hang on garden walls or attach to flower pots.
- Write funny sayings on reclaimed wood for a budget-friendly and eco-conscious garden accent.
- Combine lettering and simple images like leaves or flowers to show plant types clearly and artistically.
Personalized garden signs also make thoughtful gifts that can strengthen family connections or friendships, especially around holidays. The cost mainly depends on materials, birch plywood and a wood-burning tool can total around $15 to $30 for small projects, while paint and stencils are often less expensive. You will need enough drying time for paint, usually 24 hours, and proper sealing to protect against sun and rain.
Make sure to seal wooden signs with an outdoor varnish or sealant every year to prevent fading and water damage.
Good results show a clear, readable sign lasting multiple seasons without peeling or warping. Problems like blurred lettering or signs rotting early often come from skipping sealing or using indoor-only paints. Adjusting font size or contrast improves readability from a distance. Balancing style choices with durability ensures your personalized garden signs stay meaningful and add fun to your outdoor space for years.
Safety Considerations and When to Get Professional Help
Wearing the right safety gear prevents common injuries when making your garden sign. Always use safety glasses or goggles to protect your eyes from sawdust, splinters, and paint splashes. A dust mask or respirator is essential, especially if you are sanding wood or using spray paint and sealants, as inhaling fine particles and fumes can harm your lungs. Gloves, preferably cut-resistant, help avoid splinters and minor cuts from sharp tools or rough materials. Hearing protection is necessary if you use loud power tools for prolonged periods.
Power tools like electric saws, sanders, and wood burners can be safe at home if you follow precise precautions. Read the tool’s manual first and ensure your work area has good lighting and ventilation. Secure the material firmly before cutting or sanding to prevent slips. Wood burning involves hot tips reaching between 650°F and 900°F, so do not touch the tip, work on a fire-resistant surface, and keep a fire extinguisher nearby. Working slowly and taking breaks reduces fatigue that can lead to accidents.
Certain situations call for professional help. You should consider hiring an expert if your garden sign design requires complex wood joinery, detailed metalwork, or electrical components such as lighting that you are unfamiliar with. Professionals have the proper tools and training to avoid costly mistakes or dangers like electrical shocks. Purchasing a DIY kit simplifies the project by providing pre-cut materials and step-by-step instructions, reducing your risk and project time. Kits typically cost between $20 and $60 depending on size, material, and complexity, which may be worth it if you want a safer, easier experience. Use this checklist before starting your DIY garden sign project for safety:
- Wear safety glasses, a dust mask, gloves, and hearing protection.
- Work in a well-lit, ventilated, and organized space free of tripping hazards.
- Secure your materials before cutting or sanding.
- Follow all tool instructions closely; do not bypass safety features.
- Keep a first aid kit and fire extinguisher on hand.
- Avoid working with hot tools like wood burners near flammable materials.
- Consult or hire a professional for electrical work or advanced carpentry.
Taking these precautions reduces accidents and improves results. If you notice unusual tool vibrations, difficulty controlling the tool, or you feel tired and unfocused, pause the work to prevent mistakes or injuries. Safety might add time or minor extra cost but protects you and your creativity in the long run.
Step-by-Step Action Plan for Your DIY Garden Sign
Start creating your custom garden sign today by following these clear, timed steps. This will keep your project on track and ensure a durable, attractive result.
- Before You Start: Choose your sign material based on your garden style and weather exposure. Test a small section with paint or sealant to see how it holds up.
- Day 1: Gather all necessary tools and supplies like wood, paint, brushes, stencils, or fabric. Confirm you have everything to avoid delays.
- Day 2: Prepare your base material by sanding wood or stretching fabric tight. It should feel smooth and ready to accept paint or markers.
- Day 3: Sketch your design lightly with pencil or chalk. Check for clear spacing and readability from a short distance.
- Day 4: Paint or decorate your sign, following recommended drying times to avoid smudges or uneven coverage.
- After 1 Week: Apply a weatherproof sealant to protect your sign. It should feel dry and smooth without tackiness.
- Day 10: Install your sign securely using stakes, hooks, or mounting hardware appropriate for your garden soil or wall type.
- After 2 Weeks: Inspect your sign for wear or peeling and touch up as needed to maintain a fresh appearance.
Frequently Asked Questions
What Materials Are Best for Making a Budget-Friendly DIY Garden Sign?
Wood and recycled cardboard are affordable and easy materials for garden signs, often costing under $10. These materials allow you to customize your sign without spending much, making them perfect for budget-friendly projects.
How Can Recycled Materials Be Used Creatively for Garden Signs?
You can turn thrift store finds like old wood or metal trays into unique, rustic signs. Upcycling adds character and reduces waste, giving your garden a personalized touch with minimal cost.
What Are Some Safe Paints to Use on Garden Signs Exposed to Weather?
Look for outdoor acrylic or latex paints as they resist fading and peeling in weather. These paints protect your sign’s colors and prevent damage from sun and rain.
How Do I Secure DIY Garden Signs to Withstand Strong Winds?
Use sturdy stakes or heavy bases anchored deep into the soil to keep your sign stable. This prevents your sign from tipping or blowing away in gusty conditions.
Can I Use Fabric for Garden Signs That Last Outdoors?
Yes, canvas and treated fabrics can endure weather if coated with waterproof sealants. This extends the life of your fabric sign while maintaining vibrant colors and softness.
Are There Simple Ways to Make Garden Sign Lettering Clearer for Readability?
Using stencils or vinyl letters helps keep text neat and consistent, improving readability. Choosing contrasting colors between the background and letters also makes your sign easier to see from a distance.
Final Thoughts
Making your own garden sign gives you a practical way to personalize your space while improving its charm. Choose materials and designs that suit your style and weather conditions, then follow through with proper sealing and installation. Start with one simple sign and build your skills and collection as you go.