How to Wood Burn Letters: A Complete Guide with Pro Tips & Methods
How to wood burn letters involves using a heated tool to etch clean, precise designs onto smooth, prepared wood. Start with a fine-grain wood like basswood or maple, sanded to about 220 grit for a clean surface. Use a quality wood burning tool heated to around 700 °F to create solid outlines and clear lettering.
Key Takeaways
- Choose fine-grained, untreated wood such as basswood, maple, or cherry for best burning results.
- Sand the wood surface smoothly with 220-grit sandpaper, then wipe off dust before burning.
- Draw letters freehand or use a template to ensure consistent letter shapes and sizes.
- Transfer your design by printing it to scale or using carbon paper onto the wood surface.
- Allow your wood burner to heat fully, usually 5 to 10 minutes, before starting your work.
- Practice your burning technique on scrap wood to achieve smooth lines and control depth.
How to Burn Letters on Wood Step-by-Step
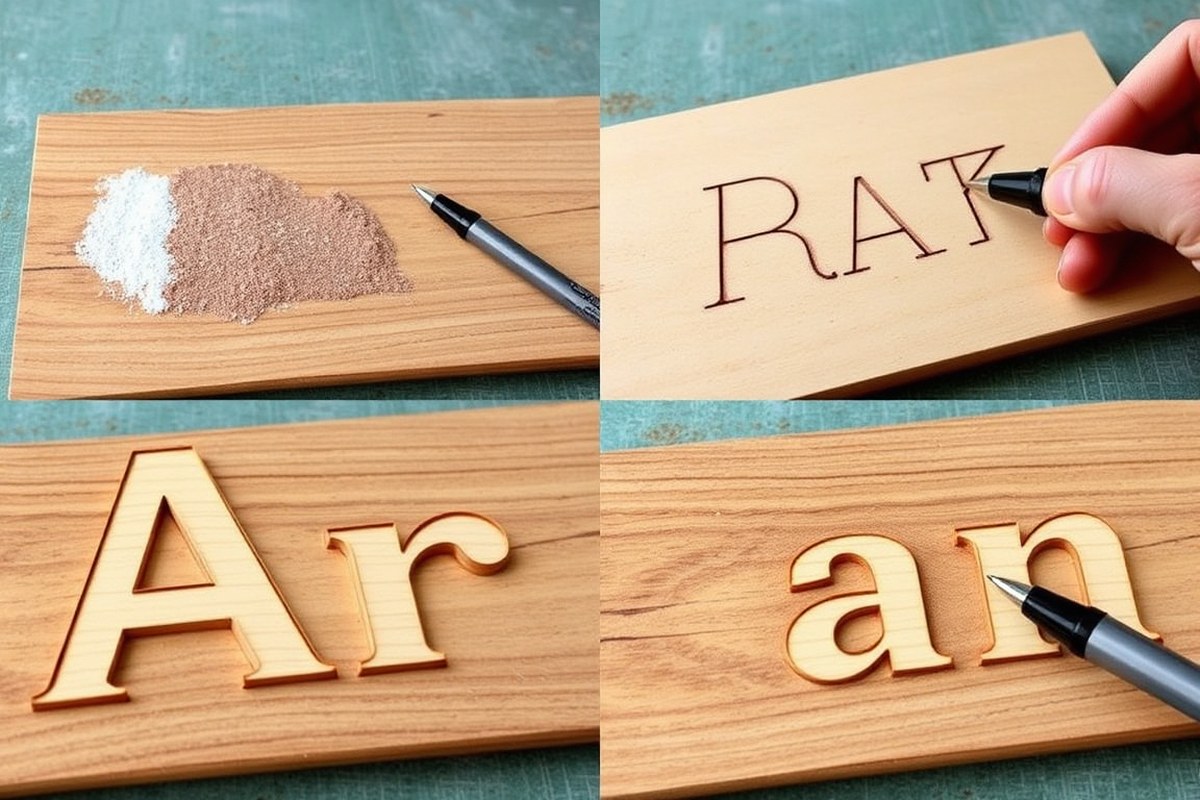
Burning letters into wood requires patience, a steady hand, and the right sequence of steps. Proper preparation ensures your letters come out neat and clear. The process generally involves cleaning and smoothing the surface, transferring your design, carefully burning the letters, and finishing the wood to protect your work. Expect the entire process to take anywhere from 1 to 3 hours, depending on the complexity and size of the lettering.
- Sand the Wood Surface Smooth. Use medium, then fine-grit sandpaper (around 120 to 220 grit) to remove any coatings and create an even surface. This step should take 10 to 20 minutes. A smooth surface helps the burning tool move steadily and produces crisp lines without grain interference.
- Trace Your Letter Design onto the Wood. Lightly draw the letters with a pencil or use transfer paper to place a printed design. This step usually takes 10 to 15 minutes depending on the detail of your letters. Clear outlines serve as guides to prevent drifting lines when burning.
- Set Up Your Wood-Burning Tool. Choose a wood-burning pen with a fine tip for lettering. Heat it according to the manufacturer’s instructions, generally taking 5 to 10 minutes. Test the heat on scrap wood until the tip creates a medium-dark burn without smoke or charring.
- Begin Burning the Letters with Steady Movements. Follow your pencil lines at a consistent speed, using smooth, continuous strokes. Do not pause on corners to avoid dark blobs. This step varies widely but plan for 20 to 40 minutes for typical projects. You can slightly slow down to darken and deepen particular sections for emphasis.
- Correct Any Fuzzy or Uneven Edges. If lines look fuzzy or ragged, lightly burn over them at a slower pace or sharpen your tool’s tip. Avoid cutting across the grain aggressively, which causes tearing. Fixing small imperfections might take 5 to 10 minutes.
- Erase Any Visible Pencil Marks. After you finish burning the letters and the wood cools, gently erase remaining pencil lines with a soft eraser. Take care not to rub hard or damage the burned areas. This cleanup usually takes about 5 minutes.
- Apply a Finish to Protect the Wood and Letters. Choose a clear wood finish such as polyurethane or tung oil. Apply a thin coat with a brush or cloth and allow it to dry for several hours. Finishing seals the burned letters and prevents fading or damage.
These steps cover the essential flow from a blank wood piece to a finished product with clear, attractive lettering. Adjust timing and temperature to your specific wood and tool. Practicing on scrap wood beforehand helps you build a steady hand and control over the burn depth and darkness.
Choosing and Preparing Wood for Letter Burning
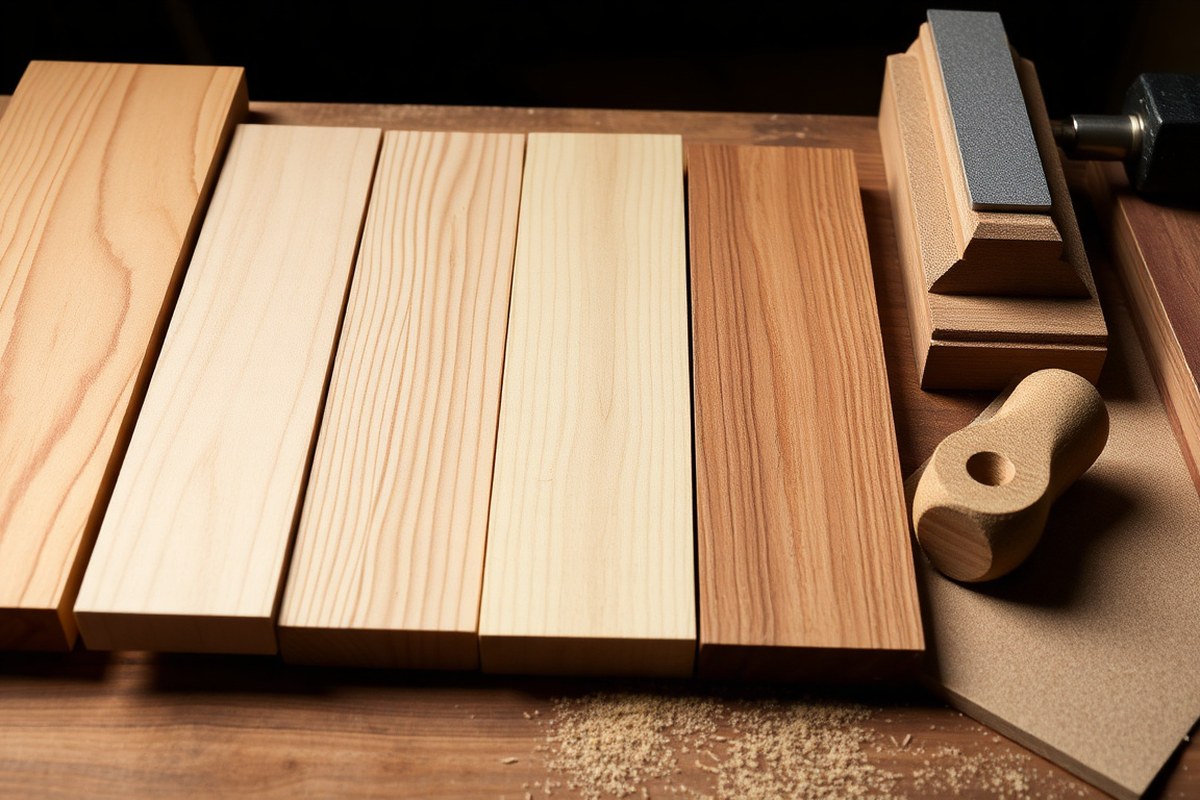
Choose soft, light-colored woods with tight, uniform grain for the best results in wood burning letters. Prepare the surface by sanding progressively up to 220 grit to ensure smooth, even burning. Avoid pressure-treated or resinous woods as chemicals and sap impede heating and damage tools.
Best Wood Types for Burning Letters
Basswood is the top pick for wood burning letters because it’s soft, pale, and has an even grain. It allows your letters to appear clear without needing extra force on your wood burning tool. Maple works well too, offering a smooth surface that holds fine detail, but it burns more slowly and requires a hotter, more patient approach. Cherry’s fine grain and subtle color shifts add character to your lettering but mildly darken over time, improving contrast. On the other hand, woods like oak have an open, coarse grain that leads to splintering during fine strokes, reducing letter precision. Pine is generally softer but varies widely due to resin pockets and visible growth rings, which can disrupt letter clarity.
| Wood | Burning Suitability | Notes |
|---|---|---|
| Basswood | Excellent | Soft, pale, smooth grain, easy to burn letters clearly |
| Maple | Good | Harder, smooth, holds detail but burns slowly |
| Cherry | Good | Fine grain, color darkens over time, good contrast |
| Oak | Poor for fine letter burning | Coarse grain, prone to chipping on fine lines |
| Pine | Variable | Soft but resin pockets and grain contrast can disrupt letters |
How Wood Grain Impacts Letter Clarity
Wood grain direction and texture influence how clearly your letters will appear. Woods with minimal or tight grain provide a consistent surface for burning marks, helping letters stand out sharply. Open-grained woods cause uneven burning; the heat may burn deeper in softer ring areas and shallower over hard grain parts, making letters look blotchy or irregular. Grain direction also matters, burning across the grain can produce less crisp edges than burning along it. Choose woods with fine, even grain to reduce fiddling with heat settings during burning and to achieve smooth letter edges with less effort.
Preparing Wood Surface for Clear Letters
Sand the wood progressively using 120 grit sandpaper at first to smooth rough edges or saw marks. Follow with 180 grit sandpaper to refine the surface further and remove scratches. Finish sanding with 220 grit to create a surface smooth enough for consistent letter burning. Clean the wood of dust and debris with a dry cloth before you start burning. Avoid using tack cloths or water as they can alter how the wood burns. Proper sanding ensures the heated tip glides smoothly, creating consistent scorch marks for crisp, professional-looking letters.
Why Avoid Pressure-Treated and Resinous Woods
Pressure-treated woods contain chemicals that can release toxic fumes when burned. They also tend to be harder and have inconsistent surfaces, making it difficult to control your burning tool precisely. Pine and other resinous woods have sap that can clog wood burning tips and cause uneven marking due to inconsistent heat absorption. These materials reduce tool life and affect letter clarity. Stick to clean, untreated hardwoods or softwoods recommended for burning to protect your tools and your health.
Preparation Checklist for Wood Burning Letters
Start with a clean, dry, untreated wood piece that matches your letter burning need. Select wood with light coloration and fine grain like basswood or cherry to maximize letter visibility. Sand using 120, then 180, and finally 220 grit sandpaper, wiping dust off completely after every step. Avoid using woods with visible resin pockets or chemical treatments. Test burn a small, inconspicuous area to adjust your tool’s heat and verify the wood’s reaction before starting your lettering. This checklist can help prevent issues like blotchy burns or uneven letters.
Use 220 grit sandpaper for final smoothing; rougher grit leaves tiny ridges that disrupt letter clarity when burning.
Tools and Materials for Wood Burning Letters
You need a reliable wood burning pen with interchangeable tips designed for lettering, along with materials to transfer your design onto wood and safety gear to protect yourself while working. Knowing which pen type fits your skill level and letter size helps, as do tips specialized for outlining and filling. Prepare the right surface, secure your design, and wear proper safety equipment to avoid burns or inhaling smoke.
Pyrography Pen Types and Tips
The core tool for burning letters is a pyrography pen, also called a wood burning pen. Beginners can start with a simple single-temperature craft pen costing about $15 to $30, which heats to a fixed level. More experienced crafters often prefer variable temperature stations in the $40 to $100 range, since adjusting heat helps create smoother, more even burns across different woods.
Tips come in various shapes and sizes, each serving a purpose in lettering. Fine-point tips are best for crisp outlines, while larger or rounded tips fill letters quickly and enable shading. Choose the tip size based on letter thickness; thick letters need bigger tips for faster coverage. Using the right tip cuts your work time and improves appearance.
| Tool or Tip | Description | Best Use |
|---|---|---|
| Single-Temperature Wood Burning Pen | Fixed heat, basic pen often included in beginner kits | Simple, small lettering for beginners |
| Variable Temperature Station | Adjustable heat for better control on different woods | Advanced lettering, shading, various wood types |
| Fine-Point Tip | Sharp, narrow tip for detailed lines | Outlining letters or small scripts |
| Large-Round Tip | Thick, rounded tip for filling and shading | Bold, thick letters and quick filling |
| Specialty Tips (e.g., Calligraphy Tips) | Custom shapes for decorative strokes | Artistic letter styles and texture |
Sharp tips heat quickly and hold heat to burn clean lines. To avoid uneven burning, let the tool reach the right temperature before touching the wood. Adjust the temperature for harder or softer woods as needed to prevent scorching or faint marks.
Design Transfer Materials
To transfer your printed or hand-drawn lettering design onto wood, use graphite (carbon) paper. Place the graphite paper between your wood surface and the printout, then tape both securely to avoid shifting. Trace over the letters firmly with a pen or pencil to leave a clear outline on the wood. Make sure letter size matches your intended space on the wood piece.
For larger lettering, ensure your tips match the scale of your design. Also, having a ruler and pencil handy helps mark precise placement of your text. Some crafters use light sanding on the wood surface before transfer to improve graphite adhesion and final burn quality.
Essential Safety Gear
Wood burning produces heat, fumes, and smoke that can be hazardous. Always wear heat-resistant gloves to protect your hands from accidental burns. Safety glasses protect your eyes from ash or splinters. Work in a well-ventilated room or use a small fan to carry away smoke and fumes.
Keep a fire extinguisher nearby, and never leave your wood burner unattended while plugged in or hot. Avoid synthetic or treated woods that produce toxic fumes when burned. Follow all label instructions on your pyrography tool.
| Safety Equipment | Purpose |
|---|---|
| Heat-Resistant Gloves | Protect fingers and hands from hot tool and wood |
| Safety Glasses | Shield eyes from wood particles and ash |
| Ventilation/Fan | Remove smoke and fumes for safer air quality |
| Fire Extinguisher | Immediate fire control in emergencies |
How to Design and Transfer Letters Onto Wood
Designing and transferring letters onto wood calls for clear planning and an accurate method. Creating your design on paper or a computer first helps ensure the layout and style are right. Then, using tools like carbon paper or drawing freehand lets you place your letters neatly on the wood before burning.
Printing and Preparing Your Design
Start by making your lettering design on paper, either by hand or with a computer program. Choose fonts and sizes that suit the wood size and desired look. Keeping the letters clean and simple usually works best for beginners.
Once printed or finalized, cut the design to fit the wood area where you’ll burn the letters. This step prevents mistakes by matching the design space exactly. It also helps to practice burning on scrap wood with your chosen style and size before moving to the final piece.
Using Carbon Paper for Transfer
Carbon or graphite paper is the most common and reliable method for transferring printed designs onto wood. It lets you replicate your lettering precisely by tracing. Here’s a practical list of steps to transfer your letters using carbon paper:
- Place the carbon paper shiny side down onto the wood surface.
- Position your printed or drawn design face-up on top of the carbon paper.
- Secure both papers with tape or clips to avoid shifting during tracing.
- Use a sharp pencil or stylus to firmly trace over each letter on the design.
- Lift the top papers carefully to check if all letters transferred clearly.
- Touch up any faint spots on the wood with a pencil before burning.
- Remove the carbon paper entirely to get a clear outline on the wood.
This method’s advantages include accuracy and easy replication of complex fonts. Carbon paper costs about $5 to $10 for a pack, making it affordable. On the downside, light or uneven pressure can cause incomplete transfers, requiring careful tracing and sometimes redoing.
Freehand Drawing Tips and Tricks
Drawing letters directly onto the wood can be quicker but demands steadier hand control. This method works for those comfortable with basic drawing and less rigid designs.
Beginners may find it challenging to keep letters uniform, but small practice exercises on scrap pieces improve skill. Use a fine pencil or light-colored marker to sketch letters. You can also use simple guides like rulers or stencils for straight lines and consistent size.
Freehand’s pros: no need for extra materials and immediate corrections. Its cons: higher chance of uneven letters and more time spent erasing and correcting. For beginners, starting with printed designs plus carbon transfer often leads to cleaner, more professional results.
Mastering the Burning Technique for Clear Letters
Controlling heat, speed, and stroke is key to creating clean, sharp letters with consistent shading when wood burning. Adjust the temperature of your pyrography tool based on the wood type. Softer woods like basswood or birch usually require lower heat settings, around 650°F to 750°F, because high temperatures can easily scorch or create uneven burn marks. Harder woods may need a higher setting, up to 850°F, to produce a clear, dark line without excessive pressing.
Speed plays a critical role in the quality of your lettering. Move the pen tip steadily and continuously to avoid dark blobs caused by pausing too long. A good rule is to maintain even pressure and keep your strokes flowing. For outlines, use slow, controlled movements with a fine tip or shader point to get crisp edges. Avoid rushing, which can cause uneven lines or blurry edges. For filling letters, use smooth, parallel strokes that lightly overlap to achieve uniform darkness without burning too deeply.
Stroke method also impacts clarity. Start by lightly tracing the letter’s outline on the wood. Once the edges are defined, fill the interior with slightly lighter, quick strokes. Pressing too hard is a common mistake; it can create grooves or uneven depth, making the letters look rough. Instead, rely on multiple passes with gentle pressure to build darkness gradually. This prevents burning through the wood and keeps your letters clean.
Avoid stopping your pen tip on the wood surface to prevent dark spots. If you need to pause, lift the tip clear, then continue. Keep your work area well-lit to see the early shades of burning. This helps you judge when to slow down or adjust heat. Consistency is more important than speed; slowing slightly when you notice the wood getting too dark will improve results.
Different woods react to heat and speed in distinct ways. For example, pine tends to burn quickly and unevenly due to its resin content, so lower heat and faster strokes work better. Birch burns evenly, making it forgiving for beginners. Always test your heat and speed on a scrap piece of the same wood before starting the main project.
Maintain a steady hand and keep the pyrography tool moving; stopping on the wood tip leads to dark marks that are hard to fix.
Finishing and Caring for Wood-Burned Lettering
Protecting your wood-burned letters is key to preserving both the artwork and the wood surface. After completing the burning, allow the piece to cool and off-gas for at least 24 hours in a dust-free area. This prevents smudging or accidental damage before applying a finish. Using a clear finish improve the contrast of the burn and prevents fading or wear from handling, sunlight, and moisture.
Popular finishes for wood-burned letters include clear polyurethane, water-based varnishes, and natural oils like tung or linseed oil. Clear polyurethane in satin or matte finish works well to seal and protect without adding shine. Apply two to three thin coats with a synthetic brush, allowing 4 to 6 hours of drying time between coats at room temperature. Water-based varnishes dry faster and have less odor, which suits indoor projects. Natural oils penetrate the wood, improving grain and color, but require multiple applications over weeks for full protection.
Before applying any finish, lightly sand the wood with fine-grit sandpaper (320-400 grit) to smooth out rough edges around the burnt lines, being careful not to sand away the letters. Wipe the surface clean with a tack cloth or damp rag to remove all sanding dust. Use a soft cloth or foam brush to apply the finish evenly, following the wood grain direction. Avoid heavy coats or drips, which can obscure the fine lines of your burned letters. Let each coat dry fully before applying the next to ensure durability.
Tool maintenance extends the life of your wood burning pen and ensures consistent performance. After each use, unplug and let the tool cool completely before handling. Use a brass sponge or fine steel wool to gently clean the tip while warm (not hot), removing carbon buildup and residue. Avoid using water or abrasive cleaners on the hot tip as this can cause damage. Store the tool in a dry, dust-free place with the tip protected by the manufacturer’s cover or in a case to prevent bending or contamination.
Inspect the tips regularly for wear or deformation. Replace tips when they no longer hold heat well or produce clean lines, which varies depending on usage but generally after 20 to 30 hours of burning. Keeping your workspace clean and free from sawdust or oils will also protect your tools and your finished pieces. This care routine takes just a few minutes after every project and can prevent costly tip replacements or inconsistent burning results.
Comparing Methods for Burning Letters on Wood
Choosing the right method to burn letters on wood depends on your skill level, project type, and budget. Pyrography pens offer fine control and flexibility, making them ideal for beginners and detailed work. Branding irons provide quick, consistent results but with less detail. Laser engraving delivers precise, professional-quality lettering suited for repeat projects, although access and cost can be barriers.
| Method | Skill Level | Cost Range | Speed | Result Quality | Best Use |
|---|---|---|---|---|---|
| Pyrography Pen | Beginner to Intermediate | $20 – $150 | Moderate | High Detail | Custom, detailed lettering on softwood |
| Branding Iron | Beginner | $15 – $50 | Fast | Consistent but less detailed | Simple, repeatable designs |
| Laser Engraver | Advanced | $200 – $3,000+ | Fast to very fast | Professional, precise | Detailed, repeat orders |
Pyrography pens use an electrically heated tip that can be adjusted between roughly 650°F to 1,200°F depending on the model and wood type. They give you control over shading and line thickness, which suits names or decorative lettering on soft woods like basswood. Results are detailed but require practice to maintain consistent pressure and speed.
Branding irons heat a metal stamp to burn a uniform shape into the wood quickly. They typically don’t offer temperature control, so choosing softer woods like pine helps prevent excessive scorching. Branding irons are best for simple letters or logos you want to stamp repeatedly. The downside is less flexibility and detail, so they’re less suited for personalized or intricate designs.
Laser engraving uses a focused laser beam to burn or etch the wood surface. This method produces clean, sharp edges and consistent depth, ideal for professional projects or multiple copies of the same letter design. Laser engravers often require a workspace setup and a digital file of your letters. Costs are higher and often include maintenance fees, but the speed and precision can justify this for business or advanced hobbyists.
Safety Tips and Troubleshooting Common Problems
Working with a hot wood-burning tool demands strict safety measures to avoid injury or fire. Always use your pyrography pen in a well-ventilated area to reduce smoke inhalation. Keep a fire extinguisher or a bucket of water nearby because wood dust and shavings can ignite easily. Wear heat-resistant gloves to protect your hands from burns, especially when handling the tool’s tip, which can reach over 900°F (482°C). Avoid loose clothing or jewelry that could accidentally touch the heated parts. When you finish your session, unplug the tool and set it on a non-flammable surface until it cools completely, which can take 15 to 30 minutes. Never leave the burning tool unattended while turned on or cooling.
Uneven burns or scorch marks often happen when you press too hard or hold the tool in one spot too long. To fix this, use a fine grit sandpaper (220-grit or higher) to gently smooth the burnt area without removing too much of the surrounding wood. Then, slowly re-burn the section, moving the tip steadily and lightly to even out the tone. Practice rolling the tool between your thumb and forefinger to create smooth curving lines, improving control and reducing accidental heavy burns. Maintaining consistent speed and pressure leads to clearer lettering with less risk of scorching. If your lines are uneven because of a dull tip, replace or clean the tip according to your tool’s instructions to restore sharpness.
Smoke stains can appear as dark clouds on lighter wood or near the design edges. To limit this, burn with the tool on a lower temperature or in short bursts rather than prolonged contact. After burning, wipe the wood lightly with a soft cloth dampened with mineral spirits to lift surface smoke stains without damaging the finish. Be cautious not to over-saturate the wood. Charcoal or residue buildup on the tool tip reduces heat transfer and line quality. Turn off and unplug the pen, then clean the tip with a fine abrasive stone or steel wool once cooled. Keeping the tip clean also cuts down on smoke and uneven burning.
Always unplug your wood-burning tool before cleaning the tip to avoid burns or electrical shock.
Step-by-Step Action Plan to Start Wood Burning Letters
Follow these steps to begin your wood burning lettering project confidently and see clear progress at each stage.
- Before you start: Gather your wood burning tool, soft hardwood plank, pencil, and carbon paper. Check that your workspace is well-ventilated and free of distractions to ensure safe and focused work.
- Day 1: Practice basic strokes and letter shapes on a scrap piece of wood. You’ll know you’re ready to move on when your lines look consistent and your control feels steady.
- Day 2: Transfer your chosen lettering design onto your prepared wood using carbon paper or a stencil. The design should be clearly visible without smudging.
- Day 3: Set your wood burner to a medium heat and begin burning the outlines of the letters slowly. You’ll see the wood’s surface darken evenly without charring.
- Day 4: Fill in your letters using smooth, steady strokes, adjusting heat settings as needed. Your letters should look uniform and clean with no burning beyond the lines.
- Day 5: Lightly sand the piece with fine-grit sandpaper to remove any rough edges. The lettering should remain sharp and intact after sanding.
- Day 6: Apply a clear finish like polyurethane or a wax polish to preserve your work. After drying, the finish should be smooth and protect the wood without obscuring the burned letters.
- After 1 week: Reassess your technique by starting a new lettering piece, incorporating what you learned about heat control and stroke consistency. Improvement in speed and accuracy indicates solid progress.
Frequently Asked Questions
Can You Wood Burn Letters on Hardwood as Easily as on Softwood?
Wood burning letters on hardwood is more difficult and takes longer because hardwood is denser. Softwoods like pine are better for beginners as they scorch more easily and clearly.
How Do Humidity and Temperature Affect Wood Burning Letters?
High humidity can make wood damp, which interferes with burning and results in uneven lettering. Warm, dry conditions help the wood burn more consistently and produce clearer marks.
Is It Better to Use a Stencil or Freehand for Wood Burning Lettering?
Stencils provide consistent letter shapes and are ideal for beginners, while freehand lets you add personal flair but requires more control. Choose based on your skill and design needs.
Can You Fill Wood Burned Letters with Paint or Stain?
Yes, filling burned letters with paint or stain can improve contrast and visibility. Let the burn cool before applying paint carefully with a fine brush for cleaner results.
Does the Grain Direction of the Wood Affect Wood Burning Letters?
Yes, burning letters along the wood grain is easier and results in smoother lines. Burning against the grain can cause the wood to splinter or produce uneven burns.
What Safety Gear Should You Wear When Wood Burning Letters?
Wear a mask to avoid inhaling fumes and work in a well-ventilated area. Safety glasses protect your eyes from wood dust and any sparks.
Final Thoughts
Wood burning letters on wood demands steady hand control and attention to heat settings, but the results can add a handcrafted touch to your projects. Start with simple designs and focus on mastering the basics first. Pick a small project to apply your new skills and enjoy the satisfaction of creating personalized wood art.