How to Mask CNC Signs for Perfect Paint Fills: A Complete Guide
Learning how to mask CNC signs correctly ensures clean, sharp paint fills that improve your work’s professional look. Use high-quality masking tape or film designed for the sign’s surface to prevent paint bleed and uneven edges. Start by cleaning the sign surface before applying the mask to ensure proper adhesion and precise paint application.
Key Takeaways
- Choose masking materials based on the sign’s surface, vinyl films for smooth acrylic, paper tapes for textured wood.
- Apply masking tape in strips, overlapping slightly to cover detailed carved edges without bubbles or wrinkles.
- Use a sharp hobby knife to trim masking along cut edges for crisp, clean lines before painting.
- Remove masking tape shortly after paint dries to avoid peeling or lifting fresh paint layers.
- For multi-color signs, mask previously painted areas with low-tack tape to protect layers during subsequent fills.
- Mask deep carves with flexible vinyl films that stretch and conform without tearing or leaving gaps.
What Masking Means and Why It’s important for CNC Signs

Masking in CNC sign making means covering specific areas of your sign to keep paint from sticking where you don’t want it. This process usually involves applying a tape or film over the surface surrounding the carved or engraved areas before you fill them with paint. The goal is to create clean, sharp paint fills inside the carved grooves or raised elements without any spillover onto the surrounding material. Masking acts as a physical barrier, ensuring the paint stays confined to the intended design.
Paint bleed is the main problem that makes masking important. It occurs when paint seeps under the edges of your tape or masking material, causing messy edges or smudges outside the carved area. This can ruin the crisp look of your letters or logos, especially on signs with detailed V-carves or 3D features. Without good masking, you might see blurred lines or unwanted paint spots, requiring extra cleanup or rework that wastes time and materials.
To mask properly, you first clean your sign’s surface to remove dust and oils that might affect tape adhesion. Next, you carefully apply a high-quality masking tape or film, making sure it sticks firmly and covers all areas around your carve lines or shapes. Press down the edges firmly to avoid gaps that paint can leak through. In some cases, you may need to mask multiple layers or use specialized tapes designed for the sign’s material, like plastic or metal. After painting and curing, you remove the masking slowly to reveal sharp, professional paint fills.
Masking doesn’t add significant material cost, quality painter’s tape typically costs a few dollars per roll, and it takes just a few extra minutes per sign but delivers significant value in the final appearance. The best results come from matching the tape type and application method to your sign’s material and the paint you use. For example, acrylic crafts paint dries fast and needs careful masking to prevent shrinkage causing paint bleed, while spray paint requires tight masking edges to stop overspray from reaching unwanted areas.
Signs made with CNC routers or laser machines often feature intricate designs and deep grooves that demand precise painting. Masking ensures those grooves get full, even paint coverage without affecting flat or surrounding areas. This is especially important when creating multi-color or layered signs, though that’s a more advanced process. For simpler single-color fills, masking remains your best defense against blurred edges and messy paint jobs, keeping your locally produced signs crisp, readable, and visually appealing.
Choosing the Right Masking Materials for Different Sign Surfaces
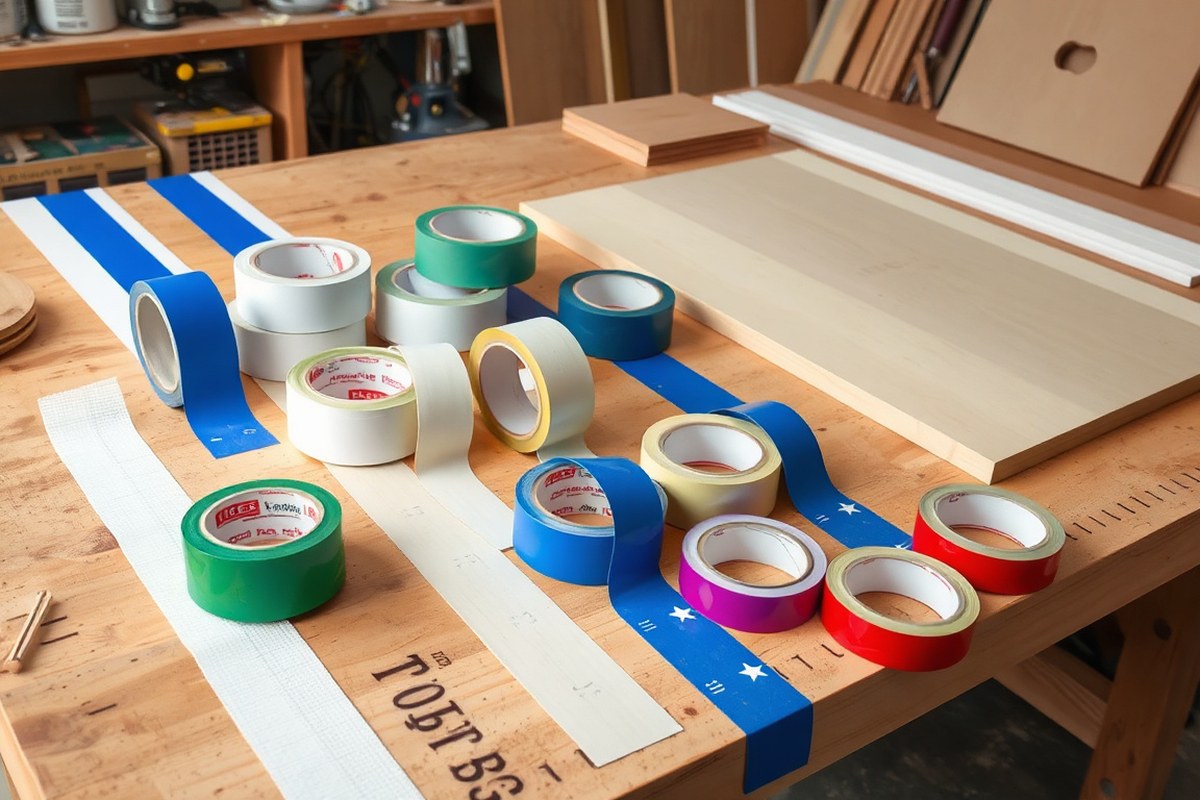
Selecting the right masking materials depends on the sign substrate you are working with. Masking tape and films serve different purposes, and choosing one that matches your CNC sign material, wood, HDU, PVC, or metal, helps prevent paint bleed, residue, or surface damage. The key factor is finding a tape that sticks well without pulling off paint or leaving sticky residue.
| Masking Material | Description | Best for Substrates | Adhesion Strength | Residue Risk | Cost Range (per roll) |
|---|---|---|---|---|---|
| Blue Painter’s Tape | Medium adhesive, designed for clean removal | Wood, HDU | Medium | Low | $5, $10 |
| Green Frog Tape | Paint-block technology, stronger adhesive | Wood, PVC, HDU | High | Low | $7, $12 |
| Delicate Surface Tape | Low tack, gentle on surfaces | Delicate woods, painted metal | Low | Very low | $10, $15 |
| Vinyl Masking Film with Adhesive Edge | Flexible plastic film, adheres around edges | PVC, HDU, metal | Medium to high | Low | $15, $25 |
| Paper Masking Tape | Basic protective tape, less precise | Wood, MDF | Low to medium | Medium | $3, $7 |
When masking carved wood signs, blue painter’s tape offers a good balance of adhesion and clean removal without damaging the natural surface. HDU, being durable and weather-resistant, pairs well with stronger tapes like green Frog Tape or vinyl masking film. These options provide a tight seal that prevents paint bleed in deeper carved sections. For PVC signs, vinyl masking film with an adhesive edge wraps around complex shapes better than tape alone, providing solid protection against paint overspray.
Metal CNC signs often have delicate finishes that can be harmed by aggressive tapes. Using delicate surface masking tape minimizes the risk of peeling paint or leaving adhesive residue. Applying tape to metal surfaces should be done carefully, pressing lightly and avoiding prolonged exposure beyond a few hours or overnight. Always remove tape slowly at a 45-degree angle to reduce surface stress.
Avoid using high-adhesion tape on freshly painted or delicate substrates to prevent surface damage, test on a small hidden area first.
Choosing the correct masking material also depends on the expected paint application method, drying time, and sign detail. For instance, when airbrushing on PVC or HDU, flexible vinyl masking films work better at covering complex curves without gaps. On flat wood surfaces with simple cuts, painter’s tape is faster and more cost-effective. Be mindful that some tapes may require immediate removal after painting to avoid residue buildup, especially in hot or humid workshop conditions.
Step-by-Step Masking Workflow for Clean Paint Fills on CNC Signs
Start by sealing the CNC sign surface to block wood grain and improve paint adhesion. Mask tape should go on after sealing and before painting. Remove tape while paint is still tacky but not wet to avoid peeling or smudging.
Preparing the Sign Surface
Begin with a smooth, clean sign surface. Sand the wood or material lightly to remove dust and smooth any rough edges created by CNC carving. Next, apply a sealant to the entire sign, including carved areas. This step prevents paint from seeping into the grain and ensures clean, sharp paint fills in recessed letters and designs.
Let the seal coat dry thoroughly before moving on; drying time usually takes between 1 and 2 hours depending on the sealant and environmental conditions. Fully sealing the surface creates a reliable base layer that helps paint only stick inside the carved grooves and reduces the need for excessive sanding later.
Applying Masking Tape Accurately
After the sealant is dry, use quality painter’s tape to mask off areas you don’t want to paint, especially the flat surrounding surfaces. Align tape flush with the edges of carved letters or features for sharp paint borders. Press tape edges down firmly to prevent paint from bleeding underneath.
Consider using narrow tape or cutting wider tape into strips for intricate or small lettering to maintain precision. Applying tape carefully reduces cleanup and sanding later. Keep tape on the sign only during the painting process and wait to remove tape until just before the paint fully cures to avoid paint pulling off.
Painting and Removing Tape
Fill carved grooves with paint next, either with a brush, roller, or paint marker for small details. Because the sign surface is sealed, paint stays inside the recesses and beads on the surface without soaking in. Let paint cure until it hardens but is still slightly tacky, typically 30 to 60 minutes depending on paint type and thickness.
Remove the masking tape carefully at this point, pulling it back slowly at a 45-degree angle to avoid peeling paint from the grooves or surface. Avoid waiting too long to remove tape, as fully cured paint can stick more strongly to tape and peel.
Once tape is removed, allow the paint fill to fully harden, usually 24 hours, before sanding the flat surface. Sand gently to remove paint overspill without sanding through the paint inside recesses. Stop sanding as soon as clean wood or sealed surface shows and the carved letters remain full of paint color.
- Sand the sign surface lightly to smooth rough spots and clean dust.
- Apply a full sealant coat to block wood grain and let it dry 1, 2 hours.
- Carefully apply painter’s tape, pressing edges down along carved details.
- Fill carved grooves with paint and let cure until tacky (30, 60 minutes).
- Remove masking tape slowly at a 45-degree angle before paint fully cures.
- Allow paint fills to harden fully, usually 24 hours.
- Sand the flat surface lightly to remove overspill without disturbing fills.
Masking Techniques for Multi-Color and Layered CNC Signs
Masking multi-color and multi-layer CNC signs requires precise separation of paint areas to keep colors sharp and prevent bleeding. It involves blocking off each color section carefully before applying paint and often using a step-by-step layering process for signs with multiple stacked layers. Following these masking techniques will help you achieve clean lines and professional-looking multi-color CNC signage.
Single-Color Blocking Techniques
Start by masking each color block individually using quality masking tape with a sharp, clean edge. Apply the tape over all areas that should remain unpainted or that will receive a different color. Use a craft knife or precision blade to trim tape precisely along the carved edges. This is especially important on V-carved details where paint lines need to be crisp and inside corners clear.
For material stability, such as MDF or plywood, ensure the surface is clean and lightly sanded before applying tape to improve adhesion. Paint tends to shrink slightly as it dries, particularly with acrylic craft paints, so double-coating are typical for vivid colors on interior signs. After painting one color and allowing it at least 30 minutes to dry, carefully peel off the masking tape before applying the next color to avoid damaging the paint edges.
Layer-by-Layer Masking Approach
For layered signs with stacked materials or relief carvings, mask each layer separately. Paint the bottom layer first; once dried, apply tape around it leaving only the exposed parts of the next layer open for painting. This approach prevents color mixing across layers and maintains clear visual distinctions in depth and color.
When working with multiple layers, test paint adhesion and drying times on scrap pieces made of the same material. Acrylics work well for quick interior multicolor signs but consider tinted epoxy for a smooth, premium finish on layers that need extra durability or gloss. Extend drying times as needed and avoid rushing between layers to minimize smudging or edge bleeding, which can ruin crisp separations.
Common Issues and Solutions
Common problems include paint bleeding under the tape, resulting in fuzzy or blurred edges. To minimize this, firmly press down the masking tape’s edges and seal them with a thin layer of clear or base paint before applying the color coat. This seals any tiny gaps and prevents pigment seepage.
Uneven surfaces can also cause tape to lift, especially on 3D features or deep grooves. Use flexible, low-tack masking films or finely trimmed vinyl decals to conform to intricate shapes without wrinkling. When you remove tape, pull it slowly back on itself at about a 45-degree angle to prevent peeling off any freshly painted sections.
Preventing and Fixing Common Masking and Paint Bleeding Issues
Paint bleed under masking tape often results from tape edges that aren’t firmly sealed or from using the wrong type of tape. This causes paint to seep beneath the mask, ruining sharp edges and requiring tedious touch-ups. Prevent paint bleed by firmly pressing down tape edges, especially around carved letters, using a hard plastic scraper or a finger wrapped in a soft cloth. Avoid stretching the tape, which can cause it to lift when paint shrinks as it dries.
Frequent mistakes you should watch for include using low-quality masking tape that doesn’t adhere well, applying paint too thickly near edges, or waiting too long to remove the tape. Waiting more than 15 minutes after painting before removing tape can lead to dried paint edges peeling off with the tape. Remove the masking tape when the paint is still tacky or slightly wet for crisp lines.
- Applying tape on dusty or oily surfaces reduces adhesion and leads to bleeding
- Masking tape overlapping itself creates uneven layers prone to seepage
- Painting in heavy coats near tape edges increases risk of bleed
- Removing tape too late can peel paint off the sign surface
- Using general-purpose tape instead of low-tack tape suited for painted wood or plastics
- Not burnishing tape edges properly before painting
- Sandpaper grit too coarse that removes masking adhesion on deep carvings
If paint seeps under tape once dried, cleanup can be tricky but not impossible. Lightly sanding the edges with 220-320 grit sandpaper smooths bleed spots without severely damaging paint fills, provided the paint layer is sufficiently thick (at least 0.5 mm). For deeper carvings, acrylic paint markers or oil-based enamel paint applied carefully with a fine brush can touch up small bleed areas without disturbing the surrounding finish. Avoid sanding too aggressively; it risks breaking through the paint depth and exposing the base material.
Remove masking tape within 10 to 15 minutes after the final coat, while the paint is still tacky, to avoid edge peel and paint lift-off.
Preventing paint bleed also means planning your paint application. Thin, even coats, applied with a fine brush or spray, reduce pressure that pushes paint under tape. For 3D carved letters, ensure the cavity depth is at least 0.125 inches to hold enough paint to survive light sanding. Shallow carvings may cause paint loss during clean-up. When working with multi-layer masking, apply each mask carefully and confirm edges are pressed down before applying paint to the next color.
Masking Deep Carves and 3D CNC Sign Features
Masking deep carves and 3D features on CNC signs requires specialized techniques to cover all recessed and raised areas precisely before painting. Using fine tapes, liquid maskants, and a combination of hand tools helps prevent paint bleed in intricate or uneven surfaces. The goal is a clean, sharp paint line that highlights the carved depth and detail without overspray or gaps.
Using Fine Tapes and Masking Fluids
For deep carvings, standard wide masking tape often lacks the flexibility to adhere well into tight corners or steep slopes. Instead, use fine, low-tack tapes like 1/16-inch or 1/8-inch precision tapes that conform easily to small contours without tearing or lifting. These tapes cost around $10 to $15 per roll but are essential for clean edges on detailed letters and patterns.
Masking fluids or liquid maskants work well on extremely uneven or complex 3D surfaces. Apply them with a small brush to fill relief cavities and hard-to-reach spots. Once dry, they create a protective film that peels off easily after painting. Choose a fast-drying formula suitable for your paint type and expect drying times of 15 to 30 minutes at room temperature (70°F). Multiple thin coats improve coverage and reduce sagging in deep cuts.
Tool-Assisted Masking Methods
Using tools like angled precision knives and fine paintbrushes improves paint masking on small letters or intricate carvings. A sharp hobby knife lets you trim masking tape precisely around tight curves and edges, minimizing excess that can cause bleed or peeling. For applying masking fluid, use synthetic brushes with pointy tips that hold liquid well for controlled application.
In some cases, applying a thin vinyl stencil cut from a craft cutter or plotter can provide sharp edges on complex shapes. Vinyl stencils are reusable and can snugly fit into recesses, making them a durable option for batch production or repeat projects. Prices start around $150 for a basic cutter but pay off when working on multiple signs with similar designs.
Best Practices for Complex Surfaces
Take time to prep the carved surface before masking. Lightly sanding and cleaning out dust from deep grooves help tapes and fluids bond better. Position the sign at a slight angle while masking to ensure tapes settle into crevices and prevent trapped air pockets.
Apply paint in several thin coats with a brush or spray at low pressure to avoid paint pooling in deep areas that can cause runs or bleed under the mask. Let each coat dry for about 20 minutes before adding the next layer. After painting, remove tapes and maskants gently and slowly, peeling back at a shallow angle to prevent chipping.
For severely uneven 3D signs like raised script letters or overlapping carvings, consider using a custom jig or frame that holds the sign steady while you mask and paint. This setup saves time and reduces errors by keeping your hands free for precision masking tools and carefully controlled paint application.
Masking Differences for Various Paint Types and Application Methods
Masking techniques differ significantly depending on the paint type and application method you choose for your CNC sign. Spray paint requires a tight seal between the masking tape and the surface since the paint can easily slip under loose edges, causing bleeding. Brush paints, including acrylics and enamels, generally have thicker consistency, so they need sturdier masking materials that can withstand the dragging force of a brush stroke without peeling off prematurely.
Epoxy paints are tougher to mask because they take longer to cure and remain sticky for hours. Masking must be both precise and durable enough to resist epoxy’s chemical strength, which can loosen cheap tapes or films. Each paint type also has a distinct drying or curing time that influences when you should remove your masking to avoid tearing edges or sticky residues.
| Paint Type | Masking Material | Drying/Curing Time | Mask Removal Timing | Key Masking Tips |
|---|---|---|---|---|
| Spray Paint (Acrylic or Enamel) | High-quality painter’s tape, low-tack vinyl film | 15-30 min touch dry; 1-2 hrs full cure | Remove within 1 hour after last coat dries to avoid peeling paint | Press tape edges firmly; work in thin layers to minimize bleed |
| Brush Paint (Acrylic or Enamel) | Masking tape with higher adhesion, paper or plastic overlayers | 1-2 hrs touch dry; 6-8 hrs full cure | Wait until paint is dry to touch but not fully cured to avoid damage | Use stencil masks for sharp edges; avoid dragging brush over tape edges |
| Epoxy Paint | Chemical-resistant vinyl or polyurethane films, strong adhesive tapes | Up to 24 hours to cure depending on formulation | Remove only after full cure to prevent edge ripping and residue | Seal edges well; avoid tape removal during tacky phase |
For spray painting CNC signs, start by cleaning your surface thoroughly and applying painter’s tape along the edges to prevent paint seepage. Press along the tape edges firmly using a burnishing tool or a credit card. Spray several thin coats instead of one heavy coat to reduce the risk of bleed. Remove the tape gently within one hour after the final coat’s dry time; waiting too long can make peeling off paint more likely.
Brush application calls for stronger masking tape since the brush’s bristles push paint against tape edges, increasing potential lift-off. Choose tapes with a chemical resistance to the specific paint solvent in your bottle. After careful brush strokes, allow the paint to dry until it’s no longer tacky, about 1 to 2 hours depending on temperature and humidity, then remove the masking. Avoid rushing because removing tape too soon might smear or tear fresh paint, while waiting too long risks tape adhesion with dried paint.
Epoxy paints demand the most patience for masking due to their extended curing periods. Use chemical-resistant vinyl films or heavy-duty masking material and seal the edges well. Allow 24 hours or more for a complete cure before peeling the mask away, which minimizes sticky residue or paint ripping. Because epoxy penetrates porous substrates, poorly sealed masks can cause bleed or uneven edges.
The best paint for masking depends on your project’s needs. Acrylic spray paints tend to be easier to work with for crisp masked edges and faster turnaround times. Brush-applied enamels provide durability but require cautious tape selection and timing. Epoxy offers superior longevity and weather resistance for outdoor CNC signs, but demands more skill and patience during masking and curing stages.
Outdoor Sign Masking: Preparing for Weather and Long-Term Durability
Outdoor CNC signs face constant exposure to moisture, sunlight, and temperature changes, so masking and sealing must address these challenges to maintain both appearance and durability. Before applying any masking tape, sealing the wood or substrate is important, especially for materials like HDU, wood, and PVC. For wood signs, apply a high-quality exterior sealant that penetrates deeply, focusing heavily on end grains and carved edges where water tends to enter first. This step helps prevent warping, cupping, and paint failure later on. Products such as exterior-rated polyurethane or spar varnish sealers work well and typically cost between $15 and $30 per quart. Allow the sealer to dry thoroughly, usually 24 hours, before proceeding with masking.
For HDU and PVC substrates, the sealing process differs. These materials don’t absorb moisture like wood, so surface cleanliness and adhesion promotion are more important than deep sealing. Use a lightly sanding step to remove surface oils and apply a specialized primer designed for plastic or HDU surfaces. This primer must cure per the manufacturer’s instructions, usually 30 minutes to 1 hour, before you mask. Masking tapes made for outdoor use with UV resistance, like 3M’s green or blue painters tape, provide a strong, weather-resistant edge to protect painted areas during spray painting or brushing.
When masking outdoor signs, choose tapes that will not leave adhesive residue after being exposed to sunlight and humidity for days. You should apply masking tape firmly and press down edges to prevent paint bleed, paying special attention to inside corners and deep carvings where more delicate masking films or liquid mask brands are helpful. For multi-texture surfaces such as carved HDU signs, a combination of thin, flexible masking tape and liquid masking film ensures clean edges without gaps in coverage. The liquid mask can fill small crevices that tape alone can’t cover, and once dried (around 15, 30 minutes), it can be peeled off easily without harming the paint.
To keep outdoor signs looking fresh for several years, finish the painted and masked sign with a high-quality, UV-resistant clear coat designed for outdoor use. A two-part polyurethane or acrylic exterior clear coat provides excellent protection against fading, cracking, and moisture intrusion. Apply at least two thin coats, allowing 2 to 4 hours drying time between coats, and more if needed at cooler temperatures. Avoid using indoor lacquers or polyurethanes as they lack the necessary additives to withstand sun and rain, causing premature failure or peeling.
Always mask outdoor signs just before painting to avoid tape losing adhesion, and remove masking tape while the paint is still tacky to prevent peeling paint or leaving residue behind.
Step-by-Step Action Plan for Masking Your CNC Signs
Follow these clear steps to mask your CNC signs effectively and achieve crisp, professional paint fills without bleed.
- Before you start: Clean your sign surface thoroughly to remove dust, oils, and debris; this ensures masking tape sticks well and paint doesn’t bleed underneath.
- Day 1: Choose the appropriate masking material based on your sign surface and paint type; verify adhesion by testing a small piece, if it peels cleanly without residue, it’s suitable.
- After preparation: Apply masking tape carefully along all carved edges using a fine brush or tool to press down edges firmly; check visually that no gaps or bubbles remain.
- Before painting: Mask any multi-layer or multi-color areas separately, allowing clean separation of colors; confirm masking integrity by lightly pressing around masked edges.
- During painting: Use thin, even coats of paint to avoid buildup that can cause bleeding; let each coat dry fully before applying the next one.
- Right after painting: Remove masking tape gently at a 45-degree angle before the paint fully cures to prevent peeling; check edges for any paint bleed to fix immediately if needed.
- After finishing: For outdoor signs, apply a clear protective coat once paint is dry to maintain masking quality over time; inspect signs periodically for wear and redo masking if repainting.
Frequently Asked Questions
How to Mask CNC Signs?
Mask CNC signs by applying adhesive vinyl or masking tape precisely over carved or engraved areas to protect them before painting. Use a squeegee to smooth the mask, ensuring no paint bleeds under the edges for a clean finish.
DIY Laser Cut Sign for the Workshop, What Do You Think?
A DIY laser cut sign is great for workshops as it offers precise, professional-looking designs on wood, acrylic, or metal. Make sure to clean edges and mask carefully for sharp paint fills.
Can I Reuse Masking Material on Multiple CNC Signs?
It’s not recommended to reuse masking material as adhesive weakens after removal, risking paint bleed or uneven coverage on new signs. Use fresh masking for each project to ensure clean edges.
How Long Should I Wait Before Removing Masking After Painting?
Wait until the paint is dry to the touch, usually 15 to 30 minutes, but remove masking before full curing to avoid peeling paint. Timing depends on paint type and environment.
Does Masking Work Differently on Laser Cut vs Routed CNC Signs?
Masking works similarly for both but laser cuts have finer edges needing more precise masking to avoid paint seepage. Routed signs may require thicker tape for deeper grooves.
What’s the Best Way to Remove Masking Without Damaging Delicate CNC Sign Surfaces?
Peel the masking slowly at a low angle to prevent lifting paint or damaging surface details. Use a sharp blade to lift tape edges if needed without scratching the sign.
Before You Go
Proper masking seals the edges of your CNC sign carvings, letting you paint clean fills and vibrant layers without bleed or smudges. Carefully choosing your materials and applying tape with attention to detail sets the stage for professional results. Your next step is to gather quality masking supplies tailored to your sign’s surface, so you can practice applying tight masks on a simple project before moving on to more complex, multi-colored designs.