Can Cricut Cut Wood? A Complete Guide for Perfect Wood Crafting
Can Cricut cut wood? Yes, but only certain Cricut machines are powerful enough to handle thin wood. The Cricut Maker and Maker 3 can cut wood up to about 3/32 inch thick using a knife blade. Other models like the Explore Air 2 and Cricut Joy cannot reliably cut wood or are limited to very thin sheets.
Start by choosing a compatible machine and officially recommended wood types like basswood or balsa wood for the best results. Thin wood sheets up to 1.5 mm are your safest bet for precise cutting.
Key Takeaways
- The Cricut Maker and Maker 3 use a knife blade that can cut through wood that is as thick as 3/32 of an inch, which is equivalent to 2.4 millimeters.
- The Explore Air 2 and Explore Air 3 are generally not recommended for cutting wood.
- Cricut Joy only uses a fine tip blade and cannot cut wood.
- Basswood, balsa wood, and wood veneer sheets are ideal for Cricut wood cutting projects.
- Use thin wood sheets (1/16 inch or 1.5 mm) for best cutting results.
- The knife blade is best for wood details larger than 3/4 inch.
Which Cricut Machines Can Cut Wood?

Cutting wood with Cricut machines depends heavily on the model you own, as not all have the power or blade compatibility required for wood. The Cricut Maker series stands out as the top choice for wood crafting. It can handle wood types like basswood, balsa wood, and chipboard up to 2.4 mm thick, roughly 3/32 of an inch, thanks to its powerful motor and ability to use the knife blade. Wood veneer sheets can also be cut, but typically with specific blade options such as the deep point blade.
By contrast, the Cricut Explore Air 2 and Explore Air 3 models are not recommended for cutting wood despite being able to handle lighter materials. However, the Explore Air models can cut very thin balsa or basswood up to about 1.5 mm thick if adjusted carefully, but results might not be as precise or durable as those from the Maker series. The smaller Cricut Joy is not designed to cut standard wood but can manage extremely thin wood materials like balsa or basswood sheets up to 1.5 mm thick, suitable mainly for simple, delicate projects.
| Cricut Machine | Wood Types Cut | Maximum Wood Thickness | Blade Type |
|---|---|---|---|
| Cricut Maker | Basswood, balsa wood, chipboard, wood veneer | Up to 2.4 mm (about 3/32 inch) | Knife blade, deep point blade |
| Cricut Maker 3 | Basswood, balsa wood, wood veneer | Up to 2.4 mm (about 3/32 inch) | Knife blade |
| Cricut Explore Air 2 / Air 3 | Balsa wood, basswood (very thin) | Up to 1.5 mm (about 1/16 inch) | Deep point blade (limited) |
| Cricut Joy | Balsa wood, basswood (very thin) | Up to 1.5 mm (about 1/16 inch) | Standard blade; limited cutting |
The Cricut Maker 3 does not significantly increase the maximum wood thickness it can cut compared to the original Maker; both support up to approximately 2.4 mm. The key difference lies in the Maker 3’s faster cutting speeds and compatibility with Smart materials but not an increase in cutting thickness for wood. Detailed adjustments in cutting pressure, blade selection, and mat use are essential to achieve clean wood cuts regardless of model.
Attempting to cut thicker or harder wood than recommended may damage the machine or result in incomplete cuts. The variety of blade options in the Maker series combined with precise force and speed settings is what enables effective wood cutting. Smaller models lack both the motor strength and blade options for consistently cutting wood beyond very thin sheets, so sticking to recommended materials and thicknesses preserves your tools and improves project outcomes.
Best Types of Wood to Cut with a Cricut
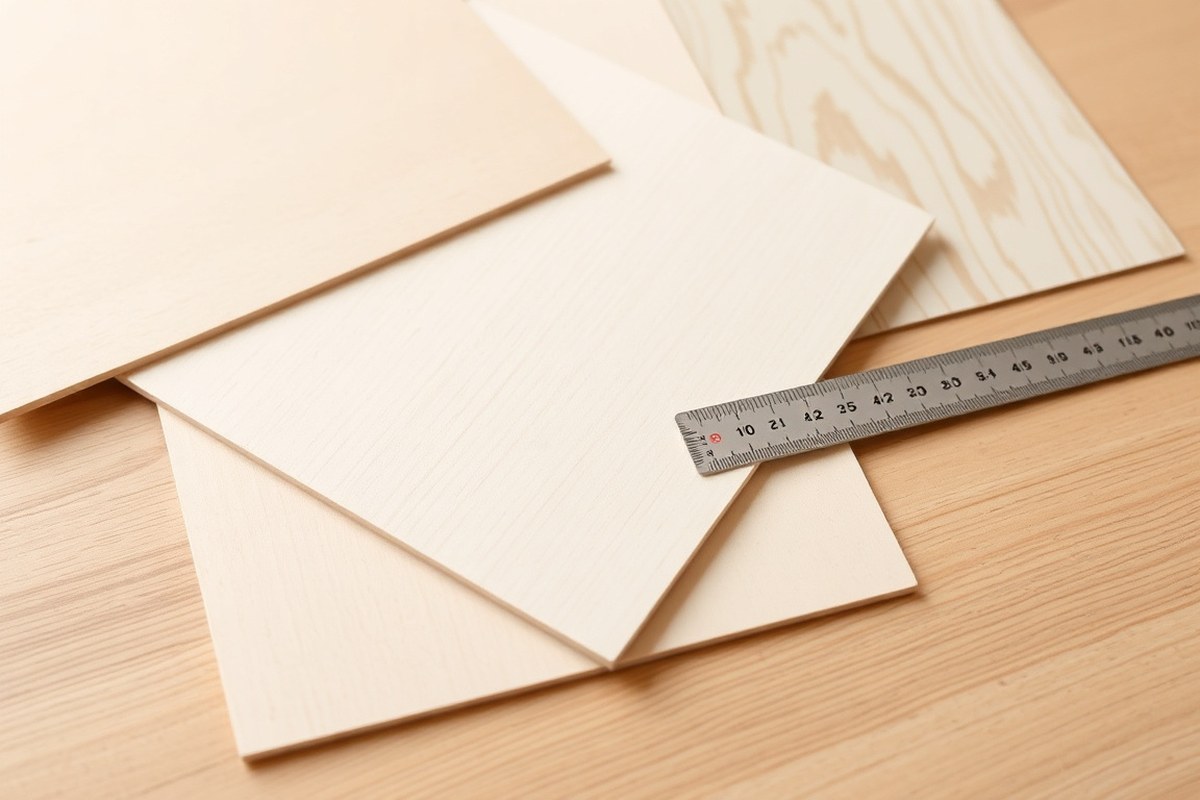
Your Cricut can cut thin wood types like balsa wood, basswood, and certain wood veneers best. Thickness should generally stay under 1/16 inch (1.6 mm) for smoother cuts. The wood’s softness, density, and flatness strongly affect cutting success.
Properties of Balsa Wood for Cricut
Balsa wood is the easiest and most popular wood type to cut with a Cricut machine. It is very soft and lightweight, which means the blade encounters little resistance. This softness allows for clean cuts with fewer passes even at thicknesses up to 3/32 inch (2.4 mm).
Balsa’s light weight also reduces warping issues, which can interfere with cutting. It’s especially good for detailed projects such as signs or small craft pieces because the blade can follow intricate lines without tearing. Using the Cricut Maker along with a Knife Blade maximizes your cutting capability with balsa wood.
Using Basswood Sheets
Basswood is a bit denser and harder than balsa, so cutting it requires more care and time. The Cricut Maker can handle basswood sheets, but expect to make multiple passes to cut completely through 1/16 inch or less thicknesses. Even with several passes, the cuts remain precise.
Basswood holds its shape well and offers a smoother surface than balsa. This makes it a good choice for projects where a finer finish or a sturdier piece is needed. Due to the density, slower cutting speeds and more pressure settings help with getting clean cuts.
Wood Veneer Options and Thicknesses
Wood veneers are the thinnest wood materials compatible with a Cricut. These can be as thin as 1/32 inch or less, which lets you cut delicate shapes with ease. Both basswood and balsa veneers are available, and you can sometimes find thinner veneer sheets from harder woods as well.
Cutting veneer requires a deep point blade if using a Cricut Explore or a Knife Blade for the Maker. Veneers are trickier because any warping in the sheet can cause cutting errors. Make sure veneer sheets lie completely flat on the mat before cutting.
| Wood Type | Max Thickness | Ease of Cutting | Recommended Blade | Passes Needed |
|---|---|---|---|---|
| Balsa Wood | Up to 3/32 inch (2.4 mm) | Easy | Knife Blade | 1-2 |
| Basswood | Up to 1/16 inch (1.6 mm) | Medium | Knife Blade | Multiple |
| Wood Veneer | Under 1/16 inch (1.6 mm) | Varies by type | Deep Point Blade or Knife Blade | 1 or more |
Choose wood types based on your project needs and machine’s capability. Thinner wood cuts more smoothly but may be less sturdy. Multiple passes are needed for denser or thicker pieces to avoid damaging your blade or machine.
Avoiding Knots and Warping
Knots and warped wood can cause incomplete or uneven cuts. These irregularities make it harder for the blade to follow the cutting path, damaging your design or the blade itself. Select flat, knot-free wood sheets for best results.
Before loading your wood, inspect it carefully and press it flat against the cutting mat. Warped or curved boards can be gently clamped or weighted down to stay in place during cutting. Flatness prevents skipped cuts or blade jams.
Always check your wood for warps before cutting; even slight bends can damage your machine or ruin your project.
How to Prepare Wood and Mats for Cutting
Preparing your wood and Cricut mat properly ensures clean, precise cuts and prevents damage to your materials or machine. You want to secure the wood firmly, use the correct mat, and confirm the wood lies flat before cutting. Doing these steps carefully helps the knife blade make consistent passes without shifting or snagging.
Choosing the Right Cutting Mat
A Strong Grip cutting mat is essential for cutting wood with your Cricut. It has a stronger adhesive than standard mats, which prevents the wood from moving during the multiple, slow cutting passes required. Using a standard or light grip mat increases the risk of the wood shifting, causing incomplete or crooked cuts and possibly damaging the blade or mat.
Strong Grip mats typically cost around $15 to $20 depending on size, which is a worthwhile investment for wood projects. You should use a fresh or lightly used mat with plenty of tackiness since a worn-out mat won’t hold the wood properly. Clean mats by removing any wood dust or residue to maintain grip quality.
Taping Wood Edges Securely
Even with a Strong Grip mat, taping around the edges of the wood adds an extra layer of security. Painter’s tape or Cricut’s own Strong Grip tape works well because it is easy to apply and remove without leaving residue. Tape prevents the wood from lifting or shifting, especially during long cuts with multiple passes.
Apply tape all around the outer edges of the wood piece, pressing it down firmly. Avoid covering the area you want to cut because tape can dull the blade or interfere with cutting. Secure edges help keep consistent pressure and prevent binding or movement that causes rough or failed cuts.
Checking Wood Flatness and Removing Imperfections
Before placing wood on the mat, check for any bends, bows, or warping. Wood that isn’t flat can lift off the mat, causing misaligned cuts or potential damage to the blade or machine. Lay your piece on a flat surface and look for any gaps underneath or noticeable curves.
If you spot imperfections, gently apply weight to flatten the wood or replace it with a better-quality sheet. Also, remove any splinters, knots, or rough edges, as these can interfere with cutting accuracy or damage equipment. Smooth surfaces create more predictable cutting paths.
Positioning Wood for Optimal Cutting
Proper placement of the wood on the mat maximizes usable space and ensures the design fits within the cuttable area. Place the wood on the mat with the taped edges firmly set against the Strong Grip adhesive. Make sure the grain of the wood runs parallel to the length of the mat to reduce blade wear and improve cut quality.
Double-check that the wood covers the design completely and lies square on the mat. Avoid placing wood too close to the edges of the mat to prevent lifting during cutting. Always leave some margin around the edges for taping and handling.
- Choose a clean, sticky Strong Grip mat designed for wood cutting.
- Inspect the wood for bows, warps, or rough defects and replace or flatten as needed.
- Place the wood flat on the mat, aligning grain direction and design placement.
- Tape edges of the wood firmly with painter’s or Cricut Strong Grip tape, leaving the cut area uncovered.
- Press down edges and surface slightly to ensure good adhesion.
- Load the mat into the Cricut machine carefully, avoiding shifting the wood.
- After cutting, verify full cut-through before removing wood to prevent tearing or breakage.
Choosing and Using the Right Blade for Wood
You need the Cricut Knife Blade to cut wood with your Cricut Maker or Maker 3. This blade is designed specifically for thicker, denser materials like balsa wood, basswood, chipboard, and wood veneers. Unlike standard fine-point or deep-point blades, the Knife Blade has a longer cutting tip that presses down with controlled pressure to slice through these woods layer by layer. Using any other blade risks dulling it quickly and can produce incomplete or messy cuts.
Setting up the Knife Blade requires installing it into the machine’s clamping housing designed for this blade. Once installed, you won’t be able to adjust cut settings manually because Cricut locks them for safety and precision with wood materials. Instead, you select the appropriate wood type in Design Space, and the machine uses pre-programmed blade pressure and cut passes optimized for that wood’s thickness and texture. For soft woods like basswood or balsa, multiple slow passes help avoid burning or cracking the wood.
Calibrating the Knife Blade is important for maintaining clean cuts. Cricut recommends performing calibration through the Maker’s menu before your first wood cutting project or if you notice uneven cuts. The calibration routine measures blade depth and pressure. Follow the on-screen instructions, usually involving the blade making test cuts on a calibration mat. Calibration can take around 10 to 15 minutes. This step helps the blade adjust to different wood densities, ensuring each layer is cut fully and cleanly without damage.
Maintaining the Knife Blade involves a few simple steps. After each wood project, gently clean off wood dust or debris with a soft cloth. Avoid using water or solvents, which can damage the blade’s cutting surface. Store the blade in its protective housing or case to prevent the tip from dulling or bending. The lifespan of the Knife Blade varies widely depending on how dense the wood is and the thickness you cut. For lighter woods like balsa, the blade may last several projects, while dense woods will shorten blade life. Replacement Knife Blades typically cost around $15 to $20.
Some users try to cut wood with deep-point blades, which are more affordable and easier to find. While deep-point blades can handle thin wood veneers or very soft wood scraps, they are not recommended for thicker or denser woods. You risk incomplete cuts, uneven edges, and extra wear on the blade and machine. The Knife Blade performs multiple, slow passes to slice through thicker wood cleanly and is worth the investment for frequent wood crafters.
By using the correct blade and calibration steps, you’ll create precise wood cuts that improve your Cricut crafting projects. Take time for blade maintenance and follow Cricut’s guidelines. This ensures your Knife Blade remains sharp and effective, giving you smooth cuts without overloading your machine or wasting materials.
Setting Cricut Design Space for Wood Cutting
Setting the correct cut settings in Cricut Design Space is essential for cutting wood successfully. Design Space automatically suggests the pressure level and the number of passes needed, but always double-check these settings for the specific type of wood you are using, such as Balsa or Basswood. The software adjusts these settings to ensure the blade slowly cuts through the wood without causing warping or excessive blade wear.
Cutting wood usually requires multiple passes, often around 14 for thinner woods like Balsa, which can take more than an hour. These multiple passes allow the machine to make shallow cuts that gradually penetrate the wood, rather than trying to cut all at once. Using slow, steady passes protects both the material and the blade, offering cleaner cuts and reducing the chance of the wood breaking or the blade dulling prematurely.
- Select the exact wood type from the material list in Design Space before starting.
- Use the suggested pressure settings, but lower pressure slightly if you notice warping.
- Expect to run 10 to 14 passes depending on wood thickness and density.
- Avoid fast mode; it skips passes and increases the risk of incomplete cuts or blade damage.
- Check after a few passes if the cut is progressing and pause if adjustments are needed.
- Make sure your wood is secure and flat on the mat to prevent movement during cutting.
- Stop the cut immediately if you notice excessive pressure or poor cut quality.
Fast mode is not recommended for wood cutting because it reduces the number of passes and speeds up the blade movement, which can lead to incomplete cuts and strain on your blade and machine. Letting Cricut Design Space perform multiple slow passes ensures the blade doesn’t bind or break the wood unevenly. Proper material selection and patience during the cut are key to avoid wasting wood and blade life.
Secure your wood firmly and monitor the cut after a few passes to avoid warping or blade damage caused by uneven pressure.
To start cutting, select the right wood type in Design Space, confirm the suggested settings, and hit the flashing ‘C’ button. The machine will then make multiple passes automatically, gradually cutting through the wood. Always mirror your design if needed before beginning to ensure the cut is correctly oriented. Paying close attention throughout the process helps you achieve smooth, professional results with your Cricut wood projects.
How Long Does Cutting Wood Take and What to Expect
Cutting wood with a Cricut Maker usually takes several minutes per piece, depending largely on the thickness and type of wood. Thin wood sheets around 1/16 inch thick can take about 5 to 10 minutes to cut a simple shape, while thicker woods up to 1/8 inch may require 20 to 30 minutes or more. The Cricut makes multiple passes over the wood during cutting to ensure it cuts all the way through without damaging the machine or the material. For instance, cutting a 1/16-inch basswood sheet often involves around 4 to 6 passes with the knife blade.
The reason for multiple passes is that the Cricut Maker’s blade is not designed to cut thick wood in a single pass. Each pass removes a small amount of material, reducing strain on the blade and motor. This layered approach improves accuracy and helps avoid tearing or splintering the wood. If the wood is denser or thicker, expect more passes and a longer cut time.
Several factors influence how long your cut will take, such as wood type, thickness, blade sharpness, and cutting complexity. Softer woods like balsa and basswood cut much faster and cleaner than harder woods. Thicker wood increases cutting time exponentially because each pass cuts through just a fraction of the material. Intricate designs with lots of fine details require slower feed speeds and more precision, extending the total cut duration.
To give a practical example, say you want to cut a 1/8-inch thick basswood piece measuring 4 by 6 inches. The Cricut Maker might need about 10 passes, each taking 2 to 3 minutes, totaling roughly 20 to 30 minutes. You’ll want to secure the wood thoroughly on a strong grip mat to prevent shifting during these passes, which can cause uneven cuts or blade damage. The machine’s software usually sets recommended cut settings based on your material choice, but always watch your cut to catch any errors early.
Cutting thinner wood or less detailed shapes will reduce cutting time significantly. Using fresh, sharp knives and a clean mat also improves speed and cut quality. Avoid thicker plywood or hardwoods that can stall the blade or strain the machine. For consistent results, test cut small samples before commencing your full project. This testing helps balance speed, pressure, and pass count for the best finish.
Common Problems and How to Fix Partial or Incomplete Wood Cuts
Partial or incomplete wood cuts on your Cricut happen when the blade doesn’t cut all the way through the wood piece. This usually occurs because the wood is not flat, the mat isn’t sticky enough to hold the wood securely, or the cut settings are off. Wood that’s too thick or dense also causes the blade to struggle, especially if it exceeds the recommended thickness your machine can handle. Attempting to cut wood with knots or irregularities increases the risk of incomplete cuts and can damage your blade or the machine itself.
Handling wood pieces that don’t cut fully through requires a careful troubleshooting approach. Begin by checking that your wood sheet lays completely flat on a clean, well-adhered mat to prevent shifting during cutting. A loose or curling edge means the blade might not reach all surfaces. Make sure your cutting mat still has enough stickiness; replace it if it doesn’t hold the wood firmly. Adjust your cut settings in Cricut Design Space to match the wood type, thickness, and density. Sometimes, running the cut one or two more times using the same settings can finish the job without damaging the material.
- Ensure wood is flat and free of warps before loading it on the mat.
- Use fresh, highly adhesive mats designed for wood or heavy materials.
- Double-check cut pressure, speed, and number of passes in your machine’s settings.
- Avoid wood with knots or dense grain to prevent blade damage and incomplete cuts.
- Use Cricut-approved wood sheets, as these are optimized for your machine’s capabilities.
- If wood is too thick, try thinner layers or multiple lighter passes instead of one deep cut.
- Inspect your blade for dullness or damage; replace it regularly during wood projects.
Knots and warped wood cause uneven resistance that can make the blade veer off path or fail to cut through. Wood with knots tends to be denser and tougher, which wears down the blade faster and forcefully pushes back against the cut. Warping lifts parts of the wood off the mat, so the blade misses its mark on these peaks. Select flat, knot-free wood veneers when cutting intricate designs, which reduces the chance of rough edges or incomplete paths.
A common mistake is pushing the machine to cut wood thicker than recommended, which results in incomplete cuts or risks motor strain. Using too much pressure can roughen edges or break the wood, while too little pressure leaves parts uncut. Frequent blade checks and simple fixes like adding tape to hold down curled edges help keep cuts clean. Following these troubleshooting actions often delivers smooth cuts without costly material waste or mechanical damage to your Cricut.
Finishing and Using Your Cricut Wood Pieces
After cutting wood with your Cricut, finishing is key to making your project look polished and durable. You’ll want to smooth any rough edges, protect or decorate the surface, and securely assemble pieces if your project has multiple parts. Each step requires different tools and approaches depending on your design and the look you want.
Sanding and Smoothing Edges
Wood cut by a Cricut, such as basswood, usually comes with some rough edges or tiny splinters. Light sanding with fine-grit sandpaper, such as 220 grit, is effective for smoothing without taking off too much material. Sand gently along the edges until the surface feels smooth to the touch and any splinters are removed. For curved or intricate shapes, use sanding sticks or small sanding blocks to maintain control.
Always sand in a well-ventilated space or wear a dust mask since fine wood dust can irritate your lungs. Avoid aggressive sanding because it can alter the shape or thin the wood in delicate areas. A clean finish after sanding will help paint, stain, or glue stick better to the surface.
Painting and Staining Techniques
Painting and staining add color and protection to your Cricut wood projects. Use craft acrylic paints for bright, opaque colors or wood stains to improve the grain and give a natural look. Apply paint or stain in thin, even coats with a small brush or sponge. Let each coat dry fully before adding another, usually 1 to 2 hours per layer depending on the product and humidity.
If you want a smooth, professional look, lightly sand between coats with a very fine grit, such as 320, to remove any bumps or brush marks. Consider sealing your finish with a clear spray sealer or polyurethane to protect against moisture and wear. This step is especially important for items handled frequently or exposed to outdoor elements.
Assembling Wood Pieces with Glue
Glue is essential for joining Cricut wood pieces securely. E6000 glue is a popular option for wood crafts because it bonds well and remains flexible once dry. Apply a thin, even layer on one surface, press the pieces together, and clamp if possible for at least 1 hour. Full cure typically takes 24 hours for maximum strength.
For projects involving wood and other materials like metal or plastic, E6000 also works well as a versatile adhesive. Avoid excessive glue that can squeeze out and mar your finish, wipe off any extra immediately with a damp cloth. When assembling complex projects, plan your gluing steps so pieces dry fully before adding the next layer to prevent slipping or misalignment.
Work in a well-ventilated area when sanding or gluing wood to minimize inhaling dust or fumes.
Step-by-Step Action Plan for Cutting Wood with Your Cricut
Follow these steps to cut wood safely and successfully using your Cricut machine.
- Before you start: Choose a Cricut Maker, as it supports wood cutting with the knife blade. Confirm your wood is basswood or balsa, no thicker than 1/16 inch for clean cuts.
- Preparation phase: Attach the strong grip mat and lightly sand your wood surface for better blade grip. Secure the wood with masking tape on corners to avoid shifting during cutting.
- Setup phase: Load the knife blade and calibrate it according to Cricut Design Space instructions. Select the “Basswood” material setting or choose custom settings based on your wood’s thickness.
- Cutting phase: Start the cut and watch carefully. Cutting can take 15 to 25 minutes depending on design complexity. Don’t remove the wood mid-cut to avoid breakage.
- Post-cut phase: Remove the mat and gently lift the wood using a scraper tool to prevent breakage. Inspect the cut for completeness and smooth edges.
- Finishing phase: Use fine-grit sandpaper to smooth edges or clean small splinters. Apply a wood finish or paint if desired to protect and decorate your piece.
Frequently Asked Questions
Can the Cricut Explore Air 2 Cut Wood?
The Cricut Explore Air 2 can’t cut wood effectively. It struggles with thin balsa and basswood, so you should opt for the Cricut Maker for working with wood.
What Kinds of Wood Thickness Can Cricut Machines Handle?
Cricut machines can cut wood as thick as 3/32 inches, mostly limited to thin balsa and basswood sheets under 1.5 mm. Thicker wood will not cut cleanly.
Can I Use Regular Blades to Cut Wood with Cricut?
No. For wood, you need a Cricut Knife Blade specifically designed to handle hard materials like basswood or balsa wood.
How Many Passes Does the Cricut Maker Need to Cut Basswood?
Cutting basswood requires multiple passes with the Knife Blade to ensure a clean cut. This takes longer but prevents blade damage.
Can the Cricut Joy Cut Wood?
Yes, the Cricut Joy can cut thin balsa and basswood up to 1.5 mm thick but is more limited compared to the Maker series.
Is It Possible to Cut Wood Veneer with Any Cricut Machine?
Yes, the Cricut Maker, Maker 3, and Explore can cut wood veneer sheets, but precise blade settings are important for clean edges.
Wrapping Up
Your Cricut Maker can indeed cut thin sheets of wood like basswood or balsa when set up properly with the knife blade and right materials. Taking time to prepare and secure your wood ensures cleaner cuts and less frustration. Try a simple design first to gain confidence, then explore more detailed projects. This hands-on experience will help you master Cricut wood crafting safely and effectively.