Camper Sign Ideas: 12 Practical and Creative Ways to Personalize Your Campsite
Camper sign ideas provide an easy way to add personality and clear identification to your campsite. Creating customized signs with your family name, fun themes, or directional labels makes your site welcoming and organized. Start by choosing materials that withstand outdoor conditions to keep your sign looking great throughout your camping seasons.
Key Takeaways
- Use durable materials like cedar, pine, or metal for signs that handle weather and last for years outdoors.
- Incorporate your family name or custom GPS coordinates for a personalized touch that marks your territory uniquely.
- DIY painted signs with reclaimed wood offer budget-friendly, customizable options suitable for short- or long-term use.
- Protect signs by applying weatherproof sealants and UV-resistant finishes to prevent fading and damage.
- Mount signs without harming trees by using freestanding posts, stakes, or removable hooks designed for campsites.
- Choose themes like funny sayings, vintage styles, or nature-inspired graphics to match your campsite’s vibe.
Creative Camper Sign Ideas to Personalize Your Campsite
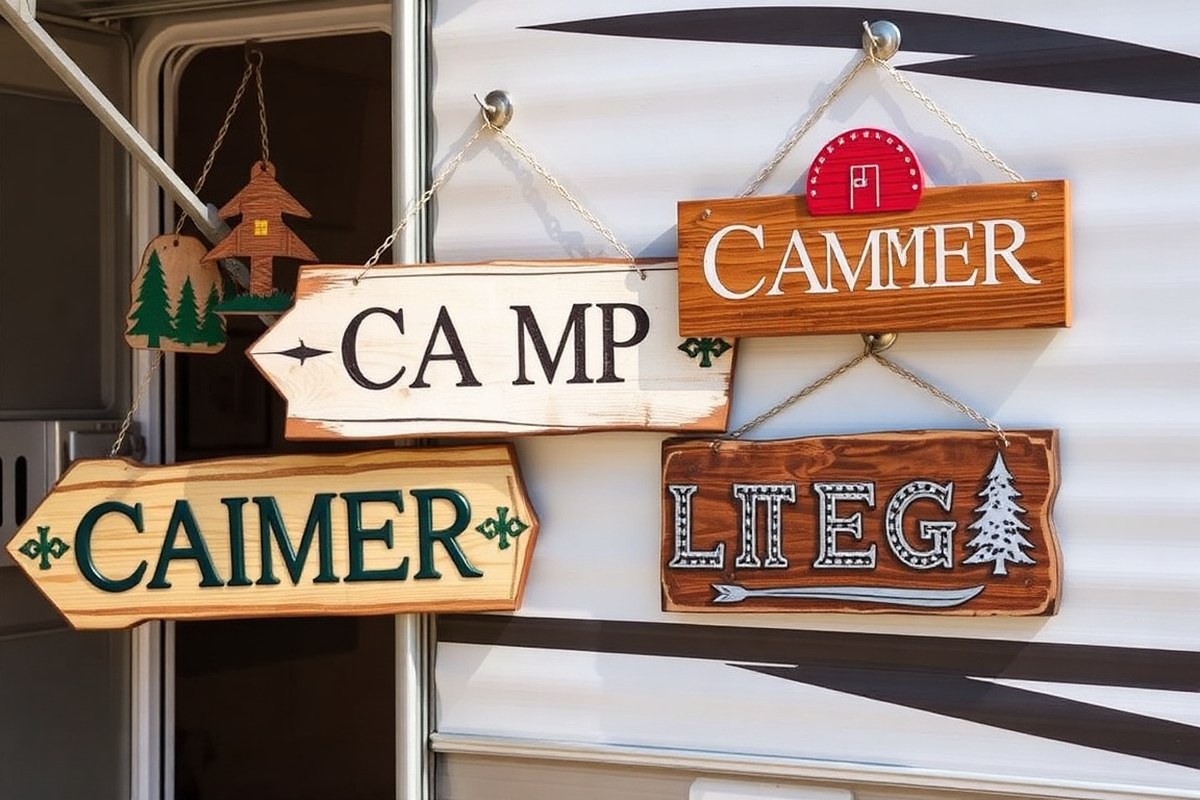
Creative camper signs can transform your campsite into a welcoming, personalized outdoor retreat. Start with a wooden sign that displays your family name or camp nickname alongside a simple mountain, pine tree, or camper graphic. Using cedar or pine wood gives durability and a classic look, with costs typically between $25 and $75 for materials and supplies if you go the DIY route or through affordable local craftsmen. This choice is ideal for permanent or semi-permanent campsites, providing a warm, rustic feel that lasts through multiple camping seasons.
For RV owners facing all-weather exposure, metal signs made from aluminum or steel deliver excellent durability and require less upkeep. A metal “Welcome to the [Last Name] Camper” sign with vintage-style lettering adds a stylish yet sturdy marker for your camping area, costing around $40 to $120 depending on size and complexity. Easy to hang with magnets or screws, these signs withstand intense sun, wind, and rain, practical if your travels lead you to diverse climates.
DIY painted signs appeal to budget-conscious campers who want quick, lightweight displays. Use reclaimed wood with weather-resistant paint or sealer, spending roughly $10 to $30 per sign. Stencils make crisp lettering and shapes easy, allowing you to craft signs that match your personality, like a “Gone Camping” message with a forest silhouette or a humorous pun about campfire tales. These signs work well for short trips or campsites where you don’t want to leave permanent marks. Expect to refresh these signs every couple of seasons as paint fades or chips.
Funny camping signs keep the mood light and showcase family humor or inside jokes. Weather-treated wood supports the life span of these playful designs, which typically cost between $20 and $50. Install them near your camper door or communal firepit to entertain visitors and spark conversations, reflecting your family’s easygoing spirit.
If you prefer something truly unique, try incorporating coordinates of a favorite camping spot or the year your family began camping. A clean sign with these personalized elements reminds you of meaningful experiences while adding a subtle decorative touch. Using wooden letters glued onto blanks or stenciled in paint offers versatility and a project you can tailor when packing for your trip.
For campers wanting to express their style or create a warm entrance, a cheerful welcome sign with soft cream letters on warm wood tones and a small camper icon sets the right tone at your campsite gate. These signs invite fellow campers and friends to share in your outdoor space, making your campsite feel more like home.
When creating personalized camper signs, consider their placement: hanging beside your camper door works well for family name or greeting signs, while entrance or directional signs benefit from larger, sturdier materials visible at a distance. Signs near shared spaces like picnic tables can be playful or informative. Balancing creativity, material choice, and weather resistance ensures your sign remains a proud part of your campsite year after year.
Choosing the Best Materials for Durable Outdoor Camper Signs
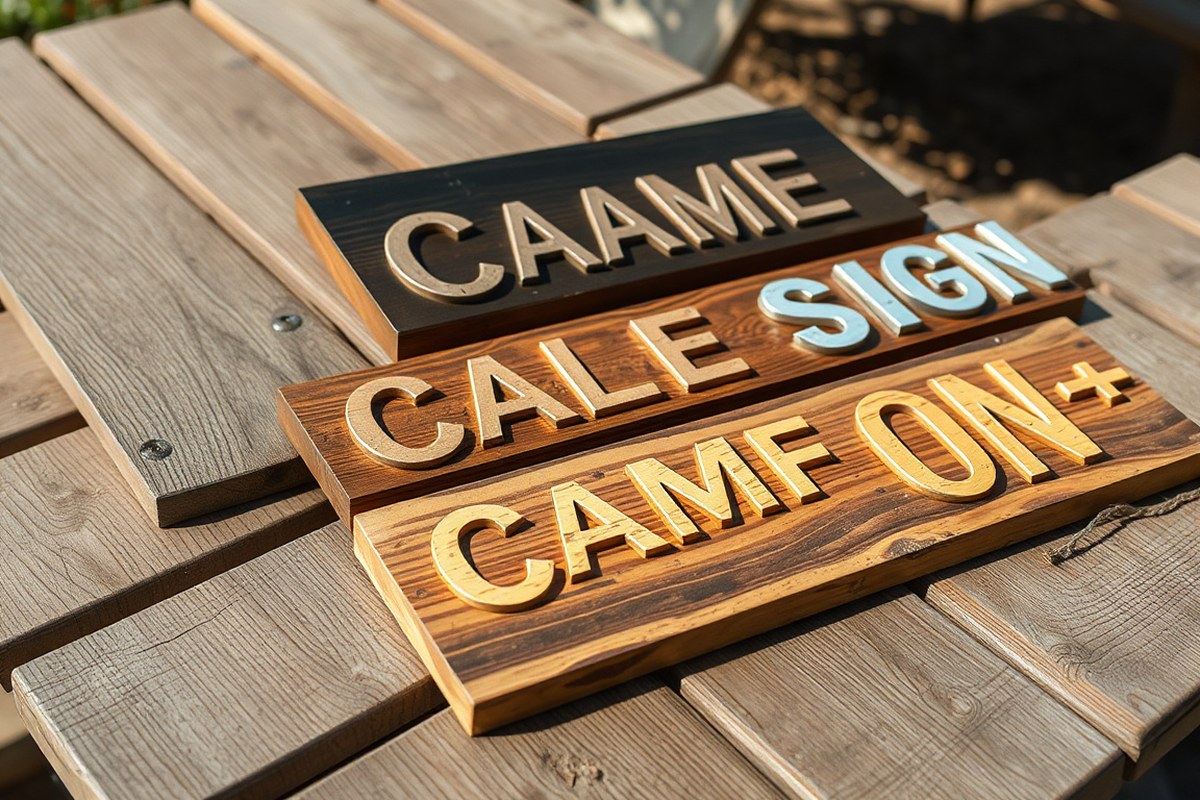
Choosing the right material for your camper sign depends on how long you want it to last outdoors, your budget, and the style or environment of your campsite. Materials like sealed wood, metal, and plastic each offer different levels of durability and maintenance needs. For instance, plastic signs resist rust and rot and can be cleaned easily with a seasonal rinse, making them very practical for camping near water or humid conditions.
Wood signs provide a classic, rustic look that blends well in forest or mountain settings. Using cedar boards or natural wood slices sealed with a weather-resistant finish will protect them from moisture and fading. However, untreated wood will deteriorate faster, especially in wet or rainy climates. Metal signs are durable and well-suited for outdoor use if treated with weather-resistant paint, offering a lasting and rugged option that fits well at campsites with wind or rough weather. Prices vary, but plastic often costs less over time because it requires less upkeep compared to wood and metal.
| Material | Durability Outdoors | Cost Range (per sign) | Best Camping Environments |
|---|---|---|---|
| Wood (sealed) | Moderate to high (with sealant) | $15, $40 | Forest, rustic, dry climates, mountain sites |
| Metal (painted) | High (weather-resistant paint required) | $20, $50 | Windswept, exposed campsites, all climates |
| Plastic | Very high (resists rust, rot, easy to clean) | $10, $30 | Humid, lakeside, rainy, low-maintenance sites |
Wood signs offer a warm, inviting aesthetic but require regular sealing with outdoor wood finish or sealer to withstand rain and sun exposure. Signs made from dark wood blanks paired with metallic markers create striking contrasts and hold their appeal longer if properly protected. Painting the wood with outdoor paint and finishing with a sealer can extend its life for several camping seasons.
Metal signs should be painted with metal paint designed for outdoor use and kept free from scratches to avoid rust. Lightweight metal plaques are easy to mount with weather-resistant hooks and can be accompanied by decorative accents like rustic metal wind chimes for both visual appeal and auditory enjoyment.
Plastic signs, though often less decorative, maintain their appearance with minimal work. Washing them each season removes mold and dirt without damaging the surface. They serve as a low-cost, highly durable choice for campers who want signs that survive harsh weather and require little upkeep.
Always apply a fresh coat of weather-resistant sealer on wood signs every camping season to prevent peeling and warping caused by moisture.
How to Make DIY Painted Camper Signs with Lasting Quality
Making a DIY painted camper sign involves selecting the right wood, preparing the surface, choosing durable outdoor paints, and sealing the sign properly to withstand the elements. You’ll need a few basic tools and materials, plus a clear plan for designing and protecting the sign so it lasts longer in outdoor settings. Here’s how to craft a personalized sign that combines style with weather resistance.
Selecting Wood and Prepping Surfaces
Start with a quality wood base like basswood plaques or reclaimed wood planks. Basswood is smooth and soft, making it easy to paint and ideal for detailed signs. Reclaimed wood adds a rustic charm but may require extra surface prep due to rough textures or old paint. Before painting, sand the wood thoroughly with fine-grit sandpaper to create a smooth surface that promotes paint adhesion.
Ensure the wood is clean and dry; any dirt, grease, or moisture can prevent paint and sealant from sticking properly. Use a tack cloth to wipe away dust after sanding. Remember to sand and seal all sides, including edges and backs, to reduce warping and prolong sign life.
Choosing Paints and Stencils
Use exterior-grade acrylic paints designed for outdoor use. These typically have UV protection and resist fading when exposed to sun and rain. Pick colors that complement your camper’s trim or campsite aesthetic, like muted blues, forest greens, or warm earth tones. For lettering and shapes, consider stencils or vinyl templates for clean, sharp lines.
Brushes with synthetic bristles work well with acrylic paints and offer good control for detailed work. Depending on your design, you might use wood carving tools for accents or borders before painting to add texture and depth.
Applying Weatherproof Sealants
Apply a high-quality outdoor wood sealer or polyurethane to protect your painted sign. Choose a clear finish with UV blockers and moisture resistance to prevent paint fading and wood damage. Apply at least two to three coats, letting each coat dry according to the product instructions, usually 2 to 4 hours. Seal all sides, including edges and back, to block moisture absorption from any angle.
Even with sealing, take your sign indoors during harsh weather to prevent accelerated wear. Proper sealing can extend sign life by months or years, but expect some weathering over time depending on exposure.
Tips for Lettering and Design
Plan your lettering size and font clearly so it reads easily from a distance, for example, large white letters on a dark green background stand out well at a campsite entrance. Use painter’s tape or vinyl stencil sheets to mark straight lines and avoid hand-drawn errors. For a welcoming touch, add natural details such as painted pine trees, lake outlines, or your family name to personalize the sign.
Allow painted sections to dry fully before adding new colors or details to avoid smudging. Use bold, simple shapes and block letters to improve visibility and durability. Finally, combine your lettering with weatherproof mounting hardware like hooks or brackets that won’t rust or damage trees. Follow these steps to create a painted camper sign:
- Select a basswood plaque or smooth reclaimed wood plank of your preferred size.
- Sand all surfaces and edges to smooth out rough spots and remove old finishes.
- Clean the wood with a tack cloth to remove dust particles.
- Paint a base coat using exterior-grade acrylic paint; let it dry completely.
- Use stencils or templates to outline letters and designs, then fill in with paint.
- Allow your design to dry fully before applying a second paint coat if needed.
- Seal the entire sign with an outdoor wood sealer, applying 2 to 3 coats on all sides.
- Mount your sign using weather-resistant hardware, avoiding direct tree attachment.
Materials will generally cost between $20 and $50, depending on wood size and paint quality. Acrylic paints typically run $5 to $10 per small bottle, wood sealers about $10 to $20 per quart, enough for multiple signs. Tools like sandpaper, brushes, and stencils might require a one-time purchase if you don’t own them already.
Weatherproofing Tips to Protect Your Camper Signs Outdoors
Protecting your camper signs from sun, rain, and wear is key to keeping them looking fresh and readable. Use clear outdoor sealers to block moisture and UV rays, and make sure to place your signs away from high-traffic areas to reduce physical damage. Regular maintenance and resealing every year or two will extend their life and prevent fading.
Choose the Right Sealants and Finishes
Apply a clear outdoor sealer designed for wood or metal, depending on your sign’s material. Polyurethane or acrylic spray sealers with UV protection are best for blocking sun damage while keeping colors vibrant. For extra moisture resistance, consider marine-grade varnish, which handles rain and humidity well. Avoid oil-based finishes if your sign will be exposed to direct sunlight, as they tend to yellow and degrade over time.
Spray sealers typically cost around $10 to $20 per can and cover 50 to 75 square feet. Apply two to three thin coats, letting each dry for at least 2 hours. This layered approach builds durable protection without a sticky surface prone to dust or dirt.
Placement Practices to Minimize Wear
Keep your camper signs clear of walkways, cooking areas, and vehicle doors to prevent accidental damage. Using a free-standing stake, shepherd’s hook, or small flagpole lets you place signs securely without harming vegetation. Hanging lightweight signs from awnings, railings, or designated hooks also reduces wear by keeping them off rough surfaces.
This approach not only preserves the sign’s finish but also avoids costly repairs or replacements. Signs mounted in shaded areas last longer because they’re less exposed to fading caused by direct sunlight.
Checklist for Long-Term Protection
- Clean your sign before sealing to remove dirt and dust.
- Apply two to three coats of a clear outdoor sealer with UV protection.
- Allow each coat to dry fully, usually 2 to 4 hours depending on the product.
- Position signs away from foot traffic and vehicle doors to prevent knocks or scratches.
- Use a free-standing or hanging display method that avoids tree attachment.
- Inspect signs for wear or damage every 6 to 12 months.
- Reseal affected areas or the entire sign every 1 to 2 years.
This checklist covers key actions to ensure your camper signs resist common outdoor threats and maintain their appearance.
Signs of Damage and When to Maintain
Fading, peeling, or water stains are clear signs your protective finish is wearing off. Rough textures or cracks in the material likely mean moisture has started to penetrate. Maintain your camper signs by wiping off dirt and debris every few months, especially after rain or windy conditions.
You should reseal signs if you notice dullness or loss of waterproof texture. Most signs benefit from resealing every one to two years, but environments with intense sun or heavy rain may require more frequent attention.
Adjustments for Different Climates
In hot, sunny climates, use sealers with the highest UV protection to combat rapid fading. Frequent resealing every year helps keep colors vivid. In wetter or humid areas, prioritize waterproof finishes like marine varnish and check for moisture damage more regularly. Consider raising signs on poles or hangers to avoid ground splash and soil contact, both of which accelerate wear. Winter campers should also store signs indoors if possible during extended cold spells to protect them from freeze-thaw damage.
Displaying Camper Signs Without Damaging Trees or Campsites
Protecting trees and campsites from damage while displaying camper signs depends largely on your mounting methods. Avoid using nails, screws, or staples directly on trees as these can harm bark and slow growth. Instead, opt for non-invasive supports to keep the area healthy and your sign secure.
One effective method is to use freestanding stakes made of wood or metal. You can attach the sign to a stake driven into the ground near your campsite. This avoids any contact with trees altogether and helps keep your sign visible without obstructing pathways or camp facilities. A typical wooden stake costs around $2 to $5, and you should drive it deep enough, about 12 to 18 inches, to ensure stability, especially in windy conditions.
For trees, hanging signs on removable hooks or straps works well. Use adjustable nylon straps or bungee cords around the trunk or branches. These materials provide firm support without piercing the bark. Place the straps loosely to prevent choking the tree and check them periodically, as swelling or growth could tighten the fit. These items generally cost under $10 and are easy to remove when it’s time to pack up.
In campsites with existing structures such as RV awnings or portable canopies, use Command Photo Hanging Strips or heavy-duty adhesive hooks that won’t leave marks. These options are best for lighter signs, typically under 2 pounds, and require smooth, clean surfaces for proper adhesion. Each strip or hook costs between $3 and $7. Make sure to follow the package directions closely, applying them in dry, warm conditions for the strongest hold.
When hanging signs from tent poles or campsite fences, lightweight chains or thin rope can support signs without causing damage. Secure the ends with simple knots or carabiners for easy removal. Avoid heavy or overly large signs on these setups to prevent tipping or pulling down your tent or fence sections.
Always avoid using anything that penetrates tree bark, as this causes permanent damage and invites pests or disease.
Checking the placement of your signs is important to avoid blocking vents or vehicle access. Signs should be visible from common gathering spots but not interfere with camping gear or safety routes. Aim for a height clear of fire sparks, at least 5 feet off the ground, to prevent any risk of heat damage or accidental contact.
By selecting the right mounting method according to your site conditions and carefully installing your sign, you make sure it stays secure and readable while protecting the natural surroundings and campsite infrastructure. This approach keeps your campsite neat, welcoming, and environmentally responsible throughout your stay.
Popular Themes: Funny, Vintage, and Nature-Inspired Sign Styles
Funny camper signs add a playful touch to your campsite while making visitors smile. Popular sayings include “Campers Have S’more Fun,” “This Is Our Happy Place,” or “Gone Camping, Be Back Never.” You can create these signs easily with weatherproof paint or vinyl lettering on wood or metal. Choose fonts that are easy to read from a distance. Cost typically ranges from $10 for DIY materials to $30 or more for pre-made or custom signs. Clear, bold text on a contrasting background works best outdoors, and avoid too many words to keep it readable. Funny signs help set a relaxed mood and give your site personality without much effort.
Vintage or rustic camper signs capture a timeless outdoor appeal. To create this look, start with natural wood planks or reclaimed wood and sand the edges for a worn effect. Use stencils or hand-paint lettering in classic fonts such as serif or cursive styles. Distressing the paint by sanding parts of the letters adds authenticity. Adding carved details or metal accents like old-style nails or brackets improve the vintage feel. Expect to spend $15 to $40 on materials depending on wood type and paint quality. Using stainless steel fasteners prevents rust stains, preserving the rustic charm. Signs with this style evoke cozy cabins and traditional campgrounds, appealing to those who appreciate heritage aesthetics.
Nature-inspired camper signs often feature elements drawn from the forest and outdoors, such as pine trees, mountains, wildlife silhouettes, or leaf patterns. These designs blend into the natural setting and can be carved, painted, or applied as decals. Common motifs include pine cones, bears, deer, and forest trails. To achieve this, select wooden planks as the base and use green, brown, and earth-tone colors. Wood burning tools can add fine details for durability and depth. Prices vary based on the complexity; simple painted signs may cost under $20 in supplies, while detailed carved or burned pieces require more time and special tools. Nature-themed signs help highlight your connection to the surroundings and create a peaceful campsite vibe.
Incorporating Personalization: Family Names and Custom Coordinates
Adding family names, important dates, or even GPS coordinates to your camper sign creates a unique and memorable identifier for your campsite. Such personalization adds character and makes your outdoor space truly yours, helping visitors or fellow campers recognize your site easily. A common approach is to include your family name or a short phrase like “Camp Happy” alongside the date you started camping at that spot. For an elegant and durable finish, consider using a wood burning kit to etch these details directly onto a wooden sign. This method provides a rustic look that withstands weather better than paint alone.
Coordinates can remind you of your special location and serve as a conversation starter. To include latitude and longitude, format them simply with a compass style: for example, 34°03’12″N 118°14’26″W. Use a bold, easy-to-read font like Arial or Helvetica and space the numbers clearly. Coordinates fit well beneath your family name or campsite number, usually in a smaller font so the sign doesn’t feel cluttered. You can create precise, movable coordinates with metal letter sets for flexibility or updating instead of burning them into wood.
Choosing the right font and layout ensures your sign remains readable from a distance and maintains an attractive design. Sans-serif fonts in medium to large sizes (at least 1 to 2 inches tall on the sign) work best outdoors. Avoid overly decorative or script fonts that can be hard to decipher, especially if your site is near trails or roads where people quickly pass by. Align your text centrally on the sign, and use contrasting colors, dark letters on a light background or vice versa, for maximum visibility. For instance, white or cream paint on stained wood gives a clear, warm look.
To assemble your sign, start with a sturdy wood board at least 12 by 18 inches, which provides enough space for names and coordinates without overcrowding. Frame the board with a wooden sign frame for extra durability and to prevent warping in humid conditions. Your wood burning kit can etch fine details in about 30 to 45 minutes, depending on the number of words and symbols. Keep a damp cloth nearby to clean the surface and control smoke marks. Apply a weatherproof sealant afterward to protect the burned or painted areas from rain and sun.
A common mistake is cramping too much information into a small space, making the sign hard to read. Spread out dates, names, and coordinates evenly, leaving about 1 to 2 inches of margin around your text. Your campsite can change or you might want to add a new date, so metal letter sets provide a reusable option that fits onto wooden backing. Adding a small painted campfire symbol or other simple graphics below your text can add charm without distracting from the personalized details.
Costs for materials typically range from $15 for a basic wood burning kit and supplies up to $40 for larger wooden boards and frames, plus weatherproofing solutions. Including coordinates and family names improve your camper sign beyond basic identification, making your outdoor space inviting and distinct for visitors and family alike.
Using LED and Illuminated Signs for Nighttime Visibility
Illuminated signs, especially those using LED lights, offer a clear advantage for campers who want to keep their site visible and organized after dark. LED camper signs use light-emitting diodes to provide bright, energy-efficient illumination around the sign’s text or graphics. This lighting makes the sign readable in low-light conditions, which helps visitors and campsite members navigate and recognize your spot without fumbling for flashlights or stumbling in darkness.
LED lights require a reliable power source to stay lit through the night. Most campers use rechargeable batteries, which can power LED signs for 8 to 12 hours depending on the light intensity and battery capacity. Battery packs vary in cost, typically starting around $15 for basic versions and climbing to $50 or more for longer-lasting, weather-sealed packs. Solar-powered LED signs are another option, offering environmentally friendly, off-grid operation by charging small solar panels during daylight hours. This setup works well in open campsites with good sun exposure but might struggle in heavily shaded areas or during cloudy weather.
Illuminated signs designed for outdoor use generally come with weather-resistant features to handle rain, dew, and temperature fluctuations from roughly 20°F to 100°F (-7°C to 38°C). Weatherproof LED signs often have sealed, waterproof housings and protective coatings on circuits to reduce moisture damage. It is important to check the IP rating of an LED sign: a minimum of IP65 ensures decent protection against water jets and dust. Signs not built for outdoor use risk short circuits or fading colors if exposed to prolonged humidity or rain.
To install an LED camper sign effectively, place it in a location visible from main foot traffic or vehicle paths but away from harsh light sources to prevent glare or reduced contrast. An improve foldable A-frame stand works well because it’s portable, easy to set up, and stable on uneven ground. High-contrast color schemes, like white or neon letters on black or dark backgrounds, improve nighttime readability. Adjust the brightness to avoid disturbing neighboring campers or wildlife, keeping the campsite peaceful.
While LED signs generally consume low power and provide consistent lighting, poorly built or cheap models might dim quickly or fail under cold temperatures. Checking reviews and specifications for operating hours and temperature tolerance helps ensure you get a sign that lasts through your trip. For longer camping stays, consider bringing spare batteries or choosing solar models with backup options. This reduces the chance of your sign going dark unexpectedly, which could cause confusion or loss of visibility.
Choose LED signs with weatherproof ratings and test your power source before the trip to avoid unexpected outages or damage during wet conditions.
Essential Safety and Campsite Rules Signs to Display Clearly
Displaying essential safety and campsite rules signs helps keep everyone informed and respectful, creating a secure, harmonious space. Signs should cover key rules like fire safety, quiet hours, trash disposal, and pet control. Clear rules reduce misunderstandings and prevent hazards, especially around campfires and wildlife.
Design signs to be straightforward and easy to read from a short distance. Use simple language and bold fonts for quick recognition. Including icons or small pictures, like a campfire symbol for fire rules, improves understanding for kids or non-native speakers. Place signs near entrances or central spots inside your campsite, keeping them visible but not obstructing trails or neighboring sites.
Emergency information and fire safety should be prominently featured. A sign by the fire ring listing local fire danger levels, safe cooking practices, and steps if a fire escapes provides important reminders. Include emergency contacts and the campsite address or coordinates to assist first responders if needed. These details might be laminated or printed on durable materials that resist rain and sun damage.
- Post campfire safety rules: no unattended fires, keep water or shovel nearby, fully extinguish before leaving
- Include quiet hours to respect neighbors and wildlife, usually between 10 p.m. And 7 a.m.
- Specify trash disposal methods, such as packing out waste or using provided bins
- Remind about leash rules or pet clean-up to maintain a clean campsite
- Share emergency contact numbers and campsite ID for quick response
- Note any specific site or park regulations, like no fireworks or motorized vehicle limits
Creating a checklist of rules gives structure and clarity. You can draft it on paper first and convert it into printed or handcrafted signage. Use weatherproof materials such as painted wood sealed with outdoor varnish or laminated prints on sturdy plastic. The cost can be low if you build the signs yourself, investing about $15 to $30 in materials for a durable 12″x18″ sign. Signs on metal or thick plastic last longer but may cost $50 or more.
Well-made, clearly placed rules signs encourage visitors to follow important safety practices and respect shared spaces. Signs that are weathered or hard to read may be ignored, increasing the risk of accidents or conflicts. Refresh signs regularly, especially the fire rules during peak season, to keep your campsite safe and welcoming.
Directional and Number Signs to Organize Your Campsite Layout
Directional signs play a key role in organizing your campsite by guiding guests and reducing confusion. To make these signs functional, keep the text simple and large enough to be read from about 10 to 15 feet away. Use straight arrows or clear symbols that point exactly where visitors should go. Applying a reusable letter stencil set ensures your lettering stays crisp and easy to understand. Choose bold, contrasting colors, black letters on a light wood background work well and fit a natural camping aesthetic.
Mount directional signs where they won’t block walkways, awnings, propane tanks, or vehicle paths. Hanging signs from a rustic chain adds charm and durability, but confirm the hardware supports the weight safely. Position signs at eye level where most people will look, like near campsite entrances or along common paths to shared facilities. Using weather-resistant materials such as treated wood or metal prevents early fading or warping from sun and rain exposure, key for signs that remain clear season after season.
For campsite number signs, visibility and durability are important. Place the sign near your picnic table or mounted on the entry post for immediate recognition. Numbers should be about 4 to 6 inches tall to ensure they stand out. Custom wood or metal signs offer a lasting solution that holds up well outdoors. If you prefer DIY, painting numbers with weatherproof outdoor paint combined with stencils provides a neat finish. Clear sealing afterward extends life by protecting from moisture and UV damage.
Good results appear as easy-to-read directional arrows and numbers that visitors spot at a glance without needing to search or guess. Avoid cluttering signs with too much text, which dilutes their purpose. When signs are too small, faded, or placed awkwardly, confusion increases, delaying movement around your site. Consider factors like frequent visitor traffic and the layout of your lot; for open campsites, more prominent signage may be necessary, while smaller groups need fewer but well-positioned markers.
The expense varies depending on materials and size. Basic wooden signs and paint can cost under $20 each, while custom metal signs or professionally made options may run $50 or more. Investing in sturdy, visually clear signs reduces stress for you and your guests and keeps your campsite orderly throughout your stay.
Printable and Digital Camper Sign Options for Easy Customization
You can find printable camping signs easily online at websites that offer free or low-cost digital templates specifically designed for outdoor and camper themes. These templates often include simple graphic designs and clear typefaces that work well when printed on standard letter-size (8.5 by 11 inches) or poster-size paper. Many focus on popular camper motifs, such as “Camper Sweet Camper,” which adds a warm, personalized touch to your space. Choosing black ink designs helps keep printing costs low and ensures good visibility even on basic printers.
To customize printable signs affordably, download a digital template and open it in a simple editing program like Microsoft Word, Google Docs, or free graphic software such as Canva. In these editors, you can change family names, arrival dates, or campsite coordinates in the text fields, or swap out icons to better match your camping style. After editing, print the sign on a good quality paper, preferably a thicker matte or semi-gloss cardstock to resist wear and fading outdoors. A typical printer ink cartridge in black costs between $10 and $20 and can print hundreds of signs, making this option economical for short-term or seasonal use.
Print your customized sign at home with a color or black-and-white inkjet or laser printer. For larger or higher-quality prints, local print shops or office supply stores can print on weather-resistant materials like vinyl or laminated sheets, which cost more but last longer. Costs for professional printing usually start around $3 to $10 per sign depending on size and material. Another option is using Mod Podge to adhere your printed paper sign securely onto a wooden board, adding durability and a rustic look. This process involves brushing a thin layer of Mod Podge on the wood, placing the printout on top, then sealing with additional coats to protect from moisture.
Designs that work best for printable camper signs include clear, bold fonts and simple graphics related to camping life, such as pine trees, tents, campfires, or RV outlines. Signs featuring short welcoming phrases, campsite rules, or fun statements add personality without cluttering the space. Stick to black and white or limited colors in the design to keep printing simple and legible from a distance. Avoid overly detailed images or small text that won’t print cleanly or stand out at your campsite.
Using printable and digital camper sign options lets you quickly refresh your campsite decor or communicate important information without expensive tools or materials. This approach is flexible enough to suit weekend campers, seasonal RVers, and long-term outdoor enthusiasts who want to personalize their space with minimal effort and expense. For ongoing use, consider laminating your prints or mounting them on sturdy backing to extend their life in the elements.
Make sure to use waterproof ink or seal your printed signs, as regular printer ink can run or fade quickly when exposed to rain or morning dew.
Creative Accents and Mounting Accessories to improve Camper Signs
Adding creative accents like wind chimes, bottle caps, chains, and frames can boost your camper sign’s charm and usefulness. These elements not only make your sign stand out but can also protect it and make it easier to move or display. Choosing the right accents and mounting options lets you match your style and campsite needs precisely.
Natural Wood and Bark Elements
Natural wood and bark accents bring a rustic, outdoorsy touch to your camper sign. Using thin strips of bark or small wood slices around the edges adds texture and a handcrafted feel. Burlap fabric can also wrap part of the sign or serve as a backing to improve its rustic charm. Apply wood finish oil or a durable wood stain to protect these elements from moisture and sun exposure, which helps maintain the sign’s look through camping seasons. A small chalkboard framed with warm wood hung beside your camper door is a practical addition for daily notes or welcome messages. These natural materials generally cost $5 to $15 per piece or roll, depending on size, and the finish oils range around $10 to $20, affordable for most budgets. Signs with properly finished wood elements resist splitting or fading, but untreated wood may crack or deteriorate faster outside.
Metal Chains and Hanging Options
Metal chains provide durable support and contribute an industrial or vintage vibe to your camper signs. Attaching a sign to your camper or posts with rust-resistant chains allows it to swing with the breeze, reducing stress on mounting points. Chains ranging in length from 12 to 24 inches are common and easy to adjust. Adding a removable stake or wire hanger lets you quickly take the sign down for travel or storage, which prevents damage while on the move. Installation involves securing sturdy hooks or eye bolts into your sign and corresponding clip points on your rig or campsite stand. The cost for basic galvanized chains is about $5 to $10 per foot. Proper mounting with chains also keeps signs away from moisture on the ground, helping with durability. Avoid lightweight chains that can bend or snap in wind; stainless steel or heavy-gauge chains work best for lasting performance.
Decorative Accents Like Bottle Caps and Yarn
Colorful bottle caps are an inexpensive recycled accent, bringing vibrant pops of color and personality to your camper sign. Glue bottle caps along the border or in patterns using waterproof adhesive; letting the glue cure fully ensures they stay in place during outdoor exposure. Multicolored yarn offers bright, soft texture and can be wrapped around edges or tied into tassels and bows attached to corners. These yarn bundles typically cost $6 to $12 and last with some weather protection, like spraying a fabric sealant. Incorporating handcrafted beaded wind chimes adds both sound and color, creating motion and charm around your sign. Attach these chimes carefully to avoid tangling and to keep them from striking your sign or rig; using small hooks or loops works well. Combining these decorative elements increases visual appeal and reflects your campsite’s vibe, but balance them carefully to avoid clutter or added weight that could affect how the sign hangs or travels.
Step-by-Step Action Plan for Custom Camper Signs
Get started on creating and displaying your perfect camper signs with these straightforward steps. Each phase guides you toward a personalized, durable, and organized campsite setup.
- Before you start: Choose your sign themes and materials based on your campsite style and climate. Confirm your choices by checking weather resistance and personal taste.
- Day 1: Gather supplies for your DIY painted signs, including quality wood or metal, outdoor paint, and sealant. Knowing you have everything ready ensures a smooth project.
- Day 2-3: Paint and personalize your signs with family names, coordinates, or favorite themes. Let them dry fully before sealing to ensure lasting quality.
- Day 4: Apply a weatherproof sealant according to product instructions to protect your signs from sun and rain. A consistent coating indicates proper coverage.
- Day 5: Plan your sign placement for visibility and safety, using non-invasive mounting options like stakes or freestanding holders. Confirm stability without harming trees or ground.
- Week 1: Install LED or illuminated signs if you want nighttime visibility. Test them after setup to confirm lighting works effectively.
- After 2 weeks: Review your campsite layout with directional and rule signs in place. Adjust any placements for better traffic flow or clarity.
- Monthly: Inspect signs for damage or wear, reapplying sealant or replacing batteries as needed to keep everything functional and attractive.
Frequently Asked Questions
What Are Some Easy DIY Camper Sign Ideas for Beginners?
Using stencils to paint simple designs on wooden signs offers an easy way to start. Choose your favorite colors and phrases that reflect your camping style for a personal touch.
How Can I Match My Camper Sign Colors to My RV or Tent?
Select paint shades that complement your camper’s trim or exterior colors. Coordinated hues create a cohesive look that improve your campsite’s appearance.
What Are Unique Themes to Try for Camper Signs Beyond Nature and Vintage?
Consider themes like nautical, rustic farmhouse, or festival-inspired signs. These can add uncommon flair and fit specific camping locations or your interests.
Can I Create a Camper Sign That Also Serves a Practical Function?
Yes, incorporate directional arrows, campsite numbers, or rules directly on your sign. This helps organize your site and informs visitors while showing personality.
How Do I Safely Attach Camper Signs Without Harming Trees or Structures?
Use freestanding posts, weighted bases, or attach signs to your camper or a nearby frame. Avoid nails or screws in live trees to protect their health.
What Lighting Options Work Best for Camper Signs Used at Night?
Battery-operated LED strips or solar-powered lights are efficient and safe for nighttime visibility. These lighting options don’t require electrical hookups and resist outdoor conditions.
Final Thoughts
Personalizing your campsite with camper signs improve both appearance and function, making your outdoor space more welcoming and organized. Start by selecting a favorite sign theme and crafting a simple personalized piece that fits your style. It’s an easy way to add character and practical information to your campsite right away.