What Is Retroreflectivity: A Complete Guide to How It Works and Why It Matters
What is retroreflectivity? It is a material property that reflects light back toward its source efficiently, unlike normal reflection that scatters light in multiple directions. This feature helps improve visibility in low-light or night conditions by directing light from headlights or flashlights straight back to the observer.
To observe retroreflectivity, the angle between the light source and observer is key, ensuring the reflected light returns where it originated. Materials with retroreflective properties are critical in traffic safety for signs, road markings, and high-visibility apparel.
Key Takeaways
- Retroreflectivity differs from normal reflection by returning light directly to its source rather than diffusing it in many directions.
- The coefficient of retroreflection quantifies performance by comparing the intensity of returned light to the incident illumination.
- Microprism films can return up to 80% of incident light, greatly improving visibility at night or in poor lighting.
- The angle of incidence, typically 30° to 60°, significantly affects the effectiveness of retroreflective materials in traffic scenarios.
- Measurement setups use sensors with defined observation angles and apertures to determine light returned from standardized sample areas.
- Wear and wash cycles reduce microprism film retroreflectivity by 5-15% per wash before stabilizing at a baseline level.
What Is Retroreflectivity and How Does It Differ from Normal Reflection?

Retroreflectivity describes a material’s unique ability to reflect light back toward its original source, rather than scattering it in different directions. This differs significantly from normal reflection, where light rays bounce off surfaces following the law of reflection, typically dispersing at angles equal to but opposite the angle of incidence. Retroreflective materials, like those used on highway signs or safety vests, capture the incoming light and send most of it straight back toward the light source, such as a vehicle’s headlights.
This directional return of light causes retroreflective materials to appear particularly bright at night, even from several hundred meters away. For example, when a driver shines headlights on a pedestrian wearing a retroreflective vest, thousands of tiny microprisms within the fabric bend and focus the light rays back toward the driver’s eyes. Unlike a mirror, which might send light elsewhere depending on viewing angles, these microprisms ensure a strong, direct light return that makes the person highly visible under low ambient light.
The effectiveness of retroreflectivity depends on factors like the angle at which light hits the surface, typically between 30° and 60° for common vehicle-to-pedestrian encounters. High-performance materials can reflect 80% or more of the incident light back toward the source, allowing visibility distances exceeding 400 meters. This property is critical for nighttime safety, as it improves recognition and reaction time by drivers.
The cost and complexity of creating retroreflective materials largely stem from the microstructure design, such as microprisms or glass beads embedded within films or fabrics. These structures precisely control how light is manipulated to ensure maximum retroreflection rather than diffuse scattering. Although regular reflective surfaces might be inexpensive and simple, their scattered light return limits nighttime visibility.
Good retroreflective performance means higher visibility and safety but can degrade over time due to washing, weathering, or abrasion. Premium microprism films may lose 5-15% retroreflectivity per wash cycle before stabilizing. This decline highlights the need for regular inspection and replacement of safety gear and signage to maintain effective light return. Retroreflective materials tested to standards like EN ISO 20471 assure consistent performance, colorfastness, and durability in real-world conditions.
How Does Retroreflectivity Work: Optical Principles and Materials
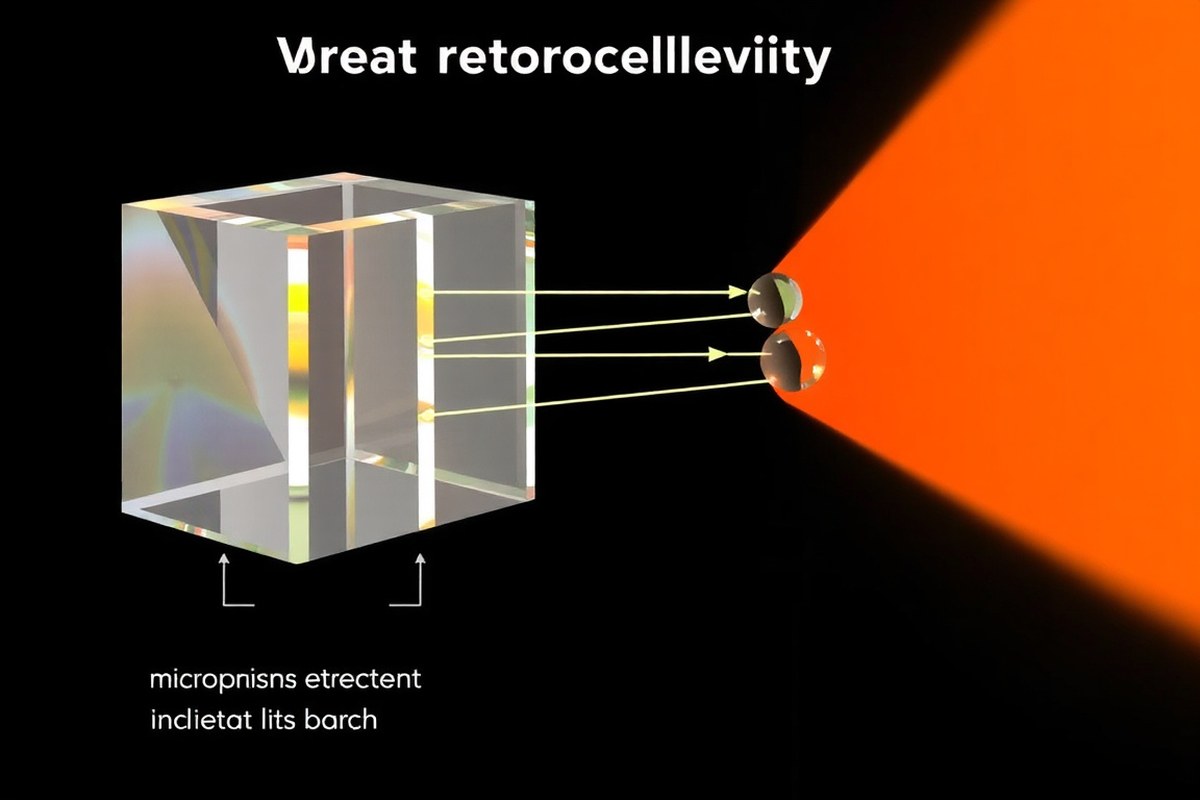
Retroreflectivity occurs when light hits a surface and is redirected back toward its source with minimal scattering. This effect is achieved through microscopic structures embedded in reflective materials, primarily microprisms or glass beads, engineered to manipulate light paths precisely. These materials capture incoming light from headlights or other sources and send it straight back to the origin, improving visibility and safety.
Microprism Retroreflectors and Their Design
Microprism retroreflectors consist of millions of small, three-sided prisms arranged on a flat substrate. Each microprism works by internally reflecting light multiple times within its geometry before sending it back in the direction it came from. The base of each prism has a highly reflective backing that bounces nearly 100% of incident light back towards the front face. The precision-cut angles inside these prisms control the direction of the returning light, making microprism retroreflectors more efficient than other designs. Their rigid, engineered structure also tends to provide higher durability and retroreflective performance over time compared to glass bead materials.
The design of microprisms allows them to sustain retroreflectivity with less degradation, even under harsh environmental conditions. They can maintain significant reflectivity after repeated exposure to cycles of weather and wear. Their ability to return light involves complex internal reflections combined with total internal reflection, which preserves the brightness of retroreflected light.
Glass Bead Retroreflectors and Light Behavior
Glass bead retroreflectors use tiny glass spheres embedded at or near the surface of reflective materials. These beads typically measure between 0.15 and 0.3 millimeters in diameter and act like miniature lenses. When light strikes a bead, it enters the glass and bends towards the sphere’s center due to refraction. It then strikes a reflective backing behind the bead, bouncing off that surface and traveling back through the glass bead along the same path. This process sends light back roughly in the direction it arrived from.
Compared to microprisms, glass beads provide a simpler and often more flexible retroreflective solution. However, they tend to lose 20 to 30% of their retroreflective efficiency with each exposure cycle, mainly due to wear on the bead surface or damage to the backing layer. Glass beads typically produce lower retroreflectivity levels than microprisms but are cost-effective and easier to apply in various materials like traffic signs and pavement markings.
Key Optical Effects: Total Internal Reflection and Refraction
The fundamental physical principle behind retroreflection is total internal reflection. When light travels from a denser medium such as glass (the microprisms or beads) to a less dense medium like air, and hits the interface at a steep angle, it reflects entirely back inside the denser medium instead of passing through. This effect helps trap and redirect the light inside the optical element until it exits back toward the source.
Refraction also plays a critical role. As light moves from air into the glass bead or prism, it bends towards the normal at the boundary, focusing the light towards the reflecting surfaces inside the element. Both multiple internal reflections and refractions work together to ensure that most of the incoming light is returned with minimal loss or scattering. The precise geometry of microprisms provides sharper control over these effects than the spherical shape of glass beads.
| Feature | Microprisms | Glass Beads |
|---|---|---|
| Geometry | Three-sided engineered prisms | Microscopic spherical glass spheres |
| Reflection Mechanism | Multiple total internal reflections plus reflective backing | Refraction through bead, reflection off backing, refraction out |
| Typical Size | Micron-scale prisms precisely cut | 0.15, 0.3 mm diameter spheres |
| Durability | High, less degradation over time | Moderate, 20-30% loss per exposure cycle |
| Reflectivity Efficiency | Higher, close to 100% reflection internally | Lower, partial loss through bead and backing |
| Common Uses | Long-lasting road signs, high-end reflective films | Pavement markings, flexible safety gear, economical signage |
Make sure the reflective backing remains intact and clean; damage or contamination can significantly reduce retroreflective performance regardless of material type.
How Is Retroreflectivity Measured and Quantified in Testing?
Retroreflectivity is measured by quantifying how much light a surface returns toward its source under controlled conditions. This is achieved using specialized instruments that emit light at specific angles and measure the intensity of the reflected light. The core metric reported is the coefficient of retroreflection, which expresses the brightness of the reflected image relative to the incident light.
Measurement Setup and Instruments
Testing typically requires a retroreflectometer designed in accordance with international standards. These instruments contain a standardized light source that emits light at a fixed entrance angle and a sensor or camera positioned to measure reflected light at a defined observation angle. Laboratory instruments maintain strict control over environmental conditions such as ambient light and temperature to ensure accuracy.
Portable retroreflectometers are also used for field testing. They operate on the same principles but may have slightly reduced precision due to factors like ambient light interference and slight deviations in sensor alignment. These devices usually produce results quickly and facilitate on-site decisions regarding retroreflective safety compliance.
The testing area is kept stable and free from dust or moisture, which can alter measurements. Instruments convert raw light intensity data into standardized units (candelas per square meter per lux, cd/m²/lx), allowing direct comparison of materials and compliance with safety thresholds.
Calculating Coefficient of Retroreflection (RA)
The coefficient of retroreflection (RA) measures how much light a material sends back compared to the light shining on it under specific angles. It uses units of cd/m²/lx, which means candela per square meter per lux. This metric helps you objectively compare the performance of various materials or production lots. To calculate RA, measure the luminous intensity of the light reflected back toward the sensor and the illuminance of the incident light on the sample. Their ratio is the coefficient of retroreflection:
RA = (Reflected luminous intensity in cd/m²) / (Incident illuminance in lux)
Here is a step-by-step outline for conducting a measurement and calculating RA:
- Position the retroreflectometer so the light source is aimed at the sample surface at the standardized entrance angle.
- Ensure the sensor or detector is aligned at the required observation angle opposite the light source.
- Activate the instrument’s light source to illuminate the surface and wait for signals to stabilize.
- Record the incident illuminance (lux) on the target area using the instrument’s photometer.
- Measure the reflected luminous intensity (candela per square meter) received by the sensor.
- Apply the ratio formula to calculate RA = reflected luminous intensity / incident illuminance.
- Compare the calculated RA to relevant performance criteria to evaluate compliance.
Standardized Geometric Conditions and Angles
Test methods specify particular entrance and observation angles to simulate typical viewing conditions on roadways or work zones. Common entrance angles range from −4° to 30°, while observation angles are typically in the range of 0.2° to 1°. These angles represent the relative positions of vehicle headlights and driver eye level during night driving.
Variations in angle combinations significantly affect measured retroreflectivity, so adherence to standard geometry is critical. International standards such as ASTM or ISO outline these angles to ensure tests yield comparable and reproducible results between different laboratories and field tests.
Selection of angles depends on the application: pavement markings often use smaller observation angles to replicate driver perspective from 15 meters, while signs and safety garments employ angles representing farther or angled views. Maintaining precise alignment and documented test parameters is essential to avoid inaccuracies from angular deviations.
Which Factors Most Affect Retroreflective Performance in the Field?
Retroreflective performance depends heavily on several factors, primarily geometric angles, environmental conditions, and material wear. The two most significant geometric parameters are the entrance angle and the observation angle. The entrance angle is the angle at which incident light strikes the retroreflective surface, while the observation angle is the angle between the reflected light beam returning toward the observer or sensor and the incoming light source. As the observation angle increases, typically from a driver’s headlight to a traffic sign or a worker’s safety vest, the perceived brightness decreases. For example, a sensor positioned at a small observation angle of 0.2° gathers more reflected light (around 0.00522 lm at 15 meters in research settings), translating to higher brightness. Standards usually dictate setting these angles precisely to ensure consistency in testing and real-world application.
Environmental factors like dirt, moisture, and weathering can seriously degrade retroreflective effectiveness. Dust or grime accumulation blocks or scatters incoming light, diminishing the light that reaches and returns from the reflective elements. Rain, fog, and road spray not only obscure the sign or garment but can also reduce the intensity of retroreflected light. Ultraviolet radiation exposure and temperature fluctuations may cause the retroreflective material to deteriorate over time, impacting reflective crystal or bead integrity. For pavement markings and roadside delineators exposed to harsh conditions, maintenance and timely replacement are essential to retain necessary safety visibility.
Material degradation through abrasion, washing, and physical strain leads to reduced retroreflective brightness. Safety clothing must comply with standards like EN ISO 20471, which mandates maintaining retroreflectivity after at least 25 wash cycles to reflect typical wear conditions. Exposing reflective materials to hot water or strong detergents harms their microprismatic or glass-bead elements, dropping reflectivity below required safety levels. Vehicle traffic and street cleaning wear down road signs and pavement markings, causing tiny scratches and fading of reflective surfaces. Frequent evaluations are essential; items that fall short of the minimal retroreflective brightness, defined by local rules in units of cd/m²/lx, should be replaced quickly to ensure drivers can see them from 200 meters or farther during nighttime or poor lighting.
Maintaining optimal retroreflective visibility involves practical steps. For safety clothing, choosing materials classified as Class 2 or Class 3, which meet higher reflectivity and durability benchmarks, offers better protection. Clean garments regularly but follow manufacturer guidelines to prevent damage. For road signs and pavement markings, scheduled cleaning routines, along with routine retroreflectivity testing using devices set to standardized entrance and observation angles, allow for objective performance assessment. Signs with readings falling below required thresholds should be repaired or replaced immediately to uphold driver and worker safety. The cost of retroreflective maintenance varies; protective clothing with high-grade materials may cost more upfront but reduce replacement frequency, while pavement markings with superior reflective beads might have higher installation costs but maintain visibility longer under heavy traffic.
Common Methods and Standards for Retroreflectivity Testing
Common retroreflectivity testing methods include both on-site and laboratory techniques, each with specific purposes and accuracy levels. Several global standards govern acceptable retroreflectivity values, defining when and how tests should be conducted to maintain safety compliance, especially for traffic safety products and materials.
On-Site Retroreflectivity Testing Techniques
On-site testing is important for verifying the current retroreflective performance of installed traffic signs, pavement markings, and safety garments. Portable retroreflectometers are commonly used tools that provide immediate readings without requiring removal or transport of materials. These devices operate by directing a beam of light at the retroreflective surface and measuring the intensity of the reflected light back toward the source, simulating nighttime visibility.
Testing is usually performed under controlled conditions during nighttime or in shaded areas to avoid interference from ambient light. Transportation agencies typically schedule inspections periodically, such as annually or biannually, to assess maintenance needs. On-site tests help identify deteriorated markings or signs that fall below minimum visibility thresholds, which improves highway safety by prompting timely replacements or repairs.
| Testing Method | Typical Use | Accuracy | Cost | Time Required |
|---|---|---|---|---|
| Portable Retroreflectometer | On-site sign and pavement marking checks | ±5 to 10% | $3,000, $10,000 per unit | Minutes per test |
| Laboratory Spectrophotometer | Material qualification and certification | ±1 to 3% | $15,000, $50,000 | Hours to days per sample set |
| Visual Nighttime Assessment | Quick field evaluations, qualitative only | Low (subjective) | Minimal | Minutes |
Laboratory Testing Methods and Accuracy
Laboratory testing provides detailed and highly accurate retroreflectivity measurements using calibrated spectrophotometers and gonioreflectometers. These instruments analyze standardized samples under controlled angles of illumination and observation to quantify the coefficient of retroreflection (RA) precisely. Such testing is critical for product development, certification, and verifying compliance with material performance requirements before deployment in the field.
Laboratories typically measure retroreflective samples at multiple entrance and observation angles, simulating driver viewpoints at night. They also conduct durability testing, including laundering cycles for safety garments, EN ISO 20471 requires material to maintain performance after 25 wash cycles, while ANSI/ISEA 107 mandates retention after 50 cycles. These rigorous protocols ensure materials meet long-term safety standards.
Ensure laboratory instruments are regularly calibrated and operated by trained personnel to maintain valid and reliable retroreflectivity data.
Overview of Key Safety Standards and Thresholds
International and national safety standards set clear minimum retroreflectivity levels for various applications. For roadway safety, agencies often refer to standards such as ASTM E1709 for pavement markings and ASTM D4956 for reflective sheeting. In occupational safety, ANSI/ISEA 107 (US) and EN ISO 20471 (Europe) specify minimum brightness and durability thresholds for high-visibility garments used by workers.
These standards define test methods, retroreflectivity thresholds, and environmental conditions, ensuring uniformity and comparability. For example, ANSI/ISEA 107 requires a minimum RA value of 350 cd/lx/m² for some garment types under specified test geometries and mandates testing after multiple laundering cycles. EN ISO 20471 similarly specifies durability and retroreflective luminance to guarantee visibility over a product’s lifetime.
- ANSI/ISEA 107, American National Standard for high-visibility safety apparel
- EN ISO 20471, European standard for high-visibility clothing performance
- ASTM E1709, Test method for retroreflectivity of pavement markings
- ASTM D4956, Standard specification for retroreflective sheeting used on traffic signs
- AASHTO M268, Specification for pavement marking materials
To maintain visibility compliance, regular retroreflectivity testing intervals should align with product types and environmental wear expectations. Roadway markings might be inspected every 1, 2 years, while safety garments require testing after specified laundering cycles. Adhering to these standards helps ensure practical effectiveness and reduces risks associated with poor visibility.
What Practical Applications use Retroreflectivity for Safety?
Retroreflectivity finds extensive use in transportation to improve safety during low-light and nighttime conditions. Traffic signs rely heavily on retroreflective sheeting to ensure drivers can read important regulatory, warning, and directional signs from distances typically ranging between 100 and 300 feet at night. These materials must meet minimum retroreflectivity levels specified by national standards, often expressed in candelas per lux per square meter (cd/lx/m²), to maintain visibility under headlight illumination. Pavement markings also use retroreflective glass beads embedded in paint or tape, providing lane delineation and pedestrian crossings that remain visible even in wet or dark conditions. Their retroreflective performance must balance brightness with durability, often requiring maintenance or replacement within 3 to 7 years depending on traffic volume and weather exposure.
In personal safety, retroreflective materials are critical for high-visibility garments worn by road maintenance crews, emergency responders, and industrial workers near traffic or heavy equipment. These garments usually incorporate microprismatic retroreflective tape that offers superior reflective intensity compared to traditional glass bead materials. The applied retroreflective tape has to meet regulatory minimums, such as those set by ANSI/ISEA 107 standards in the US, which specify performance in terms of retroreflection and surface area coverage on the garment to guarantee visibility from at least 1,000 feet under vehicular headlights. Workers’ uniforms include reflective elements not just on vests but also on hard hats, sleeves, and equipment, improving visibility from multiple angles in complex environments.
Emerging applications of retroreflective technology extend into school safety and industrial equipment visibility. Some jurisdictions require children’s backpacks and school uniforms to include retroreflective materials with defined minimum brightness levels, helping drivers see pedestrians at crosswalks during dusk or dawn. Industrial environments increasingly integrate retroreflective markers on machinery and vehicles to reduce collision risks. These markers often use durable microprismatic films that retain performance through temperature ranges from -30°F to 120°F and resist abrasion from frequent handling or weather exposure.
Ensuring effective use of retroreflective materials involves selecting the appropriate product based on the expected environmental conditions, required lifetime, and regulatory standards. For traffic signs, using Type III or Type XI retroreflective sheeting is common, depending on the road speed and traffic density. Pavement marking contractors must apply glass beads at densities specified by the manufacturer, often between 6 and 12 pounds per gallon of paint, while scheduling inspections to verify retroreflectivity levels meet the state Department of Transportation criteria. Worker safety gear must be inspected regularly for tape damage or contamination that reduces reflectivity, replacing garments every 2 to 4 years or sooner if wear is evident. Proper field testing complements laboratory assessment by allowing quick on-site checks of retroreflectivity, supporting timely maintenance decisions without extensive downtime or equipment removal.
How to Interpret Retroreflectivity Test Results for Safety Decisions
Retroreflectivity values directly reflect how well a sign or garment returns light toward a driver or observer, impacting visibility in low-light conditions. Typically measured in candelas per lux per square meter (cd/lx/m²), higher values mean you can see the object from farther away, giving more reaction time on the road. For example, a retroreflectivity value above 250 cd/lx/m² generally provides good visibility for highway signs at normal vehicle speeds during nighttime driving.
Knowing when to replace or maintain retroreflective materials hinges on comparing test results to accepted safety standards. These standards vary based on material type, location, and use case. Federal and state transportation agencies often set minimum retroreflectivity thresholds for highway signs, with values dropping below about 100 cd/lx/m² indicating a need for maintenance or replacement. Garments used by workers in high-traffic areas require even stricter values to ensure stopping distances are safe.
Several factors influence decision thresholds. The sign’s location (urban vs. Rural), typical vehicle speed, and weather conditions all affect the minimum acceptable retroreflectivity. Faster roads need higher visibility margins, while frequently snow-covered or fog-prone areas may require more frequent maintenance inspections to ensure retroreflective performance does not degrade below safe levels. The table below categorizes common retroreflectivity classes and their relation to safety margins. It serves as a straightforward reference for interpreting measurement results and making decisions about maintenance:
| Retroreflectivity Range (cd/lx/m²) | Visibility Quality | Recommended Action | Typical Application |
|---|---|---|---|
| Above 250 | High visibility, safe for all conditions | No action needed | Major highway signs, safety garments |
| 150, 250 | Moderate visibility, acceptable | Monitor regularly | Local road signs, general warning signs |
| 100, 150 | Low visibility, borderline safe | Plan replacement soon | Secondary signs, less critical areas |
| Below 100 | Poor visibility, risky | Immediate replacement recommended | All critical signage and safety wear |
Applying a checklist helps streamline maintenance decisions. First, measure the retroreflectivity at standard observation angles per industry protocols. Second, compare results to the minimum values suited for your site and application. Third, check for physical damage or dirt that might reduce the effective retroreflectivity temporarily. Fourth, schedule cleaning or maintenance if values are marginally low. Fifth, replace materials as soon as values fall into the risky zone to meet safety goals.
Costs vary: testing instruments range from $1,000 to $5,000, while replacement signs or garments can cost hundreds to thousands of dollars depending on size and material. Testing frequency should match the exposure conditions, for example, signs on high-speed roads require at least annual checks, whereas low-traffic rural signs may require only biennial assessment. Using documented standards ensures consistency and reliability in both measuring retroreflectivity and interpreting the results for safety decisions.
Best Practices and Common Mistakes in Retroreflectivity Testing
Accurate retroreflectivity testing depends heavily on meticulous preparation and strict adherence to standard procedures. Start by ensuring the test sample matches required size and mounting specifications for the instrument used. Correct positioning prevents angular errors that significantly skew readings. The retroreflectometer or photometric device must be warmed up and calibrated according to manufacturer guidelines before each use. This calibration stabilizes the instrument’s light source intensity and detector sensitivity, leading to consistent and reliable measurements.
Consistency in test conditions underpins meaningful data. Conduct tests indoors or under controlled lighting to avoid external light interference, which can falsely improve or reduce reflectivity values. Hold the instrument perpendicular to the test surface at the specified distance to maintain the correct geometry for retroreflection measurement. Repeat measurements in multiple spots on the sample surface to account for material inhomogeneity. Averaging these values gives a more representative figure than a single reading.
- Verify sample mounting follows standard size and orientation rules
- Warm up and calibrate the instrument as per manufacturer instructions
- Test in a controlled lighting environment to minimize ambient light effects
- Maintain correct instrument-to-surface distance and angle during measurement
- Take multiple readings across the sample surface and average the results
- Document all environmental conditions like temperature and humidity
- Inspect the sample surface for dirt or damage before testing
Common errors often stem from improper calibration, sample contamination, and inconsistent positioning. Forgetting to warm up the device can cause output intensity fluctuations, while dirty or scratched surfaces absorb or scatter light, falsely lowering retroreflectivity readings. Measuring at an incorrect angle or inconsistent distances introduces variability that diminishes repeatability. Avoid these by cleaning samples with approved solvents and using guides or jigs for reliable instrument placement.
Never skip instrument warm-up and calibration steps; they are essential to prevent inaccurate data that can misinform safety decisions.
Variable environmental factors like temperature and humidity also impact optical properties and instrument performance. Conduct tests within recommended ambient ranges or apply correction factors described in testing standards. For outdoor field testing, consistently note weather conditions to interpret data trends correctly. By following these best practices and avoiding typical pitfalls, you ensure test results that accurately reflect retroreflective performance, aiding valid safety evaluations and compliance assessments.
Step-by-Step Action Plan for Applying Retroreflectivity in Safety Projects
Follow these steps to effectively assess and apply retroreflective materials in your traffic safety initiatives and ensure compliance with safety standards.
- Before your project starts: Identify critical locations such as road signs, pavement markings, and safety apparel that require retroreflective enhancement. Confirm baseline retroreflectivity levels from existing materials.
- Week 1: Select appropriate retroreflective materials based on their performance data and compliance with recognized standards like ASTM or AASHTO. Verify manufacturers’ test certificates.
- Week 2: Conduct field retroreflectivity measurements using calibrated devices at multiple times of day and under various weather conditions. Document readings according to official protocols.
- Week 3: Analyze test data to identify materials or installations that fall below safety thresholds. Plan maintenance, cleaning, or replacement accordingly.
- Week 4: Implement corrective actions such as cleaning pavement markings or replacing worn signs. Retest after adjustments to confirm improvements.
- Ongoing monthly checks: Schedule routine inspections and testing to monitor retroreflective performance and anticipate degradation before it affects safety.
- After 6 months: Review maintenance records and test results to optimize material selection and maintenance frequency for better long-term performance and cost efficiency.
Frequently Asked Questions
What Causes Retroreflectivity to Degrade over Time?
Retroreflectivity degrades due to dirt accumulation, weather exposure, and material wear. Regular cleaning and maintenance extend performance and safety.
How Do Microprism Films Compare with Glass Bead Retroreflectors?
Microprism films offer higher initial brightness but may lose more retroreflectivity after repeated washing than glass bead types.
Can Retroreflective Materials Affect Night Driving Safety?
Yes, they improve driver visibility by reflecting light directly back to vehicle headlights, improving hazard recognition in low-light conditions.
Are There Temperature Limits for Effective Retroreflective Performance?
Extreme temperatures can slightly alter material properties, but most retroreflective materials remain stable within typical road environment ranges.
How Does Retroreflectivity Impact Pedestrian Safety at Crosswalks?
High retroreflectivity on signs and markings increases pedestrian visibility, reducing accidents in poorly lit areas.
What Maintenance Schedule Is Recommended to Preserve Retroreflectivity?
Inspections every 6 to 12 months help identify wear or contamination before safety declines become critical.
The Bottom Line
Understanding retroreflectivity enables you to improve road and traffic safety by selecting and maintaining materials that provide consistent visibility. Start by testing the retroreflective performance of existing safety devices in your area to identify weak points. This step prepares you to make informed decisions that improve safety and comply with relevant standards.