How to Do an Epoxy Inlay Sign: A Complete Step-by-Step Guide
How to do an epoxy inlay sign starts with preparing a precise wood surface, then carefully mixing and pouring clear epoxy to fill your carved design. Achieving a clean, bubble-free pour depends on a slow-curing epoxy resin with a pot life of 20 to 60 minutes and pouring from one corner after letting bubbles settle. Tapering your grooves about 5 degrees ensures the epoxy stays in place without leaking during curing.
Key Takeaways
- Taper inlay pockets 5 degrees to prevent epoxy leakage and create a smooth release from the wood.
- Use epoxy with a pot life of 20 to 60 minutes for better flow and fewer bubbles during pouring.
- Let mixed epoxy rest for 5 minutes before pouring to allow trapped bubbles to escape.
- Pour epoxy slowly from one corner of the groove to minimize air entrapment.
- Let epoxy cure for a minimum of 24 to 48 hours before sanding so it reaches its maximum hardness.
- Maintain a wood-to-epoxy rough ratio of about 3:1 volume, with inlay depths between 1/8 and 1/4 inch.
What Is an Epoxy Inlay Sign and How It Works

An epoxy inlay sign is a woodworking project where carved or routed pockets in wood are filled with epoxy resin. This resin hardens to create a smooth, durable, and often colorful contrast against the wood’s natural grain. The process starts with cutting or routing shallow channels, usually between 1/8 and 1/4 inch deep, into a wood piece about 1/2 inch thick. Then, you pour mixed epoxy resin into these channels. The epoxy bonds tightly to the surrounding wood, creating a smooth integration between the two materials. The wood acts as a stable frame, while the epoxy adds a distinct decorative or functional element.
This technique works well because epoxy resin has properties that complement wood. High-viscosity, slow-curing resins like deep pour epoxy allow you to fill inlays without excessive shrinkage or heat buildup, which can cause cracking. Wood is naturally porous, so sealing the surface before pouring helps prevent bubbles and ensures better adhesion. A slight taper, around 5 degrees, on the pocket walls aids the epoxy in settling evenly and releases any trapped air. After pouring, the epoxy generally takes 24 to 48 hours to cure fully, depending on depth and resin brand. This curing period is critical to achieving a smooth, hard finish that can then be sanded flush with the wood.
Epoxy inlays are popular because they offer several advantages over traditional wood inlay methods. Carving and fitting small wood pieces precisely can be time-consuming and demands high skill. Epoxy lets you create complex or delicate designs without cutting physical inlay pieces. You can tint the resin with a variety of pigments, including UV-reactive or glow-in-the-dark powders, to customize the look dramatically. Epoxy also resists moisture, warping, and wear better than wood, making signs more durable outdoors or in high-traffic areas.
Visual effects achievable with epoxy inlays include vibrant solid colors, swirling metallic finishes, or glowing accents that charge in daylight and illuminate at night. For example, adding about 15% of Techno Glow pigment to the resin creates a glow-in-the-dark effect that is subtle under light but stands out in darkness. You can also blend colors while the resin is still liquid for marbleized patterns or add sawdust to match surrounding wood if a natural look is preferred. The ability to customize color and texture uniquely personalizes your woodworking projects while adding depth and eye-catching contrast to the piece.
Essential Tools and Materials for Epoxy Inlay Signs
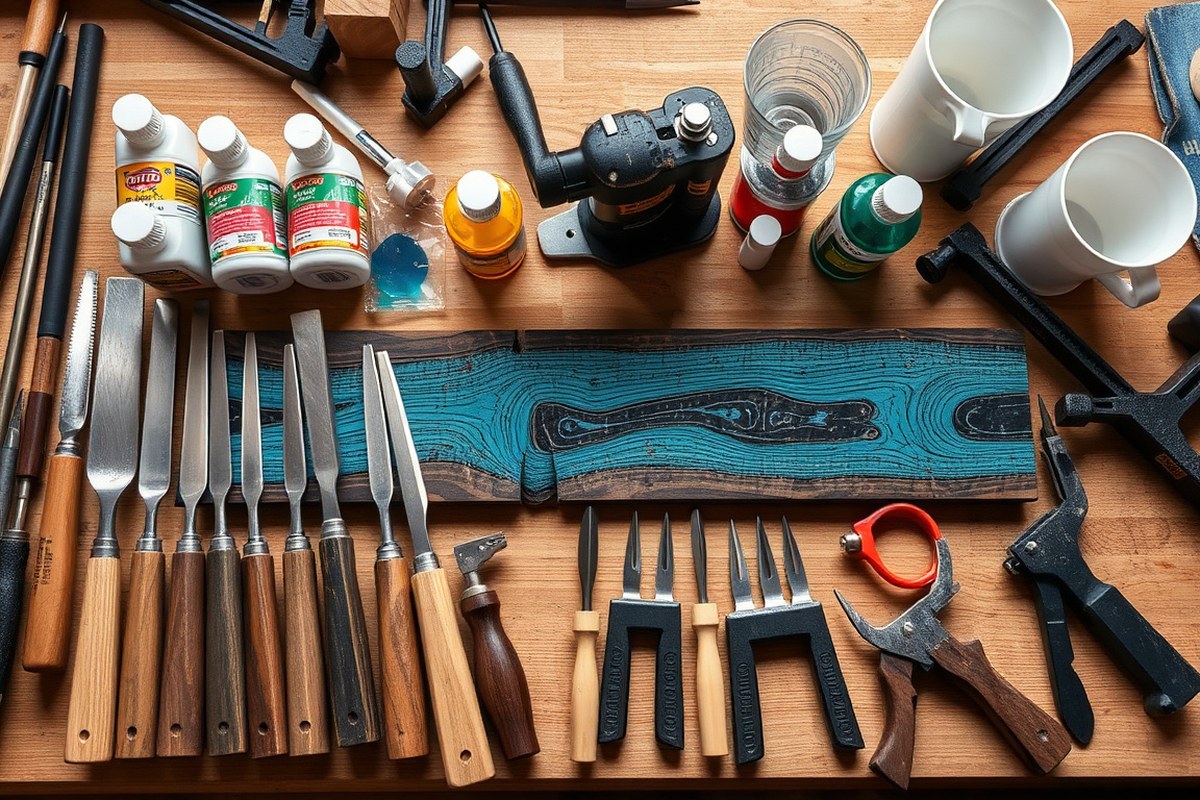
Getting the right tools and materials is key to creating epoxy inlay signs that look professional and last. For hand tools, use a set of sharp chisels around 25° bevel to cleanly square off pockets where epoxy will be poured. A Japanese pull saw with about 17 teeth per inch helps cut precise stops for inlay lines. Power tools like a trim router with a 1/4″ collet and minimal runout keep your pockets smooth and consistent, while an orbital sander with a 5mm stroke provides flatness without swirl marks after curing.
Choose epoxy resin formulated specifically for inlay work, offering clarity and a pot life between 20 to 60 minutes. That balance lets you pour and press embellishments like crushed turquoise or iridescent glass shards before the epoxy skins over, but prevents bubbles from forming. A compatible hardener ensures thorough curing and prevents cloudiness. Pigments come as powders or liquid dyes; both add vibrant colors, but test small batches first since deep or bright shades require precise mixing to avoid color shifts.
Common additives include metallic powders for shimmer or fine glitter for sparkle. You can also embed small objects like shells or quartz chips into the still-tacky epoxy layer for unique effects. Using these materials means paying close attention to epoxy’s curing schedule and the wood surface prep to avoid voids. Sealing the grain prior to pouring stops the wood from pulling epoxy away and causing bubbles or cracks.
- Chisels (Narex 4-piece set, 25° bevel) for clean edges
- Japanese pull saw (Gyokucho, 17 TPI) for precise cuts
- Trim router (DeWalt 618, 1/4″ collet) for smooth pockets
- Orbital sander (Mirka Deros, 5mm stroke) for final sanding
- Epoxy resin and matching hardener with 20, 60 min pot life
- Pigments (powder or liquid) and optional metallic powders
- Safety gear: nitrile gloves, respirator rated for organic vapors, and eye protection
Safety gear is mandatory. Nitrile gloves protect your skin from irritants, a respirator prevents inhaling fumes, and eye protection guards against splashes. Epoxy kits often cost between $30 to $80 per quart, enough for several small signs. A good-quality set of pigments and additives usually runs $10 to $25. Investing in quality tools and materials pays off with fewer mistakes and a cleaner finish.
Do not pour epoxy on unsealed wood surfaces; pores will absorb resin and release air bubbles, ruining your inlay clarity.
Choosing and Preparing Wood for Best Epoxy Results
Choosing the right wood and preparing it carefully ensures your epoxy inlay holds well and looks clean. Select wood species with appropriate hardness and grain, seal the pores to prevent unwanted epoxy absorption, then carve tidy inlay grooves for a crisp fit. These steps set up your sign for a smooth epoxy pour and lasting finish.
Wood Species and Grain Effects
Wood hardness and grain pattern directly influence how epoxy behaves when poured into inlays. Woods like reclaimed oak, black walnut, cherry, and barn pine work well for signs. Oak has deep pores that absorb epoxy more readily, which can cause cloudy or crunchy textures if untreated. Black walnut and cherry offer smoother, tighter grain that results in clearer epoxy surfaces and elegant visual depth due to their mineral streaks or chatoyance.
Check a wood’s hardness using the Janka scale: oak scores 1,290 lbf, walnut about 1,010 lbf, and cherry around 950 lbf. Harder woods take more sanding effort after epoxy cures, so find a balance based on your tools and skills. Also, consider wood movement, oak’s tangential shrinkage of around 8.6% means cavities might change slightly over time, affecting epoxy adhesion and cracking risk.
Sealing Wood Pores Correctly
Sealing before epoxy application prevents excess resin from soaking deep into the wood pores, which leads to bubbles or uneven curing. A quick coat of spray-on lacquer around the inlay area is an effective sealant method. Apply one thin, even layer and let it dry fully, usually about 15 to 30 minutes depending on brand instructions. This thin seal acts as a barrier without blocking epoxy adhesion, ensuring the resin cures cleanly and flush.
Alternatively, woodworkers sometimes use diluted glue or specialized pore fillers for sealing, but lacquer is preferred for speed and clarity when working with epoxy inlays on signs. Avoid soaking wood heavily; the goal is to seal surface pores, not saturate the fibers. Test seal a scrap piece first, then feel for uniform dryness and no tackiness before moving on.
Routing and Cleaning Inlay Grooves
Create precise, clean grooves or recesses for epoxy inlays by using a router fitted with a straight or spiral bit matching your design depth and width. Set the depth carefully, usually between 1/8 and 1/4 inch (3 to 6 mm) depending on the epoxy volume you plan to pour. Use a router table for more control or steady your handheld router with guide fences for consistent cuts along patterns.
After routing, clean out dust and wood chips thoroughly. Use a small brush or compressed air to remove debris that could trap air bubbles or weaken epoxy bonding. Smooth the groove edges with fine sandpaper to remove splinters and burrs. Sharp, clean-cut grooves allow epoxy to flow evenly and lock in place better, preventing gaps or shrinkage marks later.
Mixing and Pouring Epoxy Resin Without Bubbles
Proper mixing and pouring of epoxy resin is key to a smooth, bubble-free inlay in your wood sign. Precise measuring, adding pigments carefully, letting bubbles rise, and using controlled pouring techniques help you get an even, glossy epoxy surface.
Measuring and Mixing Ratios Precisely
Accurate measurement of resin and hardener is critical since improper ratios can stop the epoxy from curing hard. Follow the manufacturer’s specific ratio, often 1:1 or 2:1 by volume. Use clear measuring cups for each component and pour slowly to avoid splashing air into the mix.
Mix your components thoroughly but gently to avoid adding air bubbles. Mechanical mixers on low speed work well. Mix long enough to eliminate streaks, around 3 to 5 minutes, scraping the sides and bottom of your mixing container periodically. Let the mixture stand for about 5 minutes at room temperature, around 70°F, to allow bubbles to rise before pouring.
Using Pigments, Glow Powders, and Metal Fillings
Only add pigments after mixing the resin and hardener completely. Start with approximately 1 tablespoon of pigment for every 8 ounces of resin to achieve a bright or glowing look. Choosing wet pigments or glow powders helps maintain an even suspension and reduces bubbles compared to dry powders. For metallic mica powders, keep the pigment under 20% of the epoxy volume to ensure proper flow and curing.
Mix the pigments evenly until you get the desired opacity or transparency. Avoid adding pigments too early or mixing aggressively, which can create bubbles. Gradual addition and slow mixing of pigments are best for a uniform finish and good light dispersion if you plan to incorporate LED lighting effects.
Bubble Release and Pouring Best Practices
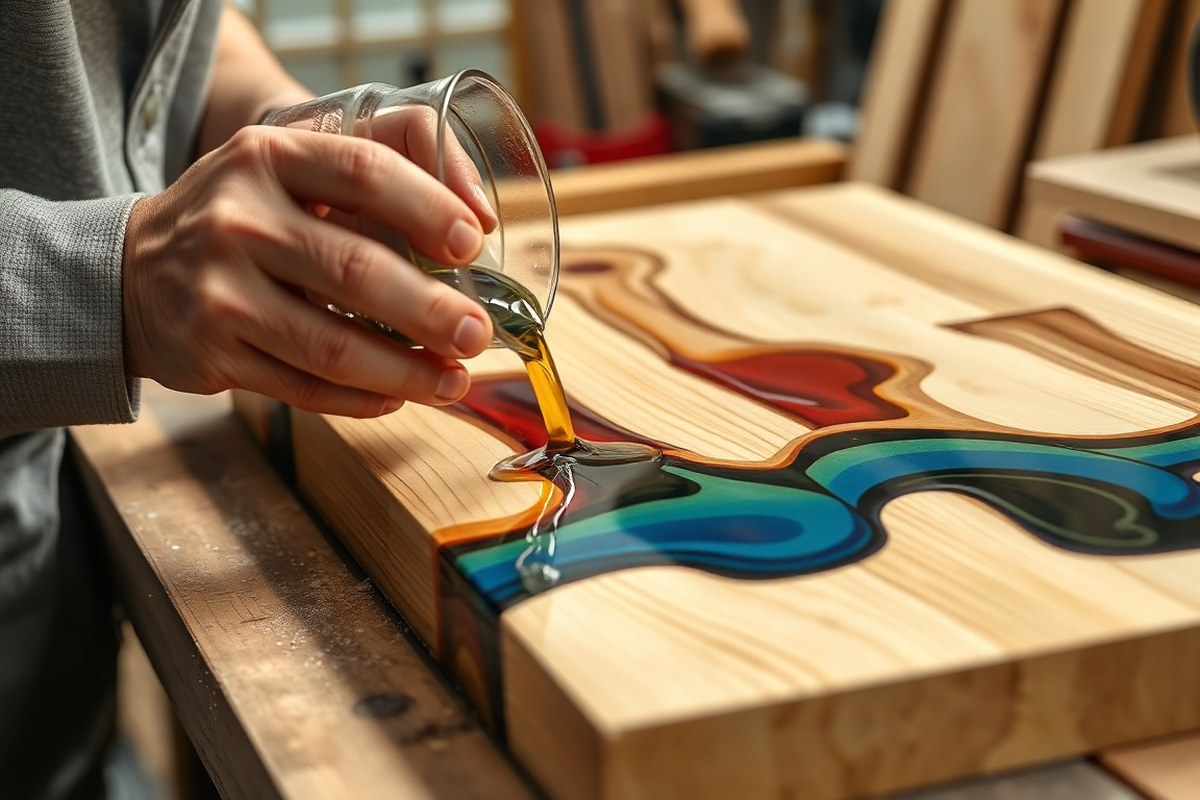
Once mixed and pigmented, pour your epoxy slowly from one corner to avoid trapping air. Start with a thin tack coat around 1/16 inch deep to seal the wood and fill small grooves. After this layer cures slightly, pour the remaining resin for the main fill. Slightly dome the surface for self-leveling, anticipating that epoxy naturally settles flat.
Use a propane torch or heat gun to lightly pass over the epoxy surface 2 to 3 times to pop bubbles. Keep the flame moving continuously to prevent overheating, which might cause yellowing or uneven curing. Maintaining epoxy temperature near 85°F before mixing helps reduce viscosity, thinning it from 500 to 1,000 cps down to about 300 cps, which encourages bubbles to escape instead of forming.
- Measure resin and hardener accurately according to your epoxy’s specified ratio.
- Combine resin and hardener in a clean mixing cup, stirring slowly with a stick or mechanical mixer on low speed for 3-5 minutes.
- Let the mixture rest for 5 minutes to allow initial bubbles to rise to the surface.
- Add pigments or glow powders gradually, mixing gently until uniform color is achieved.
- Pour a thin initial layer (about 1/16 inch) onto your wood inlay and allow it to set slightly to seal the surface.
- Fill the inlay grooves with the remaining epoxy in a steady, slow pour, starting from one corner.
- Use a propane torch or heat gun with light, sweeping passes over the epoxy to pop any surface bubbles.
- Let the epoxy cure undisturbed at room temperature for at least 24 hours to achieve 80% hardness before sanding or handling.
Curing Times and How to Know Epoxy Is Ready
Epoxy used for inlay signs typically needs to cure for at least 12 to 24 hours before it’s safe to handle or sand. For thicker pours, expect full curing to take up to 72 hours. This extended curing period ensures the resin solidifies properly, preventing stickiness or softness that can ruin your finish or damage sanding tools.
Temperature plays a key role in how fast your epoxy cures. Warmer conditions between 70°F and 80°F help the resin harden in a timely manner, while cooler environments can slow the chemical reaction significantly, sometimes doubling or tripling cure times. You should also avoid high humidity, as moisture can cause cloudiness or surface bubbles in the epoxy, affecting clarity and stability.
The thickness of your epoxy pour matters too. Thin layers, around 1/8 inch thick, cure faster, usually within 12 to 24 hours. Deep pours beyond 1/4 inch require up to 72 hours to fully set. Layers that are too thick risk overheating and could crack or cure unevenly. Pour in multiple stages if you want a thick inlay, allowing each to cure before adding the next.
To know if epoxy is fully cured and ready, check its hardness by pressing lightly with your fingernail. A fully cured surface should feel solid and no longer tacky or soft in any spot. Also, the epoxy color will often change from milky or cloudy to clear when cured properly, especially with epoxy brands designed for clear finishes.
You can speed up curing slightly using a heat source like a heat gun or placing your project in a warm area above 75°F. However, avoid direct and intense heat as it can cause bubbles or uneven curing. Slowing the cure can be done by working in cooler temperatures or using epoxy with a longer pot life, but this increases the risk of dust settling on your project or epoxy collecting moisture.
Be patient and give at least 24 hours before sanding, even if the epoxy feels dry; sanding too soon can cause smearing and damage to the inlay.
Sanding, Leveling, and Finishing Your Epoxy Inlay Sign
Sanding epoxy inlay signs flush with the wood surface requires patience and the right grit progression to avoid scratching or fogging the epoxy. Polishing helps restore gloss after sanding, while finishing coats protect the sign from wear and maintain its clarity over time. Treat epoxy with care throughout these steps to keep the inlay looking crisp and vibrant.
Proper Sanding Grit Progression
Start sanding epoxy only after it has fully cured, usually at least 24 to 48 hours, to avoid smearing or gum-up on sandpaper. Use 80-grit sandpaper first to level any high spots between the wood and epoxy. Sand with a block or electric sander, moving with the wood grain to minimize scratches. Avoid excessive pressure to prevent scratching the epoxy surface.
Follow the coarse sanding with finer grits to remove scratch marks and achieve a smooth finish. Progress through grits such as 120, 220, 400, and finish with 600 or 800 grit wet/dry sandpaper for a polished surface. Wet sanding with water after 400 grit helps prevent dust buildup and reduces heat that could fog the epoxy.
- Ensure epoxy is fully cured before sanding to avoid smearing.
- Use 80-grit sandpaper to level epoxy flush with the wood surface.
- Sand with a block or power sander, following the wood grain direction.
- Progress through 120, 220, 400 grit sandpaper to smooth scratches.
- Wet sand with 600 to 800 grit for final polishing of the epoxy surface.
- Wipe with a damp cloth between grit changes to clear debris.
- Check the surface frequently to avoid sanding through thin epoxy layers.
Using Polishes and Sealers
After sanding, use a fine polishing compound or automotive plastic polish to restore the epoxy’s gloss and clarity. Apply polish with a soft cloth or buffing pad, working in circular motions and buffing gently until the surface shines evenly. Polishing removes fine micro-scratches from sanding that cause cloudiness.
To prevent the epoxy from becoming dull or foggy over time, seal it with a clear epoxy-compatible sealer or urethane spray. Apply thin coats and allow them to dry fully between applications. Sealers add a smooth finish and help protect the surface from moisture and minor abrasions.
Applying Finishing Coatings for Protection
Protect your epoxy inlay sign by applying at least one clear coat over the entire surface. Use spar urethane, polyurethane, or acrylic finishes formulated for woodworking projects for durable protection. Choose satin, semi-gloss, or gloss sheen based on your desired appearance.
Apply finishing coats with a foam brush or high-quality synthetic brush in thin layers to prevent drips and uneven sheen. Sand lightly between coats using 320 to 400 grit sandpaper to keep the surface smooth. Two to three coats spaced several hours apart create a tough, wear-resistant finish that also highlights the epoxy’s depth and color vibrancy.
Common Epoxy Inlay Mistakes and How to Fix Them
Common problems in epoxy inlay signs include air bubbles, cloudy or soft cures, and epoxy overflow. Air bubbles often result from surface tension and trapped air escaping from the wood itself. Using a low-viscosity epoxy designed for thin inlays, such as tabletop epoxy, helps the resin flow smoothly into grooves without trapping air. Sealing the porous wood surface with a thin layer of epoxy before the main pour can prevent bubbles from rising during curing, which makes the finish smoother.
Cloudy epoxy usually occurs when the resin mixes at the wrong temperature or cures too quickly. Ideal working temperatures for most epoxy kits range between 70 and 75 degrees Fahrenheit. Cooler temperatures slow curing time and can cause a cloudy or soft cure. To fix an epoxy that didn’t fully cure, you can sand the affected area gently once it’s hardened and apply a thin topcoat of fresh epoxy to re-seal it. For best results, allow the epoxy to cure fully, typically 24 to 48 hours, before sanding.
Epoxy flowing out of your inlay grooves typically happens when you pour too much or don’t seal or tape the groove edges properly. To prevent this, accurately measure the groove volume and mix just enough epoxy for that space, pouring slowly. Applying painter’s tape around the groove edges before pouring can contain overflow. When overflow happens, wait for the epoxy to harden, then trim or sand off the excess before continuing with finishing steps. Always clean edges to maintain a sharp, professional look.
Repairing damaged inlays can vary based on the problem. For small dings or scratches after curing, sanding and recoating with a thin epoxy layer fixes surface flaws. When epoxy cracks or lifts from the wood, scrape out the damaged part, reseal the wood, and pour fresh epoxy to restore adhesion. Large mistakes may require removing the entire epoxy inlay and starting over with proper sealing and pouring techniques in place.
| Issue | Cause | How to Fix | How to Prevent |
|---|---|---|---|
| Air Bubbles | Surface tension, wood outgassing, porous wood | Seal wood with thin epoxy coat; apply heat with a torch or heat gun to release bubbles after pouring | Seal porous surfaces; use low-viscosity epoxy; work at recommended temps |
| Cloudy Cure | Temperature too low or improper mixing | Sand affected area; apply thin fresh epoxy layer after hardening | Maintain 70-75°F workspace; mix epoxy thoroughly but gently |
| Epoxy Overflow | Overpouring; no containment | Trim or sand hardened overflow | Measure groove volume; tape edges before pouring |
| Cracks or Lifting | Poor adhesion; wood movement | Remove damaged epoxy; reseal wood; repour fresh epoxy | Seal wood properly; use correct epoxy viscosity |
Applying heat to freshly poured epoxy with a small propane torch or heat gun encourages air bubbles to rise to the surface and pop. Take care not to overheat or burn the wood. Porous or raw wood surfaces must be sealed with a thin epoxy layer and allowed to cure fully before pouring the main fill to reduce gas release during curing, which causes bubbles. Working in a warm, dust-free area and mixing epoxy slowly minimizes trapped air as well.
Working with epoxy requires careful preparation and environmental control. Take your time measuring and mixing, and avoid rushing the pour or curing process. Small steps, like sealing wood early and controlling temperature, reduce common mistakes that could cost time and materials. Repairs are possible but often take extra work, so focusing on prevention is usually faster and yields cleaner results.
Safety Precautions and Advanced Tips for Epoxy Inlays
Wearing the right personal protective equipment (PPE) is essential when working with epoxy resin. Always use nitrile gloves to protect your skin from irritation and sensitization, alongside safety glasses or goggles to shield your eyes from splashes. A chemical-resistant apron helps prevent damage to your clothing and skin. Use a respirator with organic vapor cartridges if you’re working with large amounts or in a poorly ventilated space, as epoxy fumes can cause respiratory issues.
Good ventilation matters because epoxy resin emits volatile organic compounds (VOCs) during mixing and curing. Work near open windows or outdoors to keep fresh air flowing. Fans can help direct fumes away from your breathing zone. Avoid enclosed workshops without air exchange, especially for prolonged pours or multi-layer projects, to reduce headache or dizziness risks.
Store epoxy resin and hardener separately in a cool, dry place, ideally between 60 and 80°F (15, 27°C) to preserve shelf life. Keep containers tightly sealed to prevent moisture contamination, which can cause curing problems. For disposal, allow leftover mixed epoxy to fully cure in a disposable container; once hardened, it can be discarded with regular trash in most areas. Never pour uncured epoxy down drains or into the environment because it is toxic and difficult to treat. Check local regulations for hazardous waste guidelines.
Creating multi-layer epoxy inlays lets you add depth and special effects, such as clear layers over metallic powders or glow-in-the-dark additives. Pour your first thin layer and allow it to cure for 12 to 24 hours until it’s tacky but solid enough to support another layer. Then apply subsequent pours carefully to avoid bubbles and achieve sharp stratification. Use pigments and glow powders in the top or bottom layers depending on desired outcomes. Layering takes patience but results in complex, eye-catching designs.
Advanced techniques include sealing porous woods before pouring to prevent bubbles and using mold release sprays on form edges to avoid hard-to-sand overflow. Adding fine metal flakes or mixing in phosphorescent powders can create vibrant or glow voids that light up signs in the dark or catch the sunlight brilliantly.
Professional help should be sought if you plan very large pours over 1 inch thick, need food-safe certification, or want to work with complex molds and industrial-level curing processes. Experts provide specialized equipment like vacuum chambers to remove bubbles and ovens for controlled curing that hobby setups lack.
Avoid skin contact by putting on nitrile gloves before mixing epoxy; do not rely on latex gloves as they can degrade and offer limited protection.
Step-by-Step Action Plan for Your Epoxy Inlay Sign
Follow these steps to create your epoxy inlay sign with confidence and get a smooth, durable finish.
- Day 1 – Prepare Your Wood Base: Choose and clean your wood, then carve or rout your design groove. Test the fit by pressing the epoxy outline in; it should sit flush.
- Day 2 – Seal the Wood: Apply a thin seal coat of epoxy or wood sealer to the groove and wood surface. Wait for it to dry and check for any wood absorption to prevent bubbles.
- Day 3 – Mix Your Epoxy: Measure your epoxy resin and hardener exactly according to package instructions. Stir slowly for 3 to 5 minutes, scraping the sides, until the mixture is clear.
- Day 3 – Pour and Level Epoxy: Carefully pour the epoxy into the groove, slightly overfilling. Use a spreader to level it evenly and pop bubbles with a heat gun or torch. Check for a smooth surface.
- Days 4-6 – Let Epoxy Cure: Keep the project in a dust-free, temperature-stable area. The epoxy should harden without tackiness; test by lightly touching for firm resistance.
- Day 7 – Sand and Finish: Start sanding with 120-grit to remove excess epoxy, then progress to 220-grit or finer for a smooth finish. Check that the epoxy and wood surfaces are level.
- Day 7 – Apply Final Wood Finish: Seal and protect your sign with your preferred finish, such as oil or varnish. Confirm even coverage without dulling the epoxy shine.
Frequently Asked Questions
What Is the Ideal Depth for an Epoxy Inlay in a 1/2″ Thick Wooden Sign?
The ideal depth is between 1/8″ and 1/4″ to maintain a proper epoxy to wood ratio of about 1:3 by volume. This balance helps ensure the inlay is durable without overpowering the wood structure.
How Can I Prevent Epoxy from Draining Out of My Wood Pocket During Pouring?
Always taper the pocket angle to about 5 degrees for easy release and to prevent leakage. A sharper taper like 2 degrees can cause epoxy to drain, as it flows through too easily.
What Wood Types Work Best to Avoid Warping When Applying Epoxy Inlay?
Use stable, dry hardwoods rather than fresh or soft woods like pine, which can warp under epoxy weight and cause cracks. Proper wood selection ensures longevity and a professional finish.
Can I Add Decorative Elements into Epoxy After It Starts Curing?
Yes, after about 45 minutes when the epoxy is tacky, press in crushed turquoise, quartz, or glass shards for embedded accents. This technique adds texture and color to your inlay.
How Do I Check If Epoxy Is Fully Cured Before Sanding on a Sign Project?
Allow 24 to 48 hours depending on the resin brand and pour thickness, then press lightly to check firmness. Fully cured epoxy will feel hard and resist indentation.
Is It Necessary to Taper Pockets When Making an Epoxy Inlay Sign?
Tapering at about 5 degrees is necessary to prevent epoxy bleeding and make wood releases easier. It helps keep edges neat and reduces issues with uneven surfaces.
Final Thoughts
Your epoxy inlay sign will combine the warmth of wood with the clear, glossy finish of epoxy for a lasting design. Begin by carving your wood carefully, and focus on slow mixing and controlled curing to avoid common issues. Start your project today by preparing your wood and carving the design groove, you’ll be one step closer to your custom sign.