Graduation Sign Ideas That Wow: 8 Creative & Practical Ways to Celebrate
Graduation sign ideas that wow combine clear, celebratory messages with creative design to highlight your graduate’s achievements. Focus on bold text, personalized photos, and bright colors for maximum impact. Starting with a simple message like “Congrats, Class of 2025!” sets a clear theme that guests will instantly recognize and appreciate.
Key Takeaways
- Use no more than 30, 40% of the sign for graphics to leave space for signatures and messages from guests.
- A bold one-liner paired with a great photo catches attention and makes the sign highly shareable.
- Arrange 3D letters spelling “GRAD” or the graduate’s name for eye-catching yard or table displays.
- Choose bright colors in the graduate’s school palette to increase visibility and personalize the decoration.
- Incorporate a then-and-now photo to showcase the graduate’s journey, adding a sentimental touch.
- Light-up yard signs or LED accents extend celebration visibility into the evening.
Popular Types of Graduation Signs and Their Uses
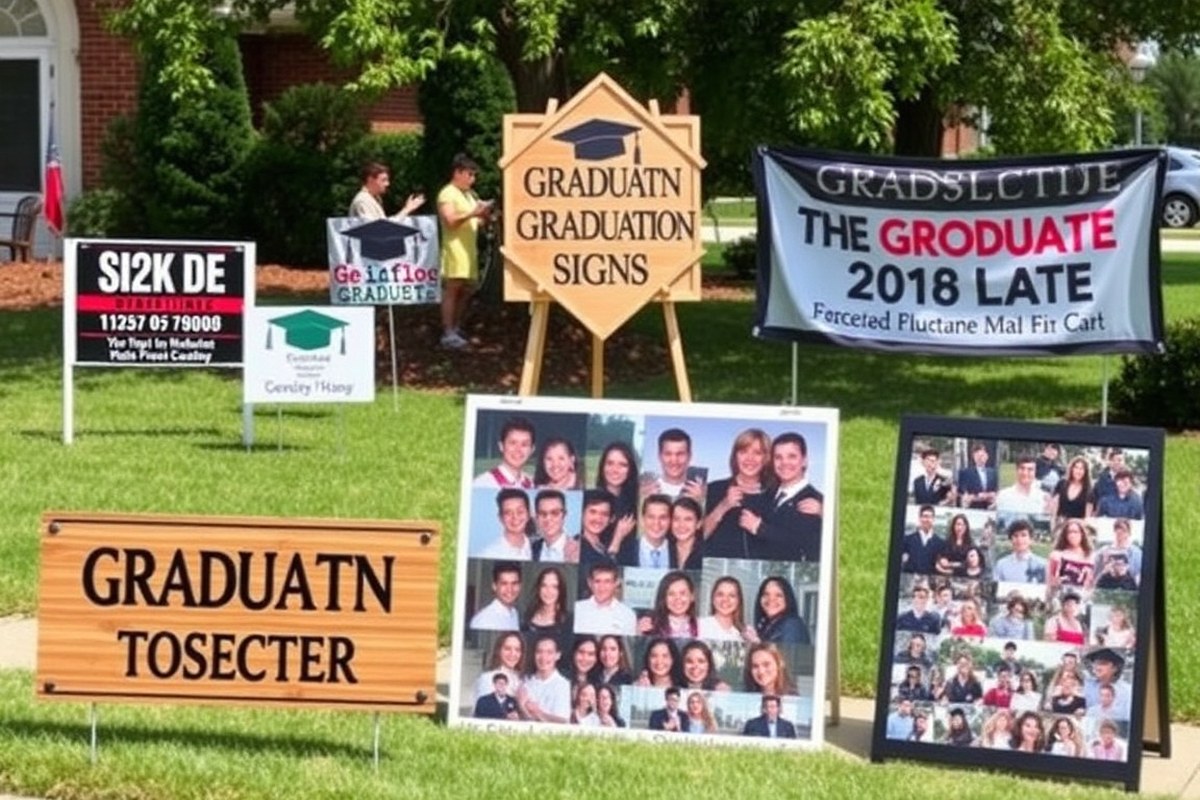
Graduation signs come in several popular types, each designed to highlight different parts of the celebration and suit specific settings. Yard signs are the most common, offering full-color prints featuring bold one-liners, photos, and personalized details like names and graduation years. They work best outdoors in front yards or along walkways to welcome guests or celebrate the graduate from the curb. Another popular option is wooden signs, which often come in kits for easy DIY customization. These add a crafty touch inside party venues or at entrance areas, offering a witty or heartfelt message that feels personal and memorable.
Faux chalkboard signs create a vintage vibe and are durable enough for both indoor and outdoor use. These are great for displaying schedules, programs, or greetings near the party entrance or seating areas. Light-up graduation signs with LED accents or 3D cutouts provide a festive atmosphere after sunset, ideally placed at main gathering spots or near the photo area to bring your celebration to life. Each type brings a different focus, from welcoming guests to providing photo-worthy moments or adding ambiance. The table below compares these main graduation sign types so you can match the right style with your event needs:
| Sign Type | Best Location | Uses | Pros | Cons |
|---|---|---|---|---|
| Yard Signs (Full-Color Prints) | Front yard, driveway, walkway | Welcome guests, curb appeal, photo ops | Highly visible, personalized photo and text, durable for outdoors | Needs stake or frame, can be affected by wind or rain |
| Wooden Sign Kits (DIY) | Entryway, indoor party space, gift table | Creative messaging, personal touch, keepsake | Customizable, reusable, warm and charming look | Less weather resistant, requires time and materials to craft |
| Faux Chalkboard Signs | Entrance, seating area, near food/drinks | Display schedules, greetings, or menus | Vintage style, durable, easy to update messages | Can be hard to read from distance, limited color palette |
| Light-Up Signs (LED/3D Elements) | Main party area, photo backdrop, evening events | Decorative lighting, attention grabber, photo highlight | Bright, attractive, adds excitement | Requires power source, higher cost, sensitive to weather |
Deciding where to place each sign depends on the event flow and lighting. Yard signs suit outdoor spaces well before guests arrive or move through the area, while wooden signs and chalkboards work great indoors or at entrance points where guests stop to read. Light-up signs shine brightest after dark, so placing them near the gathering or photo area can extend festivities into the evening with style. Costs can vary: yard signs generally cost around $20 to $50 each, wooden kits run from $25 upwards depending on size, chalkboard signs around $30 to $60, and light-up signs tend to be pricier, often exceeding $50 because of electrical components.
Choosing a mix of these signs creates a layered effect, combining visibility, personalization, and atmosphere to make the graduate feel truly celebrated. Placement and message choice reinforce the moment, so matching sign type to location and occasion delivers the best results for memorable graduation celebrations.
Designing Personalized Graduation Signs That Impress
Designing personalized graduation signs that impress involves selecting the right combination of colors, fonts, photos, and mascot elements to celebrate the graduate’s achievements while reflecting school pride. A well-designed sign features bold text, clear hierarchy, and a balanced layout that highlights key details such as the graduate’s name, class year, and school. Incorporating photos tastefully and integrating mascot motifs adds a unique personal touch and connection to the school community.
Choosing the Right Colors and Fonts
Using your graduate’s school colors is the most effective way to show school pride and create a visually striking sign. Choose two to three primary colors from the school palette to keep the design cohesive but vibrant. Pair bright colors with high contrast backgrounds to ensure text is readable from a distance, especially for yard signs or banners. Large, bold fonts work best for important information like the graduate’s name and class year, as these are the focal points. Avoid overly decorative fonts for main text since they can reduce readability, but feel free to use script or playful fonts for quotes or secondary messages to add personality.
Compliance with good font choices impacts how quickly viewers can absorb the sign’s message. Fonts like Arial, Helvetica, or Impact provide clear legibility. The size of the text matters; for a typical 24 x 18-inch yard sign, use fonts at least 3 to 4 inches tall for the graduate’s name and year. Make sure there is enough spacing between lines and letters for clarity.
Integrating Photos and Mascots
Adding a photo of the graduate personalizes the sign and makes it memorable. Position photos strategically to the side or near the bottom corner so they don’t compete with text but improve the overall design. Limit photo use to no more than 30-40% of the sign’s surface to leave ample space for greetings and signatures if the sign doubles as a guest book. High-resolution photos printed on durable materials ensure your sign looks professional and holds up outdoors.
Incorporate the school’s mascot by using vector images or cutout shapes next to the text or at the corners. Mascots celebrate the graduate’s connection to their school community and add a playful, spirited element to the sign. Use mascot images consistently with the school colors to maintain visual harmony. For example, if the mascot is a tiger in navy and gold, use those exact shades for the mascot graphic and surrounding accents.
Balancing Text and Decorative Elements
Successful signs have a clear text hierarchy: the graduate’s name and class year are the largest and most prominent, followed by the school name or milestone, then the congratulatory message or quote. Arrange text in blocks with consistent margins to avoid clutter. Decorative elements like garlands, borders, or star-shaped foam boards should frame the text without overwhelming it. Use decorative accents to draw the eye and add energy, but keep them subtle enough to maintain readability.
For a themed aesthetic, a modern style might use clean lines, sans-serif fonts, and minimalist borders in school colors. A festive style could feature cursive fonts, bright banners, and playful mascots. Select style elements that suit your celebration’s tone and location, such as a backyard party versus a formal auditorium event. Combining solid backgrounds with colorful accents can help make text pop while keeping the sign elegant and polished.
Reserve at least 60% of the sign area for open space or text to avoid a cluttered design that’s hard to read from a distance.
Crafting DIY Graduation Signs with Easy Materials
Creating your own graduation signs can fit any budget and add a personal touch to the celebration. Using easy-to-find materials like chalkboards, wood, and photo banners lets you craft unique decorations without overspending. Adding simple decorations like glitter or tassel garlands brings your signs to life and highlights the graduate’s achievements.
Making a Faux Chalkboard Sign
Faux chalkboard signs offer a classic and flexible look for your graduation party. They are budget-friendly, easy to customize, and reusable for future events. To make one, you will need a smooth board surface such as plywood or foam board, chalkboard paint, chalk markers for vibrant details, and a ruler or stencil for neat lettering.
- Prepare the surface: Lightly sand the board to ensure smoothness and wipe off dust.
- Apply chalkboard paint: Use a foam roller to cover the board in two coats, allowing 1 hour to dry between coats.
- Season the chalkboard: Rub the entire surface with chalk, then wipe off to prevent marker ghosting.
- Design your message: Sketch your layout with chalk pencil or stencil, then write with chalk markers for bold colors.
- Add details: Incorporate tassel garlands along the edges or small glitter accents to brighten your design.
- Mount your sign: Attach to a wooden easel or hang with twine for easy display outdoors or indoors.
This method costs about $15 to $30 depending on board size and supplies, making it affordable and eye-catching. Watch for smudging; chalk markers dry faster than regular chalk but still benefit from gentle handling.
Crafting a Personalized Wooden Sign
Wooden signs bring warmth and durability to graduation decorations. You can use plywood or pre-cut wooden panels, sandpaper, acrylic paint or paint pens, and stencils or vinyl lettering for custom messages. Wooden picture frames can accompany the sign to include meaningful photos, improving the sentimental value.
- Choose and prepare wood: Select a smooth wooden panel or plywood and sand all surfaces well.
- Prime the wood: Apply a layer of white or pastel primer to create a bright base for your colors.
- Plan your design: Sketch or use removable stencils to outline names, dates, or motivational quotes.
- Paint your message: Use acrylic paint with fine brushes or paint markers, allowing each color to dry 20-30 minutes before adding another.
- Add accents: Glue on decorative tassel garlands or sprinkle glitter on wet paint for sparkle.
- Protect the finish: Spray a clear acrylic sealer to weatherproof the sign for outdoor use.
- Display your sign: Place it on a wooden easel or hang it with sturdy hooks.
The total expense ranges from $20 to $50, depending on wood type and paint quality. Wooden signs look professional and last longer outdoors but require more drying time and effort than chalkboards.
Adding Decorative Touches and Lighting
Small decorations dramatically improve any handmade graduation sign. Tassel garlands create a festive vibe and match graduation outfits. Glitter offers a sparkling finish but use it sparingly to avoid messy shedding. For lighting, battery-operated LED string lights work well around the edges of signs to catch attention after dark without wiring hazards. Here are some tips for decorating your DIY signs:
- Attach tassel garlands with hot glue or double-sided tape to ensure they stay in place during wind or handling.
- Apply glitter on wet paint or glue for controlled sparkle; seal with a clear topcoat to prevent fallout.
- Use chalk markers for bold letters that won’t smudge under lights or handling.
- Incorporate photos with wooden picture frames to create storyboards for the graduate’s journey; secure frames next to or on the sign.
- Arrange LED string lights around the sign edges or behind translucent signs for soft, eye-catching illumination in the evening.
Choosing Messages and Quotes That Celebrate Achievements
Choosing the right message for a graduation sign means thinking about who the graduate is and the mood you want to create. Messages that celebrate achievements should feel personal, inspiring, or fun depending on the setting and the graduate’s personality. A sign welcoming guests can use a warm, inclusive tone, while a college graduation sign might be more sophisticated or witty. Matching the tone to the event helps guests connect emotionally and honors the effort behind years of hard work.
Deciding on a tone depends on the graduate’s age, educational level, and the party atmosphere. For younger students completing elementary or middle school, cheerful and encouraging messages work well. High school and college graduates often appreciate humor or motivational quotes that look toward their future. Funny signs with puns grab attention and lighten the mood, making celebrations memorable. Here are examples of messages tailored by mood and grade level:
- Encouraging (Elementary/Middle School): “Dream big, little graduate!”
- Funny (High School): “Finally done! Now what?”
- Meaningful (College/University): “Class of 2024: The future is yours.”
- Welcoming (Party Entrance): “Welcome to [Name]’s Graduation Celebration!”
- Catchy Slogan: “Hats off to the grad!”
- Inspirational Quote: “Your journey is just beginning.”
Popular slogans often use school colors or graduation themes like caps, diplomas, or tassels. Puns like “Time to seize the diploma” or “Up, up, and diploma away!” create light, fun moments. Future-focused quotes underscore the significance of this milestone, for example: “Today’s hard work is tomorrow’s success” or “The tassel was worth the hassle.” These catchphrases fit well on signs and resonate with graduates and guests alike.
Crafting your message takes little cost beyond printing or painting supplies but demands thoughtfulness for good results. A sign with a mismatched tone or unclear message can feel impersonal or confusing. To avoid this, speak to the graduate or close family first to capture their style. Adjust the wording length to fit the sign size without overcrowding, ensuring readability from a distance for outdoor signs. Clear, joyful messages create festive vibes and highlight the graduate’s achievement in a welcoming way.
Planning Sign Placement for Maximum Visibility and Impact
Positioning graduation signs in high-traffic, visible areas is key to ensuring they catch attention and complement your event’s setting. Place yard signs near the front walkway, driveway entrance, and along paths guests will use to enter the party area. These locations naturally draw the eye and help set the festive tone right from arrival. Signs near seating or refreshment spots reinforce the celebration throughout the event. For driveway or street-facing signs, a height of 24 to 36 inches works well so passing vehicles and pedestrians can easily see them. Larger banners, around 6 feet wide by 3 feet tall, perform best when mounted on a fence, porch, or wall where the whole group can admire them together.
Size choice depends on the setting and viewing distance. For outdoor yard signs, 18-by-24-inch corrugated plastic signs are a common choice and fit well along garden edges or in landscaping. If guests will view signs from farther away, go bigger, 24-by-36-inch signs or banners increase legibility. Smaller signs, such as 12-by-18 inches, suit table decorations or photo backdrops indoors. Use a mix of sizes to create visual interest, but keep overall proportions balanced to avoid overwhelming the space or diluting your message’s impact.
When arranging multiple signs, grouping them thoughtfully creates a polished look. Align similar signs in straight rows or gentle curves following walkways. For example, set directional yard signs spaced every 10 to 15 feet along a path to guide guests. Cluster a set of personalized yard letters spelling the graduate’s name or “GRAD 2025” on lawn sections visible from the street or party entrance. Space each letter 12 to 18 inches apart to maintain readability and avoid clutter. Consider layering smaller signs or props in front of larger banners to add depth and interest, especially in photo areas.
A checklist before placing signs helps avoid common pitfalls. Confirm where sunlight or shade will hit, bright sunlight improves visibility but can cause glare, while shaded spots might reduce attention. Check for obstacles like bushes or parked cars that block views. Ensure signs are stable and secured well to prevent tipping in windy conditions; stakes or weighted bases are often necessary outdoors. A simple site walk-through with the graduate or host offers a chance to test sightlines and adjust placements for maximum effect.
Test sign visibility from different angles and distances before the event to make sure guests won’t miss your messages or have to guess what they say.
Improving Graduation Signs with Photos and Guest Interactions
Adding photos and space for guest signatures transforms graduation signs into memorable keepsakes. Using a photo collage paired with designated signing areas invites personal interaction, making the celebration more meaningful. Guests enjoy contributing messages, which creates a shared experience that lasts beyond the event.
Creating a Then-and-Now Photo Collage
A then-and-now photo collage tells the graduate’s story visually by showing pictures from early childhood alongside recent images. Arrange photos chronologically in rows or a grid on a large sign or poster board, leaving small gaps between each picture for a clean look. Use premium gloss photo printing paper for sharp, vibrant images that stand out well outdoors or indoors.
Place the oldest photos at the left or top and gradually move to current photos on the right or bottom. Use thin white or colored borders around photos to separate them clearly. The collage should measure at least 24 by 36 inches to allow image sizes around 4 by 6 inches without crowding, which guests can easily view and remember. Avoid cluttering the layout; about 15 to 20 photos strike a good balance, showing variety without overwhelming the eye.
Designing Space for Guest Signatures
Reserve a clearly marked area beside or below the photo collage for guests to write messages. A box at least 12 by 18 inches, bordered with a contrasting color, provides enough space for 20 to 30 signatures and notes. Use headings like “Sign Your Congratulations!” or “Leave a Message for the Grad” in large, friendly fonts to guide guests.
Choose permanent markers or pens in a variety of colors to keep messages vibrant and legible. Offer fine-tip and medium-tip options to accommodate different handwriting styles. For outdoor events, provide a small side table or flat surface to make signing comfortable. Keep extra pens on hand in case some dry out or go missing during the party.
Using Signs as Interactive Guestbooks
Transforming a graduation sign into an interactive guestbook encourages visitors to engage directly with the celebration. One simple way is to include prompts on the sign such as “Share Your Favorite Memory with the Graduate” or “Write Your Advice for the Next Chapter.” These prompts help guests tap into personal stories, creating richer messages.
A photo booth frame labeled “Photo Here” adds another layer of interaction by inviting guests to take pictures with the graduate. Include a brief script next to the frame like, “Pick up the frame, strike a pose, and snap a photo to create new memories!” This can boost social sharing and add fun energy.
After the event, display the signed photos and notes in an album or digital slideshow to relive the collective spirit. This turns the original party decoration into an ongoing tribute, extending the impact beyond the day of the celebration.
Weatherproofing and Materials for Lasting Outdoor Signs
Signs set up outdoors for graduation celebrations must handle rain, sun, wind and occasional bumps while still looking great. Choosing the right materials and protective methods helps keep your signs vivid and intact throughout the event. Durable materials like corrugated plastic, aluminum, and weather-resistant foam board resist warping and fading better than standard cardboard or paper. Corrugated plastic, for example, is water-resistant, lightweight, and usually costs around $10 to $20 for a 24 x 36-inch sheet.
Protecting signs from rain and humidity involves sealing their surfaces. Laminating a paper sign or using clear adhesive vinyl film guards against moisture while preserving colors. Suppliers offer laminating sheets or rolls typically priced between $10 and $40 depending on size. For non-paper signs, applying a clear acrylic spray sealant adds a water-resistant layer; these sprays cost around $8 to $15 per can and dry within 15 to 30 minutes. Along with waterproofing, sealing also prevents UV fading when exposed to sunlight all day.
Wind can damage signs if they aren’t secured properly, so mounting choices matter. Staking signs firmly into the ground with metal or plastic stakes prevents them from tipping or flying away. Metal stakes are sturdier and reusable, ranging from $2 to $5 each, while plastic stakes are cheaper but less durable. Attach signs using zip ties, bungee cords or heavy-duty tape for extra hold. For signs mounted on walls or fences, corrosion-resistant hooks or nails work well to avoid rust and keep signs aligned neatly.
- Use corrugated plastic or aluminum for the base to resist rain and sun
- Laminate paper signs or apply vinyl film to block moisture
- Spray acrylic sealant on foam board or wood signs for water resistance
- Secure signs with metal stakes in the ground for wind stability
- Use weatherproof zip ties or bungee cords for added mounting strength
- Choose rust-resistant hooks or nails for wall or fence mounting
- Check weather forecasts and plan to bring signs indoors if severe weather is expected
Preparing each sign with these materials and methods takes effort but ensures your decorations stay crisp and attractive through sun exposure and light rain. Avoid cardboard or untreated foam, which quickly degrade when wet. Performing a test with your chosen sealant on a sample piece helps confirm it dries clear without damage. Secure placement also improves safety and presentation, preventing signs from falling or flapping during the event.
Adding Lights and 3D Elements to improve Sign Design
Adding lighting and three-dimensional elements to graduation signs offers a way to make them eye-catching both during the day and at night. LED string lights, battery-powered puck lights, and EL wire are common lighting options. LED string lights are versatile and come in warm or cool white tones, costing about $15 to $30 for 10 to 20 feet. Puck lights provide concentrated spots of light and often have adhesive backs, priced around $10 to $20 each, making them good for highlighting names or numbers. EL wire creates glowing outlines but uses more power and requires an inverter, often costing $20 to $40 per 16-foot strand. Choosing the right lighting depends on the sign’s size and location. For outdoor use, battery-powered or solar-powered LEDs avoid the need for nearby outlets and reduce trip hazards.
Three-dimensional signage features, such as raised letters or layered cutouts, add depth and shadow that catch attention better than flat designs. Foam board or carved PVC letters mounted on a flat background create a pronounced effect, while layered cardstock or plywood shapes can offer more intricate dimensionality. For example, large 3D letters spelling out the graduate’s name in 12 to 24-inch height stand out well in photos and are visible from a distance at outdoor parties. These elements also cast shadows that add texture and interest in daylight, while the added lighting accentuates contours at night. Combining materials, like metallic lettering with soft backlighting, improve this effect without needing excessive power.
You can rent 3D letters and illuminated signs from local party rental companies or event decorators, with prices typically ranging from $50 to $150 per letter or sign segment depending on size and lighting complexity. Many online retailers specialize in graduation decorations, offering kits and custom 3D letters for $20 to $60 each. DIY options include purchasing foam board letters and LED light kits separately to build personalized signs, keeping costs lower. For outdoor, durable builds, weather-resistant plastics and waterproof LED strips provide more reliability but can increase expenses by 20% or more.
For best results, position lights so they highlight key text or logos without blinding guests. Install LED lights with timers or remote controls to conserve battery life, which often lasts 6 to 12 hours depending on the light type. Keep dimensional elements securely fastened with outdoor-appropriate adhesives or screws to prevent warping or falling in wind or rain. When planning, consider the sign’s distance from photo areas to ensure lighting improve rather than obscures photographic details.
Test your lighting setup in both sunlight and darkness before the event to address glare, shadows, and battery life issues early.
Step-by-Step Action Plan for Your Graduation Sign
Follow these clear steps to create and display graduation signs that make an impact and celebrate your graduate’s achievements.
- Two weeks before the event: Choose the type of sign you want based on location and purpose, such as yard signs, banners, or photo boards. Confirm the size and materials for weather resistance to ensure longevity.
- 10 days before: Select or create a personalized design with messages, quotes, and photos that reflect the graduate’s personality and accomplishments. Look for design elements that add depth, like 3D features or lights.
- One week before: Gather materials for DIY signs or order custom prints from a reliable vendor. Check that all supplies match your design specifications and weatherproof needs.
- Four to five days before: Assemble the signs or review printed ones for quality. Test any lighting or interactive features to make sure they function properly.
- Two days before: Plan the exact placement at the venue or home for maximum visibility. Use stakes, stands, or secure mounting methods suited for the location and weather conditions.
- Day before the event: Install the signs and test them one more time in the actual setting during daylight and evening. Confirm that guests can easily see and interact with them.
- Day of the event: Monitor signs throughout the celebration to adjust for wind or weather changes. Encourage guests to engage with interactive elements like photo areas or message boards.
Frequently Asked Questions
What Are Some Unique Materials to Use for Graduation Signs?
Unique materials like acrylic, metal, or corrugated plastic offer durability and a modern look. These materials hold up well outdoors and help your sign stand out with vibrant colors or sleek finishes.
How Can I Coordinate Graduation Signs with Party Themes?
Match colors, fonts, and imagery on your signs to your party theme for a cohesive look. This approach helps tie the decoration together and makes photos more visually appealing.
How Early Should Graduation Signs Be Set Up Before the Event?
Set up graduation signs at least a few hours before guests arrive to allow for any adjustments. Early setup also ensures signs withstand wind or weather surprises and gives you time to add last-minute touches.
Can Graduation Signs Include Interactive Elements for Guests?
Yes, incorporating elements like QR codes linking to video messages or guestbooks encourages interaction. These features make your signs more engaging and create lasting memories beyond the event.
What Size Graduation Sign Works Best for Small Party Venues?
Choose signs around 18 to 24 inches wide for small venues to avoid overcrowding. Smaller sizes remain visible without overwhelming limited space or obstructing flow.
Are Illuminated Graduation Signs Suitable for Evening Celebrations?
Illuminated signs brighten outdoor areas and add festive ambiance for night events. Using battery-powered LED lights makes them safe, portable, and easy to install.
Key Points to Remember
Graduation signs can honor your graduate and improve the celebration when thoughtfully designed and placed. Start by choosing the right sign style that fits your event space and the graduate’s personality. Then create or find a design that stands out with personal touches like photos and meaningful quotes. Your next step is to begin gathering materials or order your custom signs so you can bring your vision to life well before the big day.