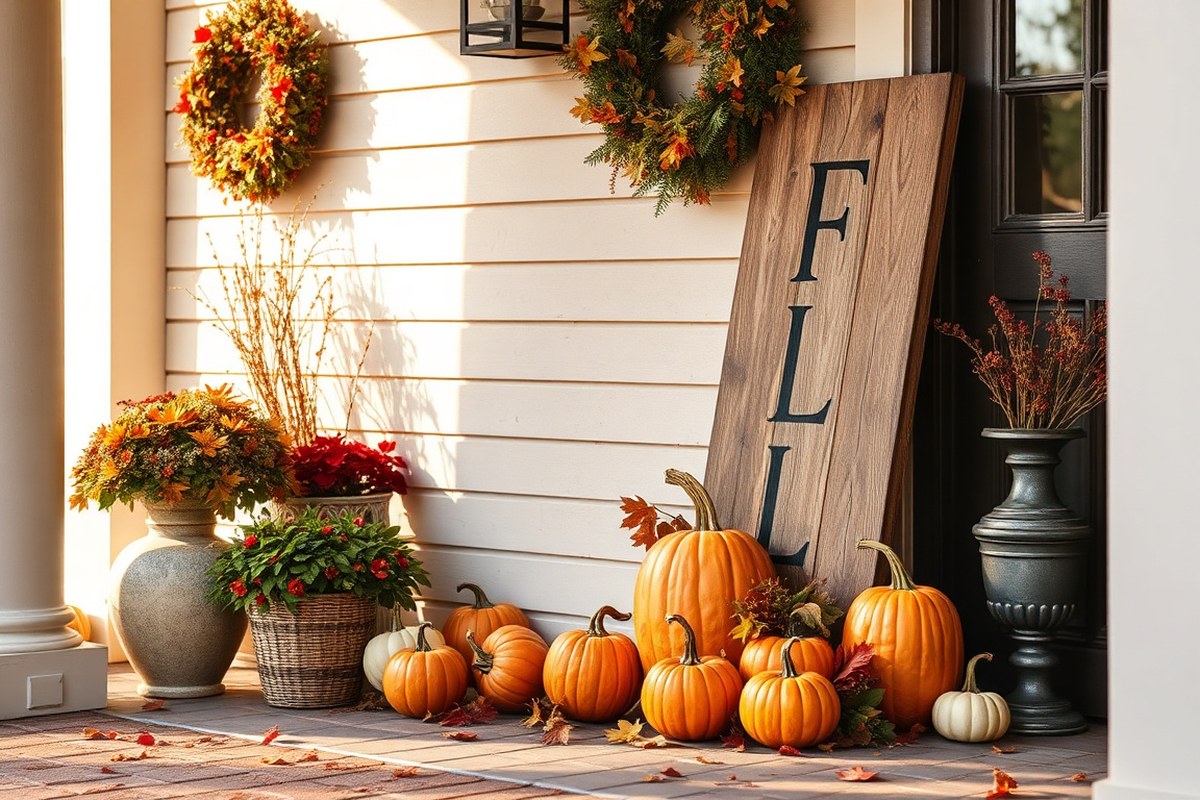
Fall Sign Ideas: 8 Creative DIY Projects with Tips for Perfect Autumn Decor
Fall sign ideas bring warm, welcoming charm to your home with easy, customizable decorations that celebrate the season. Create a memorable autumn display by choosing popular themes like harvest, pumpkins, and cozy phrases, then craft signs sized to fit doorways or porches. Start with simple materials like wood, paint, and vinyl to make signs that suit your style and budget.
Key Takeaways
- Choose sign sizes based on location: door hangers (12-18″), porch signs (24-48″), or large statement pieces (4-6 feet).
- Popular fall sign themes include pumpkin patches, harvest greetings, autumn leaves, and farmhouse motifs.
- Use affordable materials like reclaimed wood and vinyl to keep DIY fall signs between $10 and $40.
- Add 3D details such as wood beads or salvaged items for a charming, dimensional effect on your signs.
- Cricut machines simplify custom lettering and vinyl application for beginner-friendly fall signs.
- Create reversible signs for dual-season use, saving space and adding versatility to your decor.
Popular Styles and Themes for Fall Signs
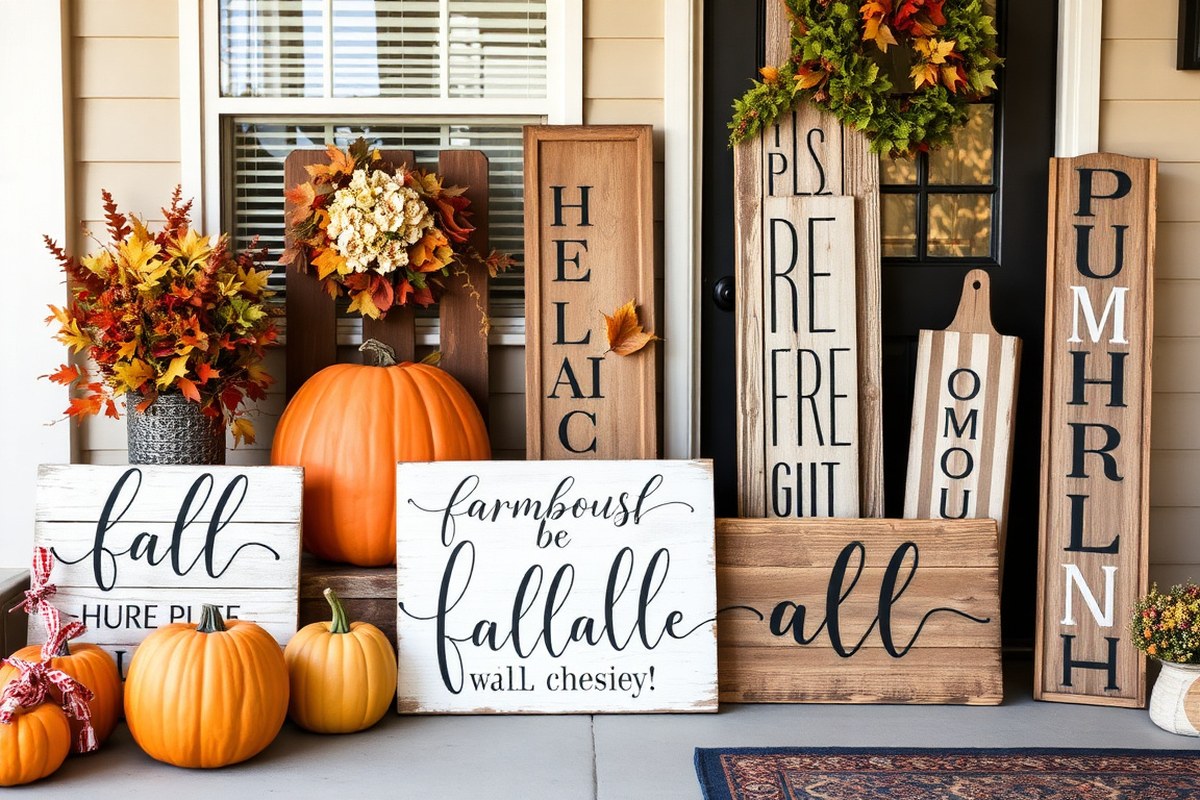
Popular fall sign styles blend traditional charm with seasonal warmth, creating welcoming accents for your home. Farmhouse signs often feature rustic or distressed wood with classic black or white lettering and classic motifs like pumpkins, leaves, and acorns. These signs suit neutral color palettes, natural textures, and vintage-inspired decor. Rustic styles lean into weathered finishes, metal accents, and bold autumn colors such as burnt orange, deep red, and golden yellow. Chalkboard signs remain popular for their versatility, allowing seasonal phrases to change easily while fitting casual, cozy spaces.
Modern fall signs tend to emphasize clean lines, minimalistic designs, and elegant fonts, often combining a matte black or white background with simple graphics like single leaves or geometric pumpkins. They pair well with contemporary home accents, glossy surfaces, and muted fall tones like soft gray or dusty rose. Choosing the right fall sayings improve the impact of your sign. Phrases like “Gather Here with Thankful Hearts,” “Hello Fall,” and “Pumpkin Spice & Everything Nice” resonate well with the season’s spirit. Shorter options such as “Give Thanks” or simply the word “Harvest” can match minimalist or farmhouse decor.
- Buffalo plaid backgrounds with script or block lettering work well for farmhouse and rustic looks.
- Stacked pumpkins or leafy garlands add a unique, bold seasonal motif to porch signs.
- Chalkboard signs featuring interchangeable fall quotes offer flexibility and charm.
- Round wood signs highlight circular motifs like wreaths or harvest symbols, suit rustic-modern blends.
- Script fonts in white or gold on dark backgrounds create elegant modern fall decor.
- Metallic copper or bronze accents add warmth and a modern twist to traditional themes.
Matching your fall sign style with your home’s decor involves considering texture, colour, and complexity. Wood signs with a natural or distressed finish fit casual, country, or farmhouse interiors, while sleek, painted signs complement modern or minimalist rooms. Using motifs like acorns, pumpkins, leaves, and harvest tools ties your sign to fall’s harvest and nature themes, keeping it relevant and seasonally inviting. Avoid clutter by sticking to two or three colours and clear, readable fonts. This ensures your sign stands out without overpowering your overall decor.
Materials and Tools Needed for DIY Fall Signs
Choosing the right materials and tools is key to making eye-catching fall signs that match your style and budget. For rustic signs, wood, especially reclaimed wood like pallet slats or scrap wood, is excellent. It offers a natural texture and character that fits farmhouse or vintage looks. Modern fall signs often lean toward sleek painted surfaces or vinyl decals applied to smooth wood or canvas, providing crisp lines and easy customization.
Painting requires basic supplies: quality acrylic or chalk paint costing about $3, $7 per bottle, paintbrushes in various sizes, and stencils if you want clean lettering or detailed shapes. For precise lettering or detailed images, a Cricut machine that cuts vinyl or stencil material can simplify your work. A Cricut costs between $150 and $250 new but speeds up complex designs and repeats. Use adhesive vinyl sheets costing roughly $1, $3 per sheet for vibrant, easy-to-apply graphics.
Dollar Tree items like unfinished wood signs or foam pumpkins provide affordable bases under $5. They can be painted or decorated with hot glue embellishments such as burlap, ribbons, or fall leaves to transform simple shapes into festive creations. The Vaseline technique, putting a thin Vaseline layer before painting, can create a worn farmhouse look if you’re after that vintage charm. Burlap fabric, fall leaf accents in orange, brown, tan, and teal, and distressing tools or antique waxes complement rustic themes perfectly.
| Material | Best For | Cost Range | Pros | Cons |
|---|---|---|---|---|
| Reclaimed Wood | Rustic signs, farmhouse style | Free, $10 (often scrap or pallets) | Unique texture, eco-friendly, low cost | Surface may be uneven, needs sanding |
| Dollar Tree Wood Signs | Budget-friendly base | $1, $5 | Cheap, easy to paint and decorate | Thin material, less durable outdoors |
| Cricut Vinyl | Modern, detailed designs | $1, $3 per sheet | Clean finish, reusable stencils possible | Needs Cricut machine and supply stock |
| Chalkboard Paint | Seasonal messages, changeable signs | $6, $12 per can | Reusable surface, customizable | Requires chalk maintenance |
| Burlap and Leaves | Rustic embellishments | $2, $8 per yard or bunch | Adds texture and color | May fade outdoors |
Tools for painting and crafting include a variety of brushes, round and flat, sponge brushes for broader coverage, and foam brushes for stencil work. Hot glue guns hold decorations firmly but handle carefully to avoid burns. Sandpaper or a sanding block smooths wood surfaces before painting. Scissors and craft knives are essential for cutting vinyl or fabric.
Finding affordable materials is simple by checking hobby stores for sales, browsing thrift shops for reclaimed wood, or repurposing scraps from previous projects. Dollar Tree and similar discount stores offer excellent starter supplies that can be customized with paint and accessories for less than $10 total.
Use lightly sanded reclaimed wood to avoid splinters but keep some roughness for authentic rustic texture.
Step-by-Step Guide to Making a Classic Wooden Fall Sign
Creating a classic wooden fall sign starts with preparing your wood properly, applying paint with clear techniques to achieve neat lettering, and finishing with a sealant to protect your work outdoors. These steps ensure your sign looks great and withstands weather over time.
Preparing the Wood Surface
Begin with a clean, smooth wooden board to get the best paint adhesion and a sharp finish. Choose wood like pine or reclaimed barn wood sized around 18″ x 24″ for typical porch or indoor signs. Remove any dirt or grease with a damp cloth and let it dry completely.
Lightly sand the surface using 120- to 220-grit sandpaper to smooth rough patches and remove splinters. For older or reclaimed wood, focus on making the surface even while keeping its rustic character if desired. After sanding, wipe the board with a tack cloth to remove dust before painting.
Painting and Lettering Techniques
Painting your background first creates a base for your design. Use acrylic paint in fall colors like burnt orange, ivory, or warm brown. Apply two thin, even coats using a foam brush or a wide-bristle brush, letting each coat dry 1 to 2 hours in a room-temperature environment (around 65-75°F). For a rustic effect, consider using a whitewash technique by diluting paint with water before brushing.
Lettering can be added with stencils, vinyl decals, or freehand methods. A no-stencil hand-painted approach involves printing your phrase in the desired font, positioning it on the board, then tracing over it with a ballpoint pen to impress the outline into the wood. Paint inside these lines with a small, fine tip brush. Use steady strokes and layer paint as needed, allowing drying between coats to avoid smudging. Choose paint colors that contrast well with your background for readability, such as ivory on dark wood or mustard yellow on whitewashed boards.
Sealing and Weatherproofing Tips
To protect your fall sign for outdoor use, sealing is essential. After all paint is dry, apply a clear outdoor polyurethane or spar urethane in satin or matte finish. These sealants resist UV damage and moisture, extending your sign’s lifespan. Use a synthetic brush and apply 2 to 3 thin coats, allowing 4 to 6 hours of drying time between coats and a full cure time of about 24 hours before outdoor display.
Seal all sides of the wood, including edges and back, to prevent warping and water damage. If your sign will face harsh weather, consider a marine-grade varnish or additional waterproofing sprays specifically designed for wood outdoor use. Keep it out of direct rain or snow as much as possible to prolong the finish quality.
- Clean and dry your wooden board thoroughly.
- Sand the board lightly and remove all dust.
- Paint the background color with two thin coats; let each dry fully.
- Transfer your lettering outline by tracing printed letters with a ballpoint pen.
- Fill in letters carefully with a fine brush and acrylic paint.
- Let paint cure overnight before sealing.
- Apply 2, 3 coats of a clear outdoor sealant, covering all surfaces.
- Allow sealant to cure completely before hanging or placing outside.
Creative Cricut and Vinyl Fall Sign Ideas for Beginners
Creating fall-themed signs with a Cricut machine is a beginner-friendly and rewarding project. You can customize popular fall sayings and images using vinyl decals on wood, metal, or chalkboards. Following a clear process for design, cutting, and application ensures crisp graphics and clean lines that brighten your home with seasonal charm.
Choosing and Preparing Vinyl Materials
Select adhesive vinyl designed for decals, such as permanent or removable premium vinyl. Permanent vinyl works best for outdoor signs or surfaces exposed to moisture, while removable vinyl is ideal for temporary indoor projects. Choose colors that match classic fall tones, orange, brown, cream, and deep green, to capture seasonal warmth.
Cuts are cleanest on smooth surfaces, so prepare wood or metal signs by sanding lightly and cleaning them with rubbing alcohol to remove oils and dust. For porous wood, consider sealing the surface with a clear polyurethane coat before applying vinyl to extend the decal’s lifespan. The vinyl sheet typically costs around $3 to $5 for 12″ x 24″ sizes, making the overall material cost affordable for beginner projects.
Designing Your Fall Sign in Cricut Software
Use Cricut Design Space to create or customize fall-themed sign ideas. You can start with templates featuring pumpkins, leaves, or harvest sayings like “Welcome” or “Sweater Weather.” Adjust fonts, resize images, and layer graphics for a unique look. Vector images and SVG files are particularly useful because they cut crisply at any size.
Keep designs simple for your first projects, limit colors to two or three and use bold fonts for better legibility from a distance. The software allows you to mirror images for heat transfer vinyl (if you use that instead) or set cut lines for adhesive vinyl. Preview your design and use the “Slice” or “Weld” tools to join shapes or remove overlapping layers before cutting.
Reliable results often come from setting the Cricut cut pressure to “Medium” for standard vinyl and using the right blade (fine-point blade) for clean edges. Cutting takes about 5 to 10 minutes depending on complexity.
Applying Vinyl to Different Surfaces
Application requires patience and precision to avoid wrinkles and bubbles. Use transfer tape to lift your vinyl decal from its backing and position it accurately on your prepared sign. A squeegee or credit card helps smooth the vinyl down firmly.
For wood signs, press firmly and peel the transfer tape slowly at a 45-degree angle. On metal or glass, clean the surface thoroughly before applying, and gently warm the vinyl with a hairdryer if it’s not adhering well in cooler temperatures. Chalkboards or felt letter boards may require vinyl that sticks lightly or easy removal, so test a small area first.
After application, the vinyl lasts several months outdoors if protected from direct rain and extreme cold, ideal for fall’s moderate weather. Indoors, the decals can stay vibrant for over a year with minimal care.
- Prepare your base material by cleaning and sanding if needed.
- Open Cricut Design Space and select or upload your fall-themed design.
- Adjust colors, size, and layering of vinyl elements for desired look.
- Load vinyl sheet on the cutting mat, align properly, and set cut parameters.
- Cut your design using the Cricut machine fine-point blade at medium pressure.
- Weed excess vinyl carefully, removing all background outside the design.
- Apply transfer tape over the vinyl and press firmly to transfer the design.
- Place vinyl on your sign surface, smooth with a squeegee, and peel transfer tape slowly.
Reversible and Dual-Season Fall Sign Projects
Creating reversible or dual-season fall signs lets you stretch your decorating budget and space by swapping seasonal themes with ease. These signs often feature two sides or interchangeable parts that shift from fall motifs to winter or holiday styles. You’ll want to pick designs and materials that hold up well to handling and bring out the charm of each season.
Design Ideas for Reversible Fall and Winter Signs
Choose imagery and colors that connect naturally to each season but share similar themes or shapes. For example, one side can show pumpkins and autumn leaves with warm browns, reds, and oranges. Flip it over to reveal snowflakes, pine cones, and holly berries in contrasting greens, whites, and reds. Keep the text neutral like “Welcome” or “Gather Here” so it fits both holidays without confusion.
Simple shapes like circles, rectangles, or arrows allow easy flipping or swapping. Wooden boards 12-18 inches wide and 24-48 inches tall are popular sizes for porch and entryway signs, offering enough space for clear designs that don’t overwhelm. Using vinyl decals or stencils on both sides make artwork crisp and fast to apply. Avoid overly intricate graphics that may be hard to replicate neatly across two faces.
Step-by-Step Instructions for Reversible Mounting
Start with a wooden board sanded smooth on both sides and sealed with a weather-resistant finish. Paint or stencil the fall scene on one side, then carefully flip the board to apply winter or holiday decorations on the other. Let each side dry completely before moving on.
Attach a sturdy frame or hanger that allows flipping. For wall or door signs, use a double-cup hook or two rotating hooks mounted on opposite sides of the board’s top edge. This setup lets you spin the sign without removing hardware. For freestanding porch signs, consider framing the board with an A-frame stand or using heavy-duty hinges that hold the sign upright and pivot it to display either side.
Finish by sealing the edges and corners with waterproof sealant or outdoor varnish. This protection wards off moisture damage when flipping the sign outside during changing seasons. Expect to spend around $20 to $40 on materials like lumber, sealant, and paint for a sign about 18 by 24 inches.
Tips for Interchangeable Decorations and Elements
Using velcro strips or strong magnets attached to a base board allows you to swap out decorations easily. Create a permanent fall base with painted pumpkins or leaves, then attach holiday items like small wooden snowflakes or holly leaves on velcro-backed pieces. This option works well for lighter decorations under 5 ounces.
Another approach is arrow signs pointing to seasonal events, such as “Pumpkin Patch →” or “Christmas Tree ←.” Mount arrowboards on a post around 4-5 feet tall with 12-inch arrows. You can swap arrow panels or repaint arrows seasonally with chalkboard paint to change event details. This method offers flexible spot decor for front yards or entry walks.
Focus on materials that withstand frequent handling. Use exterior-grade plywood or cedar, and select outdoor-rated paint and adhesives. Avoid fragile paper or thin plastic elements outdoors unless protected by a sealed shadow box frame.
Use weatherproof finishes and a sturdy mounting system to prevent warping and to make flipping your reversible sign easy and safe outdoors.
Styling and Display Tips for Fall Signs Around the Home
Place fall signs where they naturally catch attention without overwhelming the space. For front porches, position larger signs at eye level near the door or next to seating areas. In living rooms or entryways, hang medium-sized signs around 60 to 65 inches from the floor to align with average eye height. Balance smaller signs on shelves or mantels by grouping them with other fall elements like pumpkins or candles.
Combining signs with wreaths, garlands, and pumpkins improve the seasonal feel. For example, frame a fall sign with a leafy autumn garland or place a “Hello Pumpkin” sign on the door and hang a coordinating pumpkin-themed wreath above. On the porch, cluster a tall wooden harvest sign alongside a few pumpkins and a seasonal garland on the railing. Indoors, use layered displays where a sign leans against the wall behind a collection of mini pumpkins and a fabric or burlap wreath resting nearby.
- Choose 24 to 30-inch signs for porch use to maintain visibility from the street.
- Group signs with decorations in odd numbers (3 or 5 items) for visual balance.
- Pick colors that complement each other: warm oranges, deep reds, muted yellows, and natural greens work well together.
- Use varying heights: tall signs or stacked crates outdoors mix well with low-lying pumpkins; indoors, combine wall signs with table displays.
- Secure outdoor signs to withstand wind and rain, but focus on easy rearrangement for seasonal changes.
- Use lightweight materials where mobility is key; heavy signs work better indoors or on sturdy surfaces.
- Incorporate texture, such as wood, burlap, and natural foliage, to keep the display inviting.
Color coordination strengthens the autumn theme. Opt for signs that feature traditional fall hues and pair them with natural decorations like pinecones, dried corn stalks, or cinnamon sticks to add depth. Avoid overcrowding any single spot to keep the display from feeling cluttered. Spacing items around three to six inches apart allows each piece to stand out, helping guests instantly recognize your thoughtful design.
Common Mistakes in Making Fall Signs and How to Fix Them
Paint peeling or smudging on fall signs often happens because the surface wasn’t clean or dry before painting, or the paint used isn’t suitable for outdoor conditions. Moisture trapped under the paint causes it to lift over time, especially when signs face rain or dew. To avoid this, start by sanding the wood smooth and wiping it with a damp cloth to remove dust and oils. Use an exterior-grade acrylic paint for durability, and apply thin, even coats, allowing at least 2 hours to dry between layers. Adding a clear polyurethane sealant afterwards protects the paint from moisture and fading.
Uneven or crooked lettering is a common issue that can make an otherwise charming sign look unprofessional. This usually results from skipping prep steps like measuring, using the wrong tools, or rushing the painting process. Before painting, mark your layout with a pencil and use a ruler or stencil to keep letters straight and evenly spaced. For fixing mistakes, gently sanding the area and repainting over it after drying can smooth out errors. Using vinyl letters or stencils can help achieve consistent results without freehand mistakes.
Outdoor signs often face durability problems if the right materials or sealants aren’t used. Signs without weather protection can warp, crack, or show color fading within a few months. Avoid signs made solely from untreated plywood or particleboard for outdoor use. Instead, choose exterior-grade wood like cedar or pine, which resists moisture better. Seal all surfaces, including edges, with outdoor varnish or sealant. Also, keep signs out of direct ground contact and shaded from harsh sun when possible to extend their lifespan.
- Failing to sand and clean surfaces before painting causes poor paint adhesion.
- Using interior paint or cheap craft paint reduces weather resistance and causes peeling.
- Skipping pencil guidelines leads to crooked, uneven lettering; always plan your design first.
- Applying thick paint layers causes longer drying times and smudging; use thin coats instead.
- Ignoring sealant application results in faster fading and wood damage outdoors.
- Choosing soft or untreated wood materials reduces sign durability when exposed to elements.
- Not protecting signs from ground moisture invites warping and rot over time.
Correcting paint peeling starts with sanding away loose paint and cleaning the surface thoroughly. Applying a primer suitable for exterior wood before repainting also helps the new paint adhere better. For lettered signs, adding a second or third thin coat after sanding errors improves a smooth finish and sharp look. To maintain signs longer, inspect them seasonally for cracks or chips and touch up as needed using the same paint and sealant products originally used. While exterior-grade paints and sealants usually cost between $10 to $25 per quart, the investment pays off with stronger, longer-lasting fall signs that uphold their welcoming charm.
Durability and Outdoor Care for Fall Porch Signs
Protecting fall porch signs from weather damage requires applying a durable sealant designed for outdoor use. Clear polyurethane or spar varnish in a satin or gloss finish provides strong moisture resistance while preserving painted or stained surfaces. These sealants create a flexible barrier that withstands temperature swings and UV exposure, helping the colors stay vibrant through rain, sun, and wind. Use a brush or foam applicator to apply two to three thin coats, allowing at least four hours drying time between layers. Prices range from $10 to $20 per quart at craft or hardware stores.
Reapplying a protective finish every season significantly extends the life of your sign. Before adding a fresh coat, wipe the surface with a damp cloth to remove dirt and dust. Inspect signs for peeling paint or cracked sealant to decide if sanding a light scratch and refinishing is necessary. Plan to reseal once in early fall before hanging your sign outdoors, or after the winter if it stays outside all year. Neglecting this care can lead to fading, peeling, or wood warping, reducing both the appearance and durability.
Proper storage during the cold, wet months preserves your fall signs for reuse. Remove signs from the porch before temperatures drop below freezing or heavy snow arrives. Clean off dirt and moisture completely, and store the sign flat or upright in a dry, temperature-controlled environment away from direct sunlight. Wrapping wooden signs in breathable cloth prevents dust buildup without trapping moisture. Avoid basements or garages prone to dampness, which can cause mold or wood swelling. For vinyl signs, rolling them gently and storing in a tube or a large envelope protects the graphics from creasing.
Always allow sealants and paints to fully cure for at least 24 hours before exposing your sign to outdoor elements to ensure maximum protection.
Step-by-Step Action Plan for Your Fall Sign Project
Follow this simple timeline to create and display your perfect fall sign, whether it’s for indoor charm or a porch centerpiece.
- Before You Start: Choose your fall sign style and materials based on your skill level and where you’ll display the sign. Knowing this upfront helps avoid wasted supplies.
- Day 1: Gather the tools and materials you need, such as wood, paint, vinyl, or a Cricut machine. Confirm you have everything before starting to keep your workflow smooth.
- Day 2: Prepare your base, whether sanding wood for a rustic look or cutting vinyl decals. A smooth or clean surface ensures a neat finish.
- Day 3: Paint or apply your vinyl decals, following your design plan carefully. Check that colors and placement look balanced before the paint or adhesive dries.
- Day 4: Add any extra decorations like ribbons, hooks, or weatherproof coatings for outdoor signs. These finishings improve both function and aesthetics.
- Day 5: Place your completed sign in its intended spot. Observe how the lighting and surrounding decor affect its visibility and make small adjustments if needed.
- After 2 Weeks: Inspect outdoor signs for weather wear and touch up as necessary. Regular maintenance helps keep your sign looking fresh throughout the season.
Frequently Asked Questions
What Are Some Unique Themes for Fall Signs Beyond Pumpkins and Leaves?
Consider harvest-related themes like corn stalks, apples, or sunflowers to create unique fall signs that stand out and add seasonal charm. These elements celebrate the abundance of autumn, offering a fresh twist compared to traditional pumpkin and leaf motifs.
How Can I Make Fall Signs That Are Kid-Friendly for Crafting?
Use simple shapes like pumpkins, acorns, and leaves with large stencils and safe paint or markers to keep fall sign projects kid-friendly. This lets children join in easily while making creative signs suitable for the season.
Can I Use Fabric or Textiles to Make Fall Signs?
Yes, fabric such as burlap or felt can be attached to wood or embroidery hoops for fall signs. These materials add texture and rustic charm, fitting well with autumn decor styles.
What Lighting Options Work Best to Highlight Fall Signs Outdoors?
Solar-powered LED string lights or spotlights are good for outdoor fall signs, providing subtle illumination without electrical wiring. This improve visibility and ambiance during autumn evenings on your porch.
Are Fall Signs Suitable for Indoor Use Only, or Can They Survive Outdoor Conditions?
Many fall signs designed with durable materials like sealed wood or vinyl are suitable for outdoor use if properly weatherproofed. Durable finish coatings help protect them from rain, sun, and temperature changes.
What Paint Finishes Work Best for Fall Signs That Are Exposed to Weather?
Semi-gloss or satin exterior-grade acrylic paint resists moisture and fading better than flat paint for outdoor fall signs. They also make cleanup easier and help maintain vivid colors through the season.
Wrapping Up
Creating a fall sign is a rewarding way to add seasonal warmth and personality to your home. Focus on choosing meaningful designs and proper materials to match your setting and style. Start with your favorite idea today by sketching a design or gathering your supplies, you’ll have a charming sign ready well before autumn’s peak colors arrive. Enjoy the crafting process and the welcoming vibe your sign brings all season long.