How to Stain Wood for Signs: A Complete Guide for Perfect Results
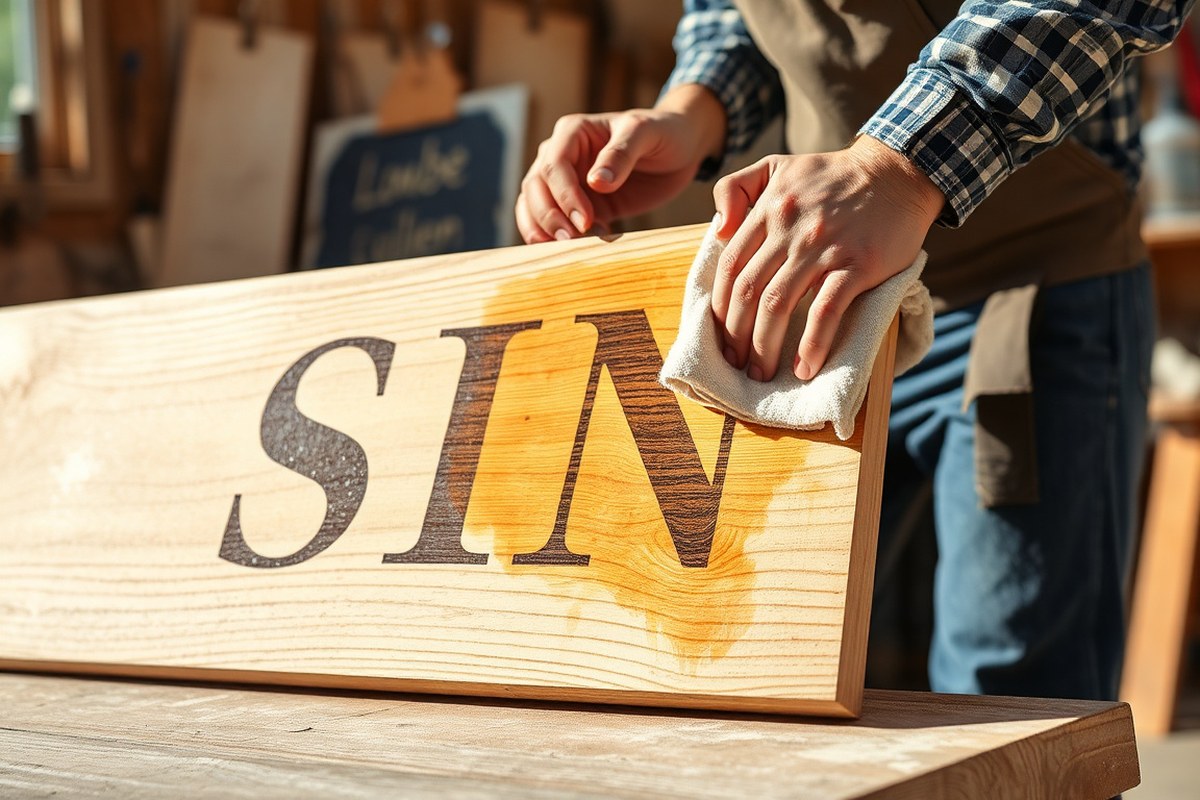
How to stain wood for signs starts with selecting the right wood and preparing its surface properly. Applying a wood conditioner before staining can help prevent blotchy color on soft or porous woods. Always remove dust and sand evenly to ensure smooth absorption for a rich, consistent stain finish.
Key Takeaways
- Apply wood conditioner and stain within 2 hours of each other for the best absorption and color uniformity.
- Let stain soak for 5 to 10 minutes before wiping off excess to achieve the desired darkness.
- Wipe away excess stain within 15 minutes while still wet to avoid sticky or uneven patches.
- Choose oil-based stain for deeper penetration and longer drying times, especially in drier climates around 77°F.
- Allow stained wood to dry at least 4 hours before sealing to protect the finish effectively.
- Wait 48 hours after staining before using or sealing your wood sign for full cure and durability.
Choosing and Preparing Wood for Staining Signs

Softwoods like pine and cedar are popular for wood signs because they are affordable and easy to work with, but hardwoods such as oak, poplar, and birch deliver a more durable and attractive finish when stained well. Woods with open grain like oak or pine absorb stains deeper, showing more texture, whereas fine-grained woods like maple and cherry may need extra care to avoid blotchy results. Choosing the right wood depends on your budget, the sign’s location, and the stain type you plan to use.
Preparing wood properly before staining is essential to achieve even color and a smooth finish. Start by sanding the surface with progressively finer grits to open the wood grain without polishing it too much. Begin with 120-grit sandpaper to remove rough spots and then move to 150 and 180 grit for a smoother finish. Avoid sanding beyond 220 grit, especially if you plan to use gel stain, because too smooth a surface will prevent the stain from absorbing evenly.
Sand following the direction of the wood grain to prevent scratches that cause uneven stain absorption and visible blemishes. After sanding, remove all dust completely using a clean, lightly damp cloth or a tack cloth made from soft cotton mesh to trap fine dust particles. This helps keep the finish smooth and free of blotches.
- Start sanding with 120-grit sandpaper, then progress through 150 and 180 grit for most wood types.
- Use 150 grit for open-grain woods if prepping for gel stain.
- Sand in the grain direction only.
- Remove dust fully with a tack cloth or damp clean rag.
- Avoid 220 grit or finer sanding for gel stains, but use it for oil- or water-based stains.
- Dry the wood if you used a damp cloth before staining.
After sanding and dust removal, the wood should feel smooth but still slightly porous to the touch, allowing the stain to penetrate and highlight the natural grain. Skipping proper sanding or cleaning can lead to uneven colour or raise the grain after staining, which makes finishing difficult. In some situations, like when working with blotchy woods such as birch or maple, additional steps like using a pre-stain conditioner can help even out absorption.
When and Why to Use a Pre-Stain Wood Conditioner
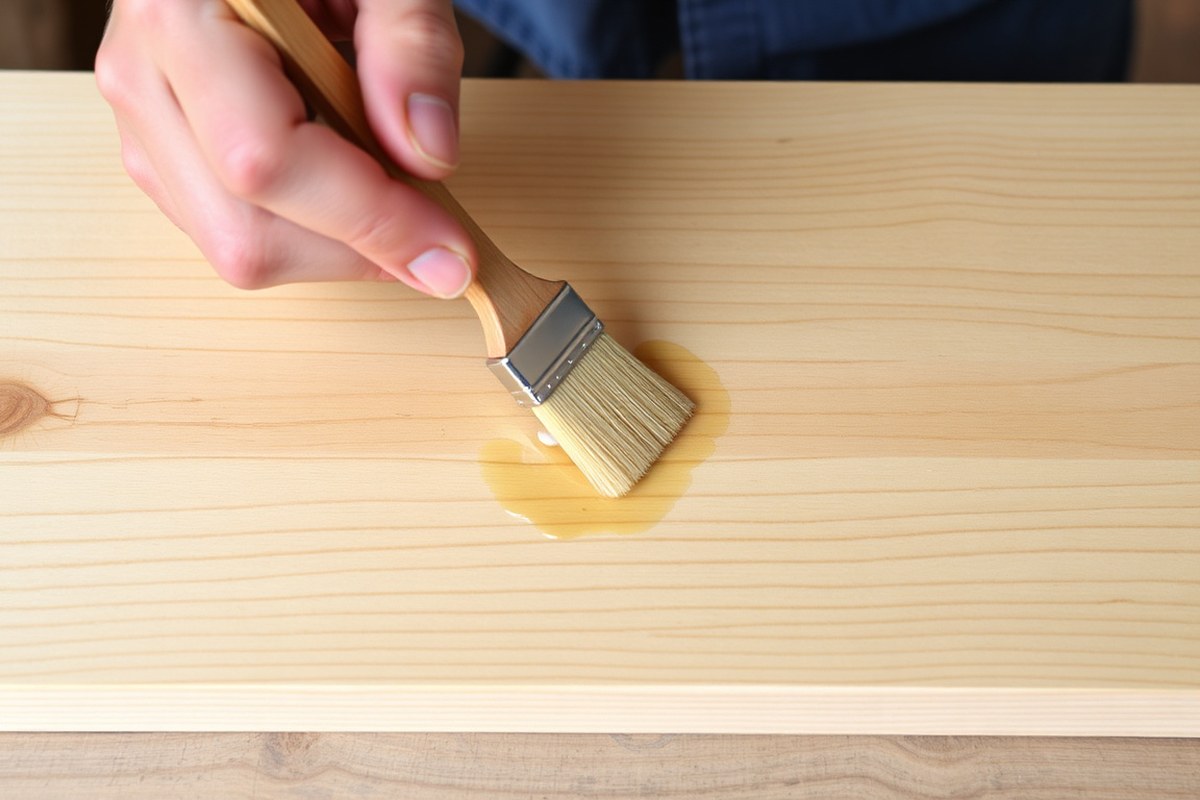
Use a pre-stain wood conditioner on softwoods like pine, birch, alder, or poplar to prevent blotchy, uneven staining. It partially seals the wood grain, helping the stain absorb uniformly. Apply the conditioner, let it dry about 30 minutes, then stain within 2 hours for best results.
Why Pre-Stain Conditioning Matters
Pre-stain conditioners fill the wood pores slightly, letting the stain absorb more evenly. Softwoods tend to absorb stain unevenly, causing blotches or dark spots. Conditioning reduces stain color intensity by 30, 40%, so the wood tone appears more consistent and controlled. For hardwoods with tight grain, a conditioner is less critical but can still improve uniformity.
Skipping this step on woods like pine often results in unattractive blotchy stains because the wood absorbs the stain unevenly. Using a conditioner means you get a cleaner, more professional finish that shows your sign design clearly.
Steps to Apply Pre-Stain Conditioner
Applying pre-stain conditioner is simple but must be done carefully for the best results. Follow these steps exactly, testing on a scrap piece of wood first to see how the conditioner affects the stain color.
- Sand the wood surface progressively through 100, 120, 150, and 180 grit sandpaper until smooth.
- Wipe off sanding dust with a damp cloth and let the wood dry completely.
- Apply the pre-stain wood conditioner evenly with a brush, foam applicator, or cloth, working along the grain.
- Let the conditioner penetrate and dry for about 30 minutes.
- Within 2 hours, apply your chosen stain liberally over the conditioned wood, then wipe off the excess following the grain.
- Avoid letting the conditioner dry completely before staining; staining within the window prevents uneven absorption.
Always test the conditioner and stain combination on scrap wood matching your sign to ensure the color and finish look right before applying to your project.
Timing Guidelines Before Staining
Timing is key to take full advantage of pre-stain conditioner benefits. Let the conditioner dry about 30 minutes but stain the wood within 2 hours to keep the conditioner effective. Staining outside this window might cause blotchiness or color variation because the wood reseals unevenly.
The conditioner reduces the intensity of your stain color by around 30, 40%. Expect your stained sign to look lighter and more muted than staining without conditioning. Adjust your stain application accordingly, applying a generous coat and wiping off the excess to get an even shade.
Allow your stained sign to dry 4 to 8 hours after staining before sealing or adding any designs. A sealed finish preserves the uniform tone and protects your sign from weathering or wear over time.
Comparing Wood Stain Types for Sign Projects
Choosing the right type of stain for your wood sign depends on the wood species, desired finish, drying time, and your working conditions. Oil-based stains penetrate deeply, water-based stains dry fast and have less odor, while gel stains offer an even finish on blotch-prone woods like pine or maple. Each stain type has advantages that suit different project needs.
Oil-Based Stains: Characteristics and Uses
Oil-based stains penetrate deeply into the wood grain, creating a rich, warm color that improve hardwoods and outdoor projects. They dry relatively slowly, about 1 to 2 hours to the touch at 77°F and 50% humidity, and need at least 8 hours before sealing.
One drawback is their odor and cleanup, requiring mineral spirits instead of soap and water. They also come with safety concerns; oily rags from application pose a spontaneous combustion risk and need careful disposal. Use oil-based wood conditioners with these stains for best results. The cost for a quart of oil-based stain like Minwax Wood Finish starts around $14.
Water-Based Stains: Pros and Cons
Water-based stains dry quickly, often within 30 minutes to an hour, with low odor and easy soap-and-water cleanup. They suit indoor projects and fast turnarounds, especially in moderate or cooler weather where drying is steady.
They do not penetrate as deeply as oil-based stains but offer a less toxic option that is easier to work with. Application requires a water-based wood conditioner for blotch-prone woods. Water-based topcoats can be applied sooner than oil-based ones when the stain drying time is properly respected. They tend to raise the wood grain, so sanding between coats may be necessary for a smooth finish.
Gel Stains: When and How to Use Them
Gel stains are thick, oil-based products that sit on the wood surface instead of soaking in, which makes them excellent for preventing blotchiness on pine, maple, birch, and cherry. This makes gel stains especially good for wood signs made of softer or blotch-prone species.
Apply gel stains by brushing on and wiping off the excess after 5 to 10 minutes. Because gel stains don’t run, they work well on vertical surfaces like doors or signs. Allow at least 8 hours before sealing, and if the environment is humid or the application thick, wait up to 48 hours. Using gel stain means you can avoid blotches while still showing the wood grain clearly.
| Stain Type | How It Works | Best For |
|---|---|---|
| Oil-Based | Absorbs deeply into the wood fibers, giving a rich and warm finish | Hardwoods, furniture, outdoor projects |
| Water-Based | Dries quickly with minimal smell and can be cleaned easily using soap and water | Indoor projects, fast turnarounds |
| Gel Stain | Remains on the wood surface rather than soaking in, preventing blotching | Pine, maple, birch, cherry, vertical surfaces |
In hot, dry weather, oil- and gel-based stains dry faster, so reduce the wait time by 2 to 3 minutes and work in smaller sections. Cold or damp conditions slow drying times by several minutes, increasing the total project time.
Step-by-Step Process to Stain Wood for Signs
Applying wood stain correctly involves using the right tools, allowing proper penetration time, wiping off excess stain, and knowing when to apply additional coats. This ensures an even, lasting color for your wood sign that avoids blotches and uneven tones.
Tools and Materials Needed
You will need a high-quality wood stain suited for your wood type, either oil- or water-based. Prepare clean, lint-free cloths or staining pads for applying and wiping the stain. A natural-bristle brush works well for spreading the stain evenly. Sandpaper (120 to 220 grit) is essential for surface preparation before staining. Have disposable gloves to protect your hands, and a sanding block or orbital sander to smooth the surface.
Using the right applicator impacts the finish; foam brushes can leave streaks, while cloths allow better control. A well-ventilated workspace helps the stain dry properly.
Applying the First Coat of Stain
Start with sanded, clean wood to ensure even absorption. Apply the stain uniformly in the direction of the grain using your brush or cloth. Avoid overloading the applicator; a thin, consistent layer penetrates better and prevents blotches. Oil-based stains typically require wiping off excess after a few minutes, while water-based stains dry faster and need quicker wiping.
The stain needs 5 to 10 minutes to soak into the wood before wiping. Longer penetration results in a darker, richer color but be careful not to exceed 10 minutes as the stain can become tacky.
- Sanding: Sand your wooden sign smoothly with 120-220 grit sandpaper.
- Cleaning: Remove dust and debris thoroughly with a tack cloth or vacuum.
- Applying stain: Use a brush or cloth to apply stain along the grain evenly.
- Penetration time: Let the stain sit for about 5 to 10 minutes depending on desired darkness.
- Wipe excess: Remove unabsorbed stain with a clean cloth.
- Drying: Allow the first coat to dry fully (2-6 hours depending on stain type).
Recoat Timing and Techniques
Most wood stains do not require a second coat, but you can apply one for deeper color. Apply the second coat after waiting 2 to 4 hours, depending on the product, but only after the first coat is dry to the touch. For oil-based stains, this can mean 4 to 6 hours. Water-based stains dry faster, sometimes within an hour. Make sure to lightly sand the surface between coats to promote adhesion.
Gel stains are an option if you want a deep, even color on lighter woods. Apply one gel coat, let it fully cure, then apply a second before the first is completely hard (between 4 and 8 hours). Multiple gel coats create a richer finish but require careful timing.
Wiping Off Excess Stain
Removing excess stain after the penetration time is key to avoiding blotches and sticky areas. Use a clean, lint-free cloth to rub off any stain remaining on the surface, following the wood grain. Leave some pigment for color but do not let it pool or dry on top.
For water-based stains, wiping should happen within 2 minutes of application because the stain dries very fast. Oil-based stains allow for longer soak time, typically up to 10 minutes before wiping. Be consistent in wiping pressure to maintain an even appearance.
Drying Times and When to Seal Stained Wood Signs
After staining your wood sign, allow it to dry at least 8 hours before applying any sealant. For most standard oil-based stains, waiting a full 24 hours before sealing is best to ensure the stain has completely soaked in and dried on the surface. Applying a sealant too soon can trap moisture or cause the stain to smear, which compromises the finish. Dry times vary based on environmental factors like temperature and humidity: warmer, drier conditions speed drying, while cool or damp conditions slow it significantly. For example, in humid weather, drying might take closer to 48 hours.
Sealing your wood sign after staining is recommended because stain alone does not provide strong protection against water, UV damage, and daily wear. Sealants create a protective layer on top that extends the life and appearance of your sign. Polyurethane is a common choice, offering durable, clear protection. Apply the sealant with a brush, moving in the direction of the wood grain to avoid streaks and bubbles. Use thin, even coats and allow each coat to dry completely, usually about 2 to 4 hours between coats. Two or three coats generally give the best protection.
Environmental conditions also affect sealant drying times. Humid weather requires giving extra time for each coat to dry fully to avoid sticky or cloudy surfaces. Work in a well-ventilated area to speed up drying and reduce fumes. Avoid sealing wood signs outdoors on windy or dusty days to prevent debris from settling on the wet finish.
Acrylic or water-based sealants dry faster and are easier to clean up than oil-based polyurethanes, which take longer but often provide tougher protection. For outdoor wood signs, pick a sealant that protects against UV rays and resists water damage. Some varnishes and spar urethanes are specially formulated for outdoor use and cost $15 to $30 per quart, depending on quality. Indoor signs can use standard polyurethane or shellac, which are less expensive but still effective. Before applying stain or sealant to your wood sign, try them out on a similar scrap piece to observe how fast they dry and how the finish looks.
Common Staining Mistakes and How to Fix Them
Blotchy or uneven stain is a common issue when finishing wood signs, especially with woods like pine, poplar, and alder. These woods absorb stain unevenly, leaving dark spots or streaks that detract from a smooth look. This happens because softer or more porous areas soak up more stain, while harder or denser spots don’t absorb as much. To fix blotches, start by sanding the surface evenly with 220-grit sandpaper, then apply a pre-stain wood conditioner. This conditioner seals the wood fibers to limit uneven absorption and allows the stain to penetrate consistently. Wiping the wood with mineral spirits can lighten blotchy stains by removing extra stain, or you can blend uneven spots using fine steel wool and a little stain remover before refinishing.
Lap marks appear when stain dries on one section before the adjacent area is stained, causing visible lines or streaks where the application overlaps. They’re usually caused by staining too slowly or applying the stain in portions without blending wet edges together. To prevent lap marks, work on small sections consistently and wipe off excess stain within 5 minutes before it starts to dry. Using a brush or rag with long, even strokes helps keep the stain uniform. Avoid stopping midway for too long, and always maintain a wet edge while working. Using a gel stain can also help because it sits on top of the wood rather than soaking in immediately, giving you extra working time without lap marks.
You can still remove some stain if your wood sign turns out darker than expected. After the stain dries, lightly sand the surface with 320-grit sandpaper to reduce color intensity, focusing on uneven or too-dark spots. Avoid aggressive sanding to prevent oversanding through the wood or damaging carved details. Alternatively, wiping the stain off sooner in the staining process (within the first 5 minutes) can prevent overdarkening. For an already uneven or dark finish, apply a diluted stain remover or mineral spirits on a clean rag to carefully lighten areas, then restain evenly once dry.
- Smooth and even sanding with 220-grit paper before staining
- Always apply pre-stain wood conditioner on blotch-prone woods
- Work quickly and keep a wet edge to prevent lap marks
- Use gel stain for better control and less blotchiness
- Wipe off excess stain within 5 minutes to avoid dark spots
- Lightly sand or use mineral spirits to fix overly dark or blotchy areas
- Avoid stopping halfway and restarting on partially dried areas
Uneven color happens when some parts of the wood absorb stain differently due to varying grain density or moisture content. Consistent sanding and proper conditioning before staining reduce this effect. Keep in mind that wood cells reach stain saturation about 5 minutes after application for most species, so wiping off stain promptly leads to a clearer, more even finish. When correcting issues like lap marks or blotchiness, patience is key, as refinishing requires drying between steps and careful blending to maintain the wood’s natural look and the sign’s overall appeal.
Safety Tips and Best Practices When Staining Wood
Staining wood for signs requires careful handling of materials to ensure safety. Wood stains often contain solvents and chemicals that can cause skin irritation or respiratory issues if inhaled directly. Wearing gloves and a mask designed for organic vapors helps protect your skin and lungs. Work in a well-ventilated area; open windows and use fans to keep fresh air moving. In enclosed spaces, vapors can accumulate quickly and become hazardous.
Rags soaked in wood stain are a significant fire risk. The chemicals in the stain can spontaneously combust when left in a pile or crumpled. To avoid this, immediately spread out used rags to dry on a non-flammable surface or submerge them in water before disposal. Once dried, dispose of them in a metal container with a lid. Never throw stain-soaked rags directly into your regular trash or leave them balled up.
Safe disposal of leftover stain is also important. Check your local hazardous waste guidelines because many stains contain oils or solvents that should not go down drains or into normal trash. Small amounts can sometimes be dried out completely by leaving the container open in a well-ventilated area (away from children and pets) until it’s hard, then discarded according to local rules. Never pour stain onto soil or into water systems.
Create a safety checklist to follow before you start staining your wood signs. First, wear nitrile or latex gloves along with a respirator mask rated for organic vapors. Next, set up your work area outdoors or near open windows with a portable fan positioned to blow fumes away from you. Have a non-flammable surface nearby to spread out used rags immediately after use. Prepare a metal container filled with water or sand for disposing rags safely. Keep a fire extinguisher rated for chemical fires within reach. After staining, clean your hands thoroughly with soap and water, even if you wore gloves.
Maintaining these safety steps requires only some planning and basic supplies, which cost around $10 to $30 for gloves, a mask, and a suitable container. Following them prevents accidents such as fires or health issues and keeps your staining project on track. Not practicing these safety measures risks respiratory irritation, chemical burns, and even major fire hazards that could destroy your workspace and supplies.
Maintaining and Storing Finished Wood Signs
To preserve the appearance and durability of your stained wood signs, handle and store them carefully during the drying and after finishing. Wait at least 48 hours before moving or touching a freshly stained sign. This drying time allows the stain to cure fully, reducing the risk of smudging or uneven color. While drying, keep the sign in a well-ventilated area at room temperature, ideally between 65°F and 75°F, away from direct sunlight, dust, and humidity. Water-based stains are more sensitive to temperature and moisture changes, so avoid high humidity or cold environments that could extend drying times or cloud the finish.
Storing your sign flat on a clean surface or hanging it by the edges ensures the stain dries evenly without pooling or streaking. Keep the storage area free of dirt and debris that might stick to the wet surface. Avoid stacking stained signs or placing heavy objects on them until fully dry to prevent dents or impressions. If you need to speed up drying, using a fan for air circulation can help, but do not blow dust or particles onto the wood.
You can safely apply paint or vinyl over stained wood after the stain has dried and cured, typically after the recommended 48-hour wait. For painting signs, interior latex paint works well and adheres nicely over stain when the surface is clean and dry. Use a primer before painting for better adhesion and durability, especially if applying light colors on dark stain. Vinyl stencils or decals require a smooth, dry surface; sealing the stained wood with a compatible topcoat before applying vinyl increases durability and prevents moisture from lifting the adhesive.
Regular maintenance keeps stained signs looking their best. Clean the surface gently using a soft cloth dampened with water or mild soap solution. Avoid harsh chemicals or abrasive cleaning tools that can damage the stain or sealant layer. For outdoor signs, reapply a compatible sealant every 1 to 2 years depending on exposure to weather, which helps protect the wood and stain from UV damage and moisture.
Allow stained wood signs to dry for at least 48 hours in a dust-free, well-ventilated space before handling or adding paint and vinyl layers to prevent damage or adhesion issues.
Step-by-Step Action Plan for Staining Your Wood Sign
Follow this plan to stain your wood sign successfully and get a smooth, lasting finish.
- Before you start: Choose the right wood and sand it smooth. Run your hand over the surface to ensure no rough spots remain.
- Day 1: Apply a pre-stain wood conditioner evenly. Wait about 15 minutes, then wipe off excess. The wood should look evenly damp, not blotchy.
- Day 1: Apply your chosen stain using a brush or cloth, following the wood grain. Let it sit for the recommended time on the label, then wipe off the extra stain with a clean cloth.
- Day 1 to 2: Allow the stain to dry completely, usually 4 to 6 hours or overnight depending on humidity. The wood should look dry and uniform before sealing.
- Day 2: Apply a clear sealer or varnish to protect the stained wood. Check for smoothness and coverage to confirm it’s sealed properly.
- After 1 week: Store your finished sign in a dry, shaded area. Inspect for any damage or fading and touch up the sealer if needed.
Frequently Asked Questions
How Long Should You Wait Between Applying Pre-Stain Conditioner and Staining?
Wait about 30 minutes for the conditioner to dry and start staining within 2 hours to ensure even absorption and prevent blotchiness.
Can I Use the Same Brush for Staining and Sealing Wood Signs?
It’s best to use separate brushes to avoid contaminating the stain with sealant and to keep finishes clean.
What’s the Best Way to Remove Excess Stain from Wood Signs?
Wipe excess stain off after about 5 minutes with a clean cloth for even color and to avoid sticky spots.
Can I Stain Outdoor Wood Signs the Same Way as Indoor Signs?
Outdoor signs need stains with UV protection and weather resistance to handle moisture and sunlight better.
Should I Sand Between Stain Coats on a Wood Sign?
Light sanding between coats can smooth the surface and help the next coat adhere, but don’t overdo it.
Why Does My Stained Wood Sign Look Blotchy After Staining?
Blotchiness often happens with uneven sanding or no pre-stain conditioner; sanding smooth and using conditioner can help.
Final Thoughts
Staining wood for signs takes attention to detail but yields rewarding, lasting results when done right. Start by properly preparing your wood and using a conditioner if needed to avoid blotches. Apply stain carefully and protect your sign with a quality sealer. Now, pick a small wood scrap and practice your staining technique before moving on to your main sign project.