How to Make Floating Frame Signs: A Complete Guide with Pro Tips
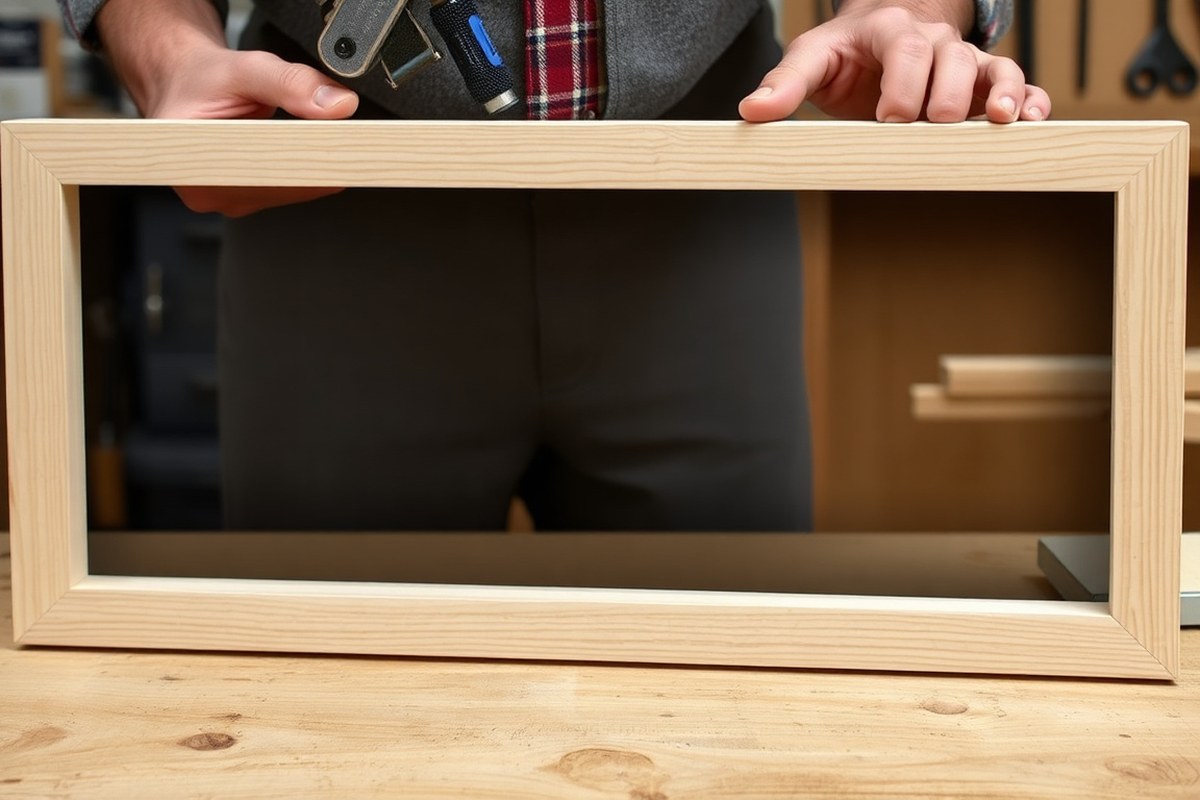
How to make floating frame signs starts with selecting quality materials and precise measurements. A floating frame sign creates a gap between the artwork and the frame, giving the illusion that the sign is suspended. This effect depends on cutting the wood to exact sizes and maintaining a consistent gap, usually between 1/4 and 1/2 inch.
Begin by measuring your artwork carefully and adding the frame dimensions with miter cuts. Accurate sizing ensures the floating gap looks clean and professional.
Key Takeaways
- Use oak project board measuring 0.5 inches by 2.5 inches by 4 feet for strong, durable frame pieces.
- Cut 1×2 boards with 90° miters, adding about 1.75 inches to frame length and width for proper fit.
- Maintain a floating gap between 1/4 and 1/2 inch to achieve the classic floating frame look.
- Glue and use a 23-gauge pin nailer or clamps to secure frame corners tightly and neatly.
- Create backing when the gap exceeds 1/8 inch to prevent wall color from showing through the floating space.
- Allow finishes to dry and harden for 24 to 48 hours before mounting the sign to protect its surface.
What Is a Floating Frame Sign and How It Works

A floating frame sign features a design that makes the artwork or sign appear to hover within the frame. The edges of the piece do not touch the frame directly; instead, there is a small space, often between 1/4 and 1/2 inch, around the artwork. Unlike standard frames that hold the piece tightly, floating frames showcase the full edges. This gap improve the look by making the sign appear to float rather than sit behind glass or frame lips.
The floating look comes from spacer strips placed between the sign and the frame backing. These strips keep a uniform gap around the sign. For crafting a wooden sign, you make two frames that fit together: the outer frame acts as the visible border, while the inner frame serves as a spacer, holding the sign offset. This setup highlights the sign’s thickness and edges and adds depth through light and shadow underneath.
When making a floating frame, careful measurement is key. You’ll want to cut the wood strips to fit snugly around your piece, leaving extra space based on how much floating gap you prefer, between a half-inch and an inch added to the dimensions ensures the frame doesn’t overwhelm the sign. The material should be sturdy enough to support the thickness and weight of the sign without bowing or warping, with 3/4-inch square dowels or 1×2 boards often recommended.
Floating frames are well suited for gallery-wrapped canvases, custom wood signs, and dimensional artwork because these types of art benefit from visibility on all edges. Canvas signs, typically varnished and textured, are usually left open without glass, which allows the artwork’s surface details to be appreciated fully. You can also adapt floating frames to hold matted photographs or prints by creating a deeper shadow box style frame to add depth. For heavier or thicker wood signs, ensuring the frame is strong and the spacer strips secure will prevent sagging over time.
The floating frame is also versatile enough to display 3D objects by using a deeper shadow box frame, essentially turning the frame into a mini display case. However, if your floating gap exceeds about 1/8 inch, adding a backing behind the sign helps hide any wall color showing through the gap, maintaining the clean floating look. Securing the sign to the frame with several screws or small fasteners prevents it from shifting, especially since some canvases or wood signs may not sit perfectly flat.
Choosing Materials and Tools for Floating Frame Signs
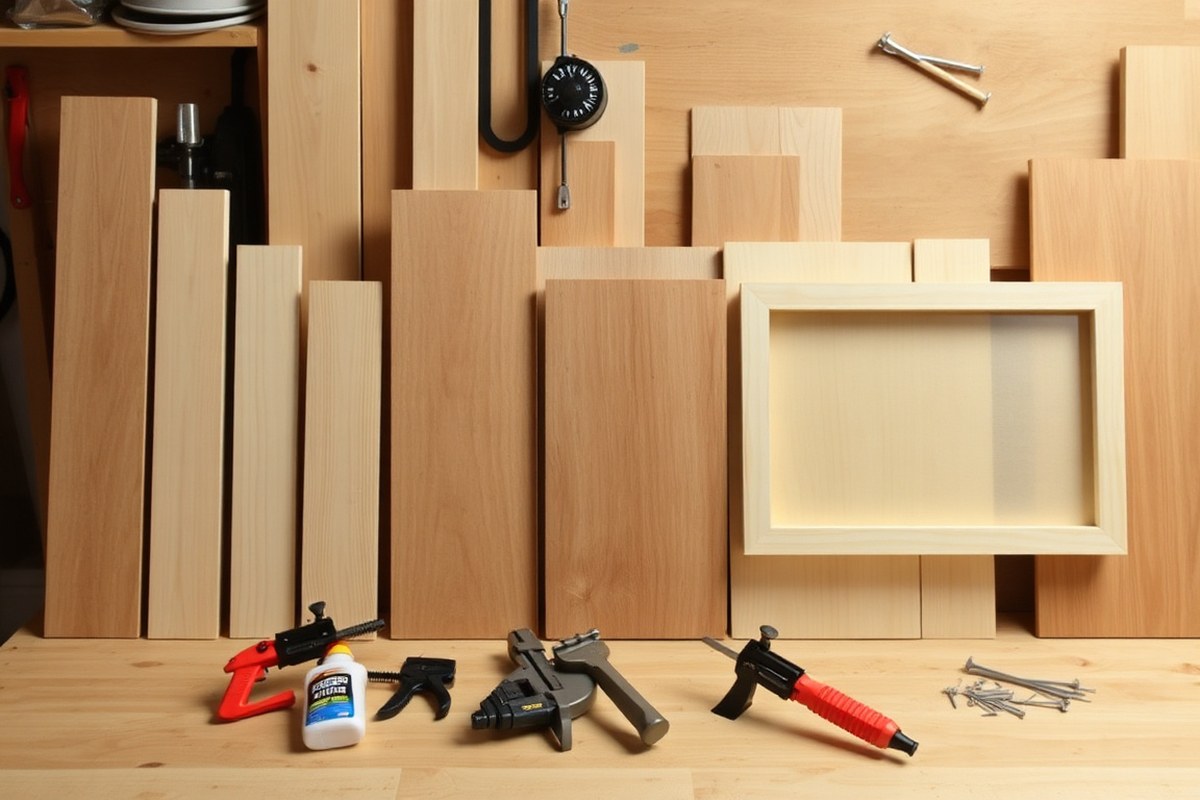
To successfully make floating frame signs, you’ll need the right combination of wood materials, tools, and hardware. Choosing suitable wood types and proper thickness, along with essential tools like a miter saw and a drill, helps ensure the frame fits perfectly and holds securely. The proper hardware keeps your frame stable and ready to hang, while safety gear protects you during assembly.
Essential Tools Needed
A few basic tools cover most of the work involved in creating floating frame signs. A miter saw is ideal for cutting boards with precise 45-degree angles on the corners, but a hand saw can be used as a substitute if you work carefully. A drill with drill bits will help you countersink screws accurately for a clean finish. Also, a Phillips head screwdriver is necessary for attaching hardware.
Temporary spacers like business cards or canvas keys are useful for creating the correct floating gap between the frame and artwork during assembly. Using clamps can hold pieces steady as glue dries or while you drill and screw parts together.
- Miter saw (or hand saw as an alternative)
- Drill with drill bits
- Phillips head screwdriver
- Wood clamps
- Measuring tape and pencil
- Temporary spacers (business cards or canvas keys)
Always measure twice before cutting to avoid wasting wood or ending up with ill-fitting pieces.
Recommended Wood Types and Thickness
Oak, pine, and maple are popular wood choices for floating frames due to their durability and smooth surfaces that accept finish well. Oak offers a sturdy, grainy look but tends to cost more, while pine is affordable and easy to work with but may dent more easily. Maple is a nice middle ground, combining strength with a fine grain.
Board thickness plays a critical role. Most floating frame pieces use 3/4-inch-thick wood boards, providing both sturdiness and the right dimension for the floating gap calculation. Thinner boards (about 1/2 inch) might lack stability or create an uneven look unless compensated for in design. Thickness also factors into measurement formulas: the frame width and length equal (2 × board thickness) + (2 × floating gap) + artwork dimension.
| Wood Type | Appearance | Workability | Average Cost (per board foot) |
|---|---|---|---|
| Oak | Grainy, strong texture | Harder to cut | $5 – $7 |
| Pine | Smooth, pale color | Easy to cut and sand | $2 – $4 |
| Maple | Fine, pale grain | Moderate | $4 – $6 |
Hardware and Safety Gear
Wood glue and screws are fundamental for assembling the frame. Use wood glue along the joints first, then reinforce them with screws to keep the frame secure over time. For hanging, sawtooth hangers nailed into the back top edge of the frame are simple and effective. Make sure the hanger is centered for even weight distribution to avoid crooked hanging.
Don’t skip safety gear. Safety glasses protect against flying sawdust and fragments, while a dust mask helps avoid inhaling fine particles during sanding and cutting. Hearing protection is useful if power tools create uncomfortable noise, especially in enclosed spaces.
- Wood glue (strong adhesive for joints)
- Screws sized for 3/4-inch boards (like #6 or #8)
- Sawtooth hangers or D-ring hangers
- Nails or small screws for hangers
- Safety glasses
- Dust mask
- Hearing protection (ear plugs or earmuffs)
Attach hardware securely and test weight support before hanging your finished frame to avoid accidents or damage.
How to Measure and Size Wood Pieces Correctly
To size floating frame pieces accurately, start by measuring your artwork dimensions, decide on the gap size between the frame and the artwork, and add wood thickness and overlaps. Use these measurements to cut precise wood lengths so corners align perfectly and the signature floating gap is consistent. Avoid cutting pieces too short or too tight to prevent assembly issues.
Measuring Artwork for Frame Size
Begin by measuring the width and height of your artwork, such as a canvas or wooden sign. Use a tape measure held at the outer edges, noting the exact dimensions. These measurements form the base size for cutting the inside frame pieces that sit directly around your artwork.
For example, if your canvas measures 24″ wide by 18″ tall, use these dimensions as starting points. Measure twice to confirm accuracy. This ensures your frame pieces will fit snugly around the artwork but leave room for the floating gap.
Calculating Gap and Frame Thickness
Decide on the width of the floating gap between the artwork and the frame. A common choice ranges from 1/4″ to 1/2″; 3/8″ is a balanced option that shows the gap clearly without being too wide. Add this gap to each side of the artwork size to find the inside edge dimensions of your frame.
Wood thickness matters because frame pieces overlap at the corners, increasing the total frame size. For inside frame pieces around the artwork, 3/4″ thick wood is typical. For the outer frame, using wider wood, such as 1 5/8″ thick, affects how long you cut those pieces. Here’s a direct formula to size each inside frame piece lengthwise:
Length = Artwork dimension + (2 × Gap)
Using the earlier example with a 3/8″ gap, calculate the width frame pieces as:
24″ + (2 × 0.375″) = 24.75″
Height pieces use the same formula:
18″ + (2 × 0.375″) = 18.75″
This gives the length to cut four pieces of 3/4″ wood for the inside frame.
Accounting for Miters and Overlaps
Floating frames use mitered 45-degree corners that overlap neatly. Inside frame corners butt up next to the artwork, so pieces are cut to the length calculated above. The outer frame pieces overlap each other at the corners by the thickness of the wood, increasing total frame length.
When cutting outer frame pieces from 1 5/8″ wood, cut the longer sides first, then measure the inside dimension of the assembled inside frame. To allow the corner overlaps, add the thickness of one piece of wood (1 5/8″) to the length of the longer side. The shorter sides remain the same length as the inside frame’s height plus gap. For example, for a canvas 24″ × 18″ with a 3/8″ gap and 1 5/8″ outer frame thickness, calculate outer frame length on long sides as:
Inside frame length + outer wood thickness = 24.75″ + 1.625″ = 26.375″
Short sides match inner frame height plus gap without extra added length:
18.75″
Use a miter saw to cut all outer frame pieces at 45-degree angles. Cut outside frame pieces individually, measuring and accounting for their positions and overlaps precisely before cutting to avoid errors. Here is a step-by-step approach for measuring and sizing wood pieces:
- Measure the width and height of your artwork accurately.
- Choose your floating gap width, typically 1/4″ to 1/2″.
- Calculate inside frame piece lengths by adding twice the gap to artwork dimensions.
- Cut four inside frame pieces from 3/4″ wood to these sizes with 90-degree ends (not mitered).
- Assemble inside frame around the artwork, then measure its outside dimensions.
- Calculate outer frame piece lengths by adding wood thickness to longer inside frame sides to allow overlap.
- Cut outer frame pieces from 1 5/8″ wood with 45-degree miter cuts at each end.
- Assemble outer frame around inside frame, confirming gaps and overlaps align correctly.
Cutting and Assembling the Floating Frame Components
Making a floating frame sign requires precise cuts and careful assembly to achieve clean, tight corners. Cutting accurate 45-degree miters, dry fitting the pieces, then gluing and clamping ensures the frame will hold its shape. Adding nails or pins and checking the square finishes the process and prevents warped or loose corners.
Setting Up the Miter Saw
Set your miter saw to exactly 45 degrees to get perfect miter cuts for each corner of the frame. Confirm the angle using a digital protractor or a carpenter’s square to avoid gaps later. Clean the saw blade and ensure it’s sharp, which helps produce smooth cuts and reduces splintering. If you don’t own a miter saw, a miter box with a fine-toothed hand saw can create precise 45-degree angles.
Secure the wood firmly against the saw’s fence before cutting. Use scrap pieces first to test the setting, checking that two cut pieces form a perfect 90-degree corner when placed together. This alignment is the basis for a square frame, so take time to calibrate the saw properly.
Cutting Mitered Frame Pieces
Accurate miters keep your frame corners tight and professional-looking. Cut all four pieces with the miters facing inward so that when assembled, they form smooth corners. Cutting the longer pieces first reduces waste and allows you to use leftover material for shorter sides.
After cutting each piece, arrange them without glue or nails in the intended frame shape. This dry fitting lets you catch any mismatched lengths or imperfect angles before the glue-up. Trim or sand small deviations to improve the fit. Remember to label pieces so you assemble the same corners as tested.
- Measure and mark each wood piece for cutting.
- Set the miter saw to 45 degrees and secure wood against the fence.
- Cut the first mitered end of a piece and label it.
- Flip the piece and cut the opposite end at a complementary 45 degrees.
- Repeat for all frame sides, labeling each for assembly.
- Arrange pieces into the frame shape on a flat surface to check fit without securing.
- Make minor adjustments with sanding or trimming if gaps appear.
Gluing and Clamping Assembly
Once the dry fit is perfect, apply a generous coat of wood glue to each mitered edge. Spread the glue evenly with a small brush or finger to ensure full coverage for a strong bond. Press the glued pieces together, aligning corners tightly to avoid gaps.
Use a strap clamp or picture frame clamp around the assembled frame to hold all sides firmly. Tighten the clamp evenly so corners pull flush without warping the frame shape. Wipe away any excess glue with a damp cloth before it dries. Let the glued frame dry at least 30 minutes to an hour before removing clamps, or follow the wood glue manufacturer’s recommended curing time.
Nailing and Squaring the Frame
Adding finishing nails or pin nails helps secure the corners for durability, especially if you plan on handling or moving the frame often. Use a 23-gauge pin nailer to gently drive nails 1/2 inch from each corner on the inside face of the frame. Avoid splitting the wood by pre-drilling with a small bit if nailing near the ends.
Check if the frame is square by measuring the diagonals from opposite corners. Both measurements should be equal within 1/16 inch for a properly squared frame. Adjust the clamp tension or tap corners gently with a rubber mallet until equal. Clamping while the glue dries keeps this square shape. Double-check squareness before the glue sets.
Creating the Signature Floating Gap and Backing
The signature floating gap on a frame sign is typically about 1/4 inch wide. This space creates the illusion that the artwork is suspended inside the frame, which is key to achieving that distinctive look. Maintaining a consistent gap is essential for the floating effect to work well and to avoid the artwork resting directly against the frame edges.
To build this gap, you can create spacer blocks or rabbet channels. Spacer blocks are small strips of wood or foam glued or nailed to the inside edges of the frame, raising the artwork slightly above the backing. Rabbets are a recessed cut into the frame’s inner side that holds the art while providing space around the edges. Both options prevent the artwork from touching the frame directly and preserve the float.
Common materials for spacer blocks include thin wood strips like 1/4-inch oak or pine, foam tape with rigid backing for a simpler method, or small wooden blocks custom cut to fit your frame. Foam spacers are quick but less durable over time, while wood offers strength and a clean finish. Rabbeting requires more skill and the right tools, such as a router or table saw, but gives a streamlined look that integrates the gap into the frame itself.
Adding backing depends on your specific sign and whether the artwork needs extra support. A rigid backing, such as MDF or plywood about 1/8 to 1/4 inch thick, ensures the frame holds together neatly and protects the back of the canvas. It’s especially necessary for heavier signs or those that do not have their own firm backing. The backing should fit snugly but not press on the canvas, sitting just behind the spacer blocks or rabbet. Some tips for creating the floating gap and backing:
- Measure your artwork’s thickness before choosing spacer thickness or rabbet depth.
- Use wood glue to attach spacer blocks for a stronger hold over nails or staples alone.
- Sand spacer edges smooth to avoid damaging the art edges.
- For gallery-wrapped canvases thicker than 3/4 inch, consider deeper rabbet cuts or taller spacer blocks.
- Choose backing material that resists warping in your home’s humidity levels.
- Test-fit all components before gluing or final assembly to ensure the gap is even on all sides.
In many cases, the backing also serves to hide wiring or hanging hardware inside the frame without affecting the floating illusion. Make sure the back rests flat against the frame and the wall to keep your sign stable when mounted. If you prefer a fully open-back look, attach thin ledge strips around the inside edges instead of full backing. This exposes the wall behind the sign but still supports the canvas and maintains the gap.
Always confirm the final floating gap is even using a ruler before fixing components permanently; uneven spacing can ruin the floating effect and distract from your sign’s appearance.
Finishing Options for a Professional Look
After assembling your floating frame, begin by sanding all surfaces and edges to ensure smoothness. Start with a medium grit sandpaper, such as 120, to remove any glue spots, rough edges, or tool marks. Then progress to a finer grit like 220 for a polished finish. Sand lightly in the direction of the wood grain to avoid scratches, paying close attention to the corners where overhanging edges might remain after clamping. Proper sanding prevents paint or stain from soaking unevenly and gives your frame a professional look.
Choosing the right finish depends on the wood species and the final look you want. Staining highlights the wood’s natural grain; apply it with a clean cloth or brush, wiping away excess to avoid blotches. Test the stain on a scrap piece of wood first. Use a high-quality acrylic or latex paint that’s suitable for wood when you want a painted finish. Sand lightly between coats with 220 grit paper to maintain smoothness. Regardless of stain or paint, apply a clear sealant afterward to protect the wood from moisture, dirt, and UV damage if your sign will hang outdoors. Polyurethane, water-based spar varnish, or clear wax are common sealers. Selecting a finish that suits indoor or outdoor use affects the durability and maintenance needed.
Dry times vary by product and environment. Allow a minimum of 2 to 4 hours for stain or paint to dry to the touch, but wait 24 hours before handling to prevent fingerprints or smudges. Sealants often need longer, up to 24 hours, to dry fully between coats, with 2 to 3 coats recommended for the best protection. For the finish to cure completely, giving it maximum hardness and durability, plan on a week before hanging the frame. Keep the frame in a dust-free, well-ventilated space, ideally between 65 and 75 degrees Fahrenheit, to speed drying and reduce the risk of tackiness or cloudiness. Rushing this process can cause finishes to peel or bubble later.
Taking time to sand thoroughly and apply finishes in thin, even layers results in smooth, rich colour and durable protection. Avoid thick coats that drip or dry unevenly, as these imperfections show up clearly on a floating frame’s visible edges and corners. Choose weather-resistant sealers for frames that will be outdoors or exposed to moisture. For indoor frames, a satin or matte finish usually looks best and reduces glare. Finishing is the final step to transform your wood frame into a polished, professional element that improve your sign’s visual appeal while protecting your work for years to come.
Mounting and Hanging Your Floating Frame Sign Safely
Choosing the right hanging hardware is essential for keeping your floating frame sign stable and safe on the wall. Use D-rings attached to the back of the frame with screws, combined with picture wire rated to support at least 30 pounds. This setup distributes the frame’s weight evenly and reduces the risk of it falling. Using conventional picture hooks that support the same weight rating will secure the frame on drywall or wood surfaces.
Installing picture wire takes attention to keep it tight and secure. Leave an extra 6 inches beyond the space between the D-rings when cutting the wire. Insert the wire through one ring twice, then twist it firmly to hold it in place. Do the same for the opposite ring, allowing just enough slack so the wire dips slightly in a shallow “V” shape when hanging. Too much slack makes the frame lean forward, while too little strain risks snapping the wire.
Wall hooks vary depending on your wall type and frame weight. For drywall, use picture hooks designed to hold up to 30 pounds, which usually cost around $5 for a pack of four. For heavier signs or plaster walls, consider wall anchors or screws into studs for extra security. Adding wall protectors at the bottom corners of the frame helps prevent marks or dents on your wall and keeps the frame level. Follow these steps to hang your floating frame sign correctly and safely:
- Attach D-rings on each vertical side of the frame’s back, about one-third down from the top edge, using screws long enough to bite into the wood without poking through.
- Cut the picture wire so it extends roughly 6 inches past the length separating the D-rings.
- Pass one end of the wire through a D-ring twice and twist it around itself at least three times to make a secure hold.
- Repeat the threading and twisting on the other D-ring, pulling the wire taut but leaving enough slack to form a small curve.
- Place a picture hook on the wall where you want to hang the frame, ensuring it matches the frame’s weight rating (usually up to 30 pounds) and is properly nailed or anchored into the wall.
- Hang the wire loop over the wall hook carefully, then adjust the frame to be level using a small level tool.
- Apply wall protectors on the back bottom corners of the frame to protect your wall and steady the frame.
- Check the frame’s stability by gently rocking it; it should feel secure without shifting or slipping.
Common Mistakes and How to Avoid Them
Mismeasuring is one of the most common mistakes in making floating frame signs. Even a small error in measuring the wood pieces can cause the frame to be too tight or too loose around the artwork. Always measure twice before cutting and use a reliable tape measure or ruler. Accurate measurements ensure that your frame fits the artwork perfectly and maintains the intended floating gap.
Uneven or imprecise cuts, especially on mitered corners, lead to visible gaps and weak joints. Using a miter box or a power miter saw set at exactly 45 degrees helps achieve crisp corners. When corners don’t align, sanding each piece individually until they fit flush before gluing is essential. Adding splines to the corners can also strengthen the joints and improve durability, though this requires an additional step of routing a spline slot and gluing in the spline.
Incorrect sizing of the floating gap, the space between the artwork and the frame, can spoil the sign’s visual appeal. A gap of about 1/4 inch to 1/2 inch on all sides is usually ideal; too small, and the floating effect disappears; too large, and the artwork looks lost inside the frame. Use spacers or small wood blocks to maintain an even gap when assembling the frame and backing.
Rushing the gluing process can cause misalignment and weak joints. Apply wood glue evenly and clamp the frame pieces firmly for at least 30 minutes to an hour, depending on the glue’s instructions. Avoid removing clamps too early to prevent frame movement or separation. Check the corners before clamping to ensure perfect fits and the correct gap size.
- Mismeasuring: Double-check all measurements before cutting.
- Uneven cuts: Use a miter saw and sand pieces separately to fit.
- Wrong floating gap: Maintain 1/4 to 1/2 inch spacing consistently.
- Rushed gluing: Clamp for recommended time and check alignment first.
- Loose corners: Add splines or wood filler for strength and neatness.
- Frame too small or large: Adjust measurements and recut if necessary.
Test fit all parts dry (without glue) to catch errors before assembly and avoid costly fixes.
Loose or uneven corners can often be fixed by sanding the mating surfaces separately, then reassembling dry to check the fit. For tight corners that still don’t align perfectly, inserting thin shims or using wood filler after assembly helps improve the look and strength. When the frame doesn’t fit the artwork properly, reassess your measurements and consider recutting or adjusting the backing to maintain the floating gap. Taking time to verify each step reduces frustration and results in a clean, professional floating frame sign that showcases your artwork effectively.
Step-by-Step Action Plan
Use this plan to build your floating frame sign with confidence and see progress quickly.
- Before you start: Gather all materials and tools listed for your chosen wood and finish. Confirm everything matches your measurements and design.
- Day 1: Measure and mark your wood pieces carefully for the frame, backing, and gap. Double-check sizes before cutting.
- Day 2: Cut the frame components using a miter saw or handsaw. Ensure cuts are clean and angles precise to avoid gaps.
- Day 3: Assemble the frame pieces with wood glue and clamps. Check the floating gap spacing matches your plan before the glue dries.
- Day 4: Attach the backing board, making sure it sits flush with the back edge and leaves the floating gap visible.
- Day 5: Sand all surfaces smoothly, focusing on edges inside the gap for a professional look.
- Day 6: Apply your finish, such as stain or paint, in thin, even coats. Let each coat dry fully for best results.
- Day 7: Install mounting hardware securely and hang your sign on a suitable wall. Confirm it is stable and level.
Frequently Asked Questions
Can I Use Floating Frames for Objects Other Than Canvas Art?
Yes, floating frames work well for 3D objects, turning the frame into a mini display case that highlights your item. Just make sure to adjust the depth for the thickness of the object.
How Can I Secure Canvases That Have Thick Edges in a Floating Frame?
Offset clips are the best choice for thick gallery-wrapped canvases as they hold the canvas firmly without damaging it. These clips attach to the back, preserving the floating effect without showing hardware from the front.
What Wood Type Is Recommended for Making Floating Frames?
Choose hardwoods like maple or oak for durability and a clean finish. They resist warping better than softwoods, which helps maintain the frame’s precise floating gap over time.
Is It Necessary to Build a Backing for Floating Frames?
Building a backing is recommended when the gap is wider than 1/8 inch to ensure the artwork appears to float without wall color showing through. A solid backing also offers extra support for the artwork.
How Do I Maintain a Consistent Floating Gap Around the Frame?
Use spacer strips or ¾” square dowels as consistent guides during assembly to keep the gap uniform. Precise measurement and careful gluing are key to preserving the signature floating effect.
Can Floating Frames Be Reused with Different Artworks?
Yes, floating frames can be reused if assembled with removable clips or screws. This makes switching out canvases easy without rebuilding the entire frame.
Key Points to Remember
Floating frame signs combine simple woodworking skills with creative design to add a unique touch to your home decor. Focusing on accurate measuring, careful assembly, and smooth finishing will give you a high-quality result. Start with your measurements today to bring your floating frame sign project to life.