
How to Make a Window Sign with 8 Proven Methods for Lasting Results
Knowing how to make a window sign helps you create eye-catching displays that attract customers and boost in-store visits. Choose your materials based on the sign’s purpose and location to ensure durability and visibility. Starting with a clear design tailored to your window size results in a professional and lasting sign.
Key Takeaways
- Printable window clings offer a removable, cost-effective solution lasting up to two years with proper care.
- Vinyl cutouts provide sharp, durable graphics ideal for long-term outdoor window signage.
- Reverse painting on glass creates a polished, professional look that works well for permanent signs.
- Hand lettering improve charm and personalization but requires practice and the right markers.
- Measure your window accurately before designing to ensure your sign fits perfectly and grabs attention.
- Keep window clings away from glass surfaces that exceed 100°F to avoid melting or warping.
1. Different Types of Window Signs Explained
Window signs come in several popular types, each suited to different needs based on style, durability, and placement. The main categories include window clings, vinyl decals, painted signs, and hand lettering. Choosing the right type depends on whether you want a temporary message, a reusable option, or a permanent display. Knowing the features and limitations of each helps you create a sign that lasts and looks professional.
Window clings stick to glass using static electricity or a light adhesive. They’re made from plastic or vinyl film and don’t damage the glass surface, which means you can remove and reuse them. Clings typically last up to 2 years, but they work best inside because outdoor exposure reduces their lifespan. They come in small sizes like 5″ x 5″ or larger formats up to 36″ x 48″, and you can choose standard or custom shapes. These signs are budget-friendly and easy to change, making them ideal for temporary promotions or seasonal displays.
Vinyl decals use adhesive to stick firmly to glass. Their adhesive varies, with some decals removable and others more permanent, often lasting several years outdoors without fading or peeling. Applying vinyl signs might require an application fluid for smooth placement and bubble-free results. Vinyl is a great choice for businesses needing a durable, professional look that endures weather and cleaning.
Painted signs involve using chalk markers, acrylic paints, or specialized glass paints directly on the window. This method suits a handcrafted style but requires some skill to avoid bumps or uneven strokes. Painted signs are permanent until removed by scraping or repainting. They allow full control over style and are perfect when you want a unique, eye-catching design that can be refreshed seasonally.
Hand lettering on windows typically uses chalk markers or water-based paint. This style is excellent for small businesses wanting a personal touch or frequently changing messages. While less durable outdoors, hand lettering can last weeks inside and offers flexibility without extra materials like decals or vinyl.
| Window Sign Type | Pros | Cons | Typical Lifespan | Best Uses |
|---|---|---|---|---|
| Window Clings | Reusable, no damage to glass, budget-friendly | Less durable outdoors, lasts up to 2 years | Up to 2 years (indoor use) | Temporary promotions, seasonal signs, indoor use |
| Vinyl Decals | Durable, professional appearance, outdoor-rated | Requires careful application, permanent options exist | Several years (outdoor use) | Long-term branding, outdoor advertising |
| Painted Signs | Fully customizable, unique style | Skill needed, semi-permanent, removal can be tricky | Months to years, depending on paint and environment | Handcrafted looks, seasonal or event signage |
| Hand Lettering | Flexible and personal, easy to update | Less durable, temporary outdoors | Weeks (indoor), less outdoors | Short-term messages, menus, small business promotions |
Proper placement influences durability and visibility. For example, clings are best positioned at eye level on the inside of windows to avoid weather damage, while vinyl decals work well on exterior glass. Maintenance involves regular cleaning and checking for wear, especially for temporary signs to keep them attractive and effective. Choose the type that matches how long you want your message visible, your budget, and your skill level for application.
2. Choosing Materials and Tools for Your Window Sign
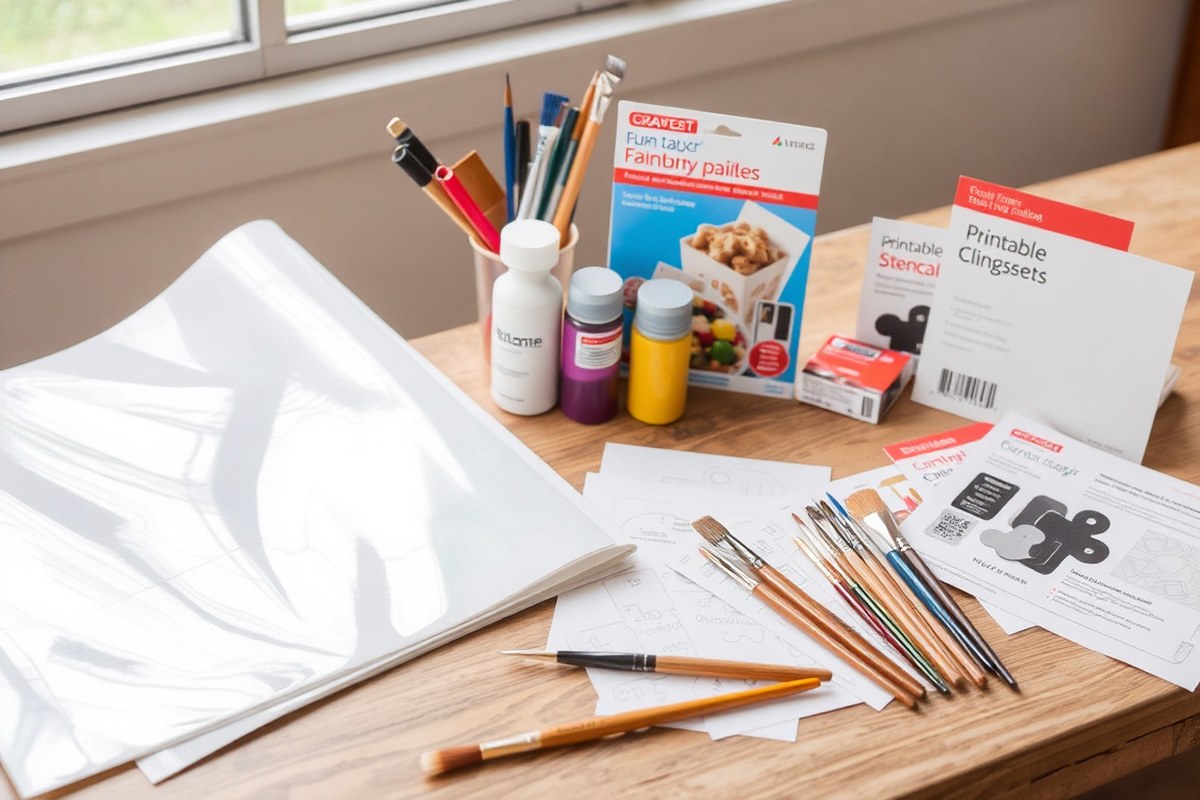
Materials and tools vary depending on the method you choose to make your window sign. Paint, vinyl cutouts, and printable window clings each require different supplies and equipment, so gathering the right items first saves time and ensures better results.
For paint-based signs, you’ll need quality glass paint or acrylic paint designed for glass surfaces. Using a paintbrush set with fine tips helps with detailed lettering. A measuring tape, a paper with guidelines placed behind the glass, and painter’s tape keep your design straight and clean. Painting on the back side of the glass protects your work from weather and wear, so plan for reverse lettering or tracing.
Vinyl cutouts require adhesive vinyl sheets and a cutting tool designed for precision work. A vinyl cutter machine is ideal and can range from $150 to $350 for entry-level models. You’ll also want transfer tape to apply your cutout smoothly onto the glass surface without bubbles. A squeegee or credit card helps press the vinyl down flat. This method offers a professional look and durable results.
Printable window clings are great for renters who need temporary signage. You’ll need printable cling sheets compatible with your home inkjet or laser printer, designed specifically for windows. These clings are affordable, generally costing about $10 to $20 for a pack of 10 sheets. Keep in mind that clings can warp if the window gets hotter than about 100°F, so place them on shaded glass or during cooler times.
- Paint method: glass paint, fine-tip brushes, measuring tape, painter’s tape, paper with lines for tracing
- Vinyl method: adhesive vinyl sheets, vinyl cutter, transfer tape, squeegee or card
- Printable cling method: printable cling sheets, compatible inkjet or laser printer, scissors or craft knife
- Common tools: measuring tape, lint-free cloth for cleaning glass, scissors or craft knife for cutting shapes
- Optional: masking tape to temporarily hold templates in place and a damp cloth for quick corrections
Choose supplies from local craft or hardware stores for quick access; online sources often offer wider vinyl and cling options but may take several days to deliver.
You can usually find glass paint, vinyl sheets, and printable clings at a craft store for around $5 to $15 per item. Buying in bulk through online retailers may reduce costs if you plan on making multiple signs. Specialty tools like vinyl cutters are an investment but speed up the process and improve precision, especially if you want clean, consistent lettering.
Make sure the glass is thoroughly cleaned with rubbing alcohol before applying any material to improve adhesion and avoid smudging. Pay attention to the instructions for drying times and curing. For example, glass paint may take 24 to 48 hours to fully dry to the touch and longer to cure for durability. Vinyl and clings stick best on smooth, non-porous glass in a clean, dry environment.
3. Designing Your Window Sign for Impact and Size
Designing your window sign to fit your window perfectly and grab attention means careful measuring, crafting a precise digital template, and choosing fonts and colors that boost readability. For reverse painting, you’ll need to flip your text so it reads correctly from outside the glass.
Measuring Your Window Correctly
Start by measuring the visible glass area where you want the sign. Use a steel measuring tape for accuracy. Measure the width and height in inches, noting any frames or mullions that might affect the visible space. Double-check measurements to avoid fitting problems.
Consider leaving a margin of 1 to 2 inches inside the glass edge to prevent your design from looking cramped or getting cut off. This margin also accounts for framing or cleaning needs.
Creating a Custom Sign Template
You can create a digital template using software like Canva, Microsoft Word, or Adobe Illustrator. Set your canvas or page size to match your measured sign space exactly. For instance, if your window space measures 24 inches wide by 18 inches high, set your template dimensions to 24″ x 18″.
Choose bold, sans-serif fonts like Arial, Helvetica, or Futura for better visibility from a distance. Keep font size large enough to fill the space without overcrowding, generally, letters should be at least 3 to 4 inches tall for small storefronts. Use high-contrast color combinations such as black text on white or bright colors on dark backgrounds.
Personalize your sign with your business name, hours, or a call to action, but keep messages concise. Add your logo or website URL if space permits, but ensure these elements don’t overwhelm the main message. Follow these steps to create your digital template:
- Open your design software and create a new document.
- Set the canvas or page size to your window’s dimensions (e.g., 24″ width x 18″ height).
- Add text boxes for your message, adjusting the font size and style for readability.
- Choose colors that contrast well and suit your brand identity.
- Incorporate logos or images, resizing them to balance your layout.
- Proofread your text for accuracy and clarity.
- Save your template as a PDF or image file ready for printing or tracing.
Reversing Text for Reverse Painting
Reverse painting involves painting your design on the back side of the glass so it’s viewed correctly from outside. This requires flipping your text horizontally before printing or transferring your template. Here is how to reverse your text in a common design program:
- Type your text as usual in your design software.
- Select the text box or object containing your text.
- Look for the “Flip Horizontal” or “Mirror” option in your software’s Transform or Arrange menu.
- Apply the flip so the text appears backward on your screen.
- Double-check your reversed text to make sure every letter reads correctly from left to right when viewed from the front of the glass.
Reversing graphics and logos follows the same flip horizontal process. This step is essential to avoid ending up with backward or unreadable signage.
4. How to Make a Window Sign with Printable Window Clings
Printable window clings are static-backed sheets that let you print your designs at home and stick them on glass without adhesive. They are reusable, easy to apply, and perfect for changing seasonal or promotional messages in your shop window or studio.
Selecting Printable Cling Materials
Printable window clings come mainly in clear or white options. Clear clings work best for inside-window applications when you want the design visible from outside, requiring you to mirror your design before printing. White clings offer a bolder look but only cling on one side, so they attach from the printed side.
Sheet sizes typically match standard printer paper like 8.5 by 11 inches, and materials designed for laser printers tend to last longer and resist fading better than those for inkjet printers. Prices can range from $10 to $30 for packs of 10 to 20 sheets, depending on brand and size, making them an affordable option for custom window signs.
Printing and Cutting Your Design
Before you print, upload your design as a flat graphic file in your cutting machine software, such as Design Space, and use its Print Then Cut feature to handle printing and cutting precisely. Mirror your image if using clear clings for inside window placement.
Use your laser printer’s best quality setting for sharper colors and durability. Allow the ink to dry completely, which may take 10 to 15 minutes to avoid smudging. After printing, carefully cut out your design using either scissors or a cutting machine to match your artwork’s edges.
Weeding, or removing excess cling material beyond your design, is easier with vinyl but still needed with decals. Take your time to peel away the non-design areas to ensure a clean look on your window.
- Prepare your design in design software and mirror it if needed.
- Load printable cling sheets into your laser printer and print the design.
- Wait 10-15 minutes for the ink to dry fully.
- Cut out your design by hand or with a cutting machine.
- Weed away extra cling material around the design carefully.
Applying the Cling to Your Window
Applying static cling without bubbles involves a few simple steps. Start by cleaning the window with glass cleaner and ensuring it’s completely dry. Dust or moisture can cause bubbles or poor sticking.
Peel the cling from its backing slowly, trying to avoid touching the sticky surface too much. Position the cling at your desired spot and press the center against the glass. Smooth outward toward the edges with a squeegee or a plastic card to push out air bubbles and moisture.
In some cases, lightly spraying the window with water before application helps reposition the cling if needed, then squeegee dry carefully. Removing bubbles one by one as you smooth the cling will result in a flawless finish. The static cling will hold firmly but can be removed and reused whenever you want to change your sign.
5. Making Window Signs Using Vinyl Cutouts
Choosing the right vinyl material is the first step to making professional window signs with vinyl cutouts. Permanent vinyl is best for outdoor or long-term signs because it resists weather and sun exposure, typically lasting five to seven years. Removable vinyl suits temporary signs or indoor use since it peels off cleanly without leaving residue but may only last a year or two outdoors. Outdoor vinyl combines durability and removability, offering a balance if you want a semi-permanent option that handles rain and sunlight well. Selecting a vinyl rated for the environment where your sign will be displayed ensures your design stays intact and sharp.
To cut your vinyl, a vinyl cutting machine like a Cricut makes the process precise and efficient. These machines can trim designs from uploaded artwork or templates with accuracy down to a fraction of an inch, which is hard to match by hand. Without a cutting machine, you can use a sharp craft knife and stencils, but these need a steady hand and patience. After cutting, you’ll need to weed the excess vinyl, the parts around and inside your design that aren’t part of the sign. Using a weeding tool or a fine-tipped tweezer helps you lift and remove these small pieces without damaging the design, especially around tight corners or letters.
Applying your vinyl decal smoothly is key to a damage-free, professional finish. Start by cleaning the window thoroughly with glass cleaner and a lint-free cloth to remove dirt and grease. Use a squeegee or a credit card wrapped in a soft cloth to apply the vinyl from one edge to the other. Press firmly to avoid air bubbles and wrinkles, working slowly. When bubbles show up, gently lift the vinyl to reapply, or use a pin to pop tough ones, then smooth them down. The backing paper should be peeled back at a sharp angle to prevent the vinyl from sticking to itself. Taking these careful steps helps your sign look crisp and vibrant on the window.
Vinyl signs can cost between $10 to $50 for materials depending on size and quality. Higher-end outdoor vinyl costs more but saves frequent replacements. Cutting machines range from $150 to $400, an investment if you plan regular sign-making. For small projects, investing in quality tools like weeding hooks and application squeegees priced about $5 to $15 each improves results significantly.
Always test your vinyl on a small window section to ensure it sticks well and removes cleanly before applying your full design.
6. Reverse Painting on Glass for a Professional Look
Reverse painting on glass is a technique where you paint your design on the back side of a window, so the finished image shows clearly from the front. This method works best for semi-permanent signs because the glass itself protects the paint, keeping the sign sharp and durable. It requires careful preparation and painting the design backward, starting with the details first, to achieve a professional appearance.
Preparing Your Glass Surface
Start by cleaning the glass thoroughly with a glass cleaner and a lint-free cloth to remove all dust, grease, and fingerprints. Any residue can cause paint to peel or bubble later. Use rubbing alcohol as a final wipe-down to ensure total cleanliness. Choose a firm, stable windowpane or glass panel that’s securely fixed in its frame to avoid movement as you work.
Make sure your glass is completely dry before painting. If your window will be exposed directly to weather, consider its location and whether it has protective coatings like low-emissivity (low-e) layers that might affect paint adhesion.
Tracing and Painting in Reverse
For reverse painting, your design must be flipped so it reads correctly from the front. Start by printing or drawing your design on paper, then flip it horizontally by hand or using a computer program. Place this reversed design behind the glass where you want your sign.
Use a fine permanent marker to carefully trace your design’s outline on the back of the glass. This creates a guide for where to apply paint. The painting process itself requires applying paint in reverse order: details first, backgrounds last.
Choose paints designed for glass. Acrylic enamel or specialized glass paints with good adhesion work well. These usually dry quickly and resist smudging. Avoid water-based paints that might wash off easily. Here’s a simplified step-by-step to paint your sign in reverse on glass:
- Clean and dry your glass surface thoroughly.
- Create your design and flip it horizontally.
- Secure the reversed design paper behind the glass.
- Trace the design with a fine permanent marker on the back of the glass.
- Paint the smallest details first, including any highlights or lettering.
- Allow each painted section to dry before adding additional layers.
- Build up the paint with several thin coats, finishing with the background last.
- Let the paint cure fully according to the manufacturer’s instructions, often 24-72 hours.
Finishing and Protecting Your Paint
Once your paint is dry, you can protect your work by applying a clear glass sealer. Use a product specifically made for use on glass to avoid cloudiness or peeling. This layer adds extra weather-resistance, especially if the window faces outdoor elements like rain or direct sunlight.
Weatherproofing is key for longevity. Window frames sealed with glazing putty or silicone caulk prevent moisture from seeping behind the glass, which could damage your paint layers over time. Avoid cleaning the sign aggressively; instead, gently wipe it with a damp soft cloth to preserve the paint.
Good results show crisp, vibrant colors visible clearly through the glass without smudges or streaks. Avoid heavy paint layers that can crack or peel under temperature changes. Multiple thin coats give the best finish and durability for semi-permanent glass window signs.
7. Hand Lettering on Windows: Tips and Techniques
Hand lettering on windows offers a personal touch that catches the eye and communicates your message clearly. Choosing the right markers or paints makes a big difference. Water-based acrylic markers and oil-based paint pens designed for glass are popular choices because they offer bright colors and good adhesion. For larger areas or bolder lettering, enamel or latex glass paints work well but require drying times of 24 to 48 hours.
Planning your layout before starting is key. Use a ruler and masking tape to create crisp guidelines on the glass surface. You can also lightly sketch your design with a washable chalk marker or pencil before applying permanent ink. Stencils bring consistency if your handwriting isn’t steady, especially for repeated lettering or logos. Place the stencil firmly on the glass and fill it in with a marker or paint to avoid smudging.
- Keep your hand steady by resting your wrist on the window frame or table.
- Work slowly, allowing each stroke to dry slightly to prevent drips.
- Use thin-tipped markers (0.5, 1 mm) for details and broader tips (2, 5 mm) for larger letters.
- Choose contrasting colors to background and avoid overly complex fonts.
- Apply paint in thin layers to avoid uneven textures.
- Let the first layer dry completely before applying a second for a richer finish.
- Use a small brush or cotton swab dipped in rubbing alcohol to correct minor mistakes before the paint dries.
Common hand lettering mistakes include uneven spacing, shaky lines, and smudges. Fix spacing issues by erasing chalk guide marks and realigning letters before painting. If a line shakes, go over it once it dries with a steady hand to smooth edges, or add outlining for definition. Smudges on glass can be wiped off quickly with a damp cloth if the paint is still wet. Once dry, use a razor blade scraper gently to remove errors without scratching the glass.
Good results look like clean, legible letters with consistent thickness and spacing. Your message should be easy to read from a distance and complement your branding colors. Hand lettering costs vary, with markers ranging from $5 to $15 each and glass paint tubes around $7 to $12. Investing time in planning and practice reduces waste and avoids repainting. A neat, personal sign draws attention and reflects positively on your business.
8. Maintaining and Removing Your Window Sign Safely
Keeping your window sign looking good and removing it without damage depends on the type of sign you use. For window clings, cleaning the glass carefully extends their life. Use a soft, lint-free cloth dampened with mild soapy water to gently wipe the window around the cling. Avoid harsh chemicals or scrubbing directly on the cling, which can cause peeling or distortion. Clings can last for several years if stored properly when not in use. To store, remove the cling by peeling it off gently and place it between two sheets of wax paper to prevent sticking and damage.
Vinyl signs, which stick with adhesive, require more care during removal. Clean the window gently with a soft cloth and warm water to soften any dirt or residue. When it’s time to remove the vinyl, slowly peel it off starting from a corner at a 45-degree angle to reduce tearing. Residue usually remains because of adhesive backing. Use an adhesive remover, rubbing alcohol, or soapy water to clean off leftover glue. Avoid scraping the glass, which can cause scratches. Vinyl signs aren’t designed for reuse, so plan on them as more permanent.
Reverse-painted signs on glass should be cleaned with a mild, non-abrasive cleaner and soft cloth. Avoid water exposure if paint is not sealed, as water could cause peeling or fading. For hand-lettered signs done with chalk markers or removable paints, use a damp cloth for wiping. Avoid harsh solvents that might damage paint or glass finishes. If the paint is designed to be permanent, removal may require special glass cleaners and gentle scraping with a razor blade held flat. Always test any cleaner or tool on a hidden area first.
Outdoor window signs face the elements and will typically last from several months to a couple of years depending on material quality, sun exposure, and weather conditions. Window clings without adhesive usually last the longest if they are not exposed to excessive moisture or extreme heat. Vinyl decals with UV-resistant toner can survive longer in sun, but heat and moisture degrade the adhesive over time, causing peeling or curling. Reverse-painted glass signs can fade or chip if not sealed properly against weather.
When removing any sign, do it during moderate temperatures. Extremely hot or cold weather can cause finishes or adhesives to become brittle or overly soft, increasing the risk of damage. For vinyl, heat from a hairdryer can soften the adhesive and make removal easier. After removal, clean the window with warm, soapy water and a soft cloth to remove any sweat, oil, or residue left behind. Wait 24 hours before installing a new sign to ensure the surface is dry and clean for the best adhesion or cling grip.
Peeling vinyl signs too quickly can leave stubborn glue residues; warming the sign with a hairdryer first makes cleanup easier and protects your window surface.
Step-by-Step Action Plan for Your Window Sign
Follow these steps to create a window sign that fits your business needs and displays well.
- Before you start: Choose the type of sign, vinyl cutout, printable cling, reverse painting, or hand lettering, based on your budget and permanence needs. Confirm it suits your window size and target audience.
- Day 1: Measure your window accurately and draft your design at the right scale. Use high contrast colors or bold fonts to ensure visibility from outside.
- Day 2: Gather all materials and tools, such as vinyl sheets, transfer tape, printer and cling film, paint and brushes, or markers, depending on your sign type.
- Day 3: Create your sign according to your chosen method. For vinyl, cut and weed carefully; for clings, print and cut shapes; for painting or lettering, set up your workspace with cleaning and masking done.
- Day 4: Install the sign on the clean interior or exterior surface of your window as instructed for your type. Check for smooth adhesion and proper alignment.
- After 1 week: Inspect the sign for wear or loosening. Clean around the sign gently without scrubbing it directly to maintain durability.
- After 1 month: Plan for replacement or refresh to keep the sign clear and attractive. Swap out clings or repaint if fading occurs.
Frequently Asked Questions
What Materials Work Best for Outdoor Window Signs?
Vinyl and weather-resistant paints work best outdoors because they withstand rain and sun without fading quickly. Using UV-protected coatings can extend the lifespan of your window sign in harsh weather.
Can I Reuse a Window Cling After Removing It?
Most window clings lose their stickiness after removal, so they are usually not reusable. To avoid waste, consider designing signs you can easily replace or use repositionable adhesives.
How Do I Prevent Paint from Smudging on a Window Sign?
Allow each layer of paint to dry fully before applying the next coat or touching the surface. Using fast-drying paint and working in a well-ventilated area helps reduce smudging risks.
What Is the Best Way to Fix Mistakes on Hand-Lettered Window Signs?
Use a damp cloth or cotton swab to gently remove small errors while the paint or marker is still wet. For dried mistakes, carefully scraping with a razor blade can help correct the area.
Can I Make a Window Sign That’s Visible from Both Inside and Outside?
Yes, reverse painting on glass allows the design to be visible from both sides by painting on the interior side of the window. This method protects the artwork and provides a professional look.
How Large Should a Window Sign Be for a Small Business Storefront?
Aim for signs that occupy about 30-50% of the window space to attract attention without blocking natural light. Adjust size to balance visibility with storefront aesthetics.
Before You Go
Creating your own window sign gives you control over how your business looks to passersby. Start with a clear design and the right materials, then follow through carefully to install and maintain your sign. Take your first step today by measuring your window and picking the sign style that fits your message and budget.