How to Make a Reverse Canvas Sign with Easy Steps and Design Tips
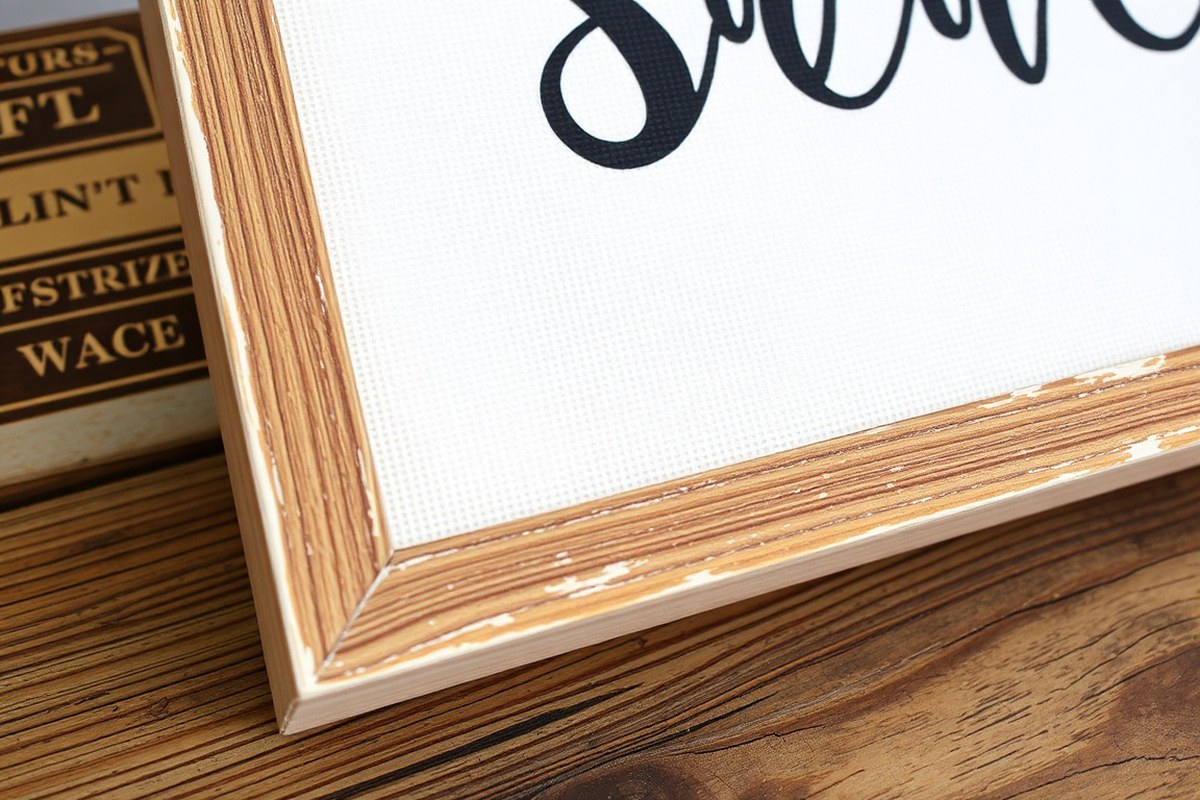
Learning how to make a reverse canvas sign means flipping a traditional canvas inside out and transforming the wooden frame into the front of your art piece. This method highlights the wooden stretcher bars while using the canvas as a backing, creating a rustic, textured look. Start by carefully removing the stapled canvas from the frame without damaging either piece for a clean, professional base.
Key Takeaways
- Use a staple remover or flat tool to gently detach the canvas from the wood frame without tearing the canvas.
- Keep all staples from the original canvas to reuse or replace as needed for securing the canvas later.
- Select a canvas size that suits your design, such as 12×16 inches, which balances surface area and frame visibility.
- Choose design methods like painting, vinyl, or heat transfer vinyl based on your desired finish and available tools.
- Apply heat transfer vinyl with proper temperature and timing: 290°F for 30 seconds on canvas surfaces.
- Secure the canvas back to the frame by stapling evenly about 2 to 3 inches apart along the edges for a tight fit.
What Is a Reverse Canvas Sign and How Does It Work?

A reverse canvas sign is a creative twist on the traditional canvas art piece. Instead of using the front of the canvas with a stretched fabric surface, a reverse canvas flips the canvas to display its back side. This method exposes the wooden stretcher bars, which become part of the sign’s design. To make a reverse canvas sign, you first remove the canvas fabric from the wooden frame, then flip the frame so the back becomes the front. After that, you either staple or secure the painted or decorated canvas back onto this frame, creating a rustic, textured look that blends fabric and wood in one piece.
This style differs from a regular canvas sign because it highlights the frame structure rather than hiding it behind the taut canvas. The raw, unfinished wood shows through on the edges, adding a farmhouse or vintage vibe to your decor. You aren’t limited to smooth surfaces and can experiment with how the fabric folds or wrinkles when restapled, creating extra dimension and interest. A standard canvas sign keeps the fabric stretched over the frame’s front, so its look is flat and polished. Reverse canvases create a layered appearance that adds charm and personality.
One main reason to choose a reverse canvas for home decor projects is budget-friendliness and accessibility. You can take a simple, inexpensive canvas, like those from craft stores or Dollar Tree, and turn it into a distinctive piece with just a few basic tools. This makes it easy to customize your signs with paint, vinyl cutouts, heat transfer vinyl, or even sublimation printing while using supplies you likely already own. For example, removing and flipping the canvas only takes about 10 minutes and a staple remover or pliers, so it fits well into quick weekend crafts or seasonal decorating.
The construction involves carefully pulling staples that hold the canvas on the original frame, flipping the canvas inside out so the backside is visible, then pulling the canvas taut again and stapling it back to the frame’s front. This step requires some patience to avoid tearing the fabric, and choosing the right tools, like a staple remover and small hammer, helps prevent damage. The cost typically stays under $10 per sign if you start with a blank canvas, but you can improve the design with vinyl decals or paint for $5 to $15 more. The natural wood frame adds durability and a natural feel, making your sign sturdy and ready to hang immediately.
Good results show a smooth restretched canvas with no sagging or loose edges, clean wooden frame edges visible around the fabric, and a design that contrasts well between the wood and the canvas surface. Common pitfalls include tearing the canvas during removal, uneven stapling causing wrinkled fabric, and frames that might be too fragile to flip without breaking. Testing your canvas’s strength before starting helps avoid costly mistakes, and lightweight designs on the canvas work best to prevent cracking or stretching over time.
Essential Tools and Supplies for Making a Reverse Canvas Sign
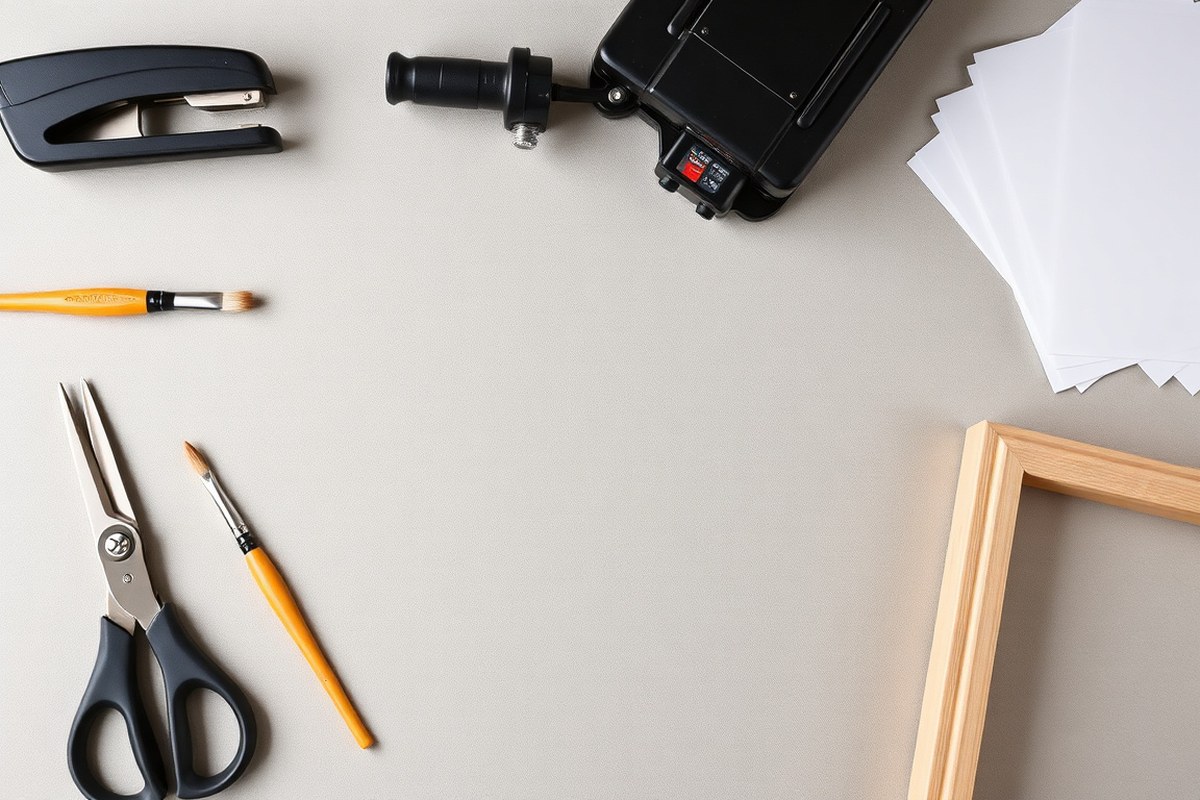
Making a reverse canvas sign requires some basic tools and specific supplies to remove and prep the canvas frame, choose the right canvas, and add design elements. Having the proper materials ensures your project goes smoothly and looks professional. Here’s a detailed checklist of what you’ll need and why each item matters.
Tools for Removing Staples and Prepping the Frame
Removing the canvas from the wooden frame involves pulling out staples that hold the canvas in place. You’ll want a good staple remover and some extra tools to make this easier without damaging the frame.
Use a flat-head screwdriver or a putty knife to gently pry the staples upward before pulling them out. Needle-nose pliers or a staple remover tool help pull staples completely free. It’s important to work carefully to avoid splintering the wood. Cleaning out leftover staples will create a smooth surface for reattaching the canvas.
A sanding block or fine-grit sandpaper is useful to smooth the frame edges after staple removal. This gives the frame a polished look and removes any rough spots that might snag your canvas when reattaching.
Choosing the Right Canvas for Reverse Projects
The best canvases for reverse canvas signs are artist-style stretched canvases with wooden frames. These typically come in sizes like 8″x10″, 12″x16″, or larger, and can be found at Michaels, Hobby Lobby, or Dollar Tree stores. These canvases have tightly stretched fabric stapled to a wooden frame, which you will remove and reattach reversed to showcase the wood.
All-cotton canvases work best because they stretch well and hold paint or vinyl cleanly. Look for canvases with solid wood frames instead of cheap cardboard backing, as the wood frame forms the display edge of your finished sign.
Alternative canvases, such as canvas panels or canvas drop cloths stretched on frames, can also work depending on the desired look. However, typical stretched artist canvases offer the most uniform and durable results.
Essential Supplies for Design and Assembly
Once your frame is prepped and the canvas is removed, you’ll need other supplies to create and secure your design. Basic supplies include acrylic paint for staining or coloring the wood frame and fabric paints or vinyl for decorating the canvas.
A staple gun with ⅝” staples is key for firmly reattaching the canvas to the backside of the frame. Using staples spaced about 2 to 3 inches apart along the edges provides a tight, even hold without warping the fabric. Additional items that help create varied styles include:
- Vinyl decals or heat transfer vinyl (HTV) and a Cricut or similar cutter
- Paint brushes, stencils, and painter’s tape for neat paint edges
- Mod Podge or spray adhesive to seal or add texture
- Sandpaper (fine grit) to distress the frame or canvas edges
- Ruler or measuring tape for precise layouts
- Scissors or a craft knife for trimming the canvas neatly
Check that the staple gun’s staples are long enough to go through canvas and secure into wood without poking through the front side for a clean finish.
Checklist for Essential Tools and Supplies
- Flat-head screwdriver or putty knife (for prying staples)
- Needle-nose pliers or staple remover tool
- Fine-grit sandpaper or sanding block
- Artist stretched canvas with wooden frame
- Acrylic paint and brushes for wood frame staining
- Staple gun with ⅝” staples for reattachment
- Vinyl, HTV, stencils, or fabric paint for canvas design
- Measuring tape or ruler
- Scissors or craft knife for trimming canvas edges
How to Use These Tools for Best Results
Start by carefully removing the canvas using the screwdriver or putty knife to lift staples, then pull them out with pliers. Sand the wooden frame smooth before applying any paint or stain. After decorating your canvas or frame, position the canvas flipped over on the backside of the frame. Stretch the canvas evenly and staple it securely every 2-3 inches along each edge using a staple gun.
Trim any excess canvas inside the frame for a neat inner edge. Use a ruler to mirror and plan your designs before applying paint or vinyl, helping avoid mistakes during cutting or placement. This process typically takes 30 to 60 minutes depending on canvas size and your design complexity.
Step-By-Step Guide to Removing and Prepping Your Canvas and Frame
Start by carefully detaching the canvas from the wooden frame to preserve the fabric for reuse. Removing the canvas without tearing it ensures a smooth surface for your reverse canvas sign. Preparing the wooden frame by cleaning and sanding allows for a better finish when painting or staining.
Removing Staples Without Damaging Canvas
Staples hold the canvas tightly to the wooden frame, so removing them gently is key to avoid tears or fabric damage. Use simple hand tools like a small screwdriver and needle-nose pliers rather than prying excessively, which can rip the canvas. Working slowly around the edges helps you keep the canvas intact and ready for your design.
Take your time to extract every staple cleanly. If some staples are deeply embedded, a razor blade or x-acto knife can help loosen the canvas where staples are stubborn. The goal is freeing the entire canvas piece without creating holes or weak spots.
Cleaning and Sanding the Wooden Frame
The wooden frame often has leftover staples, dust, or paint from prior use. Cleaning it thoroughly makes a big difference for your final look. Remove all staples and debris using pliers or a staple remover, then wipe the frame down with a damp cloth to clear dust and dirt.
Once clean, lightly sand the frame using fine-grit sandpaper (around 120 to 150 grit) to smooth out rough or splintered areas. This step is essential before painting or staining since it promotes even adhesion and helps prevent flaking or uneven patches. After sanding, wipe away any wood dust with a dry cloth.
Tips for Trimming Excess Canvas
After removing the canvas, trim away any surplus fabric to ensure it fits neatly back on the frame. Excess canvas can wrinkle or bunch when you reattach it, so cutting accurately promotes a cleaner, tighter finish.
- Lay the canvas flat on a clean surface with the painted or designed front facing down.
- Use sharp fabric scissors or a rotary cutter to trim about 1 to 2 inches past the frame edge, enough for stapling the canvas securely on the back.
- Cut slowly and evenly to avoid jagged or uneven edges.
- Check that the trimmed canvas will stretch smoothly over the frame without slack or folds.
Leaving too little margin makes stapling difficult, while too much can cause extra bulk behind your finished sign. Aim for a balance that lets you pull the canvas taut during reattachment.
How to Add Designs: Painting, Vinyl, HTV, and Other Techniques
You can use paint, vinyl, or heat transfer vinyl (HTV) to add designs to your reverse canvas sign. Each method offers unique advantages depending on your materials, tools, and the look you want to achieve. Choosing the right technique affects how durable and detailed your design will be.
Painting is the most flexible option if you want a custom, hand-crafted look. Use acrylic paint and fine brushes or stencils. Paint adheres well to the canvas surface, but it can require drying time of 20 to 30 minutes per layer. It’s best to apply multiple thin coats to avoid cracking. The downside is it can be harder to achieve crisp, detailed lines compared to vinyl methods.
Vinyl comes in two main types: adhesive vinyl and heat transfer vinyl (HTV). Adhesive vinyl sticks directly to the canvas but may peel if the surface isn’t completely smooth or clean. HTV is more durable on fabric-like canvas because you use heat to bond the vinyl to the material, making it ideal for lasting designs.
Preparing vinyl involves cutting the design with a cutting machine such as a Cricut. For HTV, you must cut the design mirrored because it will be flipped when pressed onto the canvas. Here’s a comparison of painting, adhesive vinyl, and HTV based on key factors:
| Design Method | How to Apply | Pros | Cons |
|---|---|---|---|
| Painting | Apply acrylic paint with brushes or stencils; let dry fully between layers | Customizable, textured, no special tools needed | Longer drying time, risk of brush strokes or uneven lines |
| Adhesive Vinyl | Cut design on vinyl cutter; weed excess; stick onto clean, dry canvas surface | Easy to use; sharp edges; no heat required | May not stick well on textured canvas; less durable |
| Heat Transfer Vinyl (HTV) | Cut mirrored design; weed excess; place transfer paper; press with iron or heat press at manufacturer’s recommended temp/time | Durable bond; professional look; works well on fabric canvas | Needs special equipment (iron or heat press); cutting machine required; careful temperature control needed |
Preparing HTV is straightforward if you have a cutting machine. Cut out your design mirrored on the HTV, then remove the excess vinyl (weeding). Place transfer paper on top of the weeded design. Use a Cricut EasyPress, heat press, or a household iron to apply heat and pressure following the HTV brand’s recommended temperature and time (usually around 305°F for 10 to 15 seconds). Let the vinyl cool slightly before peeling off the transfer sheet to secure the design.
Proper temperature and pressure are key. Too little heat results in poor adhesion, and too much can scorch the canvas or vinyl. The HTV method produces sharp, long-lasting designs, especially useful for quotes or images with fine details. Adhesive vinyl is better for simpler designs and shorter-term projects. Paint gives you the most creative control for customized looks but requires patience and skill. Choosing the right method depends on the tools you have, the style you want, and how long the sign needs to last.
Reattaching the Canvas Onto the Frame Neatly and Securely
Reattaching the canvas to the frame requires careful positioning and stapling to keep it taut and wrinkle-free. Use a staple gun to secure the canvas evenly on the back, placing staples every 1 to 2 inches to prevent sagging or tearing. This method helps maintain a smooth finish and protects the canvas during the final steps.
Positioning the Canvas Evenly
Start by positioning the canvas so it lays evenly across the back of the frame, leaving enough material to staple inside the frame’s edges. Smooth out any wrinkles or folds by gently pulling the canvas taut but avoid stretching it excessively, which could distort your design later. Center the canvas so the painted or designed side faces outward and aligns with the frame’s edges for a clean look.
It’s best to work on a flat surface when positioning. Lay the frame face down and place the canvas over it. Make sure all four sides extend beyond the frame’s back edges slightly to allow for stapling. This setup lays the foundation for a neat, secure attachment.
Staple Placement and Spacing Tips
Staples should be placed evenly about 1 to 2 inches apart along each side of the frame’s back. Begin stapling in the middle of one side, then move to the opposite side, pulling the canvas tight as you go to avoid sagging. Repeat this for the other sides, always stapling opposite sides in sequence to keep tension balanced.
It’s critical not to staple too close to the frame edge because the wood might split or the canvas could tear. Aim to place staples about ¼ inch inside the frame’s edge. Use a heavy-duty staple gun designed for upholstery or wood projects to drive staples securely without damaging the canvas.
Take care when pulling the canvas tight, too much force can stretch or tear it, while too little tension results in wrinkles or sagging.
Final Tightening and Trimming Excess Canvas
After securing all sides with staples, check the canvas for any loose areas or wrinkles. Add extra staples near corners or areas prone to sagging to reinforce the hold. The canvas should feel firm when gently pressed, with no visible puckering.
Trim away excess canvas with sharp scissors or a utility knife, leaving about ½ inch from the last staples. This prevents bulk and ensures the back of your frame looks clean. Canvas edges that are rough should be covered with double-sided tape or a thin backing board for added protection and a polished finish.
- Lay the frame face down on a flat surface.
- Place the canvas on the back, centering and aligning it carefully.
- Pull the canvas taut along one side and staple in the middle of that side.
- Move to the opposite side, pull tight, and staple in the middle.
- Repeat for the remaining two sides, stapling in the middle and pulling taut.
- Fill in staples between the middle staples at 1 to 2 inch intervals.
- Check for wrinkles or sagging, add staples as needed.
- Trim excess canvas about ½ inch from the last staple.
Finishing Touches and Embellishments to Personalize Your Sign
Adding finishing touches to your reverse canvas sign gives it a unique and personalized look that highlights your style. One popular option is to attach wood embellishments like chipboard shapes or letters. These elements add texture and depth, making the sign more eye-catching. You can glue these onto the painted or vinyl design area, or even on the wooden frame for a layered effect. Use strong wood glue or a hot glue gun to ensure they stay securely in place. Plan the positioning carefully before gluing to avoid mistakes, especially since repositioning can be difficult without damaging the materials.
Distressing the wooden frame is another creative step that can improve the rustic or vintage feel of your sign. Since the frame is often unfinished after removing the canvas, you can apply a wood stain or paint to give it a polished appearance. Gel stains work well because they sit on the surface, allowing you to control the darkness and wipe off excess easily. Use a soft cloth or foam brush to apply the stain evenly following the wood grain, then wipe off after a few minutes to reach the desired shade. For painting, acrylic paint can be applied in thin layers. To create a faux stain look, mix acrylic paint with water and dry brush lightly over the frame, giving it subtle color without covering the wood texture. Distressing involves lightly sanding areas where natural wear would occur, such as edges and corners, after the paint or stain has dried. Use fine-grit sandpaper (around 180 grit) and sand gently to reveal parts of the wood beneath for an aged effect. Avoid sanding too hard or too much, which might weaken the frame or remove the finish entirely.
Sealing the frame and canvas protects your artwork from dust, moisture, and fading. For the wooden frame, a clear matte or satin polyurethane spray works well to maintain the natural look without adding shine. Spray the finish outdoors or in a well-ventilated area and apply light, even coats from about 12 inches away. Let each coat dry for at least an hour before applying another, with two to three coats recommended for durability. Be careful to keep the sealant from touching the canvas surface because it can leave unwanted marks or discoloration. Alternatively, a water-based clear acrylic sealer can be brushed on carefully along the frame edges and sides, avoiding canvas contact. Protecting the painted or vinyl artwork on the canvas with a clear heat press vinyl or a thin spray sealer designed for fabric can also extend the sign’s lifespan, especially if it will be displayed in a sunny or humid spot.
Common Mistakes and How to Fix Them During Reverse Canvas Projects
Tearing the canvas is a common issue during removal or stapling. When cutting your canvas with an exact-o knife around the staples, use a fresh blade and steady hands to avoid jagged edges. When a tear occurs, patch the back with fabric glue or a small piece of canvas secured underneath before reattaching to maintain strength. During stapling, avoid excessive tension that stretches or rips the canvas by pulling it evenly and stapling every few inches to distribute pressure.
Visible staples or uneven paint on the frame can distract from your finished sign. To fix visible staples, you can gently pry them out with needle-nose pliers and fill the holes using wood putty. Once dry, sand the putty smooth before repainting. Removing staples can damage the frame, so painting over them is acceptable, but it needs at least two coats for proper coverage. Use a brush with angled bristles or a small foam roller to spread the paint evenly and minimize brush strokes or drips. Let the paint dry fully between coats, typically about one hour.
Preventing your design from peeling or lifting depends largely on the surface preparation and applying the design correctly. Start with a clean, dry canvas surface free from dust or oils, using a lint roller or tack cloth. For vinyl or heat transfer vinyl (HTV) designs, securely press with a heat tool set to the recommended temperature, usually between 270°F and 320°F for HTV, holding the heat for about 10, 15 seconds. Using paint means applying thin layers and letting each dry fully, usually around 24 hours, before adding more or handling, to ensure good bonding with the canvas fibers.
- Use a sharp exact-o knife blade and steady cutting to avoid tearing canvas
- Patch tears with fabric glue and a canvas scrap backstage before stapling
- Pry out visible staples gently, fill their holes with wood putty, then sand smooth
- Apply at least two coats of paint over staples or patch areas, letting each dry fully
- Clean and dry canvas before applying vinyl or paint to prevent lifting
- Heat press vinyl designs at recommended temps for 10-15 seconds for adhesion
- Wait at least 24 hours after painting before handling to avoid cracking or peeling
By addressing these typical issues with care, you keep your reverse canvas sign looking clean and professional. Taking time to fix tearing, cover or remove staples correctly, and ensure your design adheres well will save frustration and help your project last longer on display.
How to Display and Maintain Your Reverse Canvas Sign
Using the right hardware ensures your reverse canvas sign hangs securely and looks polished. Hollow open-back frames work best because they let you easily attach hanging tools without damaging the canvas. Consider adding a sawtooth hanger or D-rings screwed into the wooden frame, about one-third down from the top on both sides. Use small finishing nails or screws sized to the frame thickness to avoid splitting the wood. For lighter signs, adhesive hooks made for picture hanging can be a quick alternative, but avoid them if your sign weighs over 5 pounds or you want long-term stability.
Cleaning your reverse canvas sign requires a gentle touch to preserve the fabric and artwork. Light dusting with a soft, dry cloth or a microfiber duster can remove surface dirt. Avoid using water-based cleaners or sprays on the canvas, as moisture can cause warping or color running. For tougher spots, a barely damp cloth can be dabbed carefully, but test on an inconspicuous area first. The wooden frame can be wiped with a damp cloth and mild soap, but avoid saturating any part to prevent damage.
If your sign features paint or vinyl, keep it out of direct sunlight to prevent fading. It’s best to hang reverse canvas signs indoors because canvas and chipboard backing materials don’t hold up well to moisture. High humidity or rain exposure can weaken the canvas fibers, cause wrinkles, and warp the frame. Using a clear acrylic spray sealer can add a layer of protection for occasional dampness but does not make the sign waterproof. For use in bathrooms or kitchens, place the sign away from direct water contact and ensure good ventilation.
Always support the frame when hanging to avoid stress on the canvas, and never use harsh chemicals or soak the fabric during cleaning.
Step-by-Step Action Plan for Your Reverse Canvas Sign
Follow this plan to create your reverse canvas sign smoothly and enjoy a personalized decoration piece or gift.
- Before you start: Gather all your tools and supplies listed for the project to avoid interruptions. Check your wood frame and canvas for damage to ensure a good base.
- Day 1: Carefully remove the canvas from the frame using pliers and a staple remover. You’ll know it’s ready when the canvas comes off cleanly without tearing.
- Day 2: Prep the canvas by stretching and priming it as needed for your chosen design. Test your paint or vinyl on a small part to confirm it adheres well.
- Day 3: Apply your design using paint, vinyl, or heat transfer vinyl (HTV). Make sure the design looks crisp and fully dry or set before moving on.
- Day 4: Reattach the canvas to the frame carefully, pulling evenly to avoid wrinkles. Staples should hold the canvas firmly without gaps or slack.
- Day 5: Add finishing touches like embellishments, distressing, or sealing to personalize your sign. Check that all additions are firmly attached and dry.
- After 1 week: Display your new sign in a dry, indoor area away from direct sunlight to protect its look. Clean it gently with a soft, dry cloth as needed.
Frequently Asked Questions
Can I Use a Reverse Canvas Sign Outdoors?
Reverse canvas signs are best kept indoors to avoid damage from weather. The canvas and paint can deteriorate when exposed to rain and sun. Use a sealed frame or weatherproof coating for minimal outdoor exposure.
What Type of Paint Works Best on Canvas for a Reverse Canvas Sign?
Acrylic paint is ideal for reverse canvas signs because it adheres well and dries quickly. It also provides vibrant colors and is easy to work with for beginners. Avoid oil-based paints as they may crack or take too long to dry.
Can I Create a Reverse Canvas Sign Without a Cutting Machine?
Yes, you can hand-paint your design or use stencils as alternatives to cutting machines. This allows more creativity and works well for simple designs. For complex patterns, cut vinyl by hand or buy pre-cut stencils.
How Do I Prevent the Canvas from Wrinkling When Reattaching It?
Stretch the canvas evenly over the frame and staple it tightly to avoid wrinkles. Work from the center outwards on all sides before securing corners. Using a staple gun ensures a firmer hold for a clean finish.
Is It Possible to Use Fabric Other Than Canvas for a Reverse Canvas Sign?
Canvas is preferred for its stiffness and durability, but sturdy fabrics like duck cloth or linen can work. They might require more careful stretching and different adhesives to maintain a strong hold and prevent sagging.
How Do I Remove Staples Without Damaging the Frame During Disassembly?
Use a flat-head screwdriver or staple remover gently under each staple to pry it loose. Work slowly to avoid denting or breaking the frame. Smaller frames require extra caution to keep corners intact.
Final Thoughts
Your reverse canvas sign combines creativity and craftsmanship to make a unique home décor piece. Start your project with confidence by preparing well and taking each step methodically. Choose your favorite design technique next and enjoy bringing your custom sign to life.


